

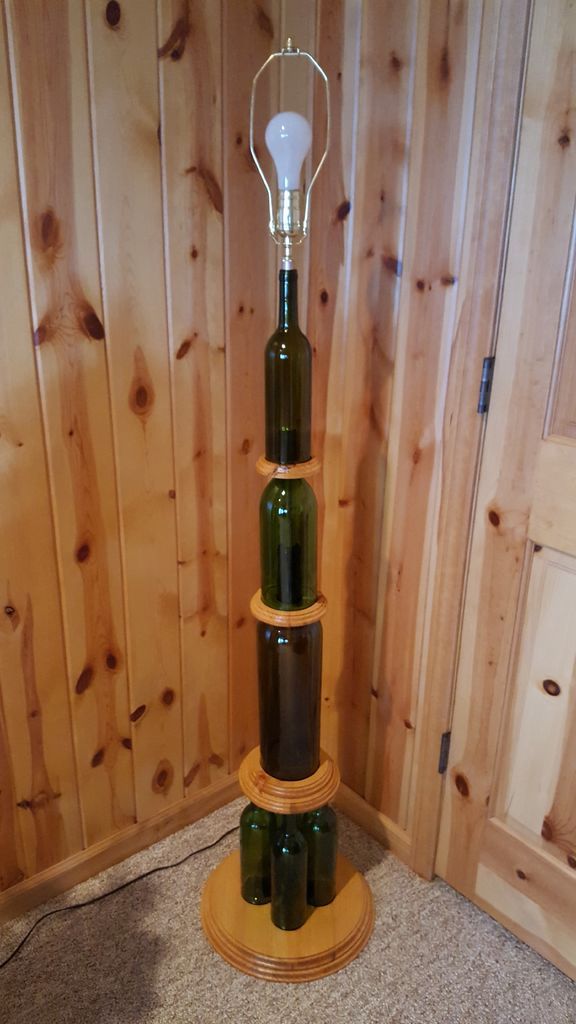
Floor Lamp Recycling Wine Bottles, with some other materials, could be used to make a new floor lamp that transforms your trash into a treasure.
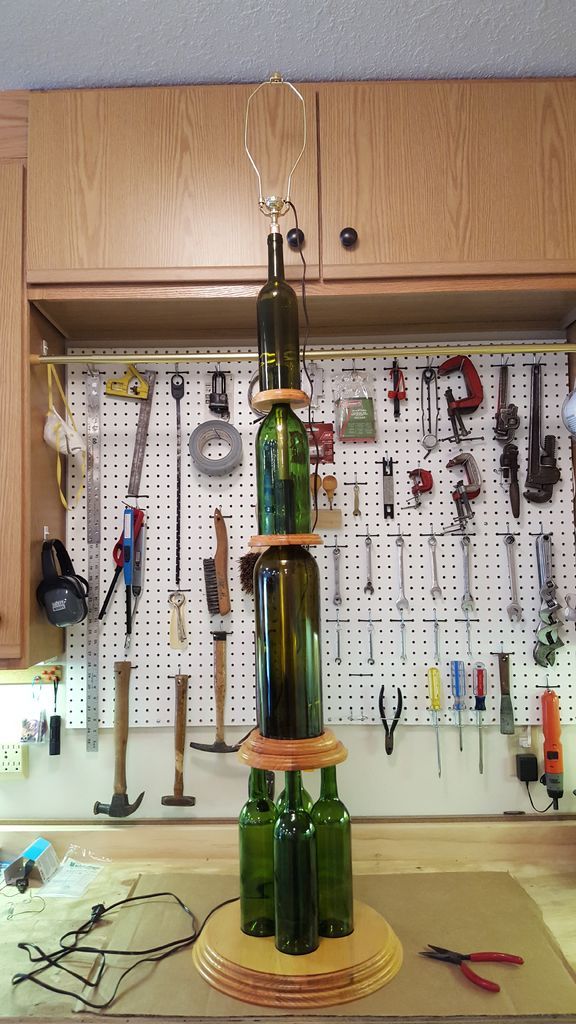
The lamp I made consists of 7 bottles: 5 are regular size (750 ml), 1 is a magnum (1.5 L) and 1 is a double magnum (3 L).
Find Bleeding Edge Supplements at Scandalous Prices on iHerb.

Side note: Apparently there is a naming system for different sizes of wine bottles ranging up to a 6L imperial bottle.
I have two pieces of 3/4″ pine that make up the bottom base.
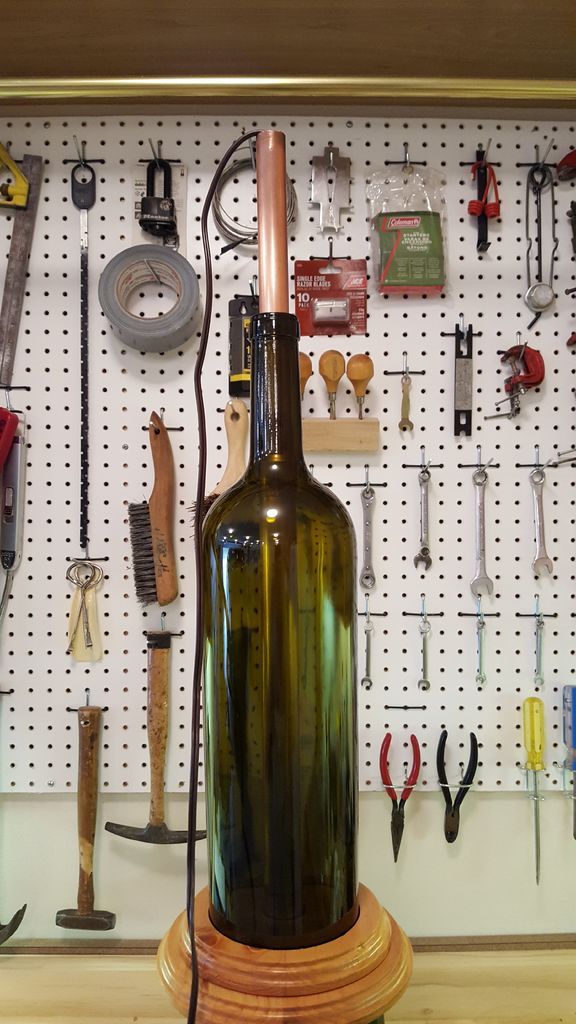
Four regular sized bottles sit on this base. Below are two smaller pieces of 3/4″ pine (2nd base) that the double magnum sits on.
Next is a smaller piece of 3/4″ pine (third base) on which the magnum sits.
Next is an even smaller piece of 3/4″ pine (fourth base) upon which a regular sized bottle sits.
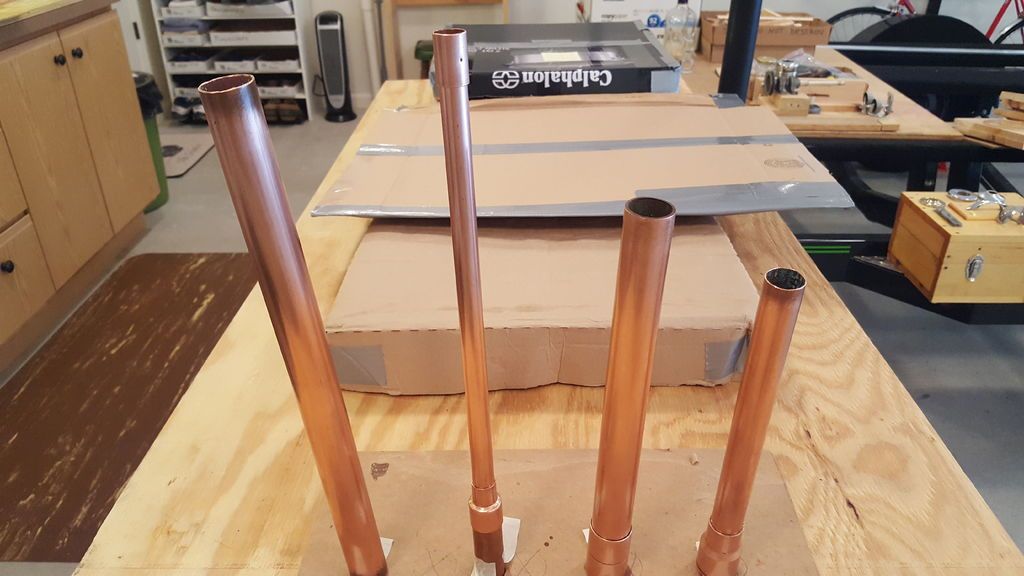
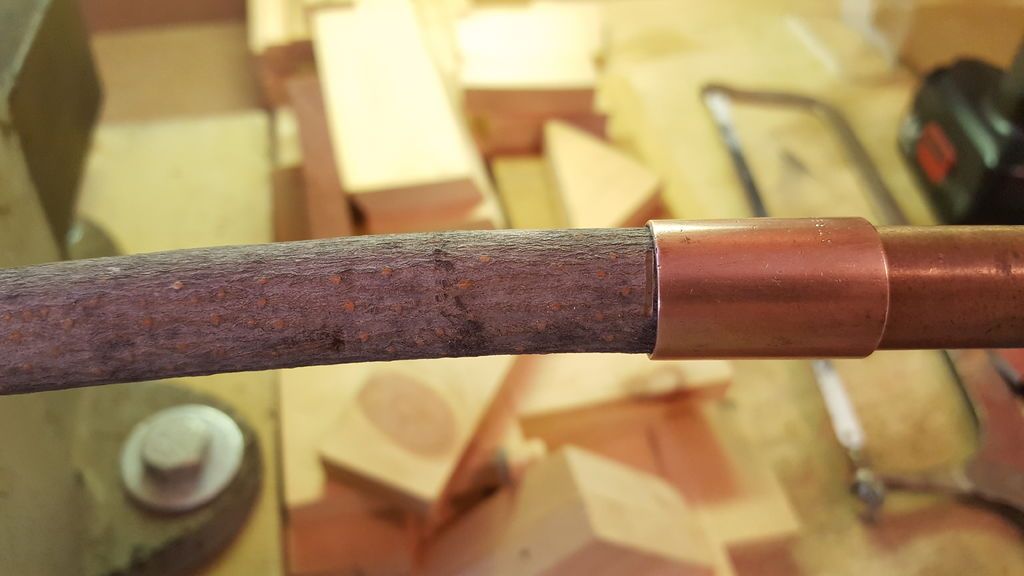
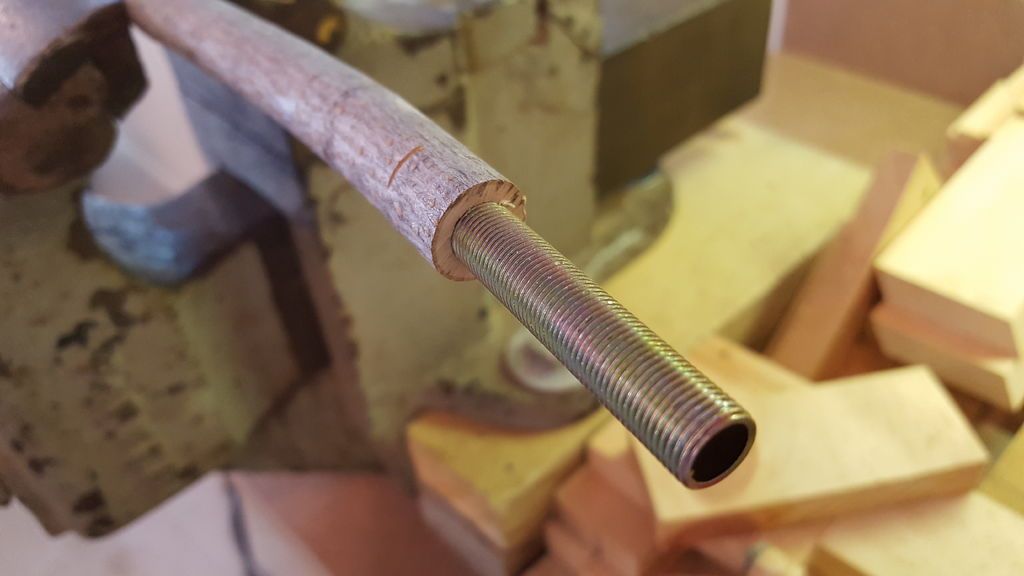
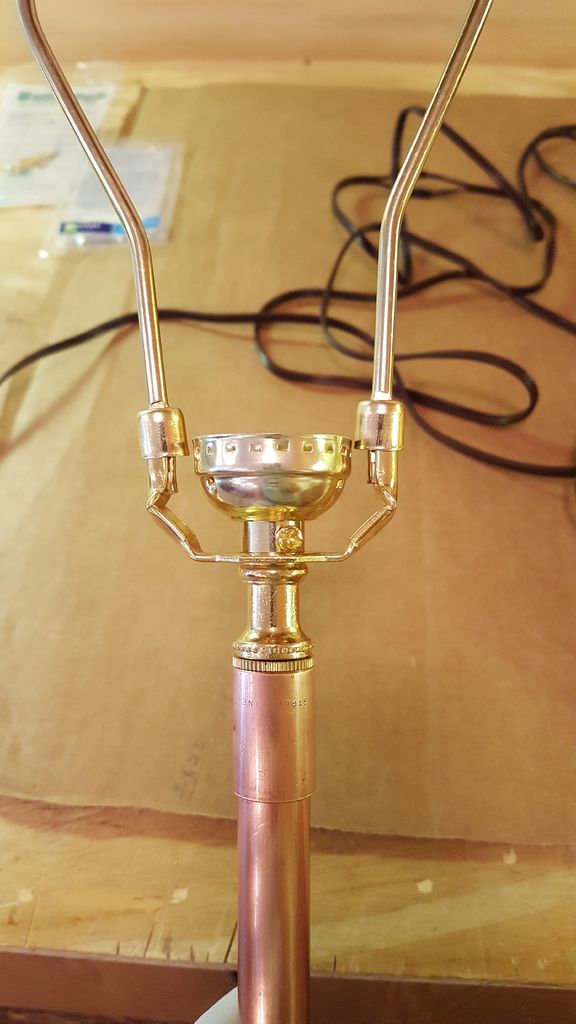
From the top of this last bottle, I placed the chopped copper lamp kit.
You can vary the number and size of the bottles depending on the look or the way your lamp looks.
So you can follow my instructions exactly or you can use it as a guide for your lamp.
Step 1: Supplies and Tools
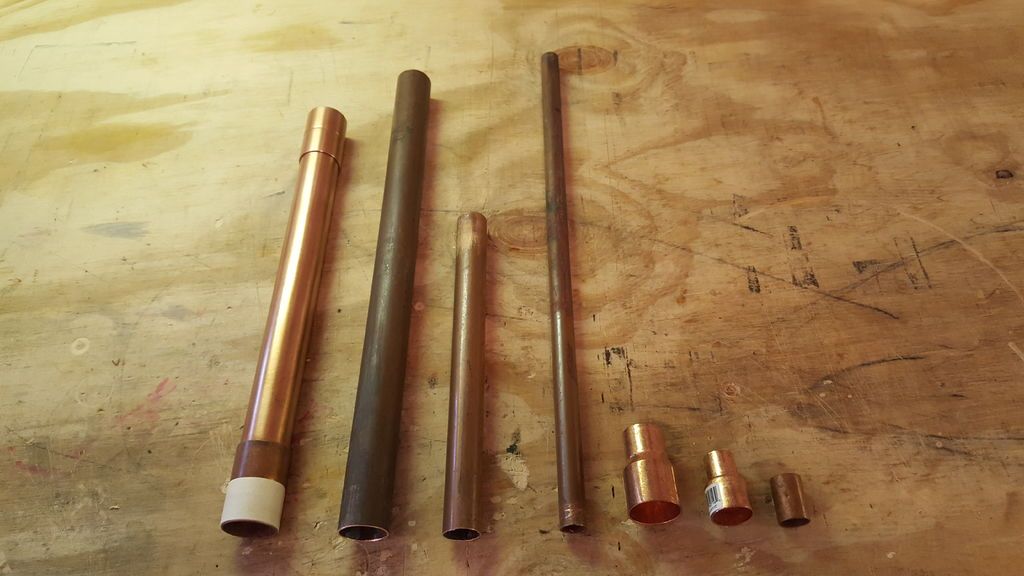
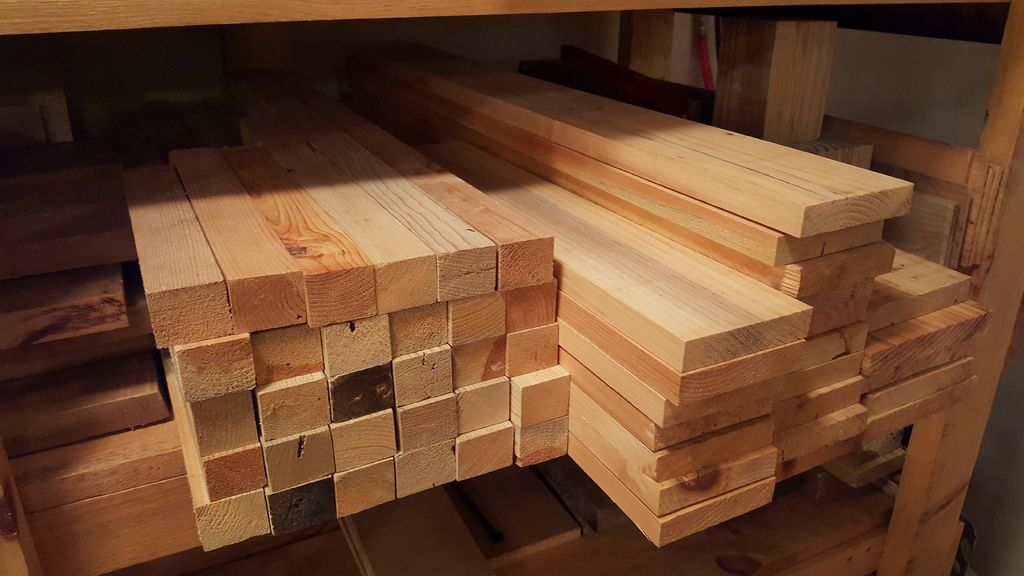
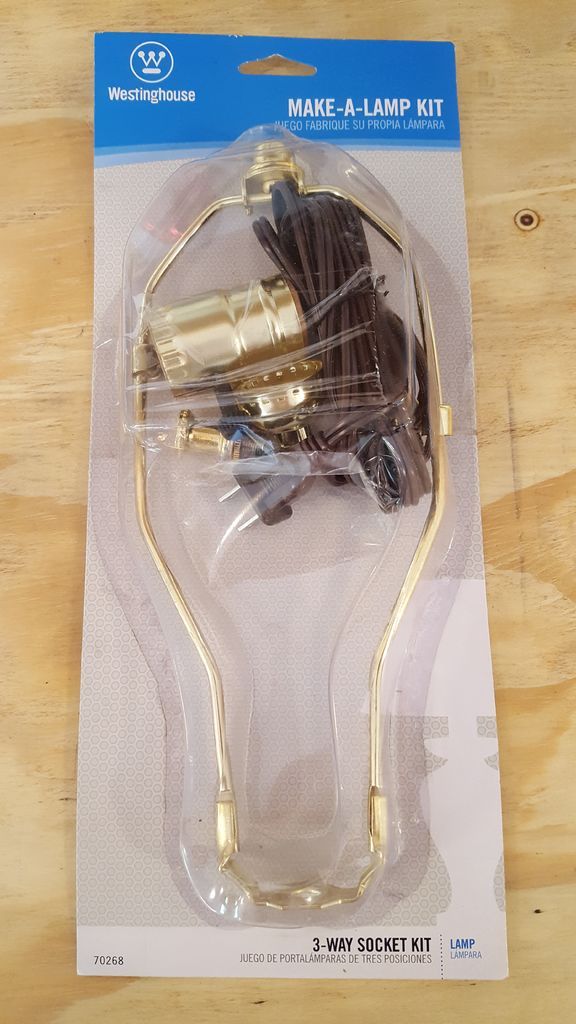
Supplies:
- Empty wine bottles (about 6 to 8 bottles)
- Metal tubes/pipes (I used spare copper tubing and couplers)
- Wood (I used pine)
- Wood glue
- Wood screws
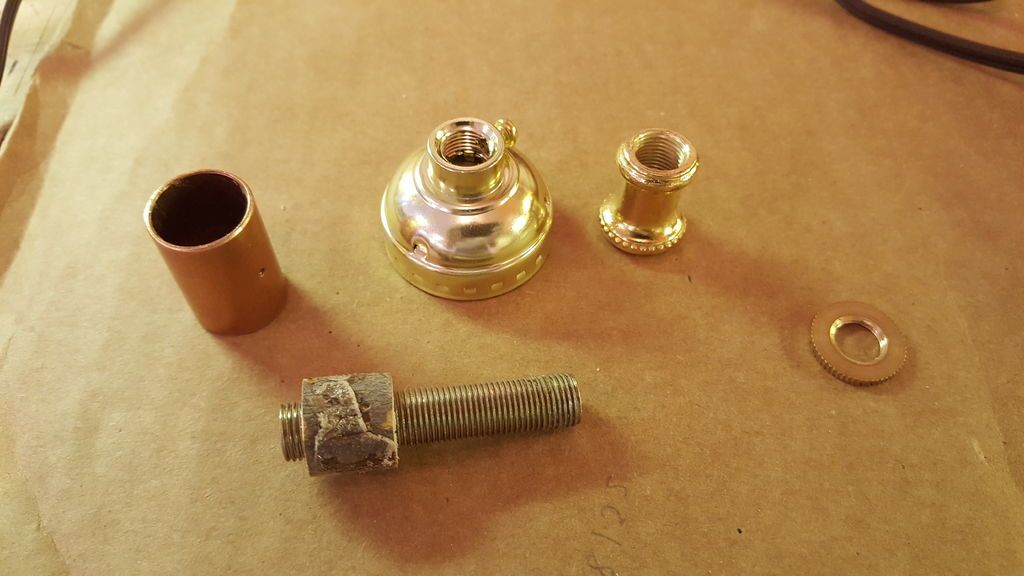
- 3-way lamp socket kit
- Wood finish
- Satin polyurethane
- Sandpaper (100, 150 and 220 grit)
- Waterproof sandpaper
- Optional: twine/jute rope.
Tools:
- Electric drill
- Electric saw
- Dremel or rotary tool with a #561 cutting bit, a #654 routing bit, and a circular cutting guide.
- Router (with immersion and fixed bases)
- Glass cutter
- Propane torch (depending on how you want to cut some of your wine bottles)
Step 2: Build the lower lamp base

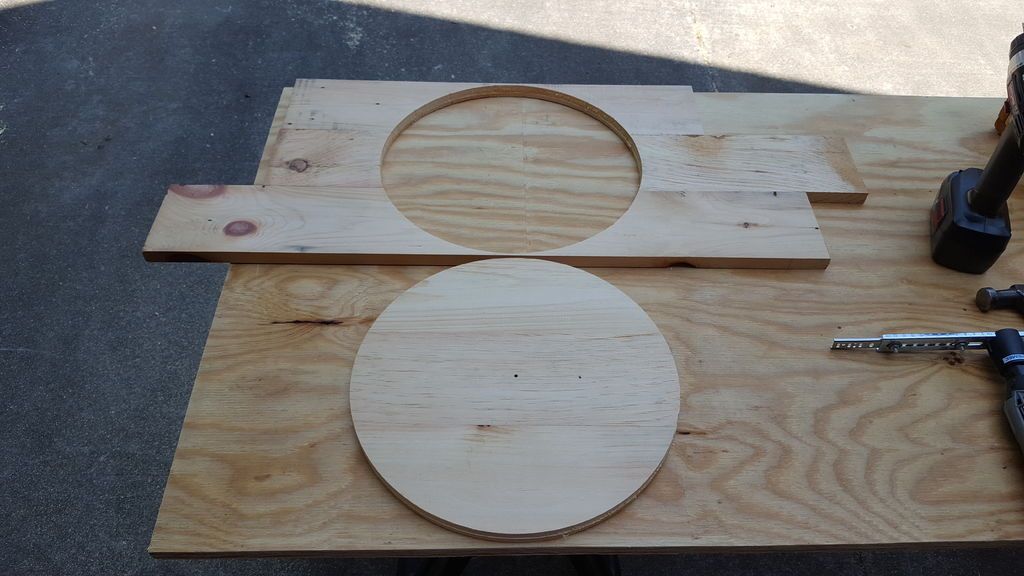
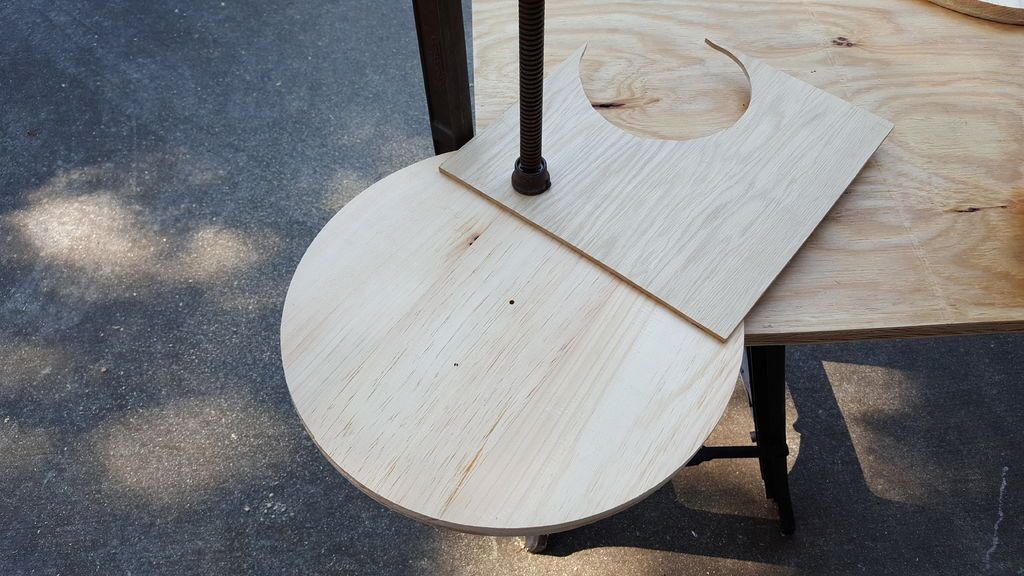
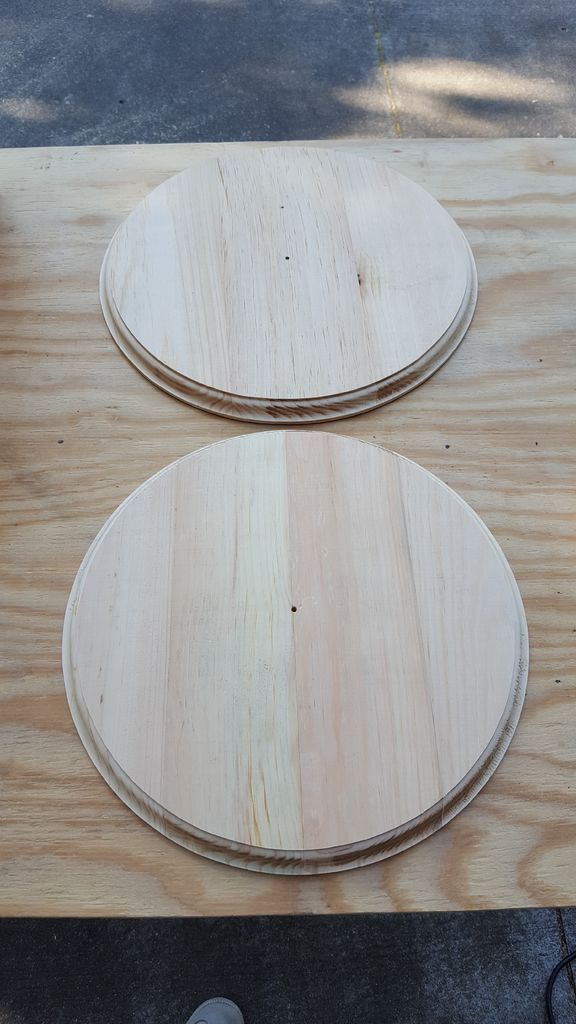
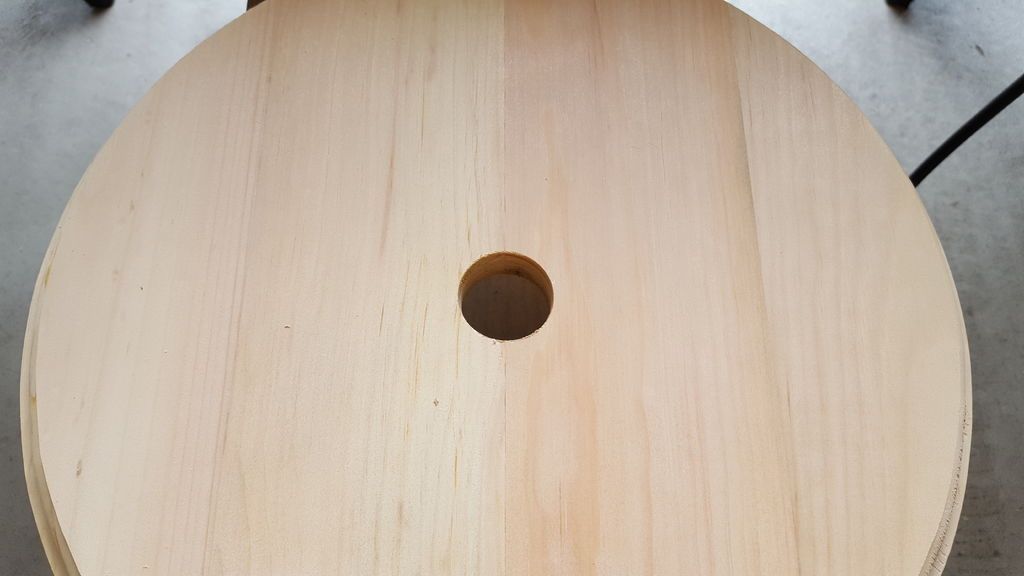
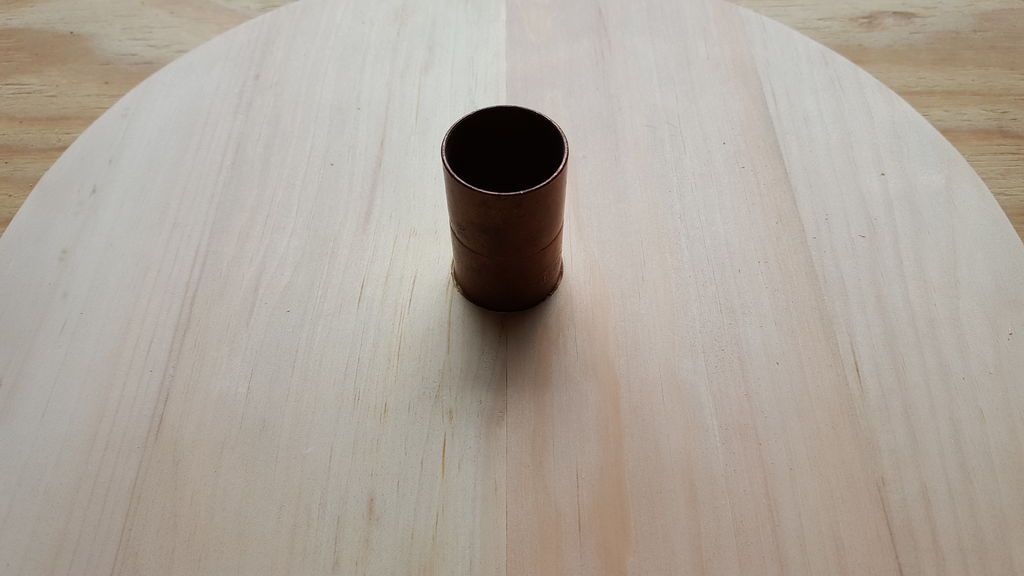
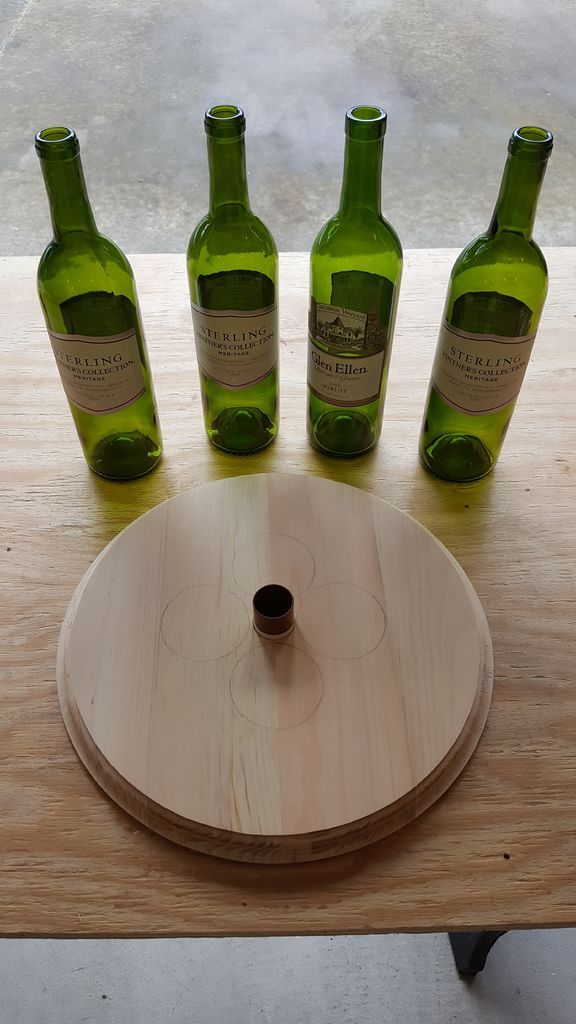
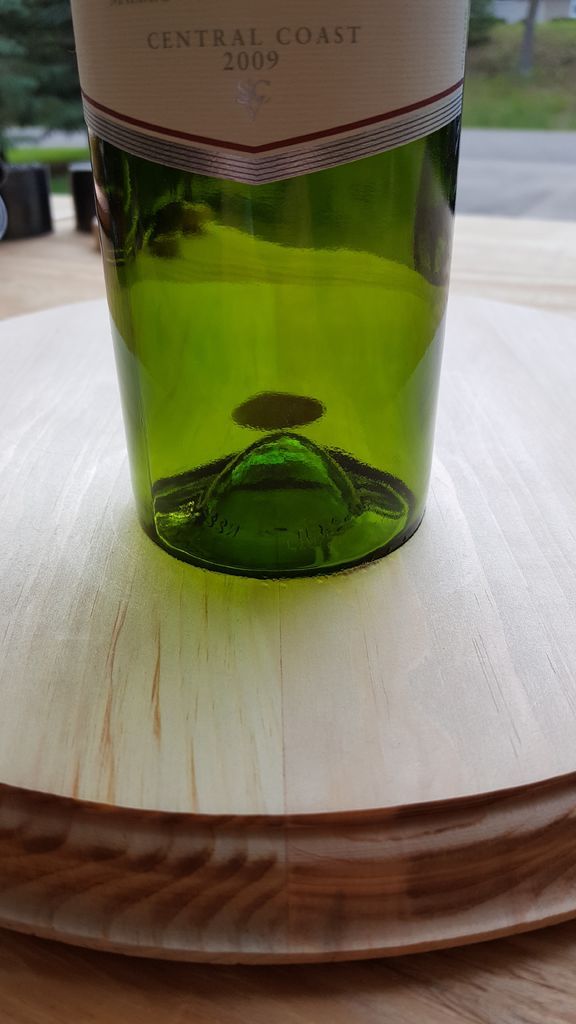
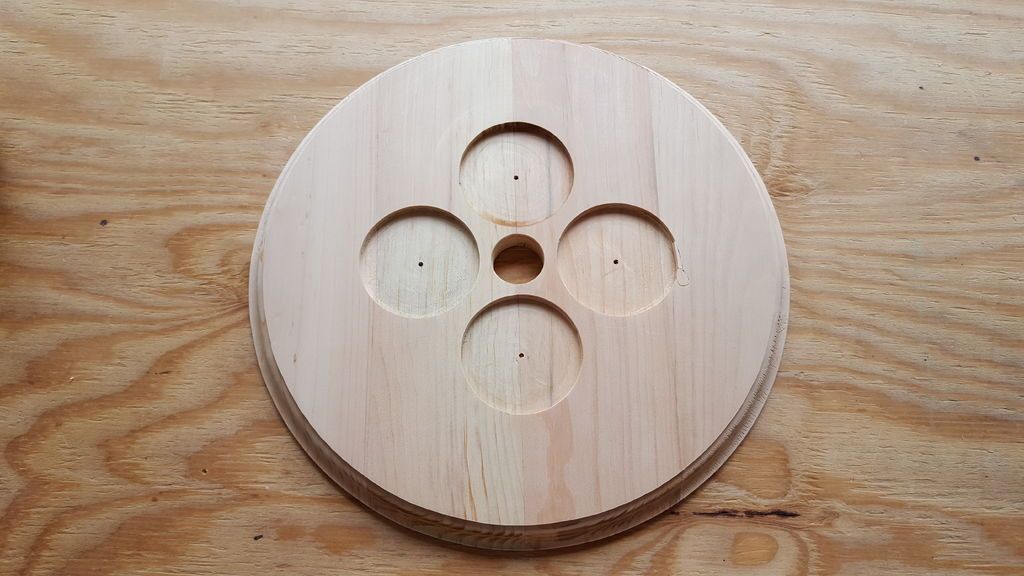
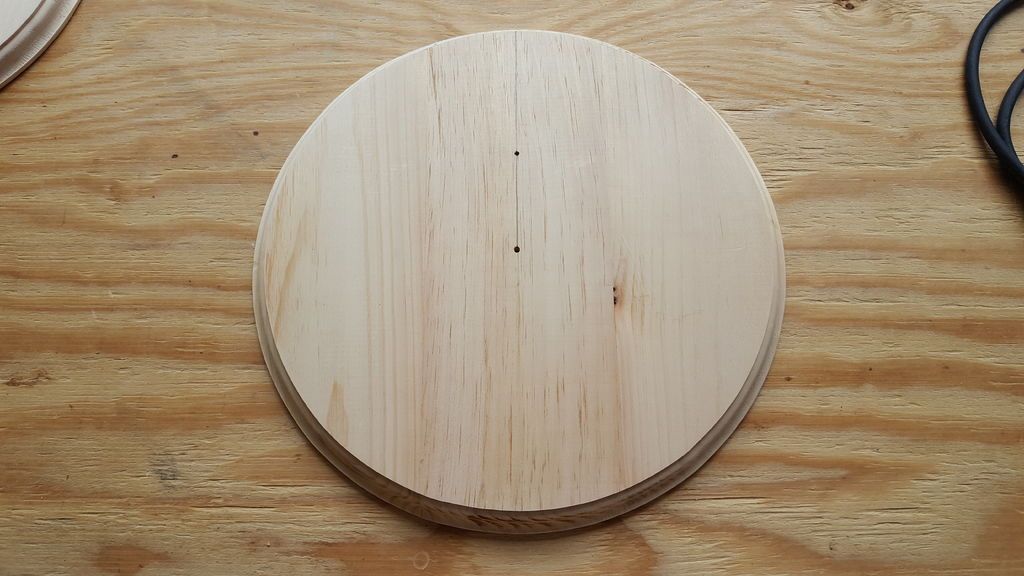
The base of my lamp consists of two circular pieces of pine wood that have a diameter of x” and a thickness of 0.75″. I had to glue pine boards together and then cut a circular piece.
An easy way to cut a perfect circular is to use a Dremel rotary tool, the 561 multi-purpose cutting bit, and the circular cutting guide.
Once you have the two circular parts on your base, you can use a fixed base router or router table to add a nice edge.
In the center of the top of the base, use a saw bit and a power drill to make a hole to allow a snug fit for the lamp post.
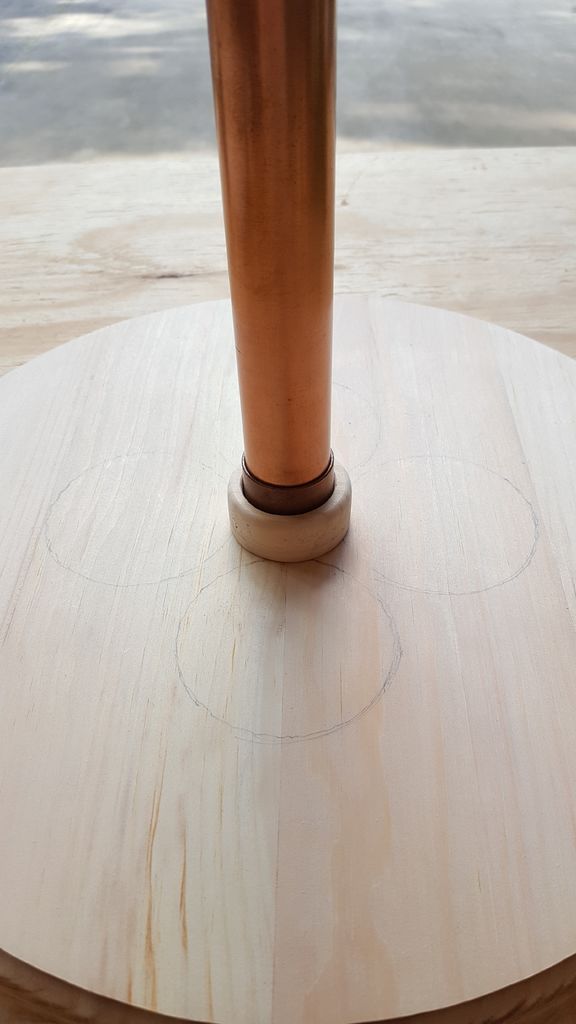
For my lamp, I used a copper x coupler.
Optional:
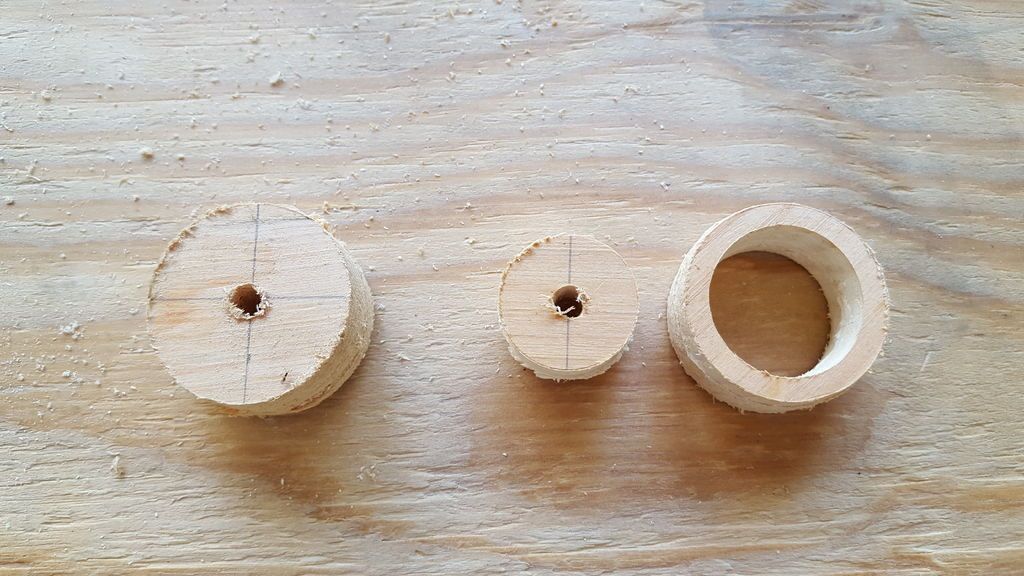
I added a small wooden ring around the copper coupler. I just thought it would be a nice touch.
I had some small pieces of circular pieces of wood from previous cuts with the hole saw attachment.
I used a smaller hole attachment and cut a small circle from the circular piece of wood to make the ring.
I then used my dremel and a sanding accessory to shape the top of the ring to give a nice rounded edge.
The base of my lamp has four wine bottles surrounding the central pole.
Therefore, I create an area for each wine bottle that sits on top of the wooden base.
Place the four bottles on the base around the center pole and draw a circle for each bottle.
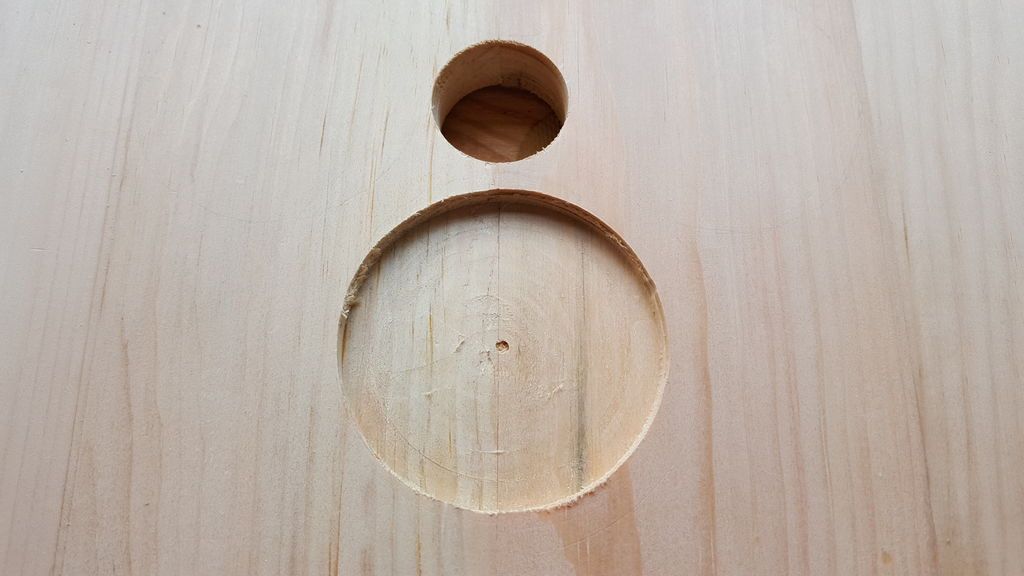
To route a nearly perfect circle, I used the routing bit with my dremel along with the circle cutting guide.
I took out a nearly perfect circle and then used my plunge base router to route the rest of the wood on the inside of the circle.
The routed depth of the circles is approximately 0.25″.
Finally, take a straight drill bit and route a line into the first base piece that will allow the lamp cord to sit between the two pieces of wood when they sit on top of each other.
Step 3: Build the 2nd base
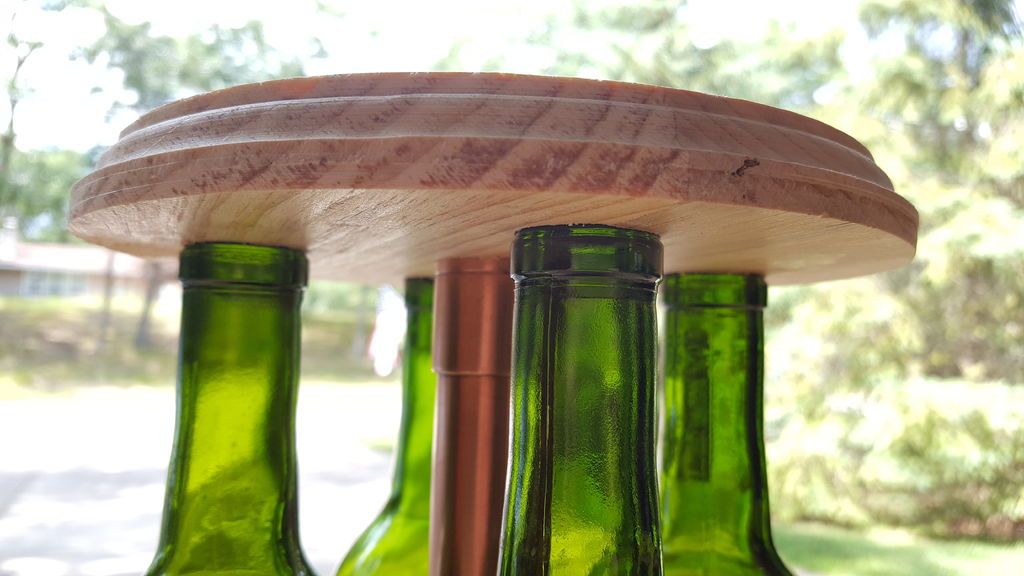
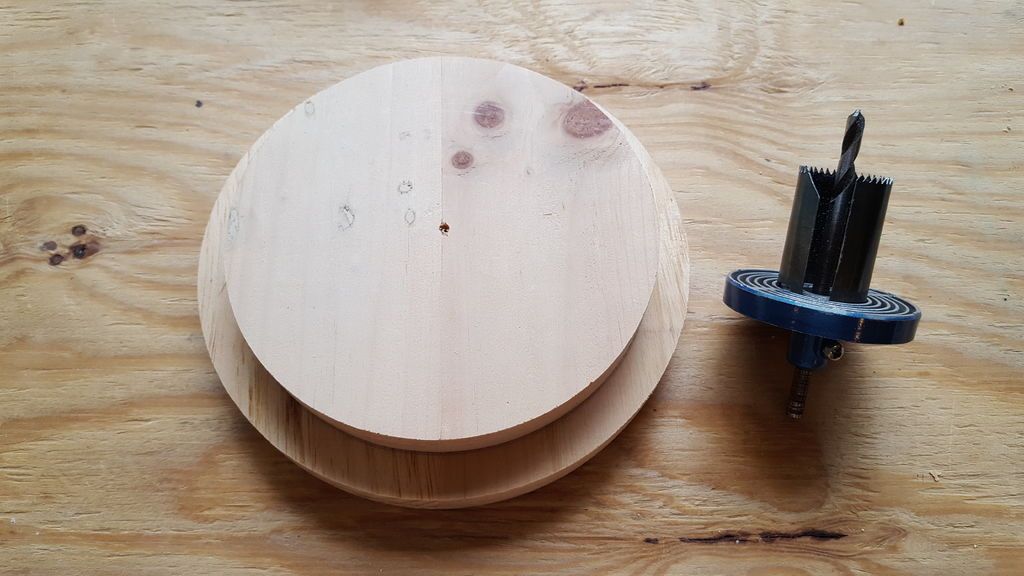
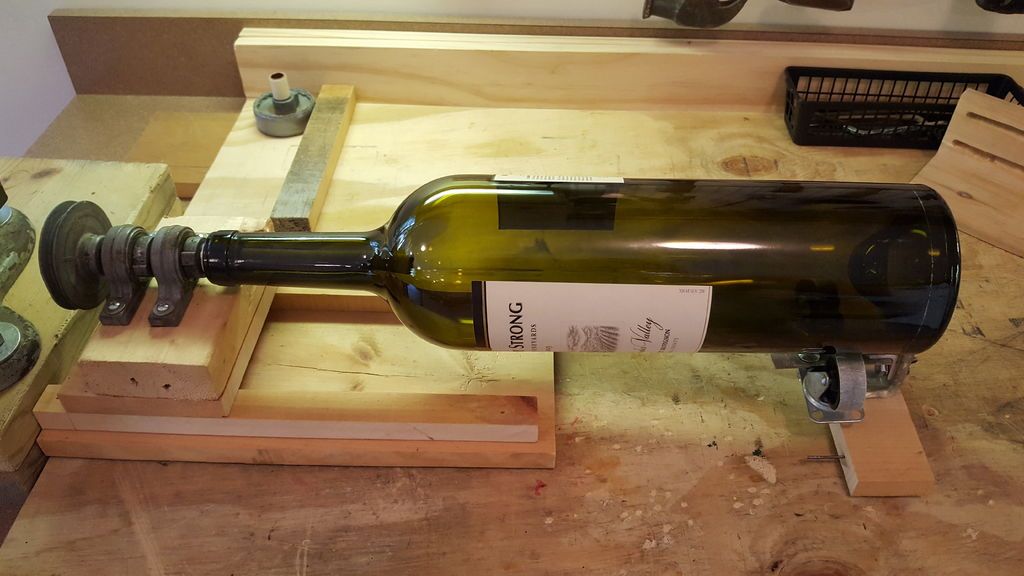
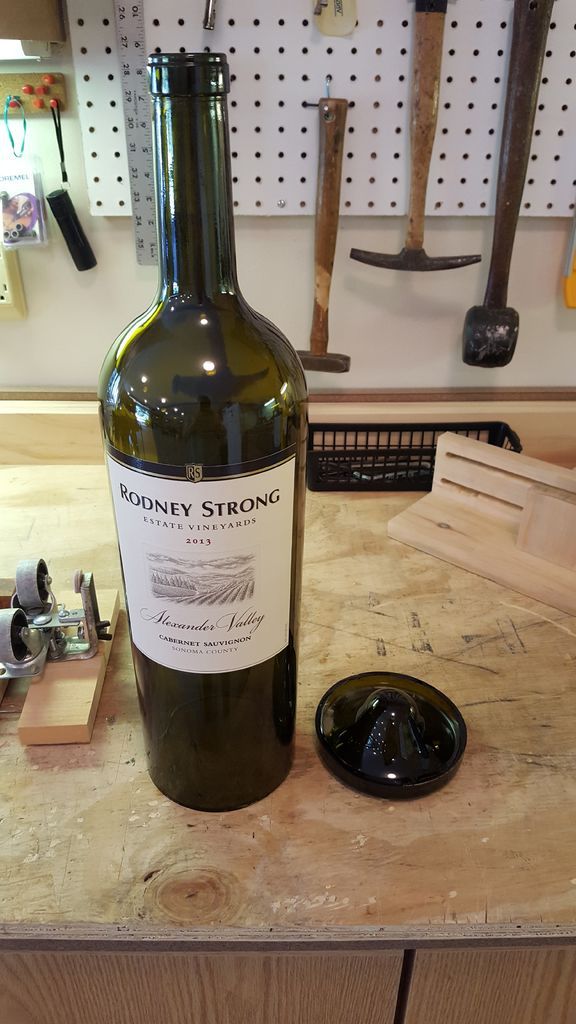
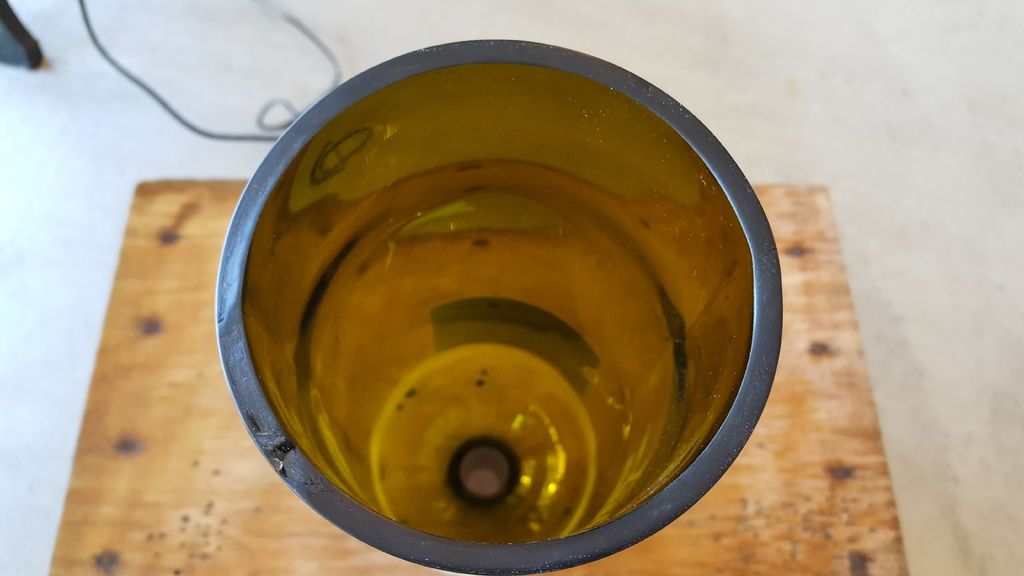
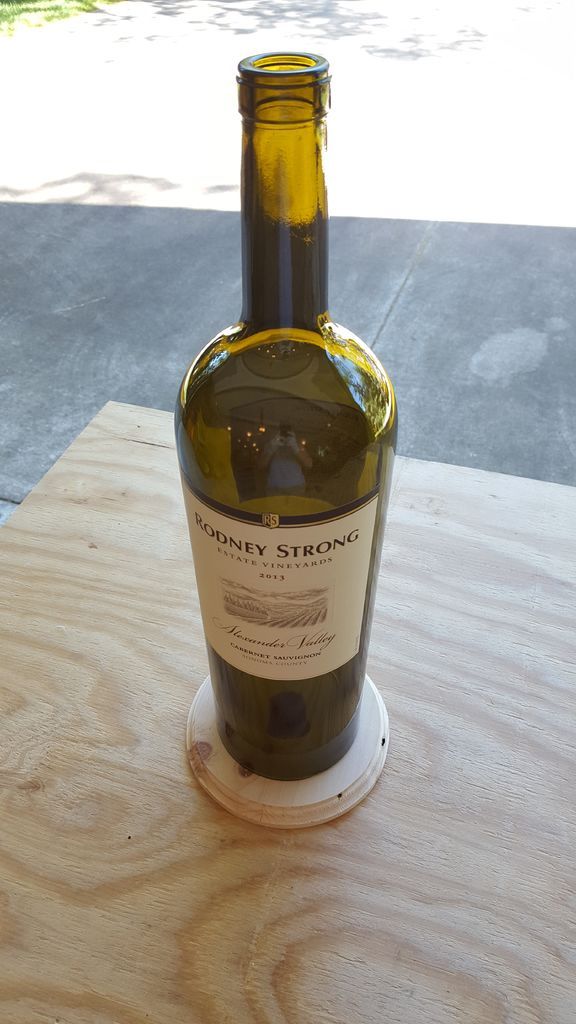
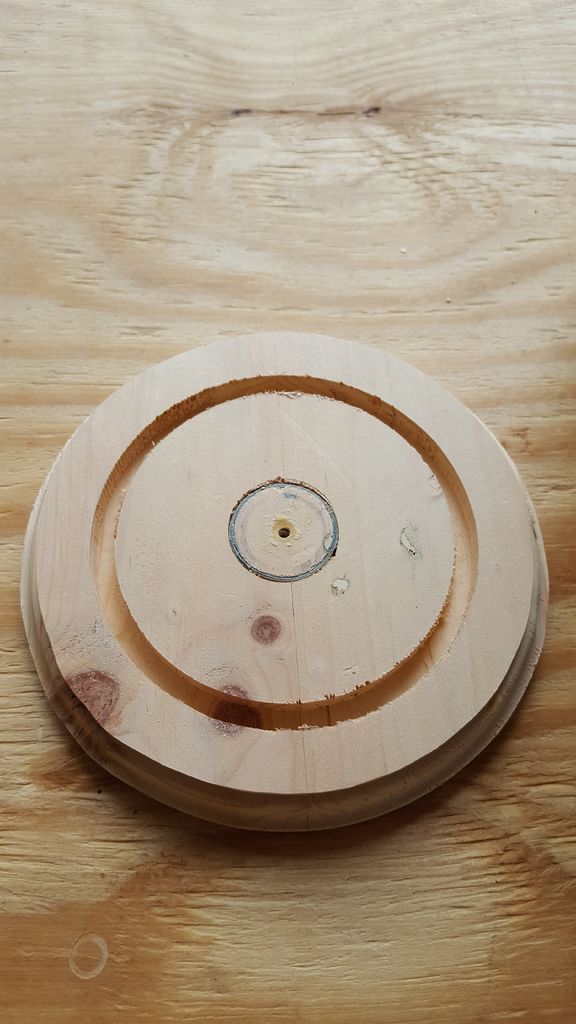
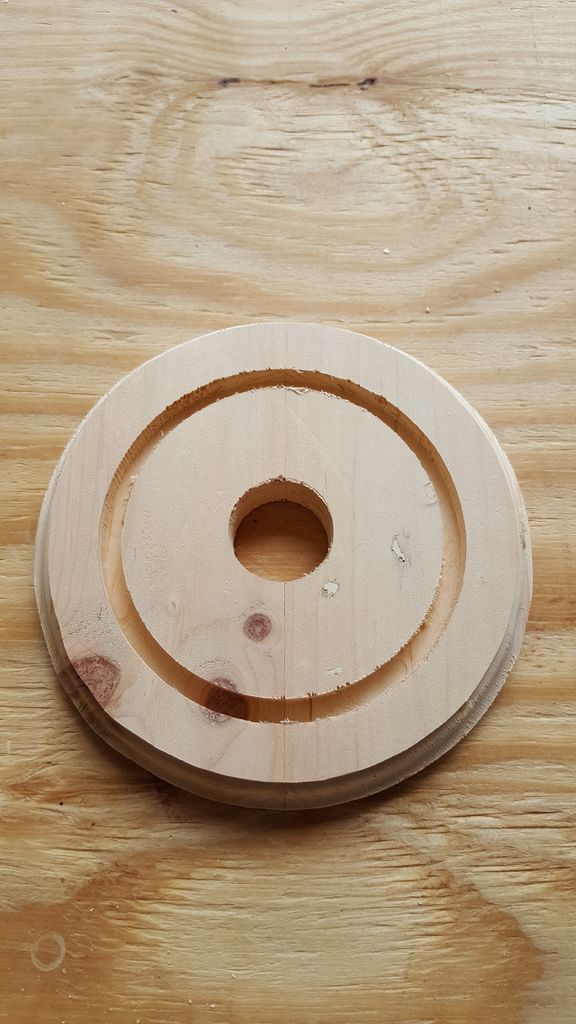
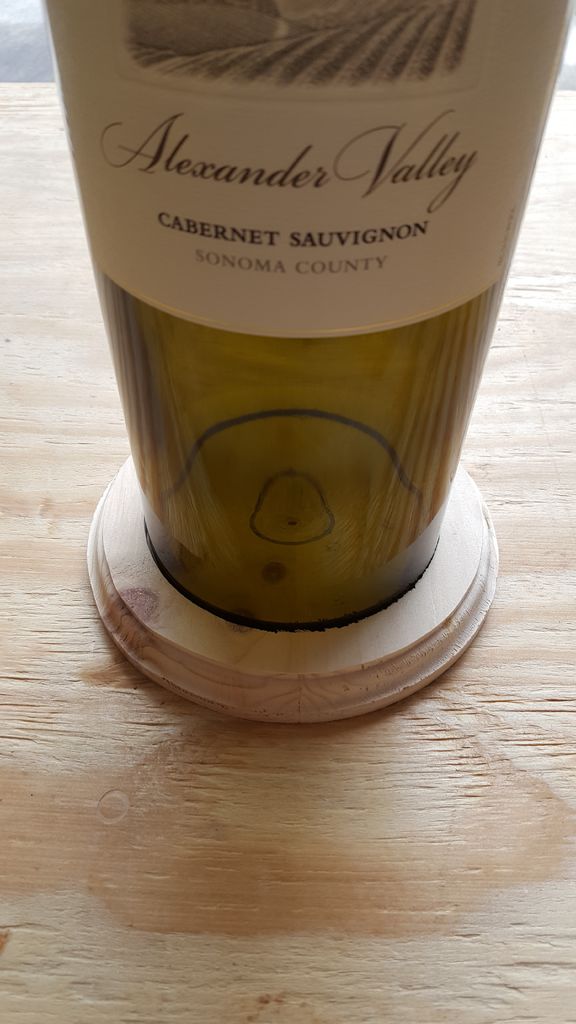
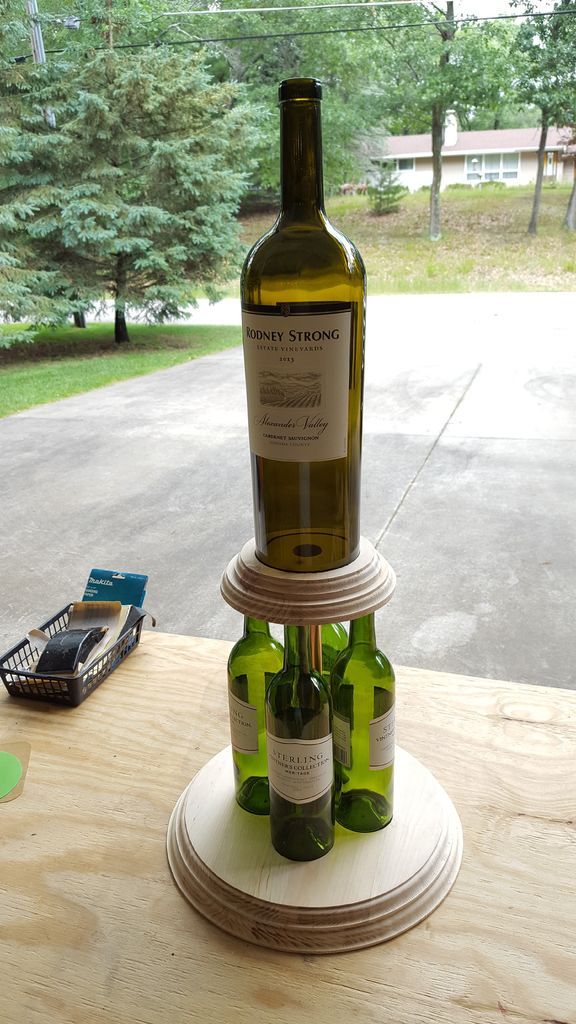
The second base found on top of the four regular-sized bottles also consists of two 0.75″ pieces of pine cut in the same manner as the previous step.
1st piece:
Cut the wood into a circle that can rest on the four necks of the wine bottles. Route a nice edge (if desired) as in the previous step.
Use a hole accessory to cut a hole for the stick.
Then place this piece of wood on the post and let it rest on the four wine bottles below.
Use a pencil and trace around where the top of the neck of each wine bottle rests on the wood.
Remove the wood and carve out an area for each wine bottle neck to rest on the wood.
2nd piece:
Cut your other piece of wood into a circle that is slightly smaller than the first piece of wood.
Before continuing, the bottom of each of the other three wine bottles must be removed so that the pole can extend up the lamp.
With the bottom removed, I placed the very large bottle on this second piece of wood and traced an outline of the bottle.
Then I used my dremel, circle template, and router bit to route out an area for the bottle to sit in the wood. The dremel router bit is 1/4″, which is the same thickness of the glass for this bottle.
The depth of the ejected area is approximately 1/4″, so in other words, the bottle will sit 1/4″ down into the wood.
Finally, use a hole saw attachment/bit and a power drill to make a hole in the center of both pieces of wood to allow the center pole to pass through.
Step 4: Build the third base
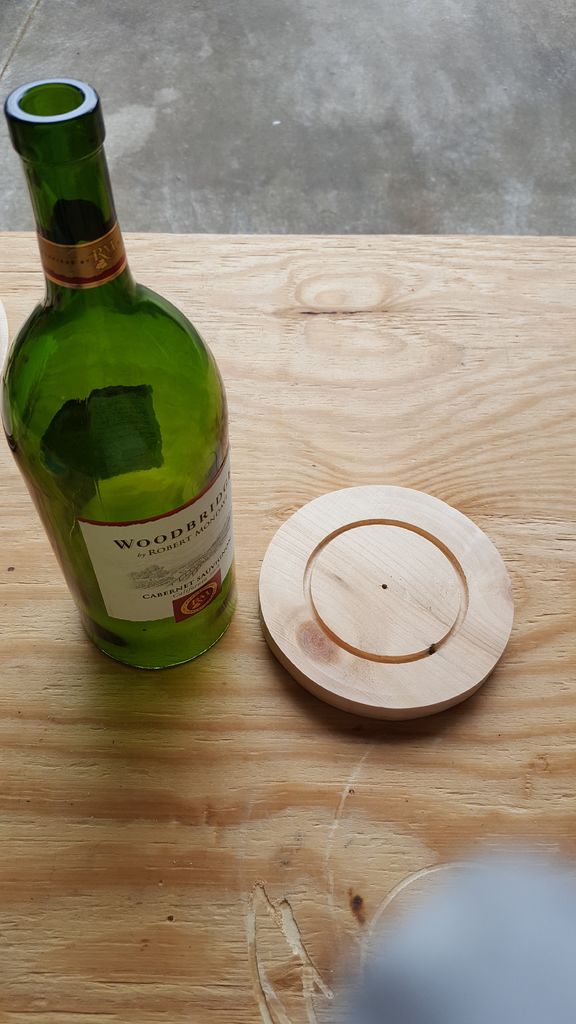
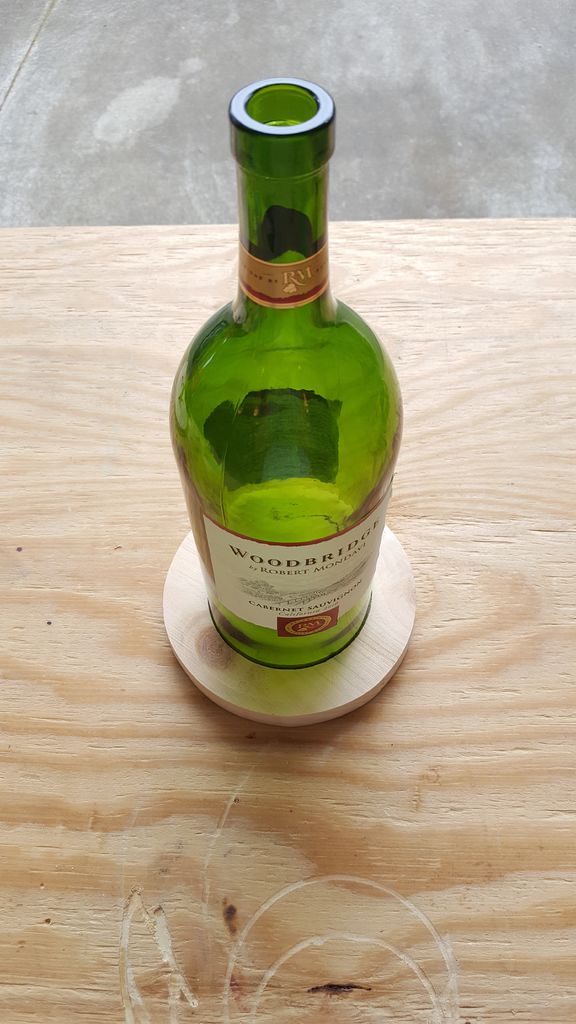
The third base consists of a 3/4″ circular piece of pine that is slightly smaller than the second base. Cut this piece of wood using the Dremel 561 bit and circular cutting guide.
Then add a nice edge with a fixed base router or router table
With the bottom of your next bottle removed, place it on this piece of wood and trace its outline as in the previous step.
Then, I use a dremel or rotary tool, the circle template, and the 561 cutting bit to route an area for the botshe feels in the wood.
The Dremel 561 bit is 1/8″, which is the same thickness of glass for this bottle.
The depth of the ejected area is approximately 1/4″.
Finally, use a hole saw bit/attachment and a power drill to make a hole in the center of the wood to allow the center pole to pass through.
Step 5: Build the 4th base
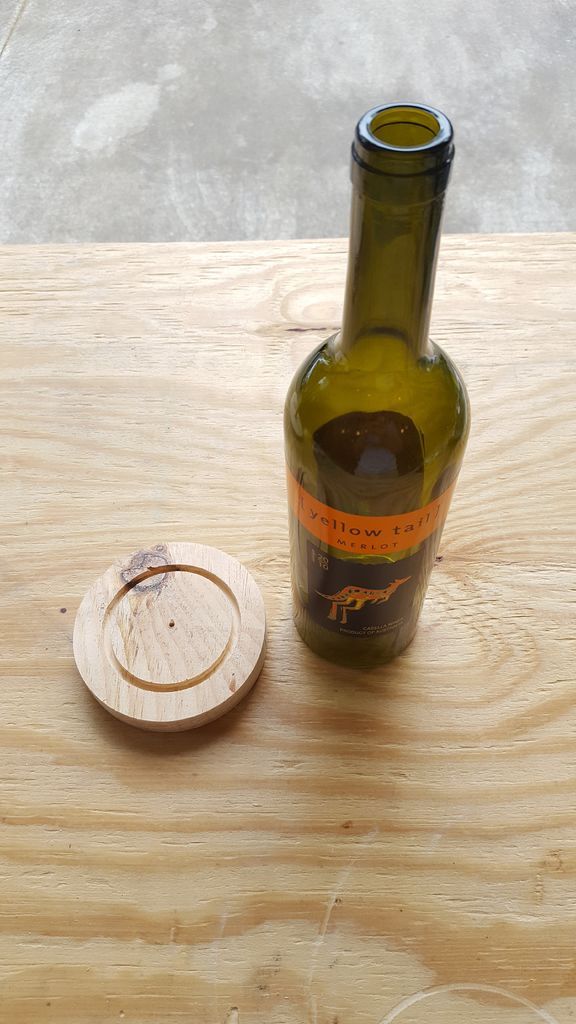
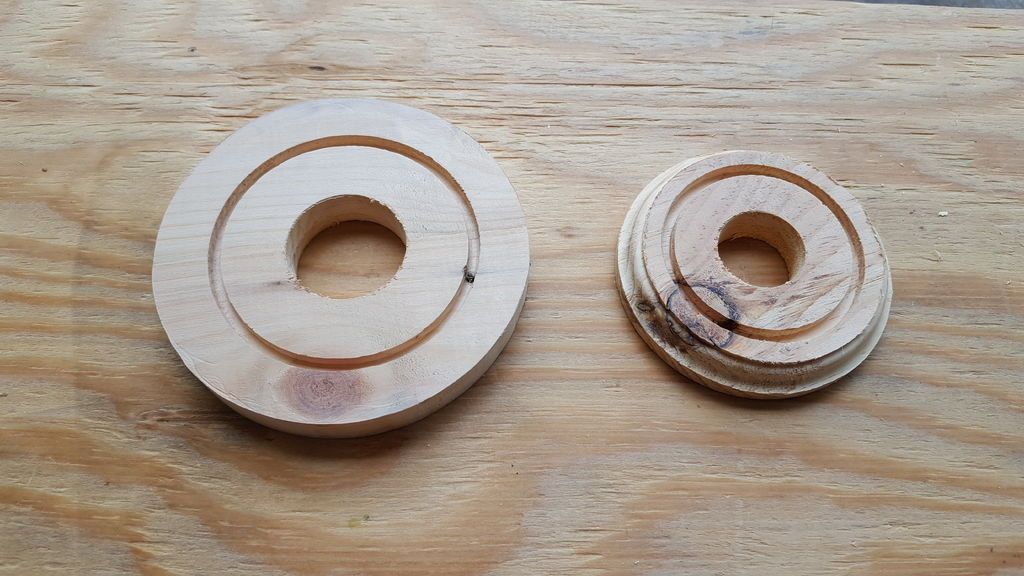
For this piece of wood, follow the same procedure as in the previous step.
Cut your wood so that it is smaller than the previous base.
Step 6: Assemble the central pole
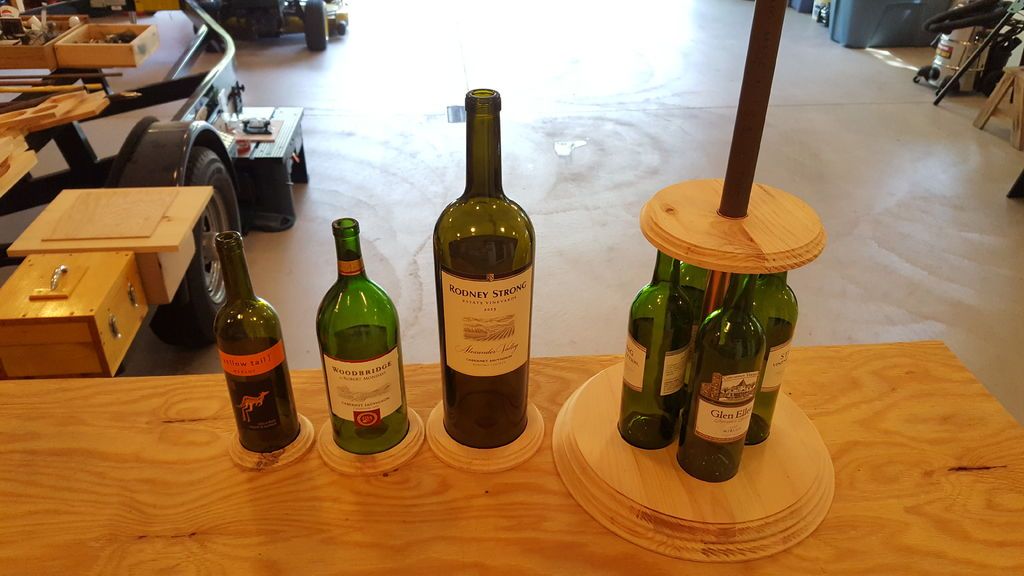
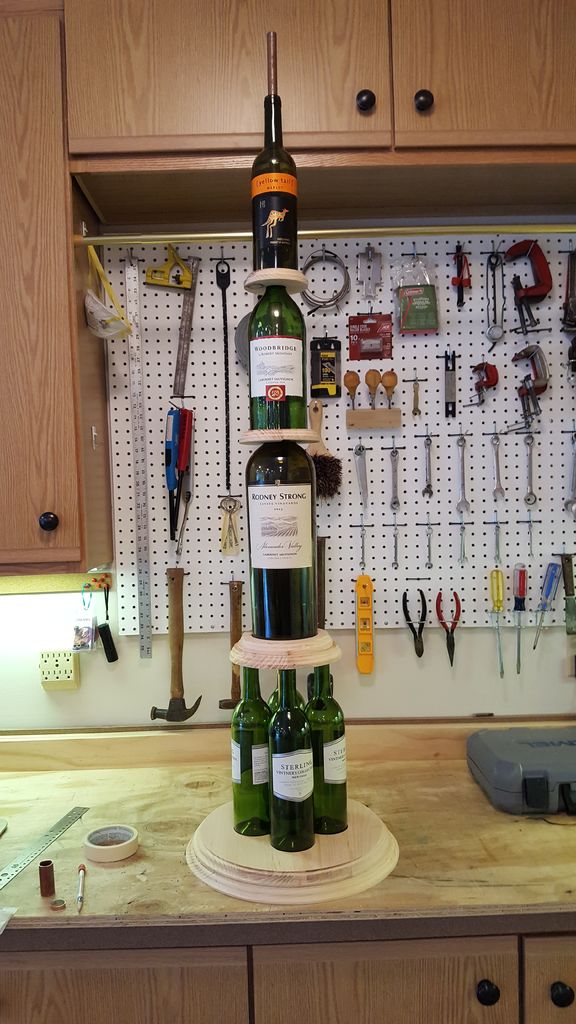
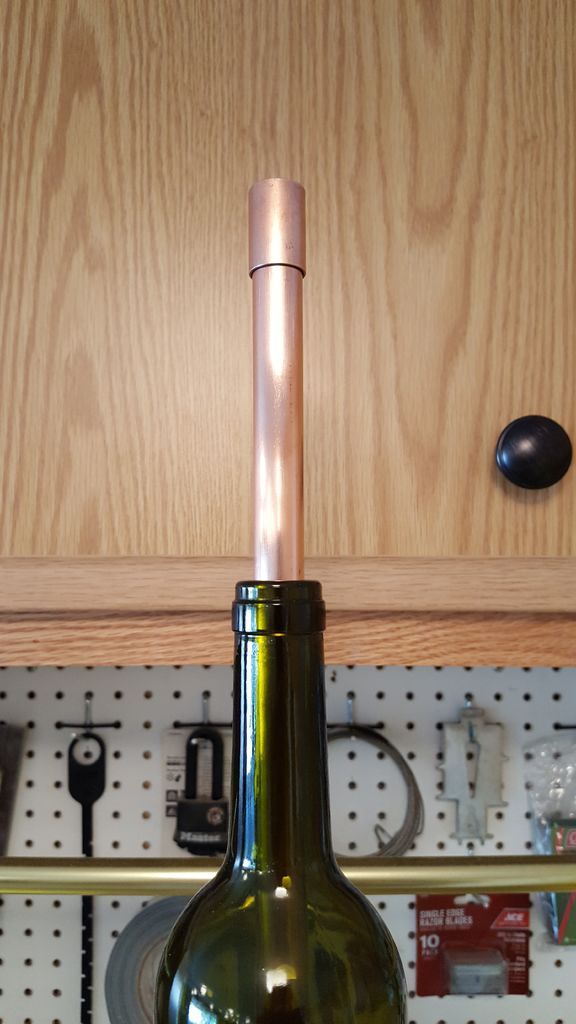
After finishing the 4th base, assemble the bottles and bases to preview what the lamp will look like.
When I was at this step, I assembled the center pole in case I had to cut some of the copper. Once you have everything that fits, you can move on to finishing the wood and copper.
Step 7: Staining and finishing
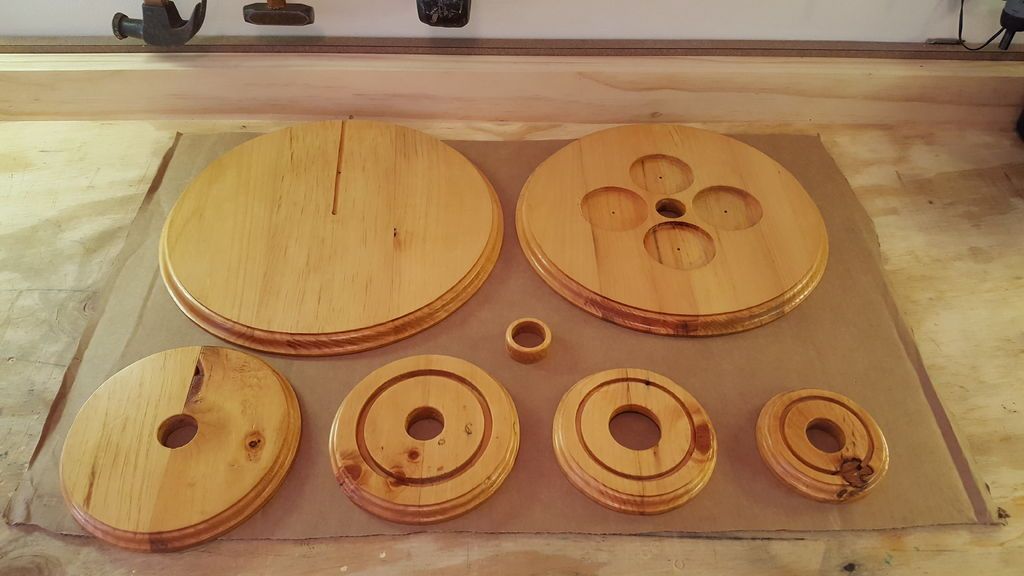
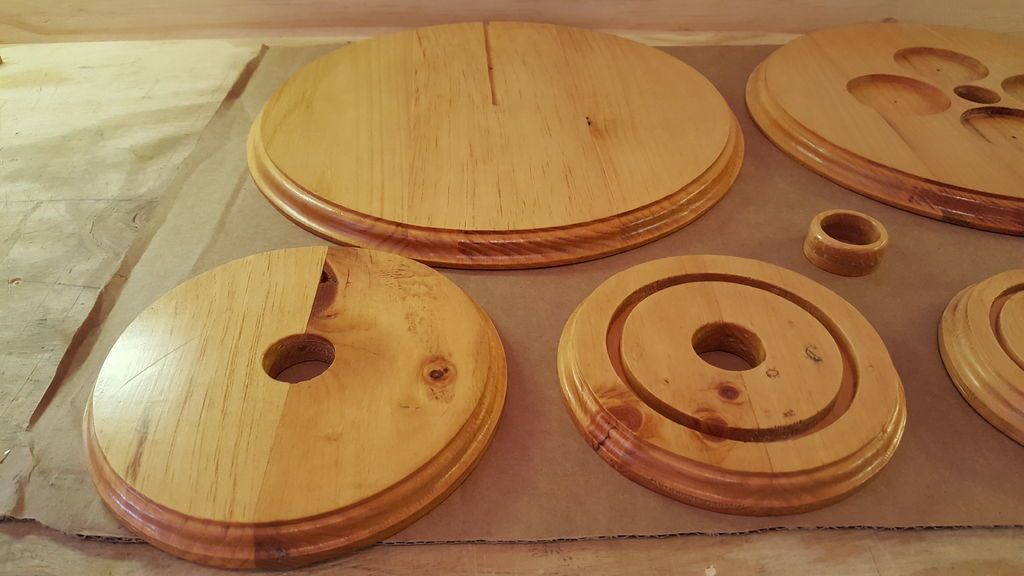
Wood: I painted each base with wood finish and covered each piece with two coats of Polyurethane.
Copper: Copper with very fine steel wool and coated each piece with Polyurethane.
Step 8: Remove the labels from the bottles
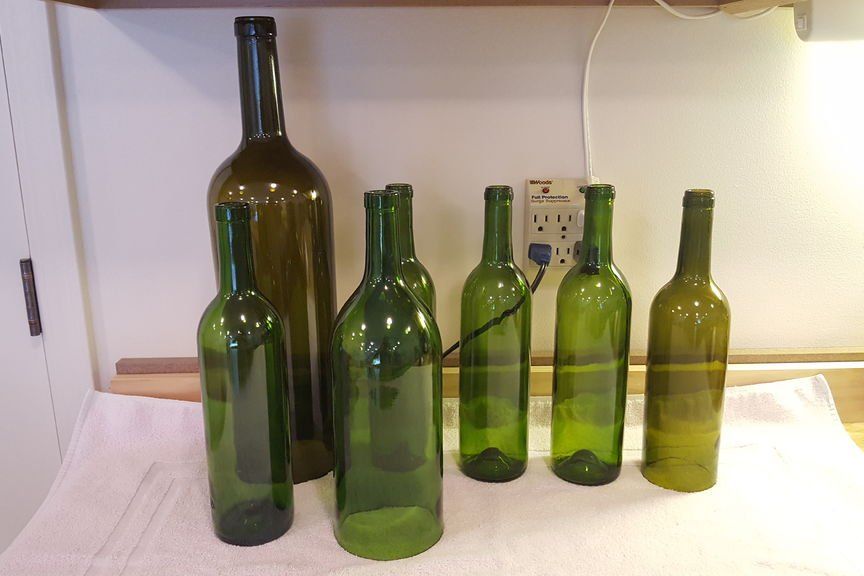
I decided to remove the labels from all the bottles. Warm water and soap will do this.
Step 9: Add the kit, equipment and lamp cable
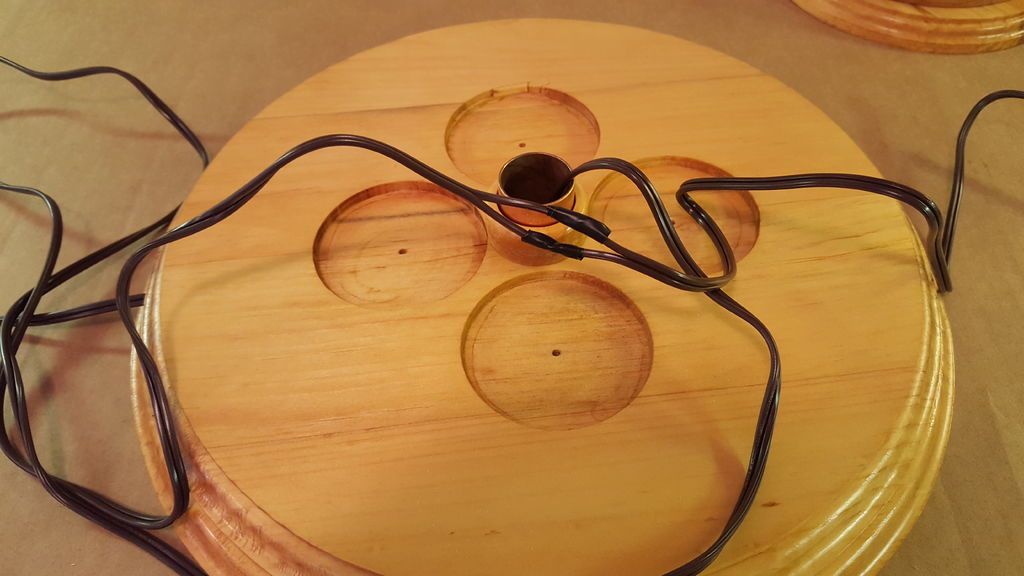
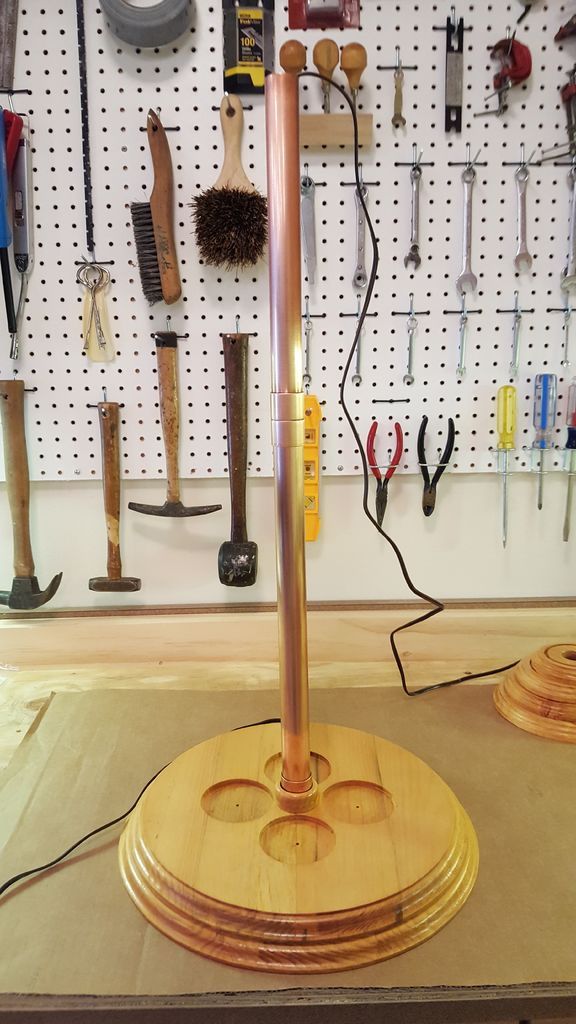
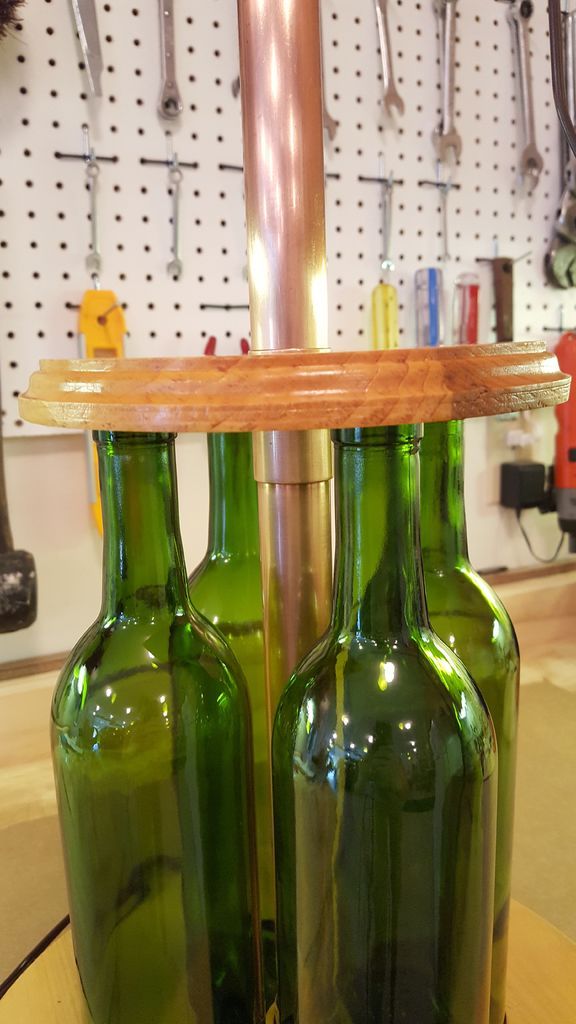
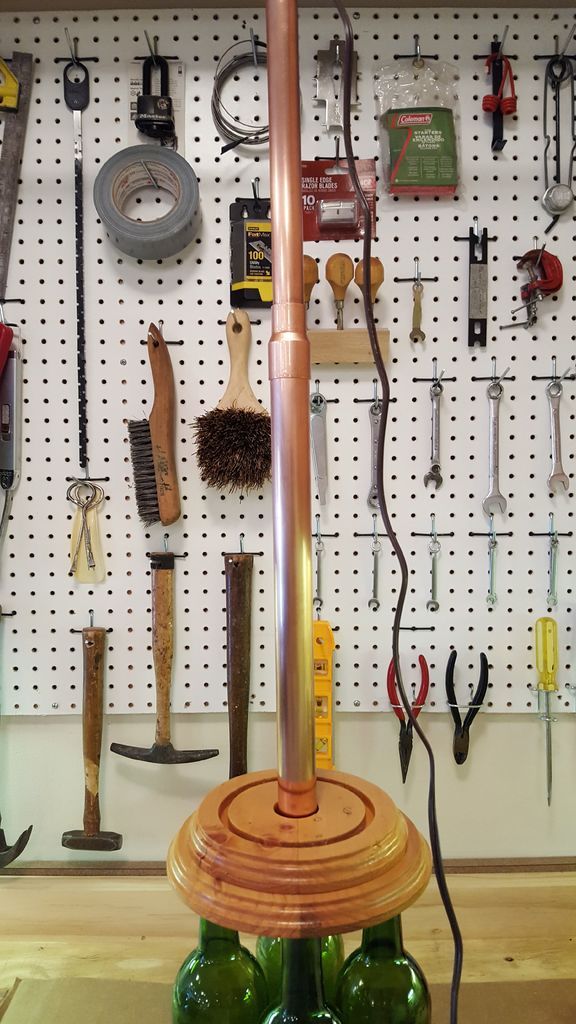
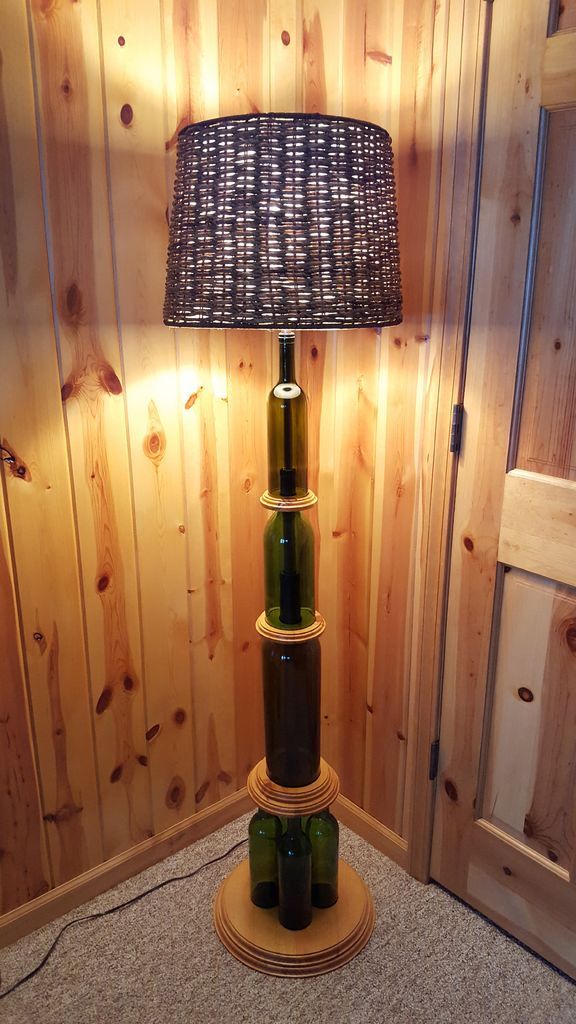
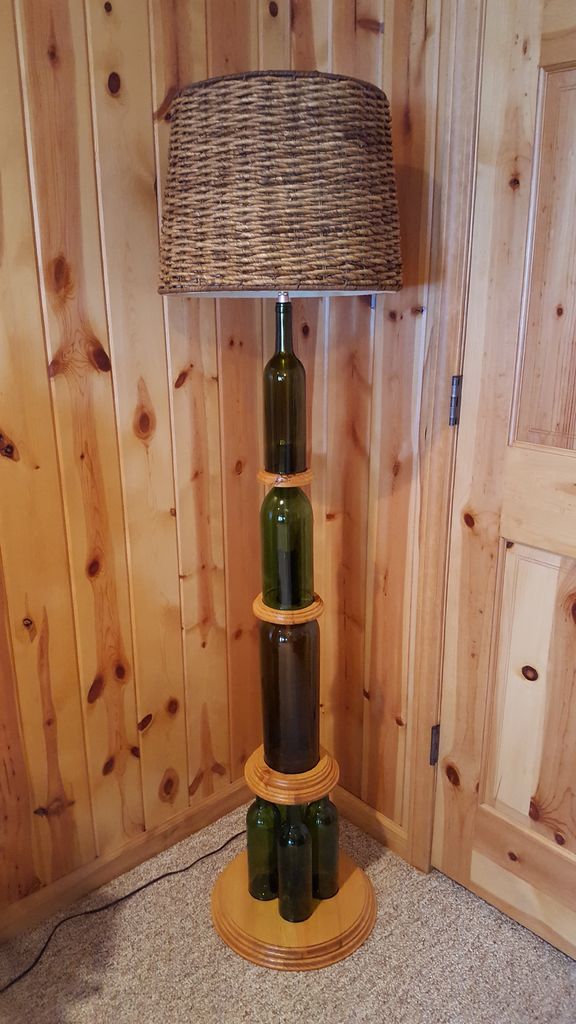
Next, I attached the two bottom pieces of the wooden base with 4 #6 1.25″ brass screws.
Next, I ran the lamp cord through the slot I had placed in the bottom piece of madera. (You can also place the wire between the wood and then screw both pieces together.)
I purchased an additional lamp cable and connected it to the previously threaded lamp cable to increase the overall length.
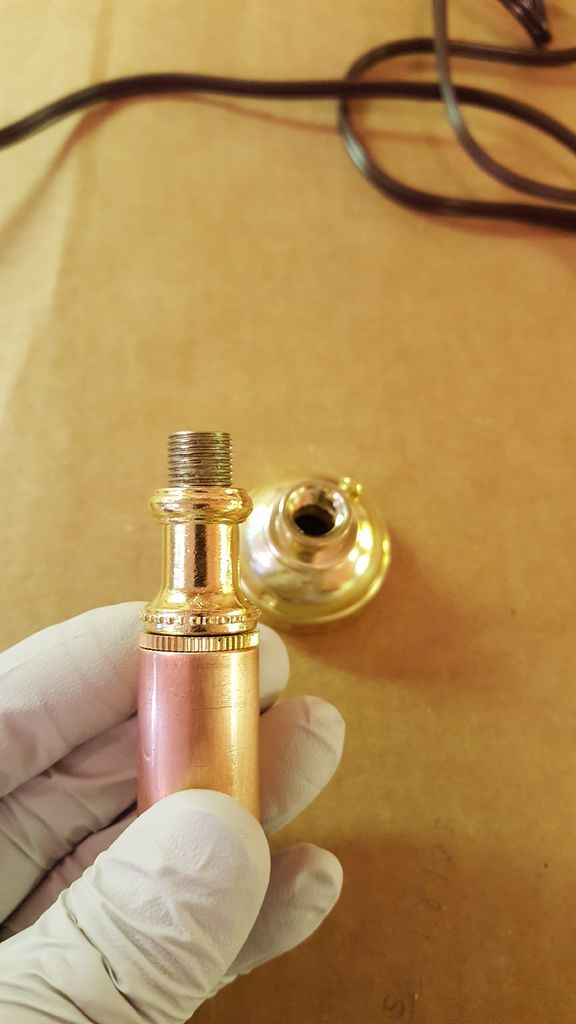
Once the wire has passed through the base, begin adding the different sections of the poles and bottles along with their corresponding bases. Attach the lamp kit to the piece of wood to the + tube and follow the instructions on the lamp kit to connect the wire to the bulb socket. Next, be sure to test out your new lamp and find a good shape that complements it.
Optional:
You can add jute rope or twine around the bottles on their wooden base for an extra touch. I didn't show this in my photos.
I hope you enjoyed it. Greetings!
Get more information at perfectionidea.com and on our Facebook for more Floor Lamp Recycling Wine Bottles.
Popular Content
How to make a rocket stove for outdoors
Cardboard Drawers Lined with Jeans
Ideas and Advantages of Window Grilles for the Home!
Latest Articles
How to make a refrigerator out of insulating material: Practical step-by-step guide
How to make a Kilim for the Home: Complete Step by Step Guide
How to protect ourselves from accidents in our workplace: Complete prevention and safety guide
Related Content
How to Make Simple Under Stair Storage Drawers!
How to Rebind Old Books from Home!
How to Make a Beautiful Pallet Lamp!
Bicycles are for Walking and Also for Your Home!
Creative Home Decor Ideas to Transform Every Space
Refreshing your home starts with smart design choices that combine comfort, personality, and functionality. Whether you want to modernize a small apartment, upgrade outdoor areas, or create cozy rustic interiors, these trending ideas can completely change the atmosphere of your space.
Outdoor Spaces That Increase Style and Functionality
Outdoor living continues to dominate modern home trends. Homeowners are increasingly investing in practical entertainment zones inspired by these BBQ shed ideas, which create the perfect setup for gatherings and weekend cooking sessions.
First impressions also matter when designing exteriors. Elegant farm entrance gates design ideas help properties stand out while improving privacy and curb appeal.
Compact living solutions are also gaining popularity. These inspiring 16x40 shed house interior design ideas show how smaller spaces can still feel luxurious and functional.
To enhance patios and entryways, homeowners are adding stylish protection with these creative porch awning exterior DIY ideas that blend aesthetics with practicality.

Rustic and Cozy Interior Design Trends
Warm and natural interiors remain timeless. These charming rustic decor ideas combine wood textures, vintage accents, and earthy tones to create welcoming spaces.
Bedrooms are becoming more personalized with curated wall arrangements. Many homeowners use these stylish picture wall ideas for bedroom spaces to display memories and artwork creatively.
Textured wall treatments are another major trend. Installing a board and batten wall adds architectural character while keeping interiors elegant and modern.
Similarly, bold accent wall ideas can instantly transform plain rooms into eye-catching focal points without requiring a full renovation.
Smart Kitchen and Organization Inspiration
Functional kitchens are essential for modern homes. These practical kitchen wall cabinet ideas maximize storage while maintaining a clean and stylish appearance.
Organization also starts at the entrance. Well-designed mud room ideas help families keep shoes, coats, and daily essentials neatly arranged.
Colorful and Personalized Home Styling
Vibrant interiors are becoming increasingly popular thanks to playful dopamine decor ideas that use bright colors and joyful accessories to improve mood and energy.
Gallery walls also continue to evolve as a major decorative feature. These trendy gallery wall inspiration ideas offer creative ways to combine prints, photos, and statement art.
Young renters and new homeowners are especially embracing these stylish first apartment aesthetic ideas to create sophisticated interiors on a budget.
Finally, selecting the right shades can dramatically influence any room’s atmosphere. These modern trendy color ideas help homeowners choose palettes that feel fresh, elegant, and timeless.
Final Thoughts
From rustic charm and colorful interiors to outdoor entertaining areas and functional storage solutions, today’s home decor trends focus on creating spaces that feel both beautiful and livable. By combining smart layouts, modern textures, and personalized decorative elements, any home can become more stylish, comfortable, and inspiring.
Browse Grand Goldman Shop
Bean Bag & Lazy Sofa
Cabinets
Chairs & Accent
Coat Racks
Display & Etageres
Fireplaces & Acc.
Living Room Sets
Loveseats
Ottomans
Recliners & Massage
Browse the Shop
 Acacia frida deluxe solid wood bed frame |
Bedroom bench |
Bed chest drawers |
Lingerie dresser |
Frame base |
Mirror with jewelry storage |
30 Bathroom Vanity |
Memory foam queen mattress |
Mattresses for back pain |
Nightstand set of 2 |
Grand Goldman Shop |
Civil Lawyer
Deutschland Trikot WM 2026
Acacia frida deluxe solid wood bed frame |
Bedroom bench |
Bed chest drawers |
Lingerie dresser |
Frame base |
Mirror with jewelry storage |
30 Bathroom Vanity |
Memory foam queen mattress |
Mattresses for back pain |
Nightstand set of 2 |
Grand Goldman Shop |
Civil Lawyer
Deutschland Trikot WM 2026







