

How to make a modular rack, if you are looking for a way to organize your books, magazines, records or audiovisual files, you can build a shelf, which if you also consider space for a television, becomes a complete rack, where you can have different household items at hand.

Find Bleeding Edge Supplements at Scandalous Prices on iHerb.

Tools to use:
- · Spatula
- · Plain
- · Mask
- · Gloves
- · Milling machine
- · Corner presses
- · Orbital Sander
- · Cordless Drill
- · 2HP compressor
- · Paint gun
- · 60 cm cup drill
Materials to use:
- · Normal Cold Glue with 500 g Topex Dispenser
- · Wood sandpaper No. 180, 10
- · 15mm MDF board 152x244cm, 3
- · Wetproof retape paste
- · Volcanite Screw 6 x 1″ 250 units
- · Robocop retaining hinge
- · Kolor Primer Paint 1 gallon
- · Wood sandpaper No. 400, 2
- · Volcanite screw CRS ZBR 6X 1 5/8 200 units
- · Water-based enamel Int/Ext Tint 1gl
- · Furniture leg, 4
This project consists of installing six modules of three different sizes on the top and on the floor, which together will have 14 compartments, where records, books and series can be stored, considering the space for a television; with its corresponding amplification equipment.
Procedure:
To make the modular rack you must order the 15 mm MDF dimensioned in the following measurements:
- 70x35cm module with 2 compartments (3 units)
- 6 pieces 70x25cm (sides)
- 6 pieces 32x25cm (upper and lower lid)
- 3 pieces 32x67cm (depth)
- 3 pieces 32x22cm (ribs)
- 3 pieces 67x20cm (bars at 45º in horizontal position)
- 3 pieces 32x20cm (bars at 45º in vertical position)
- 105x35cm Modules with 2 Compartments (2 units)
- 4 pieces 105x25cm (sides)
- 4 pieces 32x25cm (sides)
- 2 pieces 102x32cm (depth)
- 4 pieces 32x22cm (ribs)
- 2 pieces 102x20cm (bars at 45º horizontally)
- 2 pieces 32x20cm (bars at 45º vertical)
- Rack Module 210x35cm (1 unit)
- 2 pieces 210x40cm (sides)
- 2 pieces 32x40cm (sides)
- 3 pieces 32x37cm (ribs)
- 1 piece 32x207cm (depth)
- 1 piece 35x105cm (door 1)
#1. Assembly of modules
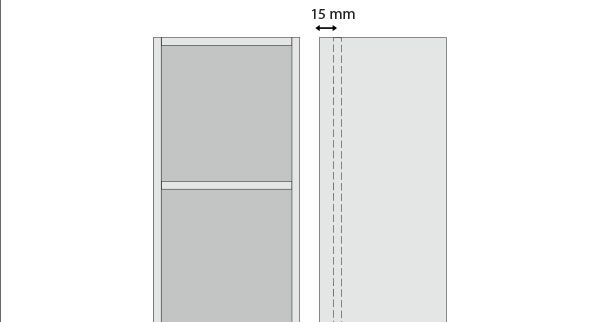
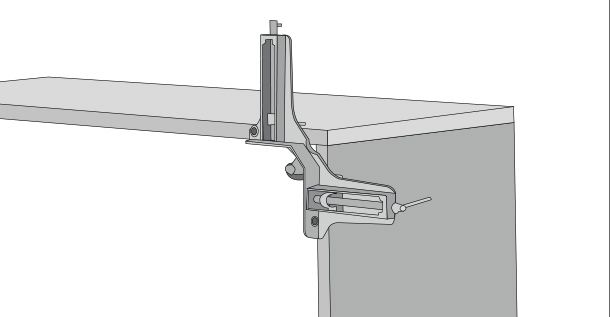
All modules are assembled in the same way, respecting this order: base or lower cover, sides, rib, bottom and roof or upper cover.
The bottom must be swallowed by 15 mm. The pieces are put together with corner presses, the edges are glued, countersunk with the drill bit and finally fixed with 1 5/8” screws.
#2. Cut the hanging bars
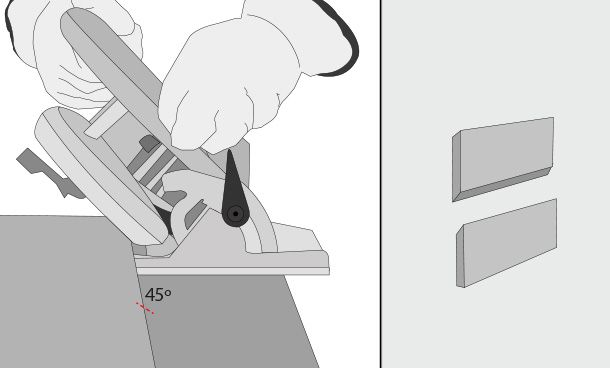
The pieces to hang the bars must be cut to their width at 45º, to leave 10 cm pieces. This diagonal cut is made with a jigsaw or a circular saw, moving its blade at a 45º angle. To make this cut, use gloves and glasses.
#3. Fix the bars to the modules
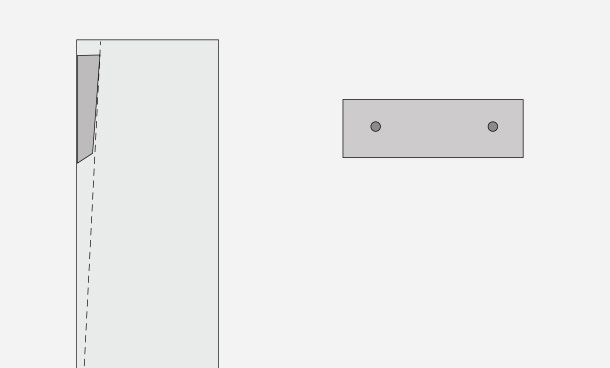
Of each pair of bars, one is fixed to the module and the other to the wall (step 10). In the modules, the bar will be flush thanks to the 15 mm space left at the bottom, and is fixed with 1” screws.
#4. Recover
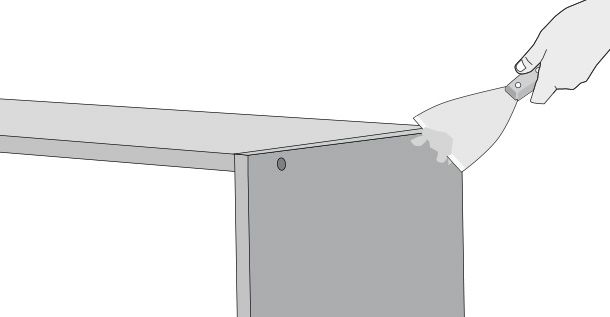
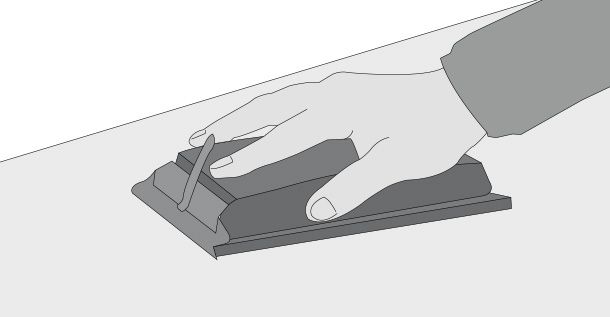
Apply retape paste on the heads of the screws and the edges. Let dry. Sand to even out, remove excess paste and improve the finish.
#5. Paint
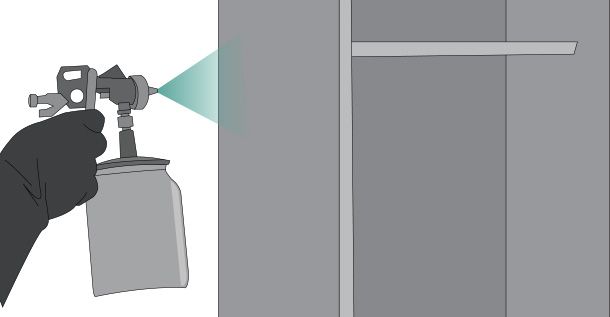
Before painting, you must apply the Primer, a base that seals the pores of the wood and improves the adhesion of the paint. It is diluted in water and applied with a spray gun.
Let dry 2 hours. Dilute the enamel in water and apply at least 2 coats of paintwith the gun.
#6. Fix the legs
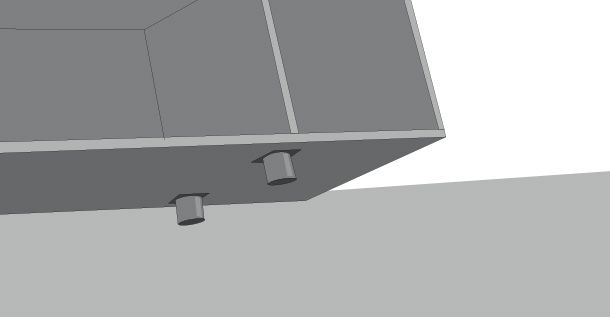
Once the paint is dry, screw the 4 legs into the rack module that will go to the floor and not hanging.
#7. Make the door
The rack module will come with a door (piece 35x105cm).
But for the equipment stored inside to respond to the remote control signal, holes must be drilled with a 60 mm socket drill bit. It is a 4x14 hole grid. Line with grid cloth, the same one used in sound amplifiers.

#8. Fix the door
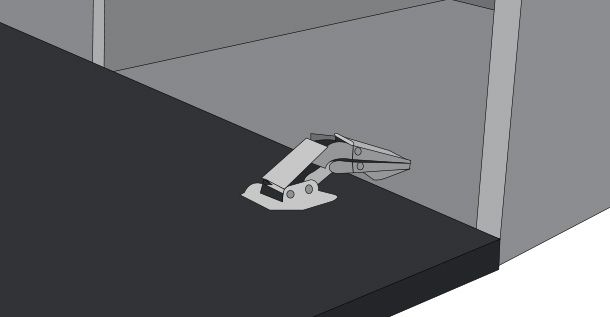
Once the door is lined, it is fixed with robocop hinges, placed on the lower edge so that it opens downwards.
The hinges are fixed with screws and there is no need to make holes or cutouts so that it is flush.
#9. Define the position
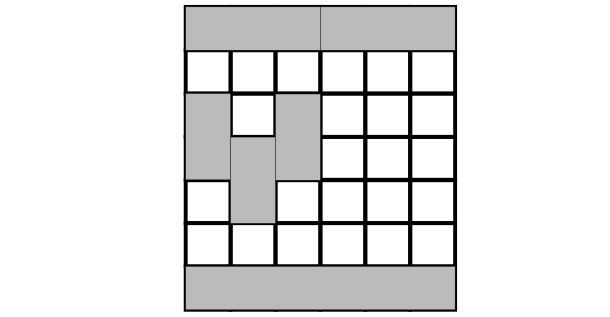
To establish the location of the modules, make a grid on the wall with the same 35 cm measurement that was used for the modules.
An alternative could be to limit yourself as much as possible to the grid in search of an ordered result; Another way is to go outside the margins of the grid, but the balance becomes difficult to manage; An intermediate distribution is the best option, since it allows you to have everything closer at hand and easily access frequently used elements.
#10. Fix bars on the wall
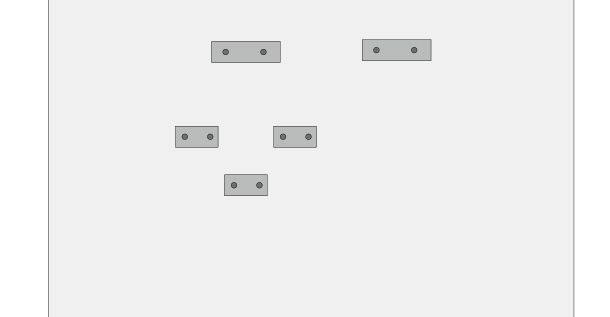
Depending on the final location of the modules, the second piece of each pair of bars must be fixed.
It is important that the pairs match the positions in the modules. The wall is screwed, drilled with a concrete drill bit, and plugs are placed.
Step by step video:
Source: do it yourself
If you liked the content, don't forget to share it 😉
Get more information at perfectionidea.com and on our Facebook for more How to make a modular rack.
- Tags
- Guide
Popular Content
How to make a rocket stove for outdoors
Cardboard Drawers Lined with Jeans
Ideas and Advantages of Window Grilles for the Home!
Latest Articles
How to make a refrigerator out of insulating material: Practical step-by-step guide
How to make a Kilim for the Home: Complete Step by Step Guide
How to protect ourselves from accidents in our workplace: Complete prevention and safety guide
Related Content
Incredible ideas to make a wooden lamp
Make a fan with an air conditioning effect with plastic bottles
How to install a floating floor in your living room or bedroom
7 different ways to make your own varnish
Creative Home Decor Ideas to Transform Every Space
Refreshing your home starts with smart design choices that combine comfort, personality, and functionality. Whether you want to modernize a small apartment, upgrade outdoor areas, or create cozy rustic interiors, these trending ideas can completely change the atmosphere of your space.
Outdoor Spaces That Increase Style and Functionality
Outdoor living continues to dominate modern home trends. Homeowners are increasingly investing in practical entertainment zones inspired by these BBQ shed ideas, which create the perfect setup for gatherings and weekend cooking sessions.
First impressions also matter when designing exteriors. Elegant farm entrance gates design ideas help properties stand out while improving privacy and curb appeal.
Compact living solutions are also gaining popularity. These inspiring 16x40 shed house interior design ideas show how smaller spaces can still feel luxurious and functional.
To enhance patios and entryways, homeowners are adding stylish protection with these creative porch awning exterior DIY ideas that blend aesthetics with practicality.

Rustic and Cozy Interior Design Trends
Warm and natural interiors remain timeless. These charming rustic decor ideas combine wood textures, vintage accents, and earthy tones to create welcoming spaces.
Bedrooms are becoming more personalized with curated wall arrangements. Many homeowners use these stylish picture wall ideas for bedroom spaces to display memories and artwork creatively.
Textured wall treatments are another major trend. Installing a board and batten wall adds architectural character while keeping interiors elegant and modern.
Similarly, bold accent wall ideas can instantly transform plain rooms into eye-catching focal points without requiring a full renovation.
Smart Kitchen and Organization Inspiration
Functional kitchens are essential for modern homes. These practical kitchen wall cabinet ideas maximize storage while maintaining a clean and stylish appearance.
Organization also starts at the entrance. Well-designed mud room ideas help families keep shoes, coats, and daily essentials neatly arranged.
Colorful and Personalized Home Styling
Vibrant interiors are becoming increasingly popular thanks to playful dopamine decor ideas that use bright colors and joyful accessories to improve mood and energy.
Gallery walls also continue to evolve as a major decorative feature. These trendy gallery wall inspiration ideas offer creative ways to combine prints, photos, and statement art.
Young renters and new homeowners are especially embracing these stylish first apartment aesthetic ideas to create sophisticated interiors on a budget.
Finally, selecting the right shades can dramatically influence any room’s atmosphere. These modern trendy color ideas help homeowners choose palettes that feel fresh, elegant, and timeless.
Final Thoughts
From rustic charm and colorful interiors to outdoor entertaining areas and functional storage solutions, today’s home decor trends focus on creating spaces that feel both beautiful and livable. By combining smart layouts, modern textures, and personalized decorative elements, any home can become more stylish, comfortable, and inspiring.
Browse the Shop
 Acacia frida deluxe solid wood bed frame |
Bedroom bench |
Bed chest drawers |
Lingerie dresser |
Frame base |
Mirror with jewelry storage |
30 Bathroom Vanity |
Memory foam queen mattress |
Mattresses for back pain |
Nightstand set of 2 |
Grand Goldman Shop |
Civil Lawyer
Deutschland Trikot WM 2026
Acacia frida deluxe solid wood bed frame |
Bedroom bench |
Bed chest drawers |
Lingerie dresser |
Frame base |
Mirror with jewelry storage |
30 Bathroom Vanity |
Memory foam queen mattress |
Mattresses for back pain |
Nightstand set of 2 |
Grand Goldman Shop |
Civil Lawyer
Deutschland Trikot WM 2026







