

Today we will teach you how to make an Eclipse lamp so that you can hang it on a wall and it fades to a soft glow when you turn it.
Light shines through a thin layer of wood veneer on the front of the disc, and semicircular holes on the back create a halo-like glow on the wall behind it.
Find Bleeding Edge Supplements at Scandalous Prices on iHerb.

Using an LED strip, laser cut plywood, a sheet of veneer, and some electronics and external components, I was able to make this lamp in about 12 hours. I can't be sure, but it might be the biggest knob in the world.

Step 1: Design
I was inspired by the Halo lamp by KJARTAN OSKARSSON STUDIO. They designed a magnificent wooden ring that hangs from a type of pulley. When you pull a leather strap, its donut-shaped light rotates and dims the light at the same time.
I love the idea of direct, manual interaction with a light source, so I decided to take my own view on this concept.
Like almost everything I do, I designed it in the Fusion 360 program. It's free, stable and versatile, it plays well with the models.
VERSION 2: BETTER DESIGN
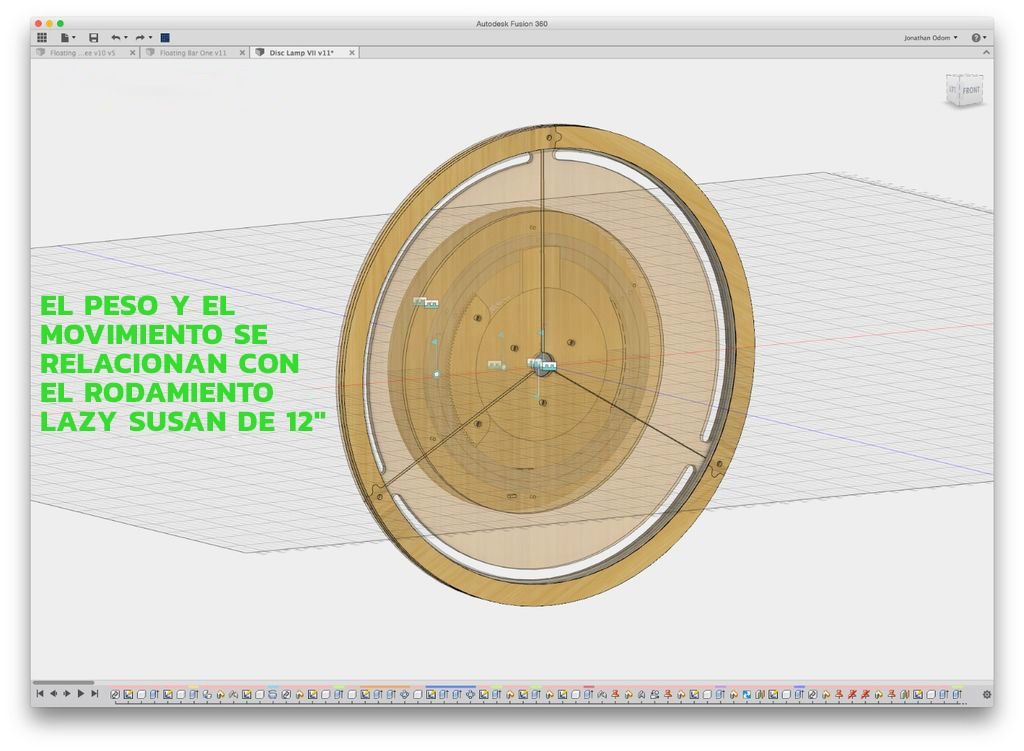
With version 2, I changed to a 12″ bearing, so there would be much more contact between the fixed back and the moving front. With this configuration I was able to have a smooth movement with a very strong and stable connection.
FILES to Download:
The f3D file is a copy of the 3D file I used to design the part. The DWG file is a design of all the parts to be cut. Notice that the layers are separated into “Cut” (which is for the 1/4″ plywood), “Octave” is for the 1/8″ plywood plate that contains the potentiometer.
- Disk lamp arrangement
- Eclipse Lamp
Step 2: Tools and materials
ELECTRONICS:
At first I was planning to use a rotary encoder with an arduino, but decided to use a much simpler design and ready to use a 12V LED dimmer. Here are the parts I used:
- 12V LED strip
- PWM dimming controller
- 12V AC/DC power supply
- Wire, solder, heat shrink tubing... Basic home electronics stuff.
TEAM:
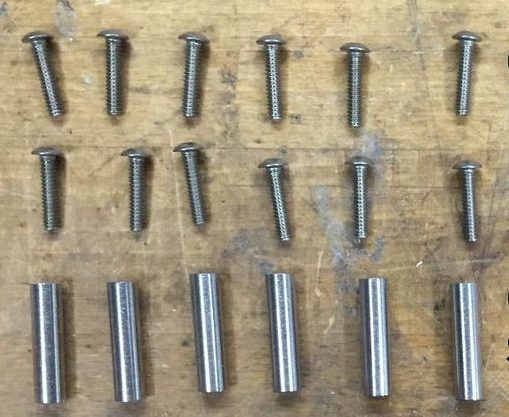
- 6-32 Machine Screws: 12
- 6-32 Steel Female Threaded Round Standoff: 6
- Ring style turntable (NOTE: This turntable may not fit the hole pattern on the cut files. The one I used was found at the store. To make it fit, change the hole pattern to match.)
- 4-40 Machine Screws: 4
TOOLS:
- Epilog 120 watt laser cutter (any laser will work, or this can be done by hand with a jigsaw/drill saw/bandsaw
- Wood glue
- Hot glue
- Welder
WOOD:
- 1/4″ plywood
- Maple veneer
Step 3: Plywood Assembly
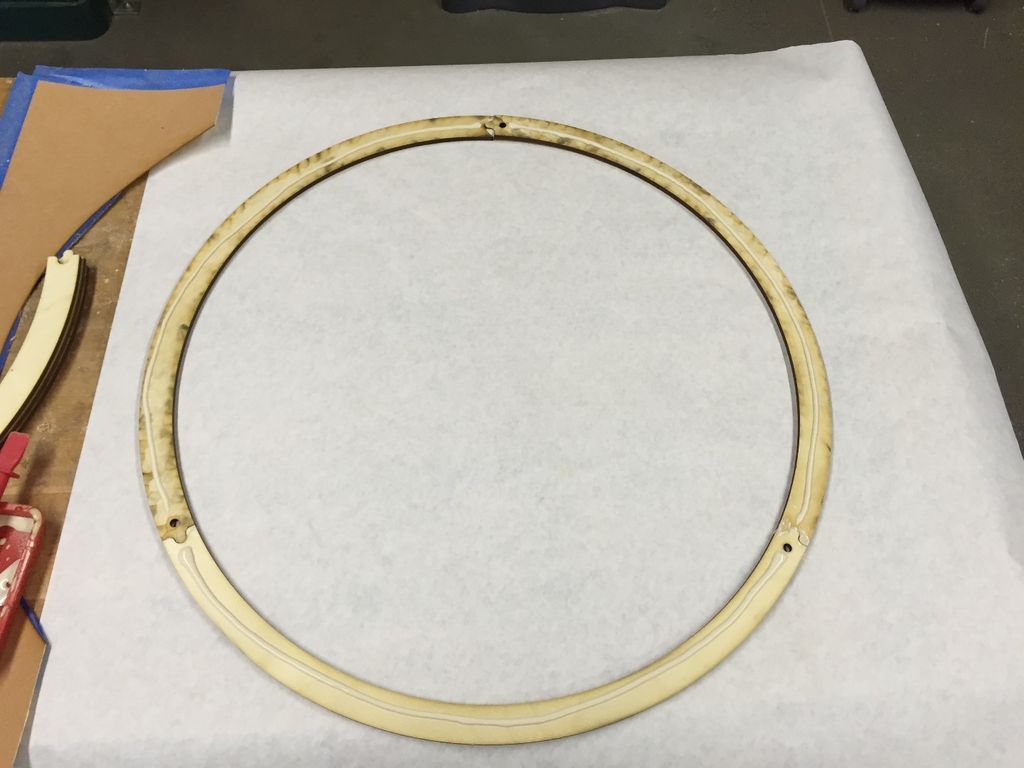
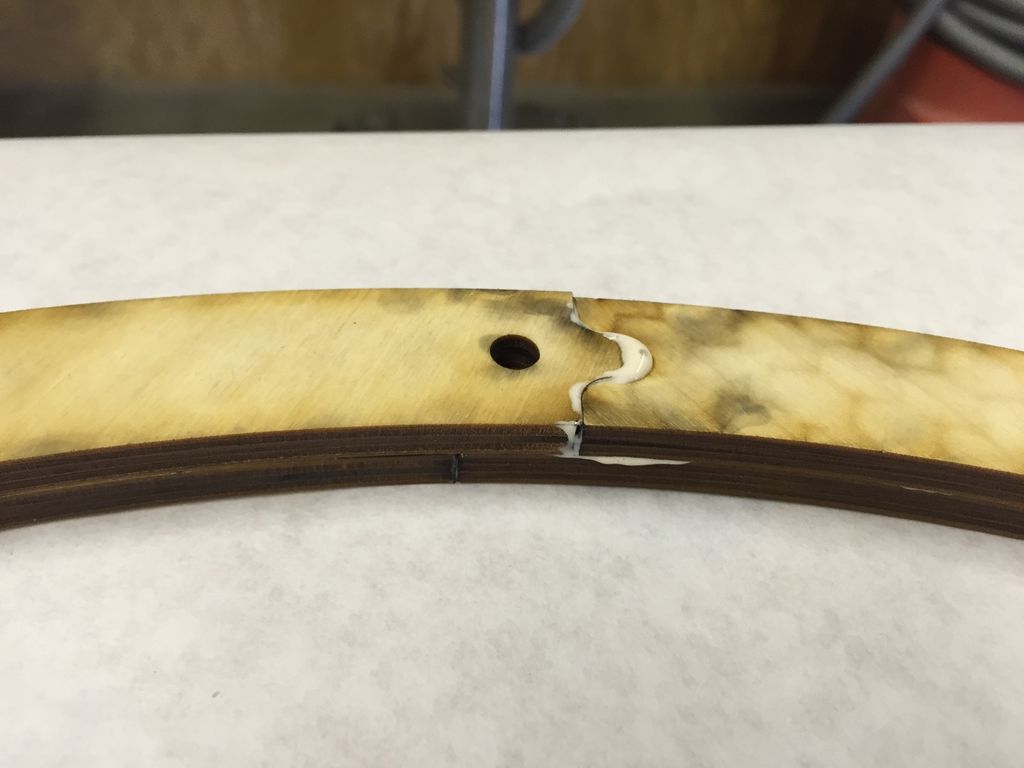
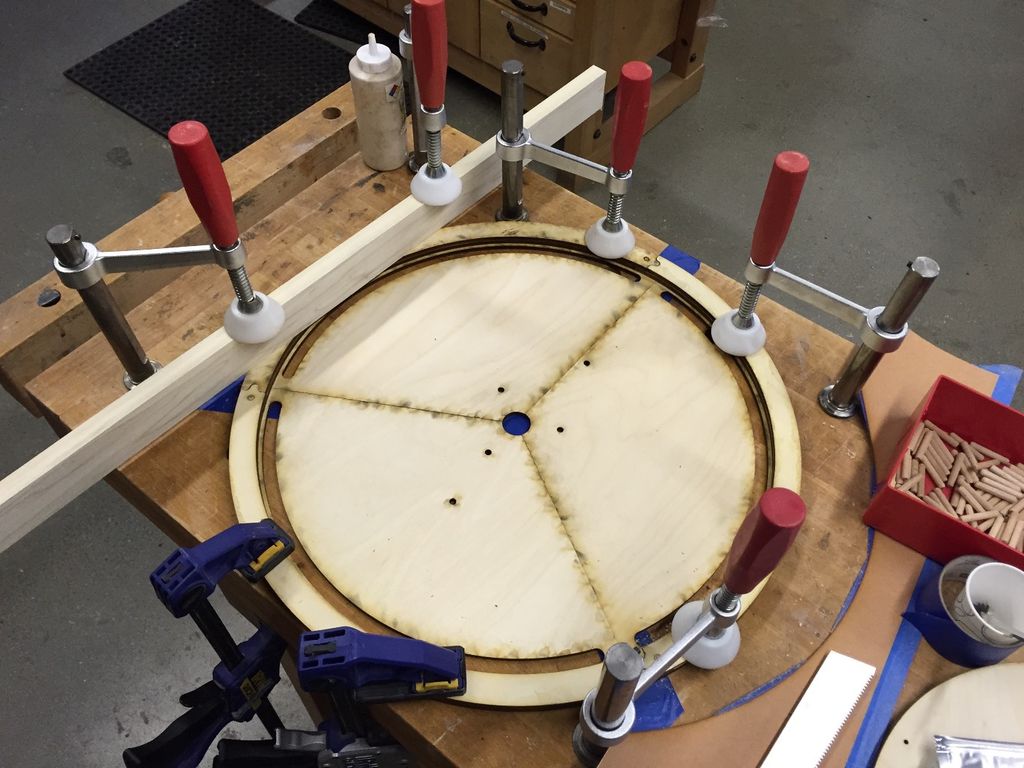
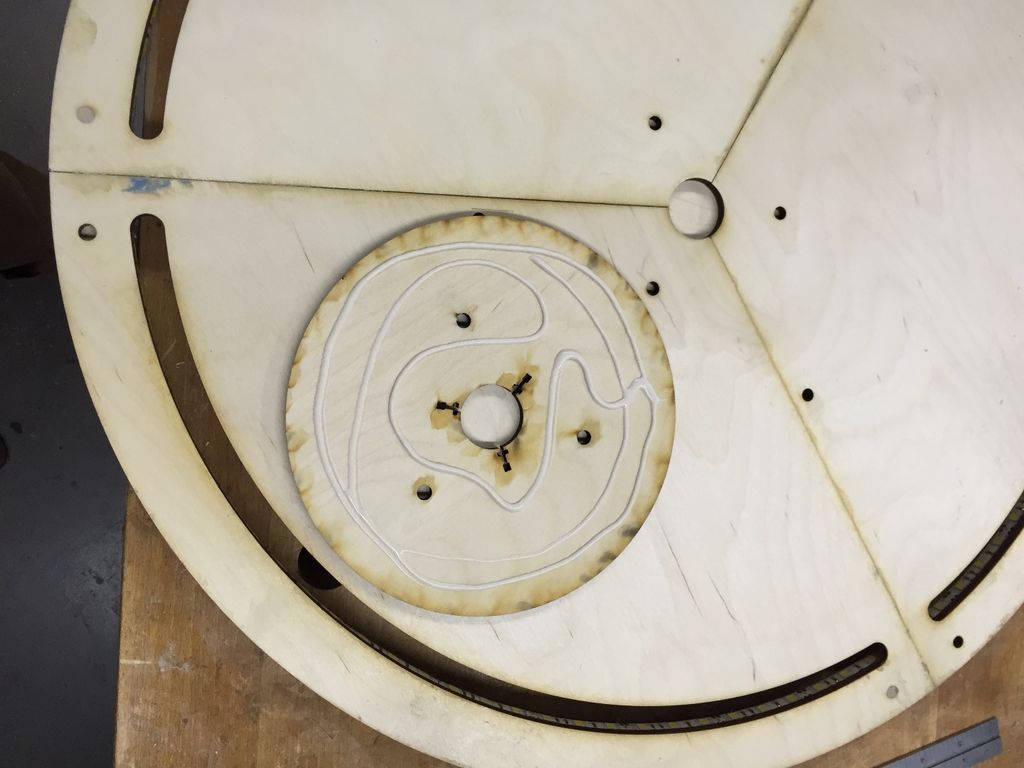
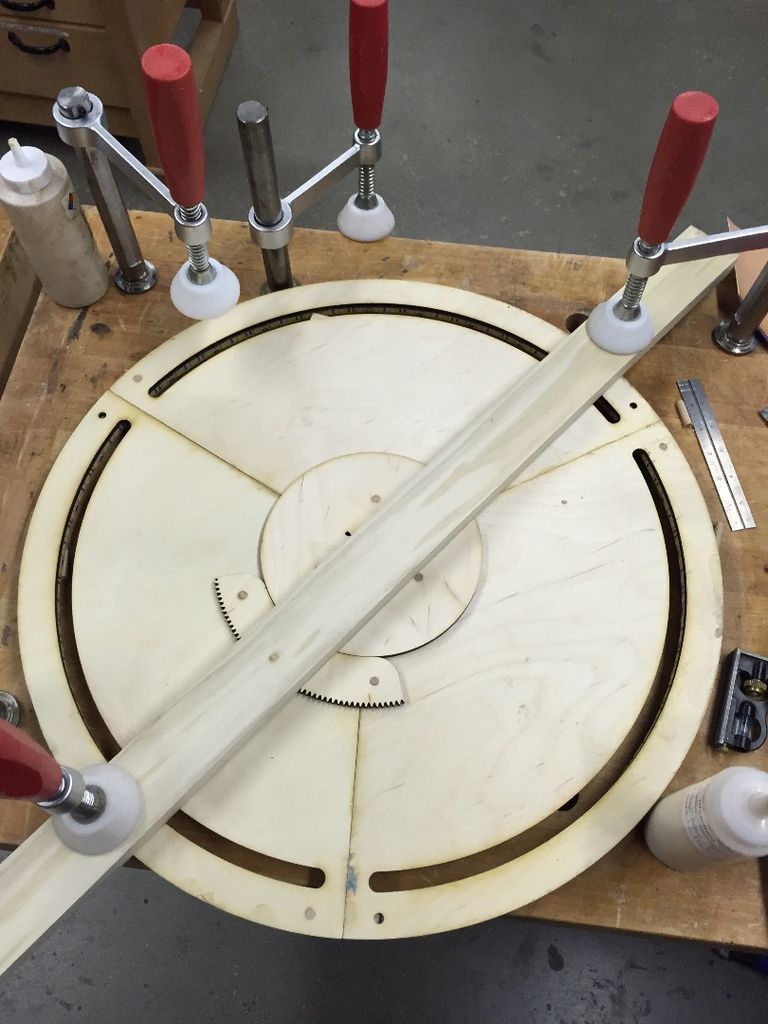
The plywood pieces areThey interlace and stack to form the parts of the lamp. I decided to use glues almost everywhere to make a more solid piece than I could achieve with bolted connections.
The plywood pieces are divided and arranged so that they take up less space on a sheet. Making a 24″ ring 1″ thick is a huge waste of material. I divide the rings and the large back panel into 3 parts each (cuts at 120º angles).
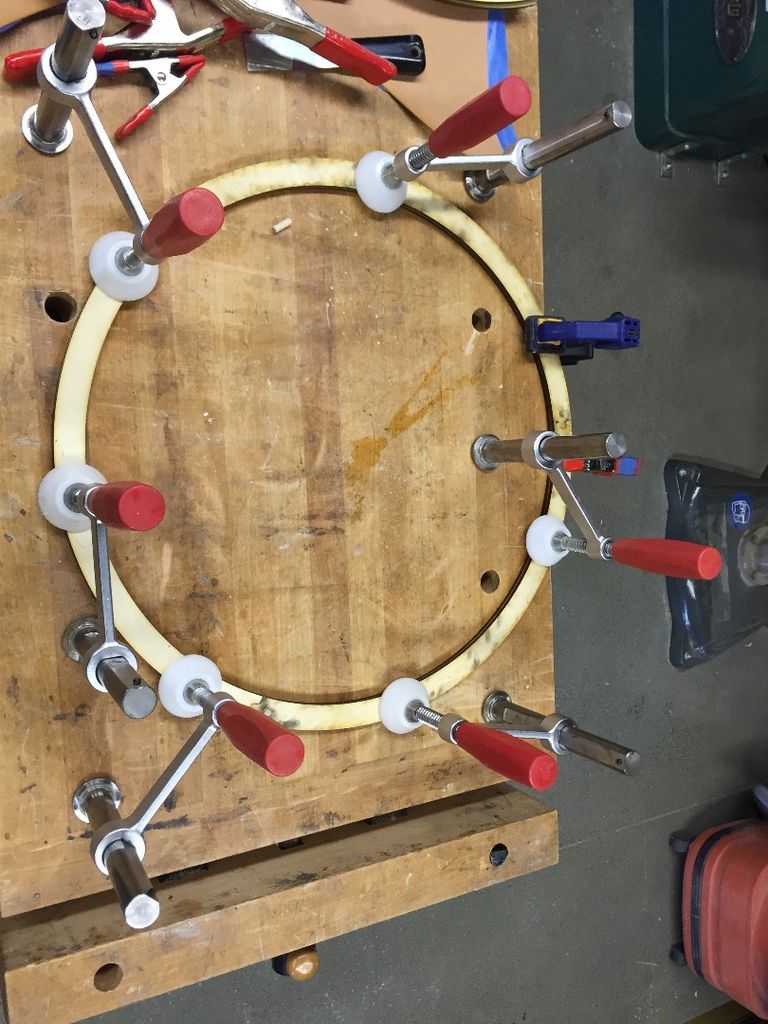
I added 1/4" holes throughout the entire stack to make precise assembly quick and easy: simply stack the pieces with glue on the seams and surfaces, then thread a binding pin through each hole. The two 1" rings stack to create a ~1/2" wall around the inside of the large panel. After gluing and adding the pegs, I clamped the parts together to make sure I wasn't getting bubbles. or uneven surfaces.
Step 4: Mount the LED
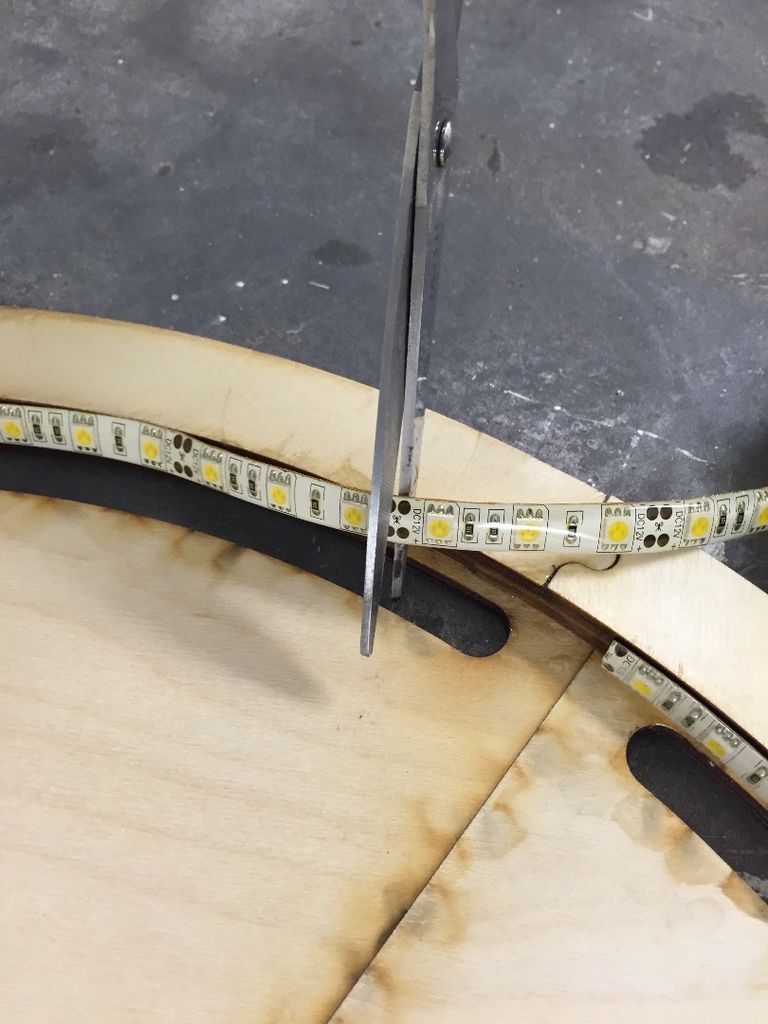
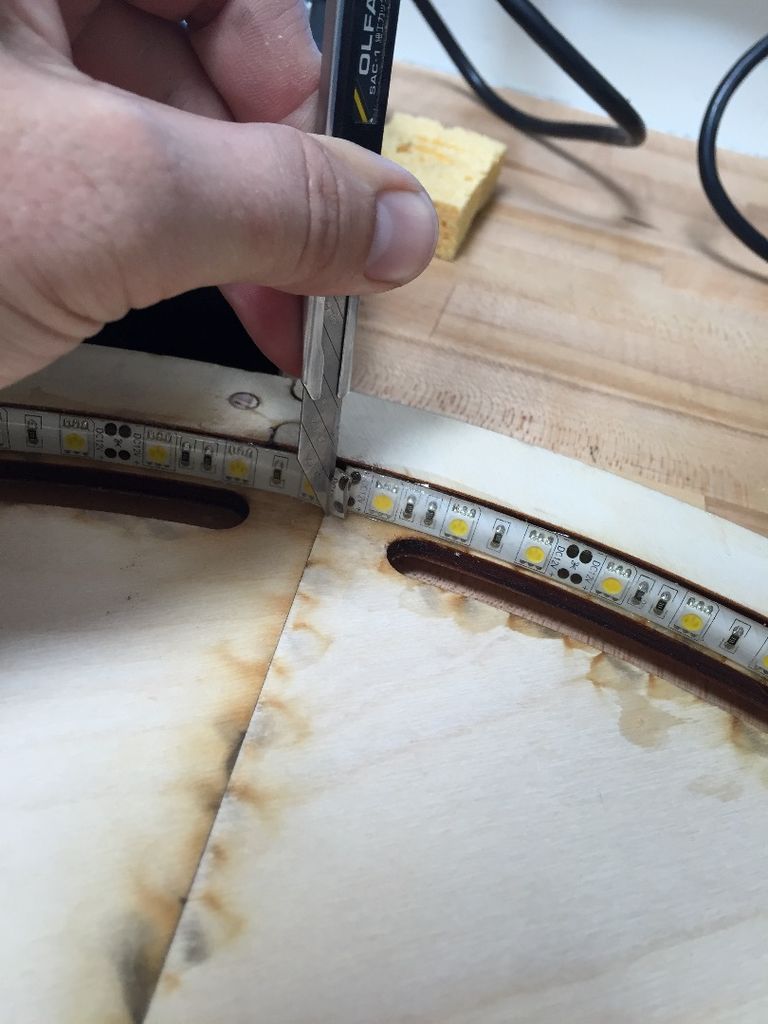



First, I placed the LED strip around the inside of the 1/2″ trim. The 5 minute epoxy works well. You can't trust the adhesive these things come with, they're practically useless. When you get to the end of your piece, you simply cut the strip with scissors.
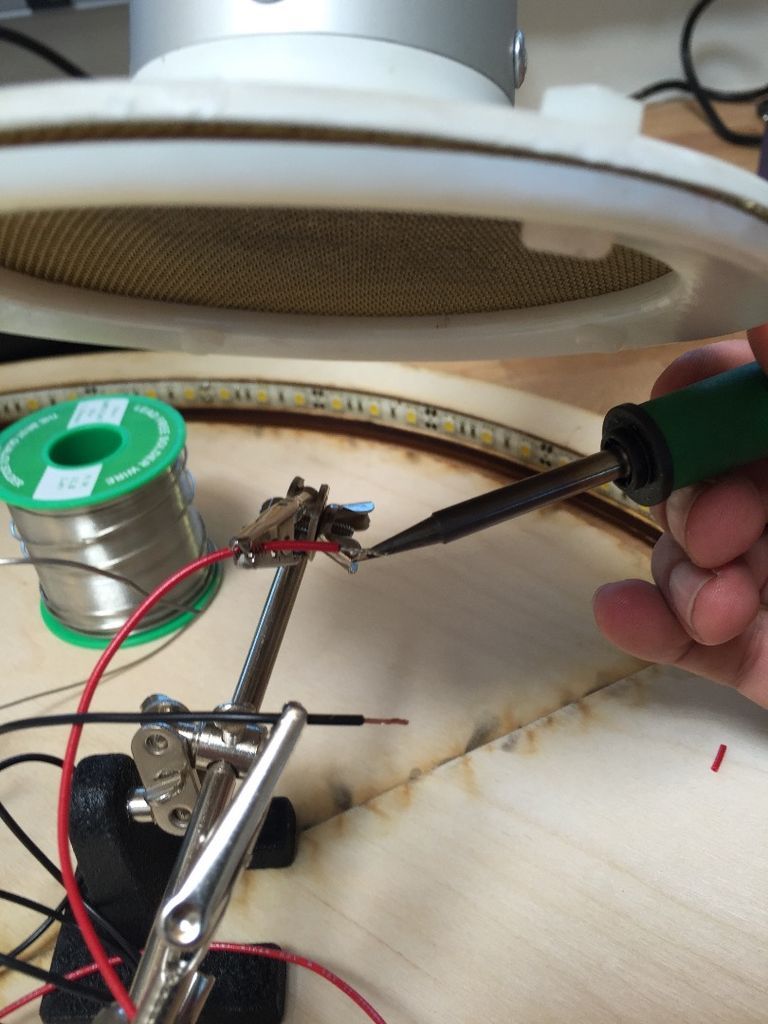
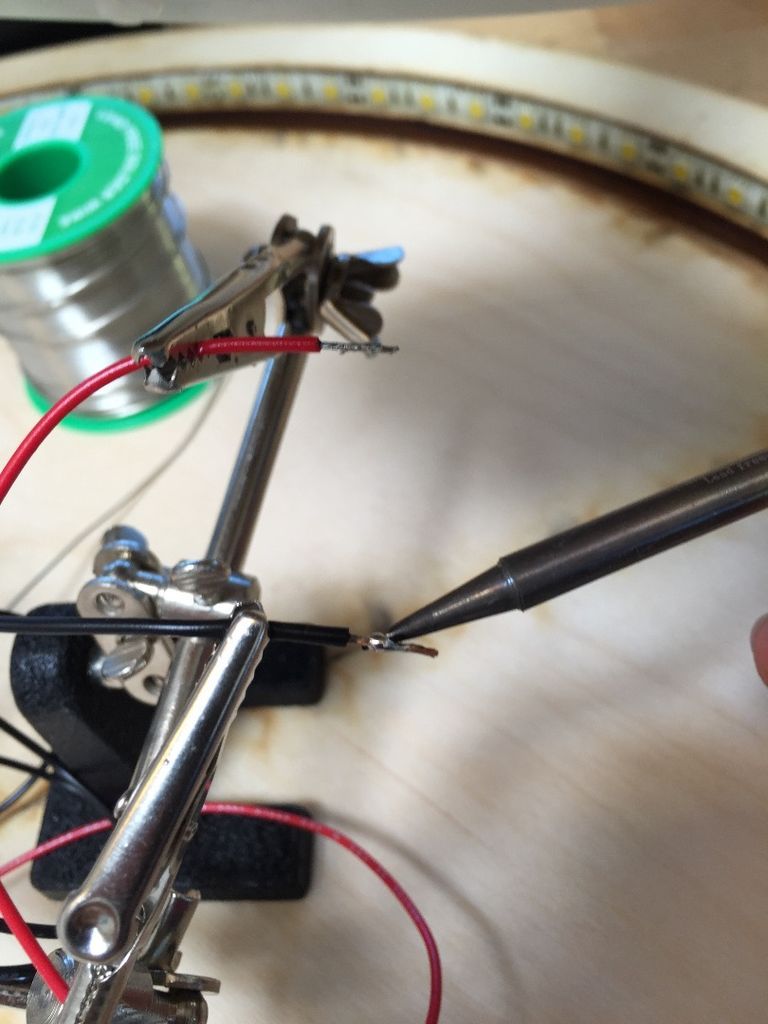
With the LEDs in place, I removed the plastic covering from the end of the strip to expose the solder contacts, then soldered them with solid black and red wires which I would then connect to the dimmer. It is always important to ensure a structural connection for wiring; Never rely on solder contacts to hold wired connections in place, this will inevitably cause short circuits. To avoid this, I simply glued the wires to the back panel, leaving enough slack at the ends to redo the connections if necessary.
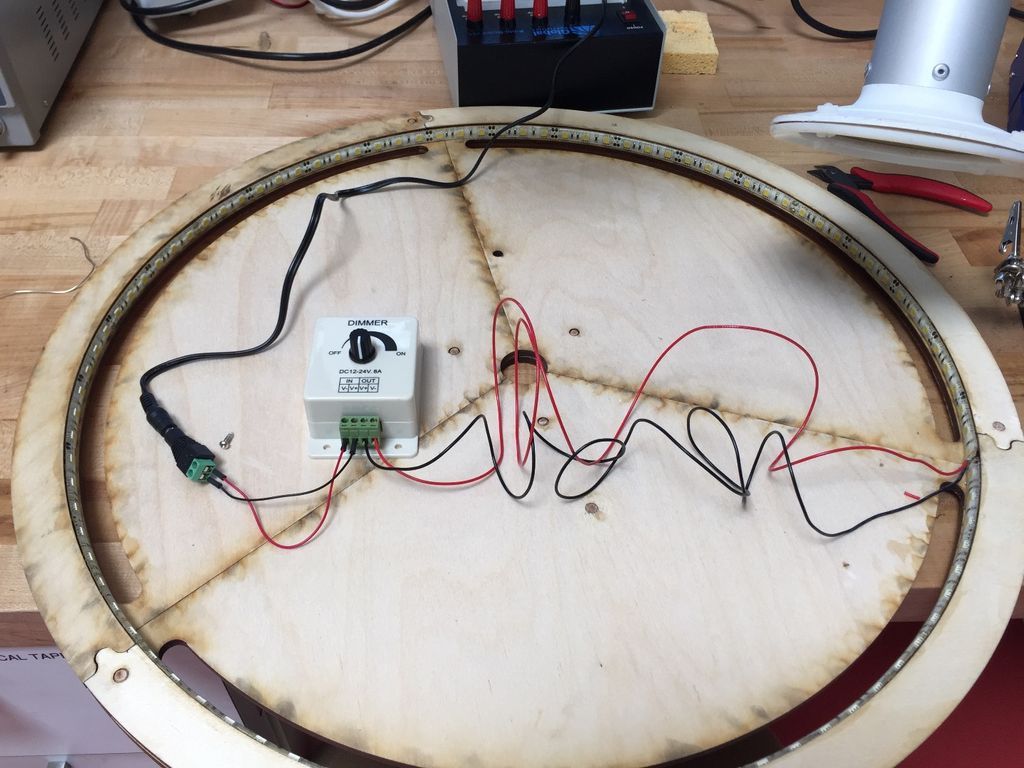
The regulator case has screwed contacts which are very useful for testing. Before assembling the rest of the electronics, I tested them by connecting the dimmer. It worked! Honestly, it's pretty hard to go wrong, there are only 4 connections (+ – on, + – off). The test in this case is really just checking for bad solder connections.
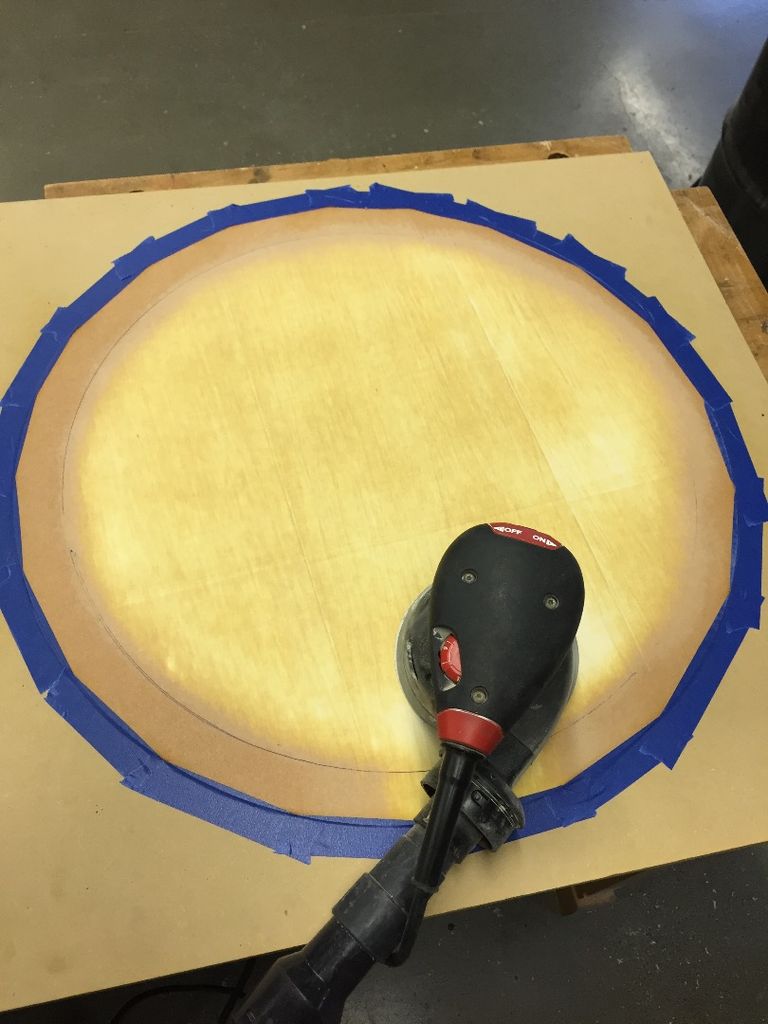
Once the LED strip was epoxyed into place, it was time to add the veneer to the front of the disc. Badge of this size (that I know of) only comes with a paper backing. If it didn't, it would simply split along the seams, and it also prevents glue from seeping through the thin layer of wood. Needing as much translucency as possible, I sanded the back layer of paper to obtain the wood.
I left a paper border about 1″ wide to allow for better adhesion to the plywood edge, then glued wood and fastened the large rotating disc to the sheet metal.
Step 5: Bearing and Gear Assembly


We had a circular style turntable in the store, so I measured it and used it for the redesign. I thought having a much larger bearing with screw hole connections would make a very stable turning action.
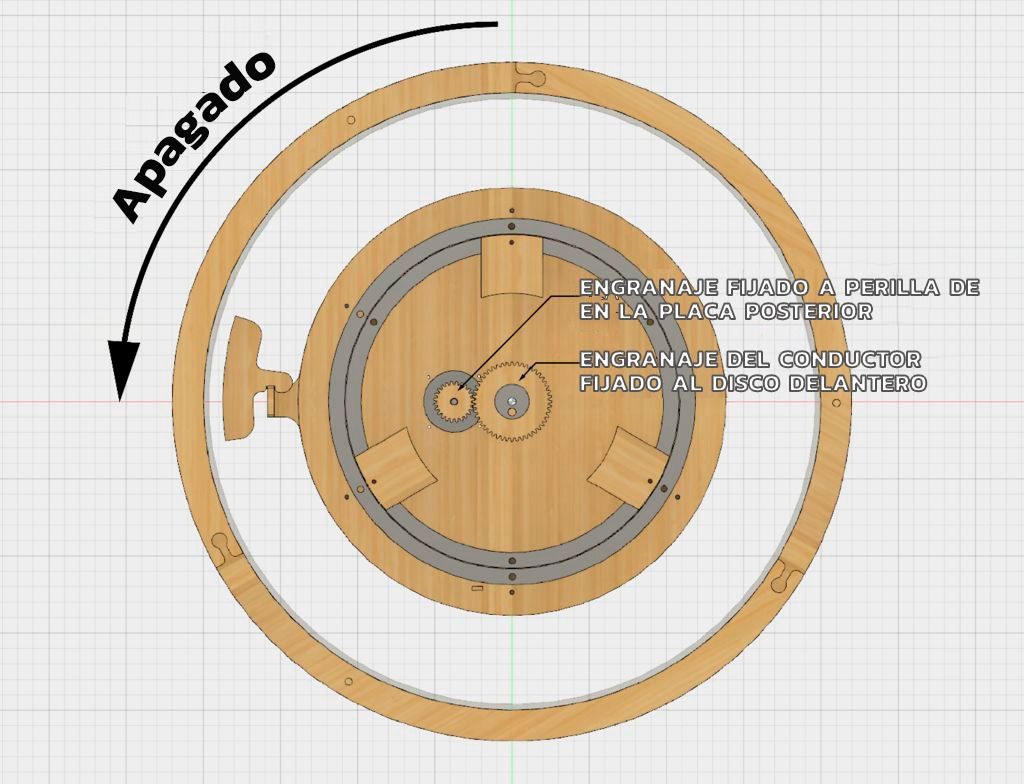
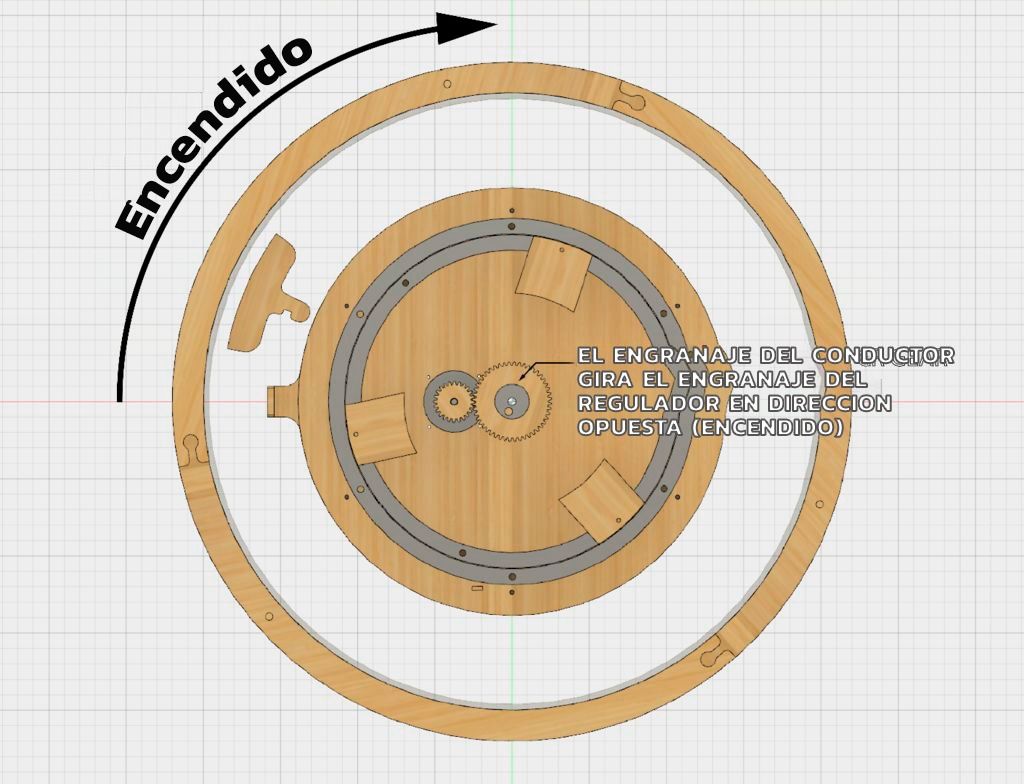
I didn't like the 1/8 turn disc = 1 full potentiometer I got with the 1-8 gear ratio I previously designed. Making a smaller 1-4 gear ratio would make the fading action smoother and feel better overall, like turning a giant knob, which is kind of the point.
The other problem with keeping the same gear action is that the potentiometer would be in the way of the turntable, so it had to be moved anyway. I designed the new pieces to join the ones I had already assembled, the new ones are as follows.
I made the new gear with a 1/4″ hole in its center and a circle with a 1/4″ hole in its center and attached them together using glue, clamps, and a 1/4 dowel to keep them aligned while the glue cured. When the glue dried, I removed the pin so I could feed the wires through the electronics on the backplate.
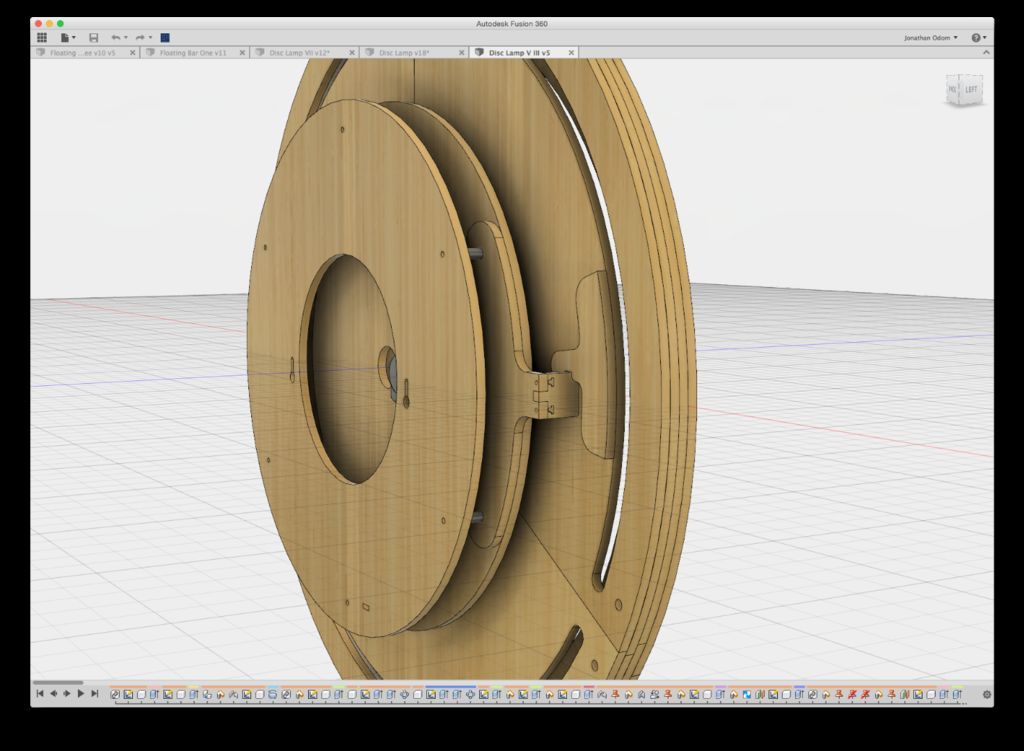
I made 3 tabs with machine screw holes that can be individually glued to the back panel of the turntable. These tabs have semi-circular ends that, but against the center circular piece of the rotating disc, ensure that the rotating disc and mounting disc are aligned at their centers. I was able to find the proper angles by lining up the mounting holes in the turntable with each tab. Some additional 6-32 flat head machine screws secure the turntable to the turntable.
The front plate of the mounting disc has 3 semicircular cuts. This allowed me to screw the turntable to the mounting plate, then screw the other turntable ring to the turntable through these cutouts.
With the 1/8″ potentiometer plate attached to the front panel of the mounting disk, I ran the LED wires through a drilled hole (which I forgot to add in the Fusion file) and connected the electronics. Everything is labeled on the dimmer switch, so you can't really mess up this part. There is also a mounting tab for the female end of the ACDC adapter connection, allowing you to easily plug and unplug the power supply.
Step 7: Final Touches


The last thing to do was finish the turntable and fix the power adapter.
The outside edge of the spinning disk was still laser-burned wood, so I glued a strip of veneer to it to make the disk look like a solid piece of wood. I did this with wood glue and a ratchet strap, it worked great! I left some extra material around the outside of the disc which I cut off with a razor blade when the glue had dried.
For the power supply, I removed the ugly black plastic cable and replaced itI came with a fabric lamp cord. I also added a small laser cut box with matching wood veneer on all panels. Having all the pieces made of similar or harmonious materials makes the design much better.
Step 8: Finished Product
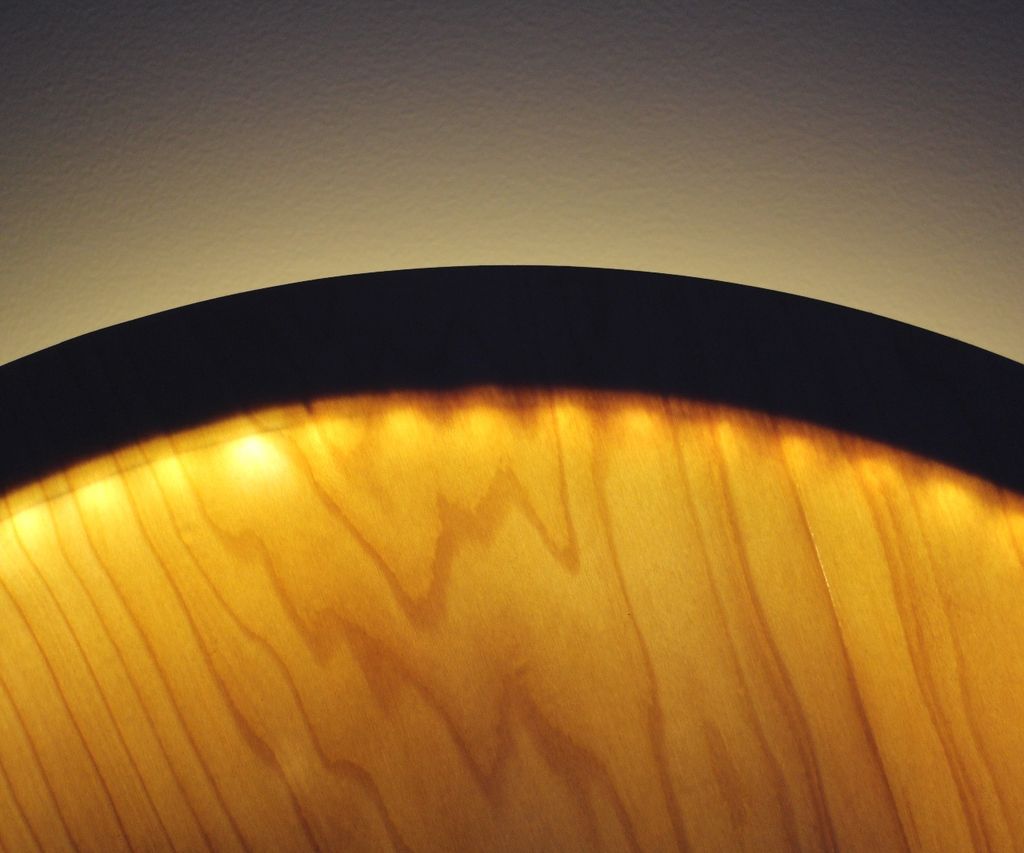
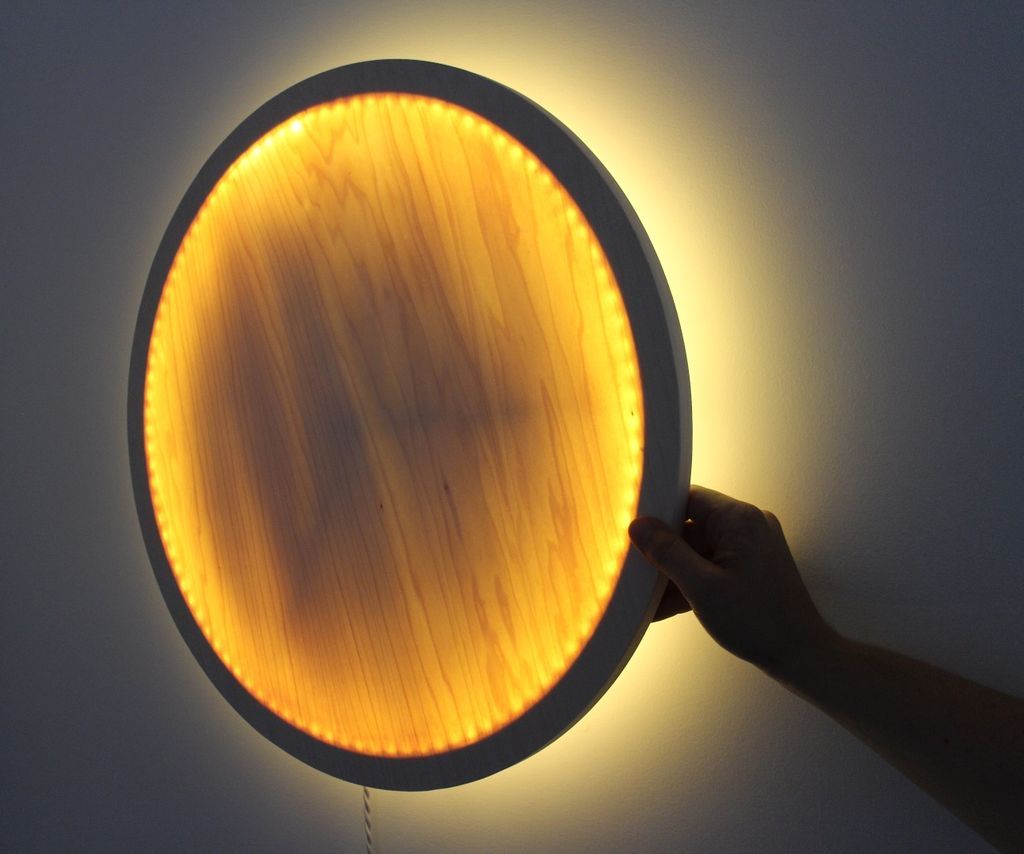
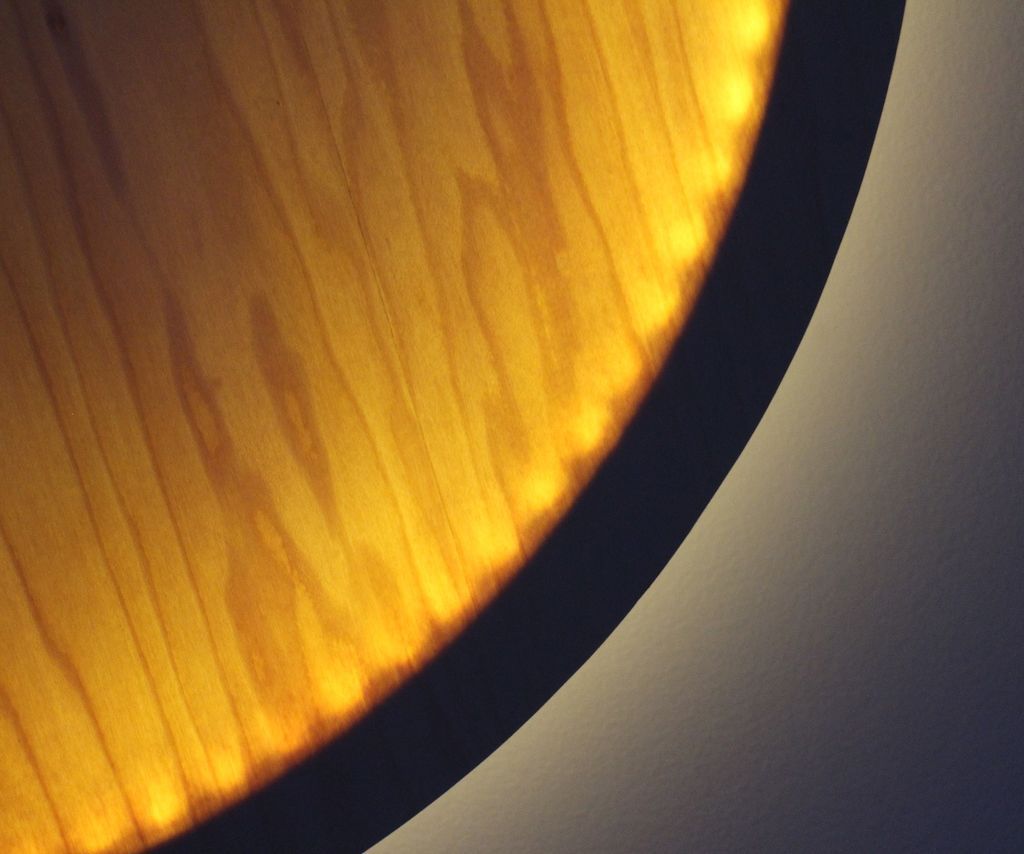
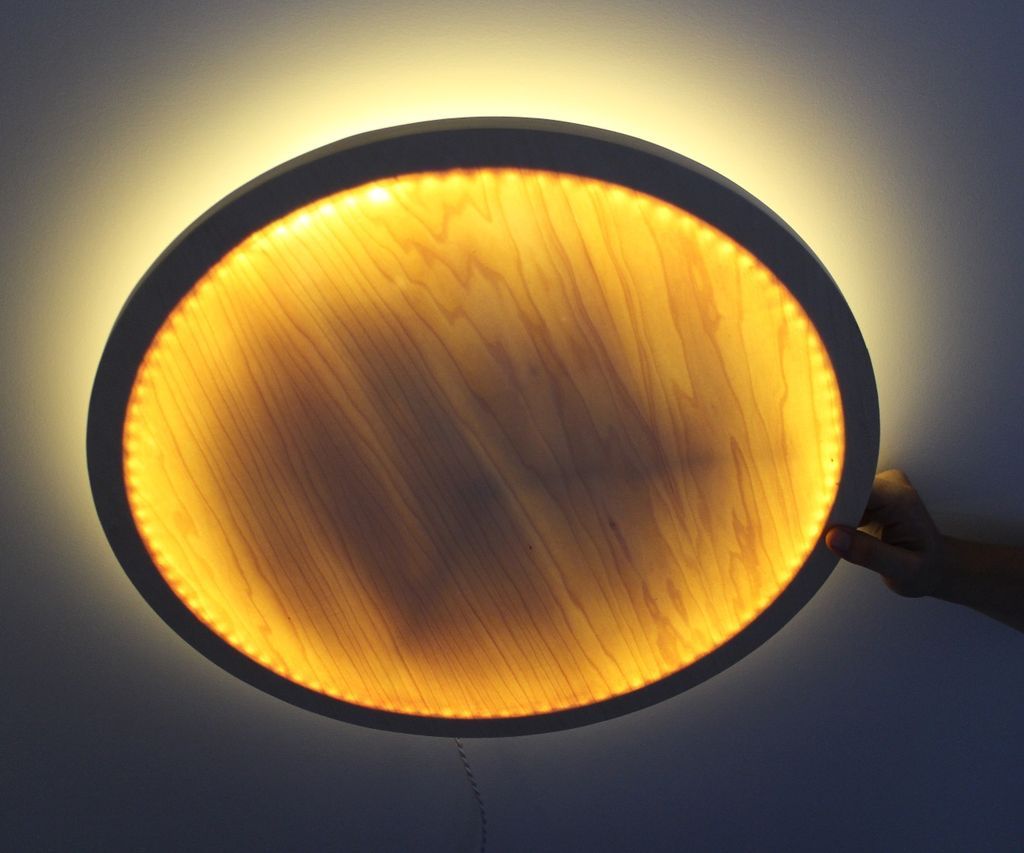
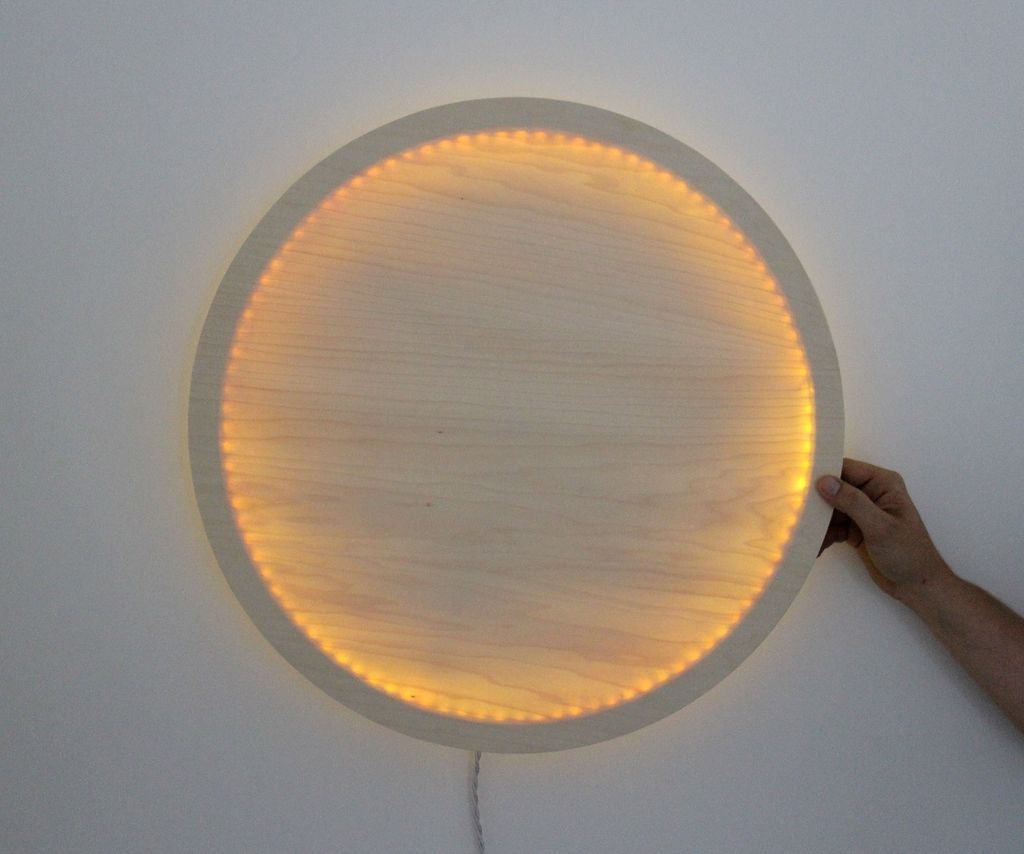


I really like the look of this piece for the most part. There are a few things I would like to change in the next round.
The hot spots around the edge are a bit distracting. Adding a second 2″ thick border to cover the edge of the LEDs will probably solve this problem.
The diffusion is not great, it is weak in the middle and bright around the edge. I was thinking of adding an acrylic diffuser panel against the veneer to help with this.
The veneer is a little wavy in the middle, it is difficult to prevent such a thin layer of wood from warping. I think in round 2, I will glue the veneer to the acrylic diffuser to make a smooth piece.
As usual, any comments or questions are welcome.
Popular Content
How to make a rocket stove for outdoors
Cardboard Drawers Lined with Jeans
Ideas and Advantages of Window Grilles for the Home!
Latest Articles
How to make a refrigerator out of insulating material: Practical step-by-step guide
How to make a Kilim for the Home: Complete Step by Step Guide
How to protect ourselves from accidents in our workplace: Complete prevention and safety guide
Related Content
Rustic Bathrooms: The Charm of Natural
Incredible Ideas and Designs of Drawers
Resistant Wooden Swing for the Front Porch of a House!
Modern Recycled Log Lounger!
Creative Home Decor Ideas to Transform Every Space
Refreshing your home starts with smart design choices that combine comfort, personality, and functionality. Whether you want to modernize a small apartment, upgrade outdoor areas, or create cozy rustic interiors, these trending ideas can completely change the atmosphere of your space.
Outdoor Spaces That Increase Style and Functionality
Outdoor living continues to dominate modern home trends. Homeowners are increasingly investing in practical entertainment zones inspired by these BBQ shed ideas, which create the perfect setup for gatherings and weekend cooking sessions.
First impressions also matter when designing exteriors. Elegant farm entrance gates design ideas help properties stand out while improving privacy and curb appeal.
Compact living solutions are also gaining popularity. These inspiring 16x40 shed house interior design ideas show how smaller spaces can still feel luxurious and functional.
To enhance patios and entryways, homeowners are adding stylish protection with these creative porch awning exterior DIY ideas that blend aesthetics with practicality.

Rustic and Cozy Interior Design Trends
Warm and natural interiors remain timeless. These charming rustic decor ideas combine wood textures, vintage accents, and earthy tones to create welcoming spaces.
Bedrooms are becoming more personalized with curated wall arrangements. Many homeowners use these stylish picture wall ideas for bedroom spaces to display memories and artwork creatively.
Textured wall treatments are another major trend. Installing a board and batten wall adds architectural character while keeping interiors elegant and modern.
Similarly, bold accent wall ideas can instantly transform plain rooms into eye-catching focal points without requiring a full renovation.
Smart Kitchen and Organization Inspiration
Functional kitchens are essential for modern homes. These practical kitchen wall cabinet ideas maximize storage while maintaining a clean and stylish appearance.
Organization also starts at the entrance. Well-designed mud room ideas help families keep shoes, coats, and daily essentials neatly arranged.
Colorful and Personalized Home Styling
Vibrant interiors are becoming increasingly popular thanks to playful dopamine decor ideas that use bright colors and joyful accessories to improve mood and energy.
Gallery walls also continue to evolve as a major decorative feature. These trendy gallery wall inspiration ideas offer creative ways to combine prints, photos, and statement art.
Young renters and new homeowners are especially embracing these stylish first apartment aesthetic ideas to create sophisticated interiors on a budget.
Finally, selecting the right shades can dramatically influence any room’s atmosphere. These modern trendy color ideas help homeowners choose palettes that feel fresh, elegant, and timeless.
Final Thoughts
From rustic charm and colorful interiors to outdoor entertaining areas and functional storage solutions, today’s home decor trends focus on creating spaces that feel both beautiful and livable. By combining smart layouts, modern textures, and personalized decorative elements, any home can become more stylish, comfortable, and inspiring.
Browse the Shop
 Acacia frida deluxe solid wood bed frame |
Bedroom bench |
Bed chest drawers |
Lingerie dresser |
Frame base |
Mirror with jewelry storage |
30 Bathroom Vanity |
Memory foam queen mattress |
Mattresses for back pain |
Nightstand set of 2 |
Grand Goldman Shop |
Civil Lawyer
Deutschland Trikot WM 2026
Acacia frida deluxe solid wood bed frame |
Bedroom bench |
Bed chest drawers |
Lingerie dresser |
Frame base |
Mirror with jewelry storage |
30 Bathroom Vanity |
Memory foam queen mattress |
Mattresses for back pain |
Nightstand set of 2 |
Grand Goldman Shop |
Civil Lawyer
Deutschland Trikot WM 2026







