

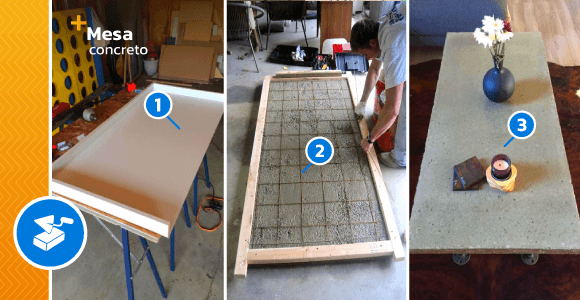
How to Make a Concrete Coffee Table, it's not made from pallet wood, so we're fine there, but we used threaded pipe... Great!
How to Make a Concrete Coffee Table
Find Bleeding Edge Supplements at Scandalous Prices on iHerb.

Materials:
- Melamine board to make the mold
- Silicone/Crack Sealant (DAP)
- 2 Bags of concrete
- Multifunctional fibers for concrete reinforcement
- 1″ rigid polystyrene rigid insulation (rigid insulation)
- Threaded pipe fittings, 3/4″ and 1/2″
- Threaded rod and nuts (Threaded rod)
- Concrete sealer
- Sandpaper
- Dust masks
- Bucket for mixing concrete
Step 1: Create the shape

We use melamine for the shape. The thin blade on the bottom seemed like a better bet than a 3/4″ piece simply because of the cost. The edges are 3/4″ melamine. You use melamine for its softness. Any scratches, dents or imperfections in the mold will appear in the finished concrete. If that's the look you're going for, that's fine. After screwing the entire assembly together, we sealed all the edges with Dap sealant to ensure the corners don't leak.
If you look closely at the left "wall" of the mold, you can see a pencil line. That line is at the 1/2″ mark. To reduce the overall weight of the table, we decided to add rigid insulation to the center of the table. Remember how your parents used to keep an empty jug or something similar in the toilet tank to take up space so it didn't use as much water. Well, this is the same idea. The insulation takes up space that would normally be solid concrete, reducing the volume of concrete used and reducing overall weight. Our total board thickness is 2″: 1/2 inch concrete on 1 inch rigid insulation core 1/2 inch concrete.
The insulation is reduced to about 2″ from the long edges and 5-6″ from the short edges. This gives us solidity around the entire table and a place to attach our legs directly to the concrete and not to the insulation.
Step 2: Paws!
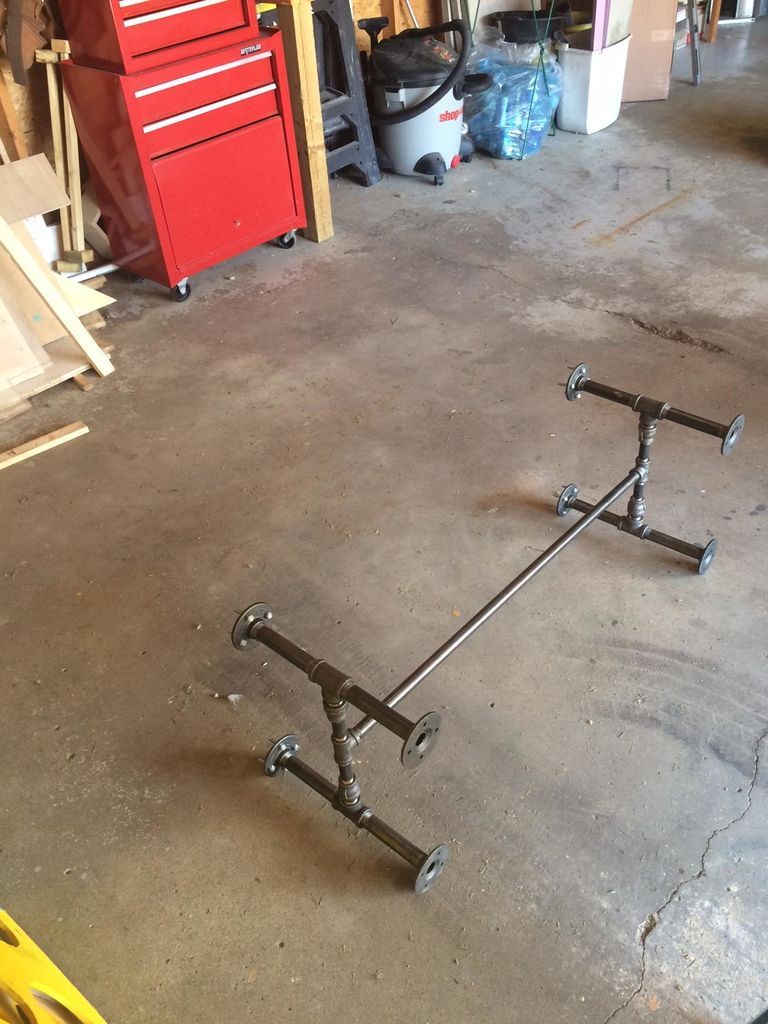
While it dries, we put the legs together. We use 3/4″ tubes for the vertical supports but reduced to 1/2″ for the horizontal ones. This saved us a little money.
If you look closely, you can see the threaded rod and nuts sticking out of the flanges on the left side. These will be embedded directly into the concrete.
Step 3: Call in reinforcements!

Once again, in an effort to reduce weight, we chose to exclude any other reinforcing metal. We went with poly fibers instead. I didn't do any testing to see if it was stronger, but it hasn't collapsed yet. 3 Months and counting!
Step 4: Pour
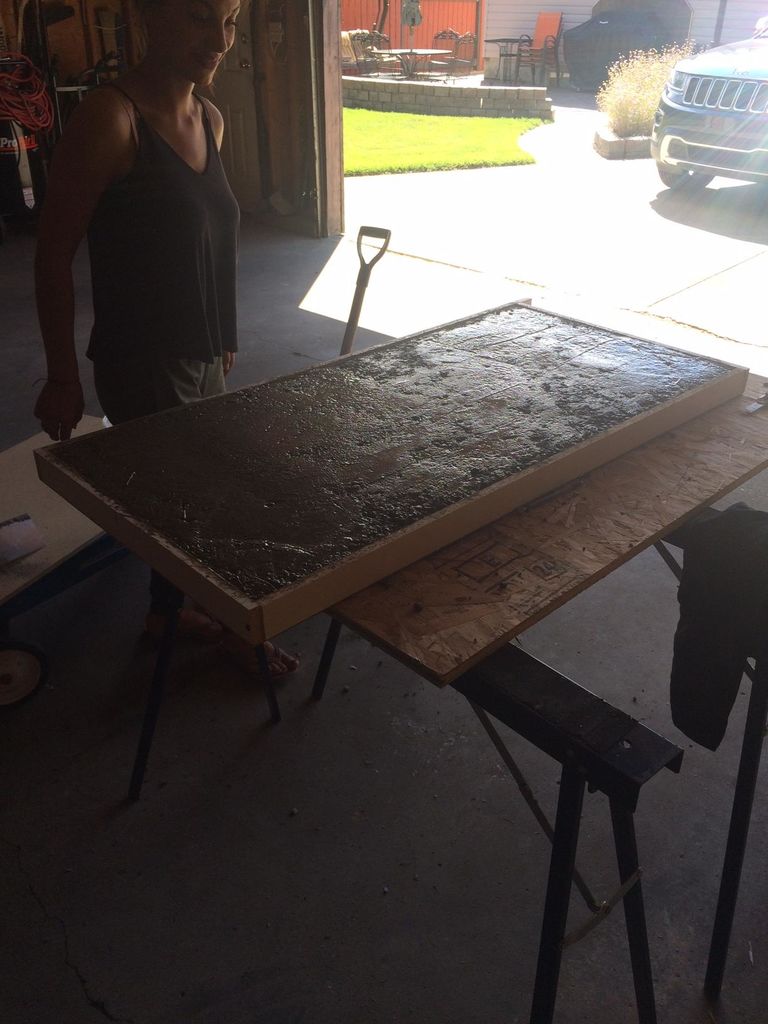
Sorry, a bit of a jump here we mixed and poured the concrete. My mixture was a little dry but seemed to go in very well. We followed the directions on the bag, but could have used more water. Pour 1/2″ of concrete into the form, place in insulation, fill in the rest. We tried our best to smooth out the concrete, but our crushing skills aren't the best, but we like how it came out. little rough around the edges
Step 5: Fixing the legs

This is how the legs are attached to the table. I just used a threaded rod and not bolts (as drawn). After pouring the concrete, we placed the legs on the wet concrete and pushed the rods. They probably don't grip as well as we'd like, but they didn't really move when everything was dry, so we call it good. If they come down the line, we'll just put glue in the holes where the rods were and then put the rods back in those holes and they won't move again. But for now, the weight of the table keeps everything in place.
Step 6: Dry and cover!

TheMoisture sealing is important, so we put some polyurethane on top.
Step 7: Ready!
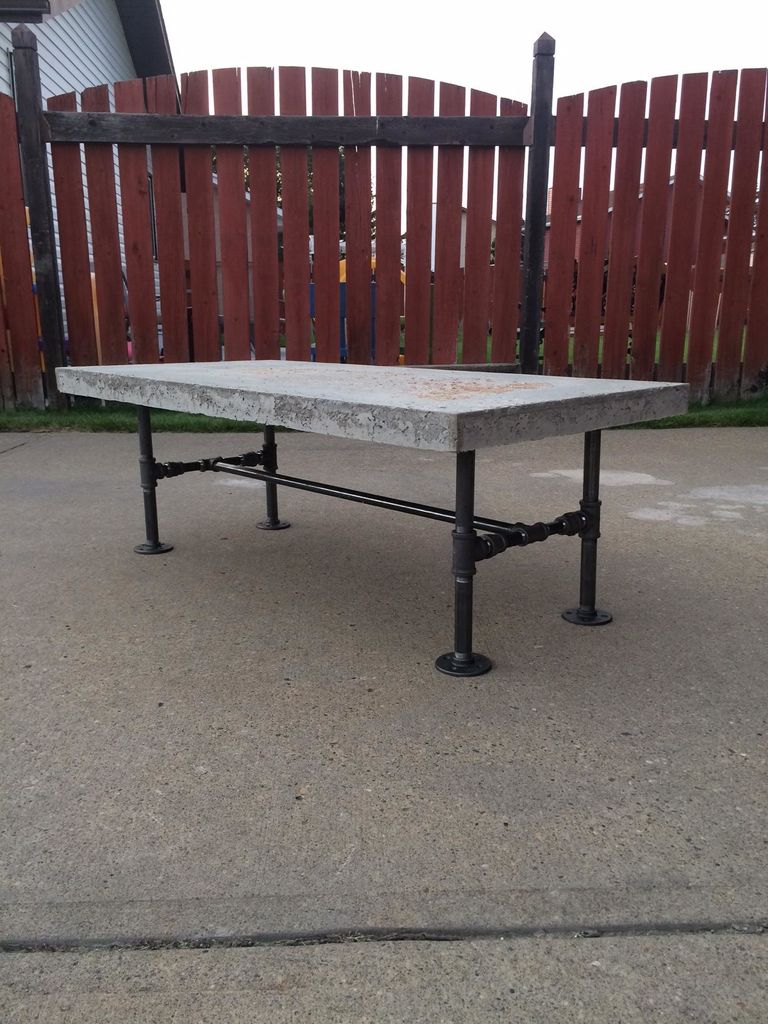

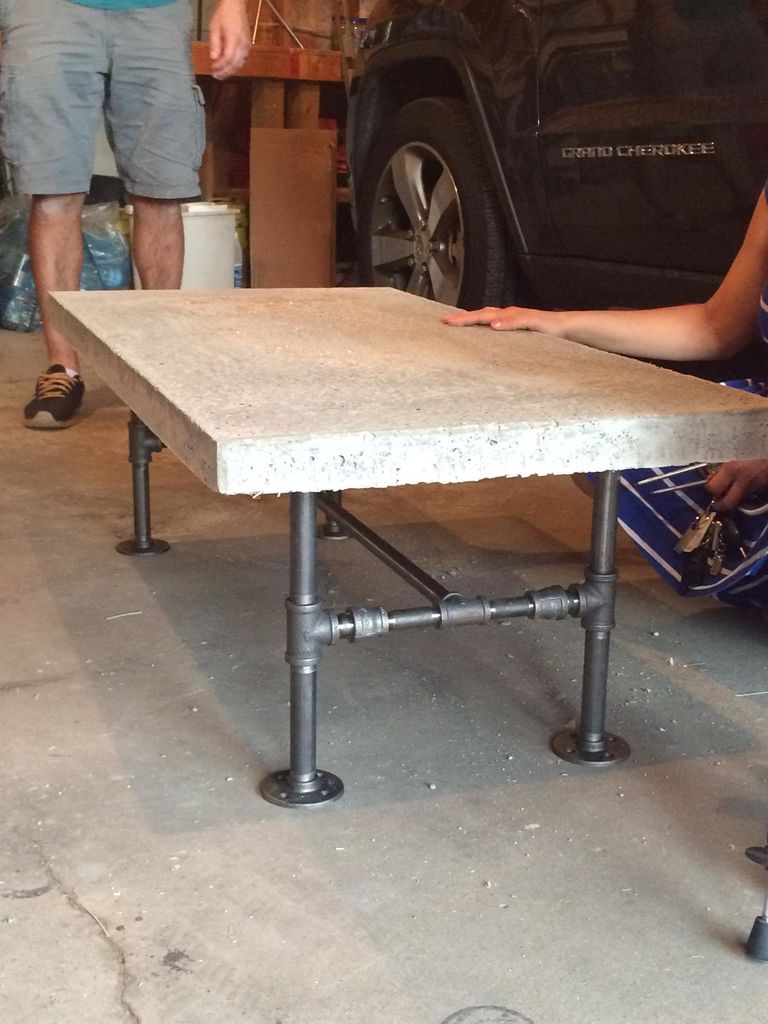
We unwrapped it after an impatient drying of 7 days. The shape came out pretty well, but it removed a hole in the melamine paper, which stuck to the table. Hand sanding and a flap wheel attachment on my drill made this quick.
The sanding was exhausting, but not terribly difficult. Especially since I just took photos without helping. All melamine remains come off quite easily.
Step 8: We land on the Moon!

We didn't get an absolutely flawless finish on the table top, but we didn't really want it to be perfectly smooth. Air bubble pits and holes add texture and depth. We could have softened more by vibrating the concrete and having a wetter mix
We were going to scratch our names on the bottom before it dried, but we waited too long. The nieces were in the entryway drawing with chalk, so we decided to do the same. We sign the background with chalk and then seal it forever!
Step 9: In Place
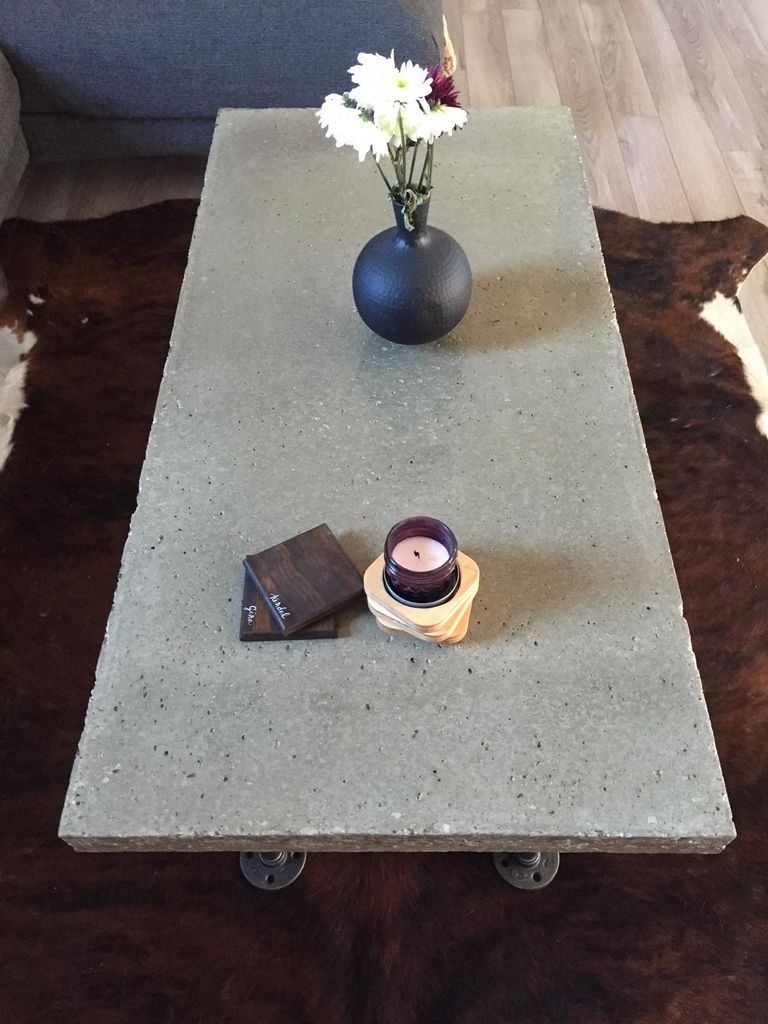


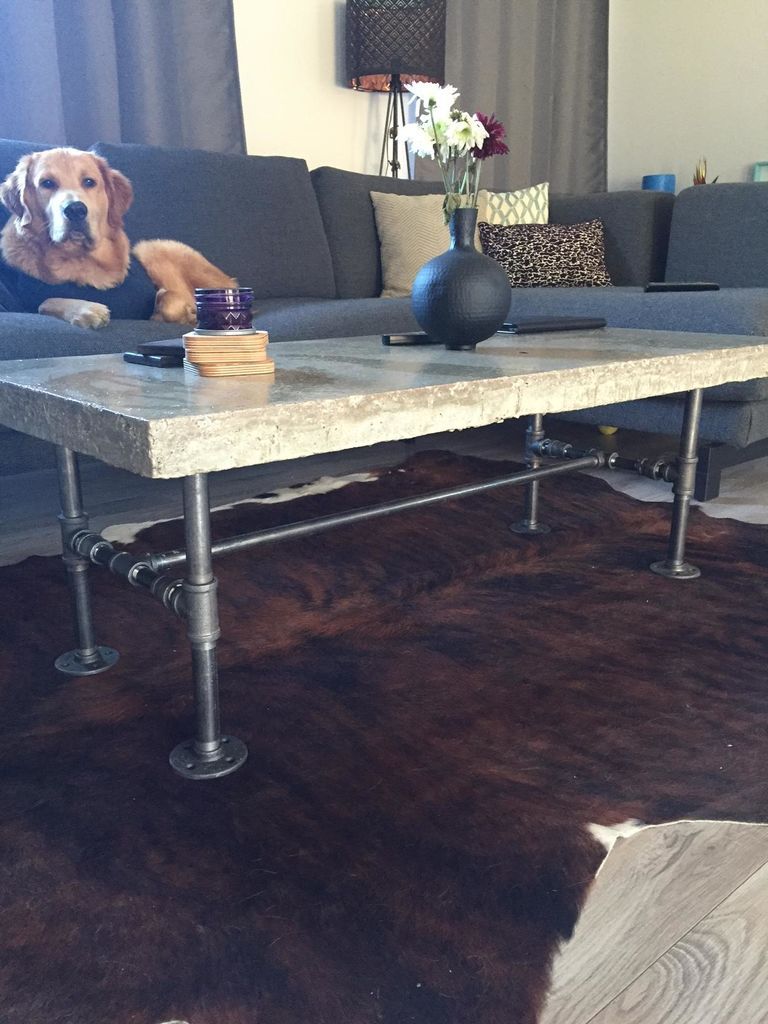
We sealed the table and added 4 layers of clear on top. Most of the holes and pits filled in a bit, but there is still some texture. It's hard to see, but it's really simple!
Get more information at perfectionidea.com and on our Facebook for more How to Make a Concrete Coffee Table.
- Tags
- Concrete
Popular Content
How to make a rocket stove for outdoors
Cardboard Drawers Lined with Jeans
Ideas and Advantages of Window Grilles for the Home!
Latest Articles
How to make a refrigerator out of insulating material: Practical step-by-step guide
How to make a Kilim for the Home: Complete Step by Step Guide
How to protect ourselves from accidents in our workplace: Complete prevention and safety guide
Related Content
How to easily open a combination lock
Playhouse Designs for the Little Ones
Design Ideas for a Beautiful Bathroom
DIY Windows to Obtain Stained Glass
Creative Home Decor Ideas to Transform Every Space
Refreshing your home starts with smart design choices that combine comfort, personality, and functionality. Whether you want to modernize a small apartment, upgrade outdoor areas, or create cozy rustic interiors, these trending ideas can completely change the atmosphere of your space.
Outdoor Spaces That Increase Style and Functionality
Outdoor living continues to dominate modern home trends. Homeowners are increasingly investing in practical entertainment zones inspired by these BBQ shed ideas, which create the perfect setup for gatherings and weekend cooking sessions.
First impressions also matter when designing exteriors. Elegant farm entrance gates design ideas help properties stand out while improving privacy and curb appeal.
Compact living solutions are also gaining popularity. These inspiring 16x40 shed house interior design ideas show how smaller spaces can still feel luxurious and functional.
To enhance patios and entryways, homeowners are adding stylish protection with these creative porch awning exterior DIY ideas that blend aesthetics with practicality.

Rustic and Cozy Interior Design Trends
Warm and natural interiors remain timeless. These charming rustic decor ideas combine wood textures, vintage accents, and earthy tones to create welcoming spaces.
Bedrooms are becoming more personalized with curated wall arrangements. Many homeowners use these stylish picture wall ideas for bedroom spaces to display memories and artwork creatively.
Textured wall treatments are another major trend. Installing a board and batten wall adds architectural character while keeping interiors elegant and modern.
Similarly, bold accent wall ideas can instantly transform plain rooms into eye-catching focal points without requiring a full renovation.
Smart Kitchen and Organization Inspiration
Functional kitchens are essential for modern homes. These practical kitchen wall cabinet ideas maximize storage while maintaining a clean and stylish appearance.
Organization also starts at the entrance. Well-designed mud room ideas help families keep shoes, coats, and daily essentials neatly arranged.
Colorful and Personalized Home Styling
Vibrant interiors are becoming increasingly popular thanks to playful dopamine decor ideas that use bright colors and joyful accessories to improve mood and energy.
Gallery walls also continue to evolve as a major decorative feature. These trendy gallery wall inspiration ideas offer creative ways to combine prints, photos, and statement art.
Young renters and new homeowners are especially embracing these stylish first apartment aesthetic ideas to create sophisticated interiors on a budget.
Finally, selecting the right shades can dramatically influence any room’s atmosphere. These modern trendy color ideas help homeowners choose palettes that feel fresh, elegant, and timeless.
Final Thoughts
From rustic charm and colorful interiors to outdoor entertaining areas and functional storage solutions, today’s home decor trends focus on creating spaces that feel both beautiful and livable. By combining smart layouts, modern textures, and personalized decorative elements, any home can become more stylish, comfortable, and inspiring.
Browse the Shop
 Acacia frida deluxe solid wood bed frame |
Bedroom bench |
Bed chest drawers |
Lingerie dresser |
Frame base |
Mirror with jewelry storage |
30 Bathroom Vanity |
Memory foam queen mattress |
Mattresses for back pain |
Nightstand set of 2 |
Grand Goldman Shop |
Civil Lawyer
Deutschland Trikot WM 2026
Acacia frida deluxe solid wood bed frame |
Bedroom bench |
Bed chest drawers |
Lingerie dresser |
Frame base |
Mirror with jewelry storage |
30 Bathroom Vanity |
Memory foam queen mattress |
Mattresses for back pain |
Nightstand set of 2 |
Grand Goldman Shop |
Civil Lawyer
Deutschland Trikot WM 2026







