

Mid-Century Coffee Table is a common mid-century design to which I added some of my favorite details. Mainly box carpentry. I'm sorry the images are smaller.
I couldn't come up with any plans for this as I judged the height first by the height of my sofa, then by the proportion of the legs and the last opening of the box. The final product ended up being 24×48″ and the box is 9.5″ tall and the legs are 6″ tall.
Find Bleeding Edge Supplements at Scandalous Prices on iHerb.

My favorite wood is walnut and I ordered about 30 board feet of 4/4 S4S (surfaced on all 4 sides) from my local hardwood dealer.
I ordered a little more because of possible messes, so I'm not sure what my table ended up using.
Step 1: Thickness and surface of the wood

I roughly cut my pieces to size a couple of inches longer than needed for a good measurement (in case I messed up my box joints later) then ran all my boards through the thickness planer first to ensure a perfect glue.
With wood like S4S, this saved a lot of time by not having to use the jointer.
Step 2: Glue the panels


I used a wood biscuit joint on all the pieces for alignment while I glued everything together.
Step 3:

All panels glued. The look of the wood is incredible.
Step 4: Unions


Most of us have seen multiple variations of box joint jigs for the table saw, but when you have a piece that is 48-50″ long, that jig is a little small and I don't have the ceiling height to push the ends into my table saw.
So, I made a portable jig to use with the router that can trace the piece, since I cut each box individually.
It actually didn't take long once the template was set up.
Knowing that I had two side pieces and three vertical pieces, I wanted to cut them all at once for perfect alignment.
The template was made to sandwich all the pieces together. It worked surprisingly well.
Step 5: Dry Fit
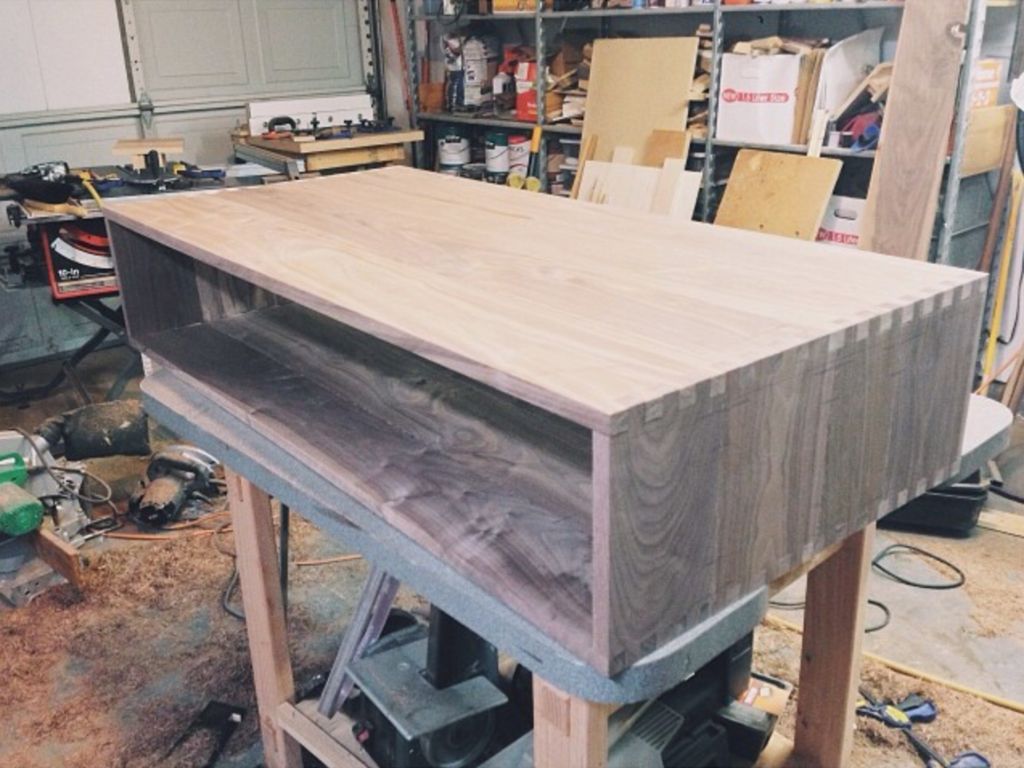

The moment of truth.
The first dry fit
It was a little tight, but nothing a chisel couldn't fix.
Once this worked, I was able to mark the center jaws, which was probably the scariest thing.
You can see a little closer to a picture of the center mortises a few pictures down.
Step 6: Central Mortices


For the center mortises, I took the center vertical piece and placed it face down on top to mark my holes.
Then, cut into the perfect top… Take a deep breath. Most of the material using a forcing bit and I chiselled the square holes.
My biggest concern was that when I pushed the vertical piece into the mortises from the bottom, it would explode somewhat, but luckily the wood was hard enough for it to stay together.
Step 7: Assembly and glue

Now to paste it. There are never enough clamps. Fortunately, my workbench was super flat at the time and I used it as a reference for warping prevention.
Step 8: The legs


I wanted the legs to be 6″ tall and strong.
It's a coffee table, in the center of the room and I want to put my feet on it, sometimes I sit on it to put on my shoes or my child will want to crawl over it and jump when I'm not looking.
So I decided to open the mortise and tenons to attach the legs to the aprons.
Here is my tenon template modified to accept the angle I decided on.
Maybe a 20 degree angle? I don't remember. Do whatever makes you happy.
Step 9: Assembled legs

Here are the legs cut and glued.
I added some oak rods for decoration and possible additional strength.
The legs are attached to the box with screws.
Step 10:
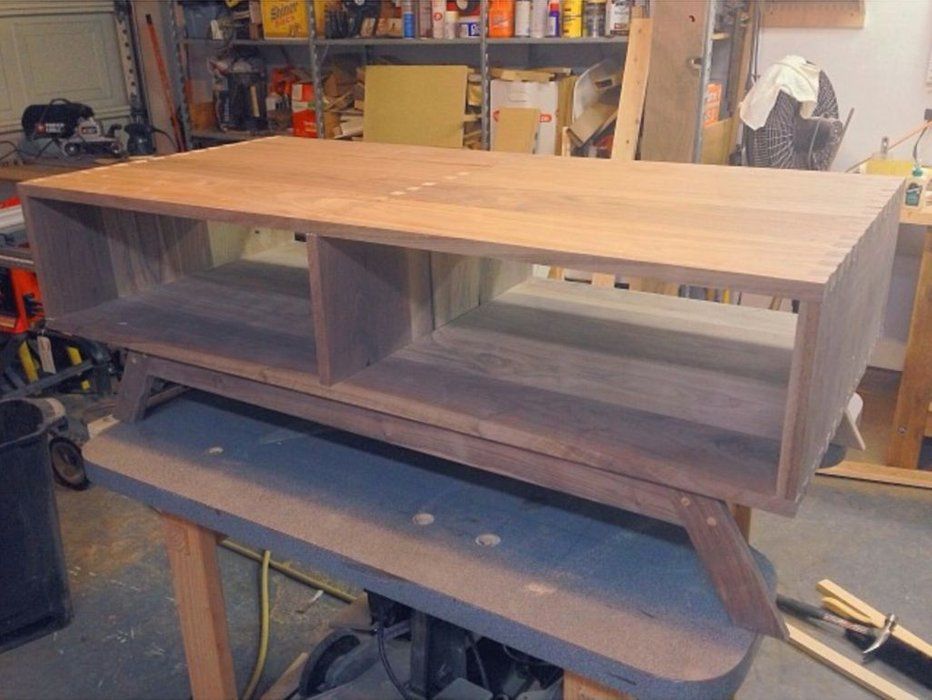
Here is the piece before sanding and final finishing.
Step 11: The End

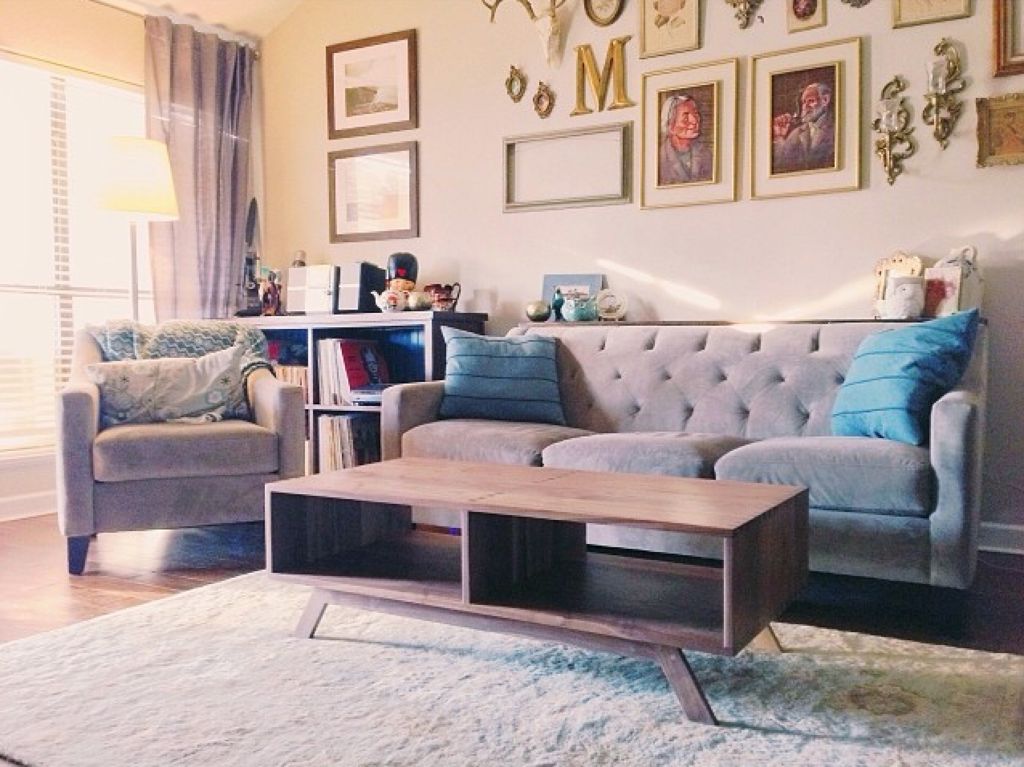

Now to disassemble and finish. I went with a satin polyurethane cloth.
About 4 layers throughout the piece and 6-7 layers on top. Even after accumulating so many coats, it still feels natural and water rings have not yet appeared after a year of use.
Step 12: Ready


Here is the final product. I still love it and would love to build another one someday just for the fun of it. Greetings!
Get more information at perfectionidea.com and on our Facebook for more Mid-Century Coffee Table.
Popular Content
How to make a rocket stove for outdoors
Cardboard Drawers Lined with Jeans
Ideas and Advantages of Window Grilles for the Home!
Latest Articles
How to make a refrigerator out of insulating material: Practical step-by-step guide
How to make a Kilim for the Home: Complete Step by Step Guide
How to protect ourselves from accidents in our workplace: Complete prevention and safety guide
Related Content
How to Fix a Zipper (Without Replacing It)
Home Office Designs
Ideas of Colorful Chairs and Stools for the Dining Room
Hanging Chair: Paracord and Pallet Wood
Creative Home Decor Ideas to Transform Every Space
Refreshing your home starts with smart design choices that combine comfort, personality, and functionality. Whether you want to modernize a small apartment, upgrade outdoor areas, or create cozy rustic interiors, these trending ideas can completely change the atmosphere of your space.
Outdoor Spaces That Increase Style and Functionality
Outdoor living continues to dominate modern home trends. Homeowners are increasingly investing in practical entertainment zones inspired by these BBQ shed ideas, which create the perfect setup for gatherings and weekend cooking sessions.
First impressions also matter when designing exteriors. Elegant farm entrance gates design ideas help properties stand out while improving privacy and curb appeal.
Compact living solutions are also gaining popularity. These inspiring 16x40 shed house interior design ideas show how smaller spaces can still feel luxurious and functional.
To enhance patios and entryways, homeowners are adding stylish protection with these creative porch awning exterior DIY ideas that blend aesthetics with practicality.

Rustic and Cozy Interior Design Trends
Warm and natural interiors remain timeless. These charming rustic decor ideas combine wood textures, vintage accents, and earthy tones to create welcoming spaces.
Bedrooms are becoming more personalized with curated wall arrangements. Many homeowners use these stylish picture wall ideas for bedroom spaces to display memories and artwork creatively.
Textured wall treatments are another major trend. Installing a board and batten wall adds architectural character while keeping interiors elegant and modern.
Similarly, bold accent wall ideas can instantly transform plain rooms into eye-catching focal points without requiring a full renovation.
Smart Kitchen and Organization Inspiration
Functional kitchens are essential for modern homes. These practical kitchen wall cabinet ideas maximize storage while maintaining a clean and stylish appearance.
Organization also starts at the entrance. Well-designed mud room ideas help families keep shoes, coats, and daily essentials neatly arranged.
Colorful and Personalized Home Styling
Vibrant interiors are becoming increasingly popular thanks to playful dopamine decor ideas that use bright colors and joyful accessories to improve mood and energy.
Gallery walls also continue to evolve as a major decorative feature. These trendy gallery wall inspiration ideas offer creative ways to combine prints, photos, and statement art.
Young renters and new homeowners are especially embracing these stylish first apartment aesthetic ideas to create sophisticated interiors on a budget.
Finally, selecting the right shades can dramatically influence any room’s atmosphere. These modern trendy color ideas help homeowners choose palettes that feel fresh, elegant, and timeless.
Final Thoughts
From rustic charm and colorful interiors to outdoor entertaining areas and functional storage solutions, today’s home decor trends focus on creating spaces that feel both beautiful and livable. By combining smart layouts, modern textures, and personalized decorative elements, any home can become more stylish, comfortable, and inspiring.
Browse Grand Goldman Shop
Bean Bag & Lazy Sofa
Cabinets
Chairs & Accent
Coat Racks
Display & Etageres
Fireplaces & Acc.
Living Room Sets
Loveseats
Ottomans
Recliners & Massage
Browse the Shop
 Acacia frida deluxe solid wood bed frame |
Bedroom bench |
Bed chest drawers |
Lingerie dresser |
Frame base |
Mirror with jewelry storage |
30 Bathroom Vanity |
Memory foam queen mattress |
Mattresses for back pain |
Nightstand set of 2 |
Grand Goldman Shop |
Civil Lawyer
Deutschland Trikot WM 2026
Acacia frida deluxe solid wood bed frame |
Bedroom bench |
Bed chest drawers |
Lingerie dresser |
Frame base |
Mirror with jewelry storage |
30 Bathroom Vanity |
Memory foam queen mattress |
Mattresses for back pain |
Nightstand set of 2 |
Grand Goldman Shop |
Civil Lawyer
Deutschland Trikot WM 2026







