

If you're looking for a durable, frost-resistant, and eco-friendly surface for your courtyard, driveway, or garden path, beole stone paving is an outstanding choice. These natural stone slabs can withstand heavy foot traffic and even motor vehicles when properly installed. In this guide, we'll walk you through the entire process, from excavation to finishing touches, so you can achieve a professional-looking result on your own. Along the way, we'll point you to essential supplies and tools available at GrandGoldman's Home Improvement collection to make your project a success.
Why Choose Beole Stone Paving?
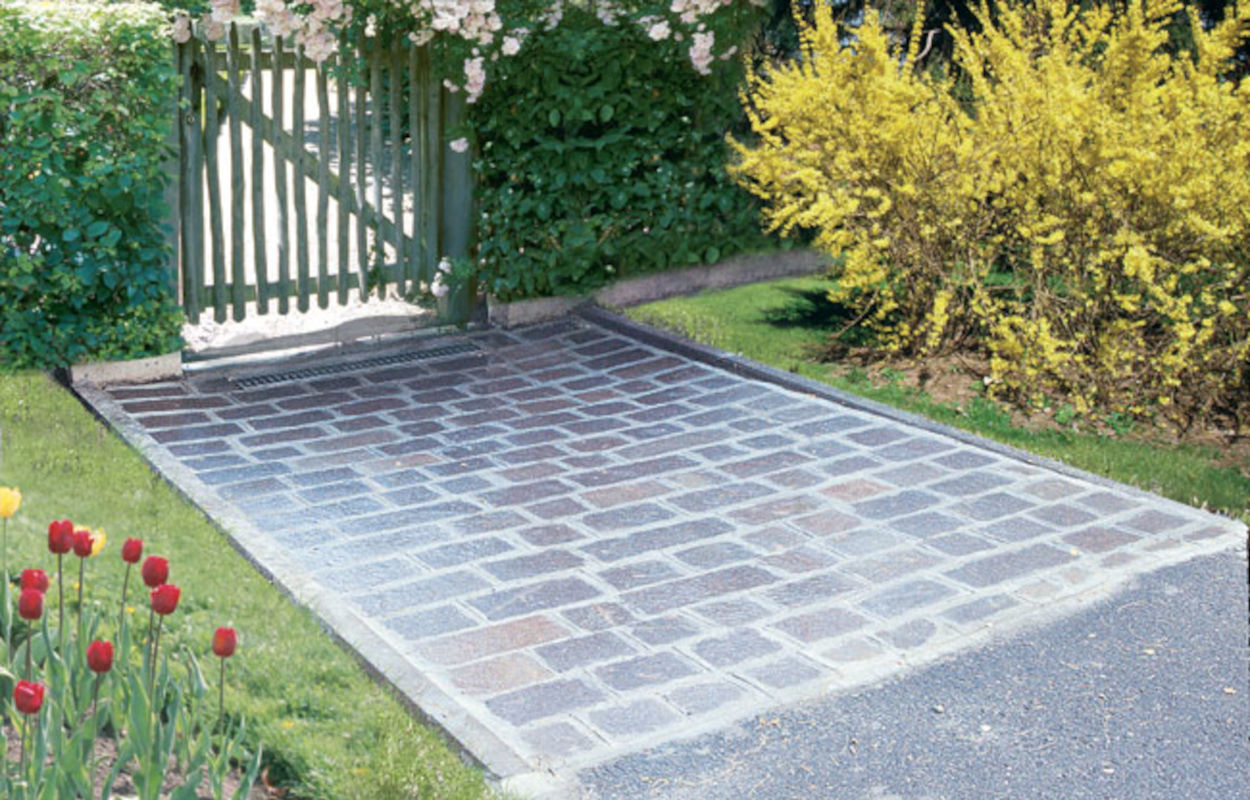
Beole stone is a natural, ecological material that offers exceptional durability. It doesn't suffer from frost damage, has minimal thermal expansion, and, when sourced from quality suppliers, looks stunning. Whether you're creating a patio for outdoor furniture or a robust driveway, beole stone provides a timeless aesthetic that complements any landscape.
Find Bleeding Edge Supplements at Scandalous Prices on iHerb.

What You'll Need for the Job
- Beole stones (squared or irregular, depending on your design preference)
- Gravel, sand, and cement
- Welded wire mesh (electrowelded mesh)
- Drainage channels, pipes, grates, and curbstones
- Tools: lump hammer, spirit level, broom, trowel, rubber mallet, aluminum straightedge
You can find high-quality garden supplies and tools at GrandGoldman to get started.
Step-by-Step Installation Guide
1. Prepare the Base
Start by removing any grass or vegetation from the area. Excavate to a depth that allows for a gravel base layer. Spread a 5–6 cm layer of dry sand over the gravel, then level it carefully using a rake and an aluminum straightedge. Lightly compact the sand with a plate vibrator for a smooth, even surface. For all your base materials, check out GrandGoldman's Home Improvement section.
2. Lay the Concrete Sub-base
Pour a concrete slab over the compacted sand and gravel. Embed the welded wire mesh into the wet concrete to reinforce it. Reinforce the edges with prefabricated concrete curbstones. This sub-base ensures long-term stability, even under vehicle traffic.
3. Setting the Beole Stones
Mix a rich cement mortar and apply it to the concrete base. Place each stone onto the mortar bed. Use a rubber mallet to tap the stone gently into position, checking levelness with a spirit level and straightedge. Work slowly to ensure each stone is flush with its neighbors.
4. Working with Irregular Stones
If you've chosen irregular beole stones, do a dry layout first. Arrange the stones on the ground without mortar to find the best fit. Use a lump hammer to chip away edges as needed for a snug arrangement. Then, lift each stone, apply mortar, and set it in place. Check levels frequently.
5. Finishing the Joints
For a rustic look, fill the gaps between stones with dry sand or a sand-cement mix. Sweep the filler into the joints and water lightly to settle it. Repeat if necessary. You can also use polymeric sand for a more stable joint. For decorative touches, browse outdoor decor options to complement your new paving.
Frequently Asked Questions
Q: Can I lay beole stone over an existing concrete slab?
A: Yes, as long as the slab is in good condition, clean, and properly primed. Apply a bonding agent before laying the mortar bed.

Q: How do I maintain my beole stone pavement?
A: Sweep regularly and rinse with a garden hose. For stains, use a mild detergent and a stiff brush. Avoid pressure washing on high settings, as it can damage the mortar.
Q: What's the best thickness for beole stones in a driveway?
A: For driveways, choose stones at least 5–7 cm thick. Thinner stones (3–4 cm) are suitable for pedestrian paths and patios.
Q: Can I install beole stone by myself?
A: Yes, with proper planning and the right tools, it's a manageable DIY project. However, lifting heavy stones may require assistance. Consider using a storage shed to keep your tools organized during the project.
Q: How long does the installation take?
A: For a 50 m² area, expect 2–4 days depending on stone shape and your experience level. Squared stones go faster than irregular ones.
Pro Tips for a Professional Finish
- Always slope the pavement slightly (1–2%) away from buildings to ensure proper drainage.
- Use a rubber mallet instead of a metal hammer to avoid chipping the stones.
- Seal the stones with a natural stone sealer to protect against stains and weathering.
- Add outdoor lighting along the path for safety and ambiance.
With these steps, you'll have a stunning, long-lasting beole stone pavement that enhances your outdoor space. For all your DIY needs—from lighting fixtures to outdoor heating—GrandGoldman has you covered. Happy building!
Browse Grand Goldman Home Decor
Discover unique craftsmanship home decor and furniture at the Grand Goldman Shop.
Best Products We’ve Tested and Rated

Our testing team has hands-on reviews of espresso machine coffee truck, truck bed air mattress, gps device truckers, door locks dementia patients, and folding cane. Every option below was compared across price, build quality, and real-world performance, with honest pros and cons. We update these guides regularly as new models arrive, so the recommendations stay current.
Our testing team has hands-on reviews of walking cane seat, recliners neck pain, chairs inc glider, retainer cleaner, and bed rails seniors. Every option below was compared across price, build quality, and real-world performance, with honest pros and cons. We update these guides regularly as new models arrive, so the recommendations stay current.
Browse the Shop
 Acacia frida deluxe solid wood bed frame |
Bedroom bench |
Bed chest drawers |
Lingerie dresser |
Frame base |
Mirror with jewelry storage |
30 Bathroom Vanity |
Memory foam queen mattress |
Mattresses for back pain |
Nightstand set of 2 |
Grand Goldman Shop |
Civil Lawyer
Deutschland Trikot WM 2026
Acacia frida deluxe solid wood bed frame |
Bedroom bench |
Bed chest drawers |
Lingerie dresser |
Frame base |
Mirror with jewelry storage |
30 Bathroom Vanity |
Memory foam queen mattress |
Mattresses for back pain |
Nightstand set of 2 |
Grand Goldman Shop |
Civil Lawyer
Deutschland Trikot WM 2026







