

On this occasion we present you a small tutorial on how to make a modern camera slider in a simple way.
With this luxury tool, you can obtain dynamic sequences wherever you are.
Find Bleeding Edge Supplements at Scandalous Prices on iHerb.

It's compact, lightweight, and tool-free adjustable, so you can take it wherever you need to shoot.
You can use this slider by hand or with the simplest motor, most of us, the DIY heads we already have at home: A cordless screwdriver.
Step 1: Video of how to make a modern camera slider
Click to see the Video.
Take a look at the main steps of the building process, get some inspiration, and leave me some feedback if you like.
Step 2: Prologue
Although I have spent many hours to make it as consumer friendly as possible, this slider is still "just perfect" for MY personal preferences.
In order to build YOUR own slider, you have to think about your personal needs, when it comes to your shooting style. Do you want to shoot on the go, or in a static location? Do you want to use a lightweight DSLM or perhaps a heavier DSLR system? Do you need slow and steady motorized movements or is natural hand movement enough for you? And many more.
I made some templates and graphics, which could be a good starting point for free download.
Step 3: Materials and tools

In this section I want to point out, what tools and materials you will need for a specific purpose.
In the image above, you see most of the materials I used to produce my slider:
Tools to make a modern camera slider:
- Windshield wipers
- Sierra
- Cordless screwdriver
Special tools:
- A thick drill bit, which matches the diameter of your steel tube (for me 25 mm)
- Another thick drill bit, which matches the outer diameter of the 608ZZ ball bearings (which are 22 mm)
Framing materials:
- 1 Wooden board from a DIY store (I chose acacia wood)
- 1-wire rod (size M5)
- 4 flexible furniture feet.
- 2 steel tubes (diameter 3-5 cm), which are the exact distance from the desired final length of the slider.
Materials for the slider:
- 3 Angle brackets with at least one longer hole on one side
- 1 Double-sided camera screw
- 6 608ZZ type ball bearings and 6 hex bolts (approximately 4cm long) and some wing nuts (all size M5) to create the sliding wheels
Helpful Tip: Buy a little more so you have some backup wheels. They will be easily interchangeable!
Materials for the motorized mechanism:
- 3 type 605ZZ ball bearings and 1 more type 608ZZ, to create the motorized mechanism
- A few wide washers to stick on both types of bearings, leaving enough space inside to not touch the hex bolts
Step 4: Create the framework


- Start by cutting out the individual parts (see first image above) and give it a first sanding. Use my templates to get exact dimensions. Download the free templates here.
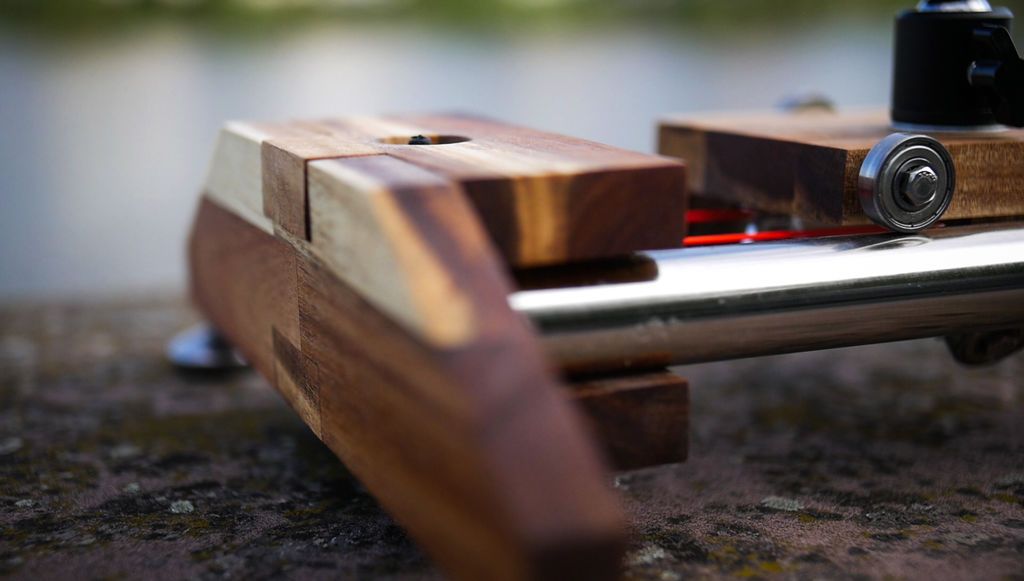
- Then drill two holes in both side panels with your coarse drill bit, matching the diameter of your steel pipe.
- I recommend not drilling completely, but deep enough so that the tubes have room to fit. Then, make a hole in the edges of both side panels and screw in the flexible furniture legs.
- Use some ropes to hold the top and bottom panel in place and drill a hole vertically, which is thick enough, to match the clearance of your M5 thread rod.
- Take outThree pieces of threaded rod to attach the bottom panels to the steel tubes. Make the top panels joinable by drilling corresponding holes on their underside.
Step 5: Create the rolling wheels

- On the Internet, I found these ball bearings and discovered a simple way to make the wheels smooth, economical and interchangeable.
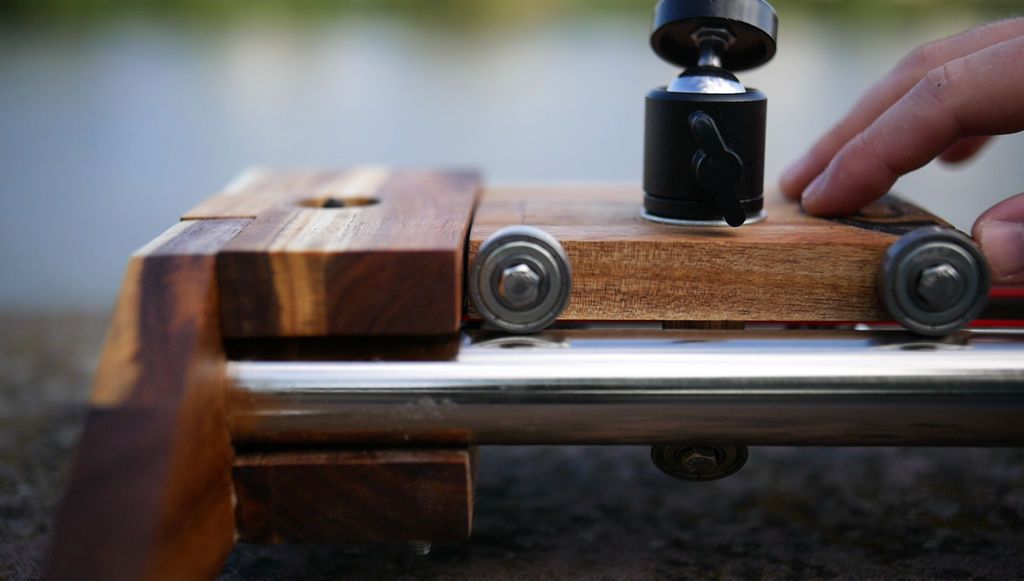
- All you need is the 4cm long M5 hexagon screw, a corresponding nut and the Type 608ZZ ball bearing. As soon as you tighten the nut, the bearing will find its place in the center and you will have a simple wheel, which can be screwed into the desired peace of the wood.
- I realized, that these ball bearings are quite multifunctional, when it comes to their usability. I used them to create the horns for my slide and mechanism, allowing me to operate my slider with a regular cordless screwdriver.
I am excited to use these bearings in upcoming projects as well.
Step 6: Create the Slider


- For the camera slide, I decided to use three of those wheels on the top and three more on the opposite side in an angled position at the bottom, to keep the slider on track.
The basic idea is that a chair with three legs never moves, so it will allow for maximum stability. It worked pretty well for me. - Start pre-drilling the three holes on the side of the wooden slide plate, but do not screw them in just yet.
- Mark the place on the top, where you want to fix the camera head. Create a flat hole to give your double-sided camera some space. Then drill a smaller hole so you can drill it. Be careful to screw it in as evenly and tightly as possible.
- Now turn your slider to the back. We will attach the lower wheels with angle brackets and we have to figure out how much space we need to lift it. Saw the matching peaces of the wood and glue and screw them.
- Angle brackets should have a longer hole on one side. The idea is to have more room for the bottom wheels to sit tighter or looser on steep tubes. Use the wing nuts here so you can fix it later as you go.
Step 7: Motorized or not?


- So, at this stage of the building process, you have a fully functional camera slider, with which you can already get amazing recordings. But if you want some super slow and steady professional looking moves, you'll need a motorized slider.
- It allows our slider to be motorized with a simple mechanism, which can be produced without much money or special knowledge.
THE BEST MOTOR IS THE ONE OF US ALREADY ARRIVED AT HOME: A CORDLESS SCREWDRIVER.
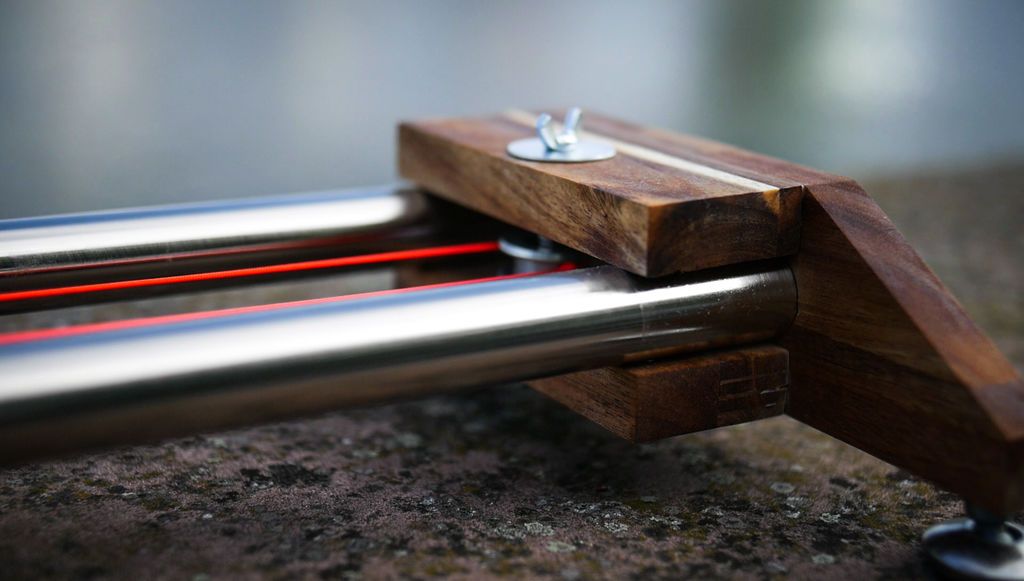
The concept: an active bearing on one side, which I would speed up with my cordless screwdriver, and a passive bearing on the other side.
Step 8: Motorized Mechanism: PASSIVE Side


- Let's start with the passive bearing. I took the top and bottom panel and created a 2cm long hole in the center. This will provide some fixing range later.
- Take one of your Type 608ZZ ball bearings and glue a wide washer on each side, to keep the string in line later. Then cut the thread rod longer and fix the rod firmly.It is in an intermediate position with 2 nuts on each side. Glue it between the long holes of the top and bottom panels on the passive side and secure everything with some wider washer with wing nuts.
Useful Tip:
- Every time you start a new DIY project, try to find out what the weak points are. And avoid them, creating space to make it adjustable. In the case of the slider, it's pretty obvious that all things move, which basically means the slider itself and the chain.
- The rope will loosen over time and with the 2cm of space you created, you will be able to tighten the rope with the wing nuts in a couple of seconds.
- Keep in mind that the more time you spend creating those pain points, the more time you can have fun with a personally created product.
Step 9: Motorized Mechanism: ACTIVE Side


Allows you to switch to the active side:
- At first, we need to use our coarse drill bit, which matches the diameter of our 608ZZ bearing (22mm), to drill a hole through the Top Panel. We will create a working bearing that is attached externally to the top panel and a fixed bearing, below which the rope will be placed. And all connected by a shorter peace of thread rod. So as soon as you speed up the thread bar with your cordless screwdriver, the fixed bearing at the bottom will drive the string for the slider.
- To achieve maximum traction between the active bearing and the rope, cut a longer strip of sandpaper and secure it with double-sided tape.
- But we have to overcome a practical problem: we have to wrap the rope once around the bearing to get enough traction to drive the chamber to slide. But as soon as we start accelerating the active rolling, the rope wraps around itself. The solution is more working bearings in front of the active bearing, to guide the rope.
Step 10: Create a quick version


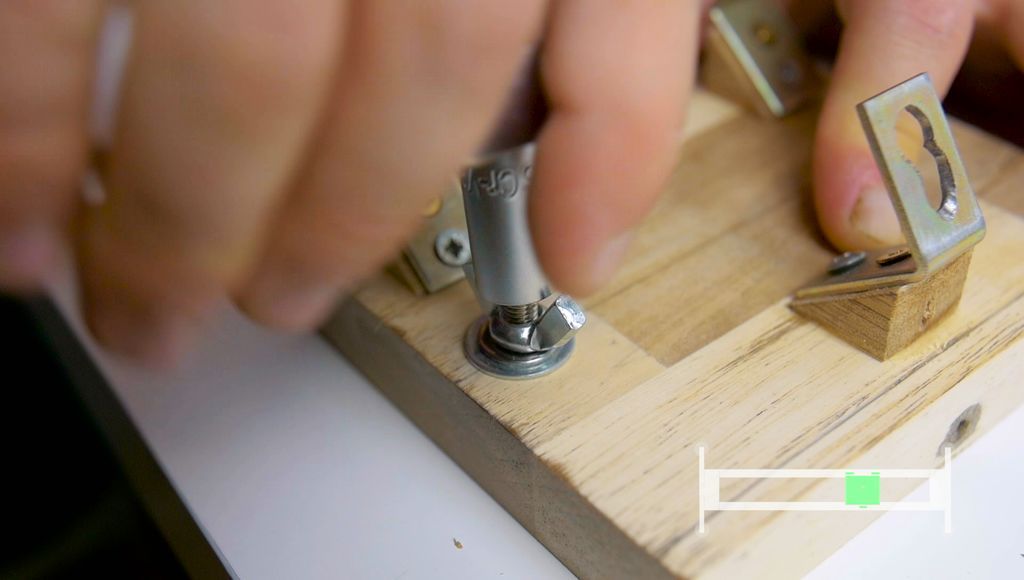
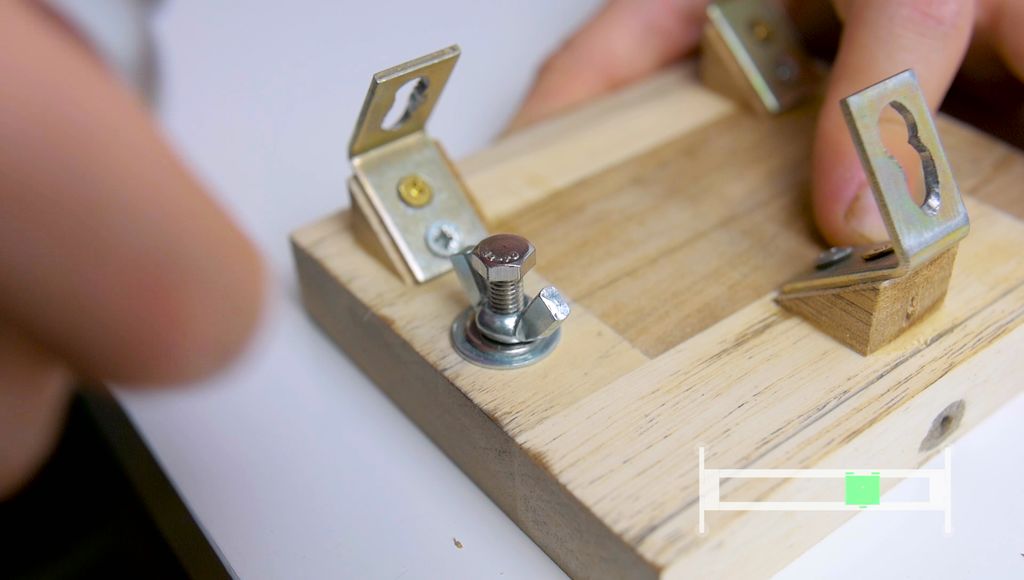
In order to switch between motorized and manual on the move, we need to create a quick release.
- All you need is another hex bolt and some wide washers (here: 2 glued together) and a wing nut. Pre-drill a hole on the underside in the middle part of the slide and screw in the hex bolt, but not all the way.
- You now have some room to place the stinger under the washer and tighten or loosen it as you go.
Step 11: Assembly and Finishing
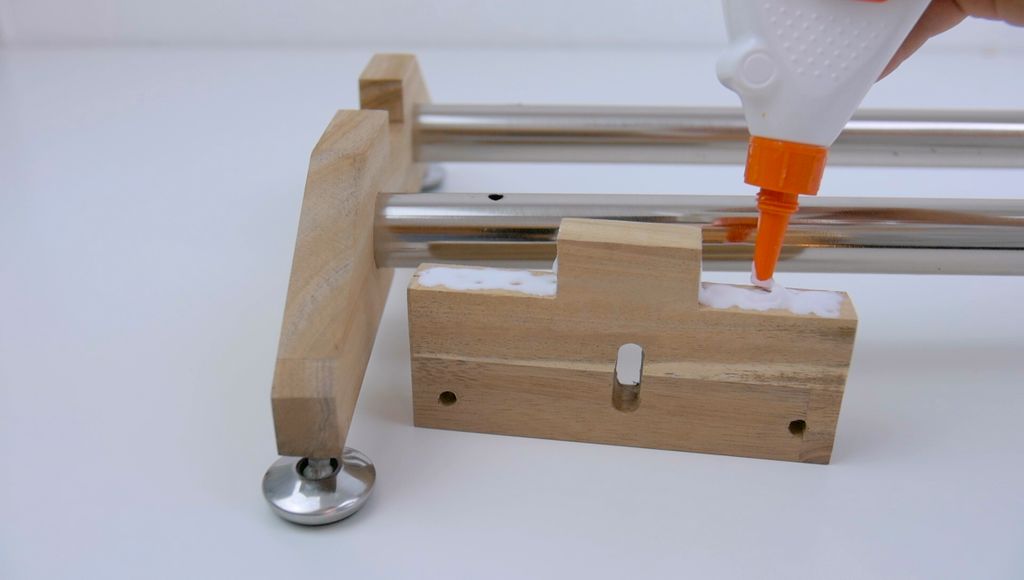


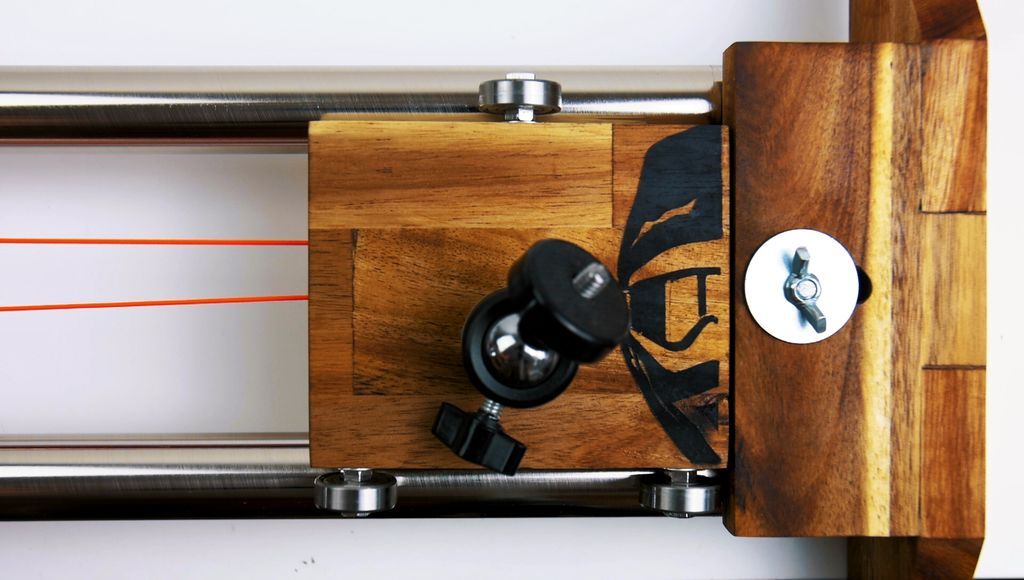
- Finally, we can glue everything together and fill small spaces with wood dust before sanding it, to create a smooth surface. I recommend gluing everything together except the Top Panel with the active bearing. Leave it attached, in case you want to swap out the rope or a training wheel.
- I screwed 2 screwsCamera mounting points on the two lower panels, so they can be mounted on two tripods.
- Finally, use some wood oil to finish your slider with a little wood oil.
QUICK OIL GUIDE:
- Make sure everything is sanded perfectly. Every scratch, small holes or any other errors will be more noticeable after oiling. Therefore, fine sanding is necessary to obtain a lowering result.
- Use a towel to cover each part of the wood with a thick layer of wood oil.
- Give the wood time to soak in the oil (10-15 minutes).
- Then take the towel and dry it so that no oil moisture remains on the surface.
- Let the wood dry 24 hours before putting it into service.
Step 12: Don't miss the edition

If you are thinking of making a modern camera slider, and you want your videos to have a more professional look, then we leave you some little tips below.
This is what I do with my Slider video:
- Stabilize it digitally in your editing software. Don't be afraid to use it, even in big Hollywood movies, most of the images have been stabilized.
- Add some color, for example by applying a LUT (look-up table). If you don't know, what is. Search the internet for it. Trust me, it's worth it.
- Use your slider scenes to support your desired atmosphere
Step 13: Ready



Anyway, I hope I can give you some inspiration for your own DIY control projects. If you have some great ideas and feel like you want to share them with everyone, please leave a comment.
Remember that you can make a modern camera sliderwith your own measurements.
- Tags
- Camera
Popular Content
How to make a rocket stove for outdoors
Cardboard Drawers Lined with Jeans
Ideas and Advantages of Window Grilles for the Home!
Latest Articles
How to make a refrigerator out of insulating material: Practical step-by-step guide
How to make a Kilim for the Home: Complete Step by Step Guide
How to protect ourselves from accidents in our workplace: Complete prevention and safety guide
Related Content
Modern Office Designs for Teleworking
How to Make a Great and Simple PVC Flute!
Modern DIY Homemade Outdoor Sofa!
Headboard with lights
Creative Home Decor Ideas to Transform Every Space
Refreshing your home starts with smart design choices that combine comfort, personality, and functionality. Whether you want to modernize a small apartment, upgrade outdoor areas, or create cozy rustic interiors, these trending ideas can completely change the atmosphere of your space.
Outdoor Spaces That Increase Style and Functionality
Outdoor living continues to dominate modern home trends. Homeowners are increasingly investing in practical entertainment zones inspired by these BBQ shed ideas, which create the perfect setup for gatherings and weekend cooking sessions.
First impressions also matter when designing exteriors. Elegant farm entrance gates design ideas help properties stand out while improving privacy and curb appeal.
Compact living solutions are also gaining popularity. These inspiring 16x40 shed house interior design ideas show how smaller spaces can still feel luxurious and functional.
To enhance patios and entryways, homeowners are adding stylish protection with these creative porch awning exterior DIY ideas that blend aesthetics with practicality.

Rustic and Cozy Interior Design Trends
Warm and natural interiors remain timeless. These charming rustic decor ideas combine wood textures, vintage accents, and earthy tones to create welcoming spaces.
Bedrooms are becoming more personalized with curated wall arrangements. Many homeowners use these stylish picture wall ideas for bedroom spaces to display memories and artwork creatively.
Textured wall treatments are another major trend. Installing a board and batten wall adds architectural character while keeping interiors elegant and modern.
Similarly, bold accent wall ideas can instantly transform plain rooms into eye-catching focal points without requiring a full renovation.
Smart Kitchen and Organization Inspiration
Functional kitchens are essential for modern homes. These practical kitchen wall cabinet ideas maximize storage while maintaining a clean and stylish appearance.
Organization also starts at the entrance. Well-designed mud room ideas help families keep shoes, coats, and daily essentials neatly arranged.
Colorful and Personalized Home Styling
Vibrant interiors are becoming increasingly popular thanks to playful dopamine decor ideas that use bright colors and joyful accessories to improve mood and energy.
Gallery walls also continue to evolve as a major decorative feature. These trendy gallery wall inspiration ideas offer creative ways to combine prints, photos, and statement art.
Young renters and new homeowners are especially embracing these stylish first apartment aesthetic ideas to create sophisticated interiors on a budget.
Finally, selecting the right shades can dramatically influence any room’s atmosphere. These modern trendy color ideas help homeowners choose palettes that feel fresh, elegant, and timeless.
Final Thoughts
From rustic charm and colorful interiors to outdoor entertaining areas and functional storage solutions, today’s home decor trends focus on creating spaces that feel both beautiful and livable. By combining smart layouts, modern textures, and personalized decorative elements, any home can become more stylish, comfortable, and inspiring.
Browse the Shop
 Acacia frida deluxe solid wood bed frame |
Bedroom bench |
Bed chest drawers |
Lingerie dresser |
Frame base |
Mirror with jewelry storage |
30 Bathroom Vanity |
Memory foam queen mattress |
Mattresses for back pain |
Nightstand set of 2 |
Grand Goldman Shop |
Civil Lawyer
Deutschland Trikot WM 2026
Acacia frida deluxe solid wood bed frame |
Bedroom bench |
Bed chest drawers |
Lingerie dresser |
Frame base |
Mirror with jewelry storage |
30 Bathroom Vanity |
Memory foam queen mattress |
Mattresses for back pain |
Nightstand set of 2 |
Grand Goldman Shop |
Civil Lawyer
Deutschland Trikot WM 2026







