

How to Install LED Ceiling Light. The goal of this tutorial is to create a custom ceiling light with a modern look, using mainly aluminum sections and LED strips.
Materials:
Find Bleeding Edge Supplements at Scandalous Prices on iHerb.

- U-shaped sections, 20 mm aluminum
- LED strips (a 12V strip, along with an electrical converter, for better safety),
- Fixing terminals if you choose to assemble multiple sections
- Electrical cables and cable connectors
- 3D printer
- Screwdrivers
- Sierra
- Welder
Notes:
The quantity or length of the materials will depend on your needs. The 3D printer is used to print the end caps, hanging brackets, and translucent diffuser. If you don't have one, the lids and supports can be made manually using other materials...
The choice of aluminum is to guarantee good rigidity, while keeping the weight low. It acts as a good heat sink, which helps the LED strips last longer.
LED strips can be cut into pieces, in some intended places, usually every 5-10 cm. Be sure to purchase a strip with enough cut marks for your chosen design. I recommend purchasing LED strips with one side glued on to aid assembly. Finally, it is much safer to use a 12V strip instead of a 110 or 230V one, in case a wire becomes loose inside the lamp.
Step 1: Light Design
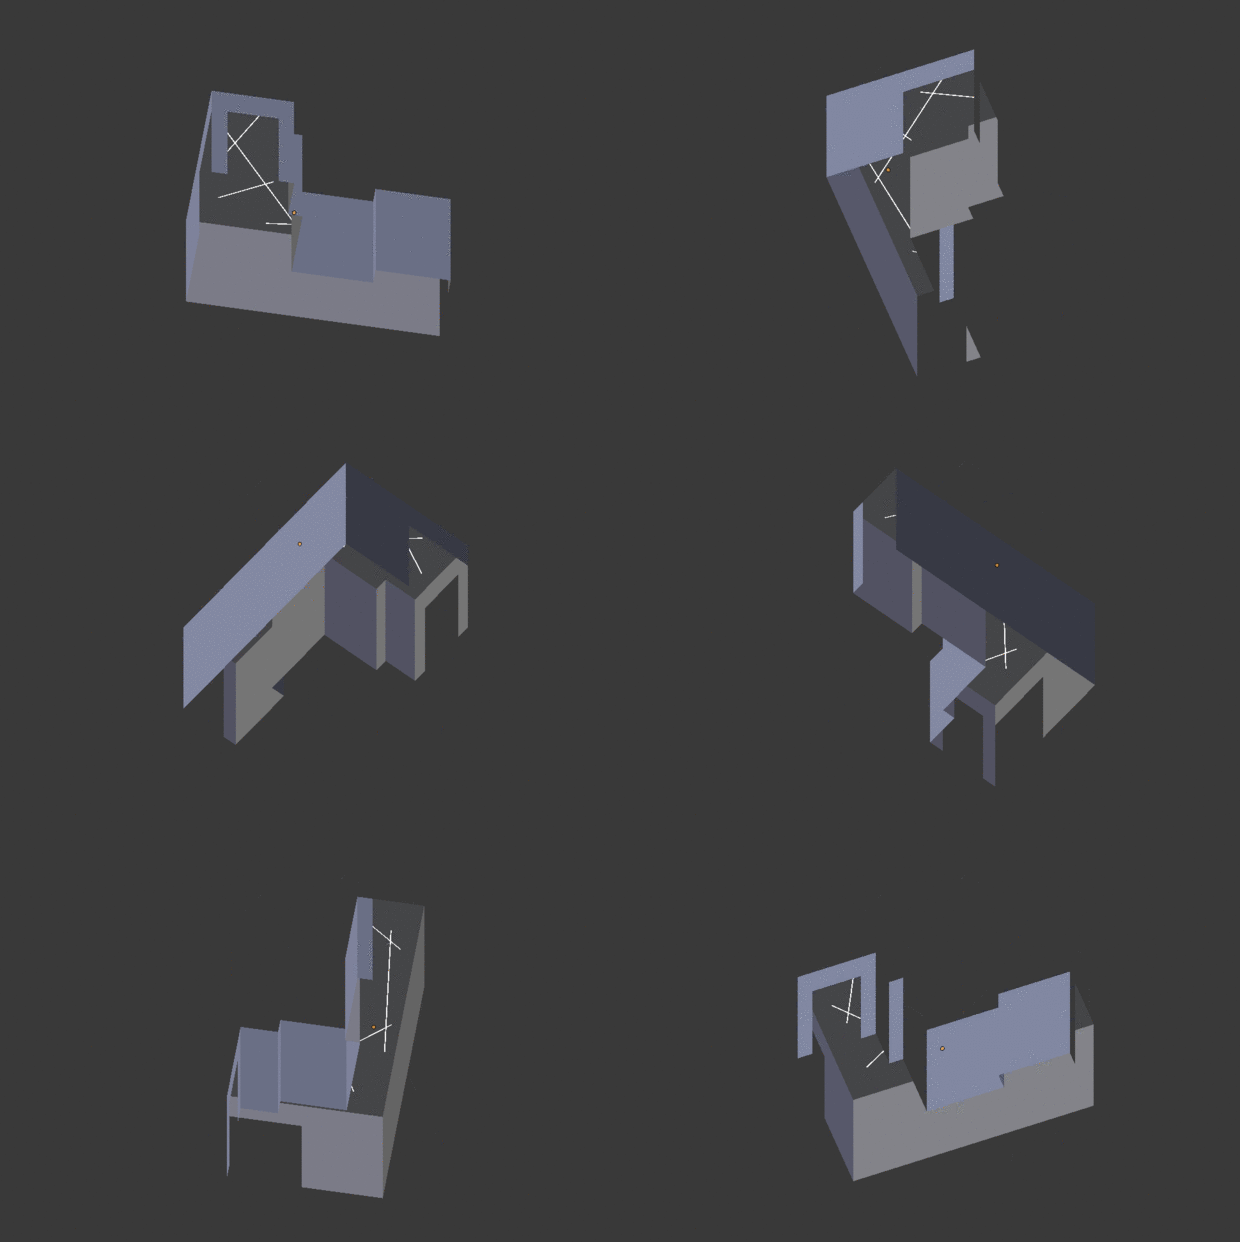
The first thing is to choose the shape of the ceiling light. You can choose a simple straight line or be more creative. Because of my L-shaped hallway, I had to assemble at least two aluminum sections; I then chose to add some additional sections through the main two to get a nicer layout.
You can make your design on paper, and create a simple view of the corridor in a 3D tool. Once the layout is known, you can measure the aluminum section and LED lengths required. In my case, I needed a section length of approximately 7 to 8 meters. To obtain a sufficient beam, you will need to know the surface to be illuminated and the use of the room, as the light intensity required will vary.
The corridor was approximately 7.5m2 wide, this meant it had to ensure at least 100*7.5 = 750 lumens. Having 750 lumens on an 8 meter LED strip is easy to achieve.
One important thing about 12V LEDs: check the power they require and make sure the converter can power them. As an example, the power of the band is 24W and it runs on 12V, so you need 24W/12V = 2A.
Step 2: Cut and assemble the sections
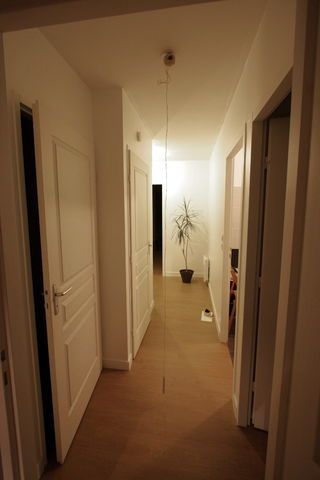
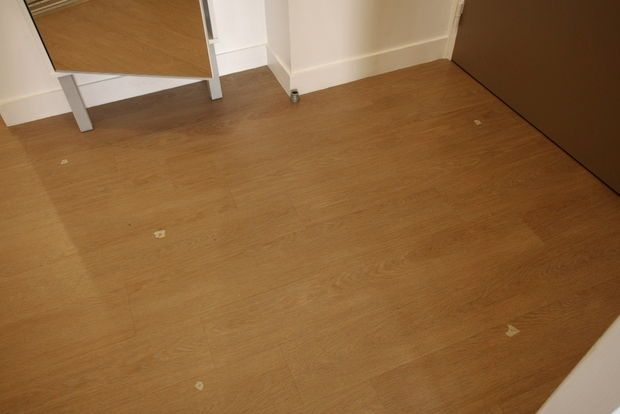
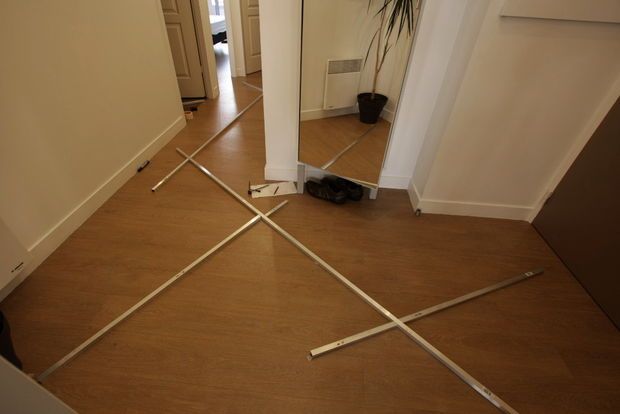
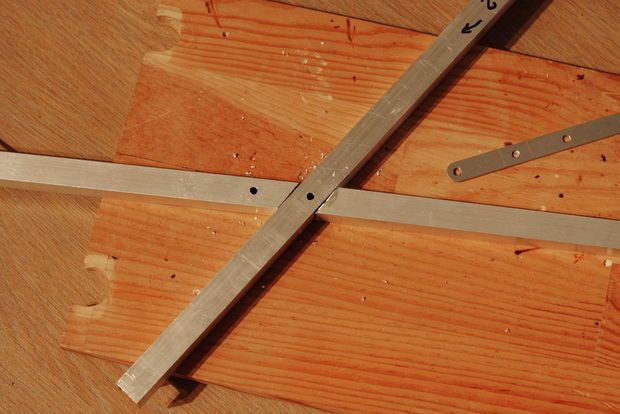
The first thing is to place the sections on the ground, according to your design. This will allow you to better visualize the final result and adjust the design. Place some tape marks on the floor to help you maintain the position of the aluminum sections during your work. Use a plumb line to find out where the suspension points are. Then place the sections, modify their design and cut them. It is best to cut the longest sections first, as a slight error in the cutting angle will result in a large displacement of the limbs. If so, you can (try to) correct the angles of the other sections.
If your design requires multiple sections joined together, use a locking lug. Locate and drill two holes, assemble the parts, and then drill the other holes using the lug as a guide. This way, you will minimize the risk of gap error.
Drill holes for each of the suspension points, one more side by side to route the power supply cables. Once this is done, take the sections at the suspension points and check the balance of the assembly. It is likely that you are going to tip; That means you will have to put "crutches" on the opposite side to maintain the horizontality of the whole.
Step 3: Power Supply
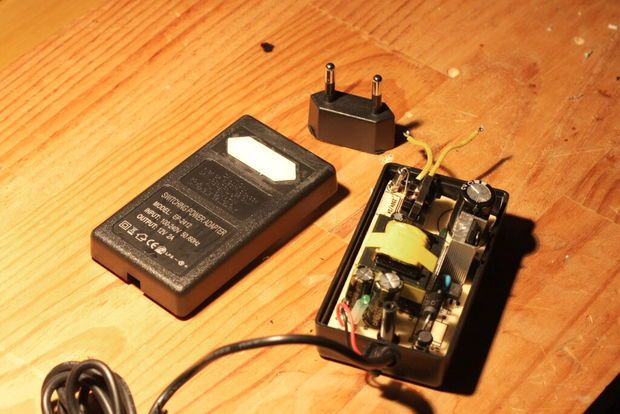
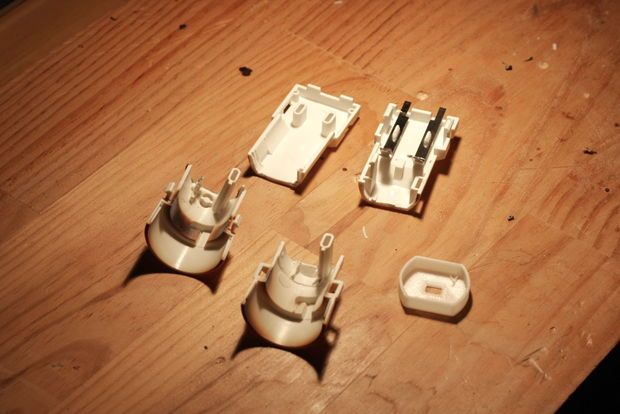
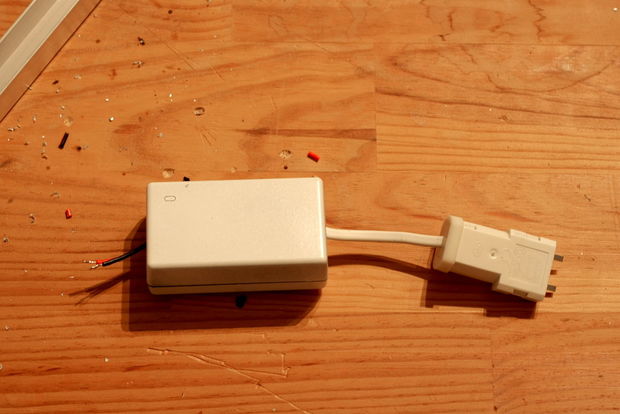
This part may be useless for those who don't have the same outlet as me. An IEC 61995-1:2005 standard is used here. Open the power supply to replace the main socket pins with a white wire. Also replace the output cable with a shorter one, and paint the box white, so it always matches the ceiling.
Shorten the IEC connector and solder the white wires from the source. The result is a good power supply with an IEC connector on one side and an output cable on the other side.
Step 4: LED Strip Configuration
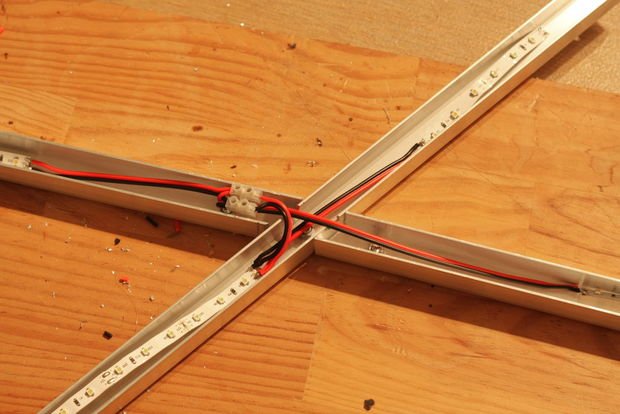
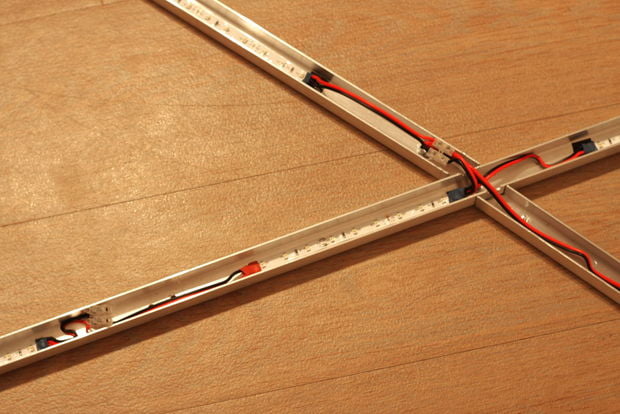
If using a 12V LED strip, connect the two wires from the strip to the power supply wires, using a connection terminal (similar to Wago). If using a 110-230V LED strip, connect the two wires to the main outlet and, extremely important, screw the ground wire (yellow-green wire) to the aluminum section. If the ground wire is not connected, you could be electrocuted if a wire comes loose.
If necessary, cut the strip into pieces spread across the sections, then solder wires to connect each piece. Take care of the polarity, as the LED will not work if a connection is reversed. Don't forget to use a heat shrink sleeve to protect the solders and prevent short circuits!
Once the design is made, glue the LED strip inside the aluminum sections. You can polish the aluminum sections with a cloth and some cream to improve the appearance.
Step 5: Hanging the light on the ceiling
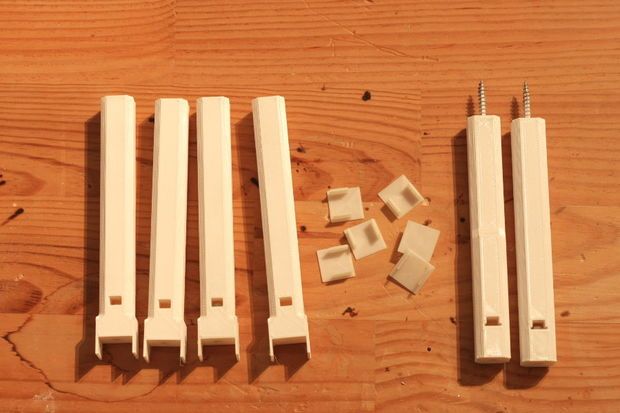
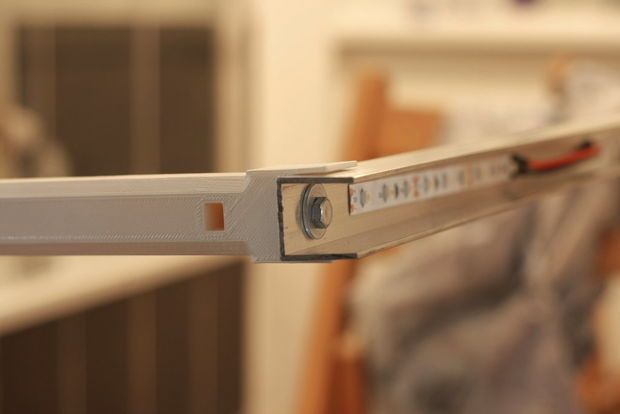
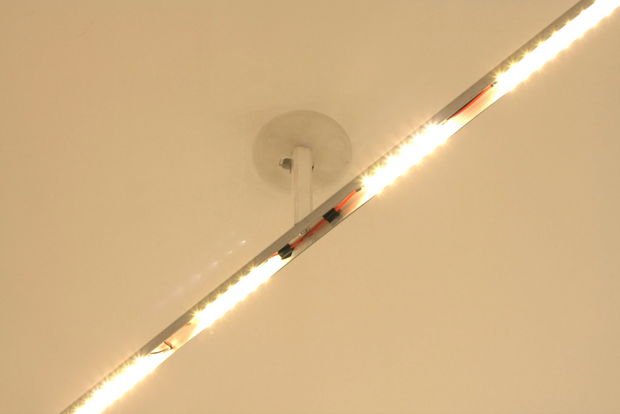
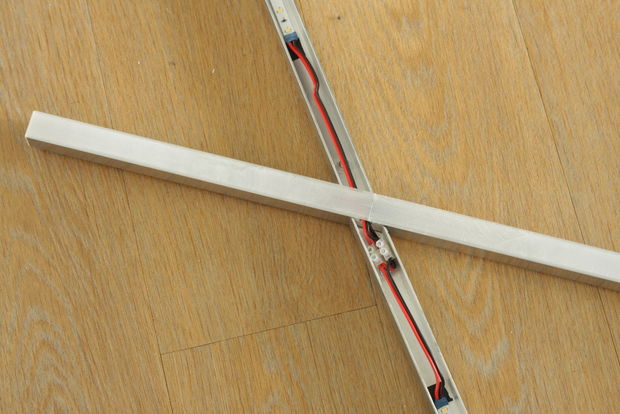
Take the sections at the suspension points and check the balance of the assembly. It is likely that you are going to tip; That means you will have to put "crutches" on the opposite side to maintain the horizontality of the whole.
He printed the hanging parts and crutches using ABS, and inserted nuts into them so they could be screwed to the aluminum sections. I think these parts could be made of painted wood (20x20x150mm).
Screw the crutches to the aluminum sections, then screw the hanging pieces to the ceiling, then screw the sections to the hanging pieces. Connect the power supply and check that all LEDs are working.
Documents for 3D Printing
The light diffuser being used are 3D printed parts, made of transparent PETG. I hope this instruction is clear and useful; Don't hesitate to leave a comment if you have a question...
Get more information at Perfectidea.com and on our Facebook for more How to Install LED Ceiling Light.
Popular Content
How to make a rocket stove for outdoors
Cardboard Drawers Lined with Jeans
Ideas and Advantages of Window Grilles for the Home!
Latest Articles
How to make a refrigerator out of insulating material: Practical step-by-step guide
How to make a Kilim for the Home: Complete Step by Step Guide
How to protect ourselves from accidents in our workplace: Complete prevention and safety guide
Related Content
How to turn a wooden spool into a practical and original small piece of furniture!
Tips for Having a Cozy Room
Wooden shelves that will make your house look amazing!
Pallet Planters: Ideas, Guide and Real Experience to Decorate your Terrace
Creative Home Decor Ideas to Transform Every Space
Refreshing your home starts with smart design choices that combine comfort, personality, and functionality. Whether you want to modernize a small apartment, upgrade outdoor areas, or create cozy rustic interiors, these trending ideas can completely change the atmosphere of your space.
Outdoor Spaces That Increase Style and Functionality
Outdoor living continues to dominate modern home trends. Homeowners are increasingly investing in practical entertainment zones inspired by these BBQ shed ideas, which create the perfect setup for gatherings and weekend cooking sessions.
First impressions also matter when designing exteriors. Elegant farm entrance gates design ideas help properties stand out while improving privacy and curb appeal.
Compact living solutions are also gaining popularity. These inspiring 16x40 shed house interior design ideas show how smaller spaces can still feel luxurious and functional.
To enhance patios and entryways, homeowners are adding stylish protection with these creative porch awning exterior DIY ideas that blend aesthetics with practicality.

Rustic and Cozy Interior Design Trends
Warm and natural interiors remain timeless. These charming rustic decor ideas combine wood textures, vintage accents, and earthy tones to create welcoming spaces.
Bedrooms are becoming more personalized with curated wall arrangements. Many homeowners use these stylish picture wall ideas for bedroom spaces to display memories and artwork creatively.
Textured wall treatments are another major trend. Installing a board and batten wall adds architectural character while keeping interiors elegant and modern.
Similarly, bold accent wall ideas can instantly transform plain rooms into eye-catching focal points without requiring a full renovation.
Smart Kitchen and Organization Inspiration
Functional kitchens are essential for modern homes. These practical kitchen wall cabinet ideas maximize storage while maintaining a clean and stylish appearance.
Organization also starts at the entrance. Well-designed mud room ideas help families keep shoes, coats, and daily essentials neatly arranged.
Colorful and Personalized Home Styling
Vibrant interiors are becoming increasingly popular thanks to playful dopamine decor ideas that use bright colors and joyful accessories to improve mood and energy.
Gallery walls also continue to evolve as a major decorative feature. These trendy gallery wall inspiration ideas offer creative ways to combine prints, photos, and statement art.
Young renters and new homeowners are especially embracing these stylish first apartment aesthetic ideas to create sophisticated interiors on a budget.
Finally, selecting the right shades can dramatically influence any room’s atmosphere. These modern trendy color ideas help homeowners choose palettes that feel fresh, elegant, and timeless.
Final Thoughts
From rustic charm and colorful interiors to outdoor entertaining areas and functional storage solutions, today’s home decor trends focus on creating spaces that feel both beautiful and livable. By combining smart layouts, modern textures, and personalized decorative elements, any home can become more stylish, comfortable, and inspiring.
Browse the Shop
 Acacia frida deluxe solid wood bed frame |
Bedroom bench |
Bed chest drawers |
Lingerie dresser |
Frame base |
Mirror with jewelry storage |
30 Bathroom Vanity |
Memory foam queen mattress |
Mattresses for back pain |
Nightstand set of 2 |
Grand Goldman Shop |
Civil Lawyer
Deutschland Trikot WM 2026
Acacia frida deluxe solid wood bed frame |
Bedroom bench |
Bed chest drawers |
Lingerie dresser |
Frame base |
Mirror with jewelry storage |
30 Bathroom Vanity |
Memory foam queen mattress |
Mattresses for back pain |
Nightstand set of 2 |
Grand Goldman Shop |
Civil Lawyer
Deutschland Trikot WM 2026







