

If you have a garden and are looking for an innovative idea, you can make containers that absorb rainwater in an easy and efficient way.
I was looking for a way to have an organic garden without having to make a raised bed/box. The great part about this setup is that everything can be changed and used on backyards, balconies, rooftops, etc. Buckets can be added or removed, plants can be changed depending on the growing season, and the entire setup can be disassembled and relocated to another site if necessary. We hope this DIY project is of great help to you.
Find Bleeding Edge Supplements at Scandalous Prices on iHerb.

The way everything works is amazing! The rain is collected in the rain barrel. This water is transferred to the container using a float valve and then distributed equally to the containers. This water is absorbed through the bottom of the containers to the soil above as needed, avoiding the need to monitor and water your plants consistently. In such a way that it will save you time, money and energy, since plants use what they need when they need it.
Tip: You can add nutrients to the secondary containment bag and it will be distributed equally to the plants.
Step 1: Find a location

As a first step find an overgrown area that I tried to use for a raised garden last year behind my garage, but the weeds and pests took over and most of my plants suffered and it is perfect for placing our rainwater absorbing containers.
IMPORTANT: Try to find an area that is slightly level and will save you some time during setup. If not, level the area with whatever you have. This will determine the levels in your various containers. If you have a large slope, then the water level will be higher in some buckets and lower in others, so make sure they are as level as possible. I used patio pavers, flagstones, and some old boards left over from various projects.
Step 2: Gather your materials

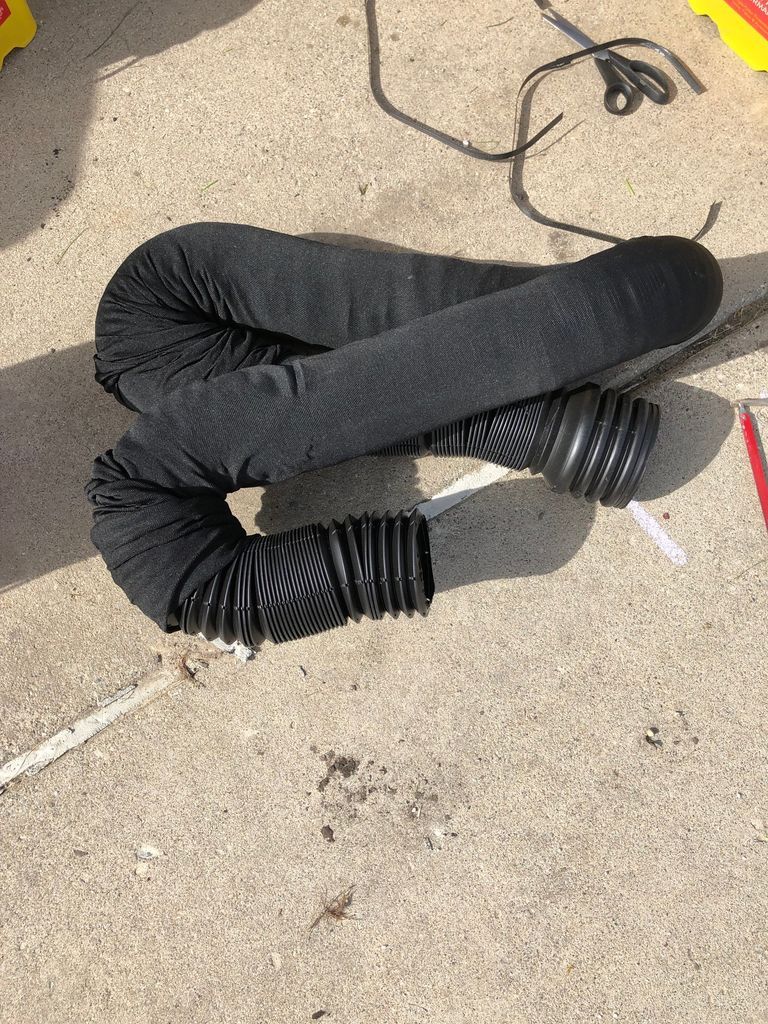


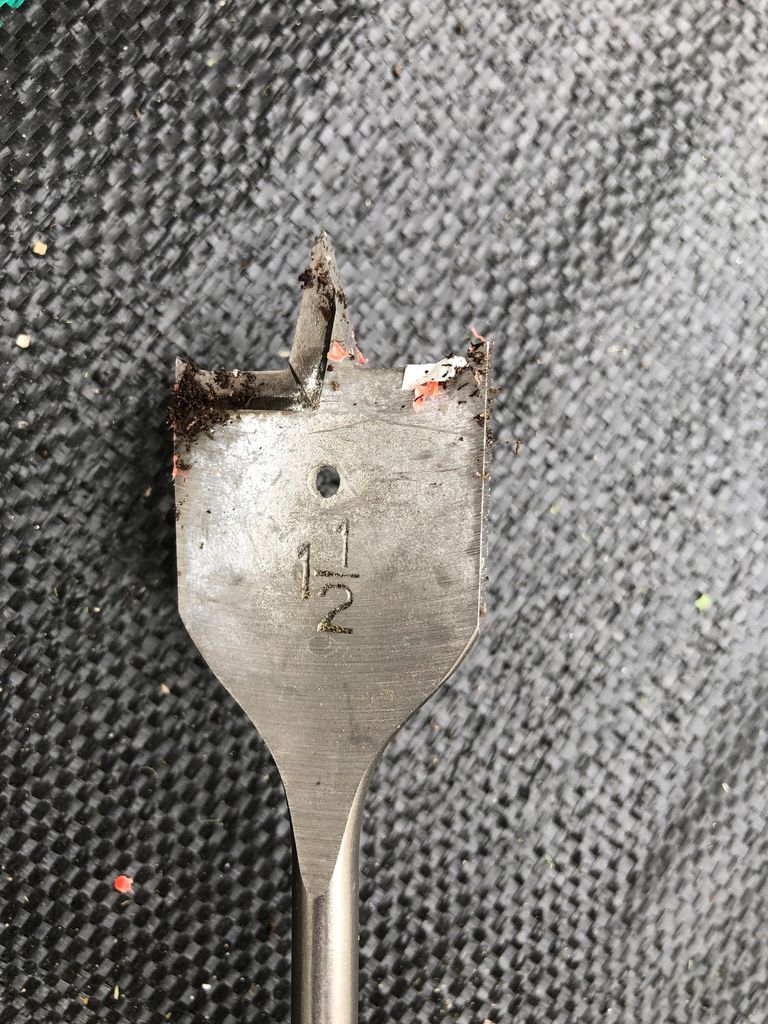
Materials: (These may vary depending on your project) (Quantities will vary, this is for 9 grow cubes)
- 1 50' weed barrier (if necessary)
- Barrier staples
- A large bag with a lid (I had one left over from moving around)
- Rain barrel from 1 to 55 gallons
- 9 Containers (I have several buckets of cat litter that I had been saving, but use what you have or a 5 gallon bucket works too)
- 1 25' Drain Pipe with Sock (Try to find it with the sock because this will help debris fill the pipe)
- Float valve
- 8 1/2″ Pvc Tee Connections
- 2 1/2″ flexible tube adapters
- 1/2″ Cutoff Riser
- 12 1/2″ Female Elbow Flexible Tubes
- 1 50′ flexible tube of 1/2″
- 1/2″ Flexible tubes Male to female elbow
- 12 1/2″ PVC Adapters
- 2 1/2″ PVC Ball Valves
- 20 Rubber washers
- 1 Drain grate
- 50 -Zipties
- Teflon tape
Tools: (may vary depending on your project)
- Little sleigh
- 1 1/2″ Paddle Bit
- 5/8″ drill bit
- Drill
- Straight tin cuttings
- Scissors
- Wire cutters
- Heat gun
- Pliers
- Saw with fine tooth blade
Step 3: Level the growth area


- CoMy second step be sure to level the area you plan to use.
- Once leveled, place your garden fabric and staple as needed to prevent weeds or other debris from impeding your work area.
Step 4: Design
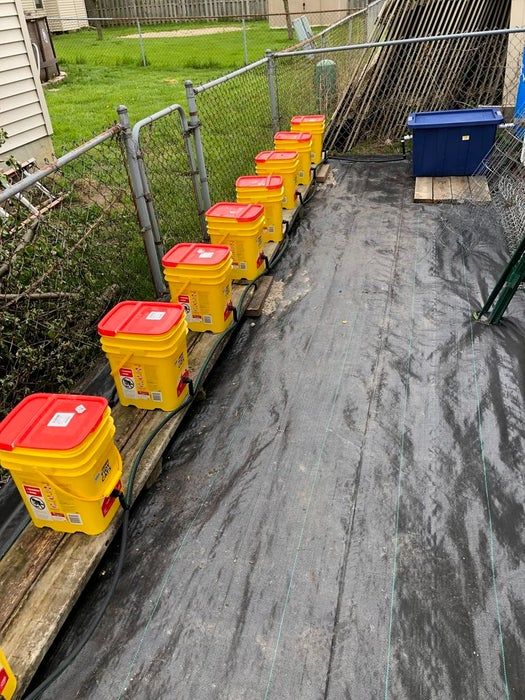
- Also layout your containers and check the level again
- Choose your bag (secondary containment) and your rain barrel (primary containment)
- Measure the distances between the containers, bag, and rain barrel to determine the lengths and number of fittings and flexible tubing needed.
Step 5: Drain Pipe


- Pull the sock back into the drain pipe and cut it to length based on the containers you are using.
- I cut 2 short sections per container.
- Once the pipe is cut, run the sock over the pipe and twist one end and apply a flange. Similarly, do the same with the other end of the pipe and cut off the excess.
- Repeat this process as necessary.
- This tube is used to retain water at the bottom. The pipe and sock keep rocks, debris and soil above the water to prevent root rot.
- Likewise this water is evil from the pipe to the ground.
Step 6: Rain Barrel


- Level and adjust the height of your rain barrel as needed (I stacked and used the 12x12 patio pavers)
- Cut a hole large enough in the top of the barrel to insert the drain gate. (This helps keep debris out of your barrel)
- Drill a 5/8″ hole 4″ from the bottom of the barrel
- Place the rubber washer on the PVC adapter over the threads.
- Place Teflon tape on the threads
- Push the adapter through the 5/8″ hole from the inside of the barrel with the washer inside the barrel and the threads protruding from the hole.
- You can screw on another adapter if necessary, then screw on the ball valve (I used the adapter to another adapter because of the distance between my rain barrel and the bag.
- You can also use pliers if necessary to ensure a tight fit. You may need another person to hold the end on the outside while you tighten the inside or vice versa)
- Use rubber washers on each accessory as necessary. (See photos)
- You can screw on the adapter after applying a rubber washer and Teflon tape to the threads on the opposite side of the ball valve.
- Finally drill a 5/8″ hole in the side of the barrel 1″ from the top for flow. (You can configure it any way you want. If you have a larger or smaller hose for a certain fitting or pipe.)
Step 7: Preparation of secondary containment (tote)


- Level and raise/lower bag as needed
- Drill a 5/8″ hole in line with the rain barrel fittings
- Insert the float valve from inside the bag (make sure you have a rubber washer before pushing it through the hole)
- Apply Teflon tape to the threads protruding from the bag on the float valve
- Apply rubber washers and screw the PVC adapter to the threads of the float valve as necessary to obtain a tight fit on the outside of the bag
- Attach screws to the PVC adapter to the ball valve to complete the connection to the rain barrel (this was a little tricky for me,since I had to lift the bag and twist it on the ball valve to get the correct connection)
- Apply rubber washers as necessary and Teflon tape to all threads.
This next part is complicated and may require some calculations (or guess work in my case).
- Punch a 5/8″ hole in the other side of the bag. This will be your output flow to your containers. (I drilled mine about 12″ from the bottom, but this will depend on how level your grow containers are and how high you want the water to be in the container. I was aiming for about 3-4″ per container and somehow I was lucky enough to hit that.) Note that the float valve can be adjusted for the amount of water you want in the tote and if the hole you drill is too high, you will have to plug it and drill a lower hole to ensure a constant supply (easy solution if necessary)
- Apply the rubber washer to the PVC adapter and insert through the hole from inside the bag
- Use Teflon tape on the threads
- Place another PVC adapter if necessary
- You can screw the PVC ball valve with rubber washers as needed
- Screw on 90 degree elbow male to ball valve and female to riser
- Attach screws to the riser and measure. Cut to size if necessary. Apply Teflon tape to the threads and screw it into the 90 degree elbow.
- 90 degree female screw to flex the pipe
- Measure the length of the flexible tube to the first container and cut it to fit.
- Apply heat to the end of the flexible tube for no more than 10 seconds or until the edge is slightly shiny and slide it over the fittings.
Step 8: Prepare the container that will automatically absorb


Layout your fittings and measure the required flexible tubing distances from the secondary container and between buckets
Each container that absorbs rainwater will need:
- T fitting
- 1 PVC Adapter
- A rubber washer
- One Elbow (female)
- You also need 1 short flexible tube
IMPORTANT: The first container will need an additional female 90 degree elbow and a male flexible tube adapter that joins the tote to the first container and so on.
- The last vessel will use a 90-degree elbow instead of a tee connection to finish the "water loop."
- Drill a 5/8″ hole about the same height as the drain pipe in your container (about 3-4″ from the bottom of the container)
- Place the rubber washer on the PVC adapter over the threads and insert the adapter through the hole from the inside of the container hub.
- Put Teflon tape on the threads of the PVC adapter
- Insert screws to the elbow so that the flexible tube enters the elbow from the bottom.
- Determine the height where you want the tee to sit and measure to cut the flexible tubing (mine is about 3-4″)
- Cut the flexible tube to length.
- Take a heat gun and apply heat to the flexible tubing for no more than 10 seconds or until the edge is slightly shiny and slide the flexible tubing over the elbow fitting. (If the hose folds on itself as you slide it onto the fitting, apply less heat.)
- Repeat this same process and apply to the top opening of the T fitting
- Do the same process on all containers except the first and last container.
Step 9: Settings

- Fill your secondary containment bag with water
- Allow the buckets to fill to the desired height (3-4″ for mine) and check to determine if the hole is the correct height on the bag
- Adjust the float valve once the desired height in the grow containers is established to ensure this level is maintained in the secondary container.
- Fill the rain barrel enough to detect leaks and ensure that transfer through the float is correct and that the level remains at the bsecondary bag
Step 10: Add some rocks and some growing


- Once your water is at the desired height, add some medium sized rocks about 3-4″ above the drain pipe to prevent the soil from becoming saturated
- I didn't have any smaller stones on hand, so I broke up some leftover slabs I had from another project
- Add the soil mix to the top of the barrel (use whatever you prefer. I used organic potting miracle in the black bag) Try to have at least 6-8″ soil to ensure enough room for plant growth
- If you have a cover, you can apply it to prevent moisture from evaporating from the soil and also helps keep bugs away. (I had the lids from the cat litter containers. I cut 2, 1 1/2″ holes in the lid for the plant to go through. I cut a slit from the hole to the front of the lid so I could get the plant in and the lid over and around the plant. This was a messy process but it turned out great.)
Step 11: Add Your Plants!


- I chose to try this with some vegetables and fruits to see how it goes this year.
- I grew lettuce without the lid and tomatoes and peppers with the lid and it was wonderful for keeping those pests away.
Step 12: Harvest and enjoy your rainwater-absorbing containers!
- I will add pictures of what our rainwater-absorbing containers look like as the plants continue to grow and what the final harvest looks like.
- Without a doubt it is an interesting DIY project.
Step 13: Almost 2 months!


Finally you will have ready your own containers that absorb rainwater, your plants will love this system. I've had to adjust a few things here and there, like adding cages to support the branches or a plastic trellis for the beans to grow on.
This project may be a little daunting at first, but after the initial setup you can wipe your hands clean and let nature and gravity do their work!
If you liked the content, don't forget to follow us on our social networks.
Popular Content
How to make a rocket stove for outdoors
Cardboard Drawers Lined with Jeans
Ideas and Advantages of Window Grilles for the Home!
Latest Articles
How to make a refrigerator out of insulating material: Practical step-by-step guide
How to make a Kilim for the Home: Complete Step by Step Guide
How to protect ourselves from accidents in our workplace: Complete prevention and safety guide
Related Content
20 Sculptures That Defy Gravity and Make Us Think!
Bathroom Shelves You Can Make Yourself
Spiral Staircase with a Ton of Curves!
The Pergolados are another Extension of the House
Creative Home Decor Ideas to Transform Every Space
Refreshing your home starts with smart design choices that combine comfort, personality, and functionality. Whether you want to modernize a small apartment, upgrade outdoor areas, or create cozy rustic interiors, these trending ideas can completely change the atmosphere of your space.
Outdoor Spaces That Increase Style and Functionality
Outdoor living continues to dominate modern home trends. Homeowners are increasingly investing in practical entertainment zones inspired by these BBQ shed ideas, which create the perfect setup for gatherings and weekend cooking sessions.
First impressions also matter when designing exteriors. Elegant farm entrance gates design ideas help properties stand out while improving privacy and curb appeal.
Compact living solutions are also gaining popularity. These inspiring 16x40 shed house interior design ideas show how smaller spaces can still feel luxurious and functional.
To enhance patios and entryways, homeowners are adding stylish protection with these creative porch awning exterior DIY ideas that blend aesthetics with practicality.

Rustic and Cozy Interior Design Trends
Warm and natural interiors remain timeless. These charming rustic decor ideas combine wood textures, vintage accents, and earthy tones to create welcoming spaces.
Bedrooms are becoming more personalized with curated wall arrangements. Many homeowners use these stylish picture wall ideas for bedroom spaces to display memories and artwork creatively.
Textured wall treatments are another major trend. Installing a board and batten wall adds architectural character while keeping interiors elegant and modern.
Similarly, bold accent wall ideas can instantly transform plain rooms into eye-catching focal points without requiring a full renovation.
Smart Kitchen and Organization Inspiration
Functional kitchens are essential for modern homes. These practical kitchen wall cabinet ideas maximize storage while maintaining a clean and stylish appearance.
Organization also starts at the entrance. Well-designed mud room ideas help families keep shoes, coats, and daily essentials neatly arranged.
Colorful and Personalized Home Styling
Vibrant interiors are becoming increasingly popular thanks to playful dopamine decor ideas that use bright colors and joyful accessories to improve mood and energy.
Gallery walls also continue to evolve as a major decorative feature. These trendy gallery wall inspiration ideas offer creative ways to combine prints, photos, and statement art.
Young renters and new homeowners are especially embracing these stylish first apartment aesthetic ideas to create sophisticated interiors on a budget.
Finally, selecting the right shades can dramatically influence any room’s atmosphere. These modern trendy color ideas help homeowners choose palettes that feel fresh, elegant, and timeless.
Final Thoughts
From rustic charm and colorful interiors to outdoor entertaining areas and functional storage solutions, today’s home decor trends focus on creating spaces that feel both beautiful and livable. By combining smart layouts, modern textures, and personalized decorative elements, any home can become more stylish, comfortable, and inspiring.
Browse the Shop
 Acacia frida deluxe solid wood bed frame |
Bedroom bench |
Bed chest drawers |
Lingerie dresser |
Frame base |
Mirror with jewelry storage |
30 Bathroom Vanity |
Memory foam queen mattress |
Mattresses for back pain |
Nightstand set of 2 |
Grand Goldman Shop |
Civil Lawyer
Deutschland Trikot WM 2026
Acacia frida deluxe solid wood bed frame |
Bedroom bench |
Bed chest drawers |
Lingerie dresser |
Frame base |
Mirror with jewelry storage |
30 Bathroom Vanity |
Memory foam queen mattress |
Mattresses for back pain |
Nightstand set of 2 |
Grand Goldman Shop |
Civil Lawyer
Deutschland Trikot WM 2026







