

DIY Cement: Box Shaped Planter will show you how to make concrete boxes using cardboard and tape. This example is a flower pot, but they could also be useful as storage cubbies. This project is good because it is cheap, fast and easy.
Box Shaped Planter

Find Bleeding Edge Supplements at Scandalous Prices on iHerb.

You could throw concrete in a cardboard box... Except for one thing: it's not airtight. The cardboard will absorb moisture from the concrete, leaving a chalky finish at best. In the worst case, the box will jump or collapse before the concrete has dried.
The solution to this problem is, of course, sealing the inside of the box will make it water tight, and will also give the concrete some texture. Taping the cardboard edges at the corners will help strengthen the box and minimize bowing under the pressure that occurs when molding.
Making your own concrete planter is a surprisingly easy and inexpensive way to create the indoor or outdoor plant home your specific garden needs. You can create your own mold from cardboard, or use plates, pre-made molds, milk cartons, pretty much anything you want. The type and number of plants you plan in the home should determine the size and shape of your planter.
Materials + Supplies:
- Cardboard boxes (2)
- Cardboard edge protectors (90 degree bends)
- Insulating tape (1/3 roll)
- Concrete or mortar mix
- Sakrete 5000+ Concrete Mixture
- Rocks/Sand/Heavy object
To mix the concrete:
- 5 gallon bucket
- Shovel/trowel
- Rubber gloves
Step 1: Tape for the boxes


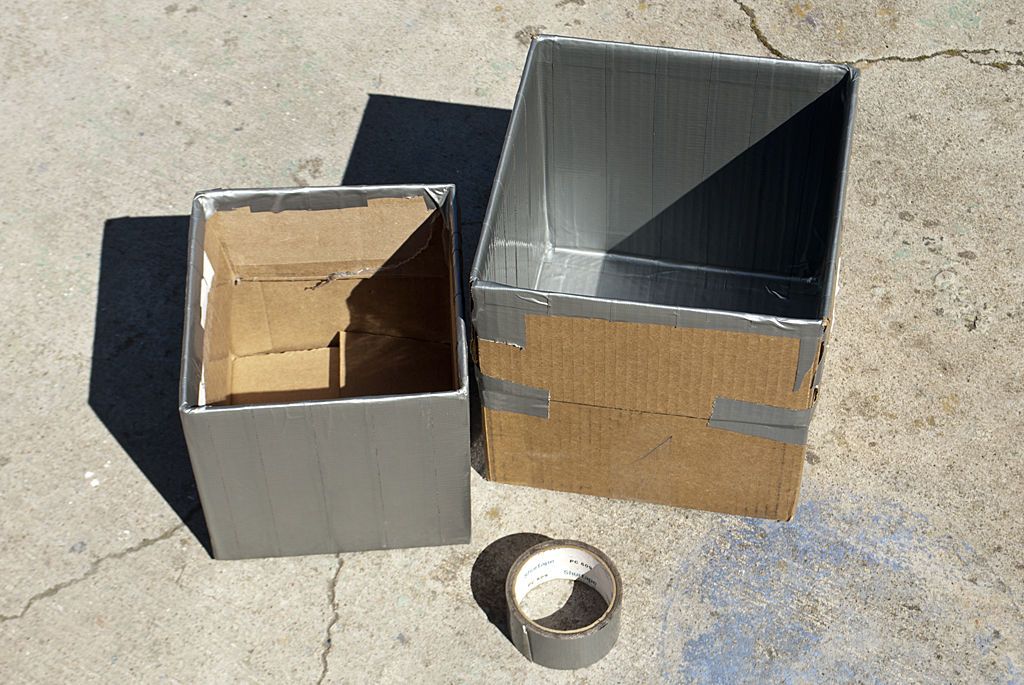


What makes a good cardboard box for this project:
- Must be heavy
- Rigid/Relatively New
- Not too big (12″x12″x12″ of concrete weighs over 135+ pounds, think about the pressure)
Less than ideal:
- Flimsy
- Dirty
- Thin cardboard
Look for two boxes that fit inside each other with a 1″ gap on all sides. More than 1″ and the box could be quite heavy, less than 1″ and it won't be as strong.
The biggest box:
- Fold the flaps outwards and tape them in place.
- Cover the inside edges of the box, especially the corners.
- Tape the entire inside of the box, with some overlap, in any pattern you like.
- Tape cardboard edges on the outside whenever possible to help strengthen the box.
- Add any decorations, such as leaves, rubber stamps, tile pieces, with spray adhesive.
The smallest box:
- Fold the flaps inward.
- Glue the outside of the box completely.
Place the smaller box inside the larger box. Lift the smaller box until there is a 1″ gap at the bottom. Make a mark on the small box, even with the edge of the larger box. When you make the mold, you will use this line as a reference to know how deep to push the smaller box down.
Step 2: Pour mixture and let dry
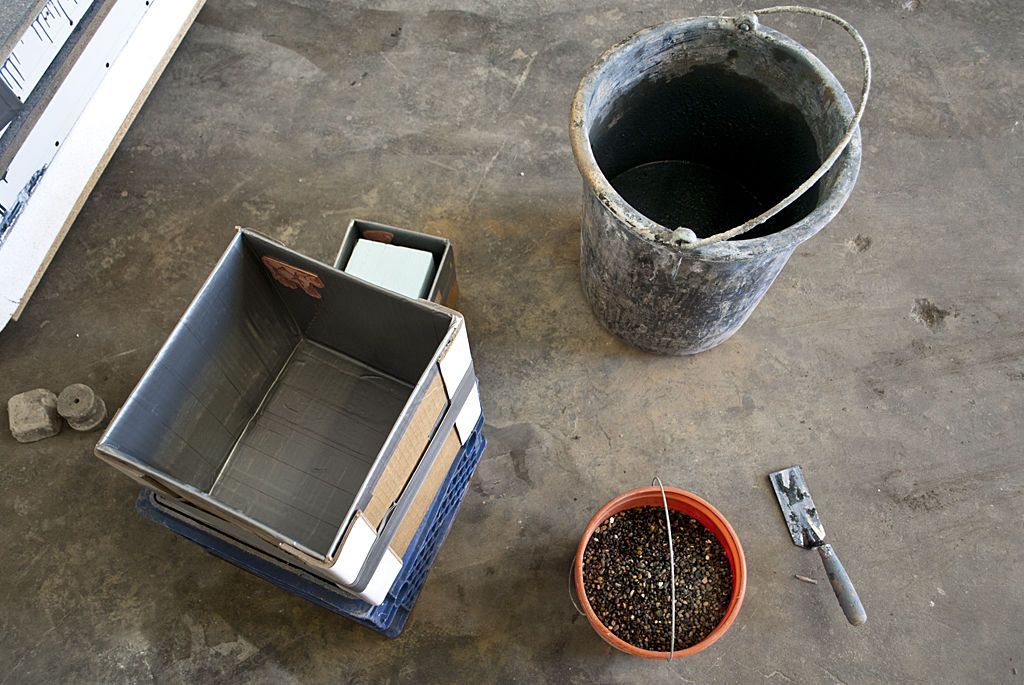


Mix concrete in a bucket or wheelbarrow. Crack-resistant concrete is your best bet. Pour the desired amount of concrete into the bucket or wheelbarrow, then add water and mix gradually, until it has a consistency similar to cake batter. Follow the instructions on the packaging.
Optional: Feel free to add decorative glass, pebbles, shells, beads or other materials as you see fit, as long as it does not drastically alter the consistency of the concrete mixes.
- Have the mortar ready and gradually add more water until the mixture has a good consistency (completely mixed, somewhat stiff and not too wet).
- Fill the large box halfway, then press the removable space down into the concrete and hold it there.
- Put something heavy (rocks, sand, weights).
- Continue adding concrete until you reach the top of the box.
- Continuously touch the sides of the box to help air bubbles rise to the surface.
- Cover with plastic to keep moisture in.
- Allow to dry for 4 days in a comfortable environment.
Step 3: Demoulding


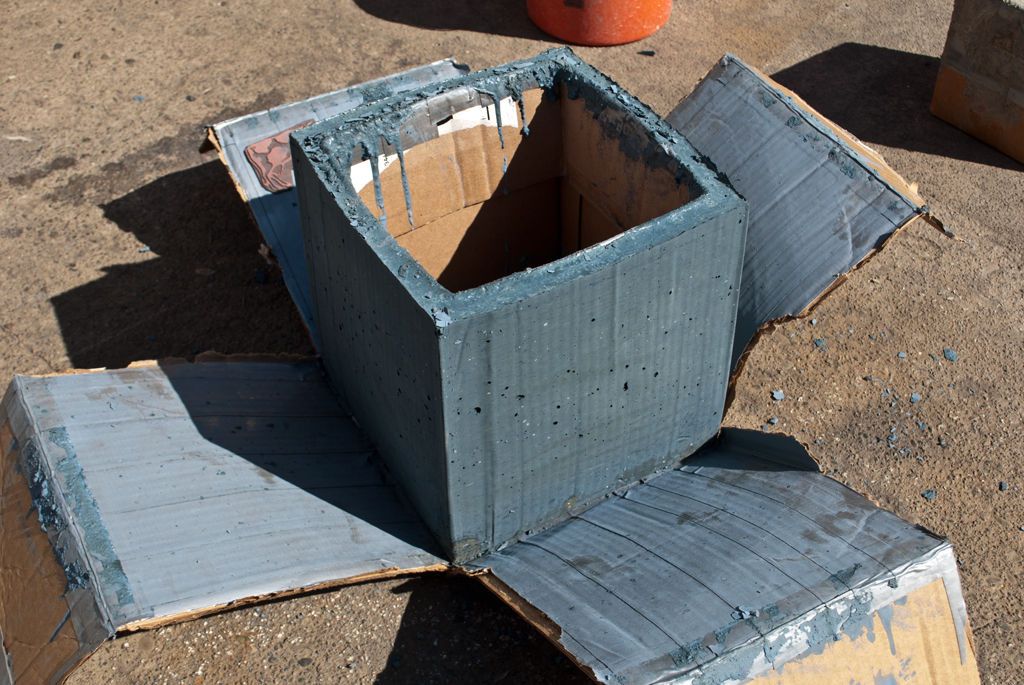


Removal is easy, just make sure the concrete has dried completely. If it has not dried for at least 2 days, it could be brittle and will break if you are not careful during these steps.
- On the larger box, tear or cut the cardboard at one corner.
- Repeat on the remaining corners until all walls are cut.
- Crush the smaller box away from the concrete and remove it.
- Sand any sharp edges with a diamond polishing pad.
- (Optional) Seal the concrete.
Step 4: Finished project
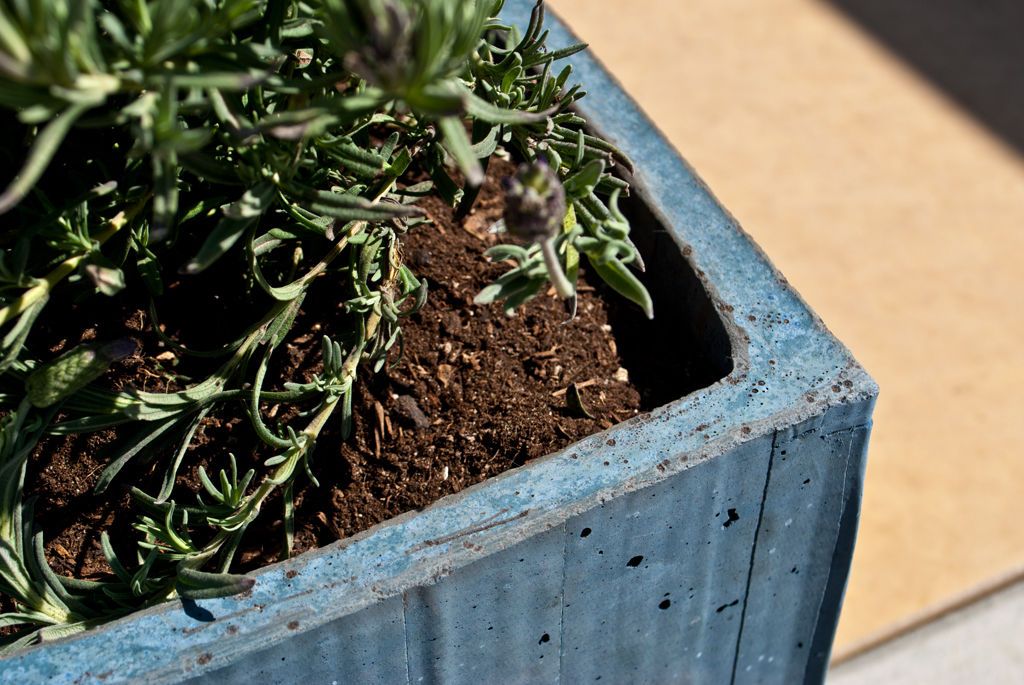


Using cardboard boxes as a forming material for concrete is excellent as they come in a wide variety of sizes and many shapes can be obtained.
The versatility of duct tape makes it ideal for temporarily waterproofing and reinforcing the cardboard box. I like this project because the formwork is rigid and the fabric looks good.
The concrete juts out from the cardboard walls in a subtle way, and each box you make will have its own unique character.
Variations:


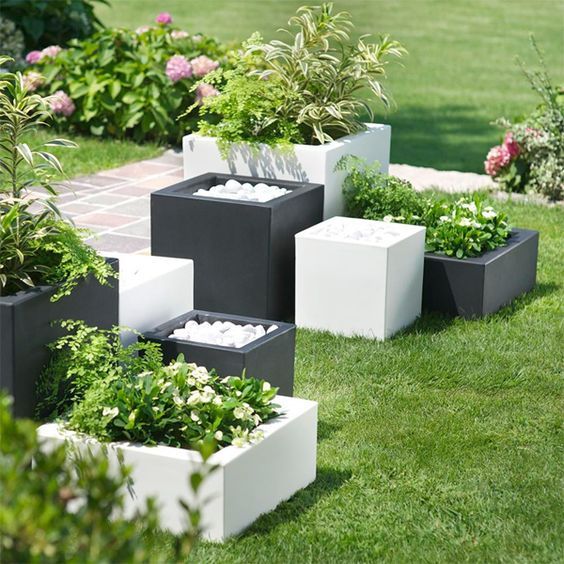
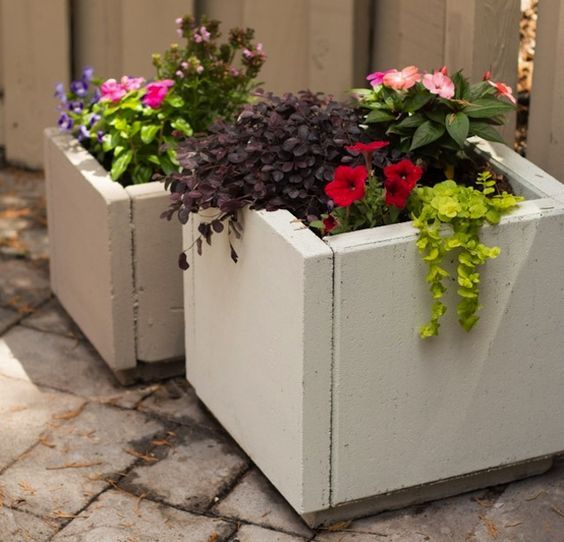

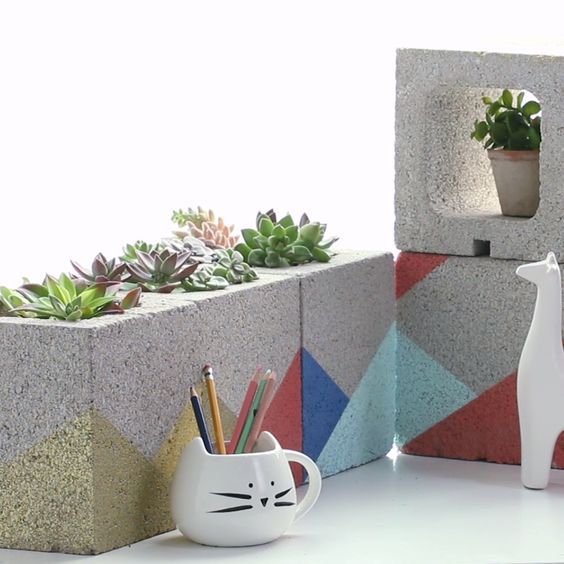


Get more information at perfectionidea.com and on our Facebook for more DIY with Cement: Box Shaped Planter.
- Tags
- Concrete
Popular Content
How to make a rocket stove for outdoors
Cardboard Drawers Lined with Jeans
Ideas and Advantages of Window Grilles for the Home!
Latest Articles
How to make a refrigerator out of insulating material: Practical step-by-step guide
How to make a Kilim for the Home: Complete Step by Step Guide
How to protect ourselves from accidents in our workplace: Complete prevention and safety guide
Related Content
Scaffold Storage System
Power Tool Storage with Charging Station
Build an Awesome Floating Picnic Table!
TV Panels with Reclaimed Wood
Creative Home Decor Ideas to Transform Every Space
Refreshing your home starts with smart design choices that combine comfort, personality, and functionality. Whether you want to modernize a small apartment, upgrade outdoor areas, or create cozy rustic interiors, these trending ideas can completely change the atmosphere of your space.
Outdoor Spaces That Increase Style and Functionality
Outdoor living continues to dominate modern home trends. Homeowners are increasingly investing in practical entertainment zones inspired by these BBQ shed ideas, which create the perfect setup for gatherings and weekend cooking sessions.
First impressions also matter when designing exteriors. Elegant farm entrance gates design ideas help properties stand out while improving privacy and curb appeal.
Compact living solutions are also gaining popularity. These inspiring 16x40 shed house interior design ideas show how smaller spaces can still feel luxurious and functional.
To enhance patios and entryways, homeowners are adding stylish protection with these creative porch awning exterior DIY ideas that blend aesthetics with practicality.

Rustic and Cozy Interior Design Trends
Warm and natural interiors remain timeless. These charming rustic decor ideas combine wood textures, vintage accents, and earthy tones to create welcoming spaces.
Bedrooms are becoming more personalized with curated wall arrangements. Many homeowners use these stylish picture wall ideas for bedroom spaces to display memories and artwork creatively.
Textured wall treatments are another major trend. Installing a board and batten wall adds architectural character while keeping interiors elegant and modern.
Similarly, bold accent wall ideas can instantly transform plain rooms into eye-catching focal points without requiring a full renovation.
Smart Kitchen and Organization Inspiration
Functional kitchens are essential for modern homes. These practical kitchen wall cabinet ideas maximize storage while maintaining a clean and stylish appearance.
Organization also starts at the entrance. Well-designed mud room ideas help families keep shoes, coats, and daily essentials neatly arranged.
Colorful and Personalized Home Styling
Vibrant interiors are becoming increasingly popular thanks to playful dopamine decor ideas that use bright colors and joyful accessories to improve mood and energy.
Gallery walls also continue to evolve as a major decorative feature. These trendy gallery wall inspiration ideas offer creative ways to combine prints, photos, and statement art.
Young renters and new homeowners are especially embracing these stylish first apartment aesthetic ideas to create sophisticated interiors on a budget.
Finally, selecting the right shades can dramatically influence any room’s atmosphere. These modern trendy color ideas help homeowners choose palettes that feel fresh, elegant, and timeless.
Final Thoughts
From rustic charm and colorful interiors to outdoor entertaining areas and functional storage solutions, today’s home decor trends focus on creating spaces that feel both beautiful and livable. By combining smart layouts, modern textures, and personalized decorative elements, any home can become more stylish, comfortable, and inspiring.
Browse the Shop
 Acacia frida deluxe solid wood bed frame |
Bedroom bench |
Bed chest drawers |
Lingerie dresser |
Frame base |
Mirror with jewelry storage |
30 Bathroom Vanity |
Memory foam queen mattress |
Mattresses for back pain |
Nightstand set of 2 |
Grand Goldman Shop |
Civil Lawyer
Deutschland Trikot WM 2026
Acacia frida deluxe solid wood bed frame |
Bedroom bench |
Bed chest drawers |
Lingerie dresser |
Frame base |
Mirror with jewelry storage |
30 Bathroom Vanity |
Memory foam queen mattress |
Mattresses for back pain |
Nightstand set of 2 |
Grand Goldman Shop |
Civil Lawyer
Deutschland Trikot WM 2026







