

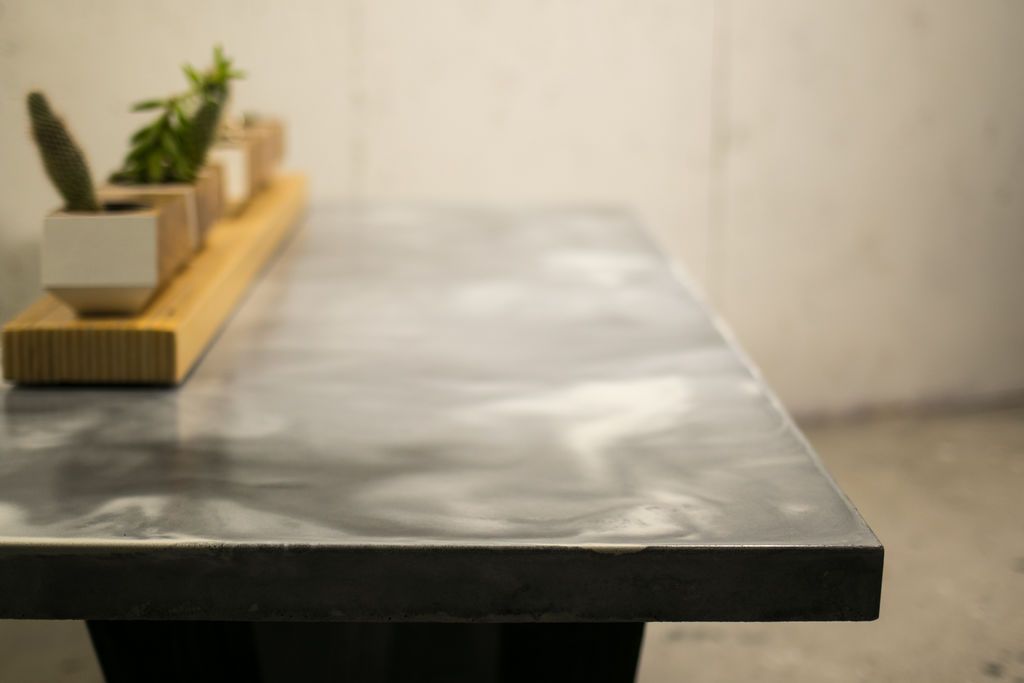
Carbonized Wood Marble and Concrete, the top is made with a precast concrete mix of glass fiber reinforced concrete (GFRC), which is prefabricated in a form of melamine. I separated batches of concrete of different colors (from white to dark gray), mixed them into the form, and then hand-turned them to get the marble look.
I also used an ancient Japanese technique called "Shou Sugi Ban" to make the base of the coffee table. I used a modernized version of shou sugi ban, using a propane torch to char the outside of the wood. This technique works well on any open grain wood, such as Douglas fir, pine, and cedar. I used inexpensive 4x4 Douglas Fir lumber from my local big box store.
Find Bleeding Edge Supplements at Scandalous Prices on iHerb.

Step 1: Materials
- Three (3) 8 feet. 4×4 Cedar or pine
- 3/4″ Plug
- 4′ x 8′ sheet of melamine for concrete form
- Two bags of pre-mixed GFRC mixes (or whatever you prefer)
- 1.5 Bag of AR glass fibers
- Concrete mixer
- Concrete sealant and 100% black silicone sealant
- Wax
- Concrete pigment
- Propane Gas Torch
- Danish oil
- Dust mask
- Diamond grinding wheel
- Level
- Kreg Pocket Hole Jig
Tools:
- Angle grinder
- Miter Saw, 18V Cordless Circular Saw, Table Saw w/32 and Japanese Flush Cut Hand Saw
- 18V Cordless Drill and Impact Driver Kit
Step 2: Make the wooden base from 4×4 wood
The base is made of 8 pieces of 4×4 wood. I ran all of the 4x4 lumber through my planer on all 4 sides to get each piece to exact dimensions of 3.5″ x 3.5″. However, this is definitely optional. You can use the 4x4s as is - do your best to choose straight wood. You will need three (3) 8′ 4x4s for this table base.
The eight pieces (shown in the attached image) are:
- 4 Legs (A)
- 2x External Extenders (B): each of these goes between two legs
- 2x Internal stretchers (C)
All your angles will be cut at 36 degrees. However, I recommend cutting all of your 4x4 pieces to a rough length (e.g. 4″ or longer than necessary), then set your miter saw to 36 degrees to make the rest of the cuts.
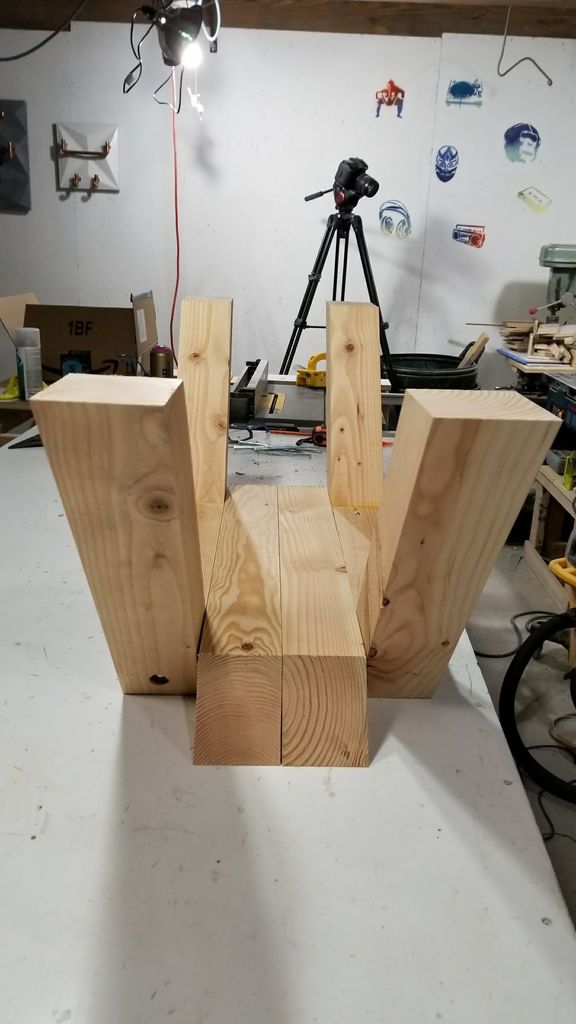
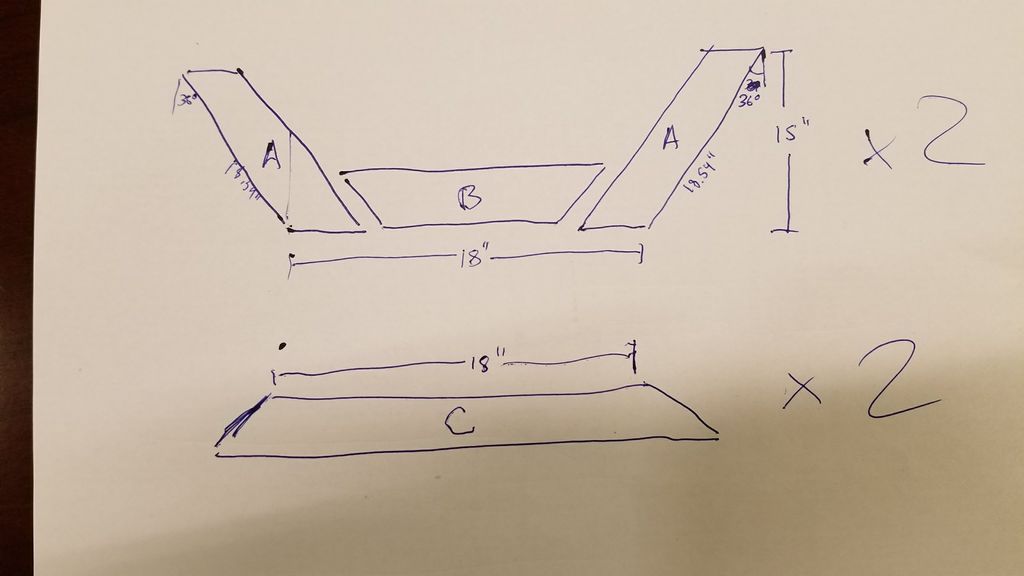
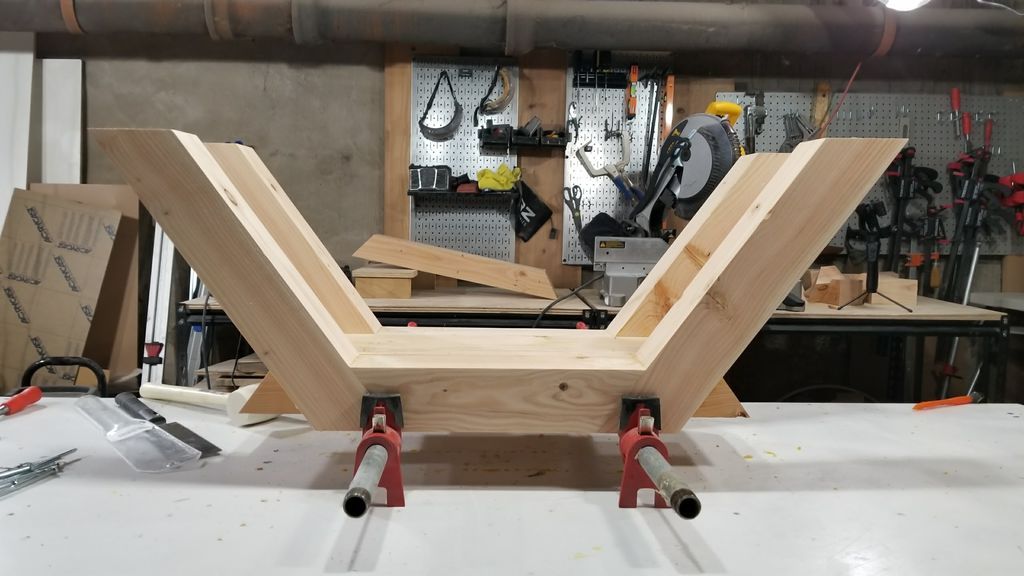
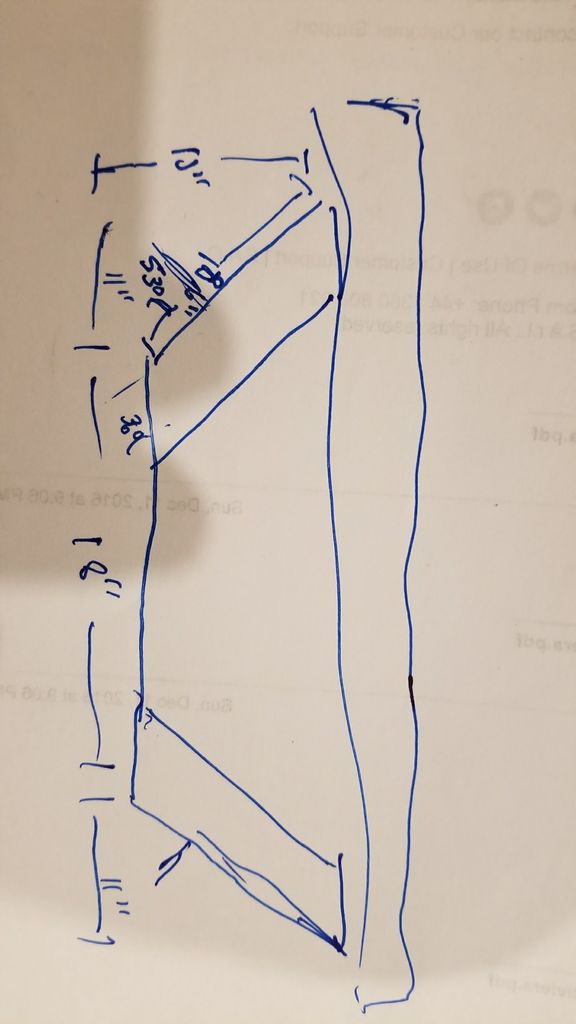
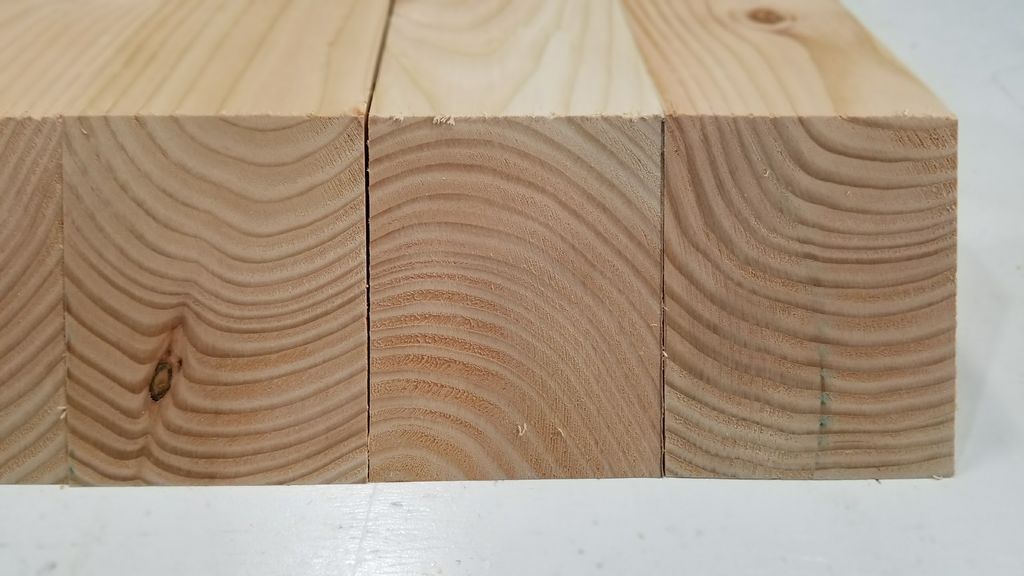
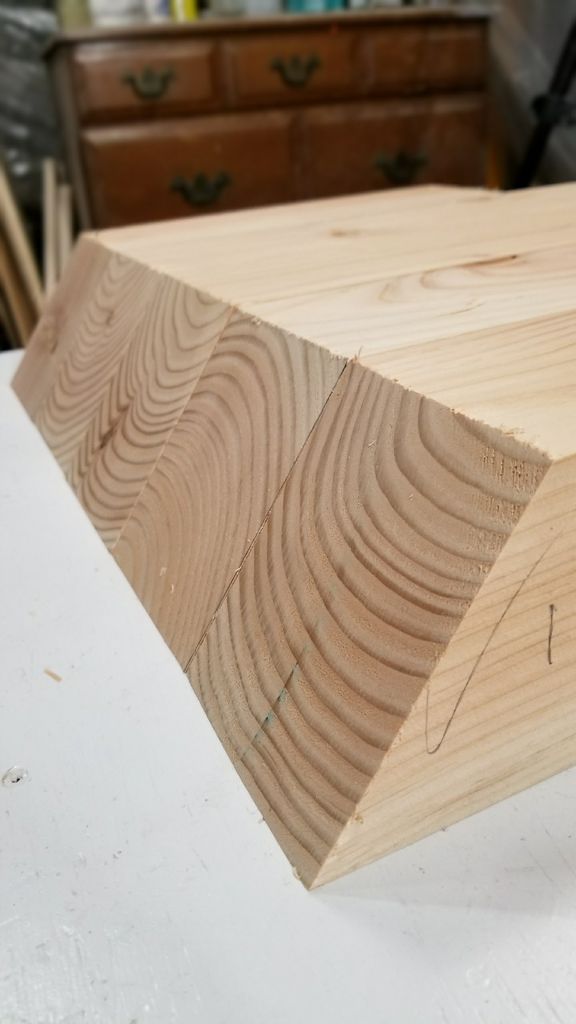
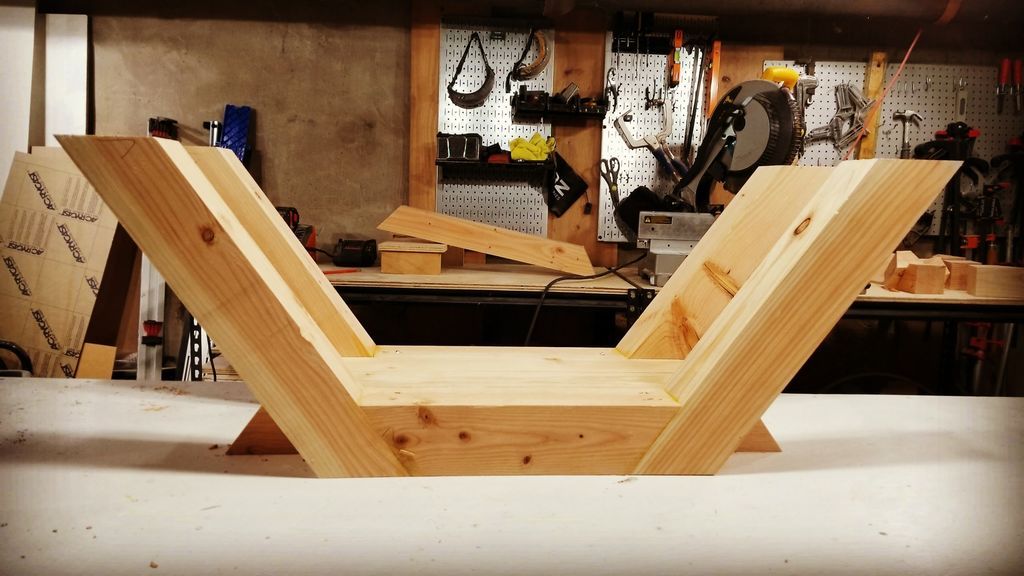
Cut off the four legs (A) first. Instead of trying to do trigonometry and get the exact length, I recommend making a 36 degree cut, then clamp the leg so the angled end rests on a table, measure 15″ perpendicularly up the table (or whatever you want the height of your base to be), mark it on the leg, then make the second 36 degree cut. Then use this leg to cut off the other four legs.
Cut your two outer stretchers (B) next. To do this, I simply lifted two legs with the scrap leg cutouts (which will be angled exactly to support the legs from the sides), and move the legs until the distance between the tops of the legs is desired (for example, I wanted 42″). Then measure the distance between the bottom ends of the legs, and this is the shortest length (e.g. bottom length) for your outer stretchers (B).
Then use your saw to cut two pieces with 36 degree cuts, so the length of the shorter side is what you just measured. Now cut your two inner stretchers. To do this, put together two legs and an external stretcher (again, scraps from angled cuts work well to hold the legs up). Place a piece of rough-cut interior stretcher next to it and mark the location of the angled cuts, then use the miter saw to cut them.
After you cut the 8 pieces, you will glue them together. Ideally, you should make a clamping jig for the internal angle of 144 degrees andbetween each leg and the external stretcher. However, I just applied glue, and used screws to hold the legs and stretchers together while the glue dried.
After the glue dried, I added a 6″ lag screw to the outside of each leg (parallel to the floor) to secure the leg to the inner stretcher. To do this, I first drilled a 3/4″ hole for the screw head to insert, then drilled a 1/4″ pilot hole in the box, and then inserted the lag screw. I then used 3/4″ dowels to fill the holes and cover the lag screw heads, and cut the dowels with a flush saw. Lastly, I used a belt sander to sand the base stretcher pieces flush and sand the pegs. Then it was time to burn.
Step 3: Burn the wood!
This is the fun part! Simply follow the instructions on your flashlight to connect it to the propane tank. It's actually pretty safe, but you should have a fire extinguisher on hand, just in case.
There's not much to it. Make sure the hottest part of the flame (the tip of the blue part) touches the wood, and watch it start to brown, then blacken. Stop when it looks the way you want, and then spray it with water. (I just used a spray bottle.) Then use a brush to lightly brush any ashy gray parts.
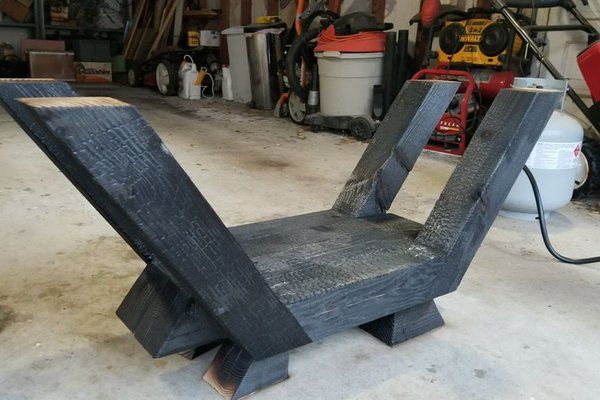
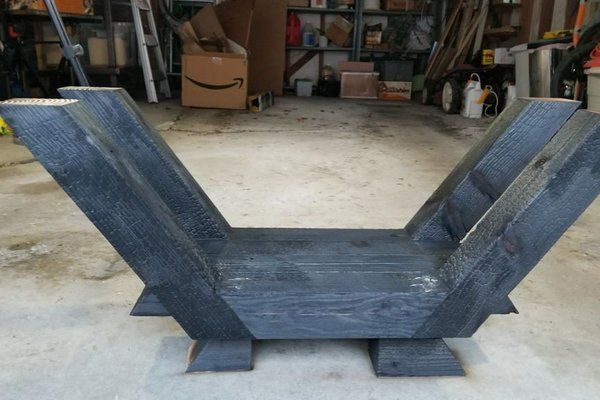
After it cools a bit, apply an oil finish. I used Danish oil because it penetrates the wood and hardens inside. This made the charred wood more durable. Be prepared to use A LOT of oil.
The process actually dries the wood and opens it up, and you're already dealing with an open soft wood, so it absorbs a surprising amount of oil. I did three heavy coats of oil, and I could still go back for another.
Step 4: Build the melamine shape
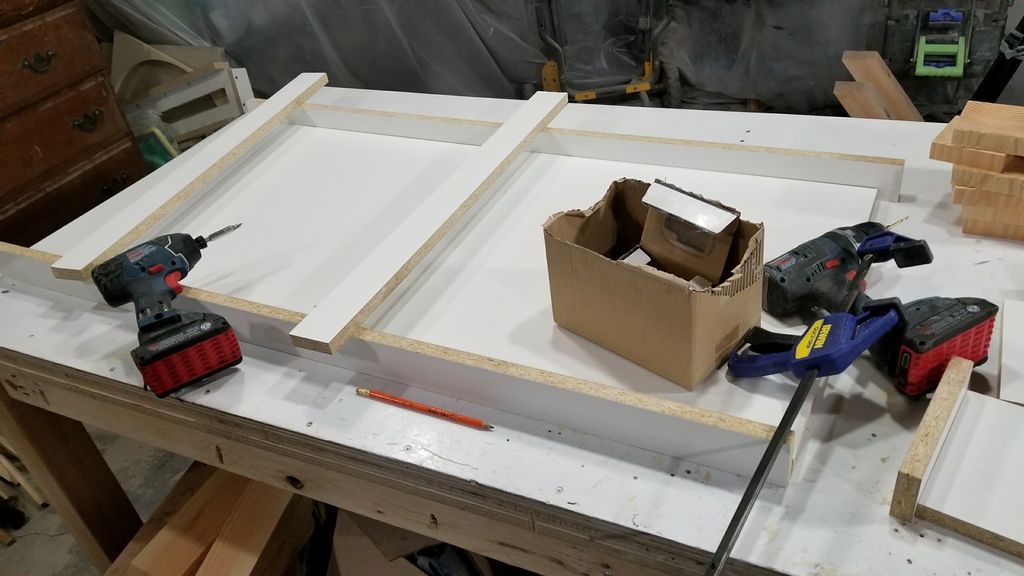
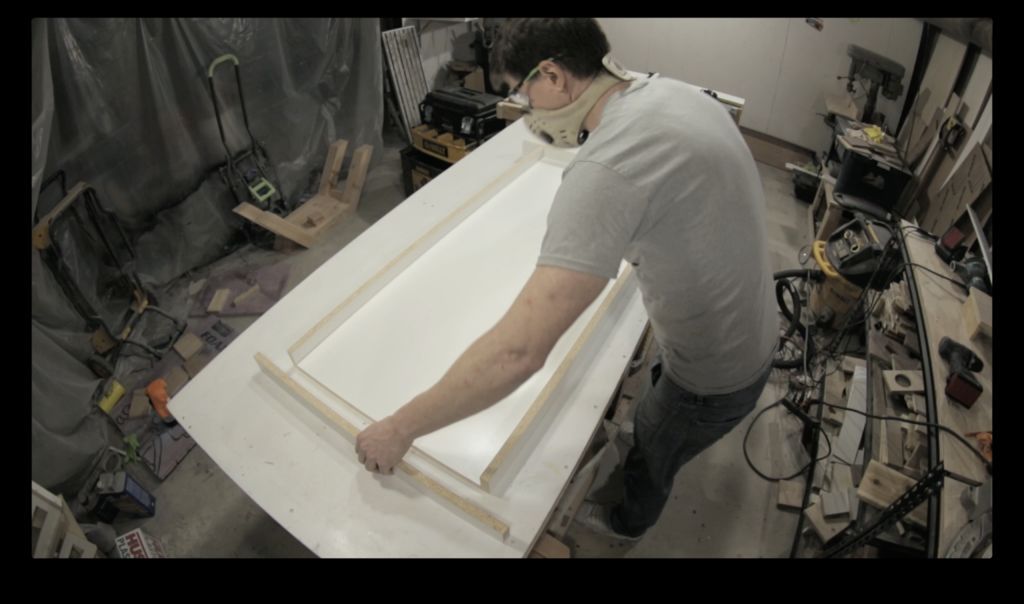
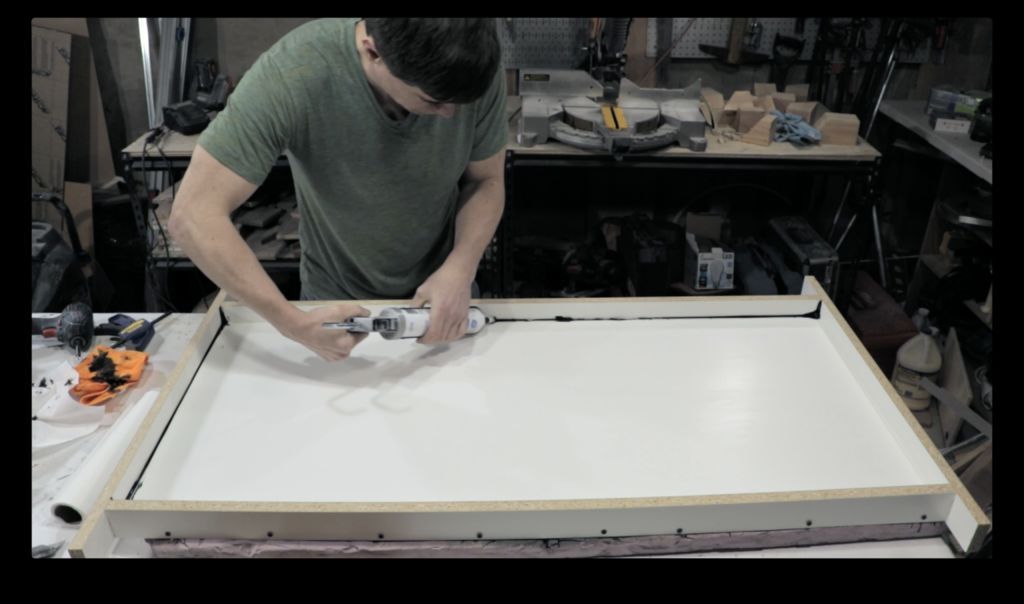
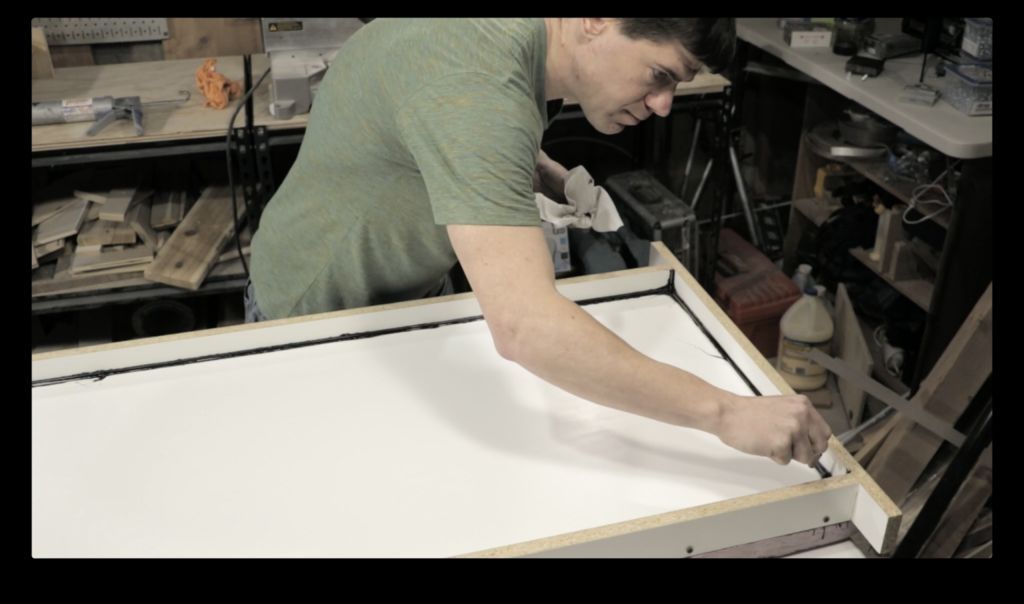
This is a pre-made design, so the table is thrown upside down.
To make the base, you will need to do the following:
- Cut strips of melamine for the sides of your form at the height of your table + 3/4″. In my case, the table was 1.5″ thick so the sides were cut to 2.25″. It is easiest to cut these strips on a table saw, but it can be done with a circular saw if you are very careful to make cuts consistently. Cut all the strips at once, so that the height is identical. Then use your miter saw to cut the strips to the length you need. Cut each side a few inches longer than the base (for example, 17″ or more for a 14″ side of the table). The extra projection gives you leverage to separate the sides of the concrete when it is removed.
- Cut a melamine base piece to the size of your table, in my case 48″ x 21″.
- Drill holes in the sides, and then screw the sides to your base. I used 1.25″ drywall screws for this.
- Apply paste wax to the inside of your form and to the bottom/side of the slab.
- Seal the inside edges with black silicone caulk, then place a metal ball tool around the edges to give you a perfect caulk line, let it dry, and then remove the excess caulk on either side of the line.
IMPORTANT: You will need to make 2x4 stretchers to hold foam inserts so they can connect mid-pour.
Step 5: Cut the foam inserts for the concrete
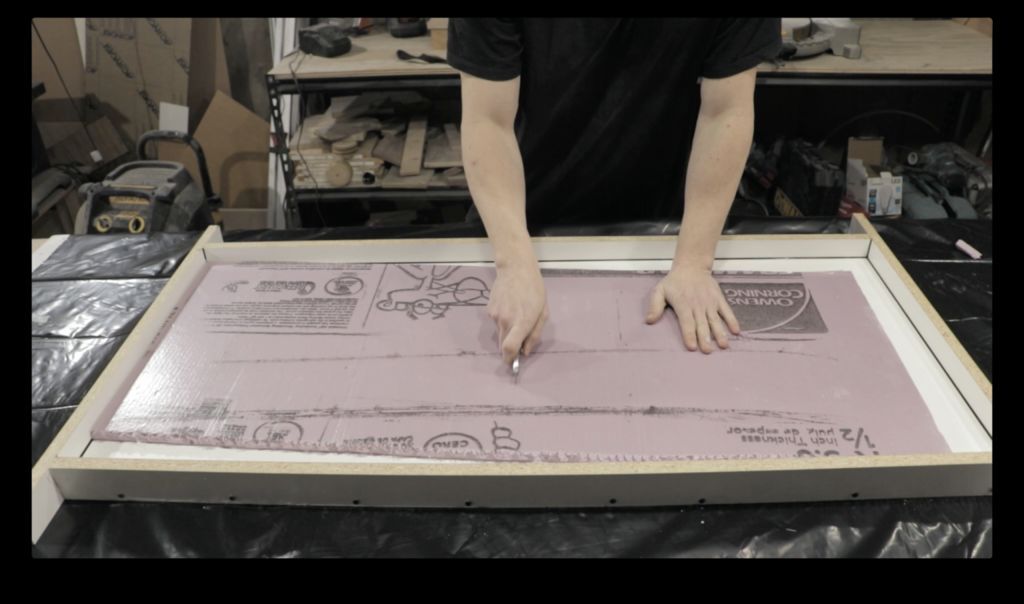
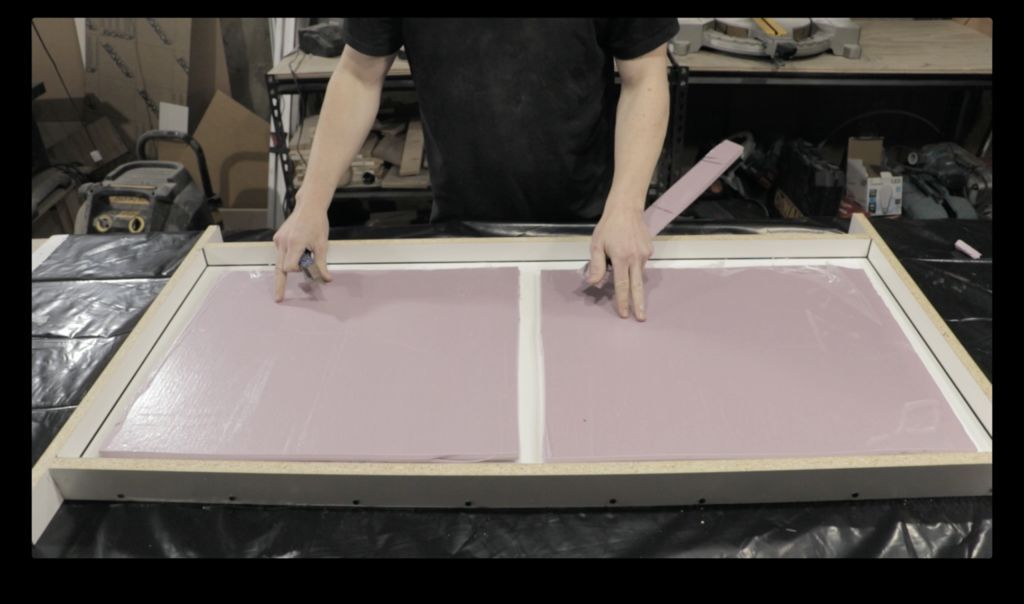
You will cut the 1/2″ pink foam insulation inserts to fit inside the form, so the concrete is only 1″ thick (except on the sides, where it is a total thickness of 1.5″). Simply use a knife to score the foam sheet so it is about 3-4″ less than the size of the table in both directions. After scoring the foam, it is easily adjusted by hand. If you want it precise, you can also cut the foamwith a circular saw or table saw.
Step 6: Mix and pour the concrete
For this project, I used a just-add-water glass fiber reinforced concrete (GFRC) mix. You mix it by adding 1 gallon of water for every 50 pounds (one bag) of mix. Simply adjust the ratio for your tile size, allowing for approximately 10 lbs of mix per square foot of tile (err on the side of having more than necessary). I used two 50 lb bags for this project. I set aside 20 pounds to use as a face layer (without fiberglass) and the remaining 80 pounds to use as a backing layer (with fiberglass). I only used 1.6 pounds of fiberglass for the 80 pounds.
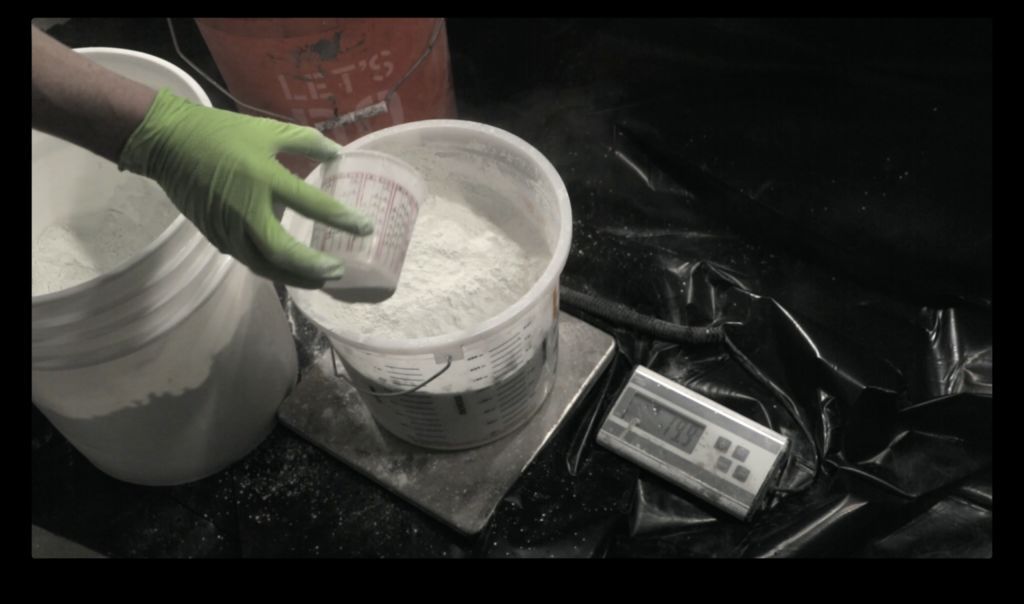
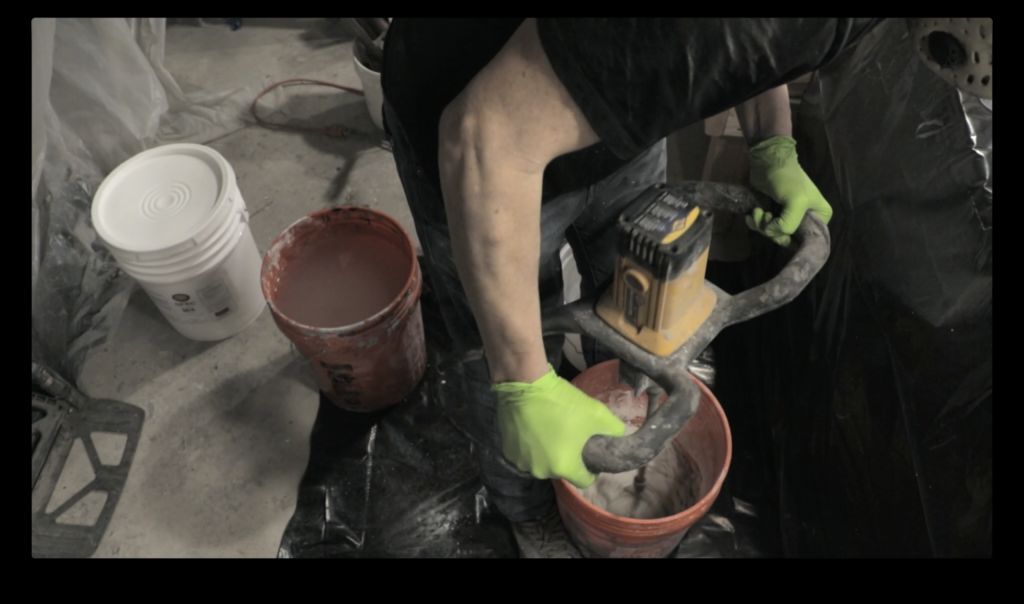
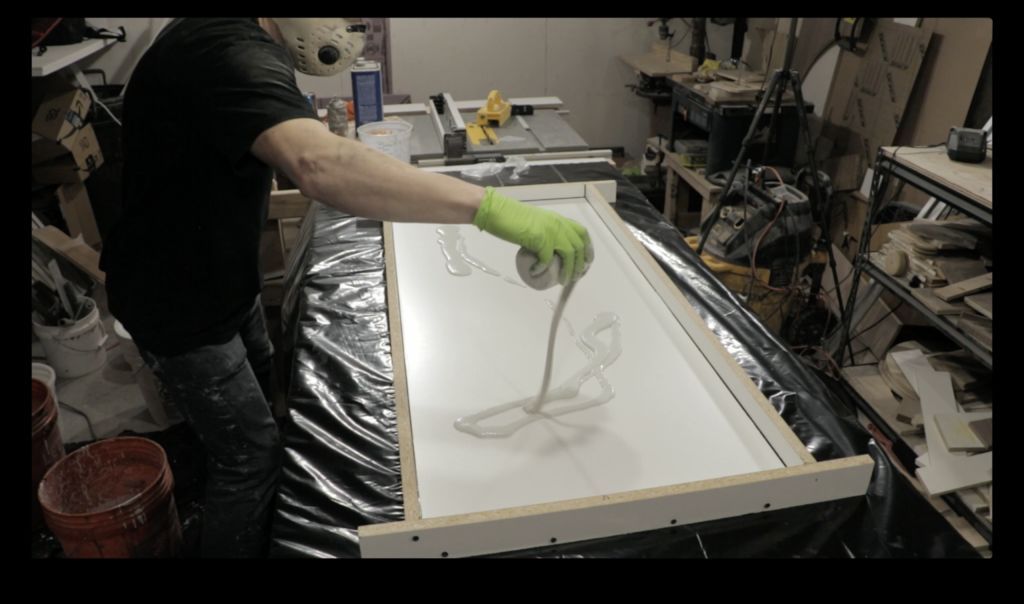
When mixing the face coat (and back coat), add the concrete mix slowly to the water. For example, add one third of the mixture, then mix, add another third of the mixture, mix, and so on. You can add a little more water (but not too much) if you need to make it thinner. The face layer should be like dripping pancake batter.
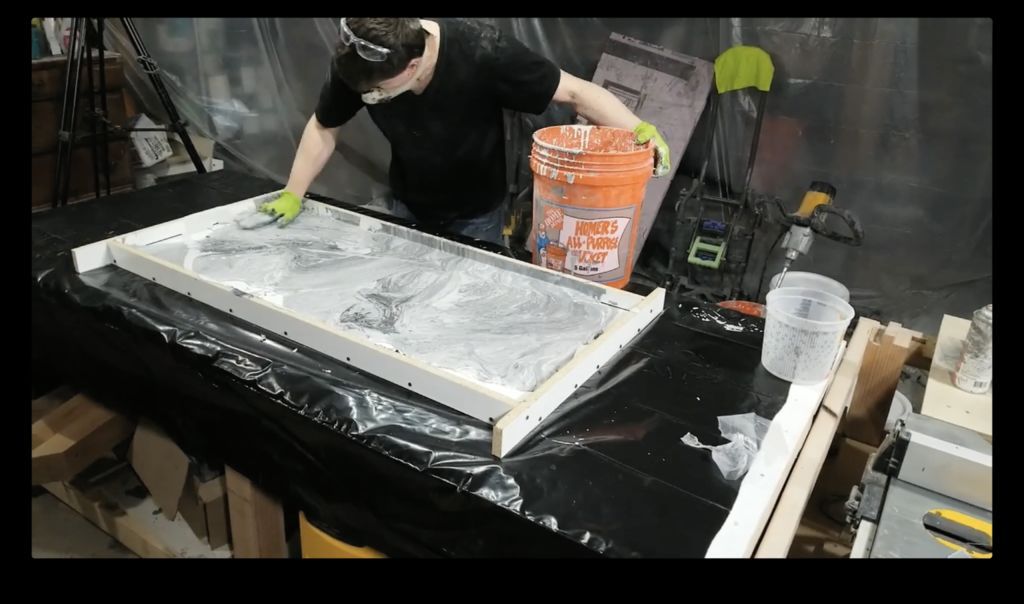
To get the marble look, I separated three smaller paint cups filled with the pure white mixture. I added a lot of pigment to a cup of paint so it was really dark gray (almost black). I then added some pigment to the remaining face coat in the main mixing bucket, and mixed it lightly so that the concrete in the bucket had a swirled appearance. I then added the three color variants and swirled it by hand until it covered the entire concrete shape in a thin layer (25″ or less).
Simply shake it by hand until you get the look you want. Then let it rest. for 30 minutes to an hour (no matter how long it takes to sit, but still slightly damp to the touch. If you want it firm enough, the back coat is not pushed through the face coat, but is still wet, so the back coat will attach to the face coat.
Then mix the back layer the same way, except after it has been mixed, add about 1 lb of glass fibers per 50 lb bag (or 1.6 lb per 80 lb in this case). Add fiber slowly, for example a third at a time. Add water if necessary to get the mixture so you can pour it directly from the bucket into the mold. Pour it in and use your hands to work in the edges and corners, making sure it covers everything.
Again, no need to vibrate. If you made your mixture flow (so that it flows easily), it will self-level. Add some of the backcoat without any pigment (for example pure white), then shake the pigment into the rest of the backcoat in the bucket, so it mixes unevenly. Then, pour the back layer until it is about 1″ tall in the form. At this point, add the foam, and screw the 2x4 stretchers on top of the foam to keep it down. Then pour the remaining back layer to fill the mold.
Step 7: Grind the bottom of the form
Let it sit for at least 24 hours (36 hours if below 70 degrees). So, if the concrete has gone along the edges of the form, you will want to use an angle grinder with a diamond abrasive to grind down the bottom, before removing it from the form. It is important to do this before removing the top of the form, so that you can use the sides of the form as a guide to grind the bottom evenly on all sides.
Step 8: Remove Concrete, Sand and Seal
After polishing the bottom so that it is even with the edges of the form on all sides, it is time to undo the top of the table. Simply unscrew and detach the form. If the side walls do not come off easily, use a rubber or wooden mallet to gently tap the sides of the form away from the concrete.
If you turned the piece over before removing them, it should be fairly easy to remove the bottom part of the form (which is now on top). If it doesn't come off, use a plastic putty (not metal or anything sharp that will scratch the concrete!) to gently pry up the bottom. If it is really difficult, then there is probably a gap between the form andthe concrete. In this case, you can use an air gun connected to your air compressor to shoot air between the form and the concrete. This will break the seal created by the vacuum, so you can remove the background of the shape.
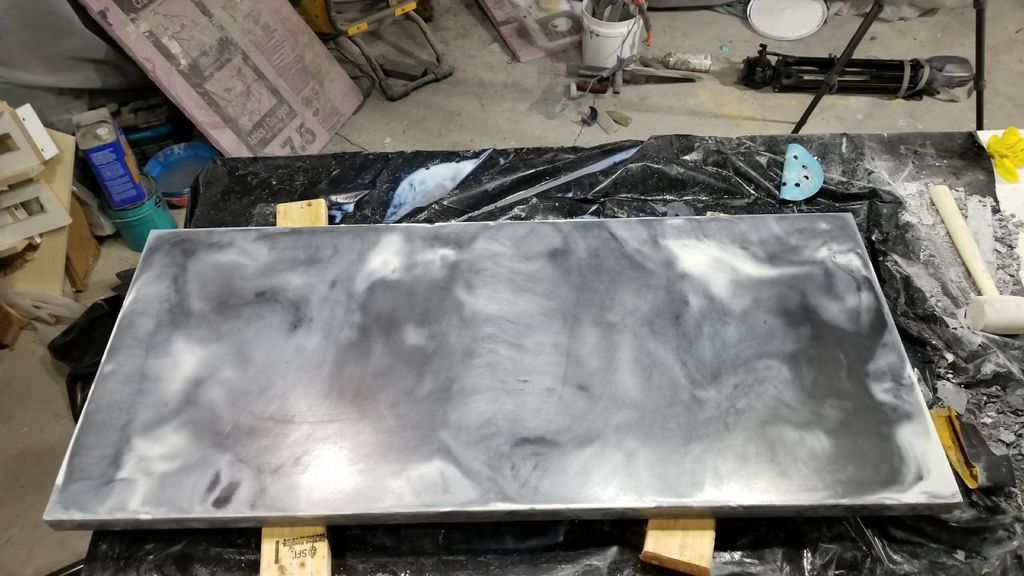
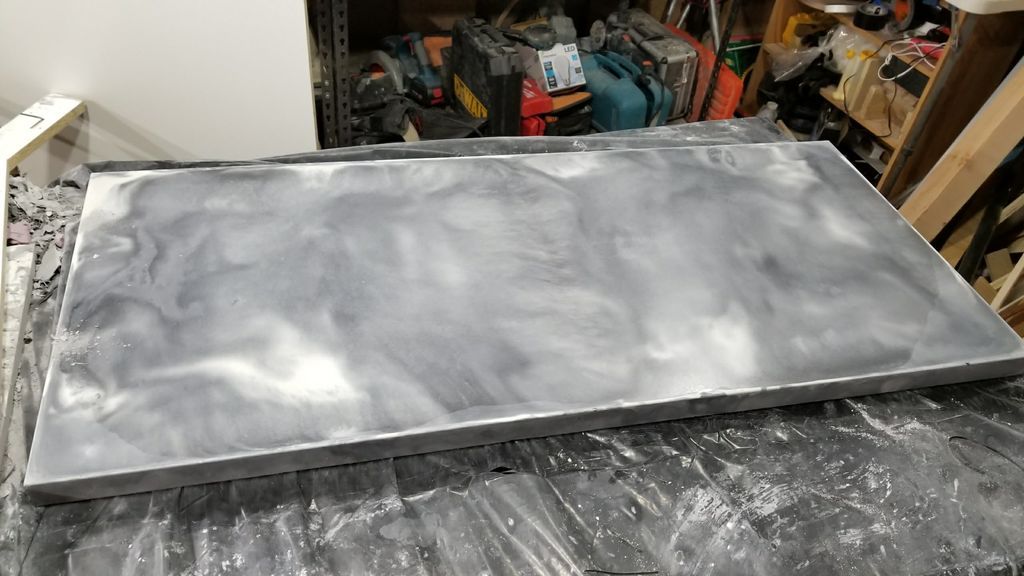
Then, given all the service, a quick wet sand, by hand, with 400 grit sandpaper. Just sand until it feels smooth a little. You will feel it when you have removed the texture of the melamine, which is all you need to do. Next, apply a concrete sealer of your choice. Simply follow the instructions that come with your sealant.
Step 9: Place the base of the table and the top. Ready!
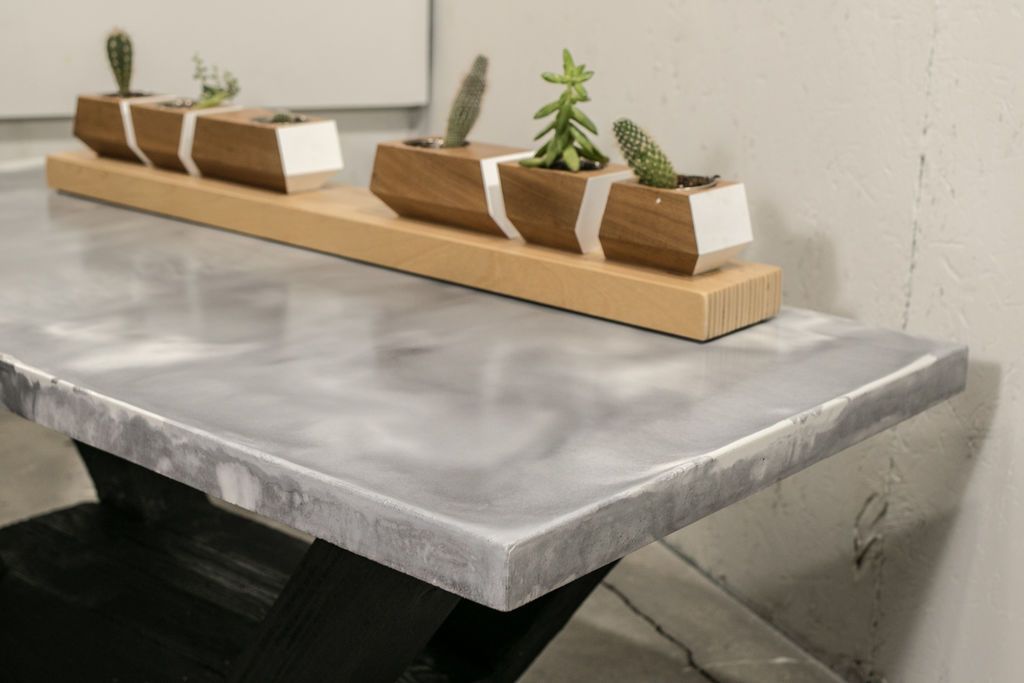
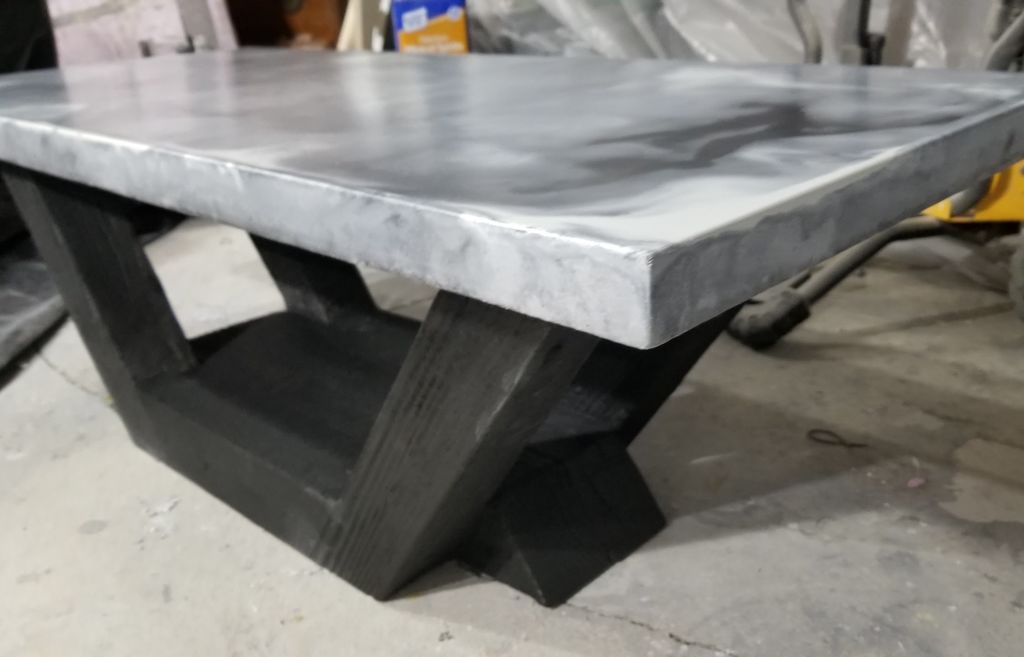
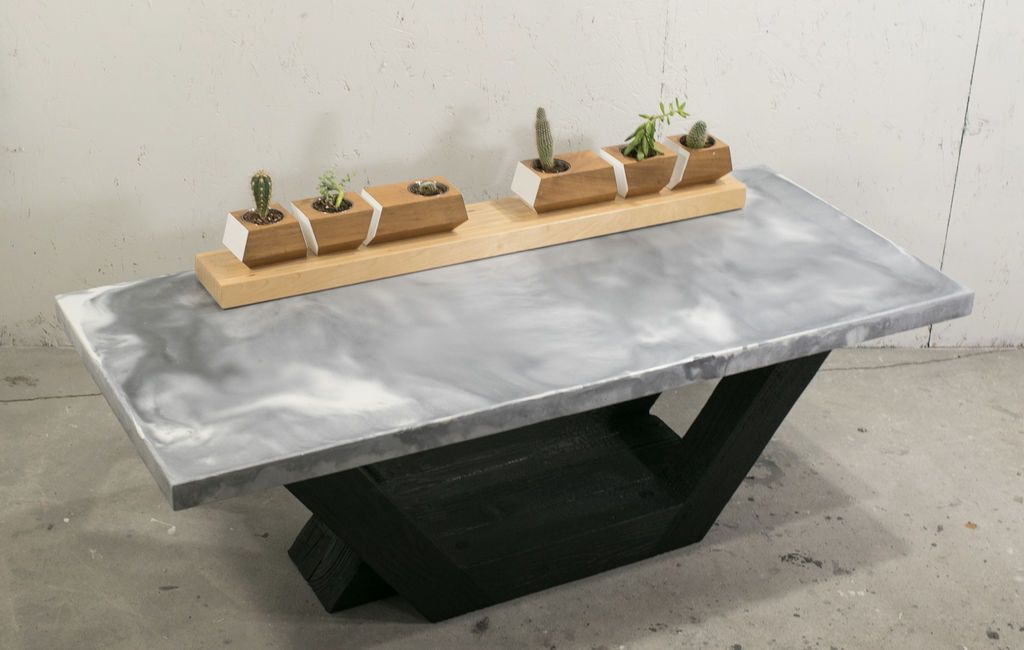
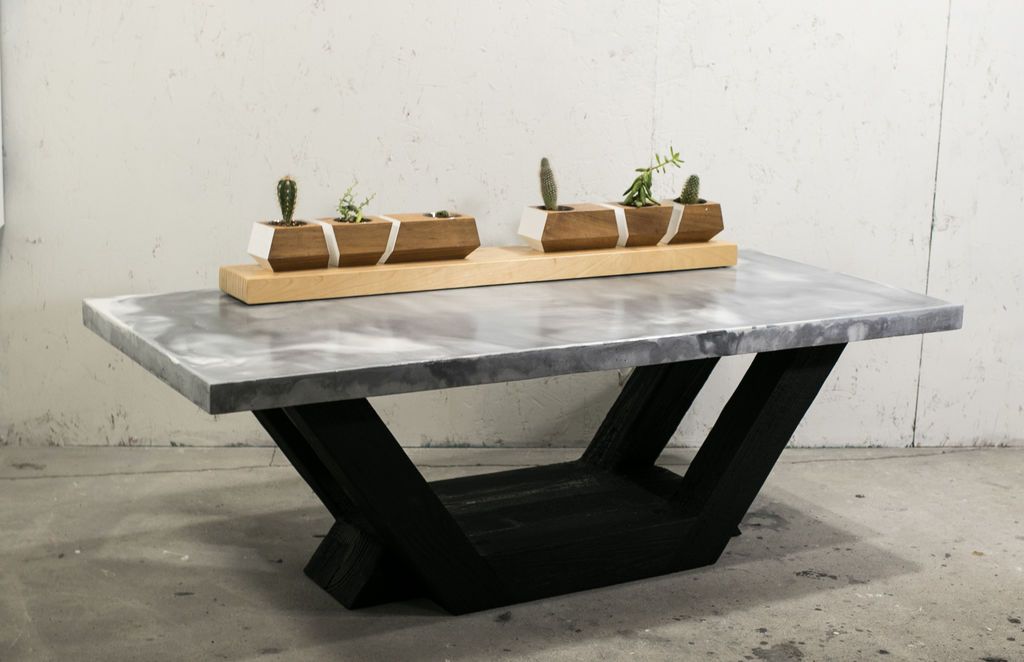
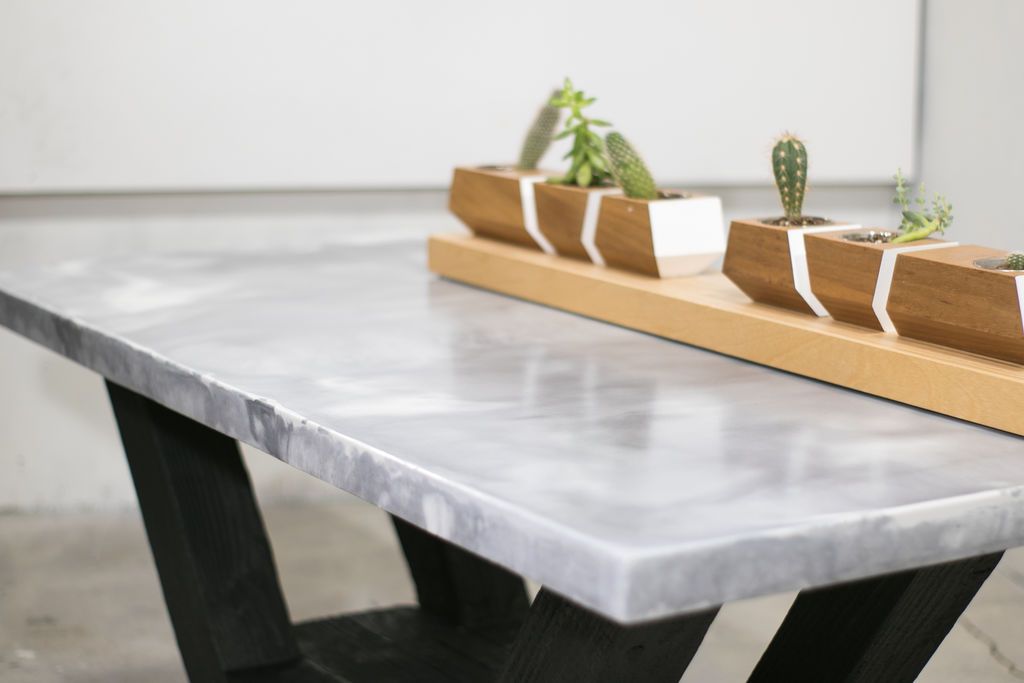
Place the table top on the base and align it so that it is perfectly centered. Carefully lift one side at a time and add construction adhesive to the top of the legs (basically the same way you would with a countertop). Before the adhesive sets, double check and make sure the top of your table is centered over the base (and adjust if necessary). Thanks for visiting us! Greetings!
Get more information at perfectionidea.com and on our Facebook for more Carbonized Marble and Concrete Wood.
Popular Content
How to make a rocket stove for outdoors
Cardboard Drawers Lined with Jeans
Ideas and Advantages of Window Grilles for the Home!
Latest Articles
How to make a refrigerator out of insulating material: Practical step-by-step guide
How to make a Kilim for the Home: Complete Step by Step Guide
How to protect ourselves from accidents in our workplace: Complete prevention and safety guide
Related Content
3 Simple and Practical Projects You Can Do with PVC Pipes!
Most Popular Stone Pieces to Create Paths in the Garden
Wood and Epoxy Hanging Table for a Living Room!
Mobile Shelf for your Woodworking Tools!
Creative Home Decor Ideas to Transform Every Space
Refreshing your home starts with smart design choices that combine comfort, personality, and functionality. Whether you want to modernize a small apartment, upgrade outdoor areas, or create cozy rustic interiors, these trending ideas can completely change the atmosphere of your space.
Outdoor Spaces That Increase Style and Functionality
Outdoor living continues to dominate modern home trends. Homeowners are increasingly investing in practical entertainment zones inspired by these BBQ shed ideas, which create the perfect setup for gatherings and weekend cooking sessions.
First impressions also matter when designing exteriors. Elegant farm entrance gates design ideas help properties stand out while improving privacy and curb appeal.
Compact living solutions are also gaining popularity. These inspiring 16x40 shed house interior design ideas show how smaller spaces can still feel luxurious and functional.
To enhance patios and entryways, homeowners are adding stylish protection with these creative porch awning exterior DIY ideas that blend aesthetics with practicality.

Rustic and Cozy Interior Design Trends
Warm and natural interiors remain timeless. These charming rustic decor ideas combine wood textures, vintage accents, and earthy tones to create welcoming spaces.
Bedrooms are becoming more personalized with curated wall arrangements. Many homeowners use these stylish picture wall ideas for bedroom spaces to display memories and artwork creatively.
Textured wall treatments are another major trend. Installing a board and batten wall adds architectural character while keeping interiors elegant and modern.
Similarly, bold accent wall ideas can instantly transform plain rooms into eye-catching focal points without requiring a full renovation.
Smart Kitchen and Organization Inspiration
Functional kitchens are essential for modern homes. These practical kitchen wall cabinet ideas maximize storage while maintaining a clean and stylish appearance.
Organization also starts at the entrance. Well-designed mud room ideas help families keep shoes, coats, and daily essentials neatly arranged.
Colorful and Personalized Home Styling
Vibrant interiors are becoming increasingly popular thanks to playful dopamine decor ideas that use bright colors and joyful accessories to improve mood and energy.
Gallery walls also continue to evolve as a major decorative feature. These trendy gallery wall inspiration ideas offer creative ways to combine prints, photos, and statement art.
Young renters and new homeowners are especially embracing these stylish first apartment aesthetic ideas to create sophisticated interiors on a budget.
Finally, selecting the right shades can dramatically influence any room’s atmosphere. These modern trendy color ideas help homeowners choose palettes that feel fresh, elegant, and timeless.
Final Thoughts
From rustic charm and colorful interiors to outdoor entertaining areas and functional storage solutions, today’s home decor trends focus on creating spaces that feel both beautiful and livable. By combining smart layouts, modern textures, and personalized decorative elements, any home can become more stylish, comfortable, and inspiring.
Browse Grand Goldman Shop
rocking chair office | teak wood rocking chair | mid century rocking chairs | cream sectional couch | plush couch sectional | hockey game table top | foldable game table | game tables for basement | spa luxe electric lift massage table | sierra comfort massage table | pregnancy massage table | wooden office chair | vintage office chairs | vintage leather office chair | office safe | under bed gun safe | wall gun safe | rv bathtub | wooden soaking bathtubTwin bathtub | two person infrared sauna | 2 person steam sauna | one person infrared sauna | 20 inch bathroom vanity | 36 bathroom vanity with top | bathroom storage | rustic bathroom decor | 48 inch bathroom vanity top | vanity chairs for bathroom | 48 inch bathroom vanity top | teak shower stool | shower door seal strip | sliding shower chair | cecotec secador | Abogados trafico de drogas
Browse the Shop
 Acacia frida deluxe solid wood bed frame |
Bedroom bench |
Bed chest drawers |
Lingerie dresser |
Frame base |
Mirror with jewelry storage |
30 Bathroom Vanity |
Memory foam queen mattress |
Mattresses for back pain |
Nightstand set of 2 |
Grand Goldman Shop |
Civil Lawyer
Deutschland Trikot WM 2026
Acacia frida deluxe solid wood bed frame |
Bedroom bench |
Bed chest drawers |
Lingerie dresser |
Frame base |
Mirror with jewelry storage |
30 Bathroom Vanity |
Memory foam queen mattress |
Mattresses for back pain |
Nightstand set of 2 |
Grand Goldman Shop |
Civil Lawyer
Deutschland Trikot WM 2026







