

This DIY wine bottle rack looks like a simple double grid, but it's actually made from individual modules of two pairs of slats plus a connecting piece in the center. The advantage of this solution is its great configuration versatility—you can stack and side-by-side modules to create a low and long piece, narrow and tall, wide and tall, or even triangular or U-shaped forms. Perfect for customizing your home improvement projects.
DIY Wine Bottle Rack – Step-by-Step Construction
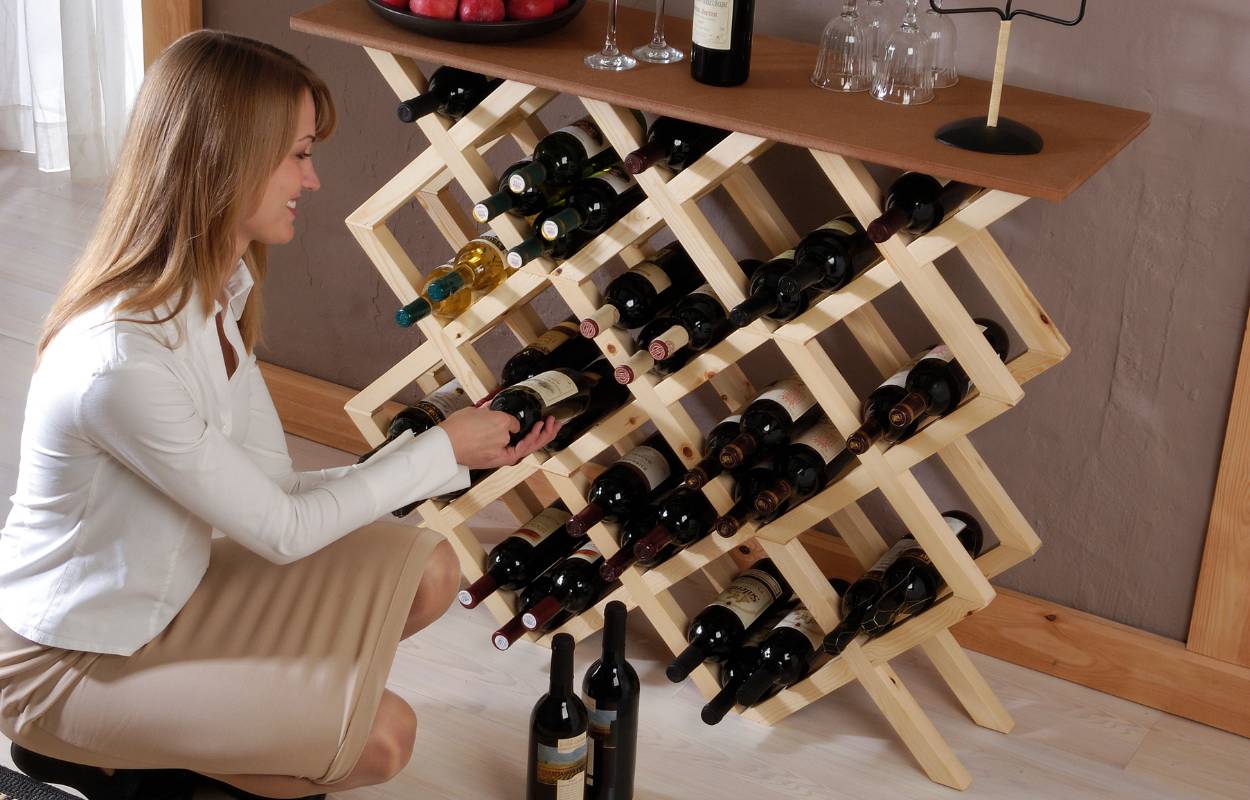
Each construction module consists of four slats with a 33×33 mm section, all the same length and with ends cut at 45°. Pairs of slats are joined at a 90° angle with a half-lap joint, then each pair is connected to another via a slat fixed at the center of the cross. Each module can be joined to a module placed above using 4 beech dowels (one for each slat) placed vertically on the 45° cut face.
Find Bleeding Edge Supplements at Scandalous Prices on iHerb.

The construction is simple and presents no difficulty, but requires great precision to obtain identical modules so that the joints and connections of the whole fit together perfectly. For this, it's essential to create a jig for cutting the wood segments in series and always marking the half-lap joint notch in the same position.
Similarly, the holes for the dowels are made in series—they must align and be perpendicular to the surface. Use a trick by improvising a jig next to the workbench. As a finishing touch, the piece needs a top element, which can be a shelf wide enough to match the chosen shape, or a removable tray for serving wine and appetizers at the table. Consider adding kitchen islands and carts for extra serving space.
Materials & Tools Needed
- Wood slats 33×33 mm (quantity based on desired size)
- Beech dowels
- Wood glue
- Measuring tape and square
- Miter saw or handsaw with miter box
- Drill with dowel jig
- Sandpaper (various grits)
- Wood finish (oil or varnish)
- Optional: shelf or tray for top
Step 1: Create a Cutting Jig
Build a simple jig to cut all slats to identical length with 45° ends. This ensures every module is perfectly uniform. Mark the half-lap joint positions consistently using the jig.
Step 2: Cut and Shape All Slats
Cut the required number of slats. For each module you need four slats. Cut the half-lap notches at the center of each slat (removing half the thickness). Sand all pieces smooth.
Step 3: Assemble Module Pairs
Glue two slats together at 90° using the half-lap joint to form an L-shape. Repeat for the second pair. Clamp and let dry. Use quality home improvement tools for best results.
Step 4: Connect the Two Pairs
Join the two L-shaped pairs with a short connecting slat at the center cross point. This forms one complete module. Ensure all angles are exactly 90°.
Step 5: Drill Dowel Holes
Using a dowel jig, drill holes on the 45° faces of each slat end. Holes must be perpendicular and exactly aligned between modules. Work in series for consistency.

Step 6: Assemble the Rack
Stack modules vertically by inserting beech dowels with glue. Add modules side by side using connecting tiles (small wooden pieces) as needed. Build your desired shape—rectangular, L-shaped, or even a triangular corner unit. For larger configurations, consider pairing with bookcases and shelving units for a cohesive look.
Step 7: Add the Top
Finish with a top shelf or tray. A removable tray is great for serving wine and appetizers directly at the table. You can also top it with a decorative piece like wall decor or a mirror to double as a console table.
DIY Wine Bottle Rack – Many Possibilities for Creative, Space-Saving Assembly
The modular design means you can adapt this rack to any space. Build it low and long for under a window, tall and narrow for a tight corner, or wide and tall as a room divider. You can even create a U-shape around a dining table or use it to define a bar area in your living room. Pair it with sofas and rugs for an integrated entertaining space.
For outdoor entertaining, consider building a weather-resistant version using treated wood and place it on your patio near outdoor patio furniture. Add outdoor lighting and outdoor heating for cozy evening gatherings. You can even incorporate BBQ grills and outdoor cooking supplies for a complete alfresco bar setup.
Frequently Asked Questions
What type of wood is best for this project?
Hardwoods like beech, oak, or maple are ideal for durability and precision joinery. Softwoods like pine can work but may require more careful sanding and finishing. Check home improvement supplies for suitable wood options.
How many bottles can each module hold?
Each module typically holds 2-4 wine bottles depending on the slat length and spacing. A standard module with 33×33 mm slats at about 30 cm length can hold 2 bottles side by side.
Can I make this rack larger or smaller?
Absolutely! The modular design is infinitely scalable. Just adjust the number of modules. For a small kitchen, 6-8 modules might suffice; for a large cellar wall, you could use 30 or more. Pair with kitchen islands and carts for compact spaces.
Do I need advanced woodworking skills?
Basic skills are sufficient if you use a jig for cutting and drilling. The half-lap joint is simple, but precision is key. Practice on scrap wood first. Desks and work surfaces can provide a sturdy assembly area.
How do I finish the rack?
Sand thoroughly, then apply a food-safe oil or varnish if the rack will hold wine bottles directly. For decorative use, any wood finish works. Consider matching it to your existing TV and entertainment furniture or dressers for a cohesive look.
Browse Grand Goldman Home Decor
Discover unique craftsmanship home decor and furniture at the Grand Goldman Shop.
Best Products We’ve Tested and Rated

Our testing team has hands-on reviews of yoga mat on carpet, supplements wrestlers, resistance bands baseball, gifts rowers, and gift someone back pain. Every option below was compared across price, build quality, and real-world performance, with honest pros and cons. We update these guides regularly as new models arrive, so the recommendations stay current.
Our testing team has hands-on reviews of ceiling mount heavy bag, scale wrestlers, pre workout pregnant, massage chair tall people, and exercise bike parkinsons patients. Every option below was compared across price, build quality, and real-world performance, with honest pros and cons. We update these guides regularly as new models arrive, so the recommendations stay current.
Browse the Shop
 Acacia frida deluxe solid wood bed frame |
Bedroom bench |
Bed chest drawers |
Lingerie dresser |
Frame base |
Mirror with jewelry storage |
30 Bathroom Vanity |
Memory foam queen mattress |
Mattresses for back pain |
Nightstand set of 2 |
Grand Goldman Shop |
Civil Lawyer
Deutschland Trikot WM 2026
Acacia frida deluxe solid wood bed frame |
Bedroom bench |
Bed chest drawers |
Lingerie dresser |
Frame base |
Mirror with jewelry storage |
30 Bathroom Vanity |
Memory foam queen mattress |
Mattresses for back pain |
Nightstand set of 2 |
Grand Goldman Shop |
Civil Lawyer
Deutschland Trikot WM 2026







