

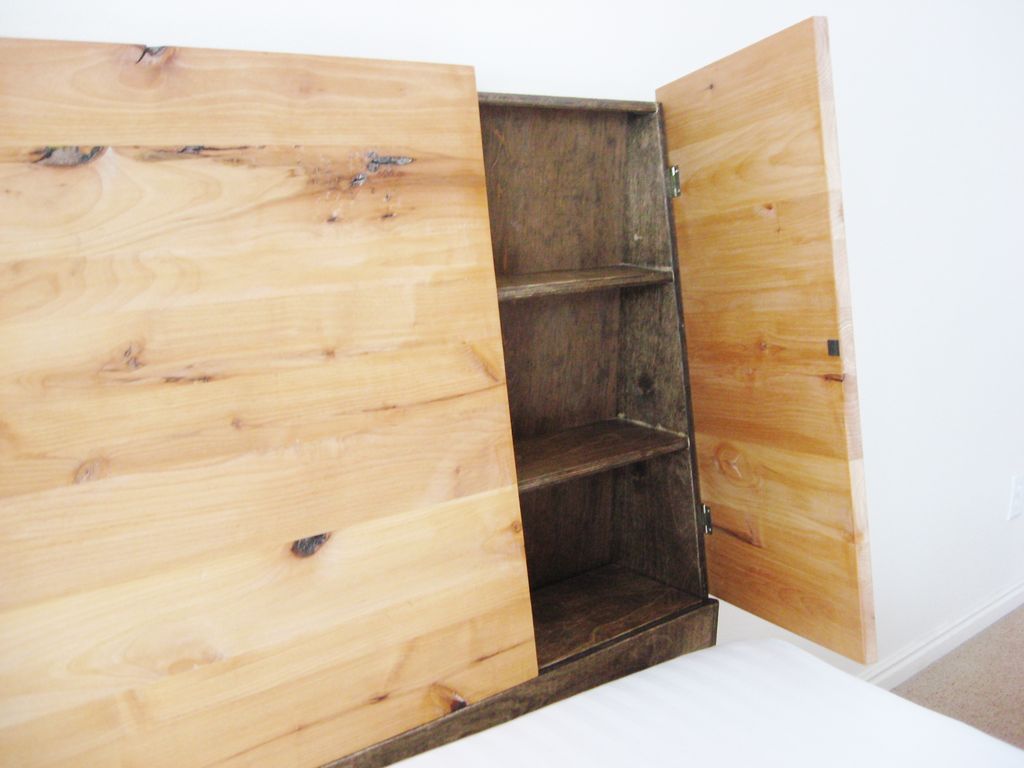
Birch Headboard with Secret Compartments and More... The headboard is basically a narrow cabinet with wooden front panels, with the following features:
- The two side panels are actually doors that open outward to reveal shelf space.
- The center panel is great for leaning on while watching TV or reading in bed.
- There is built-in adjustable ambient lighting.
- There are also three built-in secret compartments!
Keep reading to see how you can make your own headboard!
Find Bleeding Edge Supplements at Scandalous Prices on iHerb.

Step 1: Secret compartments
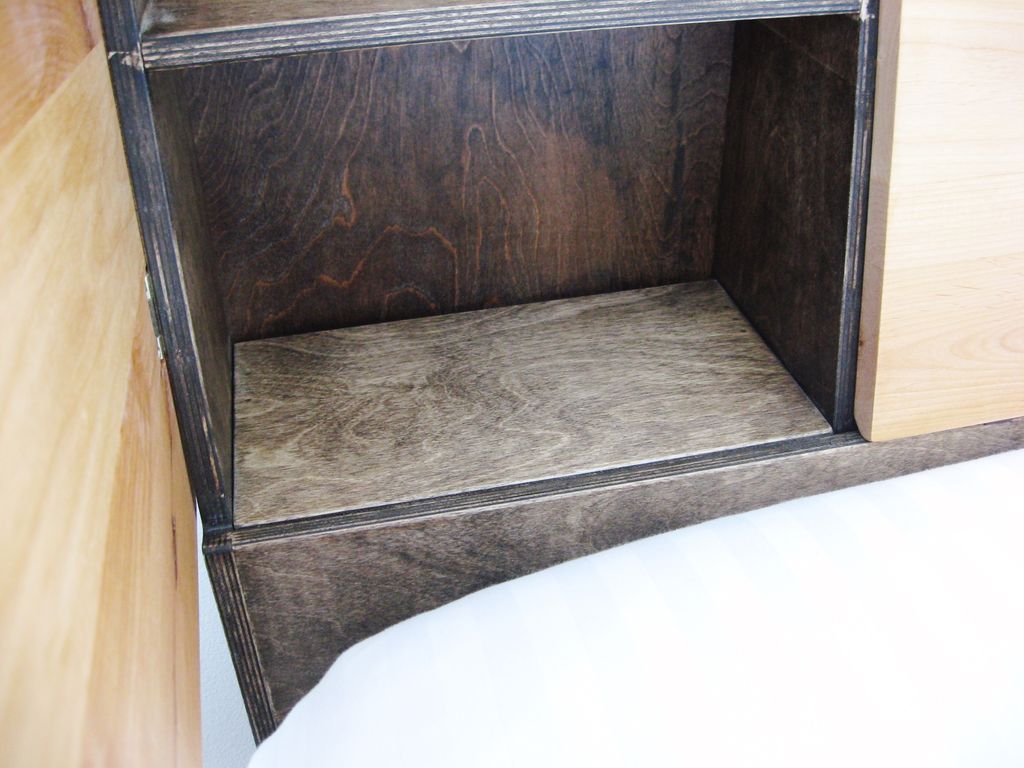
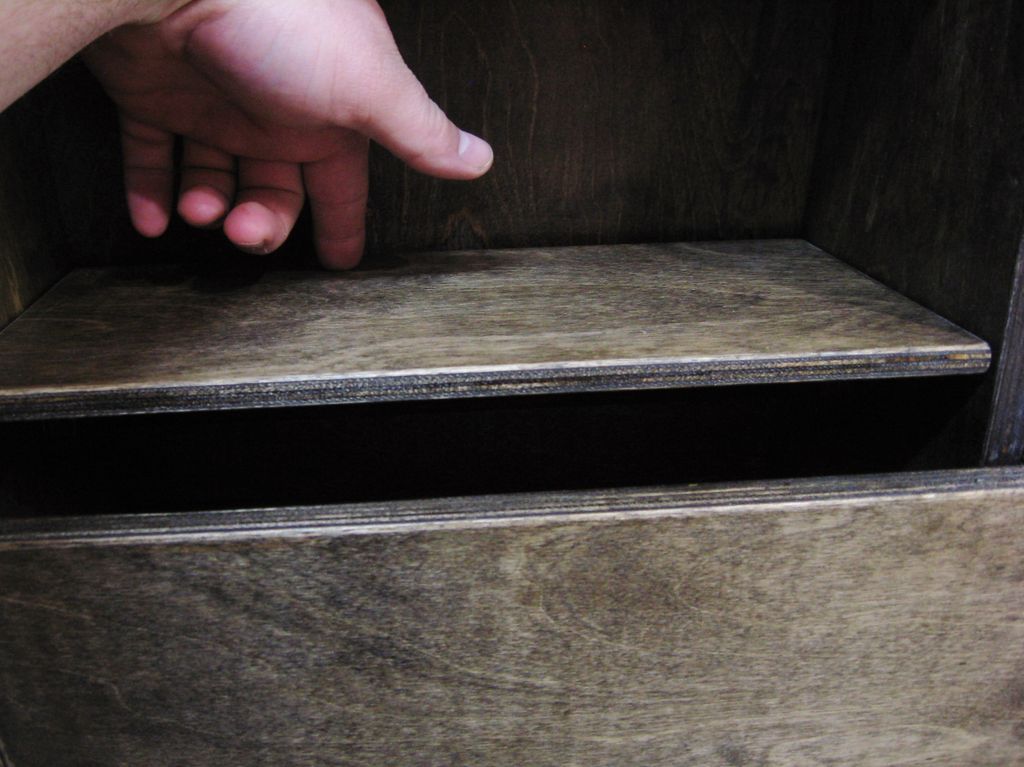
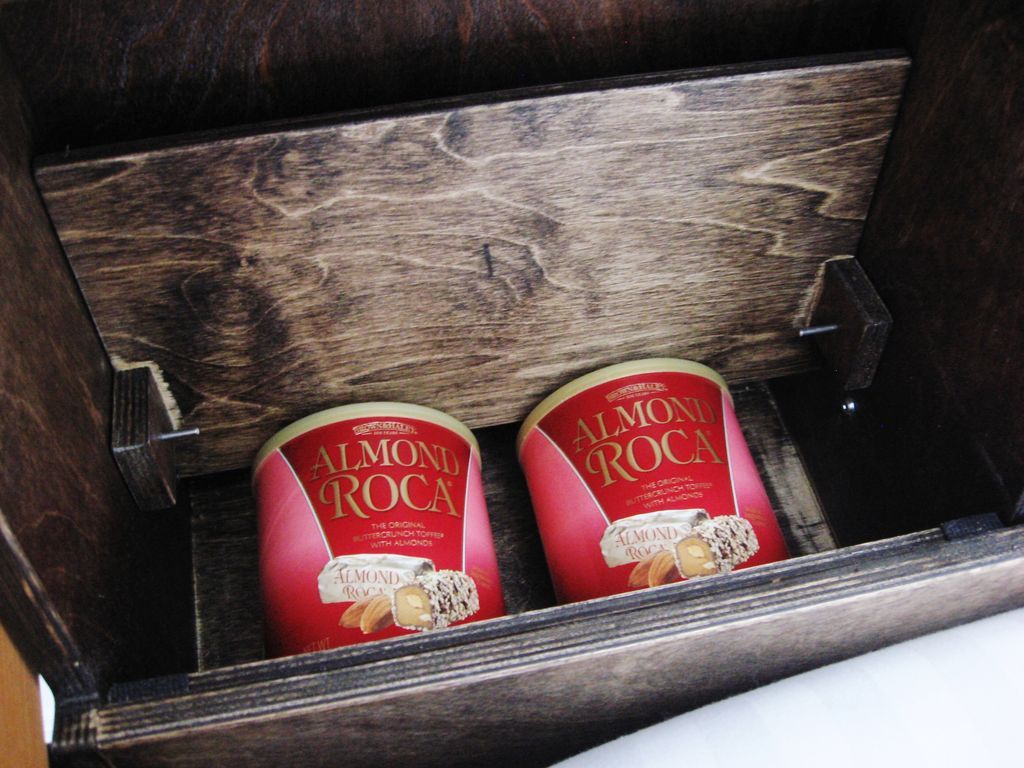
There are three secret compartments built into the lower section of the headboard (one behind each of the two doors and a larger compartment in the middle).
Step 2: Lighting
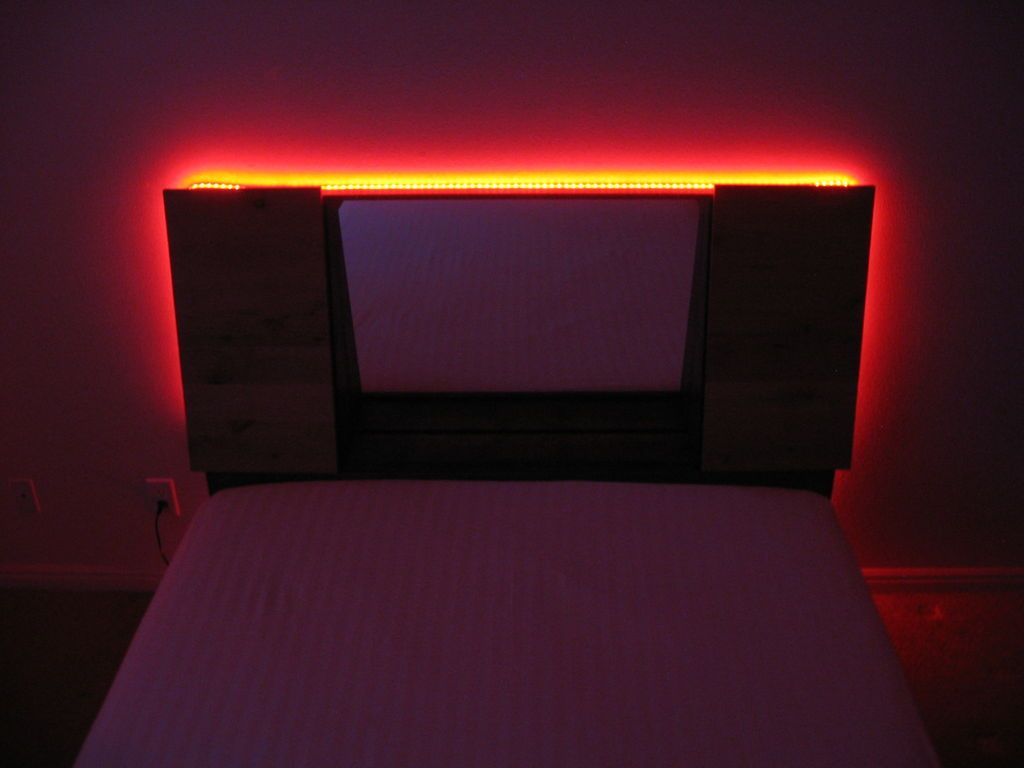
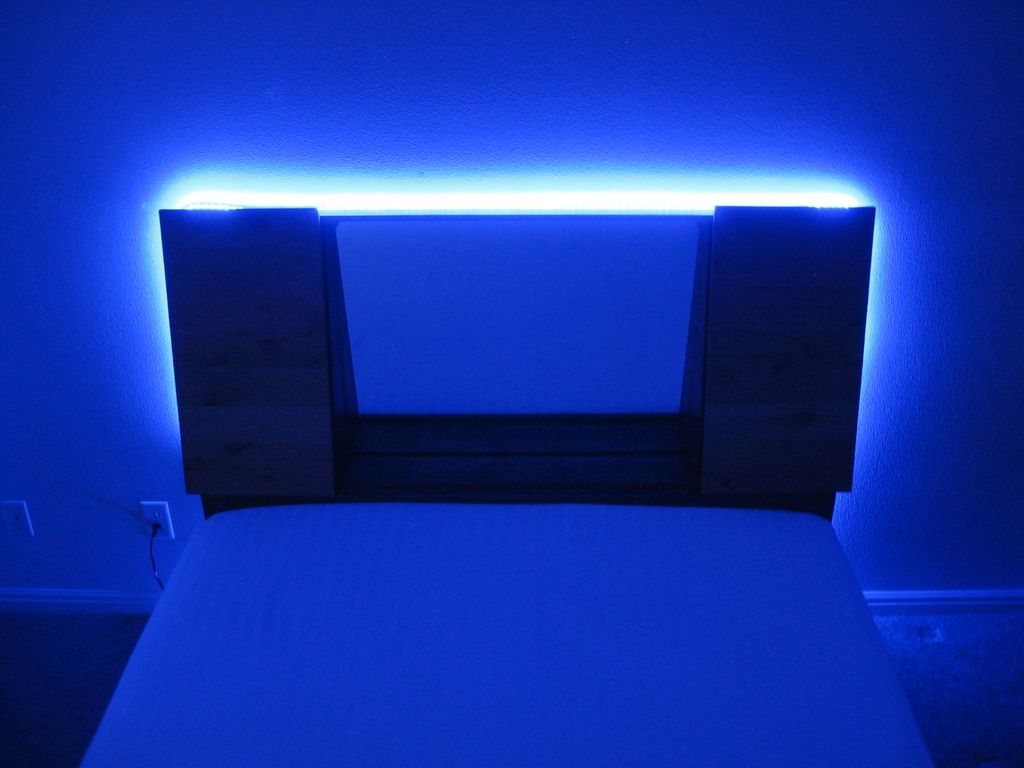
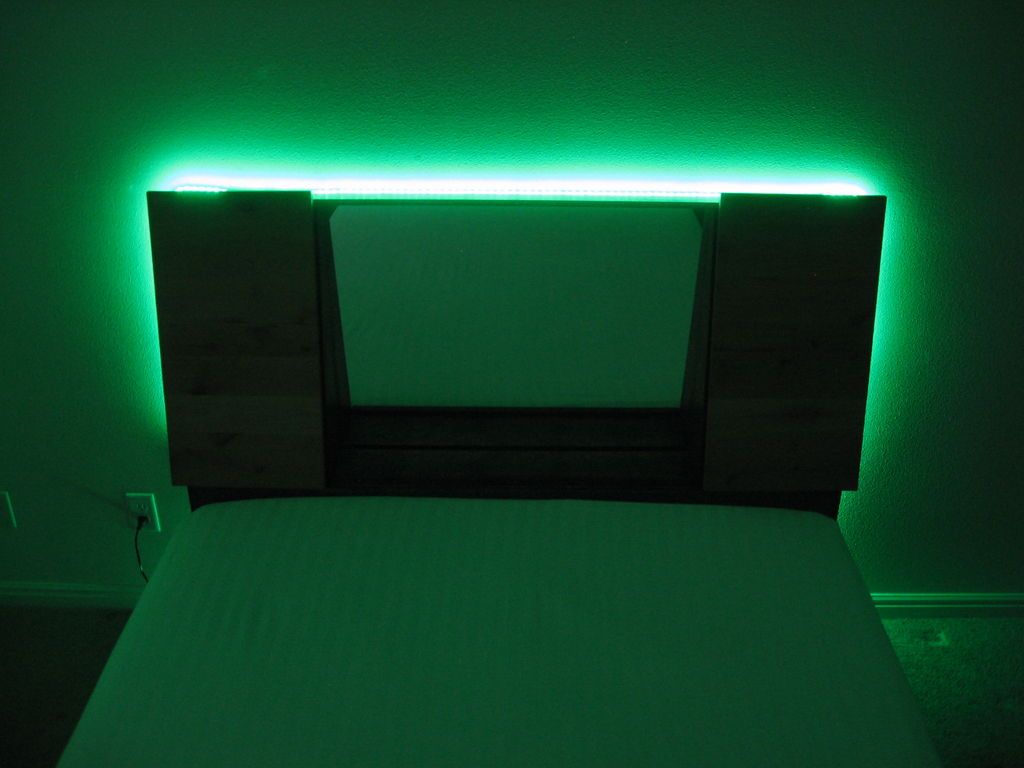
Mood lighting is provided by a dimmable RGB LED strip.
It is a plug-and-play strip, so no soldering required.
Okay, let's build this!
Step 3: Sides
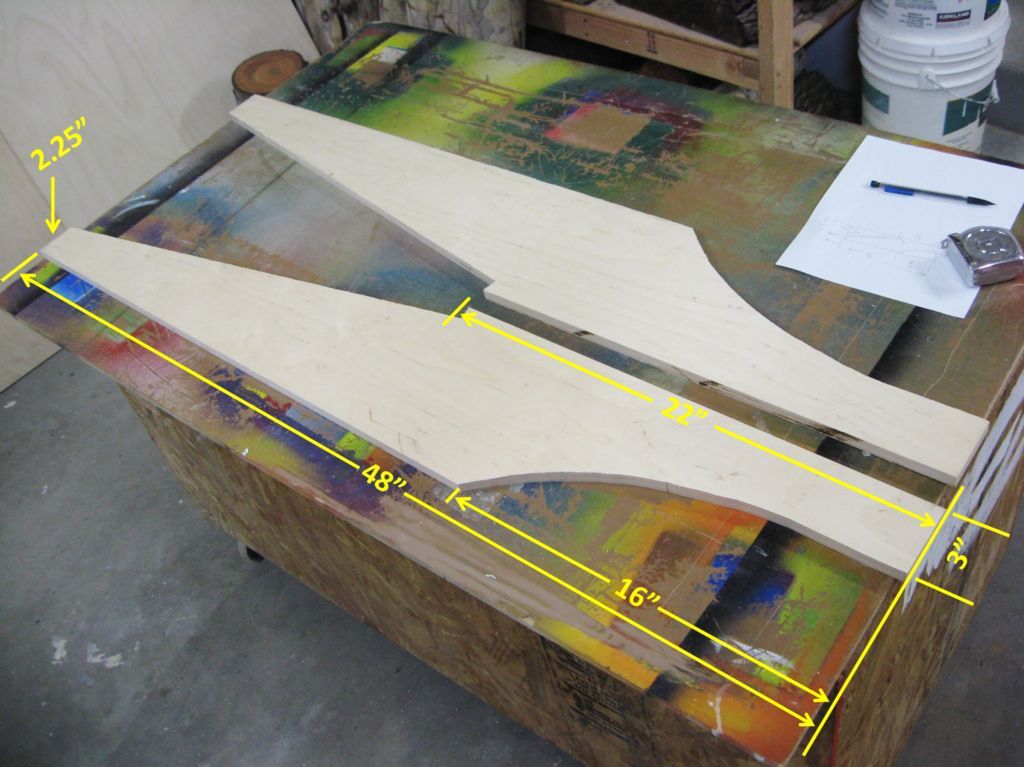
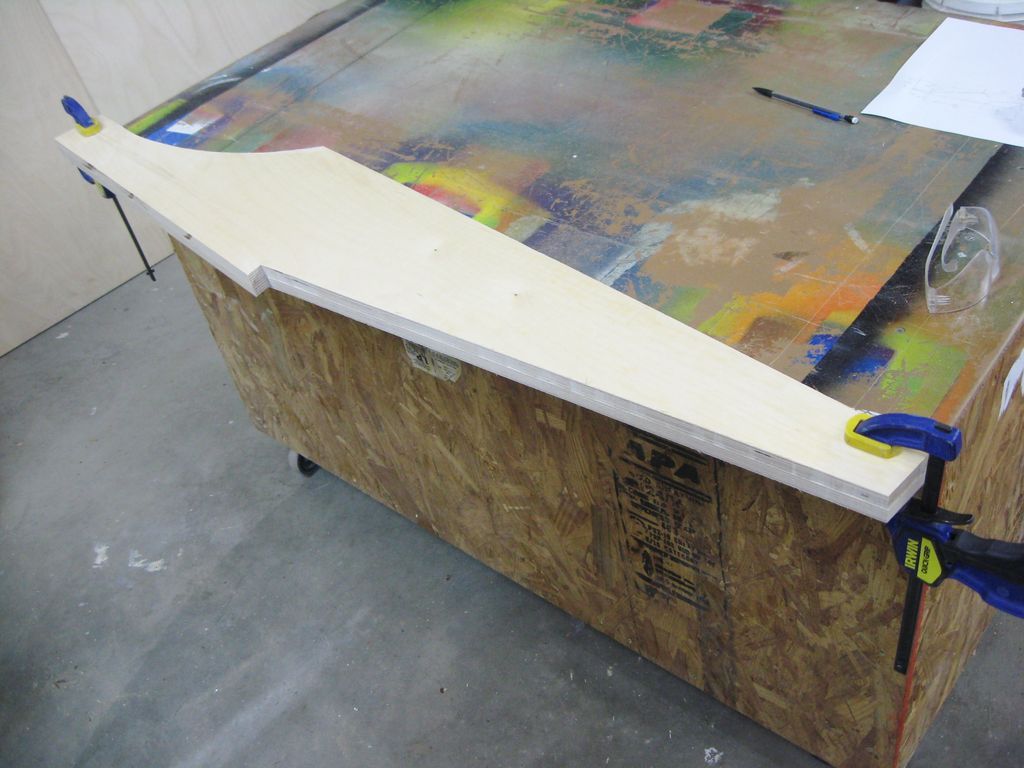
This case design starts with the design of the side pieces.
These started out as two 48″x8″ pieces of 5/8″ (about 16mm) thick Baltic birch plywood, which were cut with a table saw.
These were cut according to the measurements in the second photo on a band saw. They were then clamped and sanded to remove any noticeable irregularities.
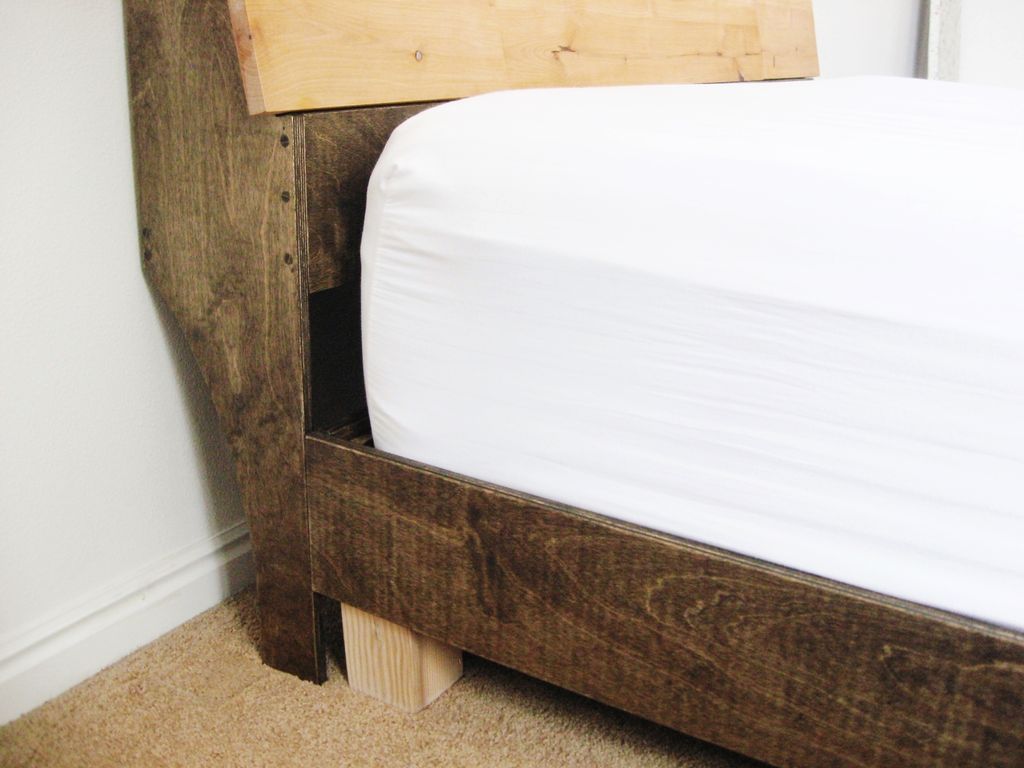
All dimensions of this headboard cover were chosen to match the height of our queen mattress, which sits on a frame I made previously.
The bed frame is a basic platform frame similar to dozens found online, but with a surrounding skirt made of birch plywood.
Several design and measurement considerations were made to accommodate the inclusion of an old mirror we had, which is 36″x30″.
I worked around these dimensions so I wouldn't have to worry about cutting the mirror.
Step 4: Prepare all the pieces that will make up the header
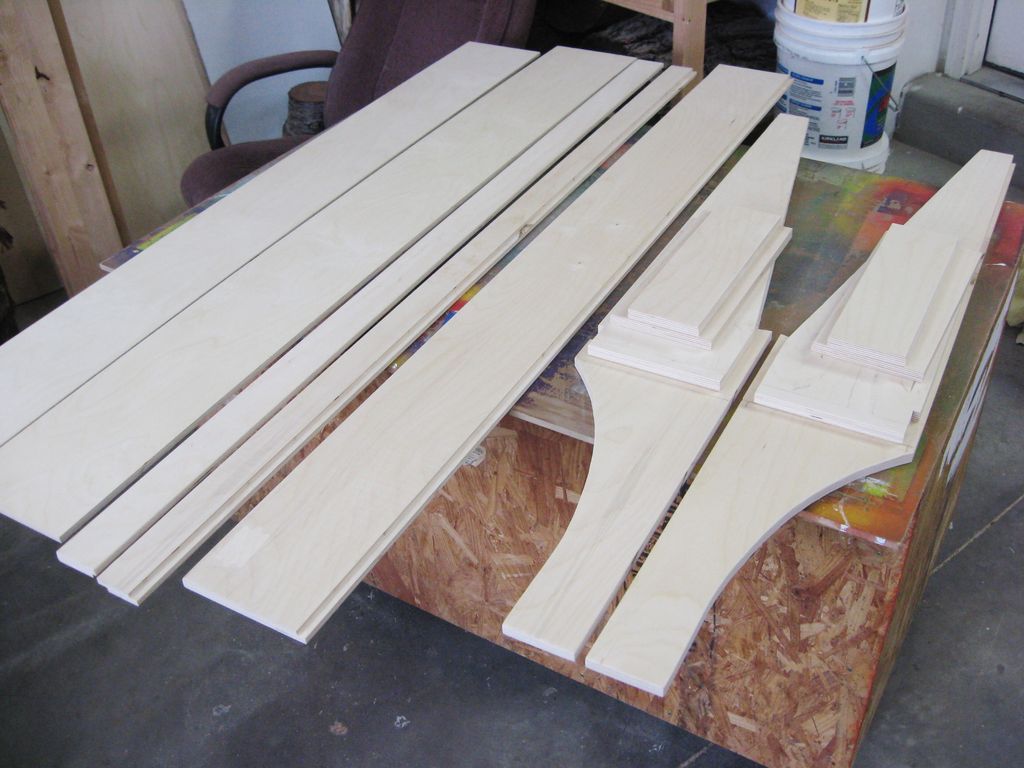
Several rails were prepared running between the side panels of the last step, some from 5/8″ plywood and some from 3/8″ plywood (approximately 10mm), depending on how strong I felt the pieces needed to be.
All rails are 60″ long, which is the width of our mattress.
This works great, since the birch plywood I usually buy comes in 60″x60″ sheets.
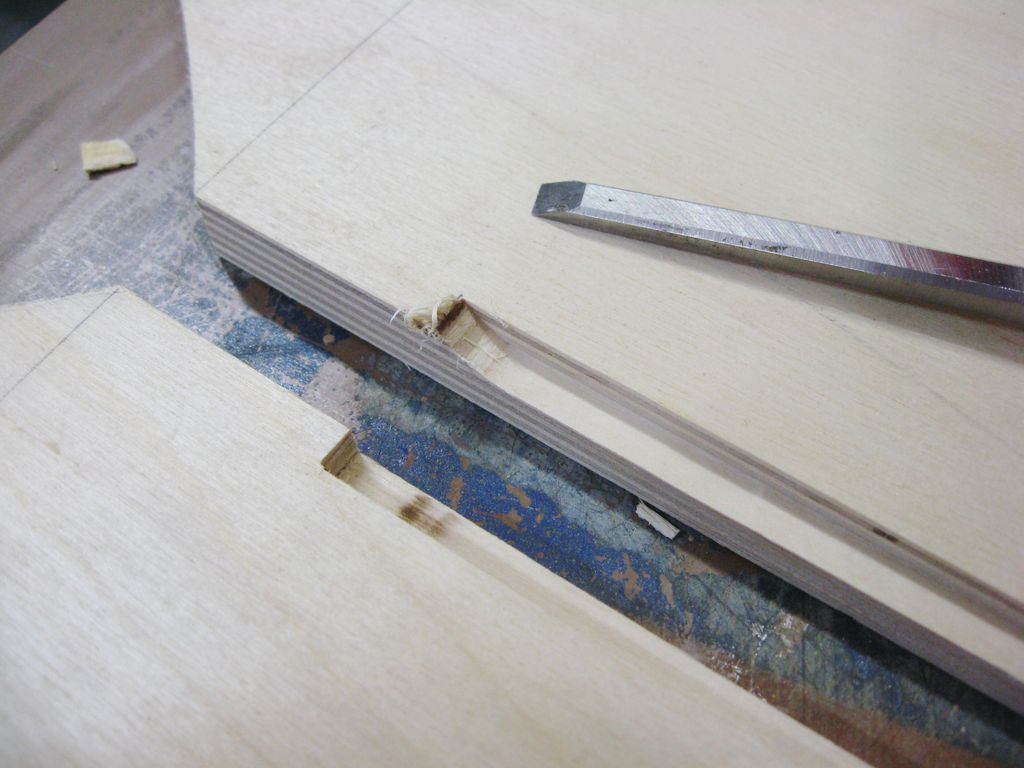
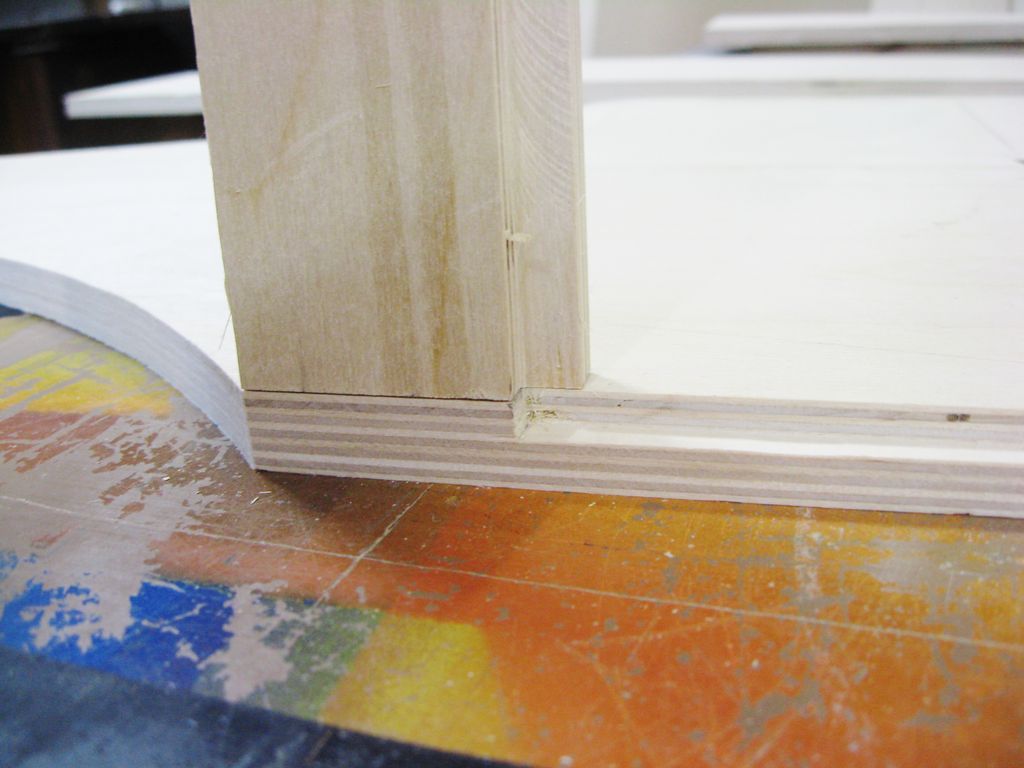
Several burr cuts were made on the rails and side pieces with a table router to accommodate the mirror and back panel pieces.
Where necessary, the ends of the grooves were made with a sharp chisel.
I roughed up all the desired edges with a little rounding on my router table, and then lightly sanded all the pieces to prepare them for assembly.
This step in the process required a lot of careful planning, measuring and cutting to ensure that I was creating pieces that would all come together as desired.
Step 5: Assemble the frame
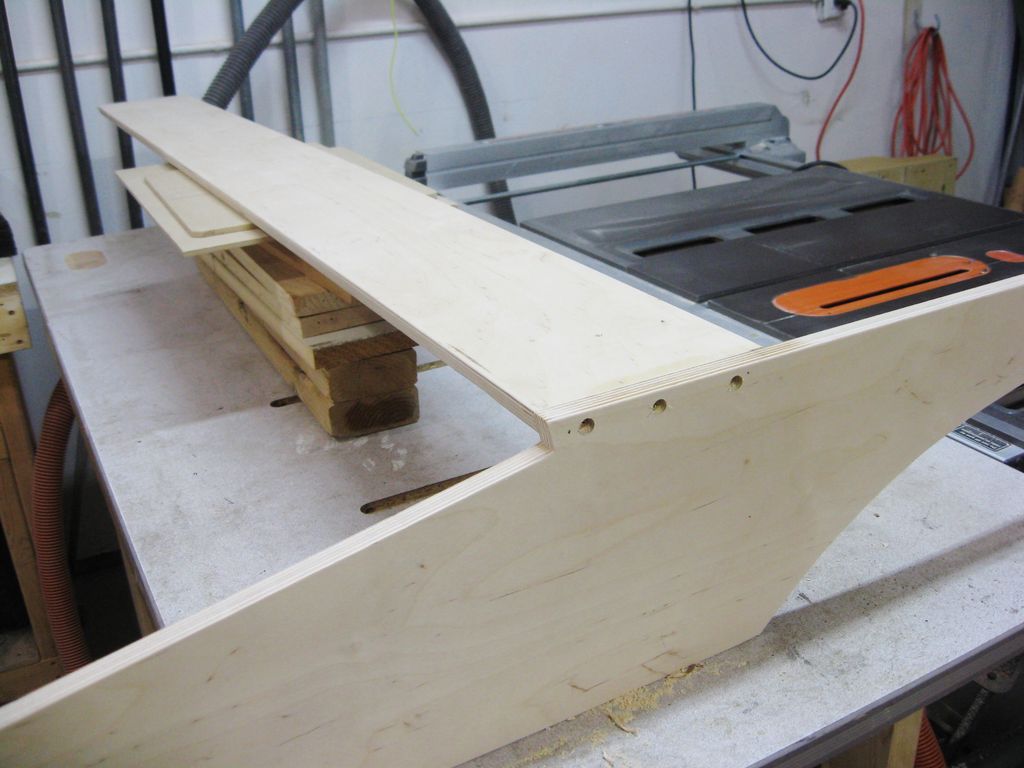
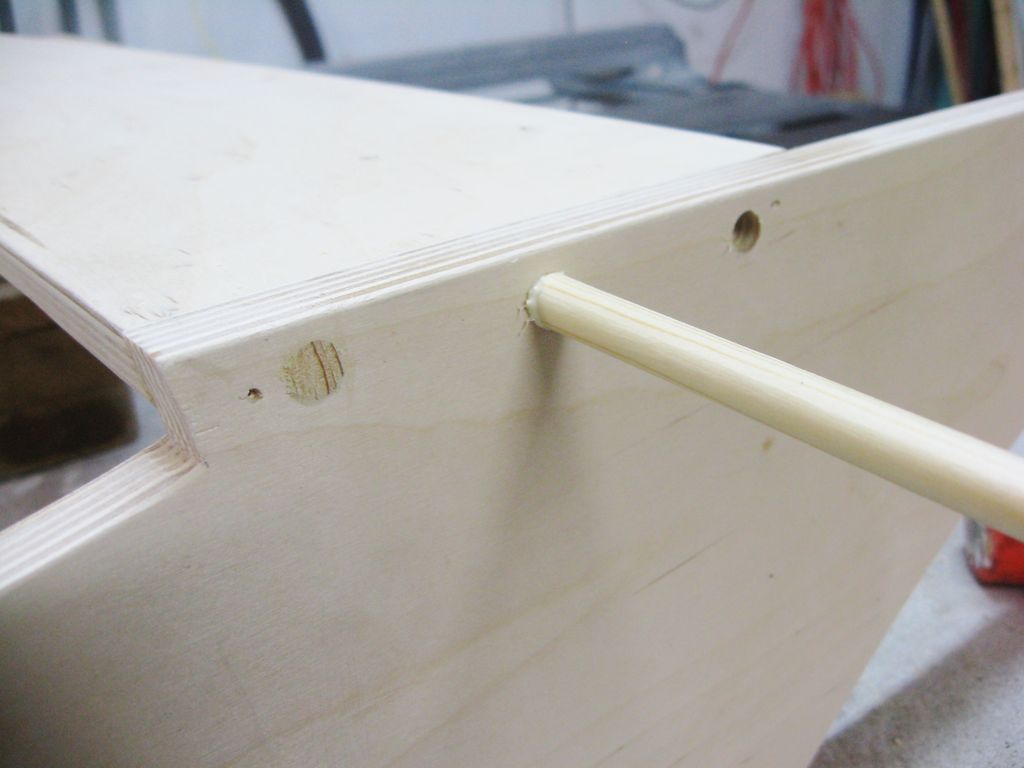
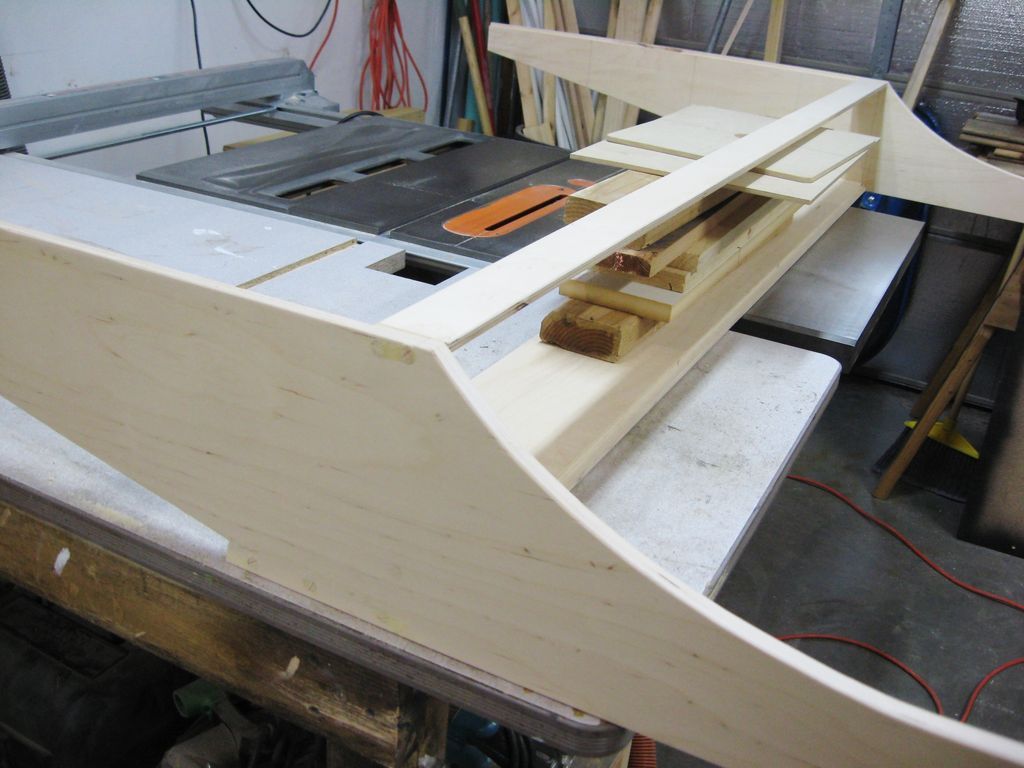
I was tempted to use pocket screws for this, butin this case I didn't feel precise or confident enough for what I wanted. Also, I thought it would be fun to have outlets on the side of the headboard.
All rails were glued and screwed to the side boards through pre-drilled and countersunk holes.
These holes were then plugged with pieces of glued tenon.
See photo notes for dimensions of the various rails.
Step 6: Add Bottom
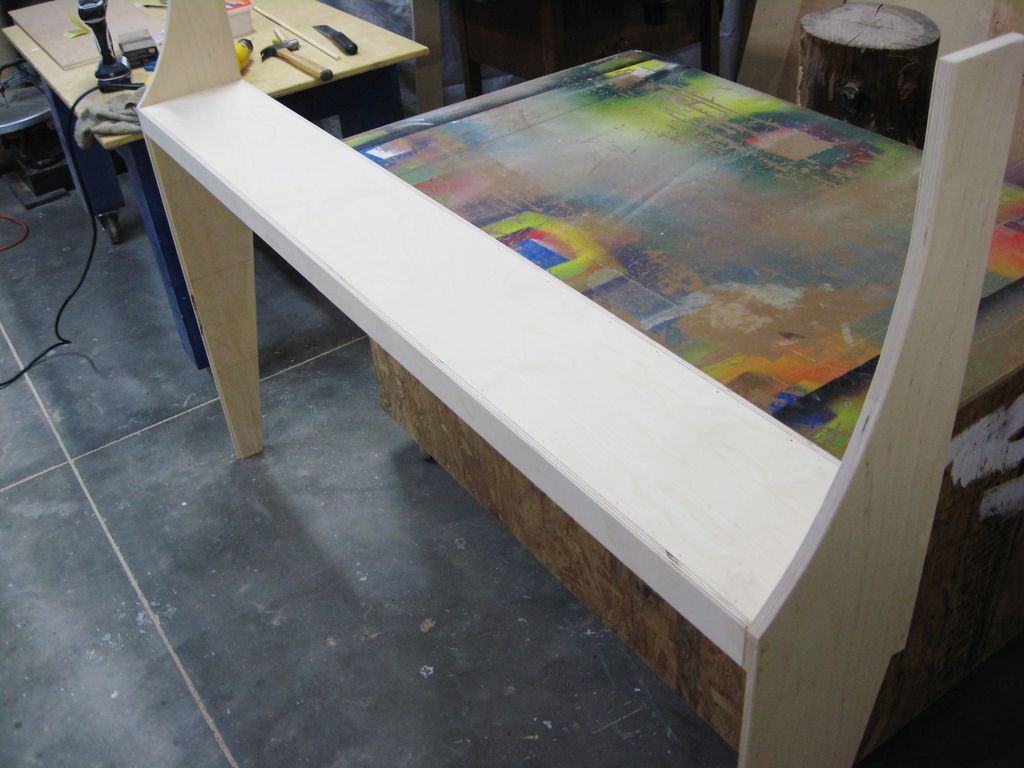
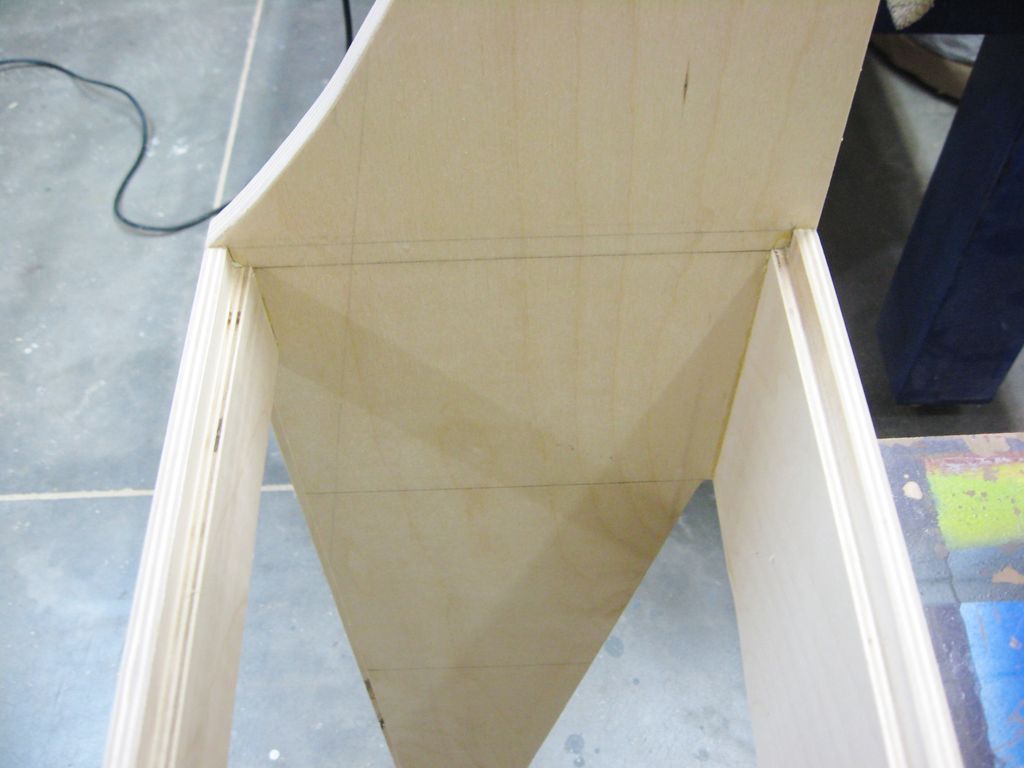
A 3/8″ thick bottom panel was glued and nailed in place to create the bottom of the headboard.
Step 7: Assemble and install the shelves
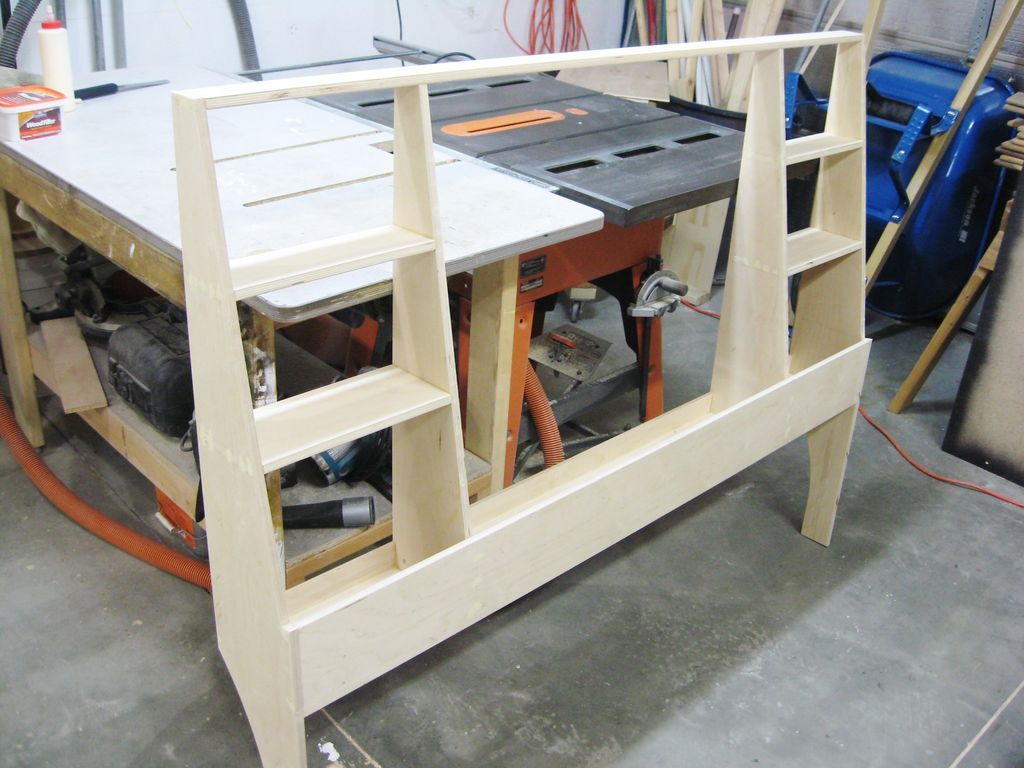
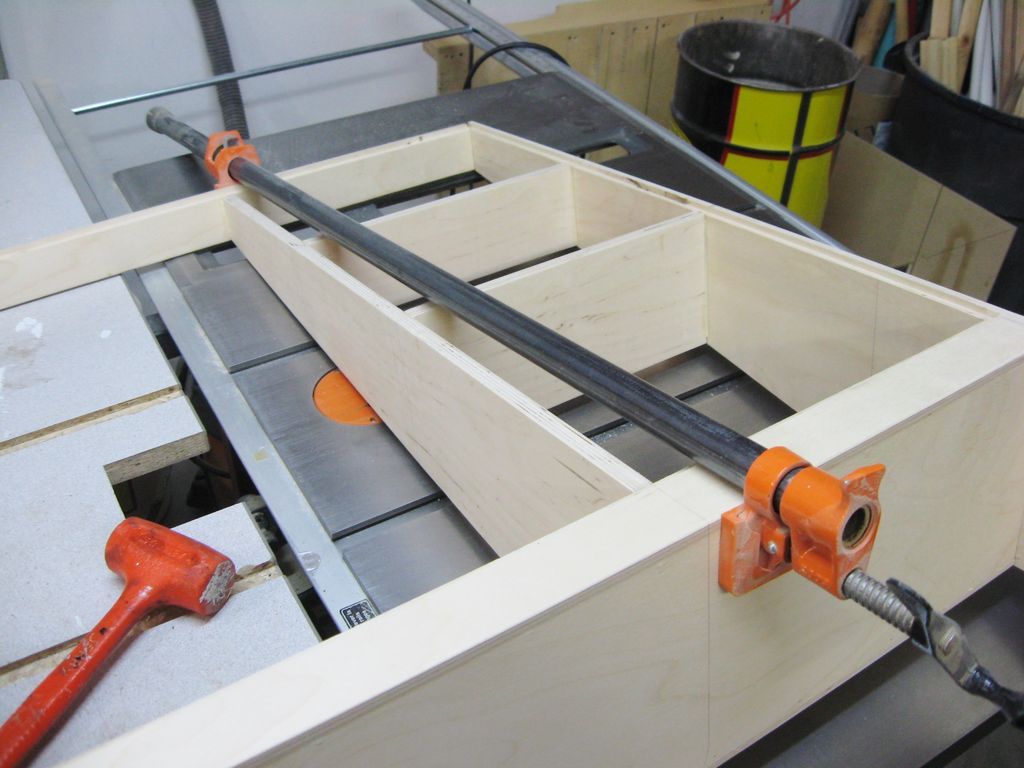
The shelves and upright supports were partially assembled outside, using glue and nail gun nails.
These were then glued and nailed into place inside the header.
The clamps were used to ensure a good tight fit while nailing the shelf assemblies into place.
Step 8: Build the secret compartments
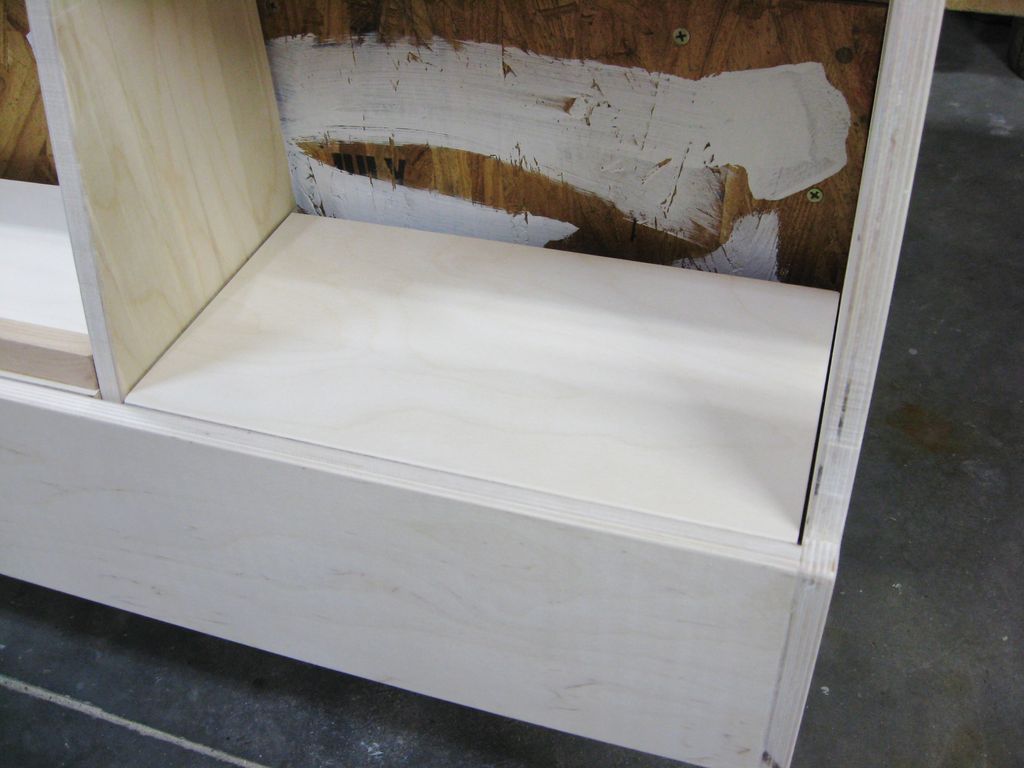
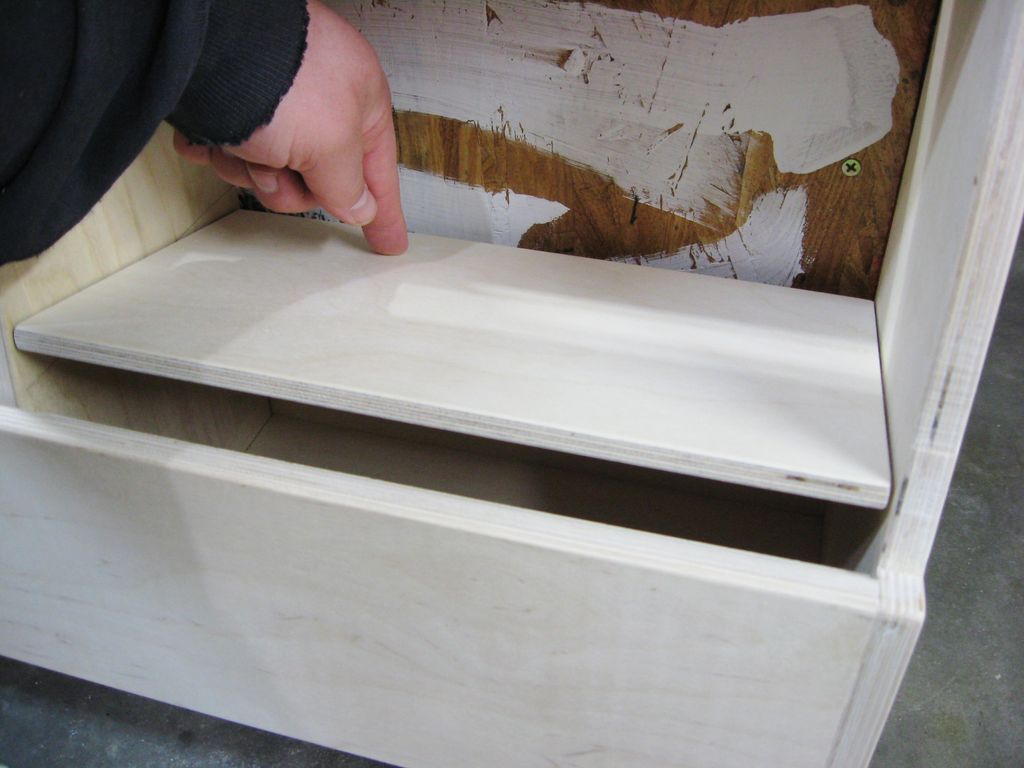
Secret compartments are 6 inches deep.
The tops of these are flush with the top of the mattress and have no visible handles or hinges.
There are no visible signs of its existence (especially if the cabinet-style front panel doors are closed and the removable panel is in place).
They open by simply pressing the inch or so back of the eyelids, and they pop open.
I'll be honest... I'm so proud of how they turned out! The following steps show how these were made.
Step 9: Make the compartment covers
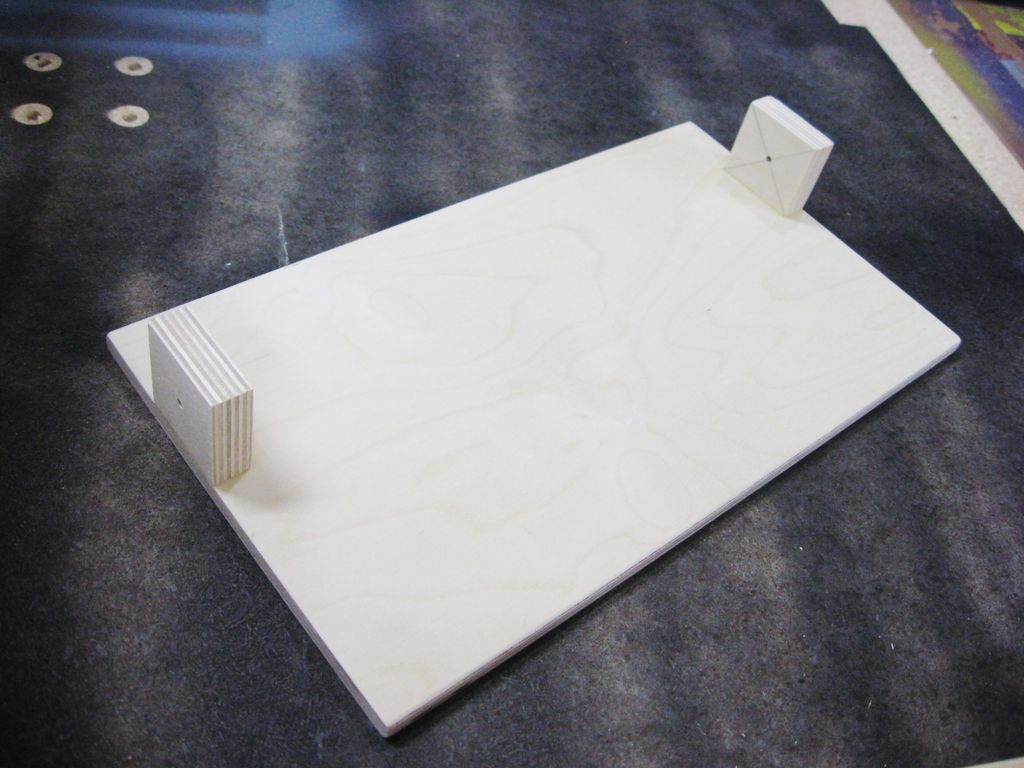
The tops are made from pieces of 3/8″ thick plywood.
Two 1 1/2″ square blocks made of 5/8″ thick plywood were glued and precisely nailed 1 1/4″ from the back edge of each panel, flush with the sides.
Lids are approximately 7″ front to back.
Before the blocks were attached to the boards, each block was drilled through the center with a 9/64″ drill bit.
This was done on a drill press to ensure that the holes were perpendicular to the faces of the blocks.
Simple hinges will be created by installing pieces of 1/8″ metal rod through these blocks and through the walls of the headboard box.
Step 10: Create Front Support Strips
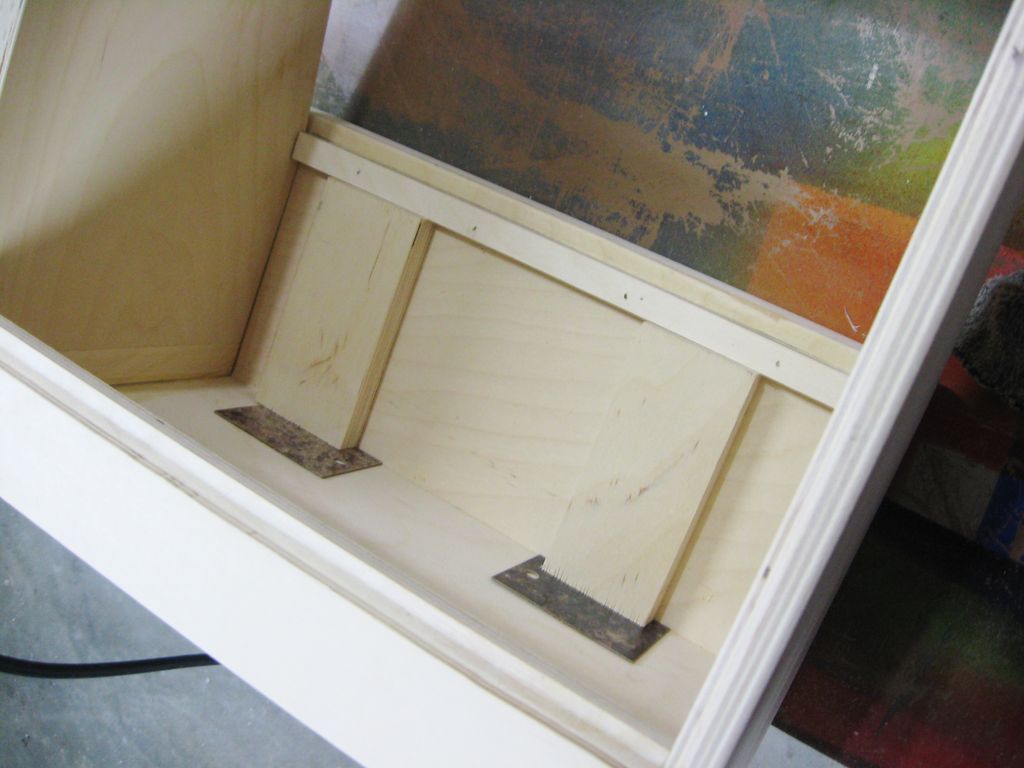
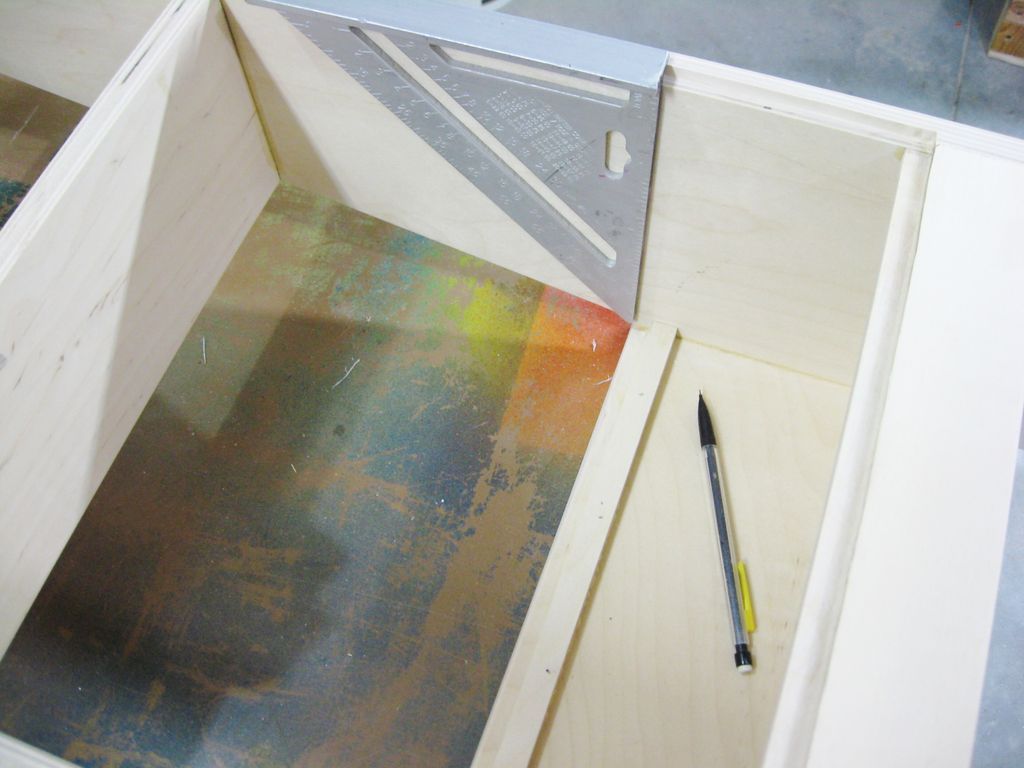
The front edge of the compartment lids should have a support to rest on.
These were made with strips of plywood that were glued and nailed together with brads.
All strips were installed at precisely the same height using the same two blocks of wood to position the nailing strips.
With the support strips in place, lines were drawn with a square along the sides and vertical support pieces of the shelf, to be level with the top of the front rail.
These lines will act as guides to help locate the tops of the lids when setting and drilling the hinge pins.
Step 11: Mark and Drill for Hinge Pins
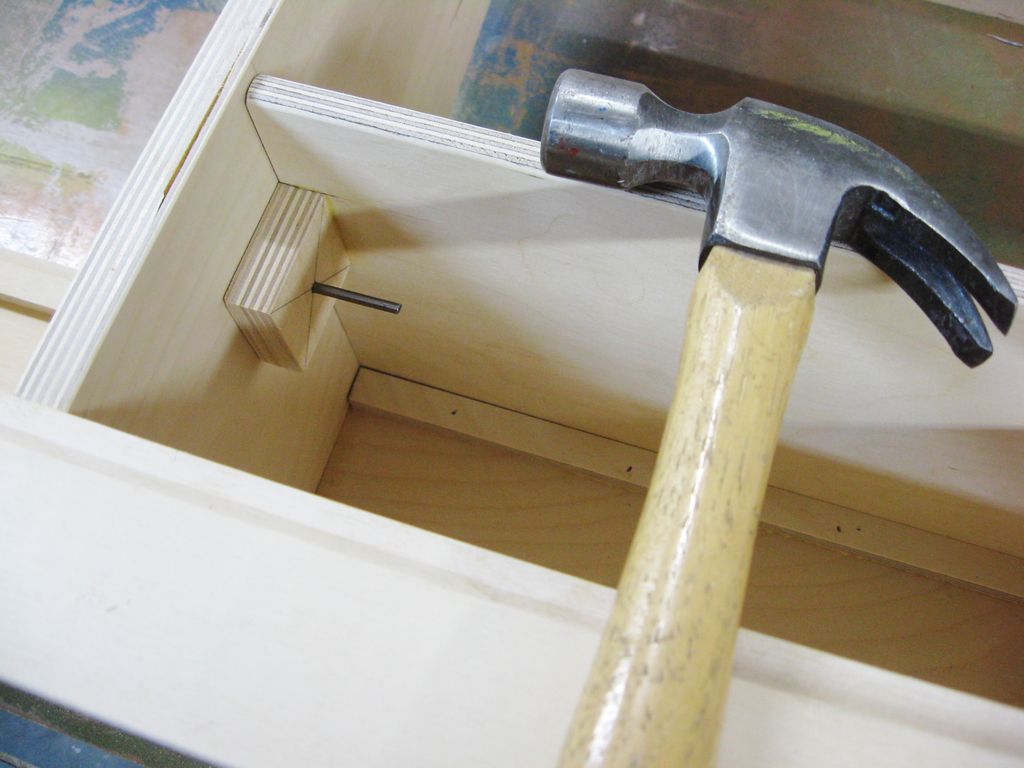
The lids were held in place with the lids aligned with the marks made in the last step.
A piece of 1/8″ metal rod was placed in the hinge blocks and tapped with a hammer to make an indentation in the walls to drill the hinge holes.
A block of scrap metal was drilled with the drill press to use as a guide to ensure that the hinge holes were drilled as close to the hole as possible.e perpendicular to adjacent wood faces.
The notches were additionally drilled with a nail set to assist in drilling, and 1/8″ holes were drilled with the aid of the guide block.
The hinge holes on the sides of the headboard box were carefully drilled to a measured depth so as not to puncture the exterior walls, while the holes in the vertical mantel support pieces were drilled directly.
Step 12: Install the Hinge Pins
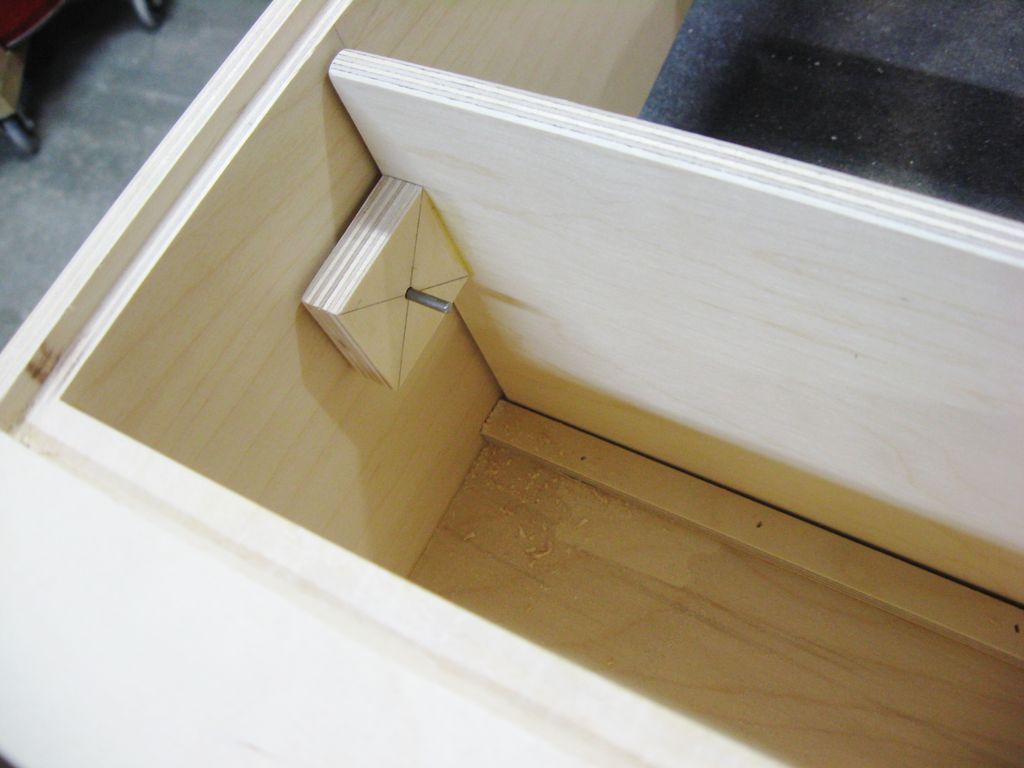
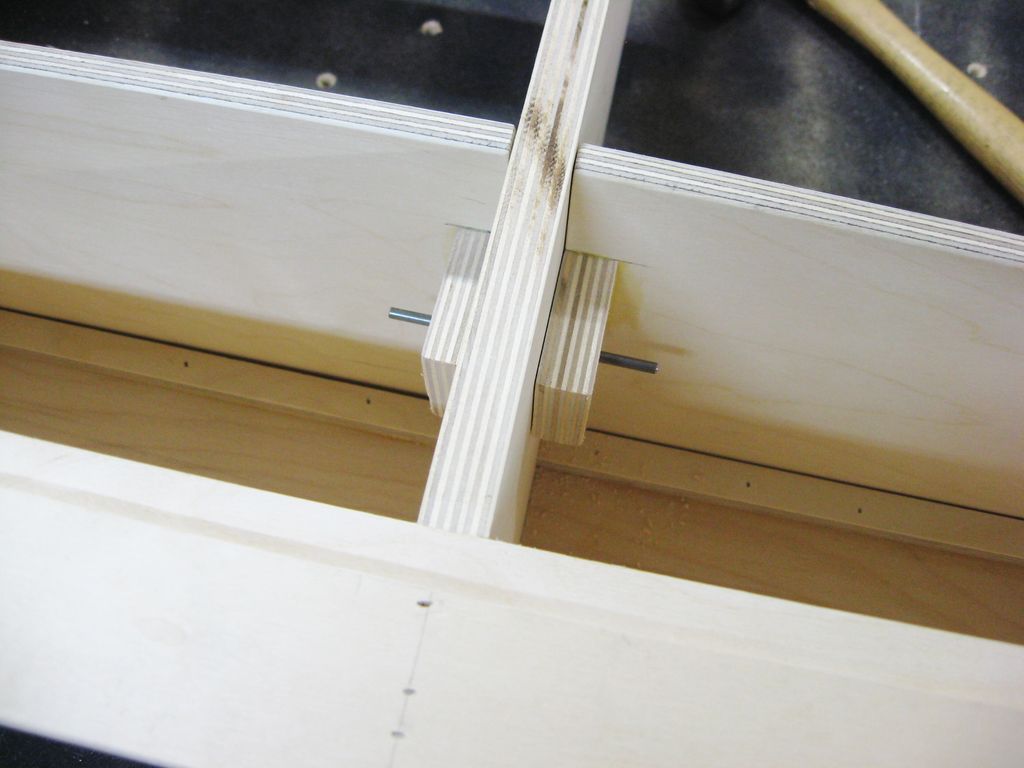
Additional pieces of 1/8″ rod were cut and installed through the hinge blocks and headboard box walls.
Step 13: Some adjustments
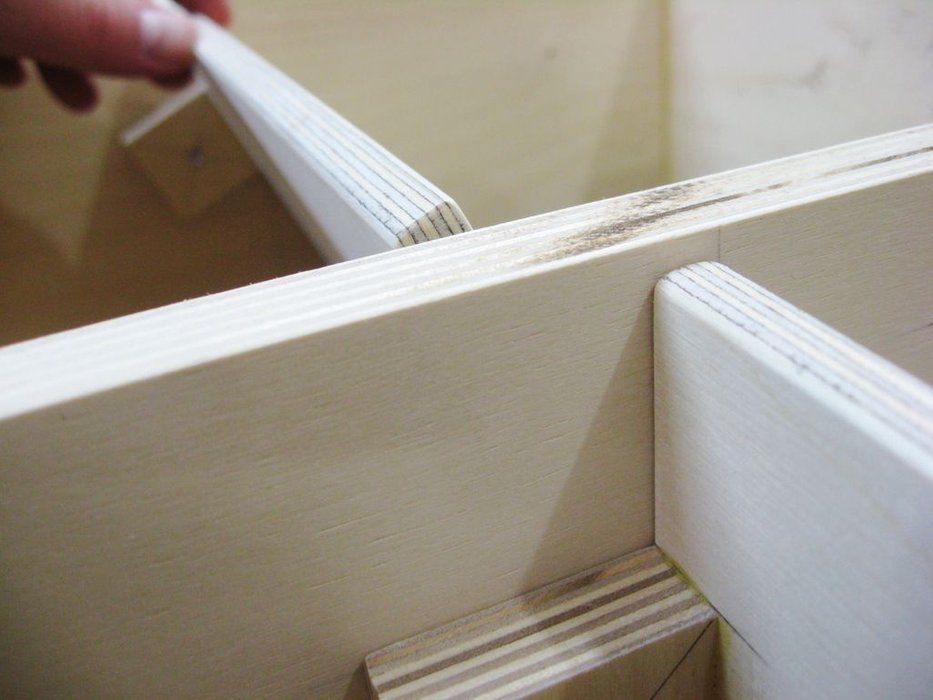
The back edges of the covers needed to be trimmed a little so they wouldn't meet the rear case panels once they were installed.
The caps were removed and trimmed on the table saw.
The front edges of each lid were a little tight, so some material was removed as well.
Step 14: Additions to the Longer Middle Cap
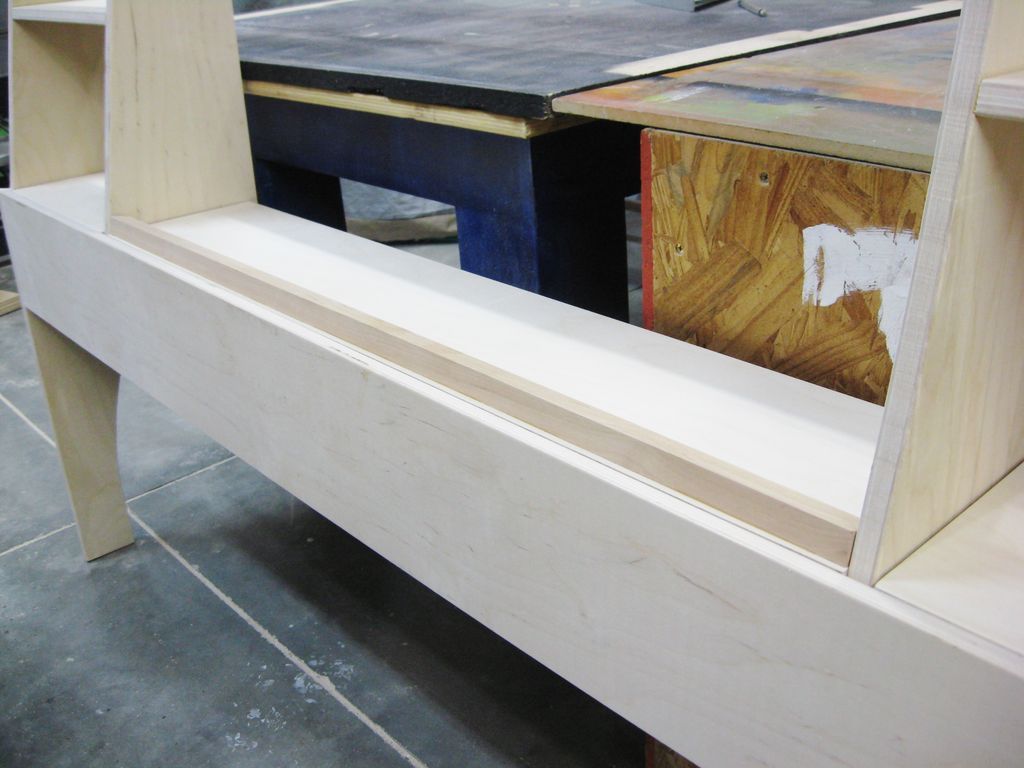
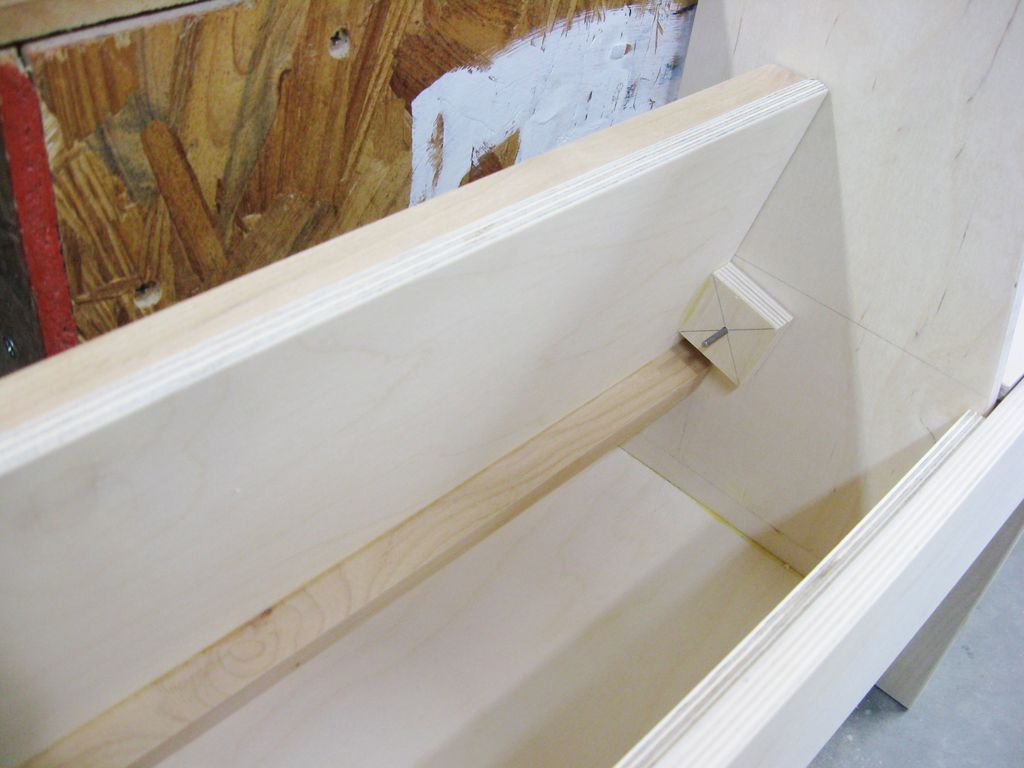
An angled strip of wood was glued and nailed along the front edge of the middle eyelid piece to act as a support for the bottom edge of the removable front panel to be made later.
I also added another strip of wood to the bottom rear edge of this lid to remove some of the camber/camber that was in the board.
Step 15: Finished Header
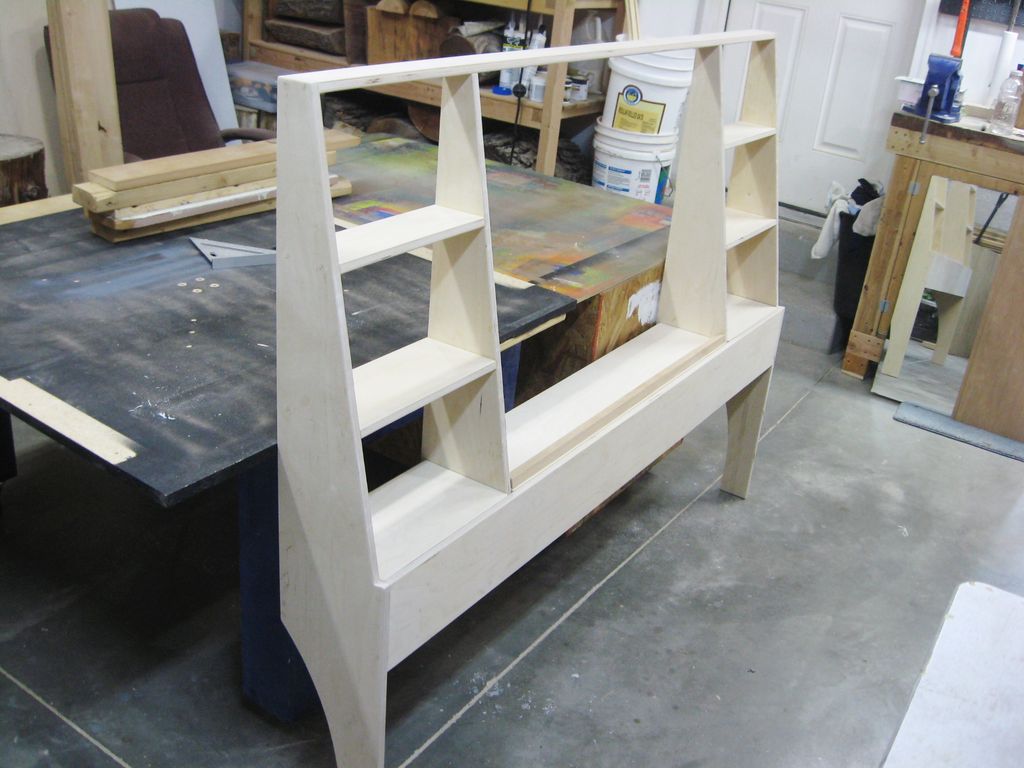
Here is the complete case, ready to be finished.
Step 16: Finishing
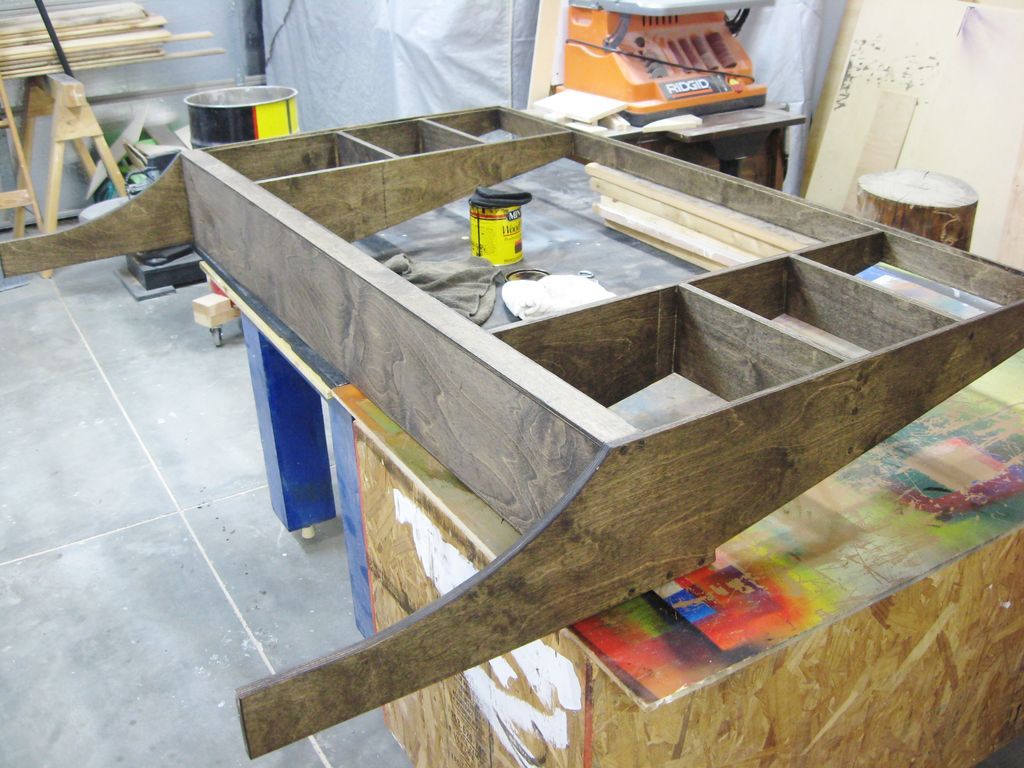
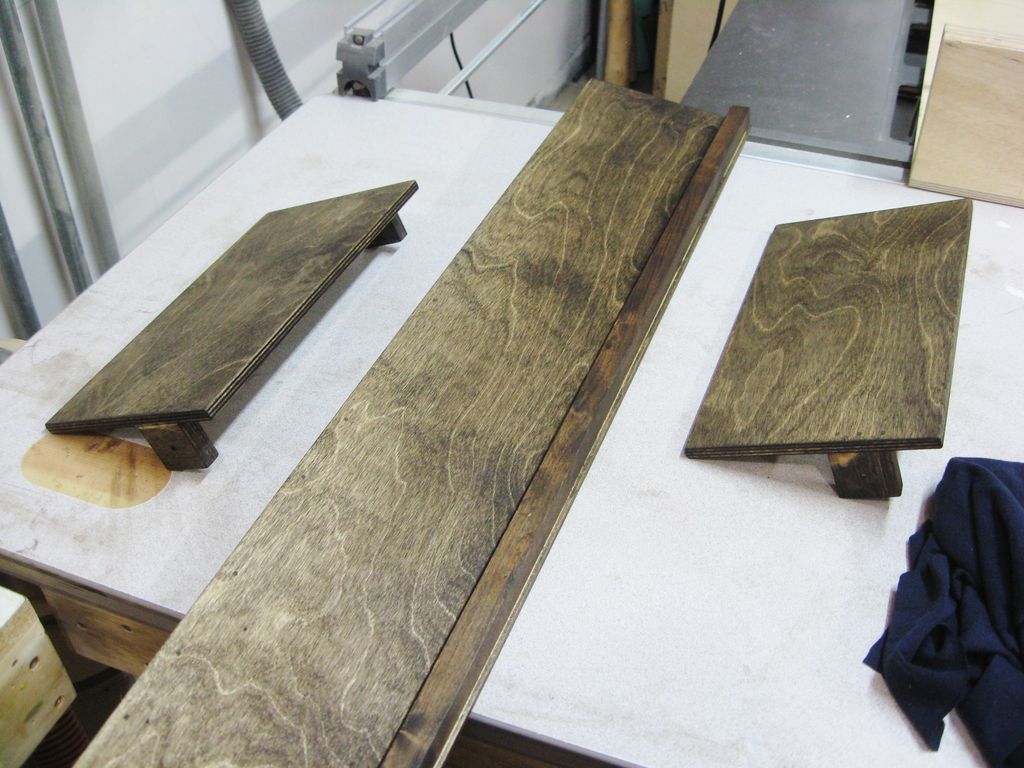
An oil-based finish was used.
This was followed by two coats of shellac with light sanding with 220 sandpaper between coats, and then the final coat. Everything was polished with furniture wax paste.
Step 17: Add panels
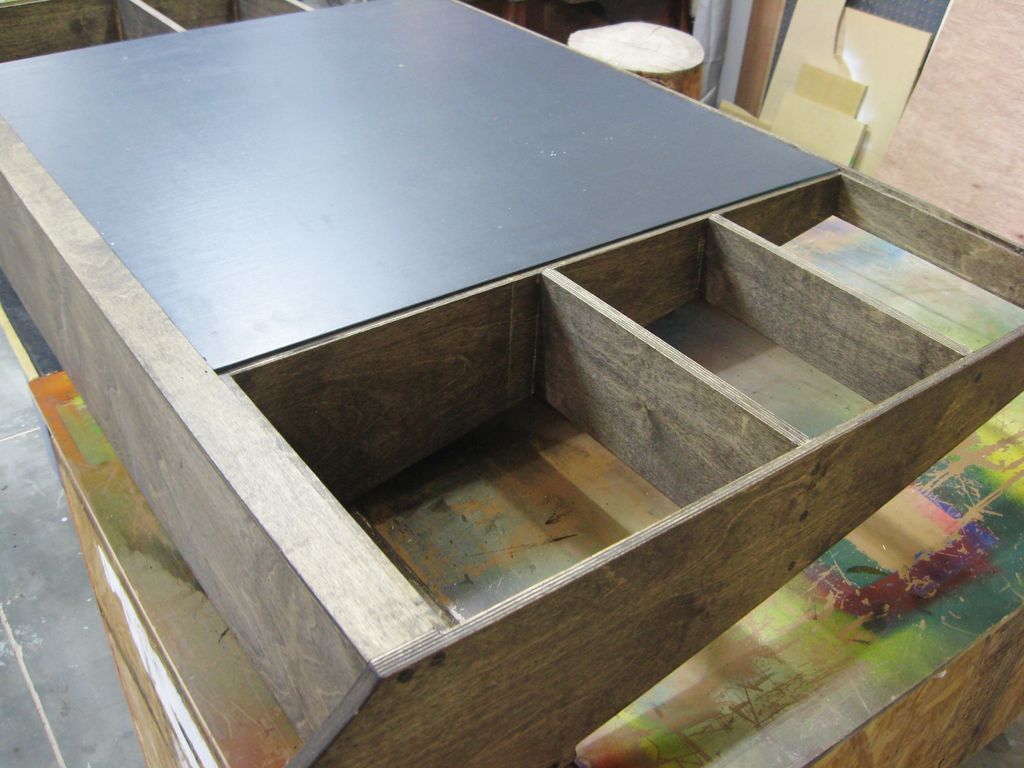
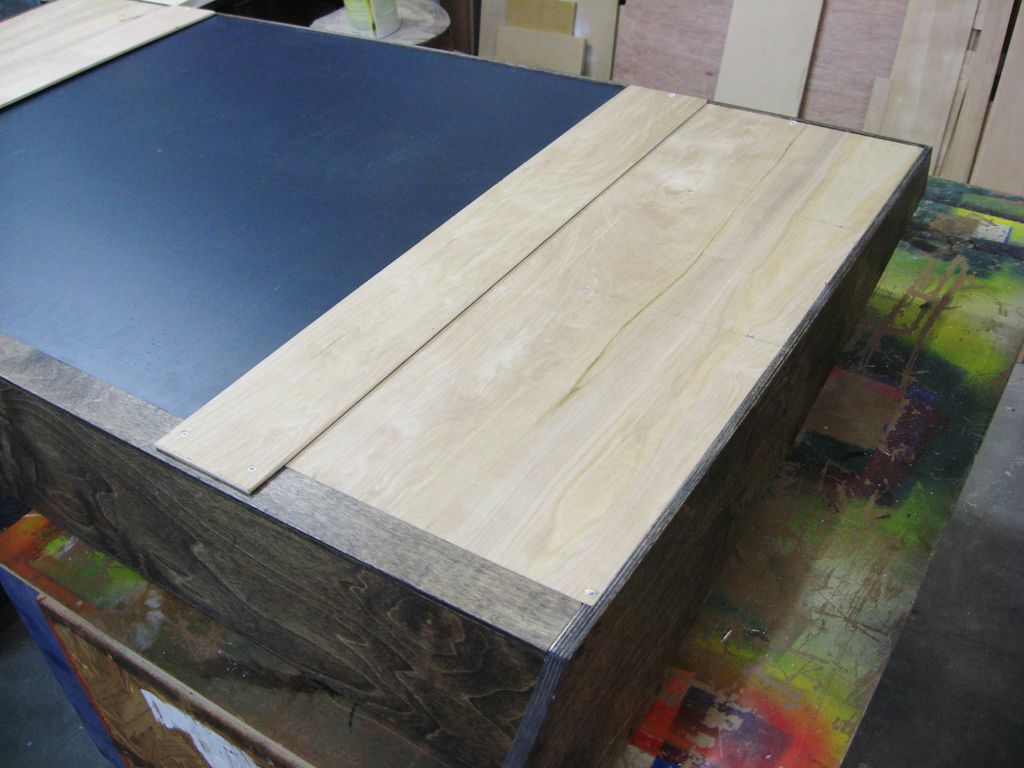
Two panels were made and finished the same way as the rest of the headboard so that they fit on either side of the mirror.
To hold the mirror in place, additional strips of thin material were glued to the sides of the wood panels (see photo 3.)
The panels were then screwed to the back of the case with small screws in pre-drilled and countersunk holes.
Step 18: Final Assembly
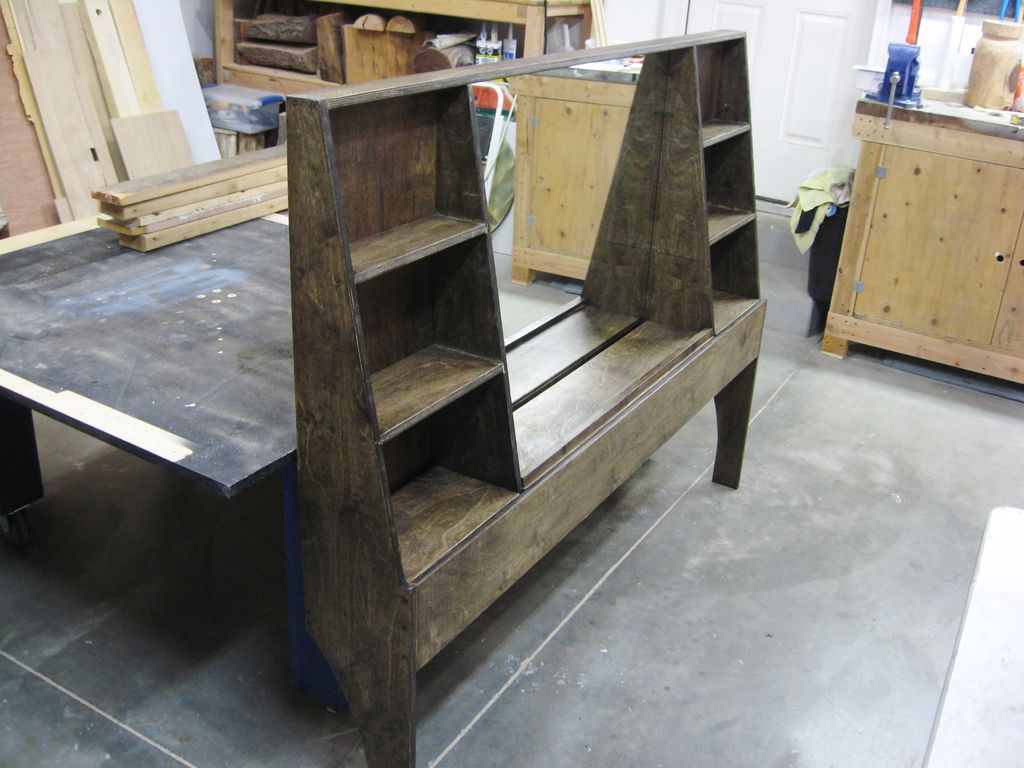
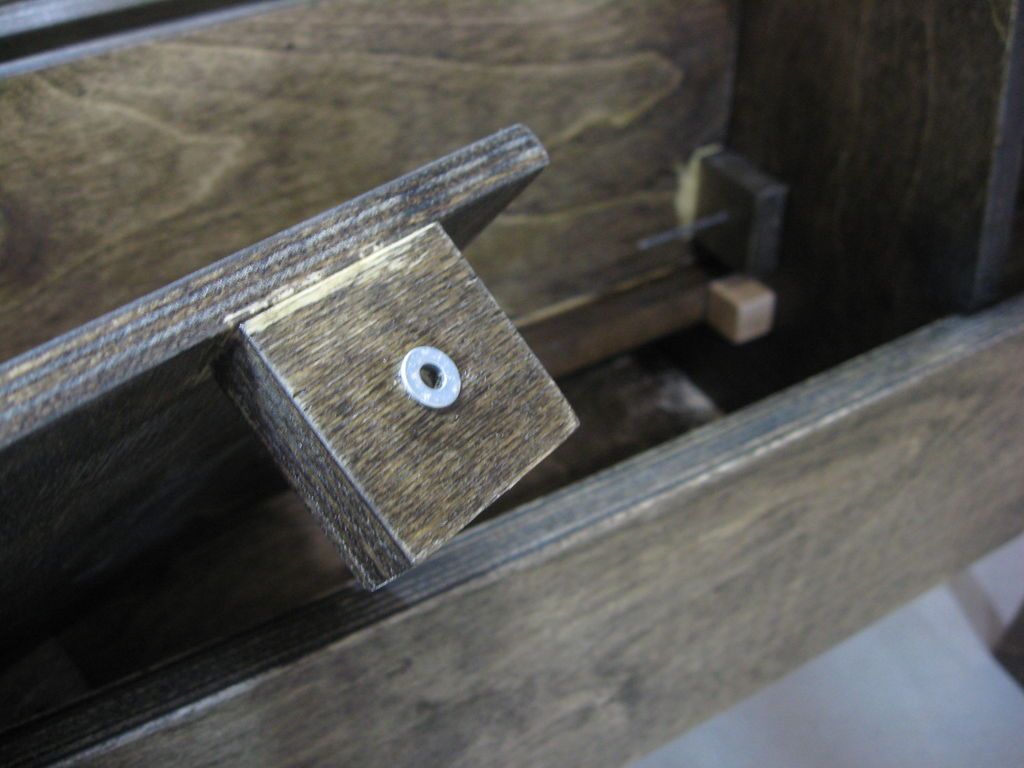
Small, thin washers were glued in place with contact cement on the outside of the hinge blocks to prevent the edges of the lids from rubbing against the walls of the case.
The lids were replaced over the secret compartments.
I added some simple bumpers to the lids of the secret compartments made from small pieces of black backed craft foam, so the lids closed quietly.
Some stops were also installed to prevent the lids from hitting the back panels or mirror when opened.
In the middle section, these were made from small wooden blocks with rubber glued to the faces, which were screwed into place.
On the side sections, I simply used small screws with shrink tubing over the heads which were screwed into place.
Step 19: Lay out and cut the boards for the front panels
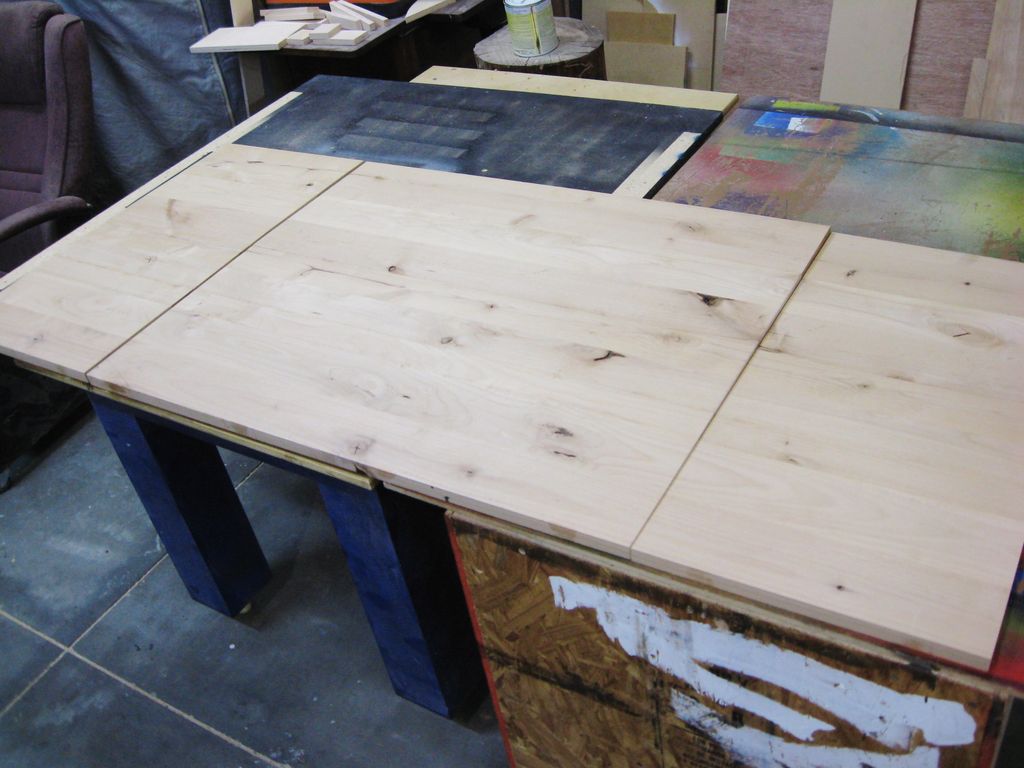
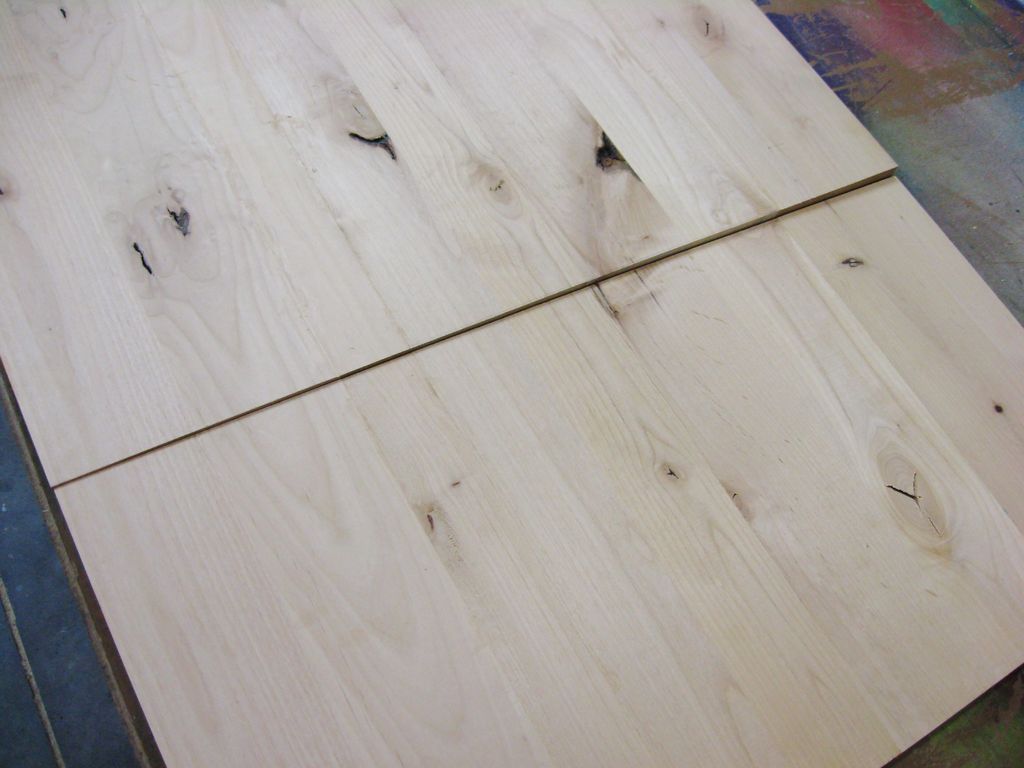
I bought a bunch of knotty alder boards to make the front panels of the headboard. After some thought, I decided to run the boards horizontally, with the grain matching the three panels.
The boards were placed and cut accordingly to create the two side doors and the removable center panel.
The boards were oriented so that any tilt of the suction cup was offset between each board.
These panels were made to extend 2 inches beyond the top and sides of the headboard box.
While an upholstered headboard would have been nice (as we sit and lean on it almost daily while watching TV and movies in bed), we ultimately opted for bare wood simply because we like the look.
We throw a couple of pillows behind us, and it's quite comfortable. If we ever change our mind and want an upholstered headboard in the case, it would be a pretty simple upgrade to make.
Step 20: Glue Panels
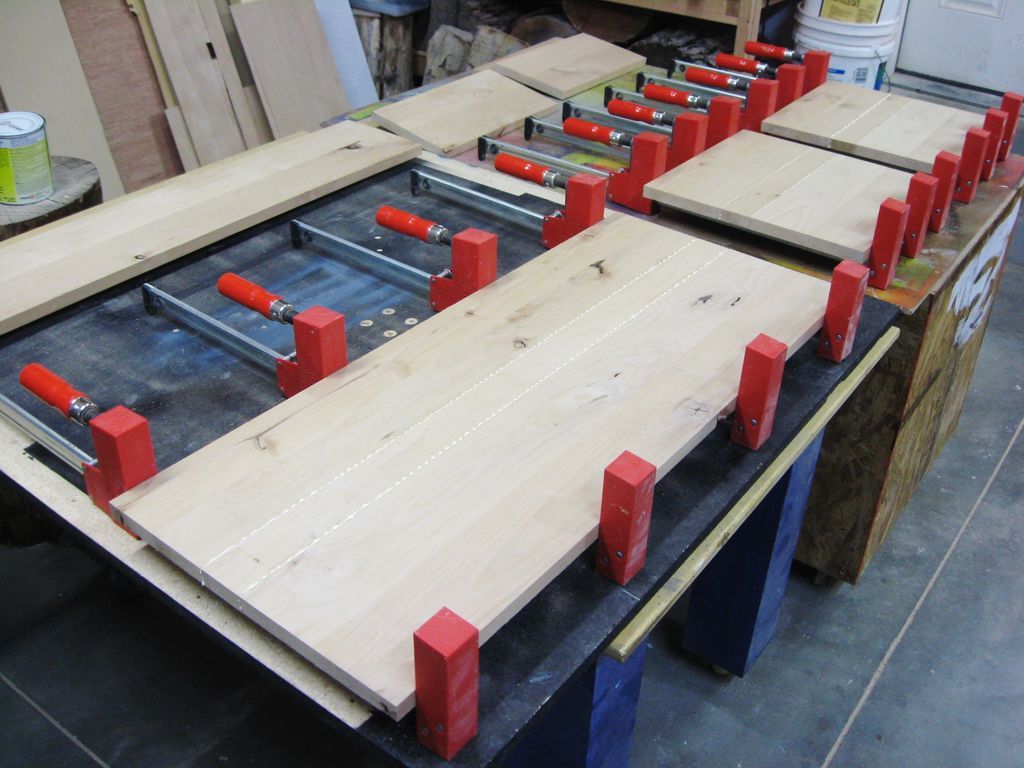
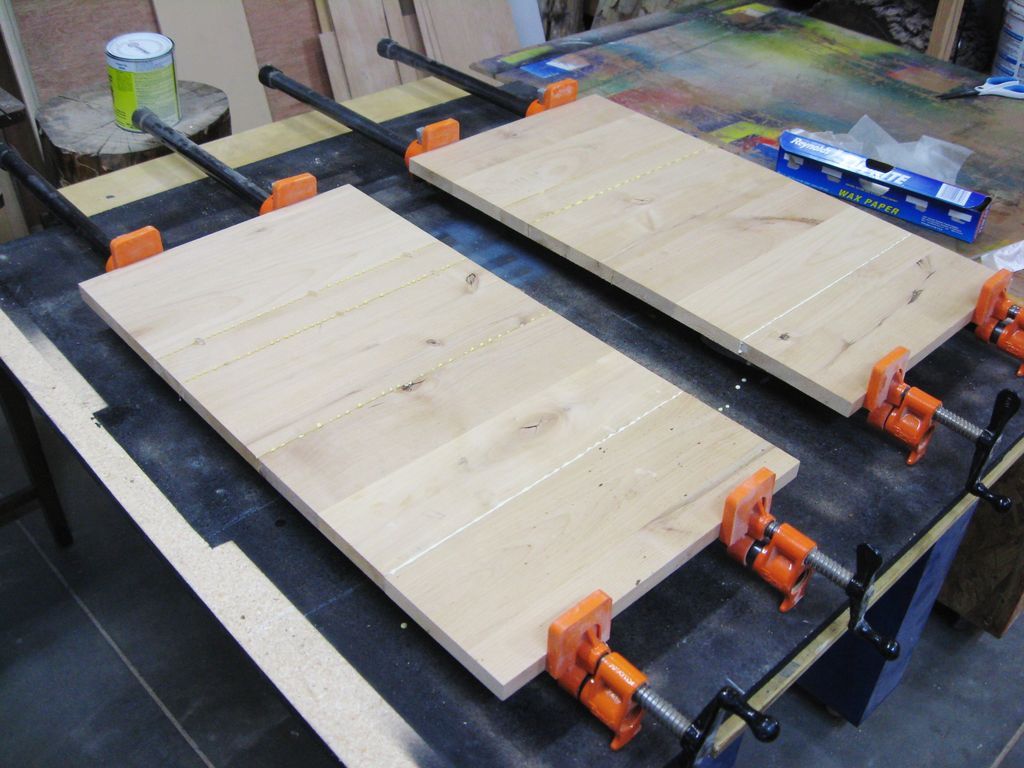
The boards for the panels were glued together using many clamps.
When the boards were dry, the excess glue was scraped off and all panels were sanded through multiple grits until they were smooth enough for my taste.
Step 21: Design and Route Recessed Hinges
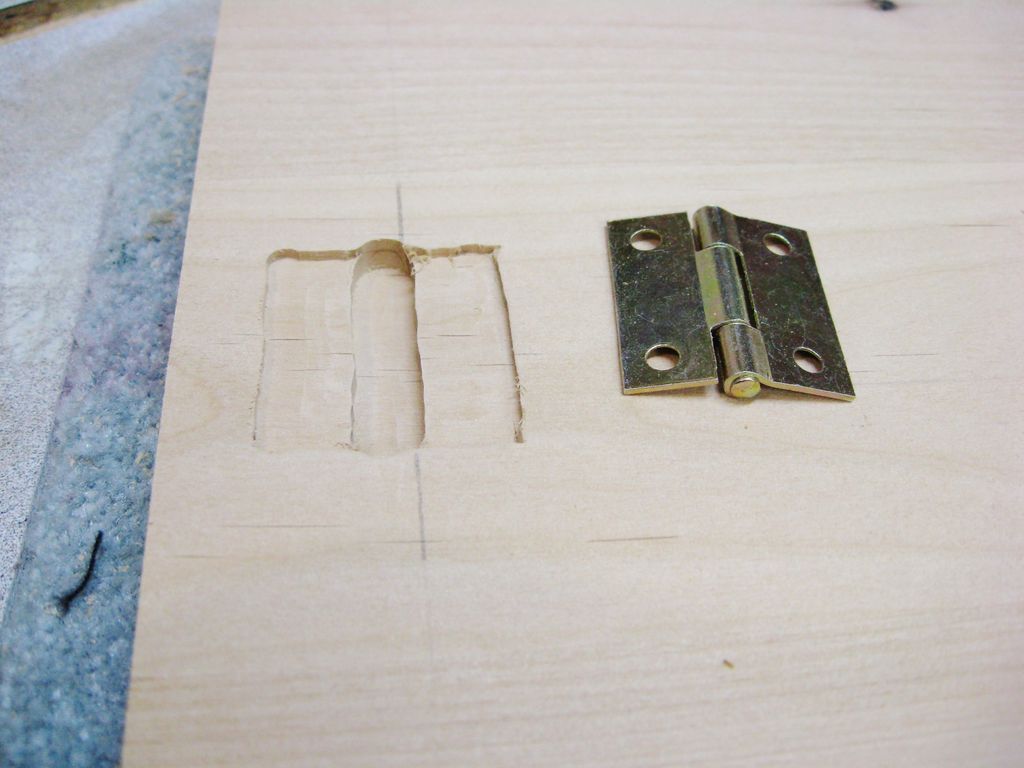
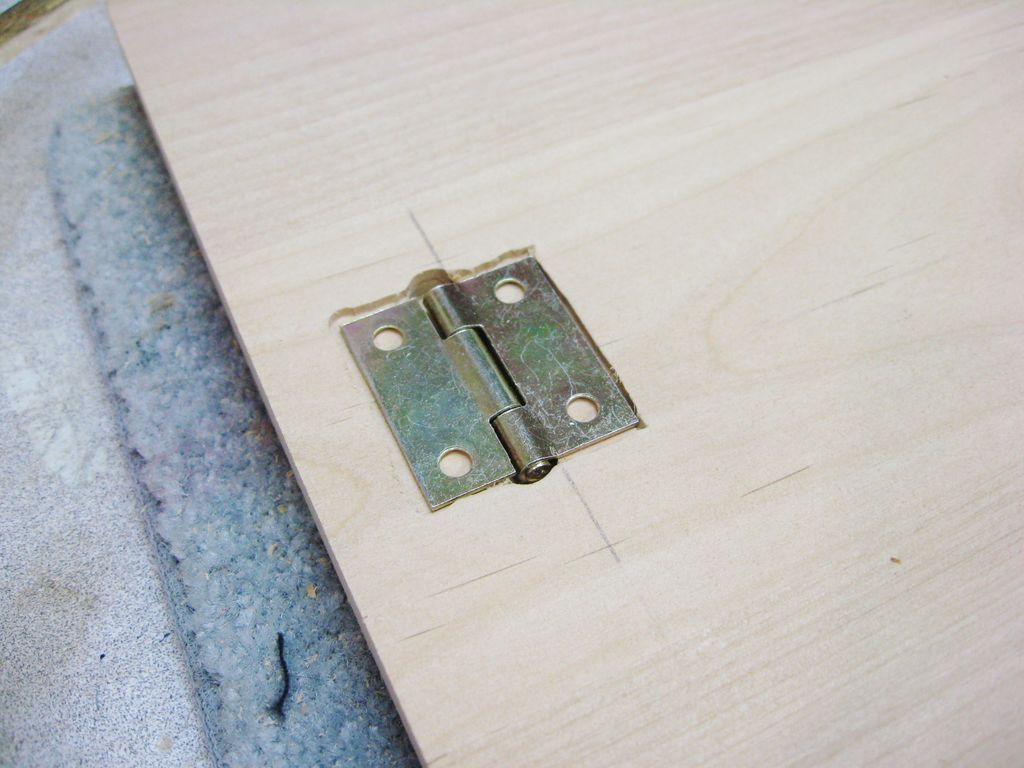
I used basic utility hinges to attach the doors to the headboard box.
For the positioning and functionality I wanted, I had to offset an area for the hinges to sit on the back of the wood doors.
This was done with a small palm router after accurately establishing the location of the hinges.
For the next steps, you will notice that the doors and center panel were completely installed and fitted to the shell, tightened, and then removed again, all before finishing and final assembly.
Step 22: Install the hinges on the doors
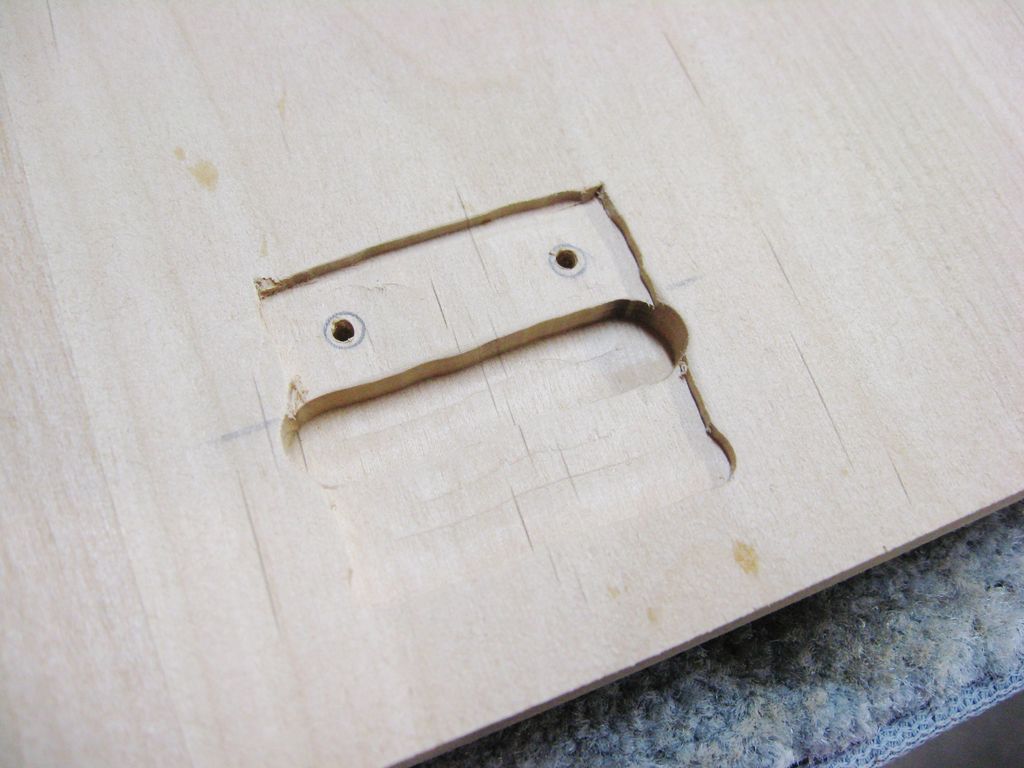
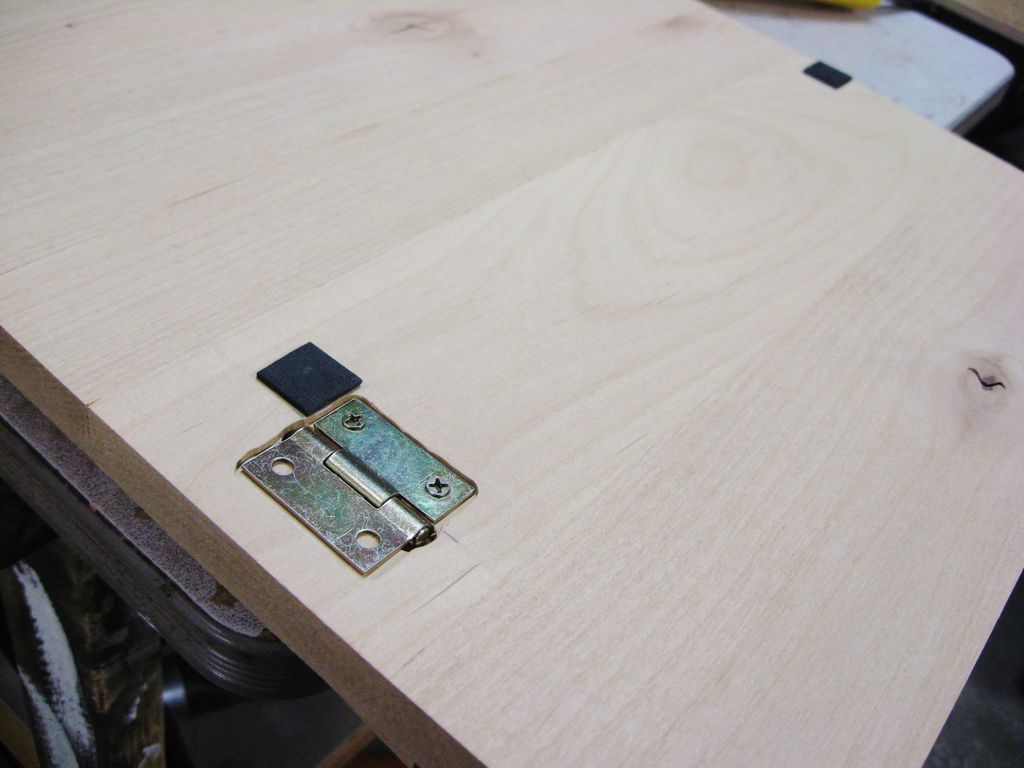
The screw locations were marked, drilled with a set of nails, and pre-drilled. The hinges were then attached to the doors.
Step 23: Install the doors
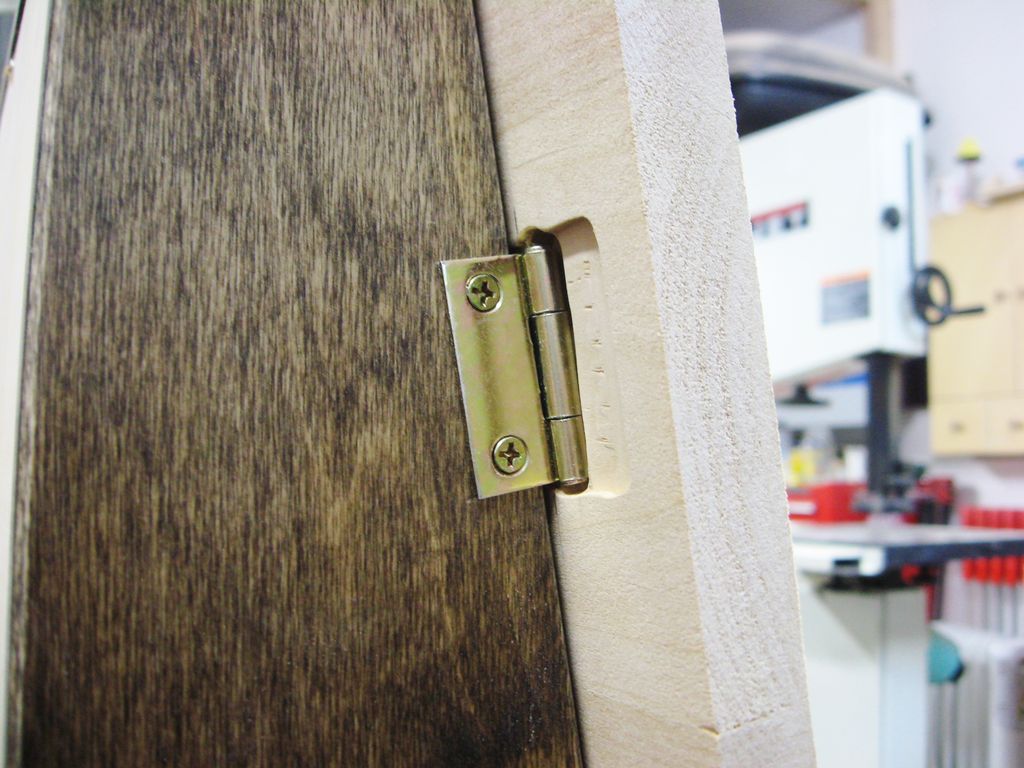
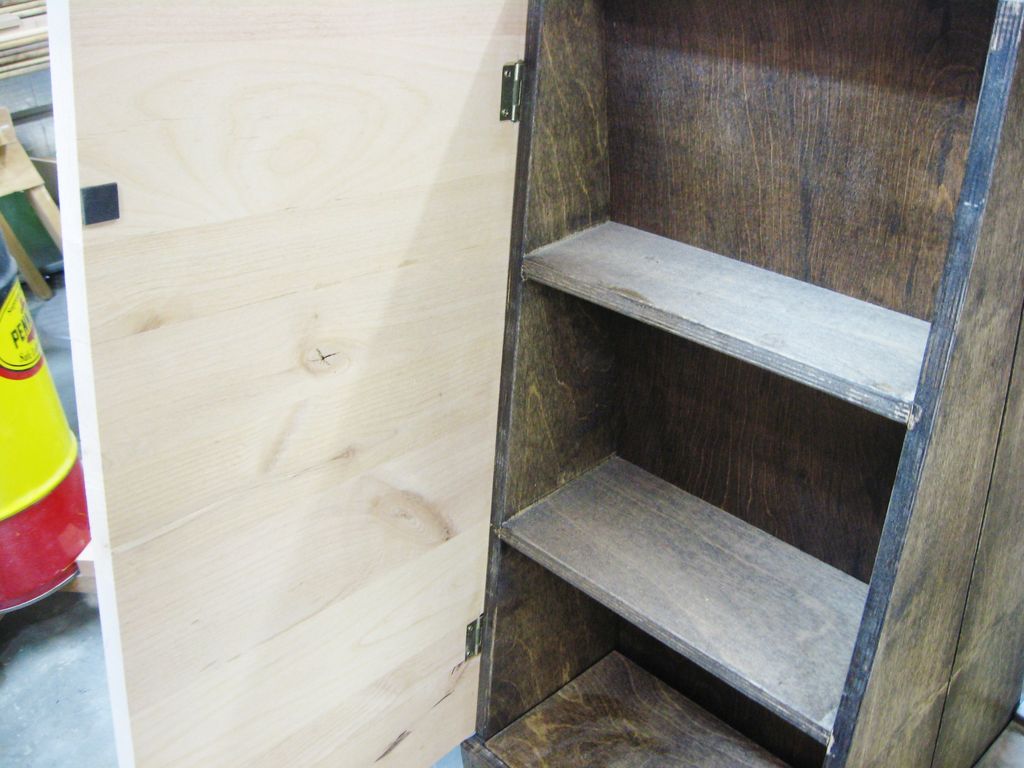
The doors were placed in the box and the position of the hinge screws were drilled. The screws had to be shortened a little, and then they were installed.
Step 24: Add Magnets to the Center Panel
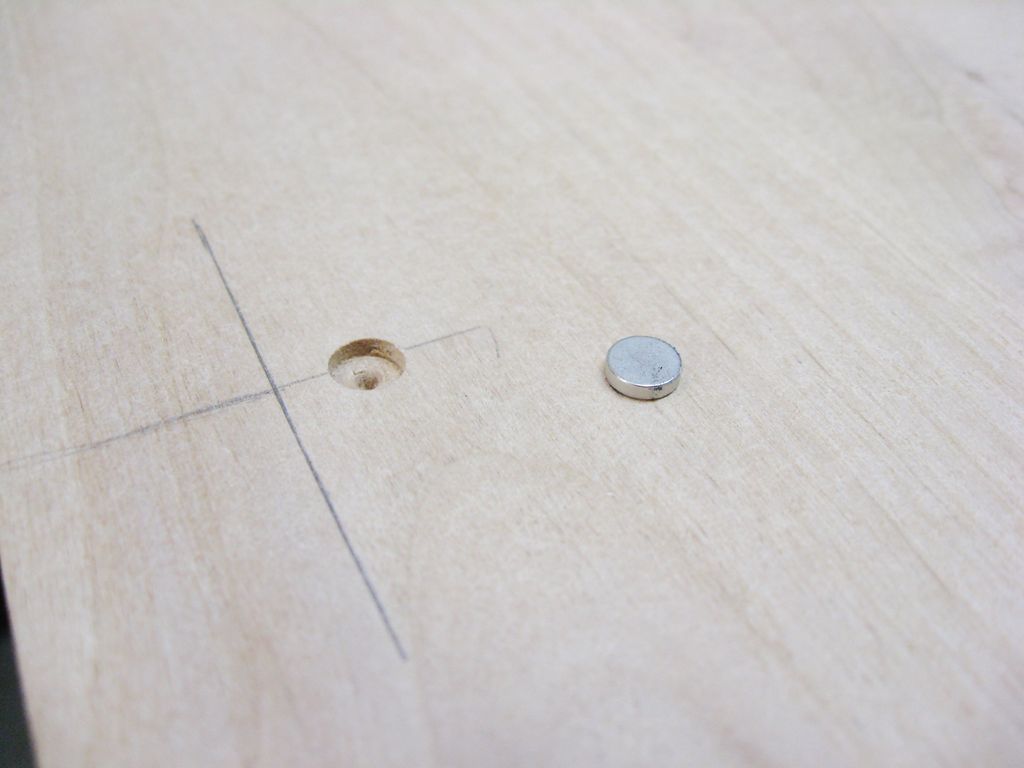
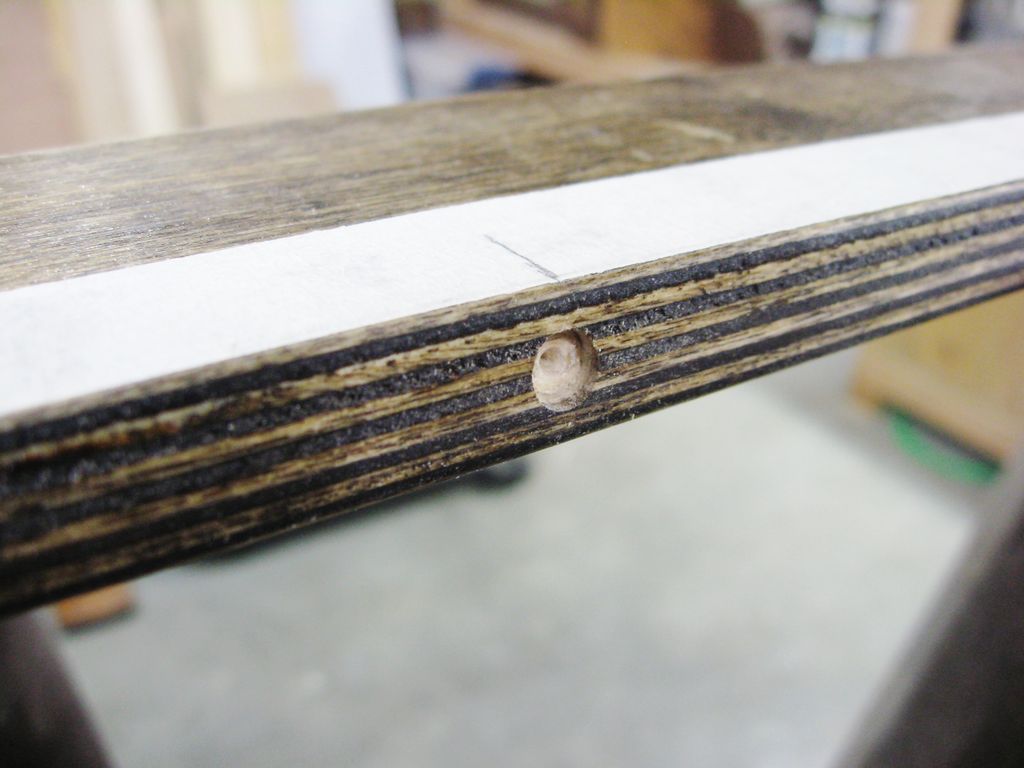
The top and bottom of the center panel and adjacent locations on the case have several neodymium magnets installed to hold the panel in place.
The locations were carefully marked, drilled with a forced drill bit, and the magnets epoxied in place.
If you do this, make sure the magnets are glued in position so they attract and don't repel each other. Very important!
Step 25: Finish the Front Doors and Center Panel
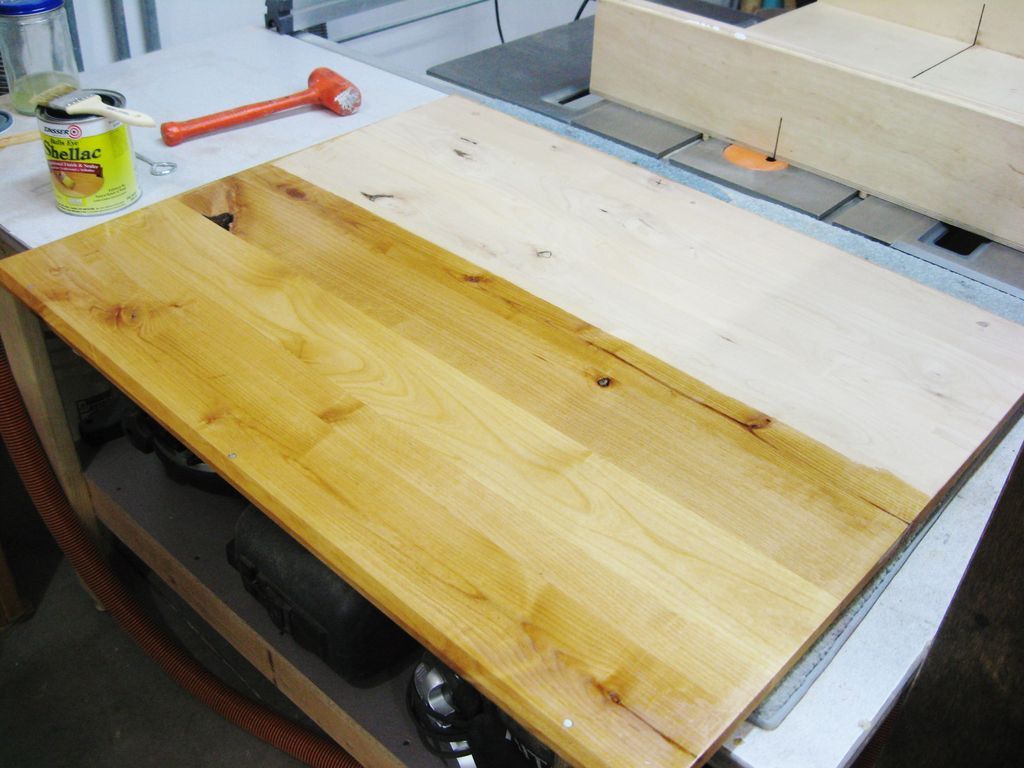
The doors and center panel were removed and finished with several coats of shellac. They were lightly sanded between coats, and after final coating.
Then they were polished with furniture paste wax.
I decided to go with shellac to make the front panels warm, simple and natural looking.
Step 26: Add keys and keysprotective wings
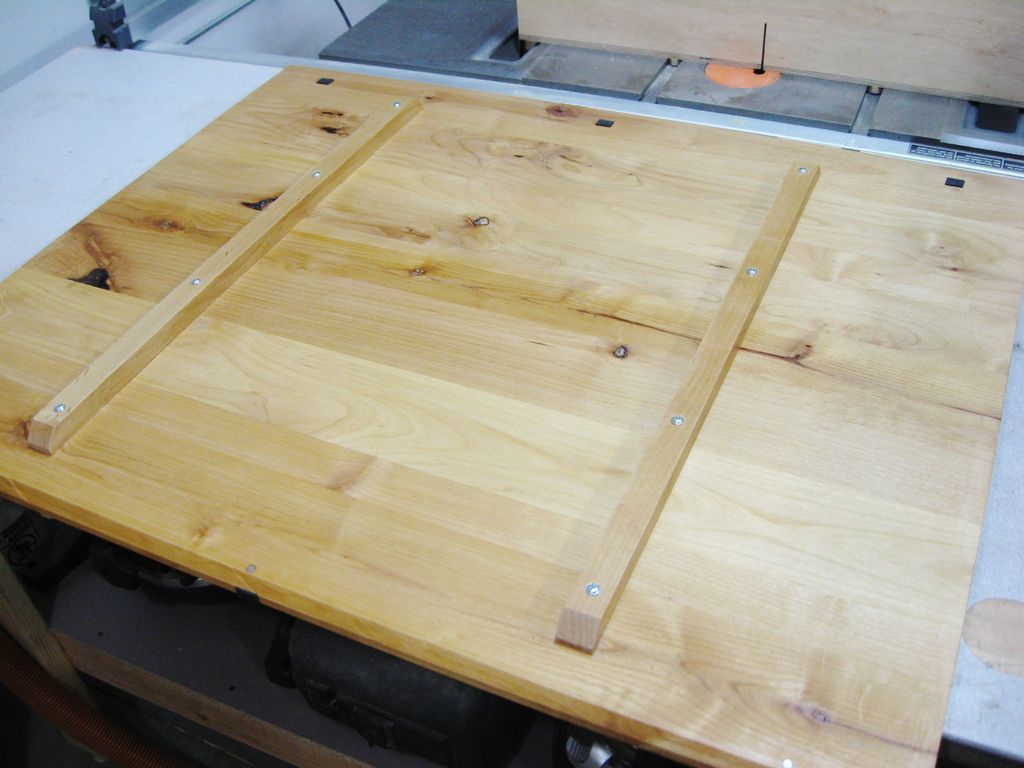
I added some braces to the center panel to keep it square and flat.
These pieces were installed with just screws (no glue) through holes that were drilled oversized to allow the panel a little acclimation movement if necessary.
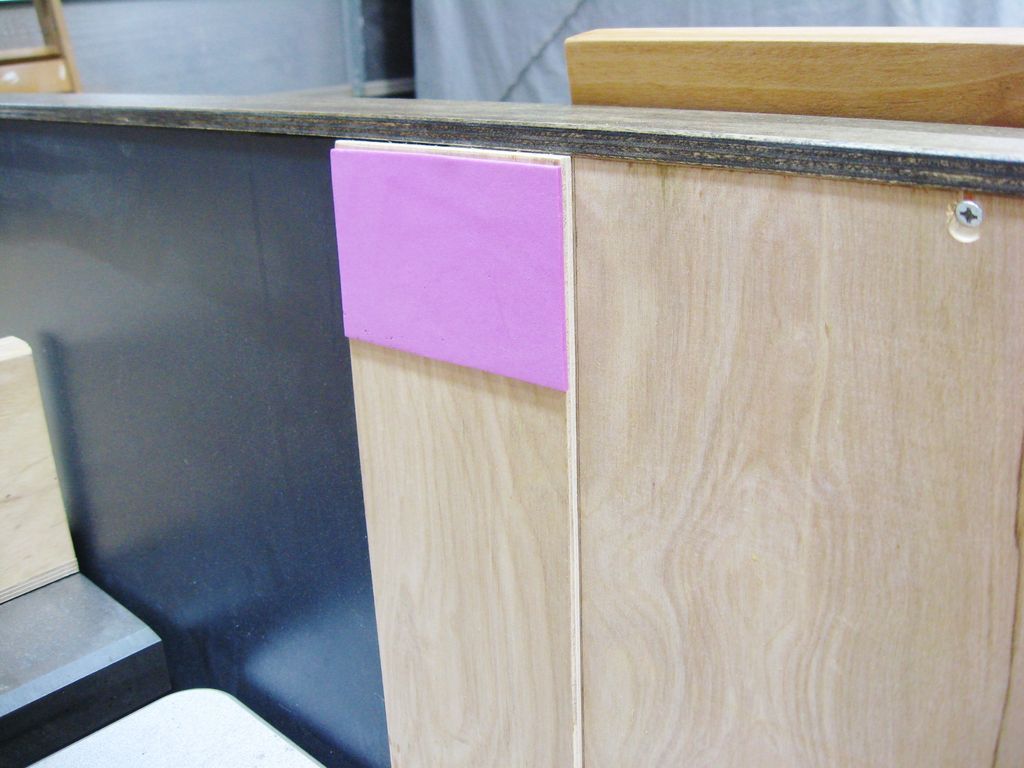
Bumper pads made of craft foam with adhesive were added to the center panel as well as the back of the headboard box.
Step 27: Install the LED lights
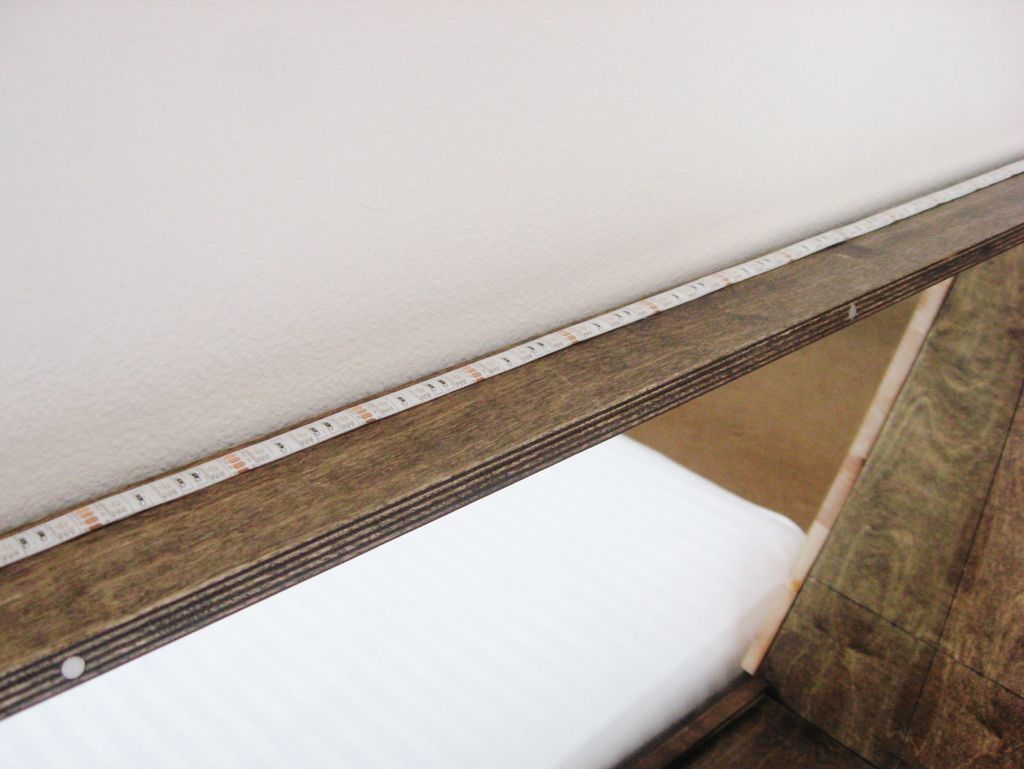
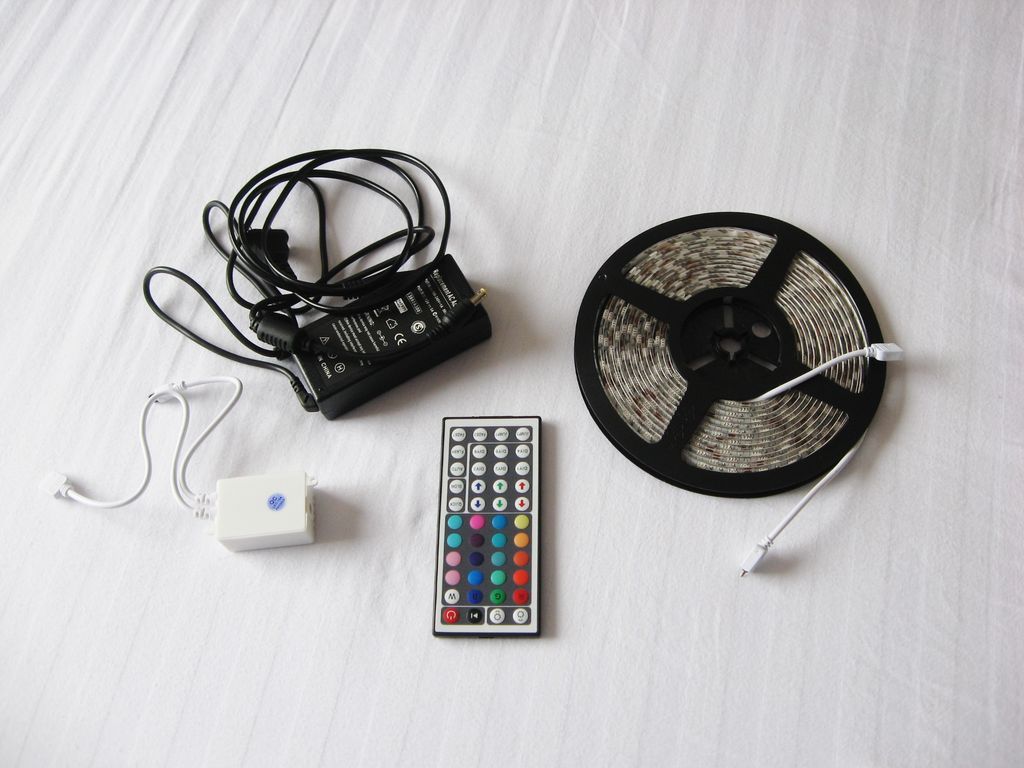
A dimmable RGB LED strip was installed along the top and sides of the headboard.
The cables were tucked under the bed, and the infrared sensor was positioned to be accessible but out of the way.
This was the easiest step of the entire project!
Step 28: Everything ready
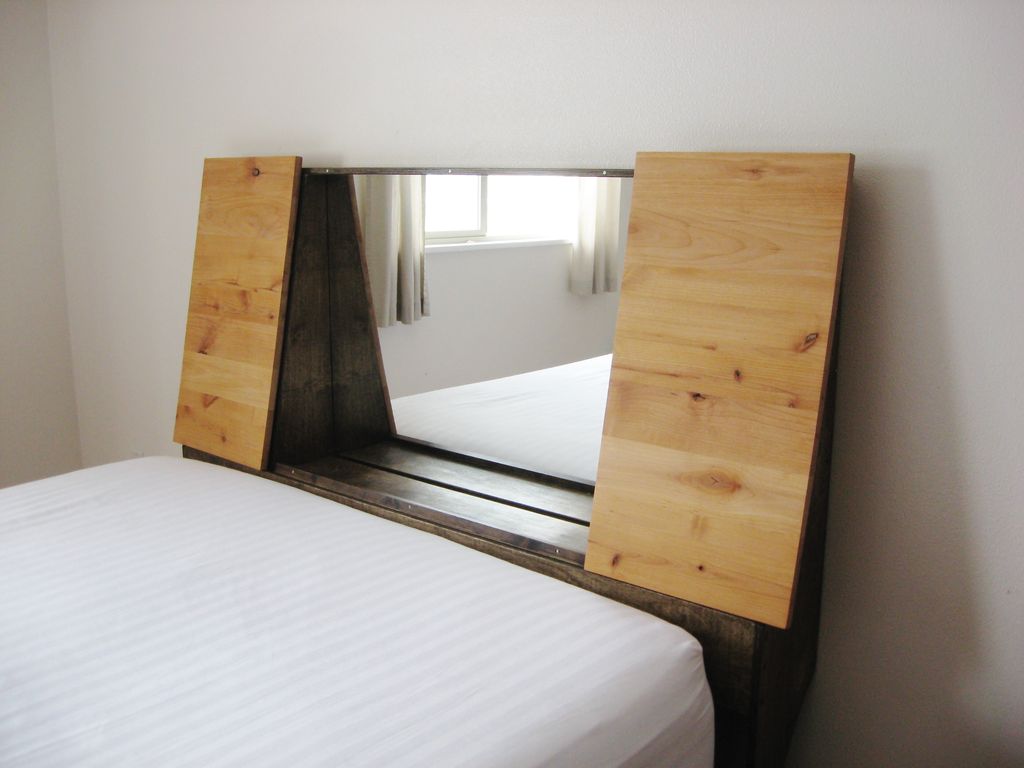
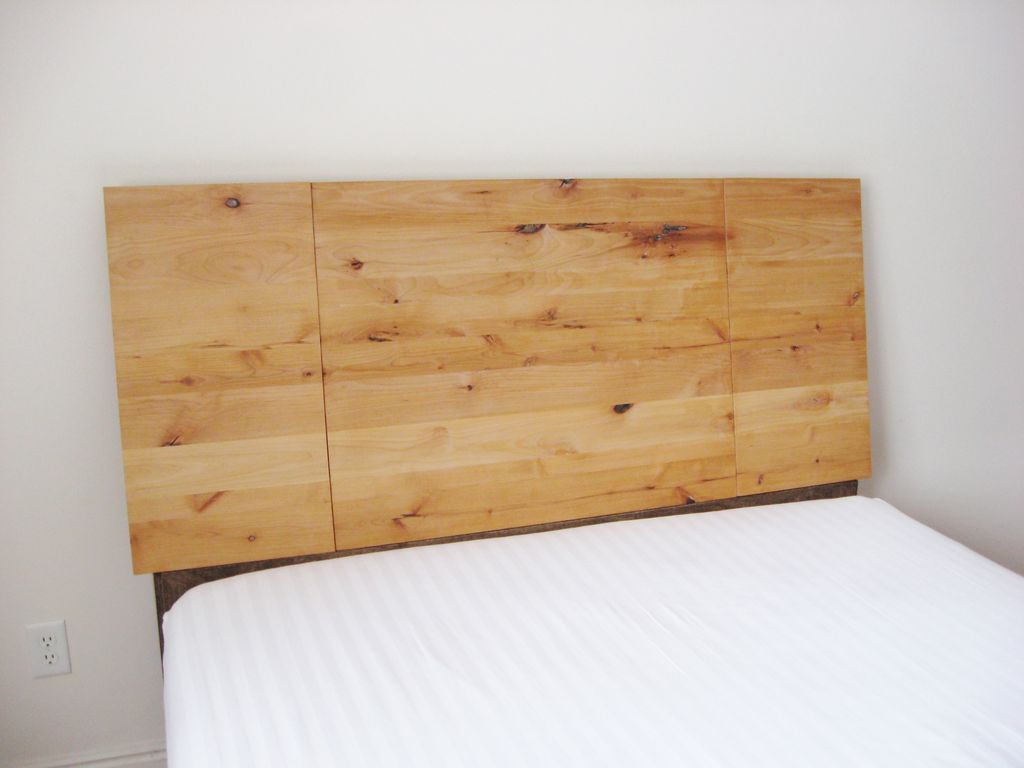
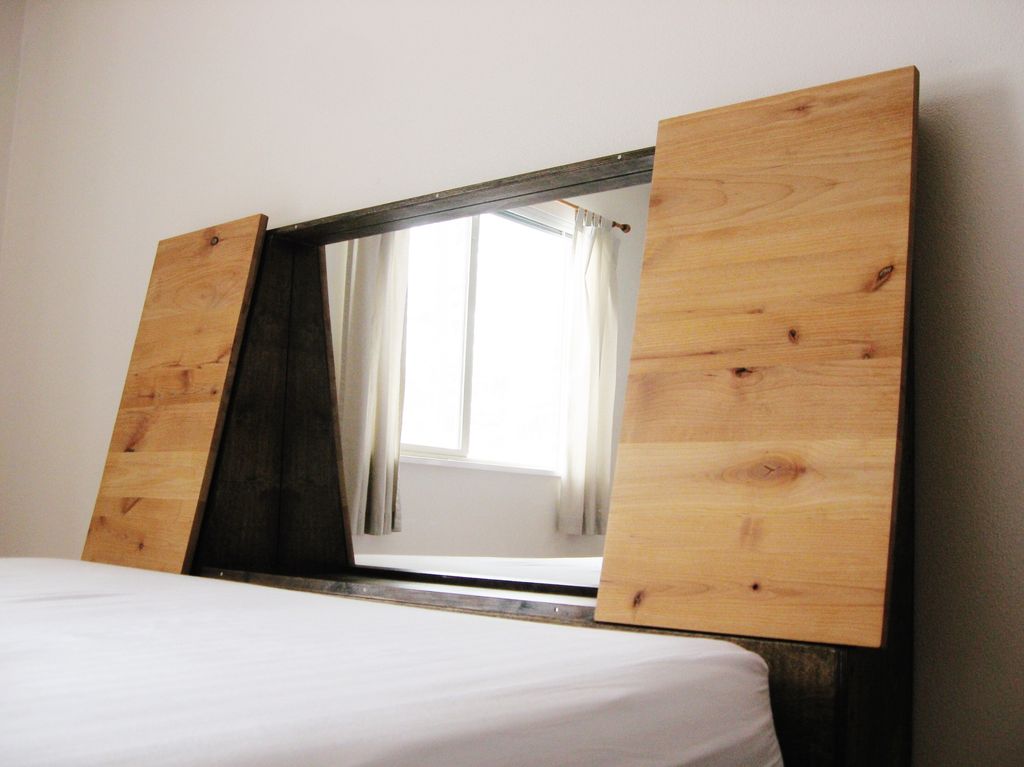
That's all. Thanks for taking a look!
Get more information at Perfectidea.com and on our Facebook for more Incredible Stacked Wood Lamp
- Tags
- Bed
Popular Content
How to make a rocket stove for outdoors
Cardboard Drawers Lined with Jeans
Ideas and Advantages of Window Grilles for the Home!
Latest Articles
How to make a refrigerator out of insulating material: Practical step-by-step guide
How to make a Kilim for the Home: Complete Step by Step Guide
How to protect ourselves from accidents in our workplace: Complete prevention and safety guide
Related Content
Simple Clip Headphone Holder
Fantastic Children's Bed Designs
9 Ideas to Insert OSB Boards in Our Home!
Magnificent Hanging Strainer Lamp
Creative Home Decor Ideas to Transform Every Space
Refreshing your home starts with smart design choices that combine comfort, personality, and functionality. Whether you want to modernize a small apartment, upgrade outdoor areas, or create cozy rustic interiors, these trending ideas can completely change the atmosphere of your space.
Outdoor Spaces That Increase Style and Functionality
Outdoor living continues to dominate modern home trends. Homeowners are increasingly investing in practical entertainment zones inspired by these BBQ shed ideas, which create the perfect setup for gatherings and weekend cooking sessions.
First impressions also matter when designing exteriors. Elegant farm entrance gates design ideas help properties stand out while improving privacy and curb appeal.
Compact living solutions are also gaining popularity. These inspiring 16x40 shed house interior design ideas show how smaller spaces can still feel luxurious and functional.
To enhance patios and entryways, homeowners are adding stylish protection with these creative porch awning exterior DIY ideas that blend aesthetics with practicality.

Rustic and Cozy Interior Design Trends
Warm and natural interiors remain timeless. These charming rustic decor ideas combine wood textures, vintage accents, and earthy tones to create welcoming spaces.
Bedrooms are becoming more personalized with curated wall arrangements. Many homeowners use these stylish picture wall ideas for bedroom spaces to display memories and artwork creatively.
Textured wall treatments are another major trend. Installing a board and batten wall adds architectural character while keeping interiors elegant and modern.
Similarly, bold accent wall ideas can instantly transform plain rooms into eye-catching focal points without requiring a full renovation.
Smart Kitchen and Organization Inspiration
Functional kitchens are essential for modern homes. These practical kitchen wall cabinet ideas maximize storage while maintaining a clean and stylish appearance.
Organization also starts at the entrance. Well-designed mud room ideas help families keep shoes, coats, and daily essentials neatly arranged.
Colorful and Personalized Home Styling
Vibrant interiors are becoming increasingly popular thanks to playful dopamine decor ideas that use bright colors and joyful accessories to improve mood and energy.
Gallery walls also continue to evolve as a major decorative feature. These trendy gallery wall inspiration ideas offer creative ways to combine prints, photos, and statement art.
Young renters and new homeowners are especially embracing these stylish first apartment aesthetic ideas to create sophisticated interiors on a budget.
Finally, selecting the right shades can dramatically influence any room’s atmosphere. These modern trendy color ideas help homeowners choose palettes that feel fresh, elegant, and timeless.
Final Thoughts
From rustic charm and colorful interiors to outdoor entertaining areas and functional storage solutions, today’s home decor trends focus on creating spaces that feel both beautiful and livable. By combining smart layouts, modern textures, and personalized decorative elements, any home can become more stylish, comfortable, and inspiring.
Browse the Shop
 Acacia frida deluxe solid wood bed frame |
Bedroom bench |
Bed chest drawers |
Lingerie dresser |
Frame base |
Mirror with jewelry storage |
30 Bathroom Vanity |
Memory foam queen mattress |
Mattresses for back pain |
Nightstand set of 2 |
Grand Goldman Shop |
Civil Lawyer
Deutschland Trikot WM 2026
Acacia frida deluxe solid wood bed frame |
Bedroom bench |
Bed chest drawers |
Lingerie dresser |
Frame base |
Mirror with jewelry storage |
30 Bathroom Vanity |
Memory foam queen mattress |
Mattresses for back pain |
Nightstand set of 2 |
Grand Goldman Shop |
Civil Lawyer
Deutschland Trikot WM 2026







