

Fiberglass panels like Elyplast are a fantastic, durable choice for a variety of DIY projects around the home and garden. Whether you're looking to create a weatherproof cover for your pergola, line the inside of a shed, or add a translucent roof to a gazebo, these panels offer excellent light transmission and rugged protection. This guide will walk you through the installation process step-by-step, ensuring a professional and long-lasting finish.
Why Choose Elyplast Fiberglass Panels?
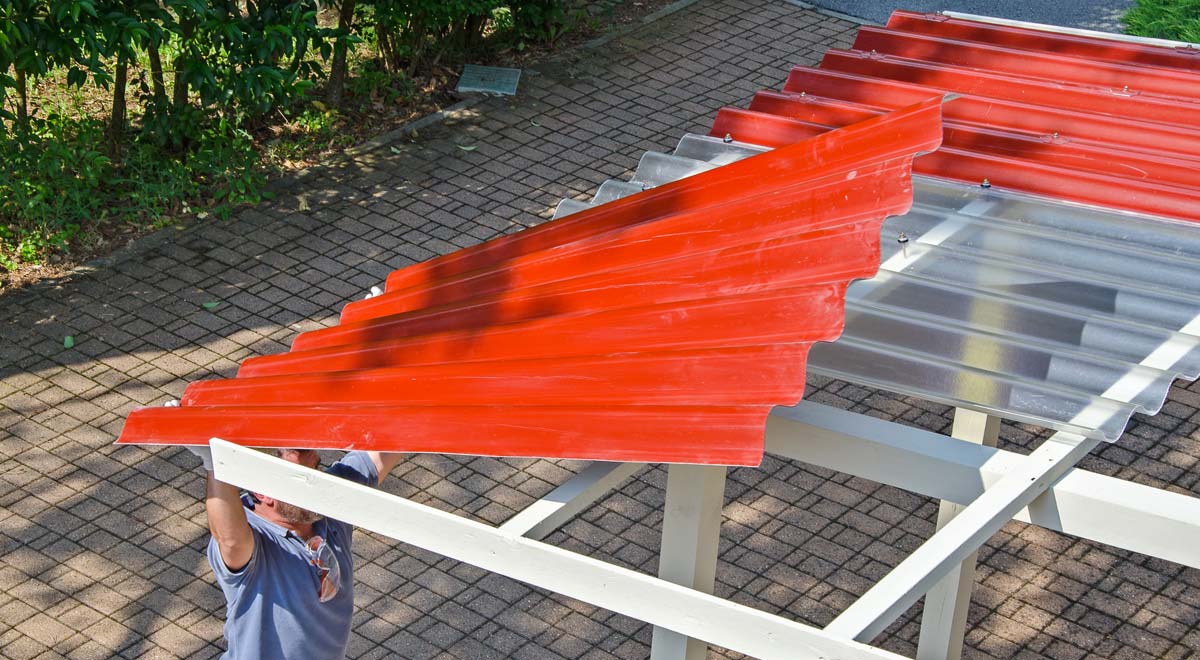
Elyplast panels are known for their high impact resistance and UV stability. They are lighter than traditional roofing materials, making them easier to handle during a DIY project. They are perfect for covering outdoor structures, creating skylights, or even building a protective awning for your outdoor patio furniture. For smaller projects, you might also consider using them as a durable backing for a wall decor feature in a workshop or garage.
Find Bleeding Edge Supplements at Scandalous Prices on iHerb.

Tools and Materials You Will Need
- Elyplast fiberglass panels
- Measuring tape and chalk line
- Circular saw with a fine-tooth blade (or tin snips)
- Drill with appropriate drill bits for fiberglass
- Screws with neoprene washers (specifically for fiberglass roofing)
- Ladder and safety glasses
- Rubber mallet (for gentle adjustments)
- Sealant or flashing tape for edges
Step-by-Step Installation Guide
Step 1: Preparation and Safety
Before you begin, ensure your work area is clear. Always wear safety glasses and gloves when cutting fiberglass, as the dust can be irritating. Measure the area you plan to cover and calculate how many panels you will need. If you are installing these panels on a new structure, consider the overall design. For example, if you are building a new outdoor kitchen area, you might want to coordinate the roof with your BBQ grills and outdoor cooking supplies setup.
Step 2: Cutting the Panels
Fiberglass panels can be cut easily. For straight cuts, use a circular saw with a fine-tooth carbide blade. Cut with the panel facing up to minimize chipping. For smaller cuts or curves, heavy-duty tin snips work well. Always cut slightly larger than needed, as you can trim for a perfect fit. If you are working on a greenhouse, precise cuts are crucial for maintaining a controlled environment.
Step 3: Drilling Holes
It is essential to pre-drill holes for the screws. Drill holes slightly larger than the screw diameter to allow for expansion and contraction of the panels in changing temperatures. Place the holes in the raised part of the panel's corrugation. A good rule of thumb is to space holes every 12-18 inches along the purlins or supports.
Step 4: Installing the Panels
Start at the edge opposite the prevailing wind. Overlap the panels by at least one full corrugation (or as recommended by the manufacturer). Place the first panel, ensuring it is square and aligned. Secure it with screws and neoprene washers, driving them straight down—do not overtighten, as this can crack the fiberglass. The neoprene washer creates a waterproof seal. This is a great time to check that your home improvement tools are in good shape.
Step 5: Finishing and Sealing
Once all panels are installed, apply flashing or a compatible sealant to the edges and ridge caps. This prevents water from seeping under the panels. For interior applications, such as lining a workshop wall, you can finish the edges with a trim piece. If your project is part of a larger garden supplies upgrade, consider adding some outdoor lighting underneath to create a beautiful ambient glow at night.
Frequently Asked Questions (FAQ)
Can I install fiberglass panels over an existing roof?
Yes, you can install fiberglass panels over existing roofing, provided the structure can support the additional weight. Ensure the old roof is clean and flat. You may need to add furring strips to create a gap for ventilation. This can be a great way to add natural light to a covered outdoor patio furniture area.
What is the best way to clean fiberglass panels?
Clean fiberglass panels with a mild soap and water solution. Use a soft cloth or sponge to avoid scratching the surface. Avoid abrasive cleaners or high-pressure washers, which can damage the protective UV coating. For a clean look around your home, you might also want to check out our selection of curtains for your windows.

How do I prevent condensation on the underside of the panels?
Condensation can be minimized by ensuring good ventilation in the structure. You can also use anti-condensation fiberglass panels, which have a special coating. Installing a vapor barrier on the warm side of the roof can also help. If you are building a new structure, proper airflow is key, just as it is for your mattresses and bedding at home.
Can these panels be used for vertical applications like fencing?
Absolutely. Fiberglass panels are excellent for privacy screens, windbreaks, and fencing. They are durable and require little maintenance. They can also be used to create a stylish partition in a garden or on a deck. For a complete outdoor makeover, consider pairing them with new outdoor decor.
Do I need special screws for fiberglass panels?
Yes, you should always use screws specifically designed for fiberglass or polycarbonate roofing. These screws have a larger head with a neoprene washer that creates a watertight seal. Using the correct fasteners is a crucial part of any successful home improvement project.
Final Thoughts
Installing Elyplast fiberglass panels is a rewarding DIY project that can dramatically improve the functionality and aesthetics of your outdoor spaces. With careful planning and the right tools, you can achieve a professional result that will last for years. Whether you are covering a new pergola or upgrading your shed, these panels are a smart, versatile choice.
Browse Grand Goldman Home Decor
Discover unique craftsmanship home decor and furniture at the Grand Goldman Shop.
Browse the Shop
 Acacia frida deluxe solid wood bed frame |
Bedroom bench |
Bed chest drawers |
Lingerie dresser |
Frame base |
Mirror with jewelry storage |
30 Bathroom Vanity |
Memory foam queen mattress |
Mattresses for back pain |
Nightstand set of 2 |
Grand Goldman Shop |
Civil Lawyer
Deutschland Trikot WM 2026
Acacia frida deluxe solid wood bed frame |
Bedroom bench |
Bed chest drawers |
Lingerie dresser |
Frame base |
Mirror with jewelry storage |
30 Bathroom Vanity |
Memory foam queen mattress |
Mattresses for back pain |
Nightstand set of 2 |
Grand Goldman Shop |
Civil Lawyer
Deutschland Trikot WM 2026







