

Create your own bathing station for your pet with the following tutorial, which is very easy to make with simple materials.
Give your dog the attention he deserves with a dedicated dog washing station!
Find Bleeding Edge Supplements at Scandalous Prices on iHerb.

With a few pieces of off-the-shelf hardware and a stylish accessory from Moen, you can keep your dog clean and add a nice accent to your home.
I made this project with some basic woodworking tools, some plumbing fixtures, and garden hoses for water supply and drainage.
You have the added benefit of using drain water to keep your plants healthy while under state-imposed water restrictions!
Create a beautiful bath station for your pet with the following steps:
Step 1: Tools and materials


Accessory:
- Weymouth Brushed Nickel Two-Handle Tub Filler with Handheld Shower by Moen. This accessory fits the project stylistically, and the handheld shower attachment makes washing a dog an easy task.
Tools - Table saw (or circular saw)
- Hand drill
- Band saw (or Saw)
- Nail gun (or hammer and finishing nails)
- Wood glue + tweezers
- Construction adhesive E-6000
- Teflon tape
- Crescent pliers and wrench
Platform materials:
- 3/4″ plywood (approximately 4’X4’)
- 1X6 redwood boards (approximately 27 linear feet)
- 2X4 lumber (about 24″ total)
- 1 1/2″ X 1 1/2″ hardwood posts (four to 8″ long)
- 30″ galvanized steel sink
Plumbing materials:
- 1″ PVC elbow drain strainer
- 1″ male to 3/4″ female PVC adapter
- 3″ long 3/4″ PVC pipe segment
- PVC adapter with 3/4″ to 3/4″ male thread
- Female thread to female thread to hose thread adapter
- Male to male thread adapter for hose thread
- 3/4″ pipe threaded cap
- Galvanized plumbing tape
- Two garden hoses
Step 2: Design

The design is quite simple for this project. It consists of a plywood box with an open bottom (32 1/2″ X 32 1/2″ X 5 1/4″) that is covered with redwood boards. There is a wash tub in the center, and the fixture is placed at an angle in one of the corners.
The platform that the wash tub sits on has wooden legs giving it about 3″ of clearance underneath. This allows the hoses to be routed. The Moen accessory I used for the project is a floor-mounted tub filler with a handheld shower attachment. The floor mount feature allowed me to keep the profile low, as both the tub filler and tub can be attached to a raised platform, and the handheld shower attachment is essential for dog washing.
Step 3: Building the Platform


The deck is made of 3/4″ plywood. The drain hole is drilled in the center of the deck, and the two holes for the tub filler tubes are placed in the corner.
First, I cut the plywood pieces. With all the plywood pieces cut, I glued, fastened and nailed the panels. Once the nails are in, there's really no need to keep the clamps on.
With the box built, I measured and marked the hole centers on the top piece. Before drilling these holes, it is important that you double checkthe dimensions of its parts (the strainer drain and the accessory tubes). I used saws for the holes. With these, it's easy to get flush holes with a hand drill instead of trowels.
Step 4: Make a wooden clamp


The bathtub filler tubes must be securely attached to the platform. The package comes with some heavy-duty adjustable wall framing hardware, but it's overkill for such a small project. In the narrow space I left for myself in the corner of the platform, I fashioned a wooden clamp to attach to the underside.
The template provided in this step includes holes for the tubing and a 1/4″ gap between the two parts of the clamp. The piece with the angled ends is screwed and glued to the bottom of the platform, and the other two pieces are attached with the screws. Screws hold the clamps in place and when the tubes are inserted, they can be tightened to keep them in place.
I made this clamp from a spare piece of 2X6 wood. I used the jig to drill the holes on the table saw, then used the saw and a saw to make the other cuts. I made the clamps independent, but this could also be done without the perpendicular space in between.
You can see in the third photo in this step that there are two intersecting holes in my clamp. This is because I didn't measure correctly when I drilled the holes the first time. The clamp still works fine, it just needs semi-circular slots that line up with the holes in the deck.
Step 5: Finishing the cover


When the clamp was finished, I attached it to the bottom of the deck so all the holes would line up.
Next, I cut my finishing boards to size. These dimensions will differ depending on the size of the boards used to finish the plywood box. The important thing to remember is that the edges of the finish boards on the top must overlap the edges of the box so that they are flush with the faces of the finish boards on the sides.
For example, if my plywood box is 30″ wide and my finish boards are 1/2″ thick, my finish boards on top would need to be 31″ long so that they stick out 1/2″ on each side.
With my boards cut to size, I glued the ugliest side of the boards, placed them on the box, and used the nail gun to attach them to the box.
With all the boards glued and nailed. I turned the box over and drilled holes through the finishing board; This part is easy because the holes in the plywood box are already there to align the drill.
Lastly, I attached the 1 1/2″ square posts to the corners.
Step 6: Place the Wash Tub


The next step was to place the wash tub. First, I used a hole saw to drill a hole in its center the same size as my strainer drain. Next, I used a large amount of silicone caulk around the hole in the center of the deck for an extra layer of water protection.
With the wash tub in place, I used more caulk around the strainer drain gasket and around the hole in the wash tub. After I had applied all the caulk I would need, I inserted the strainer drain and tightened the nut on the bottom of the deck.
WithPro tip:Water always wins. If you want to keep a project like this in good shape for years, it would be best to remove the drain and reapply caulk about once a year to make sure water doesn't leak and rot the wood.
Step 7: Drain Assembly


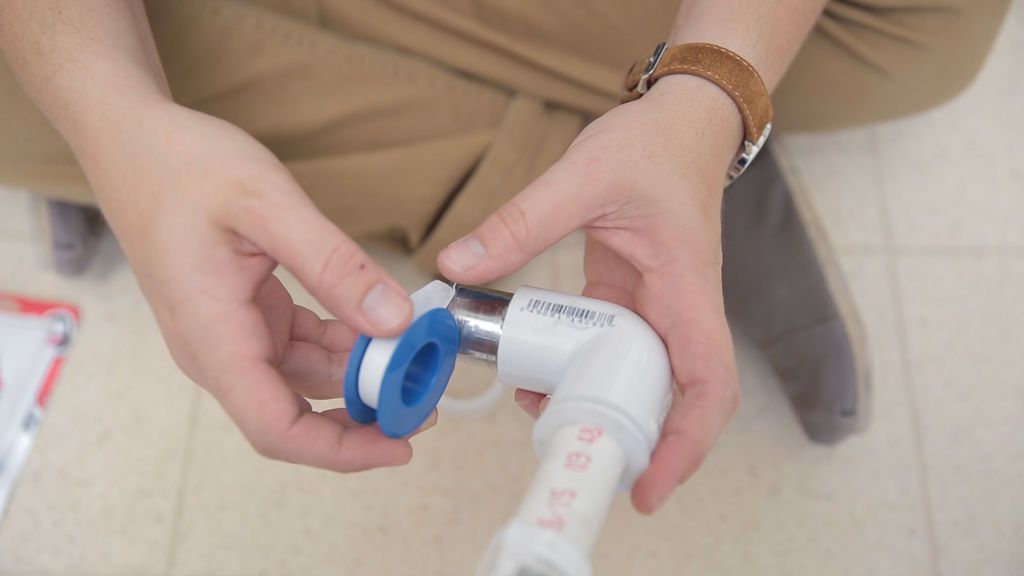
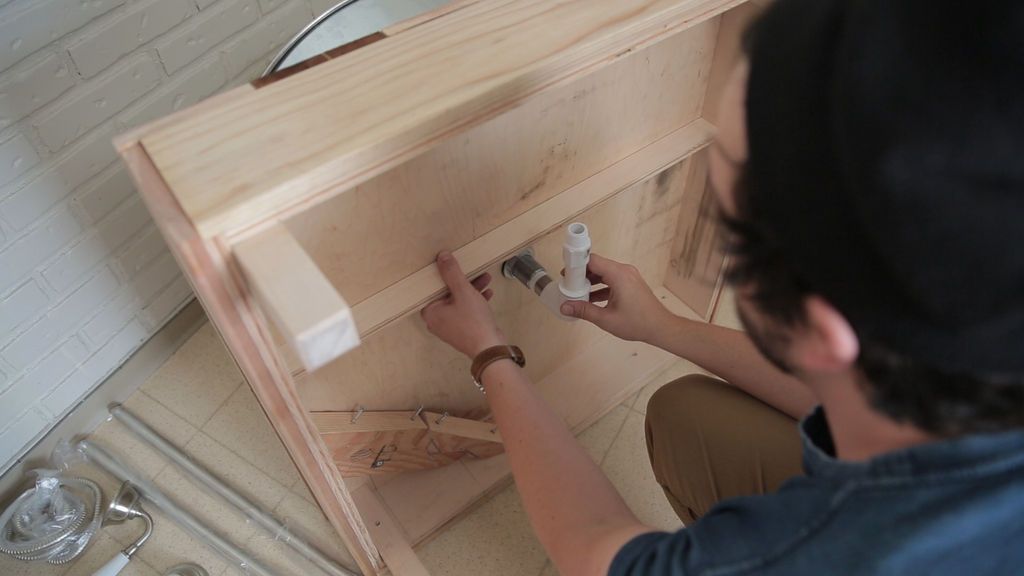


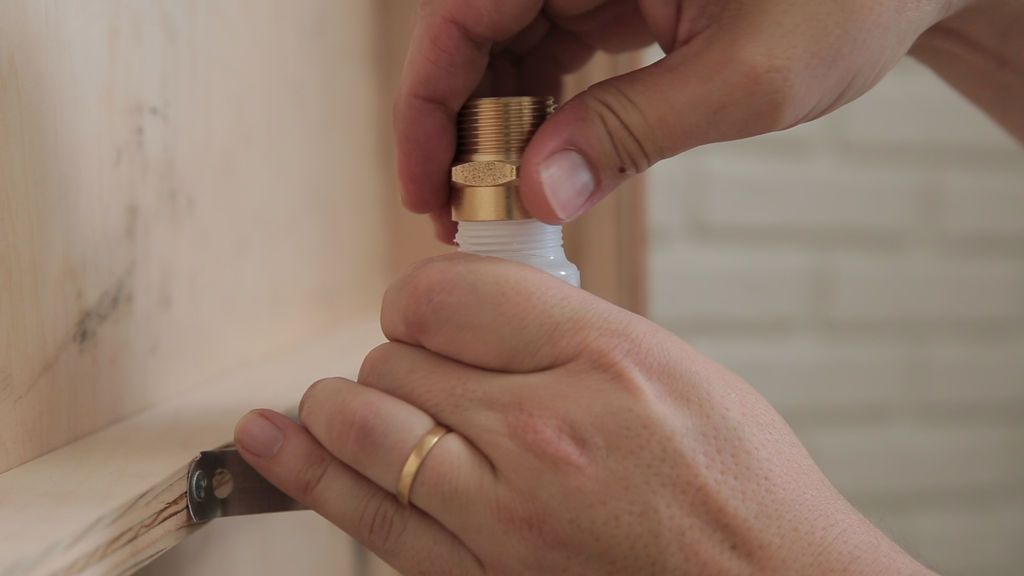
I designed the project so that the drain would connect to a garden hose. That way, I could use the wastewater to water my plants (a big plus in a drought!).
First, I applied a healthy dose of E-6000 to the metal nipple that comes with the filter drain. E-6000 is waterproof and sticks to almost anything, so it seemed like a good choice for this application.
This nipple inserts into the 1″ PVC elbow. The open end of the elbow receives the 1″-3/4″ adapter and the 3″ long 3/4″ PVC pipe inserts into this adapter. The open end of the 3/4″ PVC pipe connects to the threaded adapter, and then this adapter connects to the hose adapter and finally to the garden hose.
This seems like a lot of parts to connect a drain to a garden hose, but I had three people at the hardware store brainstorming with me, and this seemed like the best solution based on their inventory.
With my Frankenstein hose adapter mounted, I put some Teflon tape around the threaded end of the drain nipple and screwed it tightly onto the drain end of the strainer with some channel locks.
When this was in place, I used some plumber's tape to keep the adapter firmly attached to the bottom of the platform. This is very important because any pressure exerted by the garden hose could break the seals! E-6000 that I trust to keep my floor dry!
Step 8: Assembly and placement of the bathtub filler
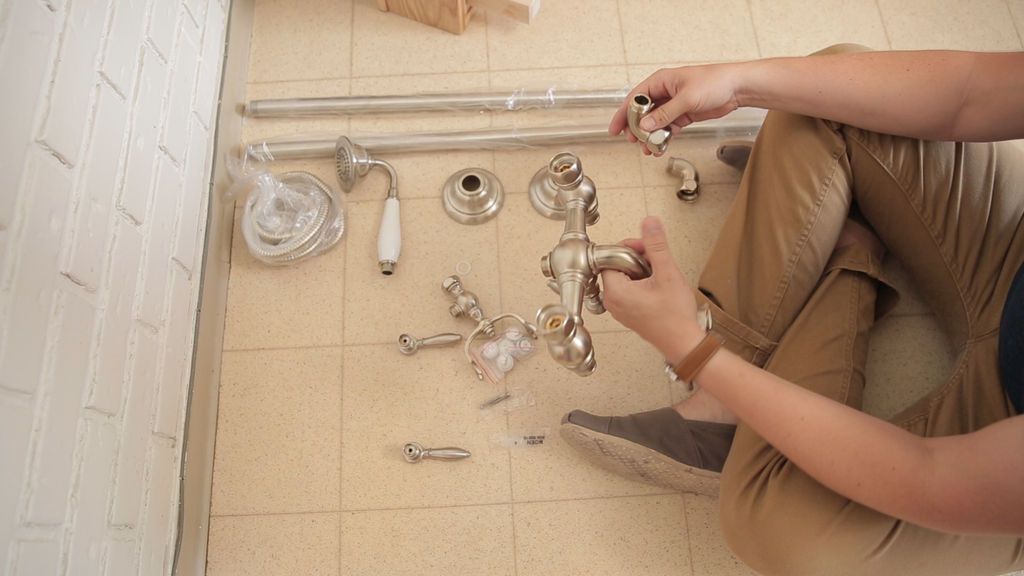
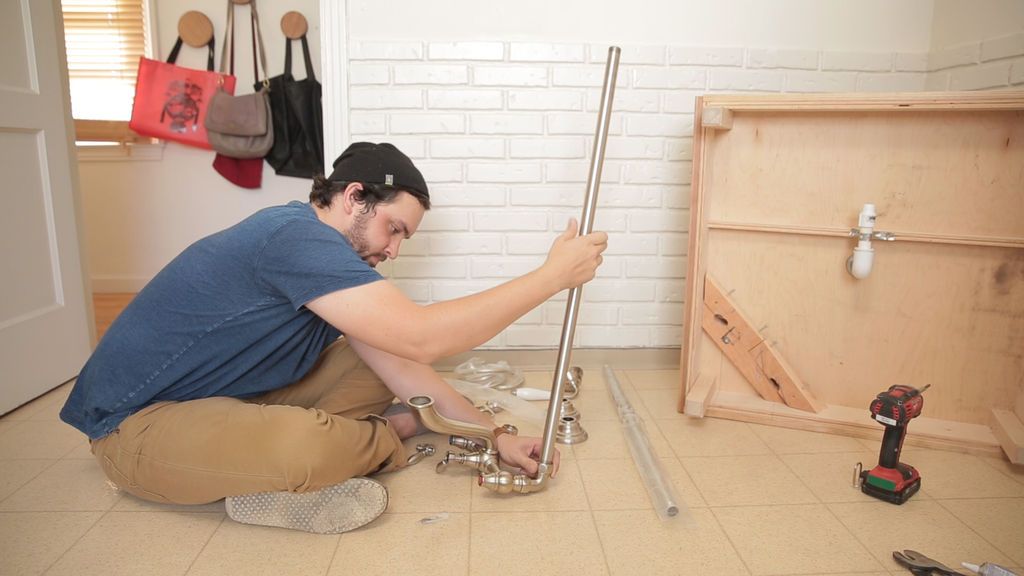


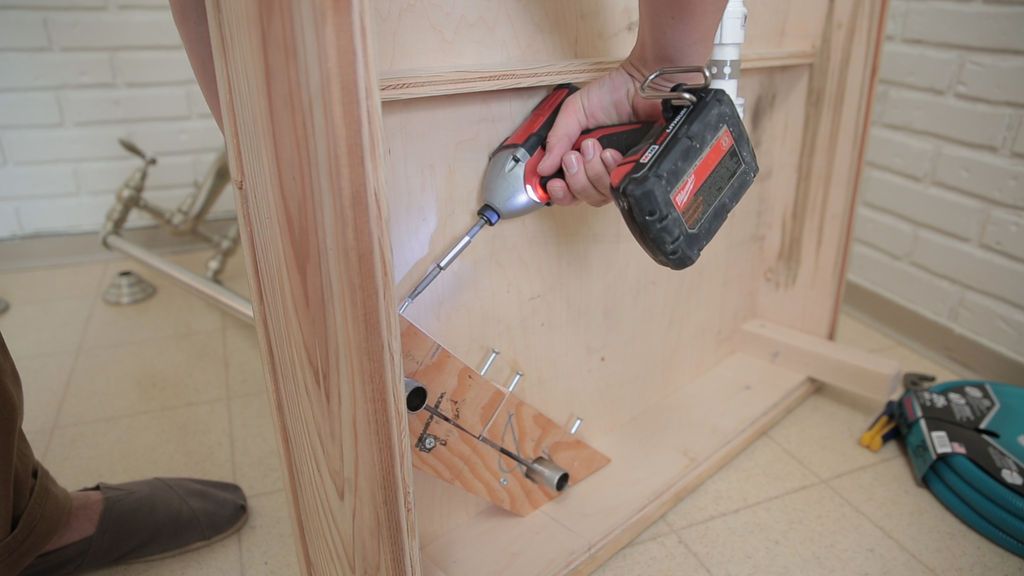


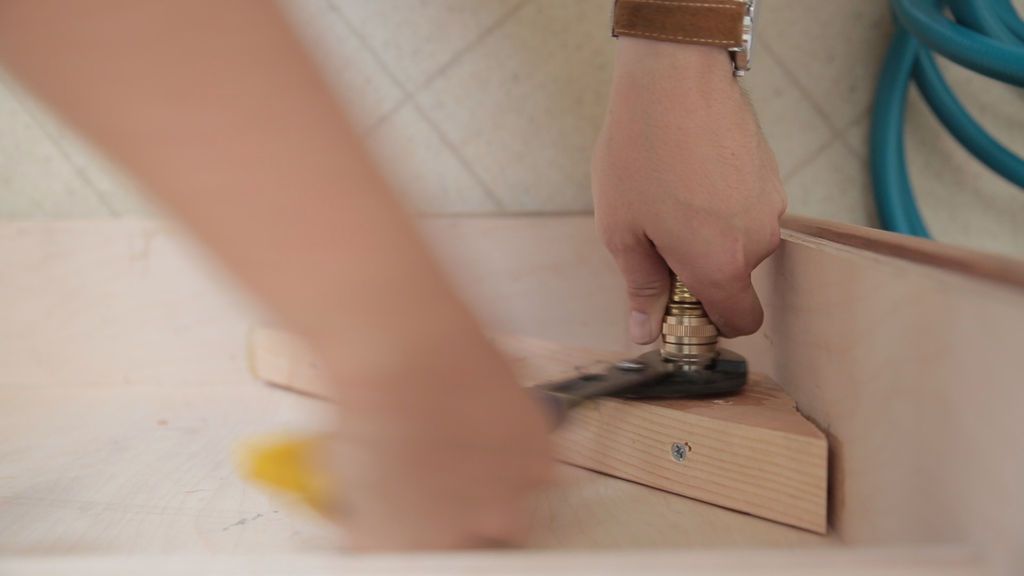


The Moen Weymouth tub filler comes with everything you need to assemble right out of the box and includes clear instructions. I assembled the entire fixture before inserting it into the holes drilled in the corner of my deck. Fortunately, I measured everything correctly before drilling the holes, so the water pipes in the fixture fit perfectly.
Making sure the pipes were in the same place to ensure a level finished fixtureOr, I tightened the screws on my wood clamp to hold the fixture in place. This allowed for a very secure fit, so I wasn't worried about the accessory being stable.
I was planning to connect the water line to the kitchen faucet, so I only needed to use one of the water pipes for the supply. I placed a female, female hose thread adapter on the cold water pipe at the bottom of the deck and added a cap to the end of the hot water pipe. This is an important step! If I hadn't added that cap, water would come out of the pipe if I ever turned the handle on the hot water valve.
With all the plumbing fixtures connected, I finished assembling the Moen Weymouth handheld shower fixture.
Step 9: Water inlet/Water outlet


Finally, I connected the supply hose to the kitchen faucet and guided the drain hose across the balcony to the floors below. It is important to ensure that the supply faucet is securely connected to prevent spraying. It's also important to make sure the end of the drain line is lower than its opening, because water flows downhill.
Step 10: A clean dog is a happy dog
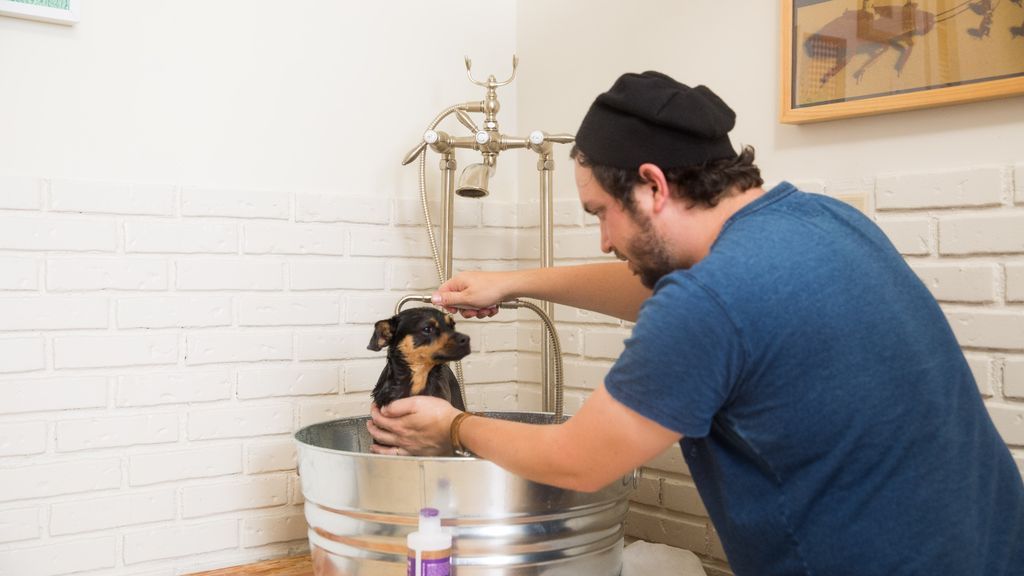


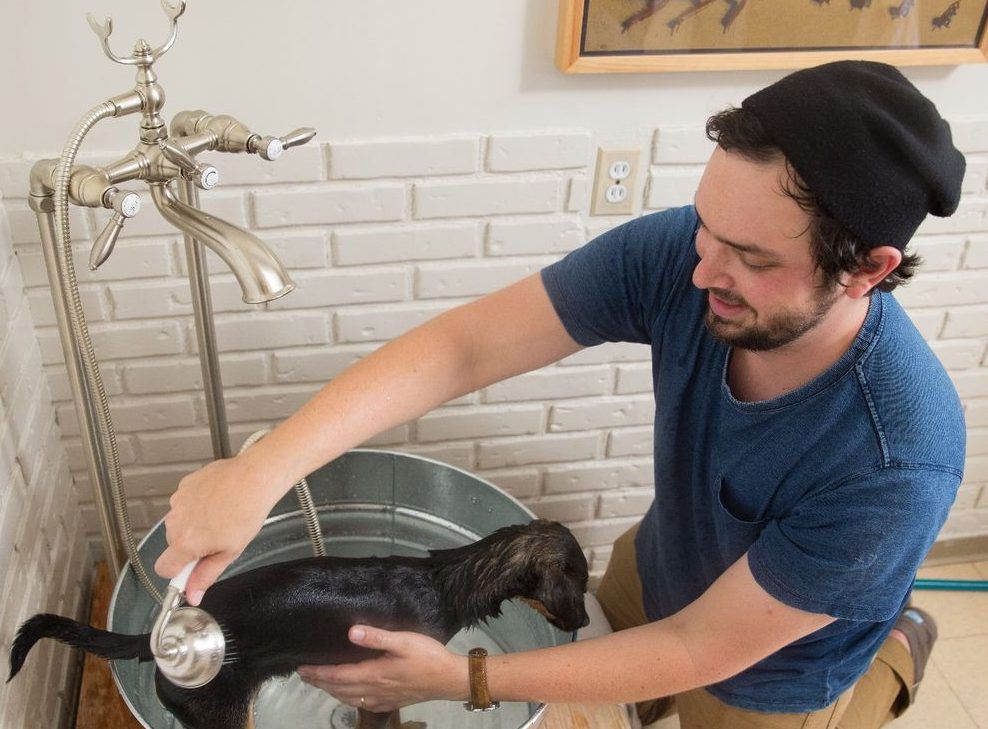
Finally, I played outside with Elsie and let her get as dirty as she wanted. The dog washing station worked perfectly, Elsie didn't seem to care too much about a good wash, and the handheld shower attachment made this task much easier.
I would love to know if anyone has any good ideas for a more elegant way to connect the drain to the garden hose, I have a feeling there is a much simpler way to do this part.
Don't forget to follow us on our social networks for more news!
Popular Content
How to make a rocket stove for outdoors
Cardboard Drawers Lined with Jeans
Ideas and Advantages of Window Grilles for the Home!
Latest Articles
How to make a refrigerator out of insulating material: Practical step-by-step guide
How to make a Kilim for the Home: Complete Step by Step Guide
How to protect ourselves from accidents in our workplace: Complete prevention and safety guide
Related Content
Concrete Spiral Stairs
Lego Themed Door Knob
20 Ideas for Small and Fun Kitchenstionals!
Ideas that Help You Decorate Your Home with Old Stairs
Creative Home Decor Ideas to Transform Every Space
Refreshing your home starts with smart design choices that combine comfort, personality, and functionality. Whether you want to modernize a small apartment, upgrade outdoor areas, or create cozy rustic interiors, these trending ideas can completely change the atmosphere of your space.
Outdoor Spaces That Increase Style and Functionality
Outdoor living continues to dominate modern home trends. Homeowners are increasingly investing in practical entertainment zones inspired by these BBQ shed ideas, which create the perfect setup for gatherings and weekend cooking sessions.
First impressions also matter when designing exteriors. Elegant farm entrance gates design ideas help properties stand out while improving privacy and curb appeal.
Compact living solutions are also gaining popularity. These inspiring 16x40 shed house interior design ideas show how smaller spaces can still feel luxurious and functional.
To enhance patios and entryways, homeowners are adding stylish protection with these creative porch awning exterior DIY ideas that blend aesthetics with practicality.

Rustic and Cozy Interior Design Trends
Warm and natural interiors remain timeless. These charming rustic decor ideas combine wood textures, vintage accents, and earthy tones to create welcoming spaces.
Bedrooms are becoming more personalized with curated wall arrangements. Many homeowners use these stylish picture wall ideas for bedroom spaces to display memories and artwork creatively.
Textured wall treatments are another major trend. Installing a board and batten wall adds architectural character while keeping interiors elegant and modern.
Similarly, bold accent wall ideas can instantly transform plain rooms into eye-catching focal points without requiring a full renovation.
Smart Kitchen and Organization Inspiration
Functional kitchens are essential for modern homes. These practical kitchen wall cabinet ideas maximize storage while maintaining a clean and stylish appearance.
Organization also starts at the entrance. Well-designed mud room ideas help families keep shoes, coats, and daily essentials neatly arranged.
Colorful and Personalized Home Styling
Vibrant interiors are becoming increasingly popular thanks to playful dopamine decor ideas that use bright colors and joyful accessories to improve mood and energy.
Gallery walls also continue to evolve as a major decorative feature. These trendy gallery wall inspiration ideas offer creative ways to combine prints, photos, and statement art.
Young renters and new homeowners are especially embracing these stylish first apartment aesthetic ideas to create sophisticated interiors on a budget.
Finally, selecting the right shades can dramatically influence any room’s atmosphere. These modern trendy color ideas help homeowners choose palettes that feel fresh, elegant, and timeless.
Final Thoughts
From rustic charm and colorful interiors to outdoor entertaining areas and functional storage solutions, today’s home decor trends focus on creating spaces that feel both beautiful and livable. By combining smart layouts, modern textures, and personalized decorative elements, any home can become more stylish, comfortable, and inspiring.
Browse Grand Goldman Shop
rocking chair office | teak wood rocking chair | mid century rocking chairs | cream sectional couch | plush couch sectional | Ivory sectional | King sofa bed | sofa bed click clack full size | rv sofa bed replacement | rv sofa bed | leather sofa and recliner | M1 three Seater Sofa | ashley tov furniture lillian velvet storage bench | walnut storage bench | john louis home solid wood shoe storage bench | Rustic storage bench | bluetooth fireplace tv stand | 70in tv stand | corner cabinet tv stand | polycarbonate chair mat | patio chair material replacement | gaming chair mat for carpet | gwang felt desk pad | maruse large leather desk pad | faux leather desk pad | acme ievi writing desk | ashley furniture carynhurst home office desk | acme furniture gorden writing desk | corner vanity bathroom cabinet | gun wooden cabinet | Cecotec secador | 3 draw file cabinet
Browse the Shop
 Acacia frida deluxe solid wood bed frame |
Bedroom bench |
Bed chest drawers |
Lingerie dresser |
Frame base |
Mirror with jewelry storage |
30 Bathroom Vanity |
Memory foam queen mattress |
Mattresses for back pain |
Nightstand set of 2 |
Grand Goldman Shop |
Civil Lawyer
Deutschland Trikot WM 2026
Acacia frida deluxe solid wood bed frame |
Bedroom bench |
Bed chest drawers |
Lingerie dresser |
Frame base |
Mirror with jewelry storage |
30 Bathroom Vanity |
Memory foam queen mattress |
Mattresses for back pain |
Nightstand set of 2 |
Grand Goldman Shop |
Civil Lawyer
Deutschland Trikot WM 2026







