

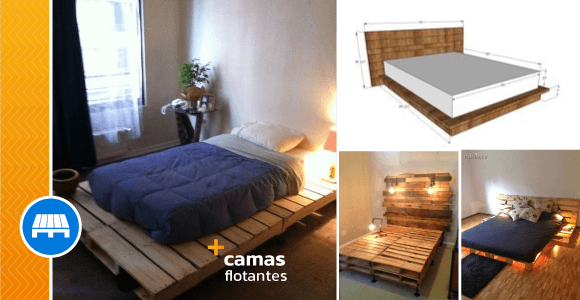
Bed with Modern Design and Floating Perspective, eliminate the legs that are normally used in each corner and try to hide the base structure as best as I could when standing in front of it...
After several suggestions, I added some LED lights around the bottom parameter... It really adds to the effect!
Find Bleeding Edge Supplements at Scandalous Prices on iHerb.

Modern Design Bed
And this is what I came up with. Six arms extend from a central column to support the edge of the bed and the headboard.
These arms are hinged at the base, with a steel cable tensioned between the opposing arms to restrict their width and further rigging to the base to create a static, level structure.
The base extends to prevent everything from tipping over when you sit on an edge with minimal flexibility.
The bed is designed around a standard 4ft 6 mattress. Overall dimensions are 2120mm long and 1570mm wide, the frame sits at a height of 350mm.
Supplies:
- 7 x 2400 mm scaffold board
- 1 x 1800mm scaffold board
- Wood for slats, I used 69x18mm white wood
- Wire cable (not sure how much less than 20m)
- 8 Eye Bolts
- 9 Tensioners
- Wire rope thimbles
- Cable holders
- Electrical tape
- 8 M10 30mm Bolts
- 10 M10 100 mm Bolts/Nuts
- 4 M10 130 mm Bolts/Nuts
- Wood screws
- Wood glue
- Oil/varnish.
Tools I used:
- Saws (table/miter/circular/saw)
- Router
- Drilling with drill bits and hole cutters
- Sander
- Chisels
- Screwdrivers
- Hammers
- Cable cutters and pliers
- Set of keys
- Clamps
- Level
- Tape measure
Step 1: Design
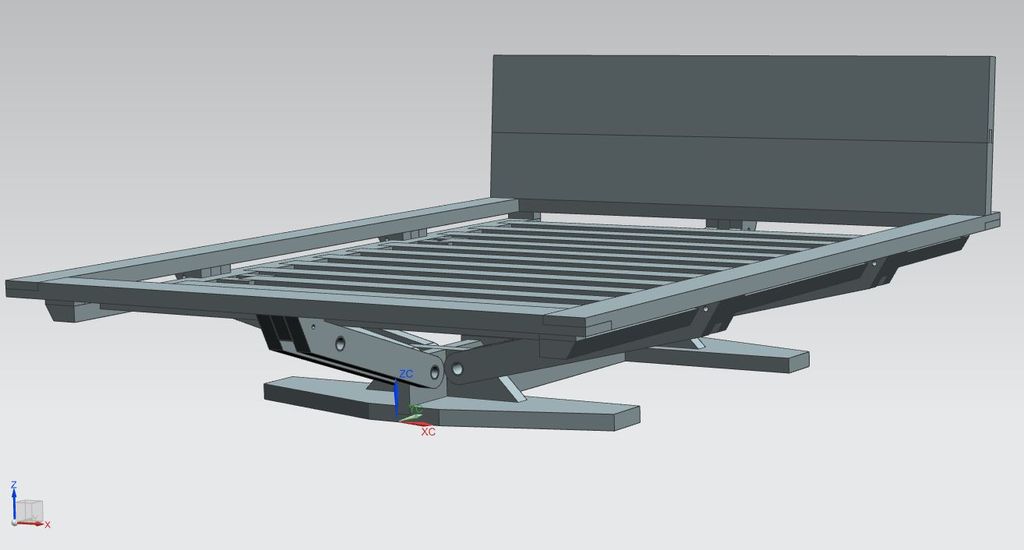
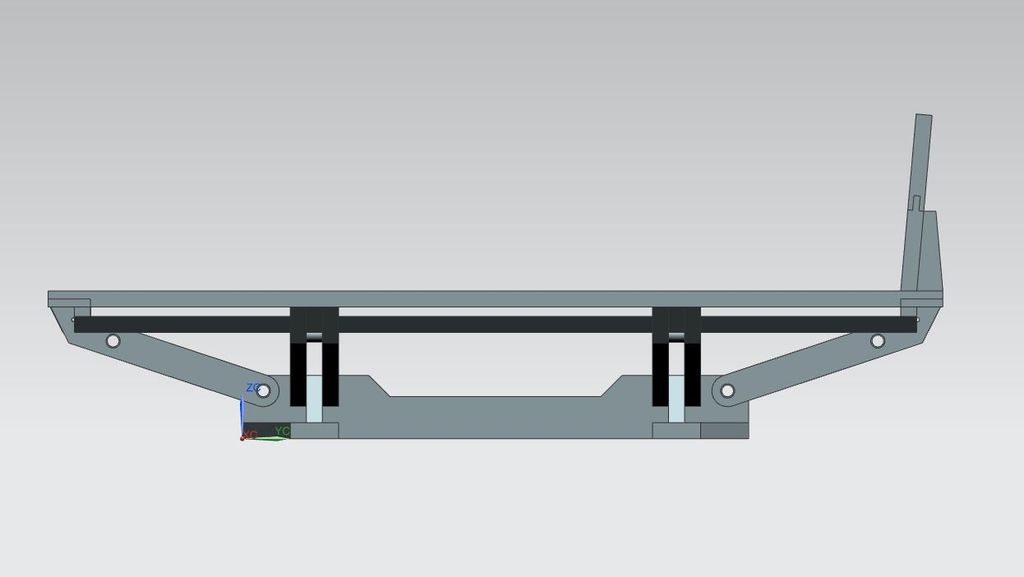
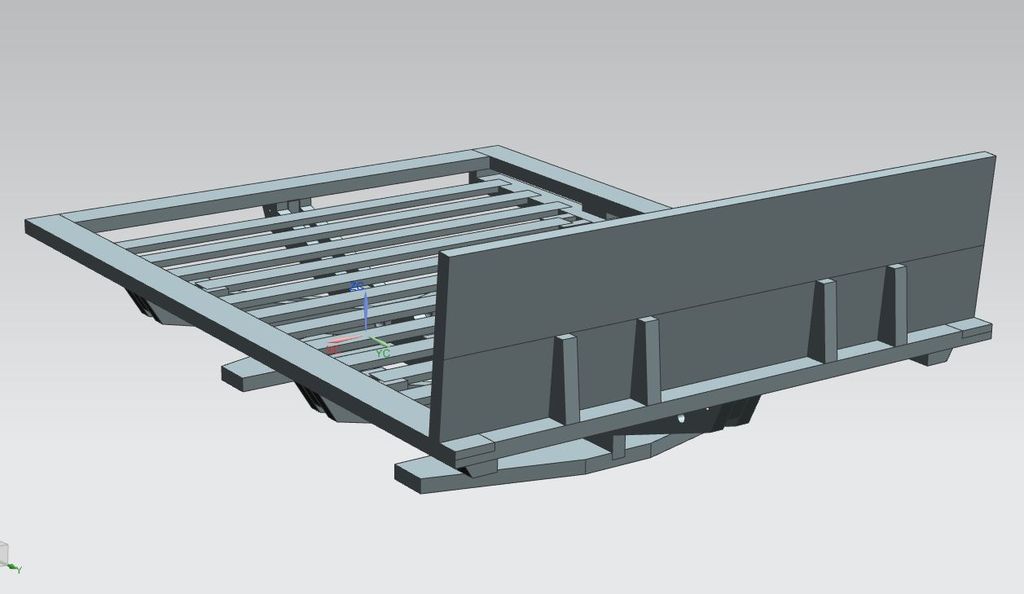
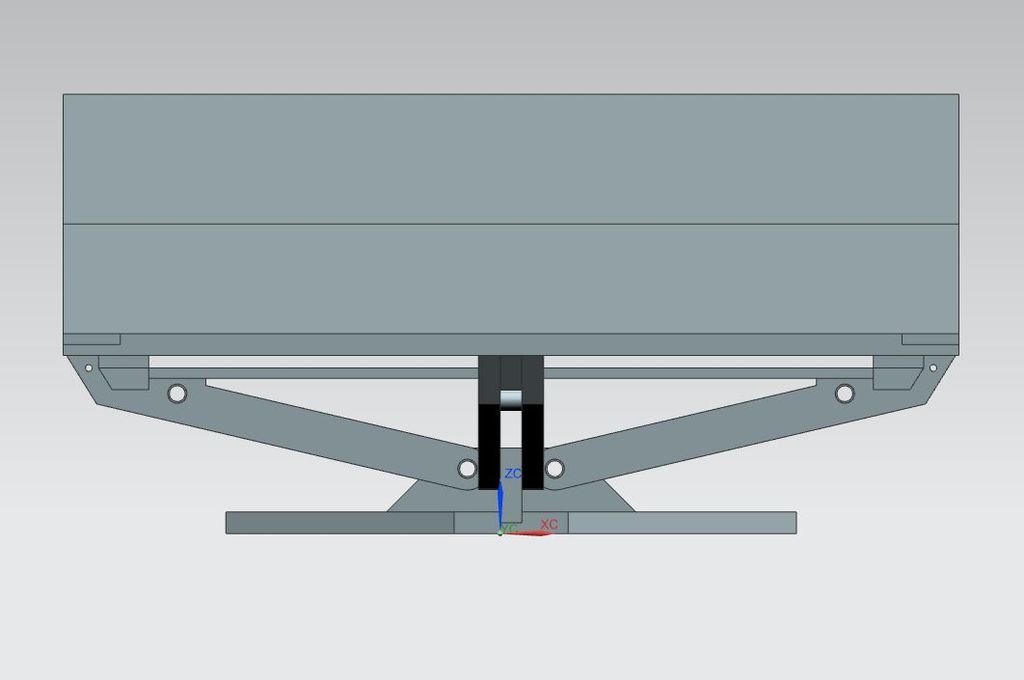


The arms are hinged in fixed locations to reduce stresses in that area of the design. The use ofe a pin joint means that they are essentially free to rotate and therefore stress free when loading the end of the arms, now the joint has to deal primarily with compression loading.
To prevent the arms from rotating, the cable is mounted between the opposite arms, which comes into tension when the arms are loaded.
And with only a 4mm cable with a minimum load of ~1000kg, the structure should remain solid.
With the design sorted, it was time to start building! I have given a summary of the steps I took and the photos should help, but it is essential that you only need to create the parts specified in the drawings.
Step 2: Preparation

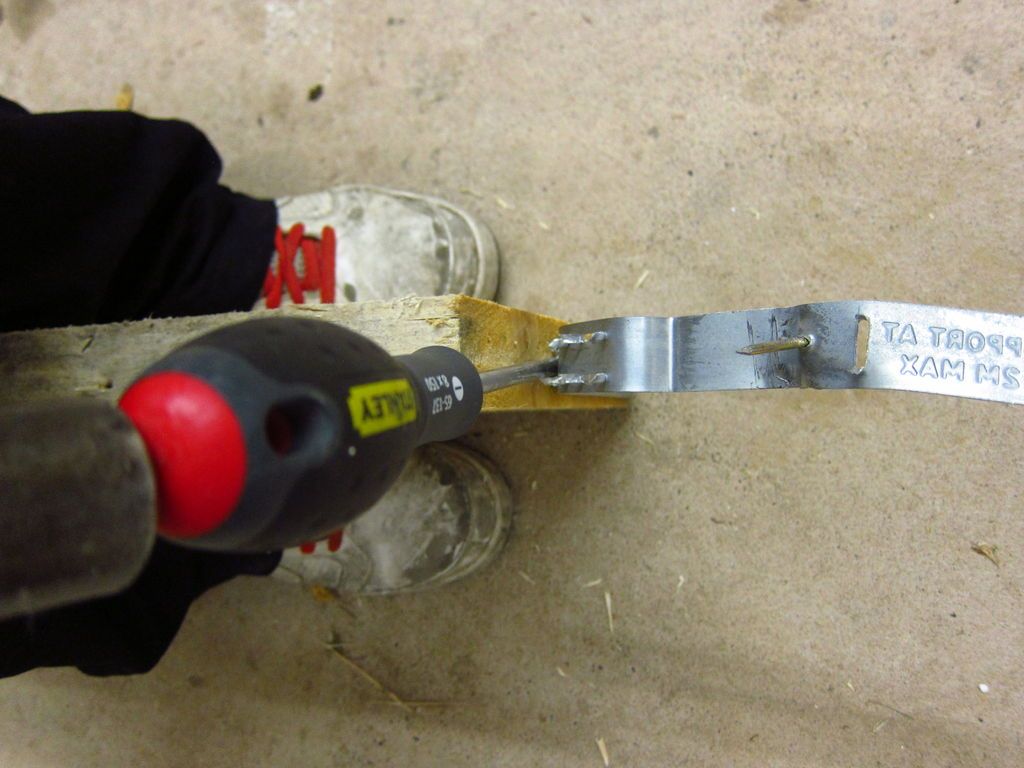
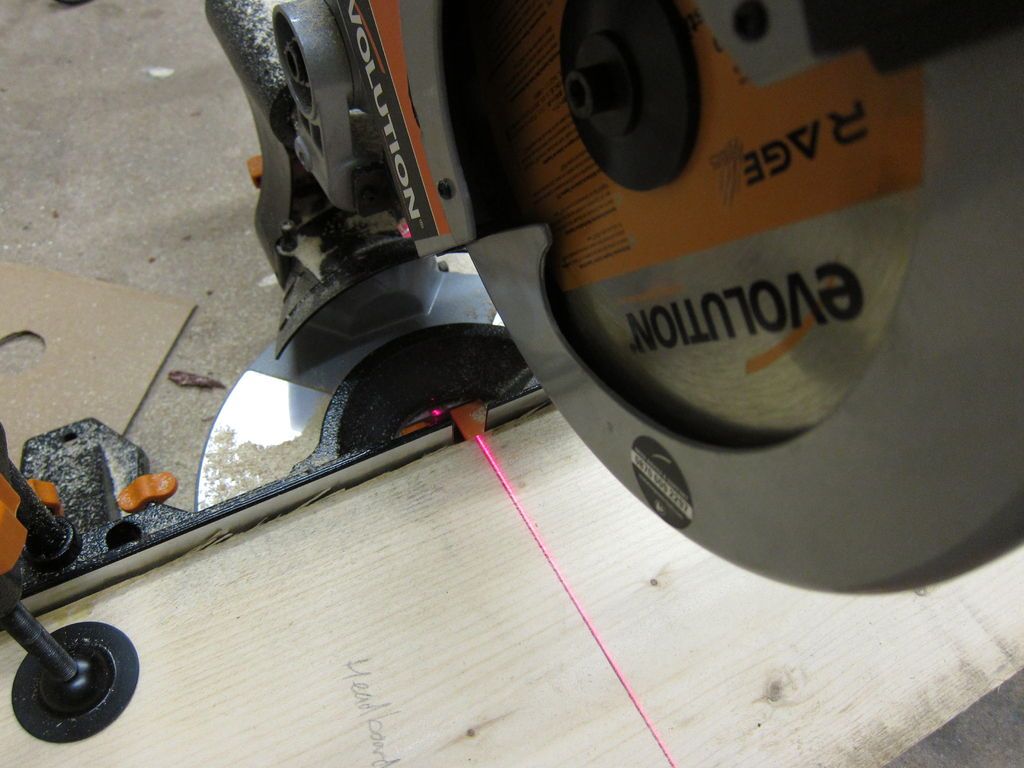
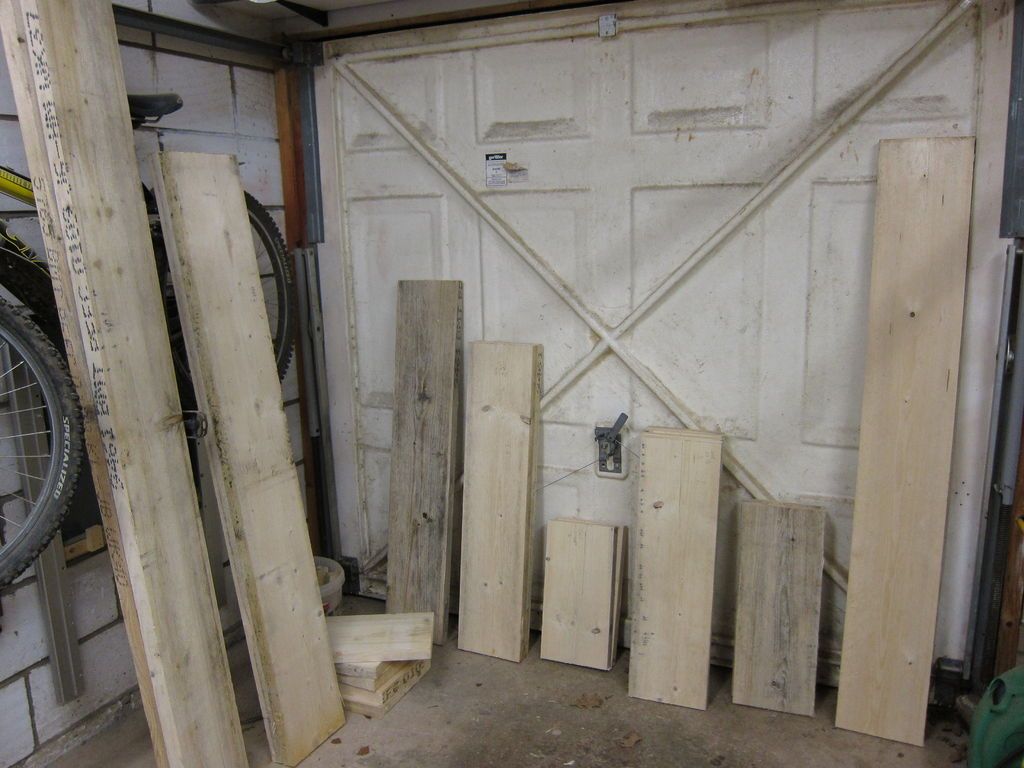
The bed will be made of 8 scaffold planks (7 – 2400 mm and 1 – 1800 mm long). You can regularly pick them up cheaply from wood recovery/recycling yards, which helps keep costs down.
I began by preparing the scaffolding boards; removing the metalwork from the ends and giving them a little order.
To make them easier to work with, I cut them to the length of the individual components. You can see in the included image how the 8 boards are divided into parts.
Step 3: Base


The base consists of 5 parts that you need to cut; 2x base plates, 2 base supports and spine.
Plate/base plate:
- Mark the part using the dimensions on the drawing.
- To recess the width of the piece, I first used a miter saw with the depth stop engaged (slightly less than the required depth) and made several cuts to remove most of the material. I then used a Router to finish the cut to the correct depth.
- For the other hole cut I had to use the Router for the complete cut. This meant having to make multiple passes, each one taking out a little more material. The corners are detailed with a chisel.
- Then I used a saw to round off the ends of the first base plate. And then I used a Route with a profile bit to copy it to the second one.
- The holes for the eye bolts were drilled with the bottom recessed to allow the nut to sit level.
Base supports:
- Mark the parts
- Used the miter saw to cut the 45° angles.
- For the center cut, I first made holes in the corners and then used a saw to cut it
- The holes for the pins were drilled.
Thorn:
- Mark the parts
- Cut to correct width with a table saw
- Holes for pins
- With all the pieces cut out I used a Router to round the edges and sanded it. I then did a dry assembly to check that everything was tight and adjusted the parts where necessary to ensure a good fit.
It was time to apply some wood adhesive, put the parts together and hold everything up to dry. I added some screws just in case.
Step 4: Arms


The first "side arm" you cut out will become the "master" that will be used to make the others, so take your time to get it right.
- Cut the planks to the correct width
- Mark the parts or pieces.
- Trim the piece with the appropriate saw for each cut.
- Drill holes for the pins (adjust the diameter of this hole for the size of dowel you are using).
- With the first cut, you can use it to quickly mark the others and then cut them into the rough shape.
Then, using a router with a profile bit, the 'master' is used as a guide to terminate the other arms and ensure they are all the same:
- Clamp the “master” to the top of the “gross” blank.
- Set the heading on the bit to run around the "master".
- The depth of my Router was at maximum, so I had to make the cut in two parts, eliminating the "master" for the second cut.
You should now have 8 side arms that are identical.
The only difference between the Side Arms (a) and (b) is the side in which you route a small gap to allow the mounting of a slat. The arms for the front and back follow the same process….
The parts were then given a quick sanding and the edges were rounded.
The spacers were then cut out and glued between two arms, with brads used to add strength. I inserted a metal tube while they were drying to ensure proper alignment.
Step 5: Batten Supports
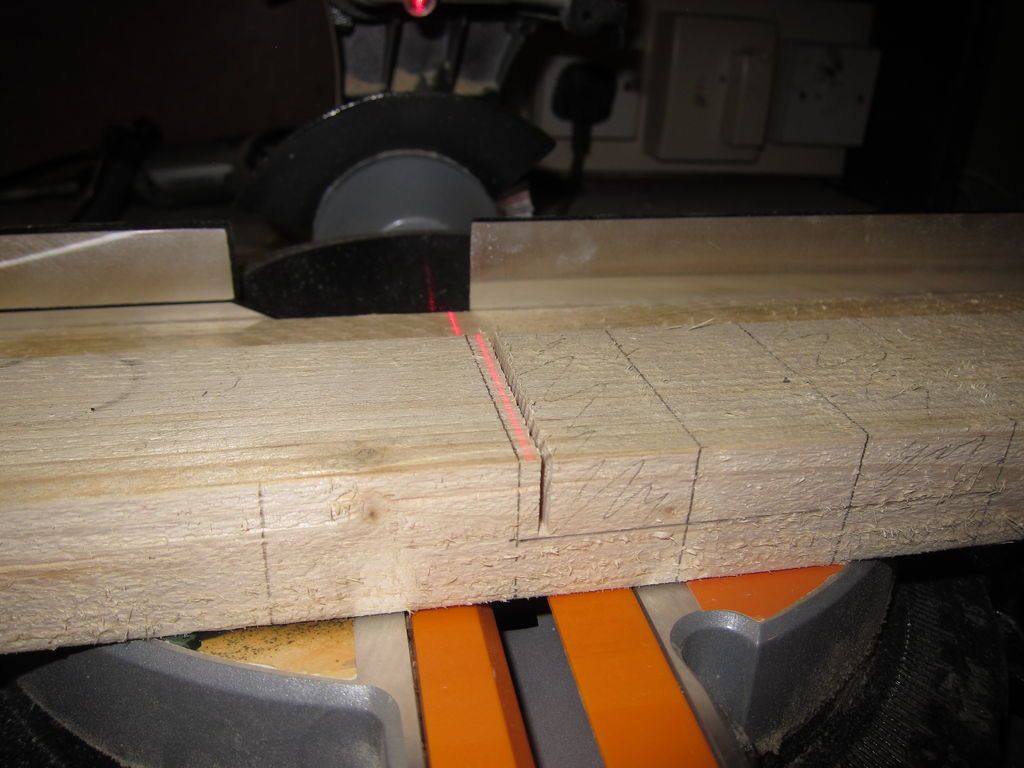
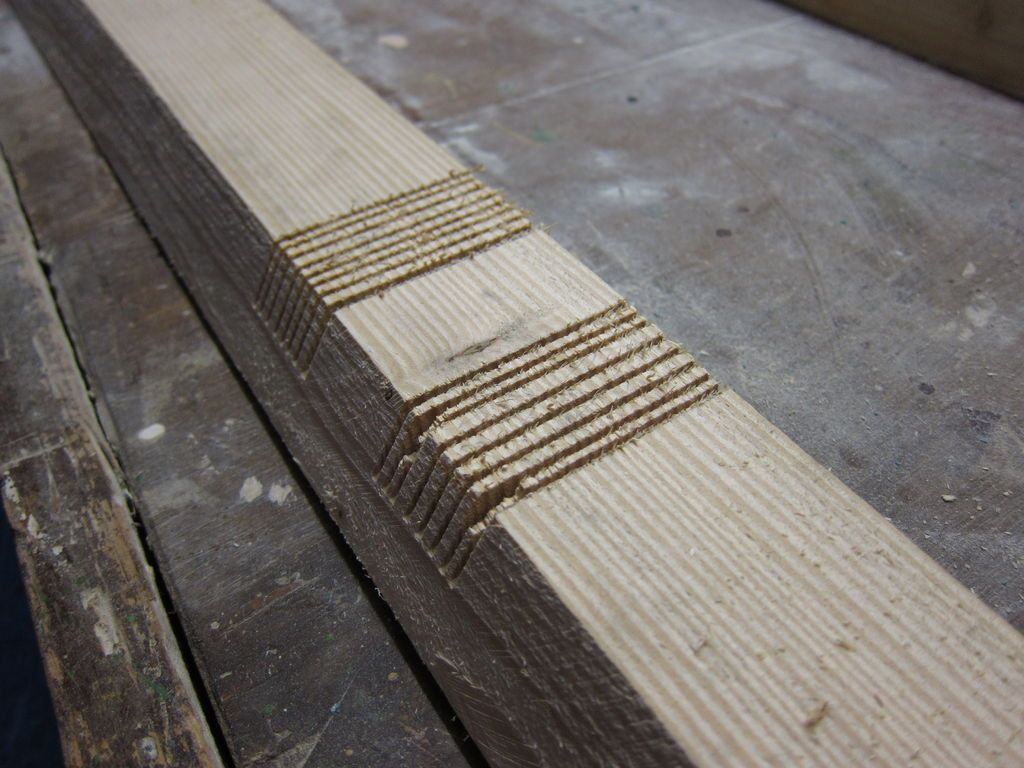
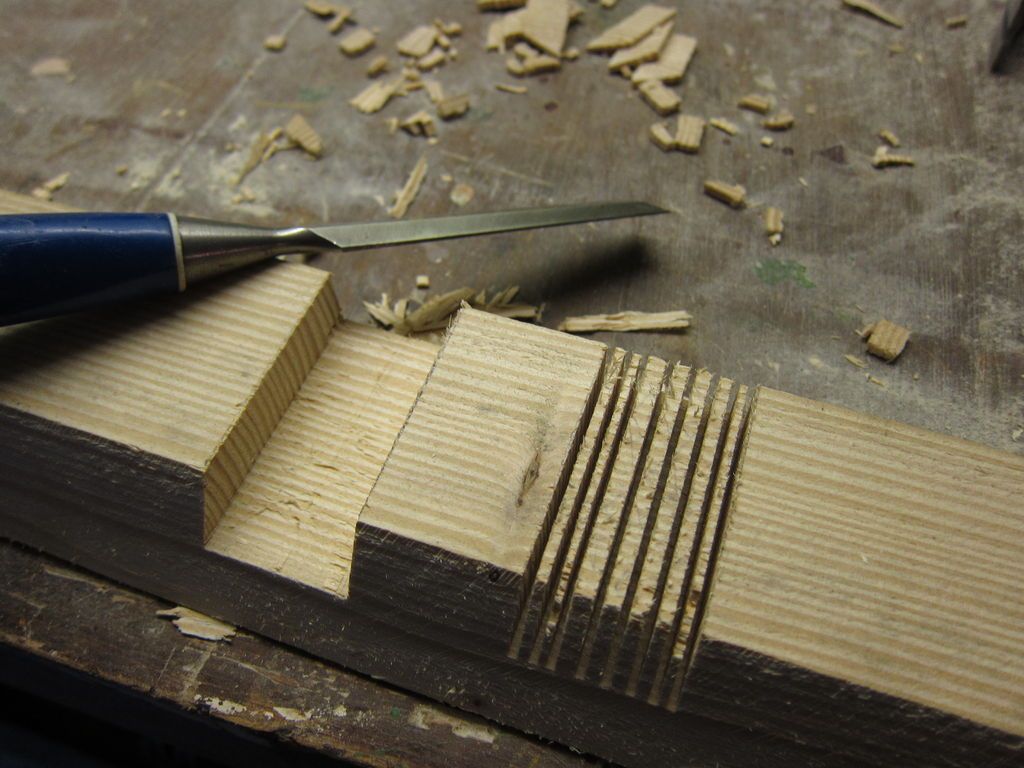
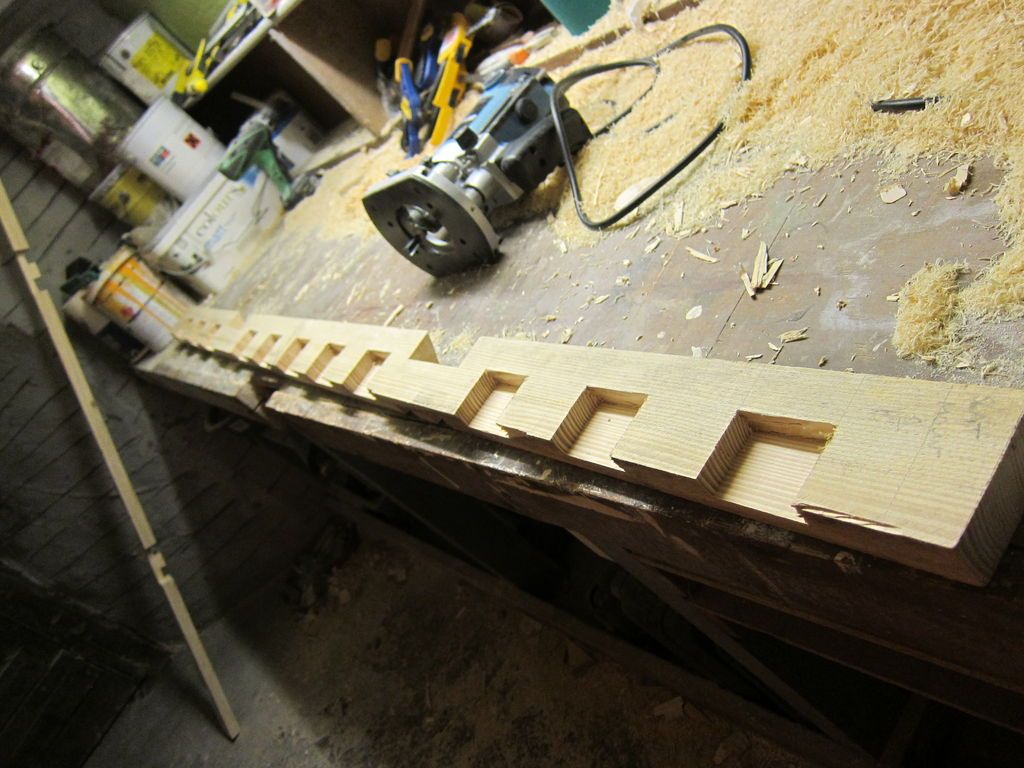

These parts will be attached to the bed frame and used to assemble the slats. 2 slat assemblies are needed, one on the left and one on the right.
- The blanks were cut to the correct width using a circular saw with the blade set to the correct angle.
- The clippings were cut again using the same method. Multiple cuts with the miter saw set to the required depth and then cleaned with a chisel.
- A template was cut out of a piece of wood and used with a router to cut holes for the slats to sit.
The slats were also cut to the required lengthat this point.
Step 6: Surround/Head


The headboard and frame are simply lengths of planks joined together with a lap joint.
Header:
- I used a table saw to cut multiple slits to the correct depth.
- Then chisel away most of the material
- A Router was configured to finish the cut.
- The gasket was tested and adjusted to obtain a good fit.
- On the bottom board I cut a 5° bevel along the bottom edge
- Glue was applied and the two boards were closed to dry.
Surrounding:
- Cut to correct width with a circular saw.
- The miter saw with the depth stop set was used to cut multiple passes that were trimmed with a chisel.
- The joint was tested and adjusted to obtain a good fit.
- The rabbets and slots were routed for the headboard supports and side hardware.
- The surrounding one was glued and fastened
Step 7: Finishing
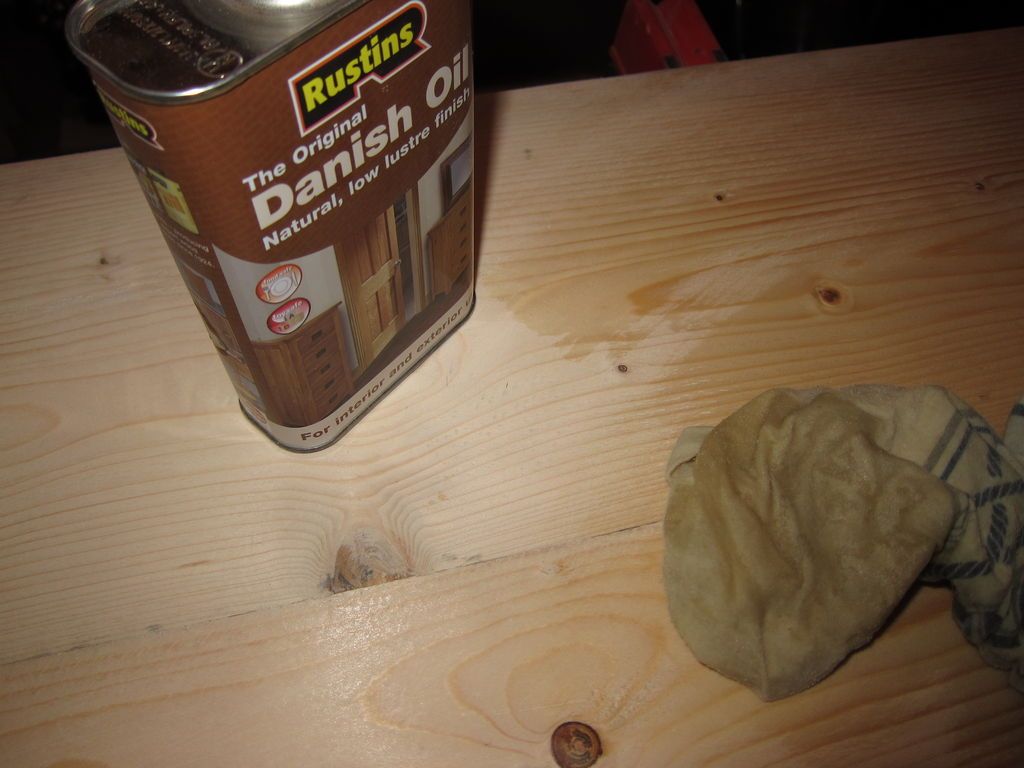
All parts received a final sanding and then finished with Danish oil to maintain a natural look.
With all the pieces made, we are now ready to assemble!
Step 8: Assembly


The tubes I used for the pins (34mm diameter) were left over from my previous scaffolding shelving project, so I started assembly by cutting the pins, 12 are needed. The arms can now be assembled to the base structure.
- I started with the "side arms", connecting the opposite arms together. The cable, with a turnbuckle inserted at the midpoint, is wrapped around the top pin of each arm and clamped. I wrapped it in electrical tape.
- I used a ribbon to establish the correct width of the arms meant to be apart and tightened thecable tie to set this width.
- The front and back are now arranged in the same way. At this point, all 3 sets of arms will be able to swing from side to side, so now we have to improvise down to the base.
- The top pin rigging of each arm is connected to the end of the base supports. The arms can now be locked into a static frame by tightening the turnbuckles on the positioned sides!
- With the arms adjusted, we can now add the slat mounts to each side of the frame. These simple ones sit on the cutout at the top of the side arms.
- The surrounding one rises in its place. Sits on the flat portion on the upper arms.
- Then I placed the slats on the mounting points.
- The slat mounts are now joined to the surrounding one. The wood blocks are glued and screwed between the batten mounts and the frame. I did this when they were assembled on the arms rather than before to ensure alignment.
- The headboard is placed on the frame and holes drilled through it and the headboard is supported. The headboard can be screwed into place.
- The “accessory” pieces need to be cut out and glued/screwed to the frame. Again, done when assembled to ensure they were in the correct place between the arms.
- Holes are now drilled through the arms and fittings. A bolt is pushed in and the nut is tightened… The bed frame is now secured.
- The last step was to fine-tune the tension of the cables to level the entire bed frame.
Step 9: Project finished!

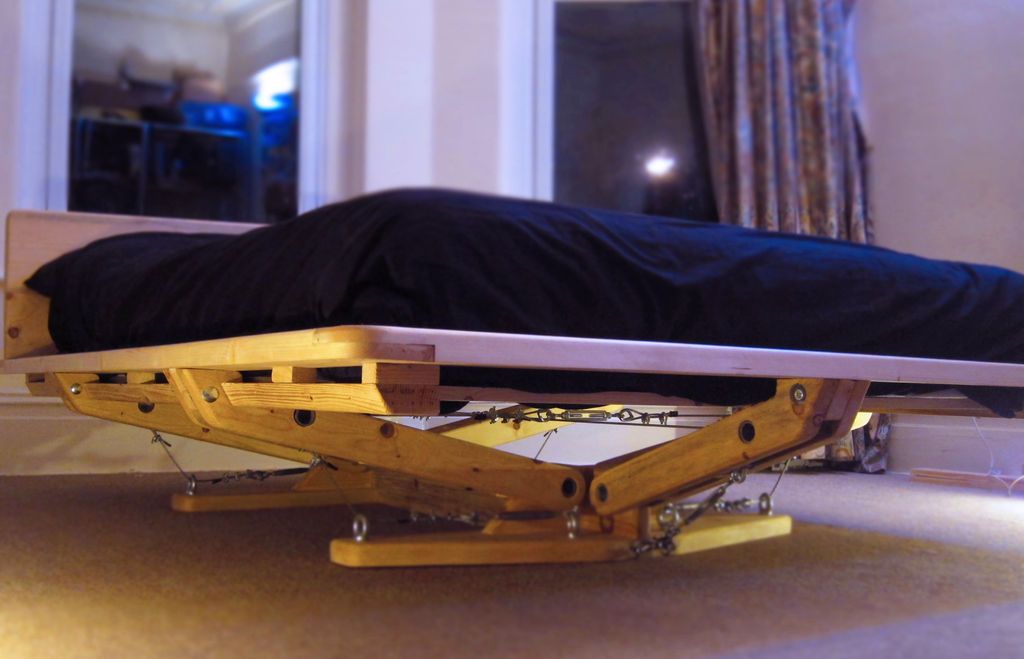
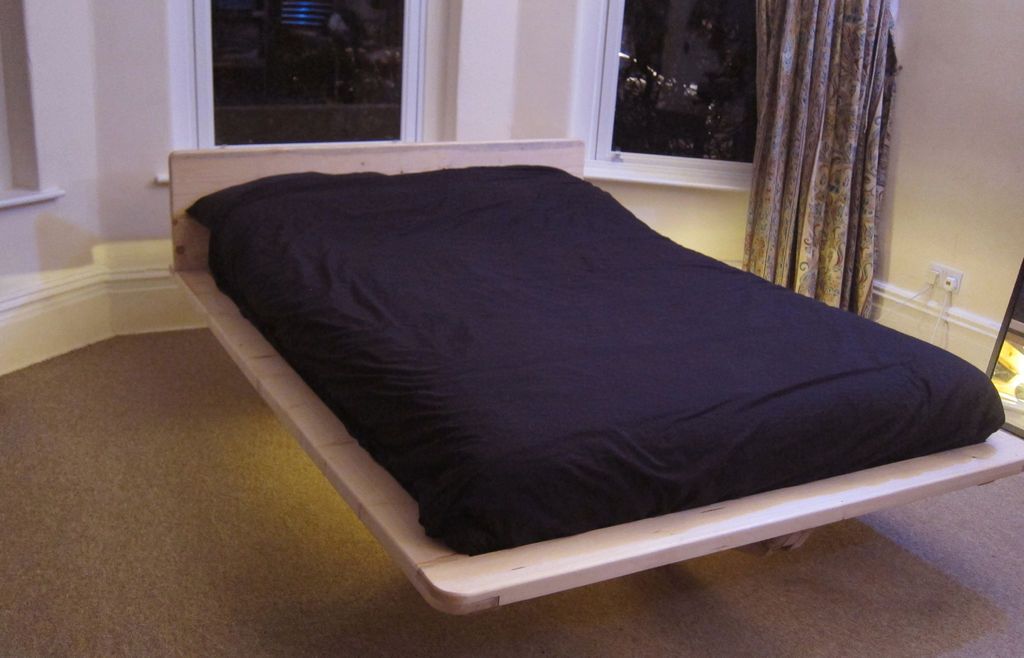
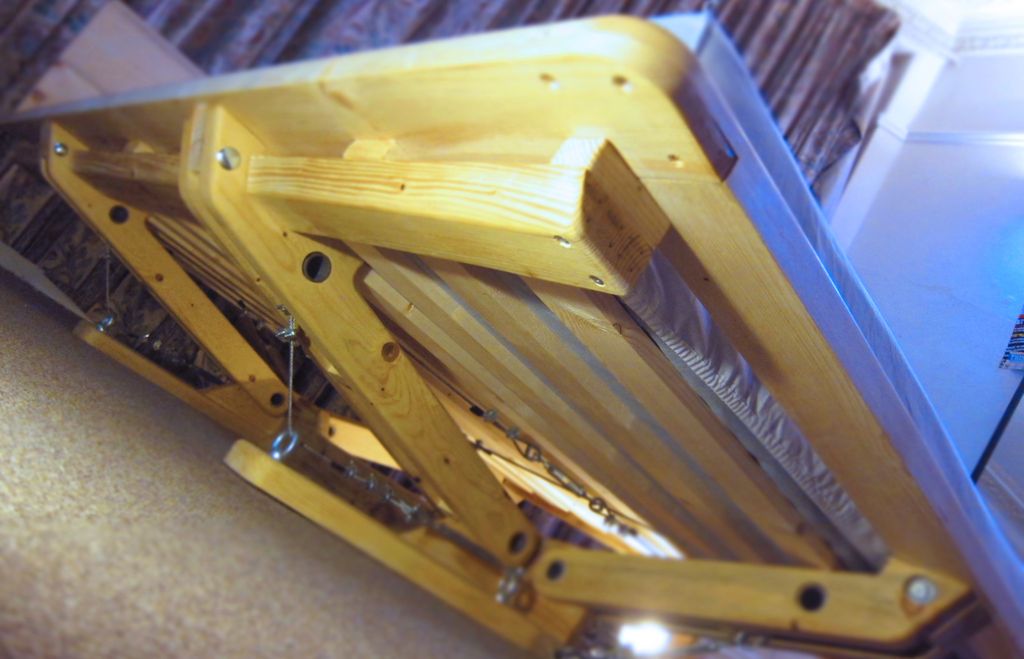
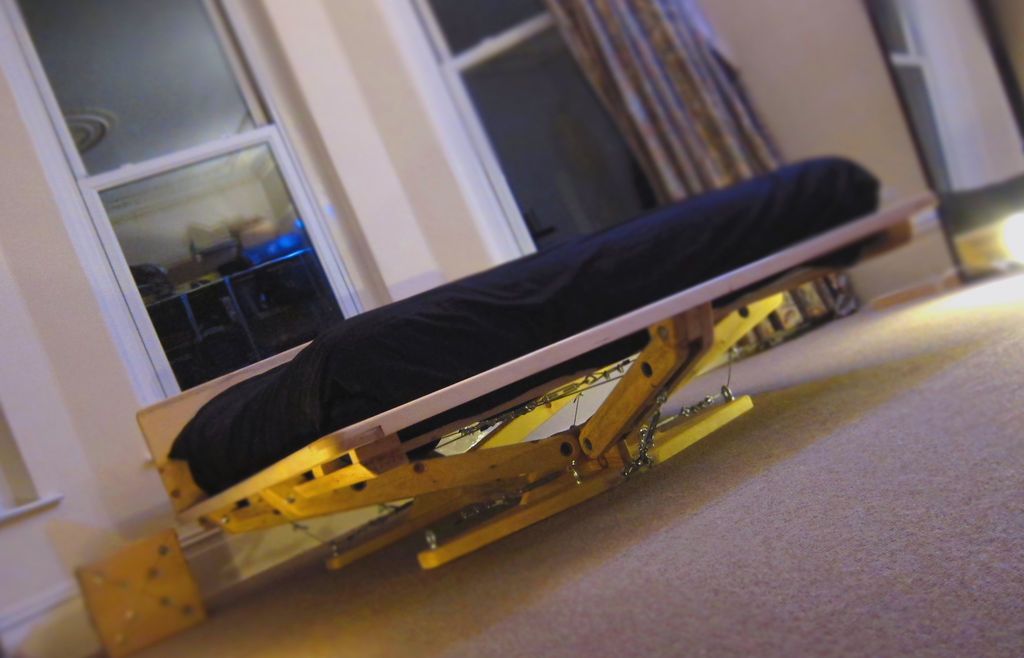
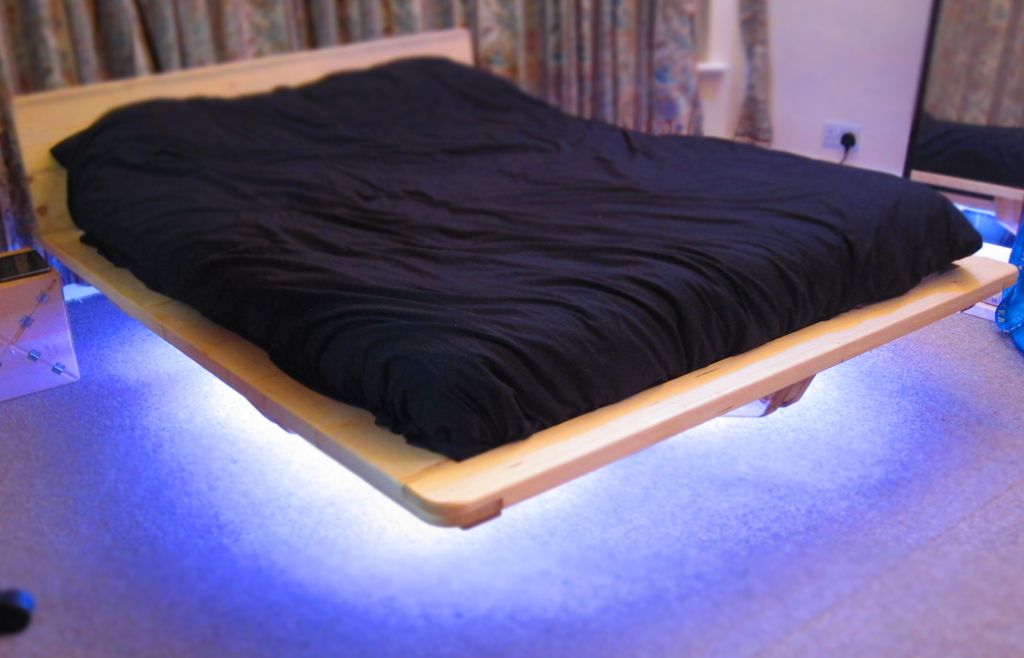
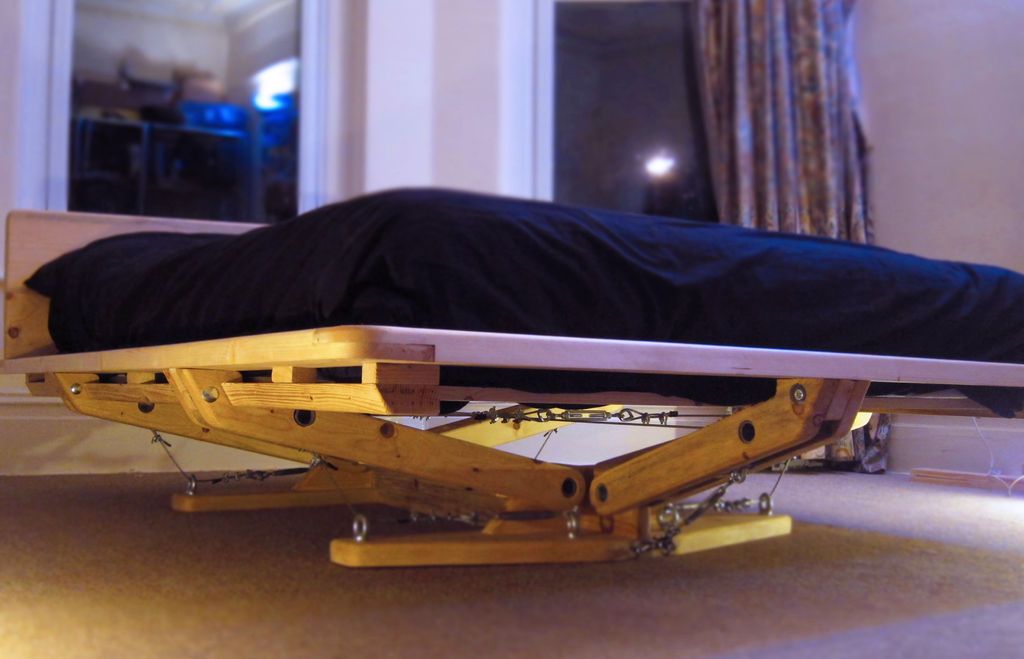
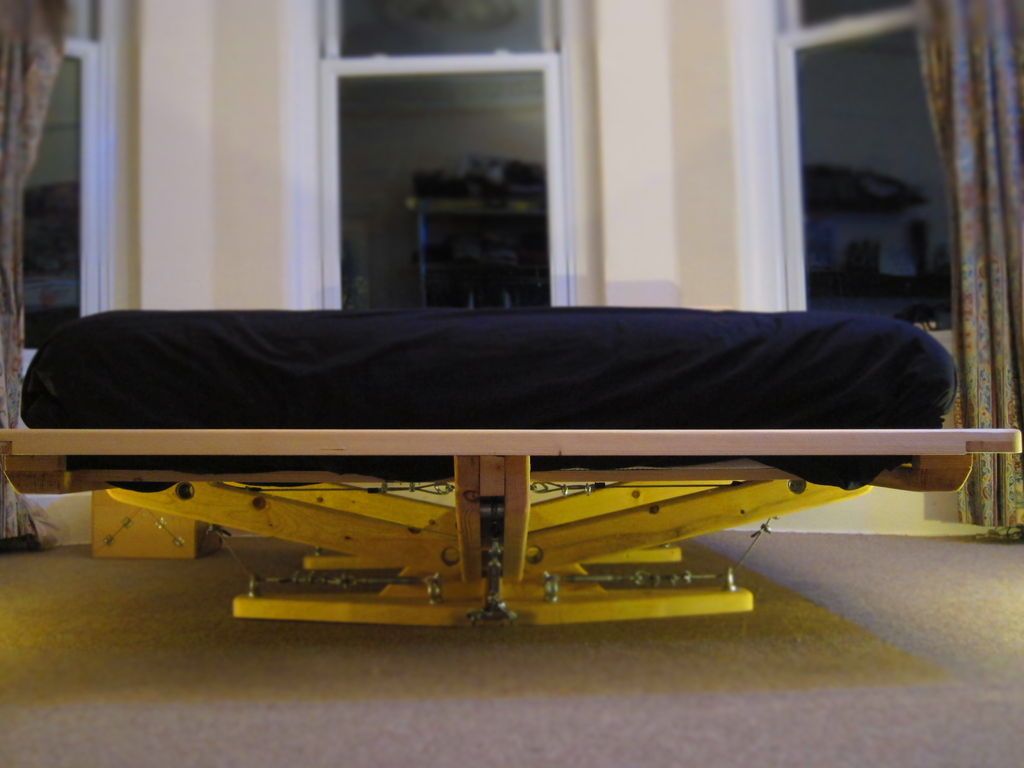
The bed frame is now complete! I've slept there the last few nights and haven't woken up in a pile of splintered wood yet, so it's all good!
Being a prototype design, there are obviously some things I would do differently if I made another one. While you can sit right on one side without lifting the other side, there is a small amount of flex - extending the base supports further would improve this but would then compromise the "floating effect".
In the end, while you can happily sit in the corners without support, perhaps change the design so that the arms come out towards the corner of the frame instead of forward/back in the center.
Get more information at perfectionidea.com and on our Facebook for more Modern Design and Floating Perspective Bed.
- Tags
- Bed
Popular Content
How to make a rocket stove for outdoors
Cardboard Drawers Lined with Jeans
Ideas and Advantages of Window Grilles for the Home!
Latest Articles
How to make a refrigerator out of insulating material: Practical step-by-step guide
How to make a Kilim for the Home: Complete Step by Step Guide
How to protect ourselves from accidents in our workplace: Complete prevention and safety guide
Related Content
The Versatility of Youth Bedrooms Today
Portable and Cool Vertical Garden Made of PVC Pipes!
Side Table Made of Recycled Wood!
How to Make a Water/Air Pump/Vacuum Pump!
Creative Home Decor Ideas to Transform Every Space
Refreshing your home starts with smart design choices that combine comfort, personality, and functionality. Whether you want to modernize a small apartment, upgrade outdoor areas, or create cozy rustic interiors, these trending ideas can completely change the atmosphere of your space.
Outdoor Spaces That Increase Style and Functionality
Outdoor living continues to dominate modern home trends. Homeowners are increasingly investing in practical entertainment zones inspired by these BBQ shed ideas, which create the perfect setup for gatherings and weekend cooking sessions.
First impressions also matter when designing exteriors. Elegant farm entrance gates design ideas help properties stand out while improving privacy and curb appeal.
Compact living solutions are also gaining popularity. These inspiring 16x40 shed house interior design ideas show how smaller spaces can still feel luxurious and functional.
To enhance patios and entryways, homeowners are adding stylish protection with these creative porch awning exterior DIY ideas that blend aesthetics with practicality.

Rustic and Cozy Interior Design Trends
Warm and natural interiors remain timeless. These charming rustic decor ideas combine wood textures, vintage accents, and earthy tones to create welcoming spaces.
Bedrooms are becoming more personalized with curated wall arrangements. Many homeowners use these stylish picture wall ideas for bedroom spaces to display memories and artwork creatively.
Textured wall treatments are another major trend. Installing a board and batten wall adds architectural character while keeping interiors elegant and modern.
Similarly, bold accent wall ideas can instantly transform plain rooms into eye-catching focal points without requiring a full renovation.
Smart Kitchen and Organization Inspiration
Functional kitchens are essential for modern homes. These practical kitchen wall cabinet ideas maximize storage while maintaining a clean and stylish appearance.
Organization also starts at the entrance. Well-designed mud room ideas help families keep shoes, coats, and daily essentials neatly arranged.
Colorful and Personalized Home Styling
Vibrant interiors are becoming increasingly popular thanks to playful dopamine decor ideas that use bright colors and joyful accessories to improve mood and energy.
Gallery walls also continue to evolve as a major decorative feature. These trendy gallery wall inspiration ideas offer creative ways to combine prints, photos, and statement art.
Young renters and new homeowners are especially embracing these stylish first apartment aesthetic ideas to create sophisticated interiors on a budget.
Finally, selecting the right shades can dramatically influence any room’s atmosphere. These modern trendy color ideas help homeowners choose palettes that feel fresh, elegant, and timeless.
Final Thoughts
From rustic charm and colorful interiors to outdoor entertaining areas and functional storage solutions, today’s home decor trends focus on creating spaces that feel both beautiful and livable. By combining smart layouts, modern textures, and personalized decorative elements, any home can become more stylish, comfortable, and inspiring.
Home Decor ShopAcacia frida deluxe solid wood bed frame | Bedroom bench | Bed chest drawers | Lingerie dresser | Frame base | Mirror with jewelry storage | 30 Bathroom Vanity | Memory foam queen mattress | Mattresses for back pain | Nightstand set of 2
Browse the Shop
 Acacia frida deluxe solid wood bed frame |
Bedroom bench |
Bed chest drawers |
Lingerie dresser |
Frame base |
Mirror with jewelry storage |
30 Bathroom Vanity |
Memory foam queen mattress |
Mattresses for back pain |
Nightstand set of 2 |
Grand Goldman Shop |
Civil Lawyer
Deutschland Trikot WM 2026
Acacia frida deluxe solid wood bed frame |
Bedroom bench |
Bed chest drawers |
Lingerie dresser |
Frame base |
Mirror with jewelry storage |
30 Bathroom Vanity |
Memory foam queen mattress |
Mattresses for back pain |
Nightstand set of 2 |
Grand Goldman Shop |
Civil Lawyer
Deutschland Trikot WM 2026







