

Secret Library Shelf Reusing Old Books, the outside parts of the books are laminated into slats that are attached and trapped in a track inside the box, just like a roll-top desk, only to the sides.
Also, decorating the box is completely up to the individual builder. I had some walnut paneling and molding left over from an old broken cabinet, so I used that to give it an antique look.
Find Bleeding Edge Supplements at Scandalous Prices on iHerb.

To build a Secret Library Shelf Reusing Old Books, you will need:
- Lots of old books.
- Some strips of wood the same width as the columns of the book, about 1/4 inch to 3/8 inch thick.
- 1/2 to 1 inch thick plywood or MDF.
- Thin plywood, pressed wood, or other backing material
- Screws. You'll need some to build the sliding mechanism. These should be 1/2-inch or 3/4-inch screws with a shaft narrower than the width of your slats. Screw heads should be the typical type, tapered wood screw type, 1/4 to 5/8 inch wide. You will need more to build the case. These should be the same type of tapered wood screw, but 1/2 inch longer than the thickness of your plywood/MDF.
- Wood router.
- Drill.
- Sierra. You will need a table saw, circular saw, or any saw capable of making straight 90 degree cuts in your plywood/MDF. You will also need a miter saw or any saw capable of cutting the slats to the perfect length, with 90 degree perpendiculars.
- Wood glue.
- Clamps.
- Cloth.
- Lacquer, polyurethane. in case you need to cover the outside cover of the book and to protect them.
- Wax.
- 80, 100 or 120 sandpaper.
- Scissors.
- Adhesive tape.
- Circle template. Something with a 2-2 1/2 inch radius. U
- Pencil or other marking tool.
Step 1: Planning the dimensions of your project
So the way this all works, is the "Drum" (the group of fabric backed slats that slides on the track) splits in the middle and slides to the sides of the box. So:
- You will need the inside of your box to be as wide as the number of books you want to use, plus about 2 inches.
- You will need the inside of your box to be the same height as the outside of the book, plus about 1/8 of an inch.
- You will need the inside of your box to be as deep as half the width of your box, minus the width of one of the books.
- Your final external dimensions will be these numbers plus twice the thickness of your material.
I know this is a strange way to measure, but everyone's books and boxes will be different dimensions, so this ensures that the project will work independently.
Step 2: Measure and Cut Your Materials


Cut your plywood/MDF lengthwise and widthwise with your table saw or other capable saw. You will need to add twice the thickness of your material to the height of the sides.
Mark and cut your slats at the height of the spines of your book.
Step 3: Mark and Route Your Track

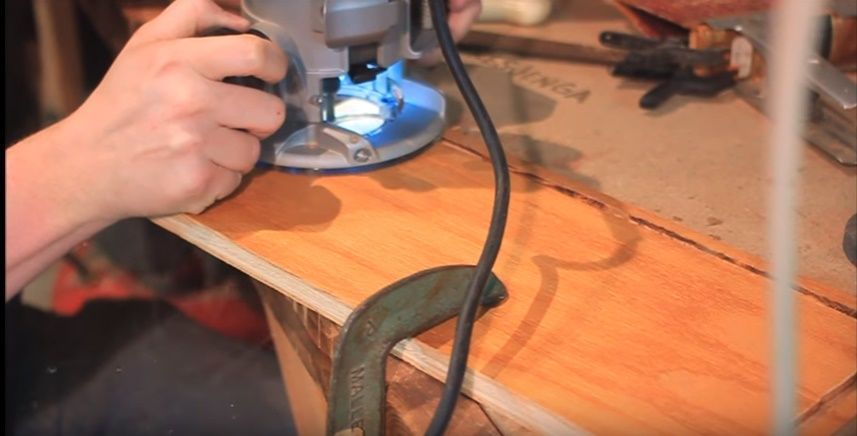


On the top and bottom pieces of plywood/MDF, about 1/2 inch from the front and side edges, mark a straight line running parallel to these edges
Use your circle template to mark a round corner for your track, as shown. Use your router set to a depth of about 1/4 inch to 5/8 inch, to cut exactly along the inside of your mark. If necessary, create a low-dial template. Run your track around the edge and from the back edge of the box onto the top and bottom pieces of the mdf.
Use your papersandpaper to sand the inner edges of the track without problems. Also make sure the bottom is completely flat and level, this is very important.
Step 4: Remove the cover from your books

Flex the cover of the book a little and see if it separates on its own. Help him by using a blade or other sharp instrument. Cut the sides of the cover if they are still attached. Recycle the pages and front covers, or save them for another project.
Step 5: Glue the spines of the books

Add glue to each slat, spreading it thinly over the wide surface
Press the spine of the book down onto the slat and secure it in place or place a heavy object on top until it dries. Repeat this for each of them.
Step 6: Assemble your box
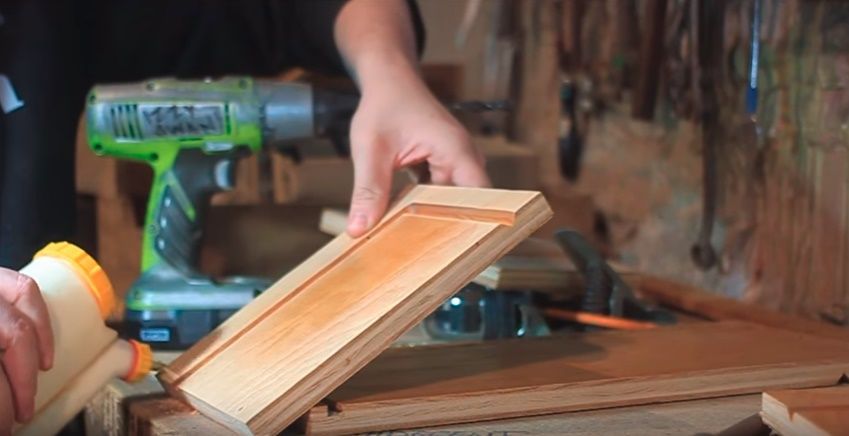

The box will be constructed using simple butt joints, with glue and screws.
Be sure to mount as shown, with the sides extending toward the outside edge of the box, on the outside of the top/bottom pieces. Pre-drill the screw holes with the narrower bit, then drill down into that hole using the larger bit to "countermink" the head of the screw so it is flush with or below the surface of the box. Make sure your track on the top and bottom of the box faces the inside of the box and runs along the same edges; Otherwise this will not work.
Step 7: Insert the screws into your wooden slats


Drill two holes in the top and bottom edge of each of your slats, each about 1/4 inch from each end. Two of your slats will be the "lead" in your drum, and will run on their outer ends. On the leftmost slat of your layout, drill a hole in the center and right end of the top and bottom edges. On the slat on the far right, drill holes in the center and left edge of the top and bottom edges. This will allow the outer edges of these slats to overhang the curve of your track a little, giving it a more realistic look and better glide.
Insert the screws into the drilled holes, until the tape starts, almost all the way in. Be careful not to split the slats.
Step 8: Check the track
Insert each slat into the track and run it to where it will be placed on the final product. They may linger a little at this point because they want to lean as you slide them. Use the screws on each slat to eliminate any tilt or slack in its movement. The screws should be removed so that they lightly touch the bottom of the bottom track and hold securely, but do not touch the "bottom" of the top track. Divide the slats into two groups, right and left side, so that they meet at the middle front of the court. Remove the slats and place them aside according to the group. Use your soap or wax to lubricate the top and bottom track.
Step 9: Assemble the drum

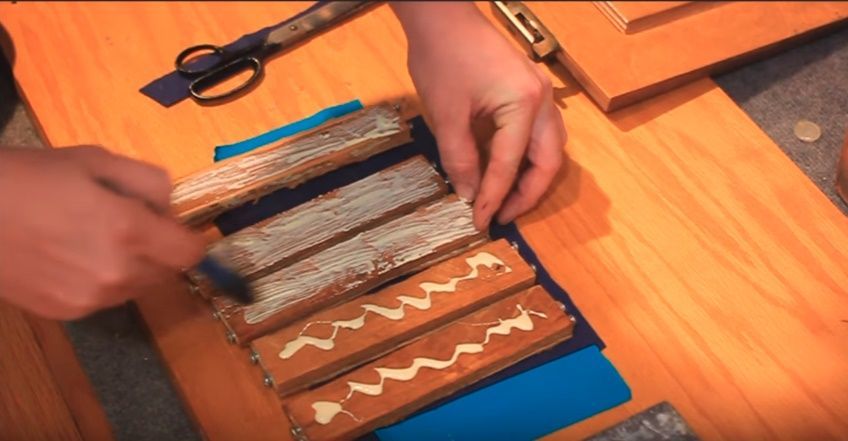


Cut a strip of your fabric slightly shorter than the height of your ribbons and a couple of inches wider than each group in your final arrangement. Stick this strip to a flat work surface, you won't mind putting glue on it. Pull it tightly so there are very few/no wrinkles. Place the slats, long edge to long edge, on the strip, making sure they are in the correct order for the side they will run on.The fabric should reach almost to the top and bottom edge of each slat, and they should be in a perfectly straight line at the top and bottom.
Flip each slat over and spread the glue on the back. Turn them over and make sure the arrangement is correct, and that each long edge touches. Place a large, heavy surface over the top of the glue until it dries. I used another piece of plywood and a heavy weight. Just make sure it's pressed evenly.
Step 10: Finish the drum

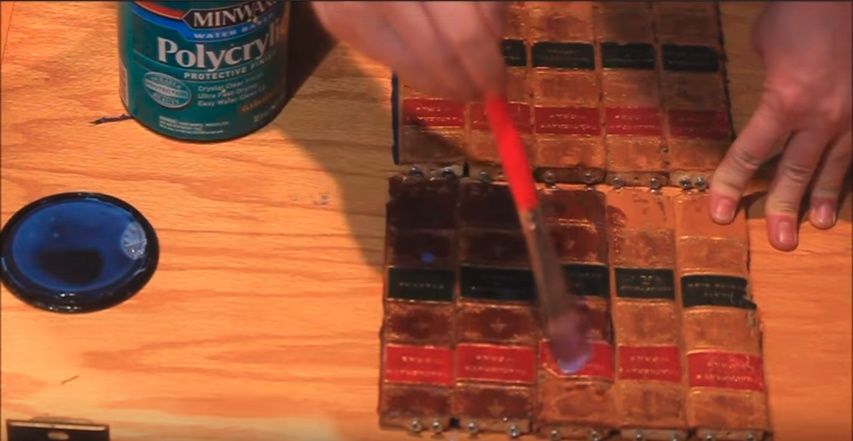


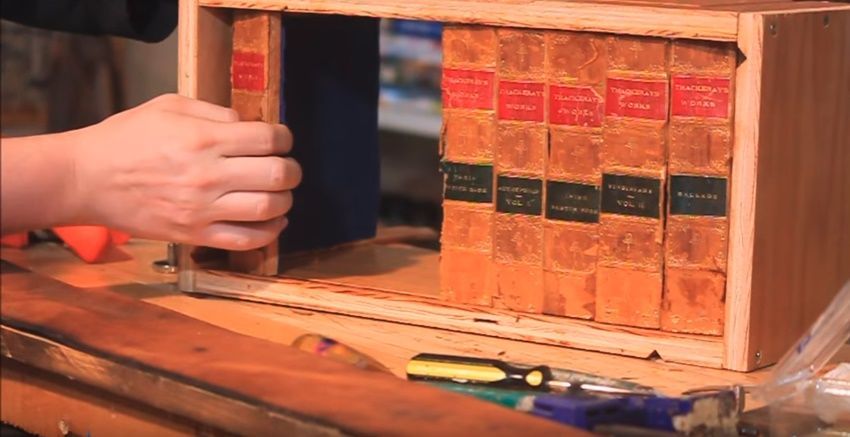
Remove the weights once dry, and lift them off the work surface. Fold between each slat to release any stray glue that may have bound the edges. Cut excess fabric from the ends. Cover the spine of your book if necessary.
Insert them into the correct side of your track, across the back. Cut the backing material to the size of the back of the box and attach it with small screws, pre-drilling the holes.
Step 11: Optional: Decorate your project


I chose to use some leftover panels and molding from a broken cabinet I took apart last year. I want an "old" look which I think it needed to really come to life. You can feel free to decorate yours however you see fit. I know not everyone has 100 year old walnut molding lying around. You can use edging, edge banding, paint, finish, etc. to match your personal taste.
So, now that your project meets your aesthetic standards, you can move on to the last step!
Step 12: Use it!
Fill your new hidden storage space with your favorite/valuable/precious things and enjoy! Thank you for visiting us and reading Secret Library Shelf Reusing Old Books!
Get more information at perfectionidea.com and on our facebook for more Secret Library Shelf Reusing Old Books.
Popular Content
How to make a rocket stove for outdoors
Cardboard Drawers Lined with Jeans
Ideas and Advantages of Window Grilles for the Home!
Latest Articles
How to make a refrigerator out of insulating material: Practical step-by-step guide
How to make a Kilim for the Home: Complete Step by Step Guide
How to protect ourselves from accidents in our workplace: Complete prevention and safety guide
Related Content
Spiral Wall Shelving!
How to make a refrigerator out of insulating material: Practical step-by-step guide
Resistant Wooden Swing for the Front Porch of a House!
Bathroom Furniture Ideas: Tips for Choosing the Right Furniture
Creative Home Decor Ideas to Transform Every Space
Refreshing your home starts with smart design choices that combine comfort, personality, and functionality. Whether you want to modernize a small apartment, upgrade outdoor areas, or create cozy rustic interiors, these trending ideas can completely change the atmosphere of your space.
Outdoor Spaces That Increase Style and Functionality
Outdoor living continues to dominate modern home trends. Homeowners are increasingly investing in practical entertainment zones inspired by these BBQ shed ideas, which create the perfect setup for gatherings and weekend cooking sessions.
First impressions also matter when designing exteriors. Elegant farm entrance gates design ideas help properties stand out while improving privacy and curb appeal.
Compact living solutions are also gaining popularity. These inspiring 16x40 shed house interior design ideas show how smaller spaces can still feel luxurious and functional.
To enhance patios and entryways, homeowners are adding stylish protection with these creative porch awning exterior DIY ideas that blend aesthetics with practicality.

Rustic and Cozy Interior Design Trends
Warm and natural interiors remain timeless. These charming rustic decor ideas combine wood textures, vintage accents, and earthy tones to create welcoming spaces.
Bedrooms are becoming more personalized with curated wall arrangements. Many homeowners use these stylish picture wall ideas for bedroom spaces to display memories and artwork creatively.
Textured wall treatments are another major trend. Installing a board and batten wall adds architectural character while keeping interiors elegant and modern.
Similarly, bold accent wall ideas can instantly transform plain rooms into eye-catching focal points without requiring a full renovation.
Smart Kitchen and Organization Inspiration
Functional kitchens are essential for modern homes. These practical kitchen wall cabinet ideas maximize storage while maintaining a clean and stylish appearance.
Organization also starts at the entrance. Well-designed mud room ideas help families keep shoes, coats, and daily essentials neatly arranged.
Colorful and Personalized Home Styling
Vibrant interiors are becoming increasingly popular thanks to playful dopamine decor ideas that use bright colors and joyful accessories to improve mood and energy.
Gallery walls also continue to evolve as a major decorative feature. These trendy gallery wall inspiration ideas offer creative ways to combine prints, photos, and statement art.
Young renters and new homeowners are especially embracing these stylish first apartment aesthetic ideas to create sophisticated interiors on a budget.
Finally, selecting the right shades can dramatically influence any room’s atmosphere. These modern trendy color ideas help homeowners choose palettes that feel fresh, elegant, and timeless.
Final Thoughts
From rustic charm and colorful interiors to outdoor entertaining areas and functional storage solutions, today’s home decor trends focus on creating spaces that feel both beautiful and livable. By combining smart layouts, modern textures, and personalized decorative elements, any home can become more stylish, comfortable, and inspiring.
Home Decor ShopVanity bench | Outdoor bar table | Dining bench | Dining set for 6 | Oval dining table furniture | Butcher block kitchen islands | Mid century modern dining chairs | Triple buffet server | Triple buffet server | Outdoor kid furniture
Browse the Shop
 Acacia frida deluxe solid wood bed frame |
Bedroom bench |
Bed chest drawers |
Lingerie dresser |
Frame base |
Mirror with jewelry storage |
30 Bathroom Vanity |
Memory foam queen mattress |
Mattresses for back pain |
Nightstand set of 2 |
Grand Goldman Shop |
Civil Lawyer
Deutschland Trikot WM 2026
Acacia frida deluxe solid wood bed frame |
Bedroom bench |
Bed chest drawers |
Lingerie dresser |
Frame base |
Mirror with jewelry storage |
30 Bathroom Vanity |
Memory foam queen mattress |
Mattresses for back pain |
Nightstand set of 2 |
Grand Goldman Shop |
Civil Lawyer
Deutschland Trikot WM 2026







