
Today learn how to create false wood-look panels from the comfort of your home which you can implement in any home environment.
This is an easy to use project and can be used in many applications.

Supplies:
- You will need 4x8 sheets of 1/2″ pink foam insulation
- Sharpening markers, a tape measure, a straight edge
- An adjustable wood burning tool or soldering gun.
- A wire brush with a wooden handle
- A cleaver cutting knife
- A hand torch
- Paint supplies (roller and brush) and some different colored paints (flat latex paint for the walls)
- Instant glue
Steps to create false wood-look panels:
I would recommend some good gloves, eye protection and a good respirator type mask. Foam be sure to be outdoors or in a very well ventilated area.
#1: Let's get started!

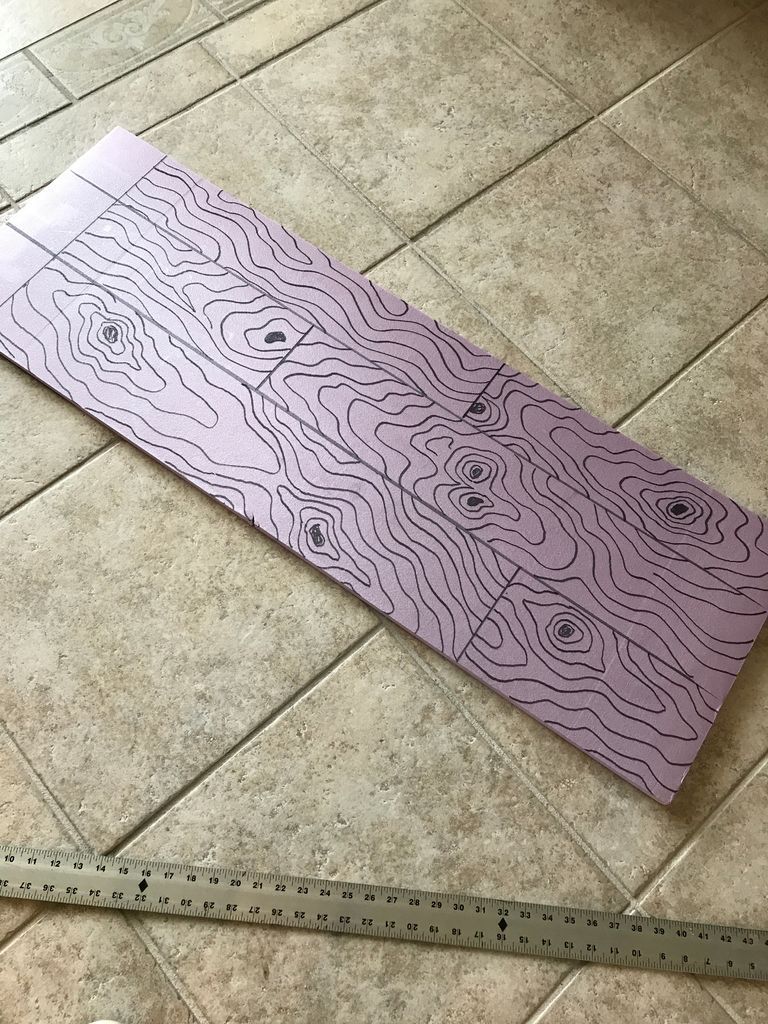

- Cut the panels to size (it all depends on where you are going to use them).
- I used the straight edge (I used a T drywall) to draw my cut lines and then used a razor blade to cut the panels.
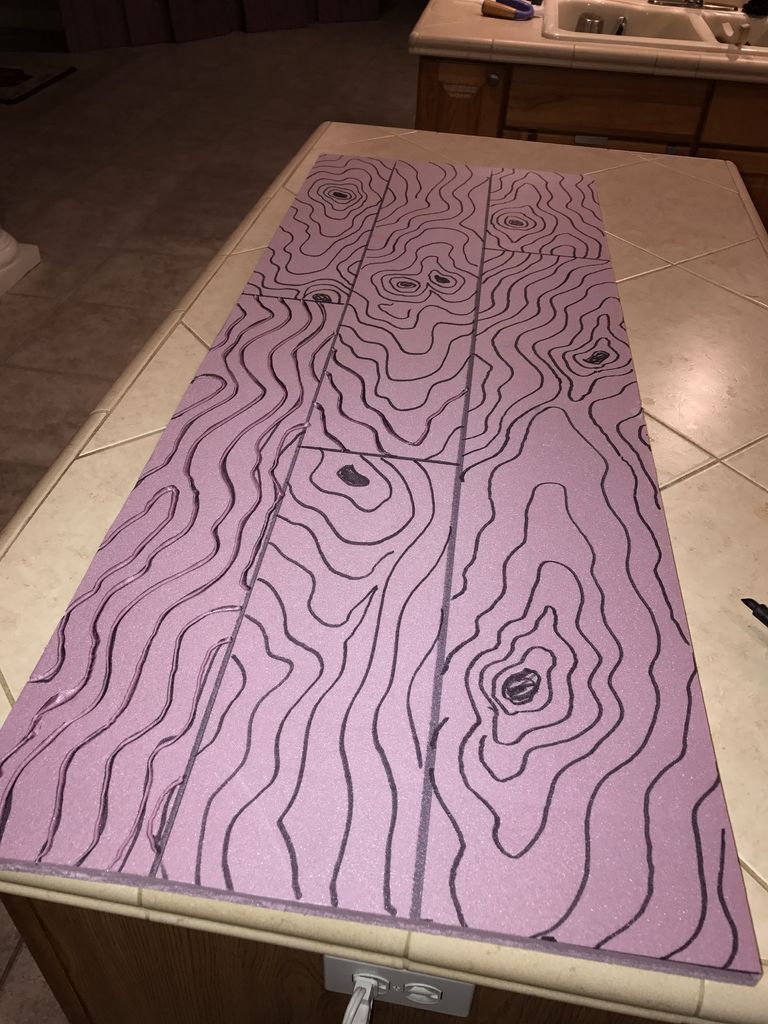
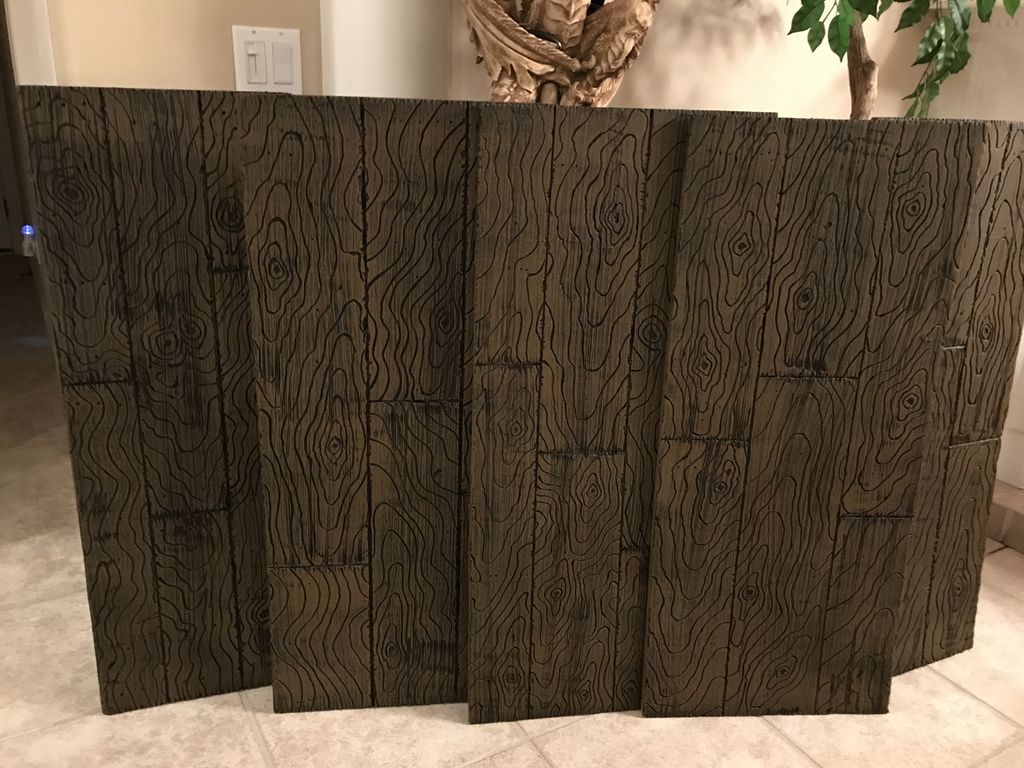
- Using the straight edge and a marker, I begin to draw the pattern of the board. I kept it random with some wider boards.
- The idea is that these are recycled, old, half-dried barn boards.
- Now I start drawing the wood pattern on each board, starting with the knot and then drawing a random pattern moving away from the knot and keeping the lines about 1/2 inch apart.
- Easy once you get the hang of it.
#2: Sculpting the pattern
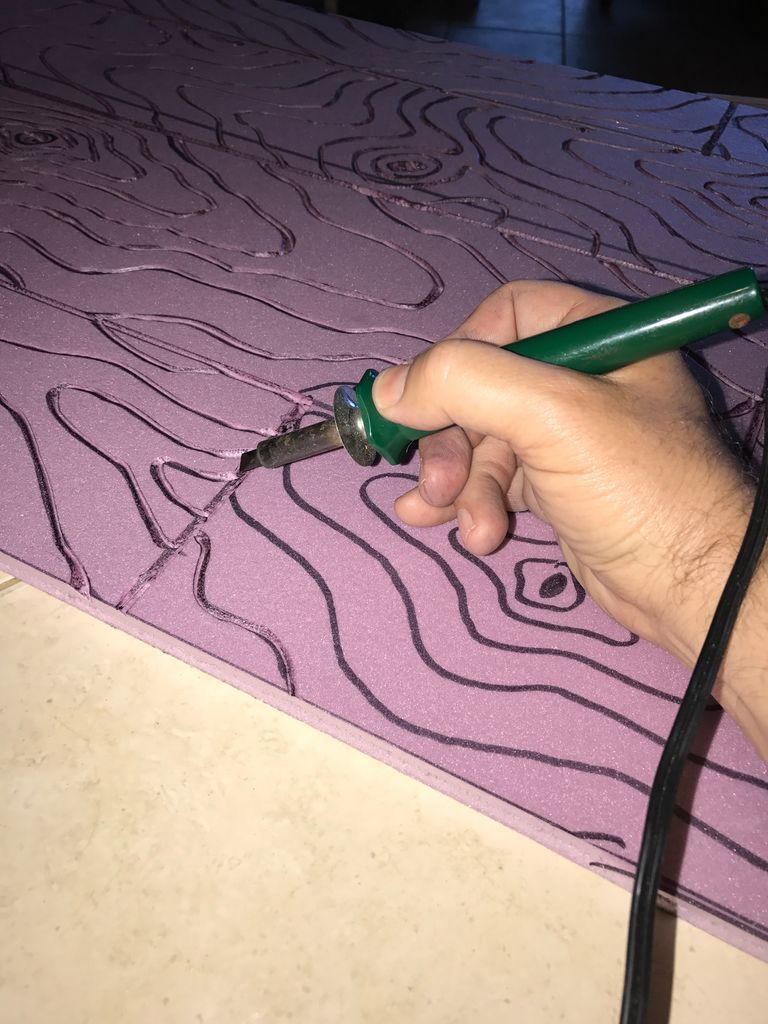


- Using my soldering gun on a medium setting with the tip pointed, I was able to “slide” the tool across the pattern…
- I have to keep moving or the tool will melt the foam more and more.
- I would suggest using a piece of scrap metal first to understand how fast or slow you will need to go.
- I melt the tip of the tool halfway.
- This seems a little strange at this point, I know.
#3: Time for some fine details!
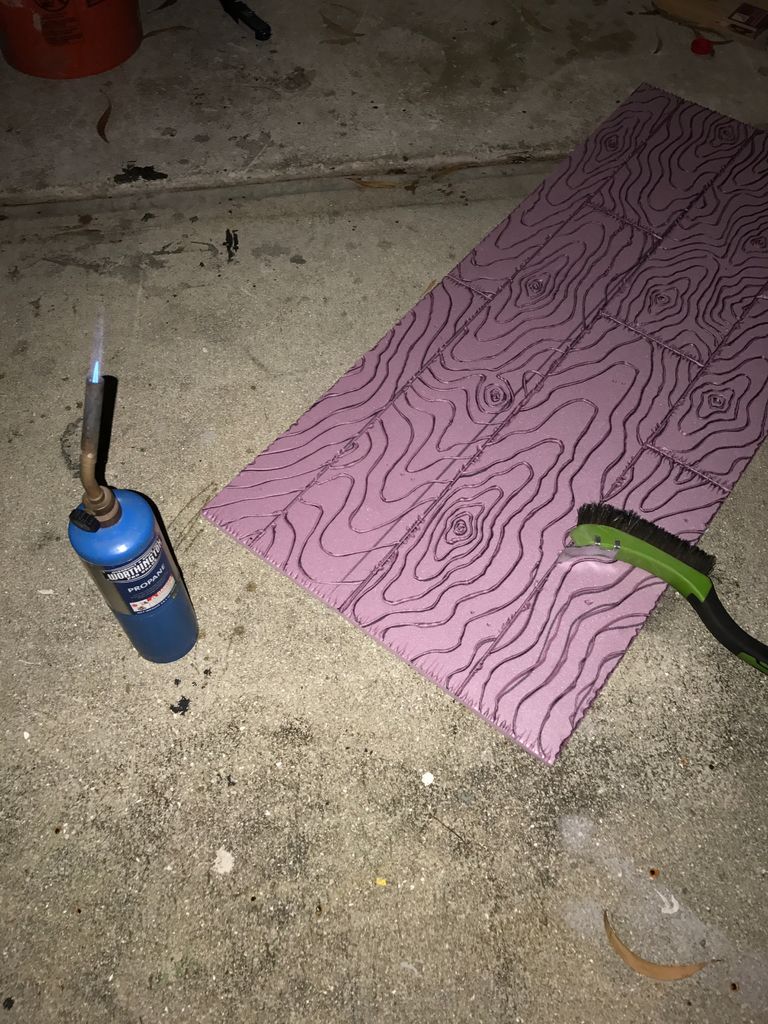
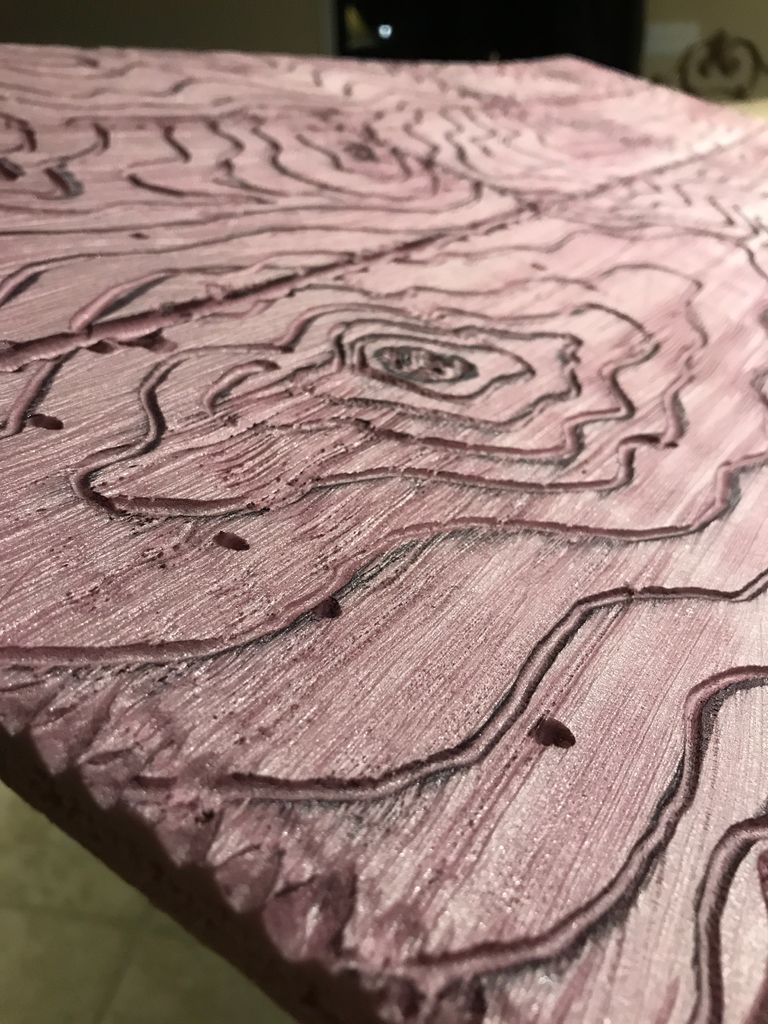


Make sure you get a wooden wire brush, I started with a plastic one and when I heated the wire it melted and the wire came out!
- I turned the torch to medium and heated the wire brush. You only have to heat it for approximately 30 seconds.
- While the wire is hot, start at the end of each "board", tilt the brush at about a 45 angle and drag slowly so the wires melt.
- Be sure to "wiggle" the brush slowly from time to time.
- Just keep repeating this step until you get the desired effect.
- This will also help "harden" the foam.
- The brush will also open up some of the carved lines and give it a much more natural aged look.
- Be sure to "sit" a little more on the ends of the boards, as that's where it would age the most.
#4: Time to finish the painting!

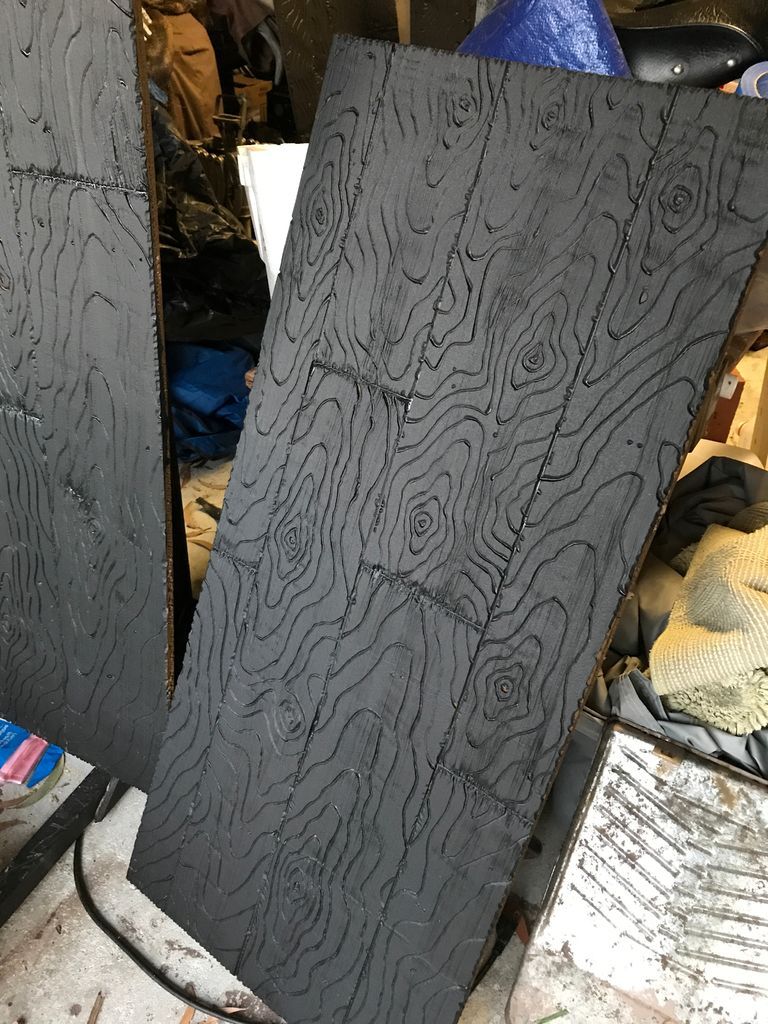
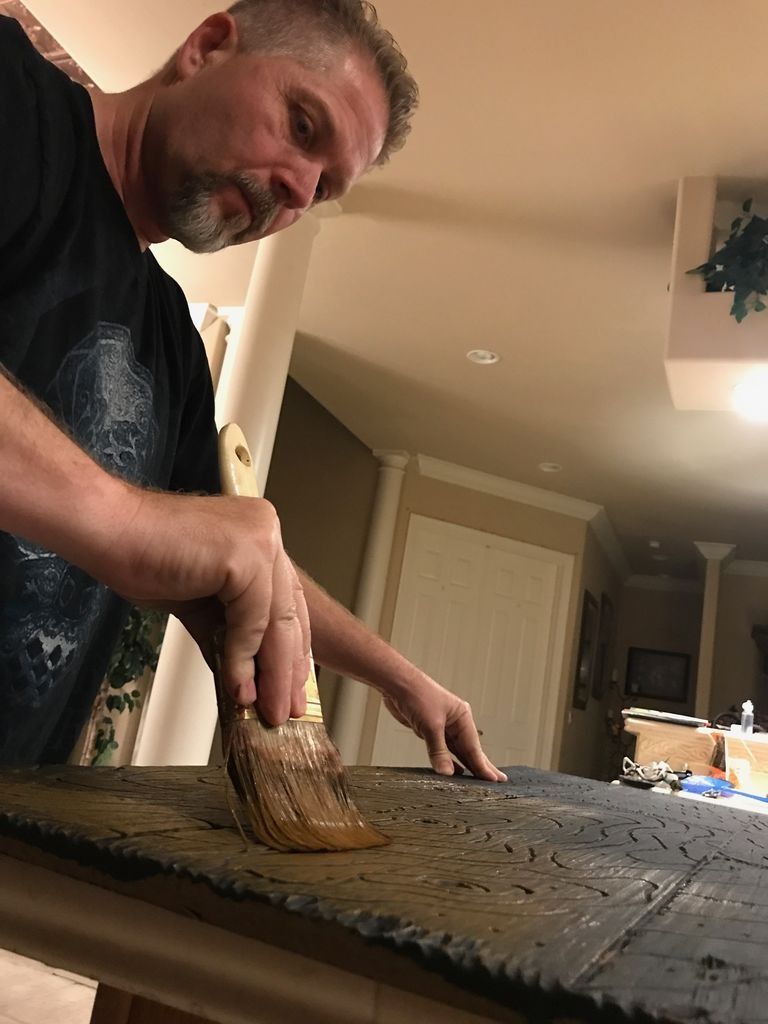
- I used a very dark brown flat latex interior paint for the base, almost black and a thick roller to apply. Make sure you put paint in all the grooves so it does NOT look pink... This is a pain as I found out!
- Every time I think it was good, another angle would show a little pink!
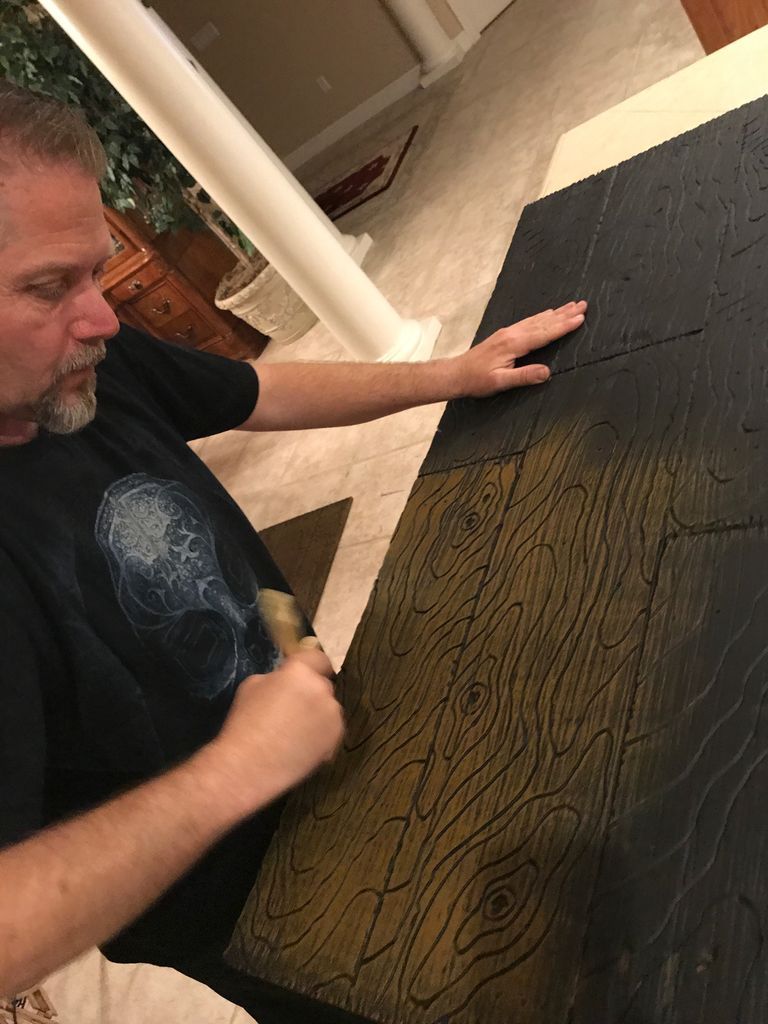
- Once you are sure that the primer has completely covered all the pink and that the panels are DRY, it is time for finishes.
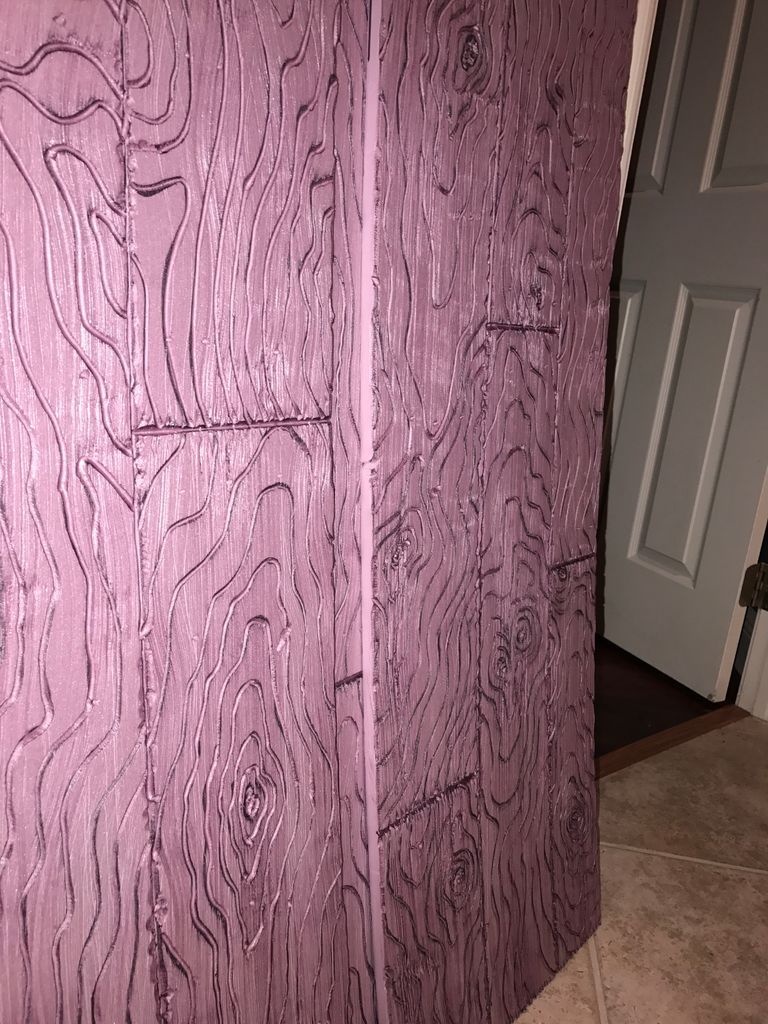
- It will be a dry brush technique. You won't need much paint for this step.
- With a lighter toned color, dip the end of the brush into the paint...using a piece of foam or cardboard, apply the pain until it is almost completely off the brush.
- Very slightly in the opposite direction of the "grain" brush, do small sections at a time.
- This should go quickly, but be careful not to add too much paint. I also add some other colors, like a little green on some boards.
#5: Finish it!
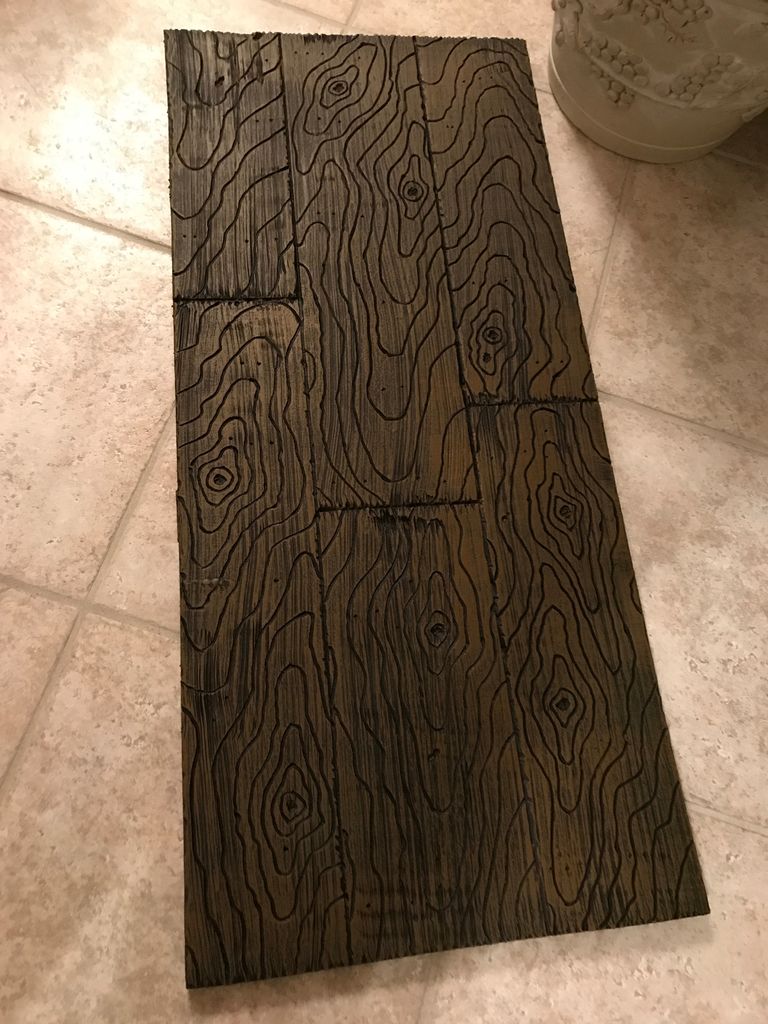
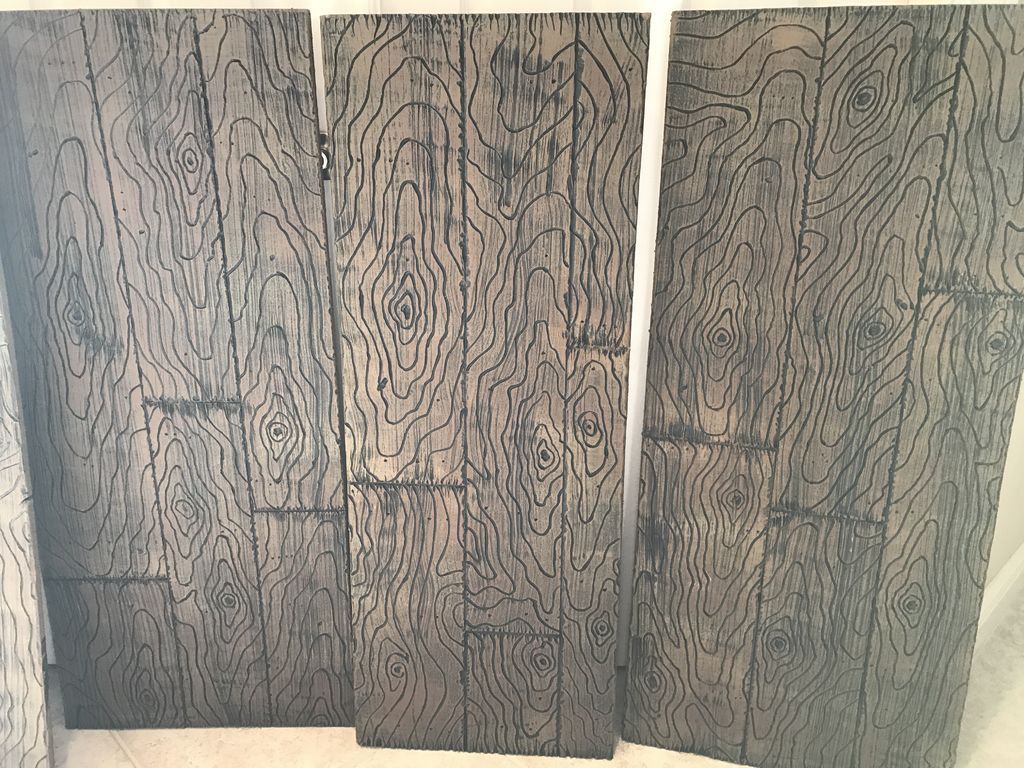

After dry brushing all the panels, I place them in sunlight to "check" if there are any light spots or if another color is needed.
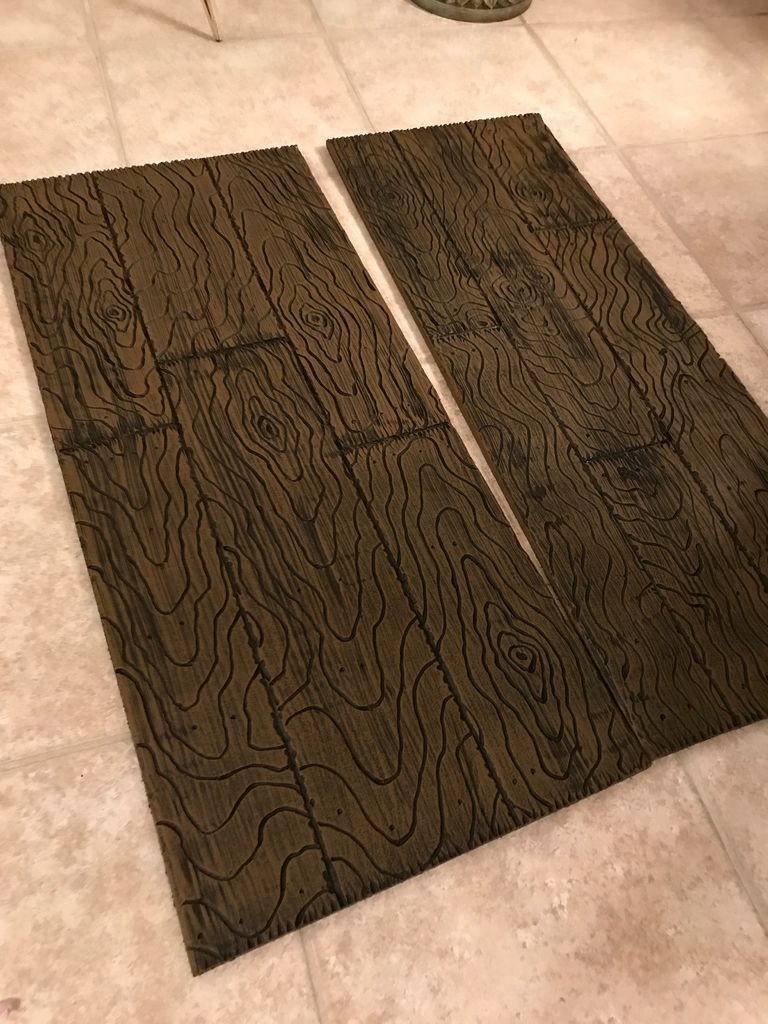
That's it... You can use any color as a dry brush top coat.
Next time we will make a wall and have different staggered colored boards, red and gray.
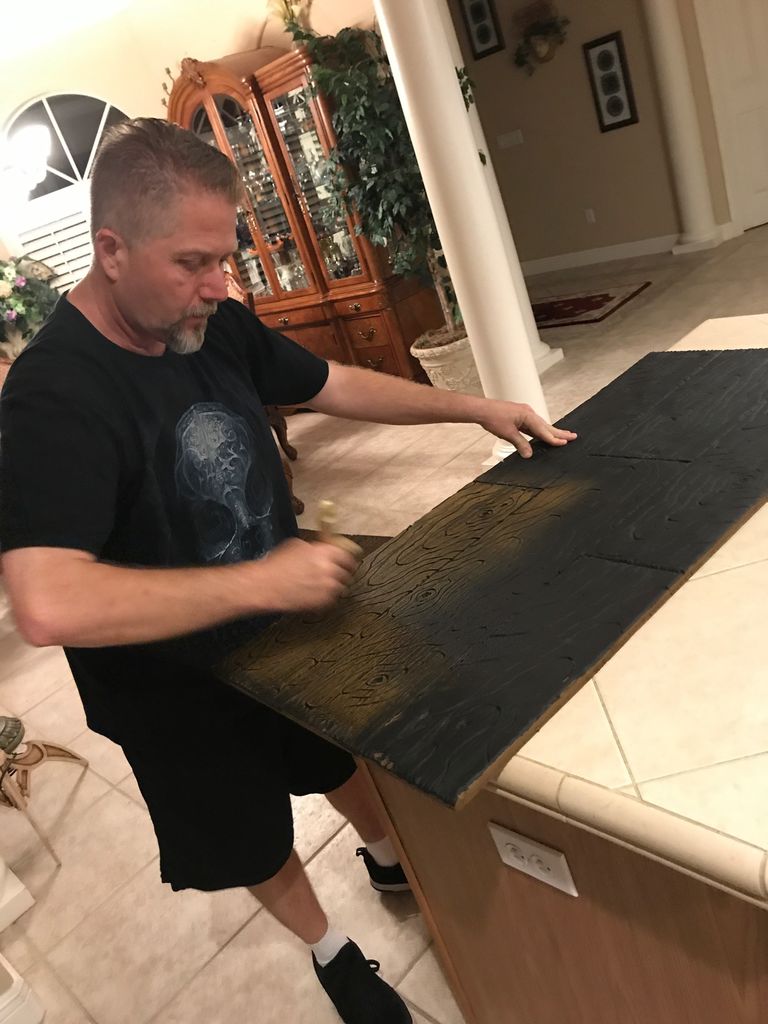
#6: Install!
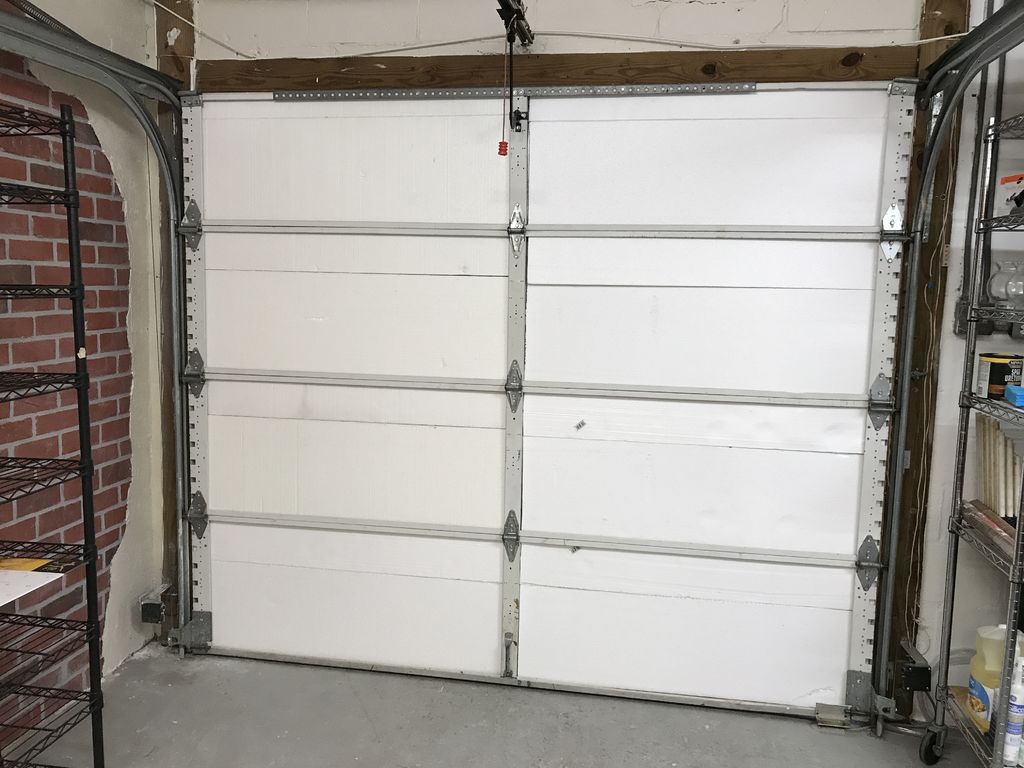

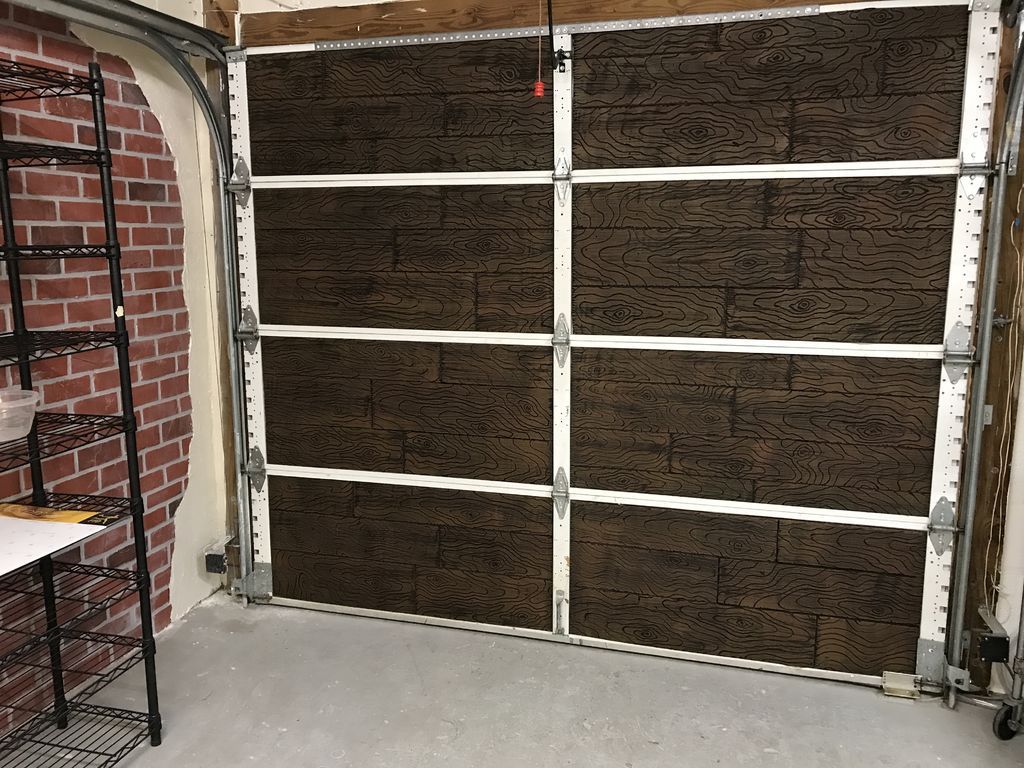
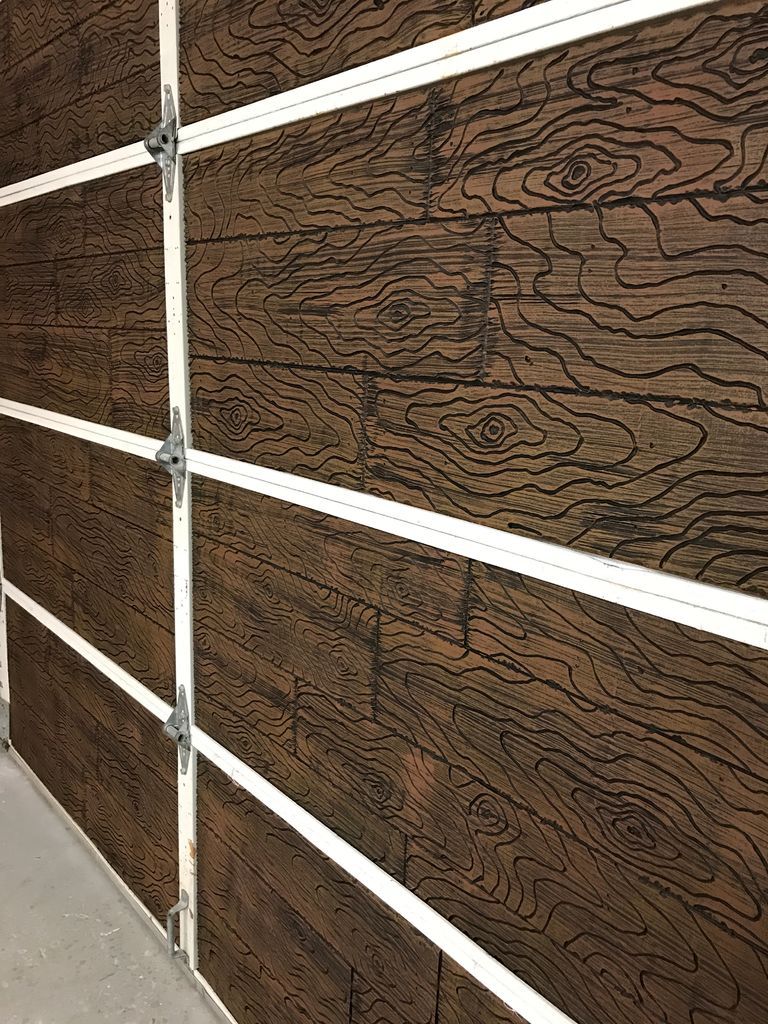
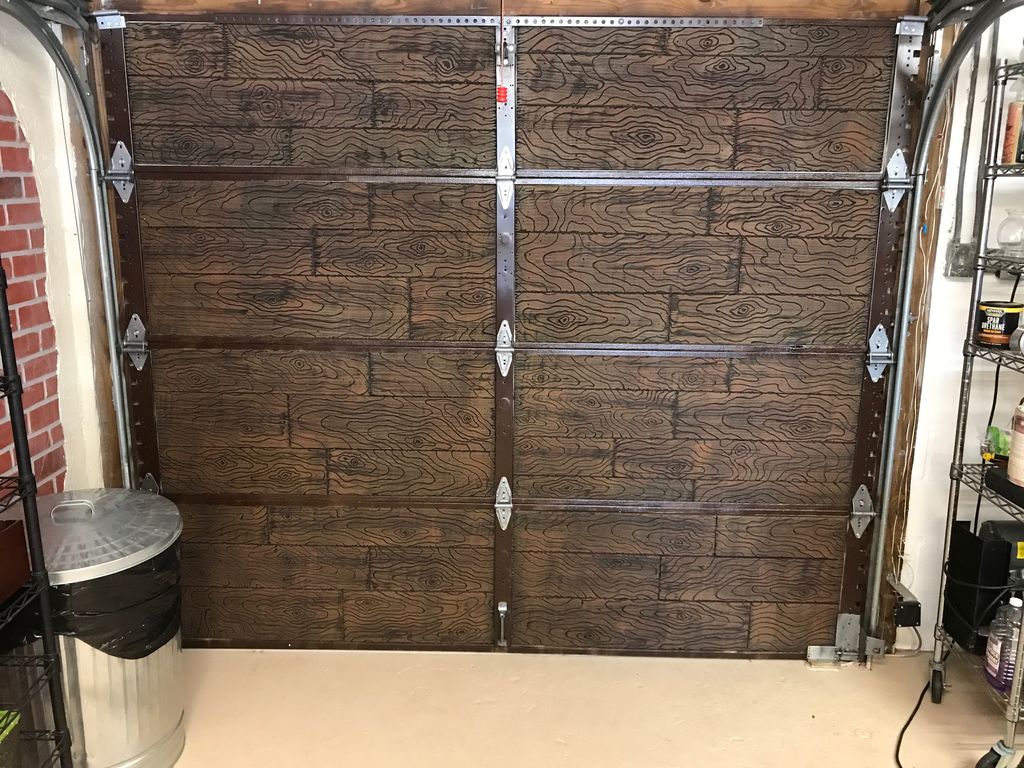
I used the mechanical grip to glue the panels to the door...
Just a few taps were enough and there is no "waiting" time once you press the panels.
The most important thing is that the PTO will not enter the foam. It's very light and easy to work with! Have fun!!
Don't forget to follow us on our social networks for more news!
Popular Content
How to make a rocket stove for outdoors
Cardboard Drawers Lined with Jeans
Change the facade of your home with simple steps!
Latest Articles
How to make a refrigerator out of insulating material: Practical step-by-step guide
How to make a Kilim for the Home: Complete Step by Step Guide
How to protect ourselves from accidents in our workplace: Complete prevention and safety guide
Related Content
Turn Cans into Beautiful Pots
Headboard with lights
Cool Triple Bunk Bed Designs
Super Economical Table for the Router
Creative Home Decor Ideas to Transform Every Space
Refreshing your home starts with smart design choices that combine comfort, personality, and functionality. Whether you want to modernize a small apartment, upgrade outdoor areas, or create cozy rustic interiors, these trending ideas can completely change the atmosphere of your space.
Outdoor Spaces That Increase Style and Functionality
Outdoor living continues to dominate modern home trends. Homeowners are increasingly investing in practical entertainment zones inspired by these BBQ shed ideas, which create the perfect setup for gatherings and weekend cooking sessions.
First impressions also matter when designing exteriors. Elegant farm entrance gates design ideas help properties stand out while improving privacy and curb appeal.
Compact living solutions are also gaining popularity. These inspiring 16x40 shed house interior design ideas show how smaller spaces can still feel luxurious and functional.
To enhance patios and entryways, homeowners are adding stylish protection with these creative porch awning exterior DIY ideas that blend aesthetics with practicality.

Rustic and Cozy Interior Design Trends
Warm and natural interiors remain timeless. These charming rustic decor ideas combine wood textures, vintage accents, and earthy tones to create welcoming spaces.
Bedrooms are becoming more personalized with curated wall arrangements. Many homeowners use these stylish picture wall ideas for bedroom spaces to display memories and artwork creatively.
Textured wall treatments are another major trend. Installing a board and batten wall adds architectural character while keeping interiors elegant and modern.
Similarly, bold accent wall ideas can instantly transform plain rooms into eye-catching focal points without requiring a full renovation.
Smart Kitchen and Organization Inspiration
Functional kitchens are essential for modern homes. These practical kitchen wall cabinet ideas maximize storage while maintaining a clean and stylish appearance.
Organization also starts at the entrance. Well-designed mud room ideas help families keep shoes, coats, and daily essentials neatly arranged.
Colorful and Personalized Home Styling
Vibrant interiors are becoming increasingly popular thanks to playful dopamine decor ideas that use bright colors and joyful accessories to improve mood and energy.
Gallery walls also continue to evolve as a major decorative feature. These trendy gallery wall inspiration ideas offer creative ways to combine prints, photos, and statement art.
Young renters and new homeowners are especially embracing these stylish first apartment aesthetic ideas to create sophisticated interiors on a budget.
Finally, selecting the right shades can dramatically influence any room’s atmosphere. These modern trendy color ideas help homeowners choose palettes that feel fresh, elegant, and timeless.
Final Thoughts
From rustic charm and colorful interiors to outdoor entertaining areas and functional storage solutions, today’s home decor trends focus on creating spaces that feel both beautiful and livable. By combining smart layouts, modern textures, and personalized decorative elements, any home can become more stylish, comfortable, and inspiring.


