
How to Give Your Old Clothes a New Look, tie-dye shirts are almost as American as apple pie. It's impossible to be sad about tie dye colors...
While some instructions suggest using rope, I find that elastic bands work best. Either way, the most important thing is that you have fun reviving that old polo, sweatshirt or shirt and transforming it into a rainbow masterpiece (You can adapt this technique to create your own unique designs).

Next I pass them...
Step 1: The shirt, suitable for dyeing!

The shirts that work best are 100% cotton, but you can also use 50% cotton/50% polyester. The results will not be as vibrant.
I once tried to dye a 100% polyester garment and when it was unwrapped, all the paint was washed away! Dyes only adhere well to natural fabrics, like cotton, silk, and rayon, but we're talking about cotton here...
Step 2: Presentation of your colors

You can very easily purchase stain/paint kits at craft stores, which come with everything you need. Includes rubber gloves, rubber bands, soda ash, urea, and complete, easy-to-follow instructions.
The dyes are already in the compressed bottles, all you have to add is warm (not hot) water.
Other alternatives include purchasing individual packages of dyes. These also come with the necessary urea, soda ash, and mixing instructions. However, you would need to purchase some squeeze bottles separately if you don't have any.
Step 3: What you will need
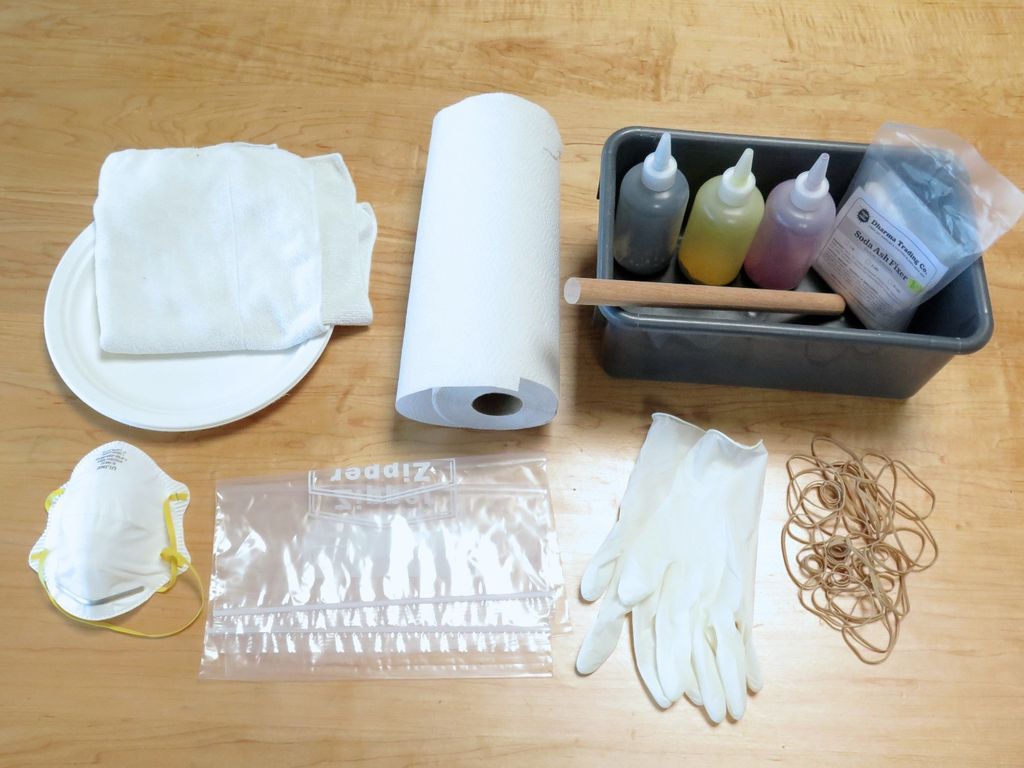
You will need the following;
Procion dye, rubber bands, rubber gloves, dye bottles, urea and soda ash, large bags, a bucket to soak the shirts in, and a wooden dowel or something similar to create the twist in the shirt.
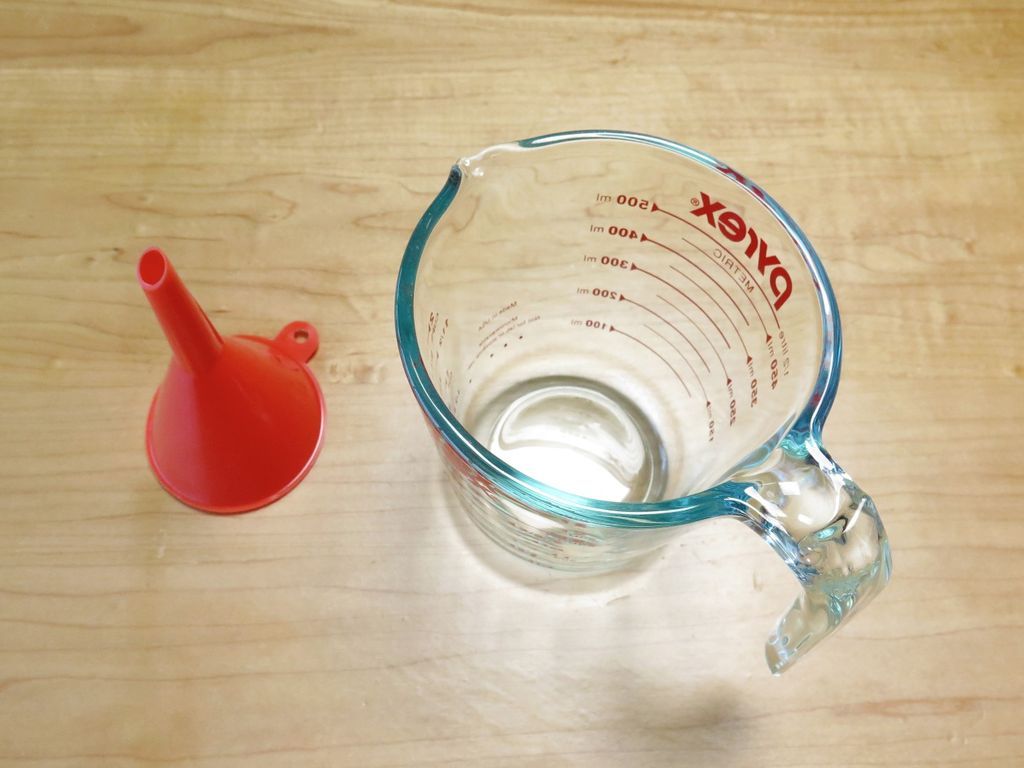
A funnel and measuring cutter are also useful for mixing the dye.
Step 4: Soaking the shirt
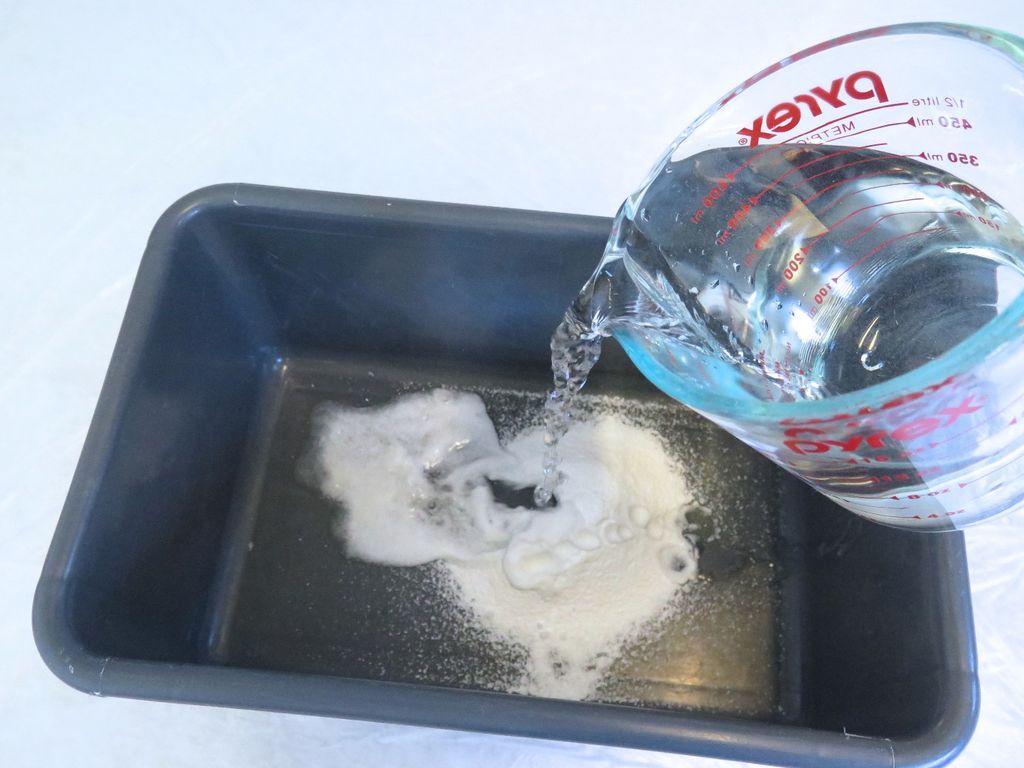

To allow the dyes to adhere to the shirt, you should soak it in a solution of HOT water and sodium carbonate for about 10 minutes.
Follow the instructions given with the soda ash so you have the correct mixture. Don't use too hot or too cold water, and add a couple of tablespoons of table salt to the mixture too! Make sure the mixture is completely dissolved before adding the shirt.
The water temperature should be about the same as a baby's bath! As sodium carbonate is slightly caustic, you may want to wear rubber gloves at this point, especially if you have a cut on your finger – it will sting! After soaking, drain the shirt well. The more liquid you can squeeze out, the more dye can get in! I usually spin my shirts in the spin cycle of the washing machine.
Note: if you wear a new shirt, wash it first.
Step 5: Swirl Pattern to Create a Rainbow!

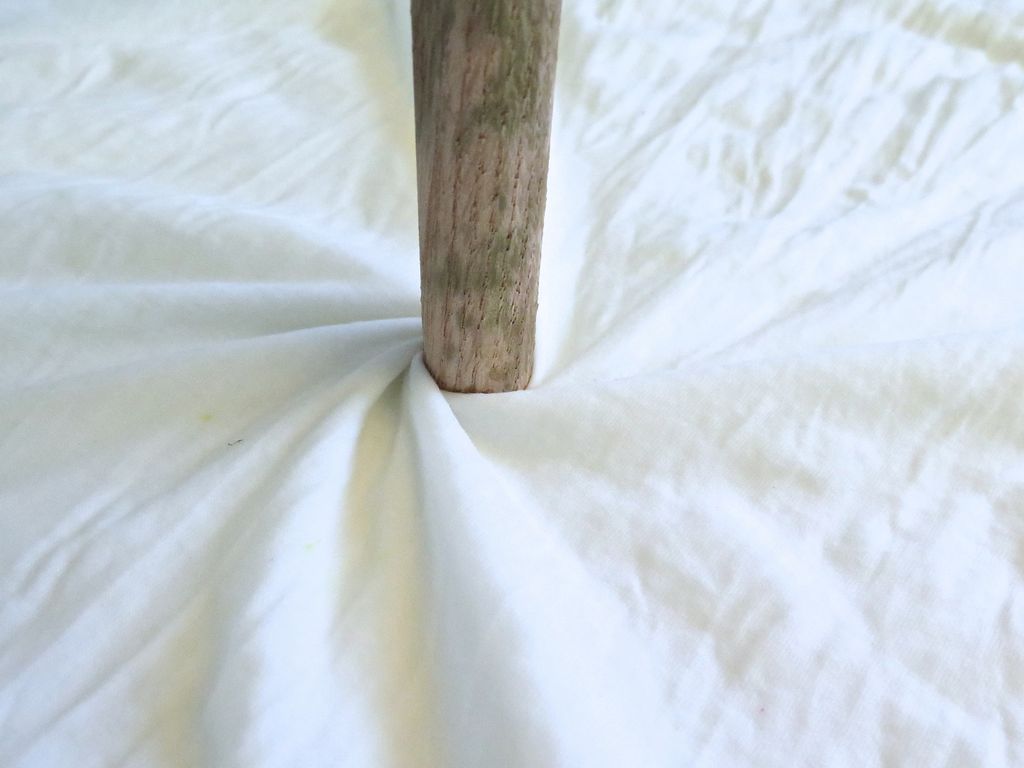

After you've soaked and wrung the shirt (by the way, if you don't do it in the washing machine, try wringing it with a friend) place the shirt on a flat surface.
Place it right side down as you will then get a sharper pattern on the front of the shirt. Of course, if you want a sharper pattern on the back, you know!
Place the wand, (or your finger or a wooden clothes pin) in the center of the shirt and begin to rotate clockwise.clockwise until you have a nice flat cake shape.
You can also turn counterclockwise if you prefer, it doesn't really matter.
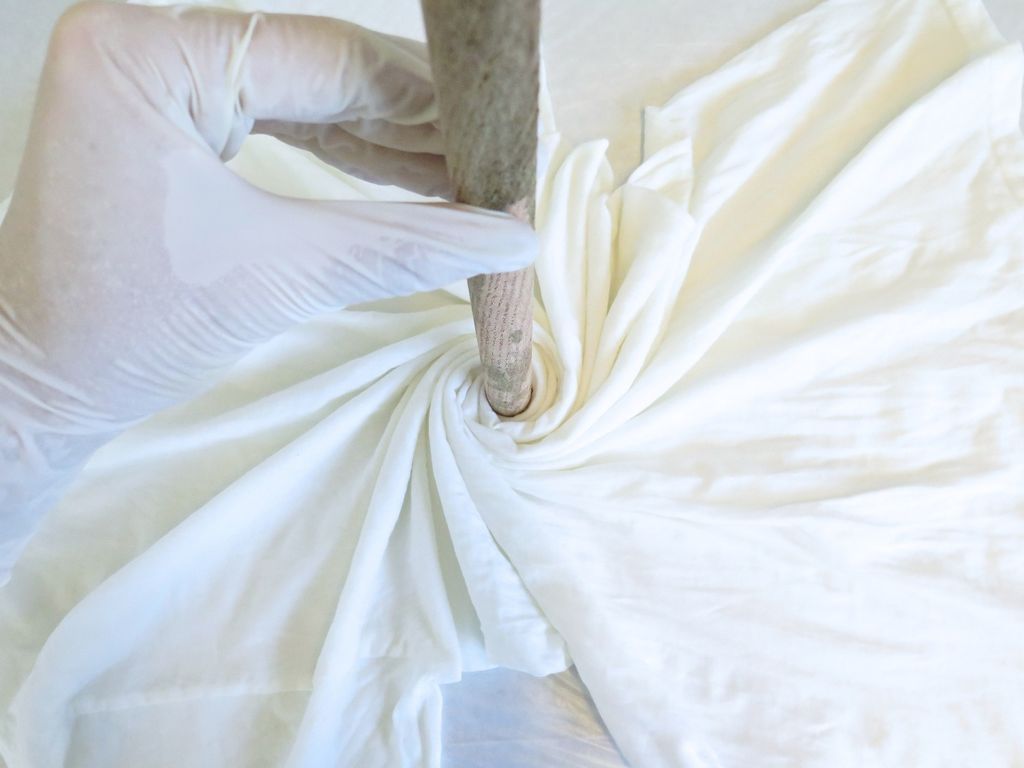
Step 6: Do it right!
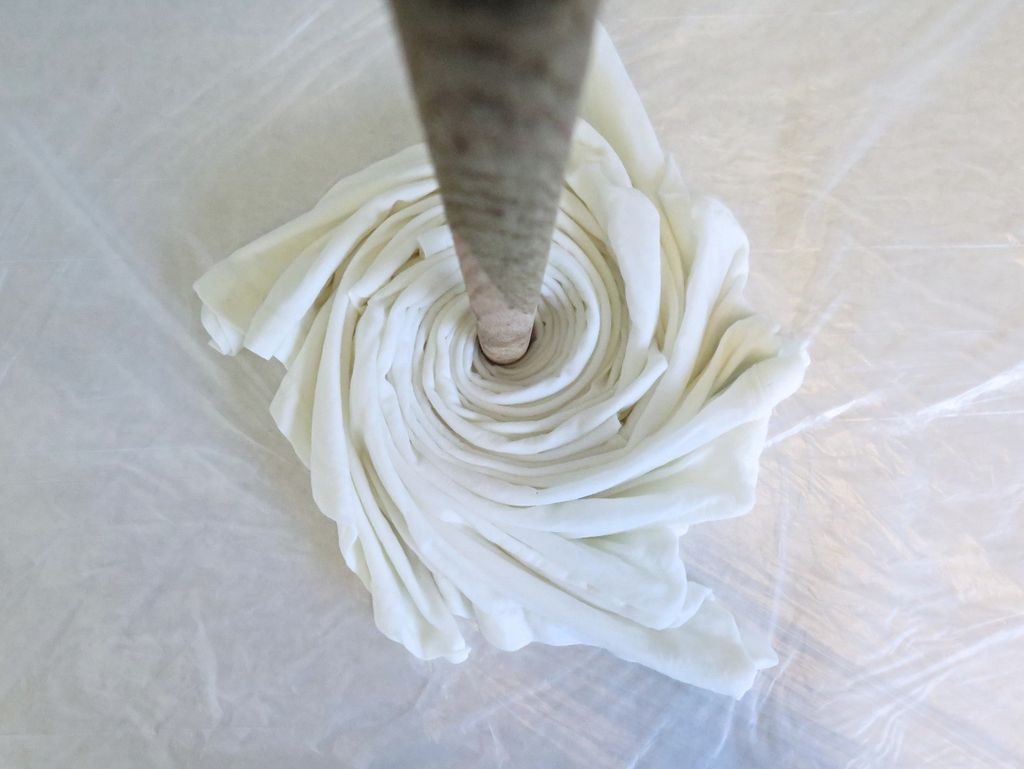
This is what your shirt should look like at this stage. Don't let the shirt slide down the rod, make it work by hand without turning the rod! Now you are ready to remove the pin and put on the rubber bands. The trick is to attach the bands without disturbing the shirt! It can be done! Be careful when removing the plug. You don't want to pull the shirt in the middle. This part of the process is the most important step of all.
Step 7: Use the bands!


With your lovely cake shape achieved, you can now put on the rubber bands. Slide on several bands (see picture), then turn the shirt inside out and put on some more.
This maintains its shape. Keep everything as flat as you can. Now you are ready to paint!
Step 8: Preparing to paint

You will need to cover your work surface with plastic. Something like a plastic tablecloth will work well. You should also wear old clothes, old shoes, etc.
The dyes will stain your clothes, the floor, the walls, the ceiling, etc.
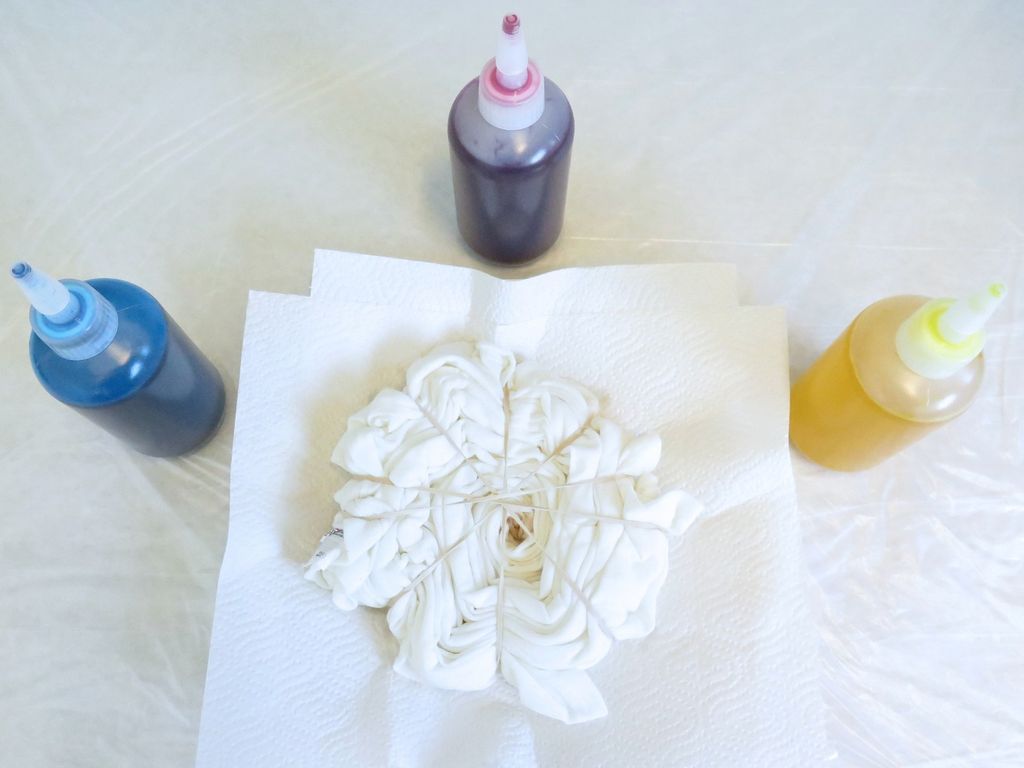
Step 9: Use all the colors


On a couple of thicknesses of paper towels on top of a plate. It's less messy and easy to flip everything. Wear rubber gloves!
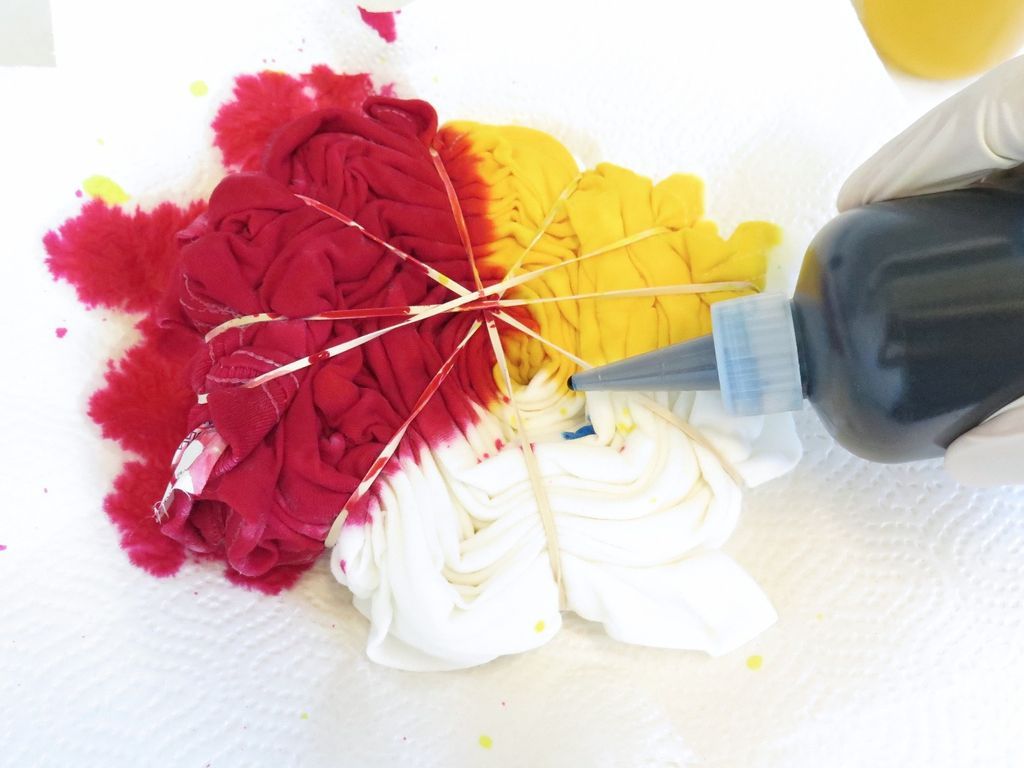
With these three colors you can make any color you want. To make the rainbow spin your shirt, imagine your "package" is a real pie chart.
Working from the center of the shirt and holding the bottle underneath the shirt, place one-third of the lemon yellow shirt. Don't shake the bottle as it will make a mess!
Dye the second third of the shirt fuchsia red and the final third turquoise. Don't leave any blank space showing - the "white" hides within the folds!
If you overlap the colors on the edges of each section you will get the other colors of the rainbow, i.e. green, purple and orange. It's magic!
Tip: Always put yellow – (or other light-colored dyes) first. Once you "lose" or cover it by mistake, it changes to something else (orange or green).
Step 10: Flip the cake!
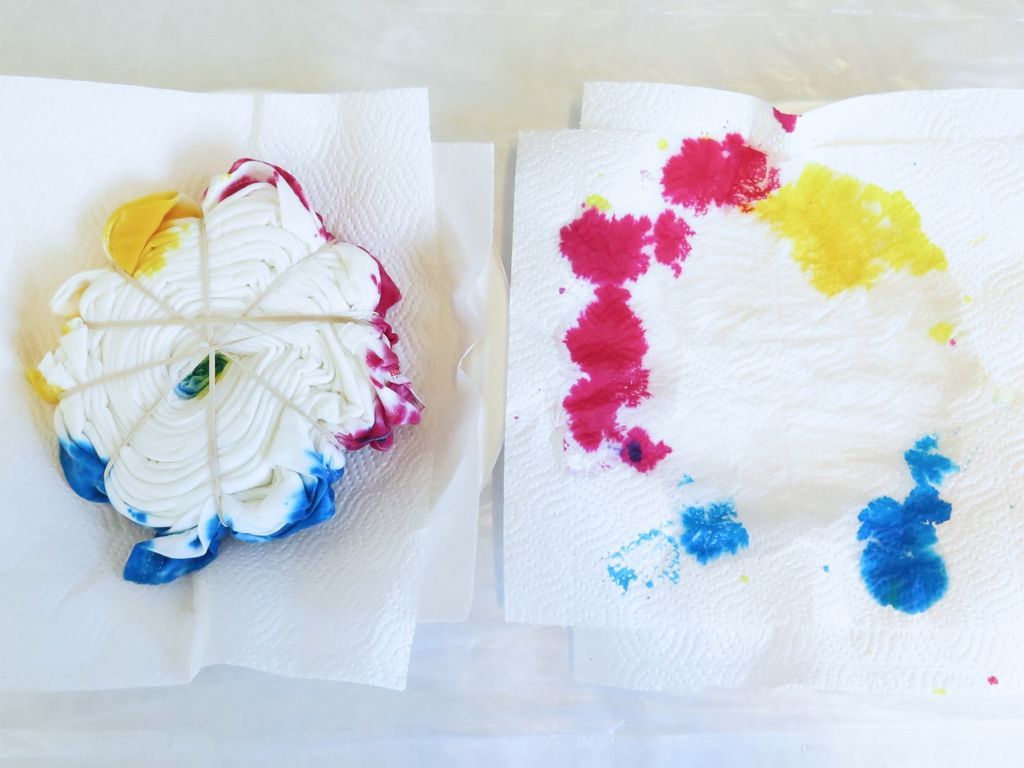


When you're done putting the dye on the first side, turn everything over. This will be easy to do if you simply turn the plate over onto another paper plate with a clean paper towel. Apply the stain to this second side in a similar manner.
If you are spinning the rainbow, you want to make sure you put all three colors behind the same colors you used on the other side (i.e. red behind, blue behind, etc.)
If you don't, you won't get a rainbow spiral, but rather a sort of rainbow spider pattern (which is actually quite nice!)
Step 11: Now comes the hard part!
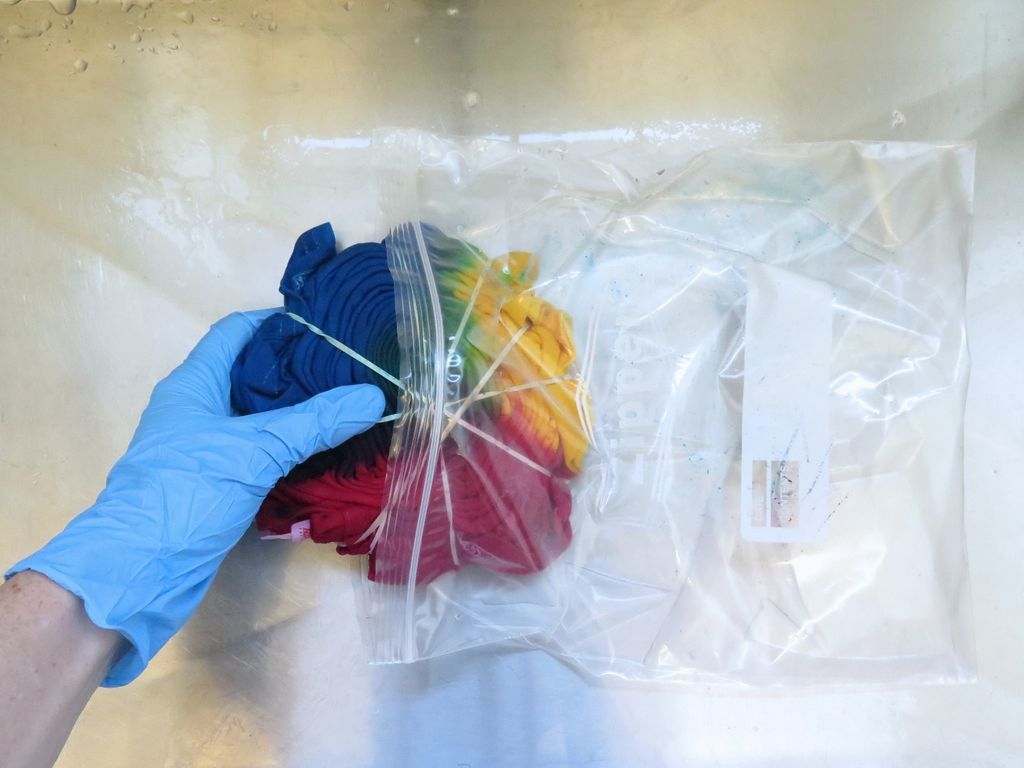
After you have finished putting the dye on the shirt, put it in a zip-top bag and seal it well.
Place the bag in a warm place and leave it for AT LEAST 24 HOURS! The dye needs this time to "prove" and allows the beautiful colors to really bond with the fabric.to. You can unwrap after 8 hours.
But you can also leave the shirt on for up to 36 hours if you are very patient. If you leave it on longer, I have found that the colors become blurry (I don't know why). When you unwrap your shirt use rubber gloves and old clothes again.
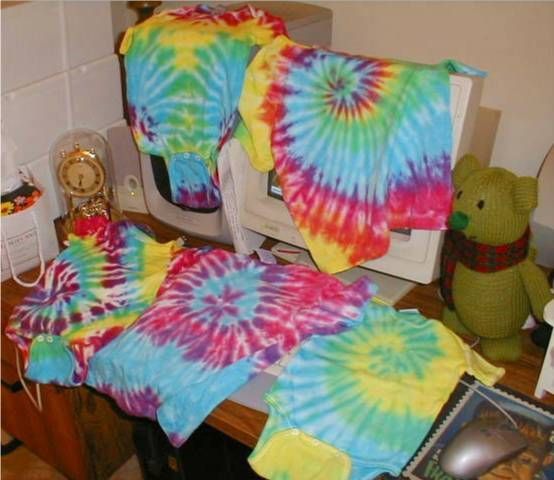
Step 12: Unwrap Your Masterpiece!


I love this part! This is the moment you've been waiting for. It's time to unwrap and reveal your beautiful (we hope) creation for all to see.
Take the shirt out of the bag! You can remove the bands first, unwrap and start running the shirt under a cold tap, or just run it under the tap for a while and then remove the bands. BEWARE, if you have never dyed your hair before you will be surprised at how much dye spills out while you rinse. The water could turn black! Don't fear, this is normal.
Continue rinsing until the water runs clear (it may take a while). Hopefully, if you've done it right, your pattern will be revealed in all its glory. I usually wash my shirts two or three times on their own before trusting them with other colors.
Step 13: The moment of truth
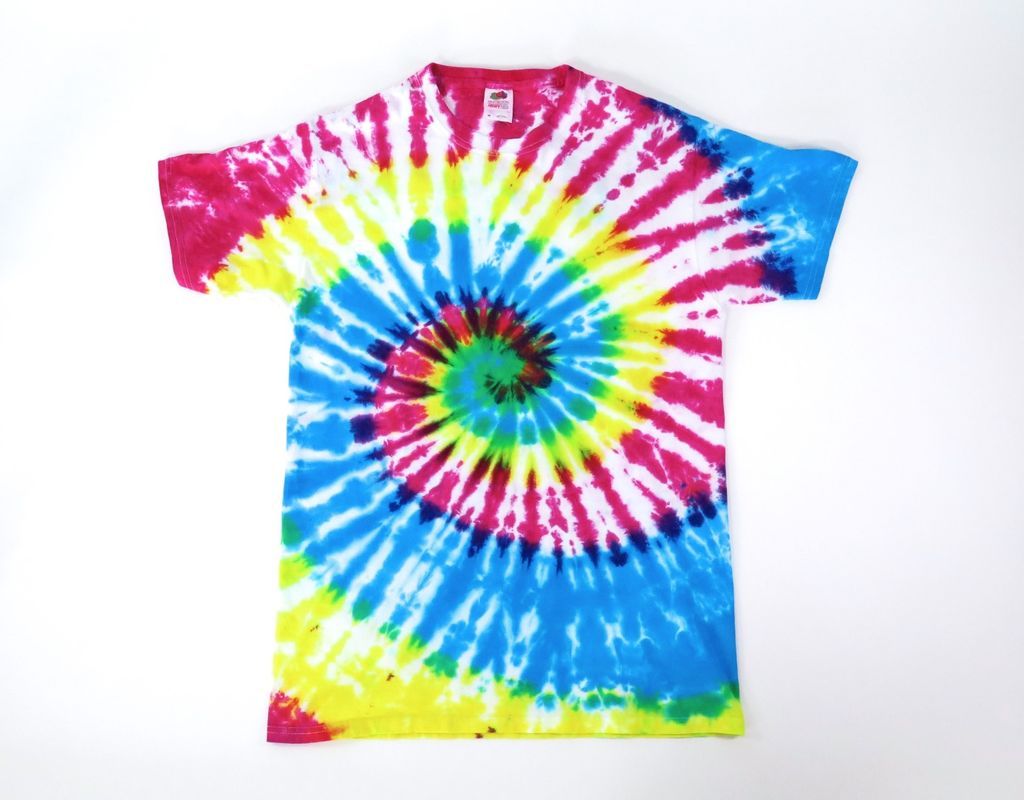
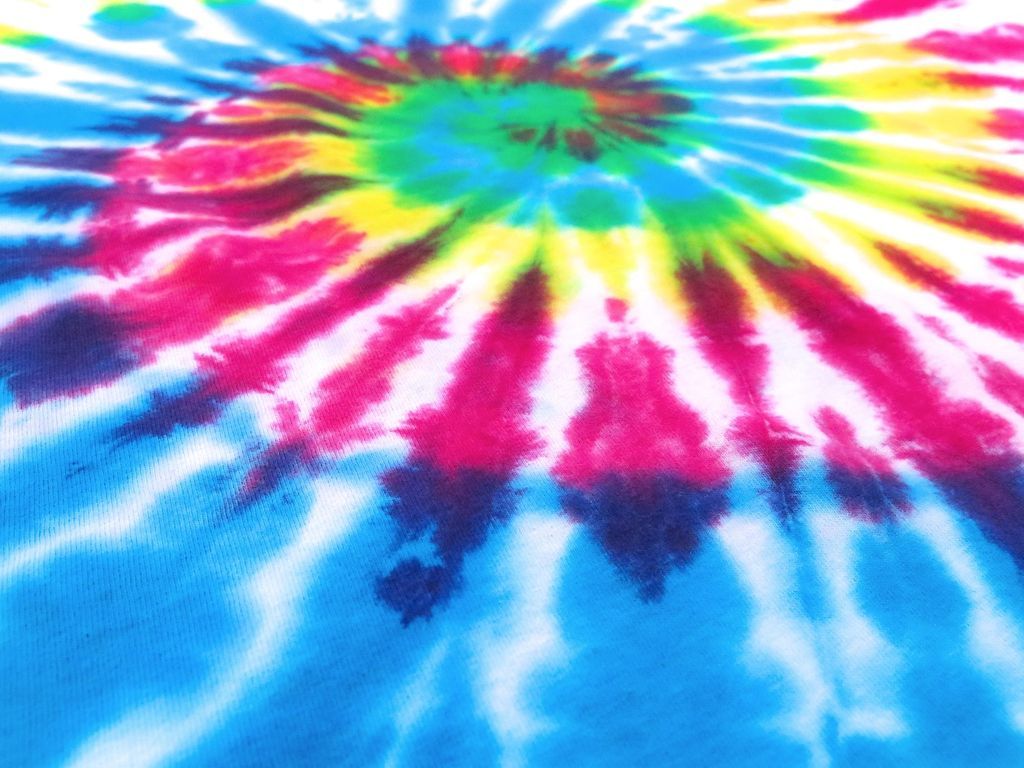


Here is my shirt. I hope yours is as good or even better! Enjoy!
Get more information at perfectionidea.com and on our Facebook for more How to Give a New Look to Your Old Clothes.
- Tags
- Clothes
Popular Content
How to make a rocket stove for outdoors
Cardboard Drawers Lined with Jeans
How to Build an Octagonal Platform
Latest Articles
How to make a refrigerator out of insulating material: Practical step-by-step guide
How to make a Kilim for the Home: Complete Step by Step Guide
How to protect ourselves from accidents in our workplace: Complete prevention and safety guide
Related Content
Ideas to Decorate the Garden with Stones
Removing Rust with Citric Acid!
Embroidered Bathroom Rug Designs
Make it Easy and Economical: HowMake a Capitone Headboard
Creative Home Decor Ideas to Transform Every Space
Refreshing your home starts with smart design choices that combine comfort, personality, and functionality. Whether you want to modernize a small apartment, upgrade outdoor areas, or create cozy rustic interiors, these trending ideas can completely change the atmosphere of your space.
Outdoor Spaces That Increase Style and Functionality
Outdoor living continues to dominate modern home trends. Homeowners are increasingly investing in practical entertainment zones inspired by these BBQ shed ideas, which create the perfect setup for gatherings and weekend cooking sessions.
First impressions also matter when designing exteriors. Elegant farm entrance gates design ideas help properties stand out while improving privacy and curb appeal.
Compact living solutions are also gaining popularity. These inspiring 16x40 shed house interior design ideas show how smaller spaces can still feel luxurious and functional.
To enhance patios and entryways, homeowners are adding stylish protection with these creative porch awning exterior DIY ideas that blend aesthetics with practicality.

Rustic and Cozy Interior Design Trends
Warm and natural interiors remain timeless. These charming rustic decor ideas combine wood textures, vintage accents, and earthy tones to create welcoming spaces.
Bedrooms are becoming more personalized with curated wall arrangements. Many homeowners use these stylish picture wall ideas for bedroom spaces to display memories and artwork creatively.
Textured wall treatments are another major trend. Installing a board and batten wall adds architectural character while keeping interiors elegant and modern.
Similarly, bold accent wall ideas can instantly transform plain rooms into eye-catching focal points without requiring a full renovation.
Smart Kitchen and Organization Inspiration
Functional kitchens are essential for modern homes. These practical kitchen wall cabinet ideas maximize storage while maintaining a clean and stylish appearance.
Organization also starts at the entrance. Well-designed mud room ideas help families keep shoes, coats, and daily essentials neatly arranged.
Colorful and Personalized Home Styling
Vibrant interiors are becoming increasingly popular thanks to playful dopamine decor ideas that use bright colors and joyful accessories to improve mood and energy.
Gallery walls also continue to evolve as a major decorative feature. These trendy gallery wall inspiration ideas offer creative ways to combine prints, photos, and statement art.
Young renters and new homeowners are especially embracing these stylish first apartment aesthetic ideas to create sophisticated interiors on a budget.
Finally, selecting the right shades can dramatically influence any room’s atmosphere. These modern trendy color ideas help homeowners choose palettes that feel fresh, elegant, and timeless.
Final Thoughts
From rustic charm and colorful interiors to outdoor entertaining areas and functional storage solutions, today’s home decor trends focus on creating spaces that feel both beautiful and livable. By combining smart layouts, modern textures, and personalized decorative elements, any home can become more stylish, comfortable, and inspiring.


