

How to Make a Mobile Power Bank, we will teach you how to make a mobile power bank, which will be very helpful when traveling. In these instructions, I will show you how you can create your own power bank using readily available and inexpensive components. This backup battery contains a 18650 li-ion battery from an old laptop or you can buy a new one. Later, I made a wooden casing with cool-looking plexiglass lights for a cooler aesthetic feel. I'll walk you through each of the steps to build this.
Watch the video on how to make a mobile power bank:
Find Bleeding Edge Supplements at Scandalous Prices on iHerb.

Video Link.
The specifications are:
- Capacity: 6600mAh (Expandable)
- Output voltage: 5V
Step 1: Required Materials
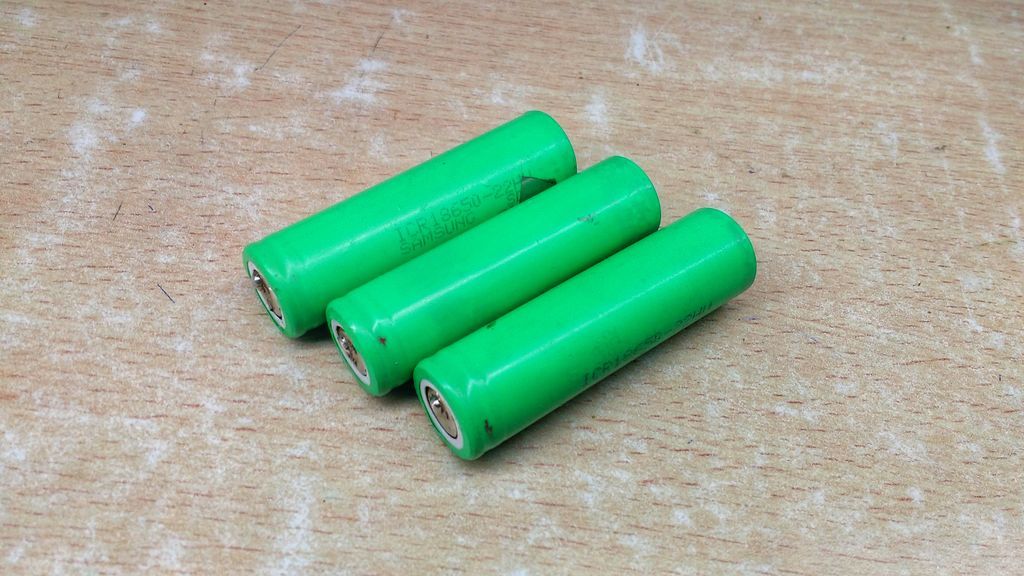

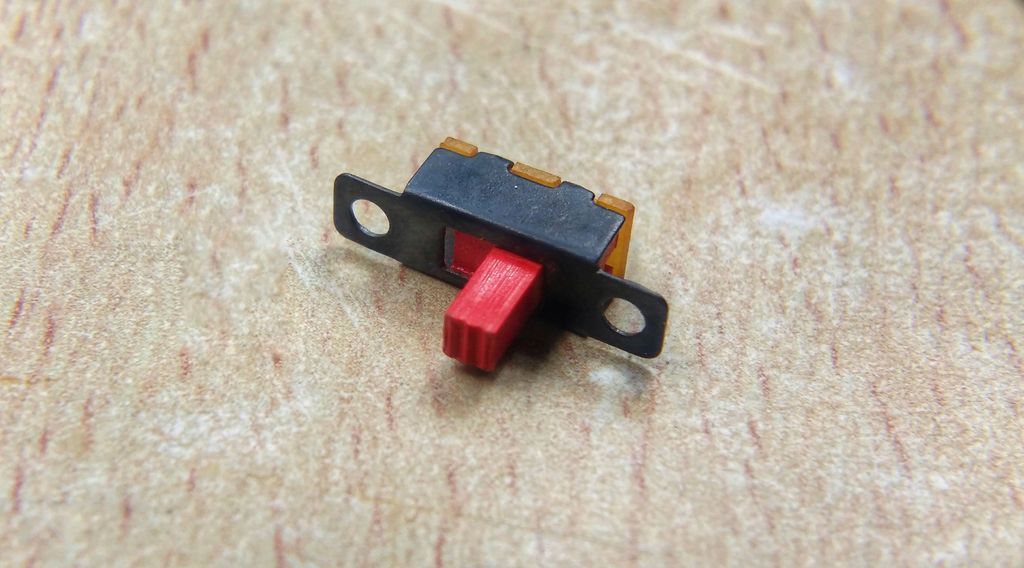
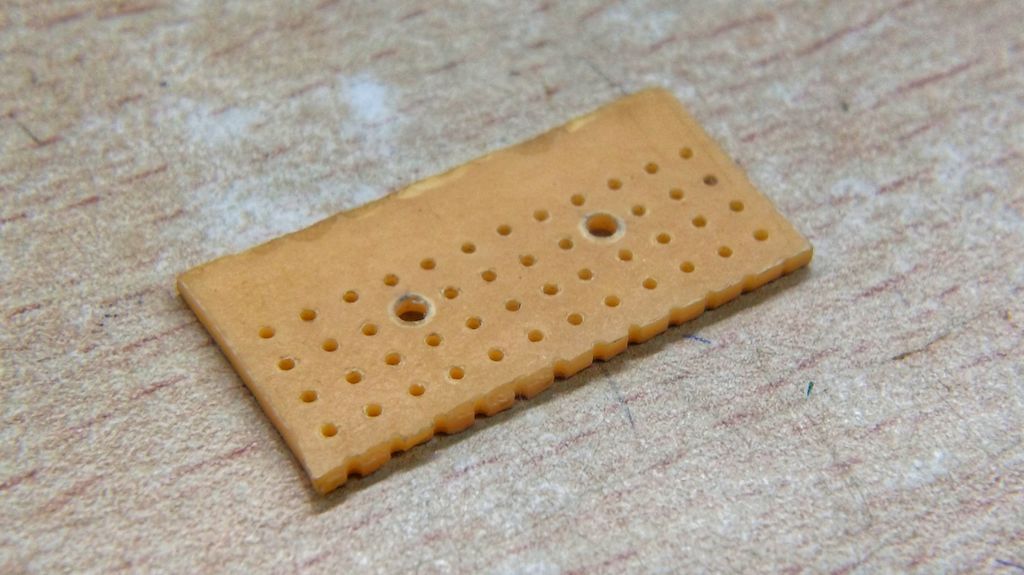
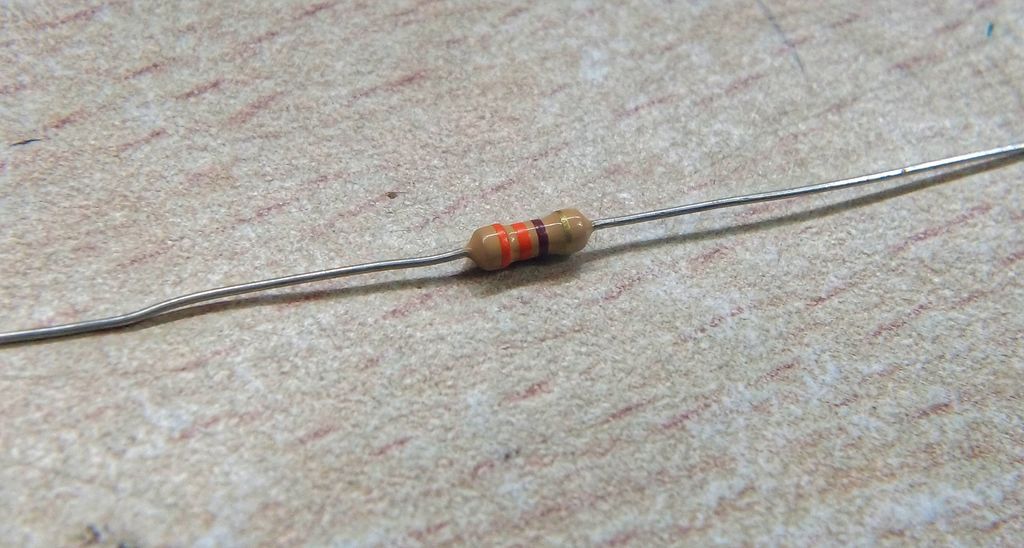
- 18650 li-ion battery
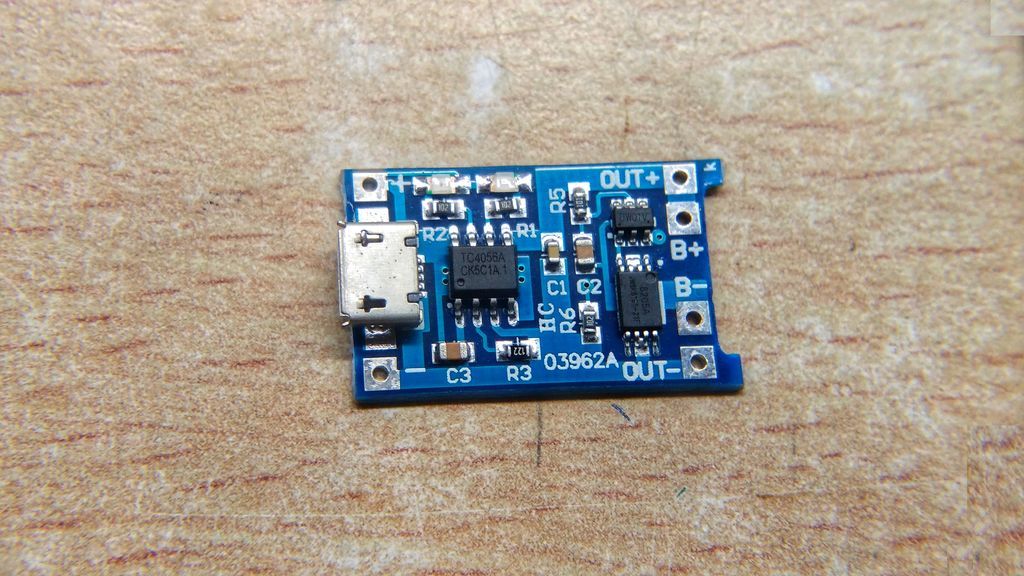
- TP 4056 battery protection module
- 6009 Boost Converter Module
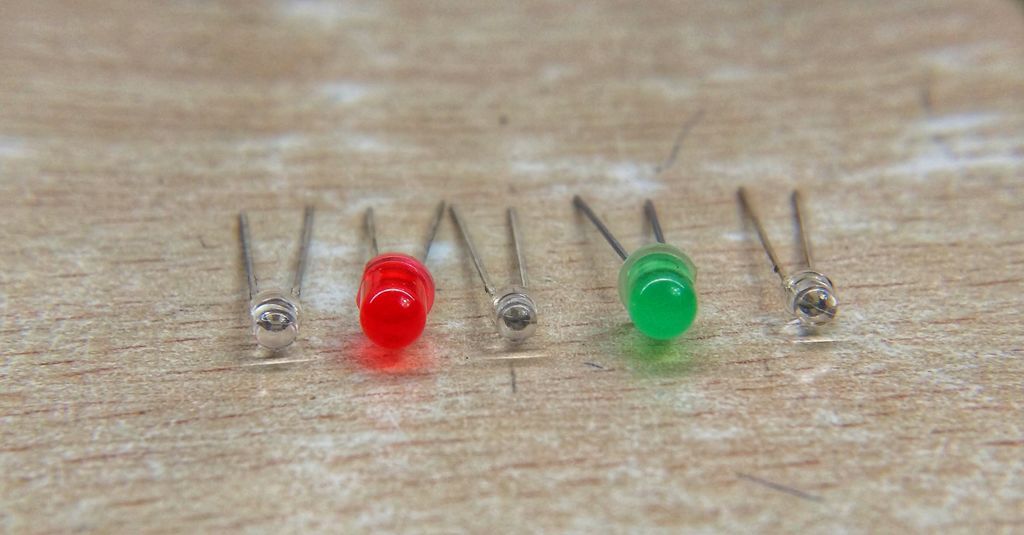
- LED
- 330 ohm resistance
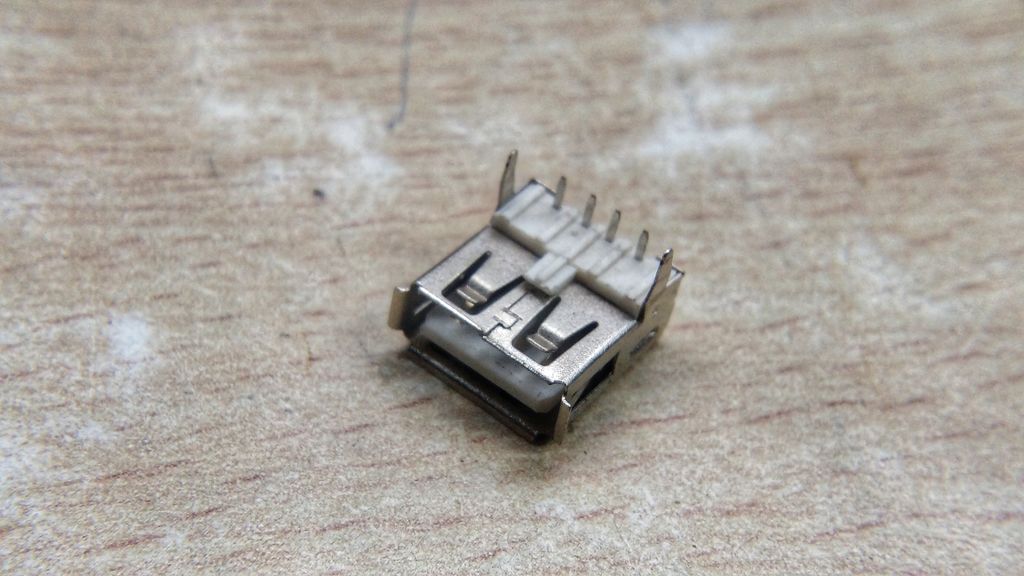
- USB female connector
- Welding kit
- Switch
- Plywood (3/4″ and 1/4″ thick)
Some basic carpentry tools such as drill, hacksaw, chisel, etc.
Step 2: Make the battery
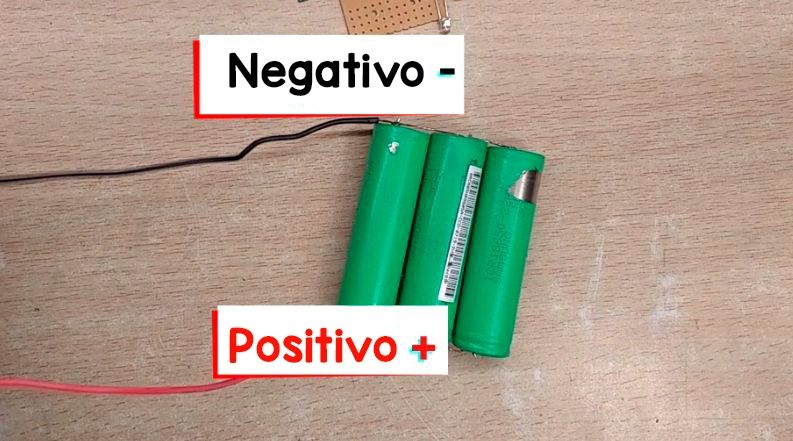
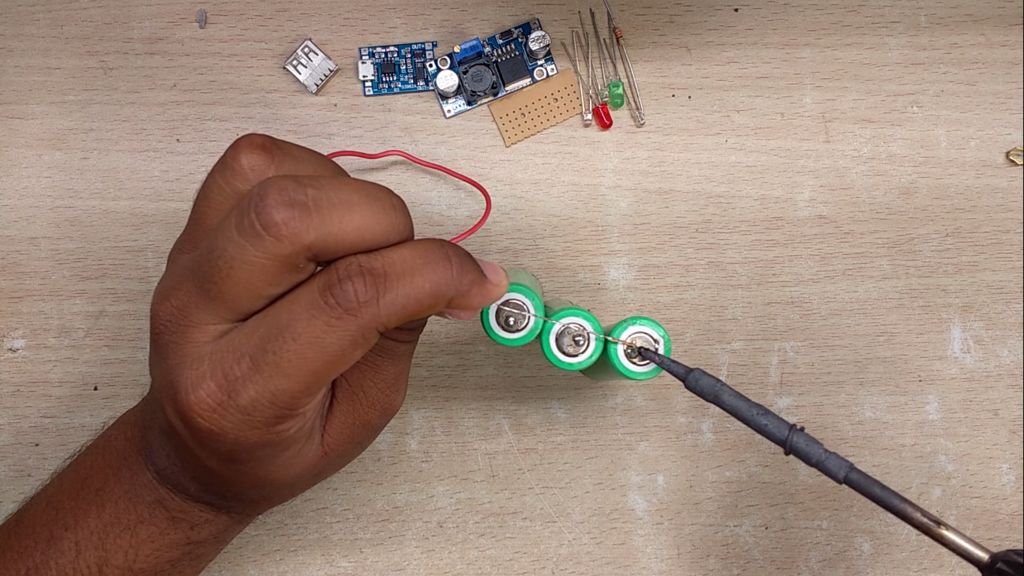
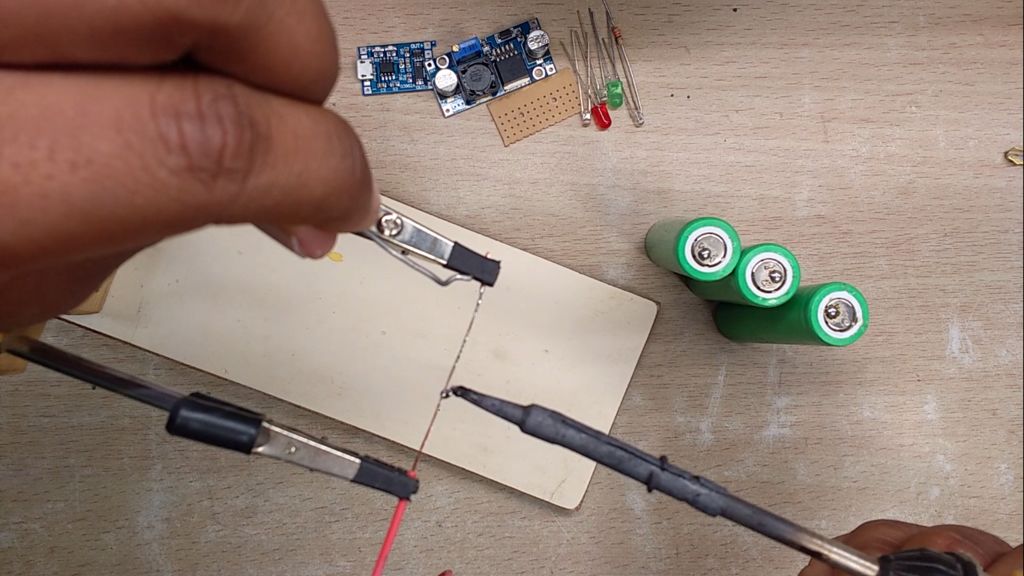
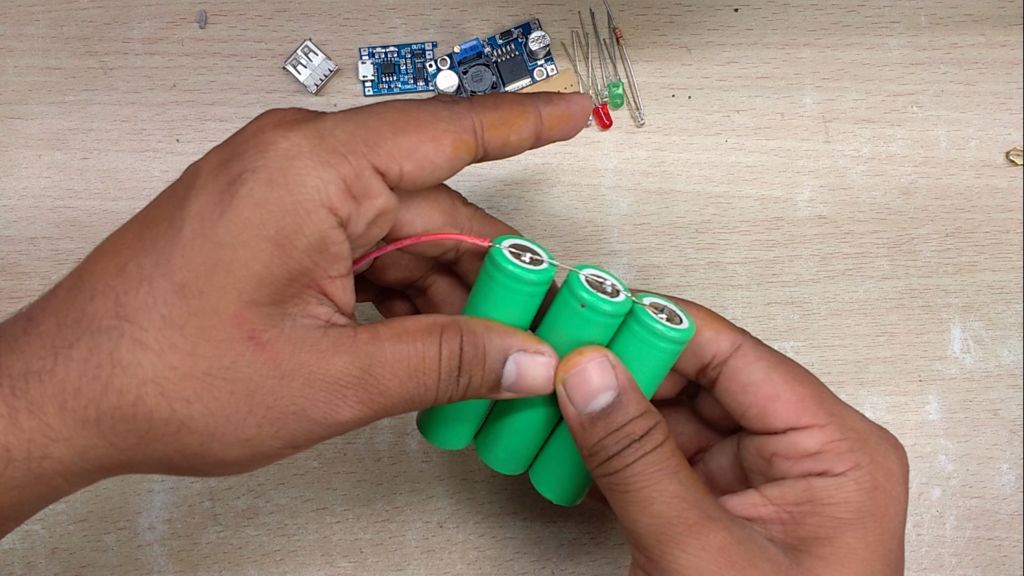
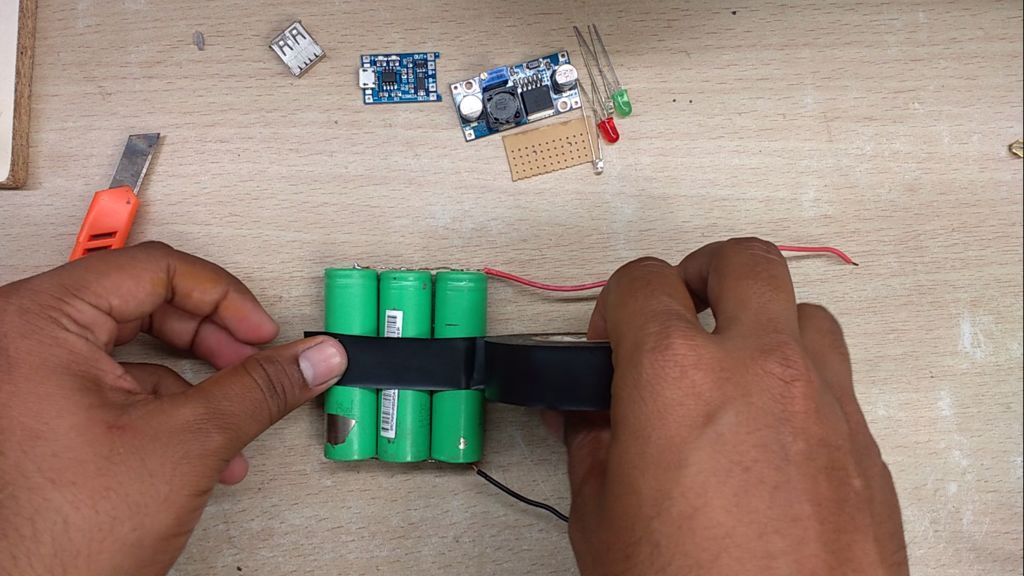
- The terminals of the 18650 batteries are cleaned using an IPA solution.
- Apply a little flux and use the soldering iron to blow up the surface of the battery terminal.
- Also strip the wire insulation at the ends and tin them. Batteries must be connected in parallel configuration. Solder the wires to the battery and do not overheat the battery during soldering.
- My batteries were original Samsung ICR18650-22 model and I suggest you use good quality batteries for longer life and safety.
- I am using 3 batteries in parallel to obtain a total capacity of 6600 mAh. You may want to add more batteries in parallel to increase capacity.
- Then tie down the batteries using electrical tape or kapton tape.
Note:It is important to charge the batteries to the same voltage level before connecting them in parallel. Otherwise, the battery with higher potential will be discharged to a lower potential and a large current will flow through them, resulting in excessive heat.
Step 3: Battery Protection Circuit
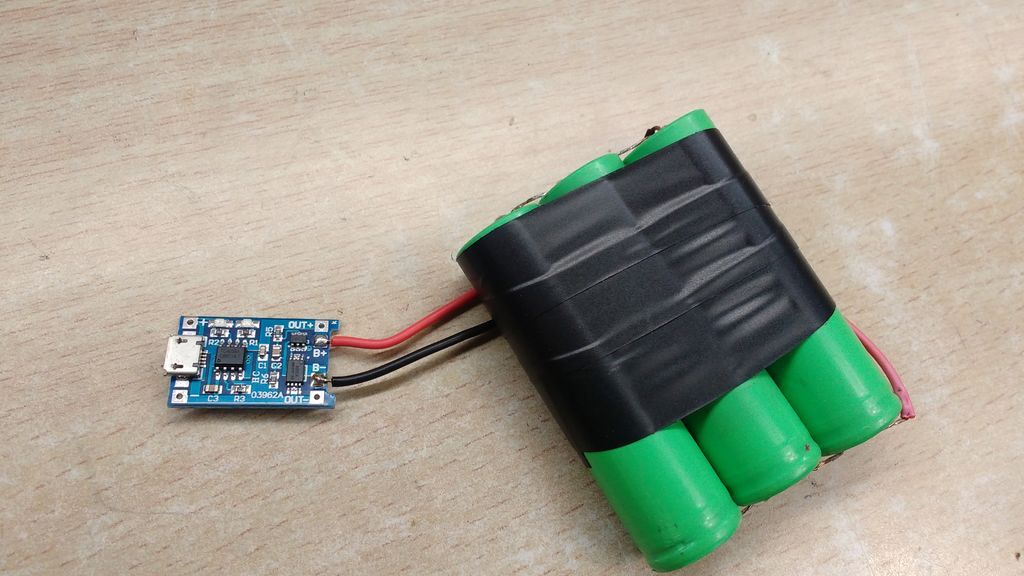
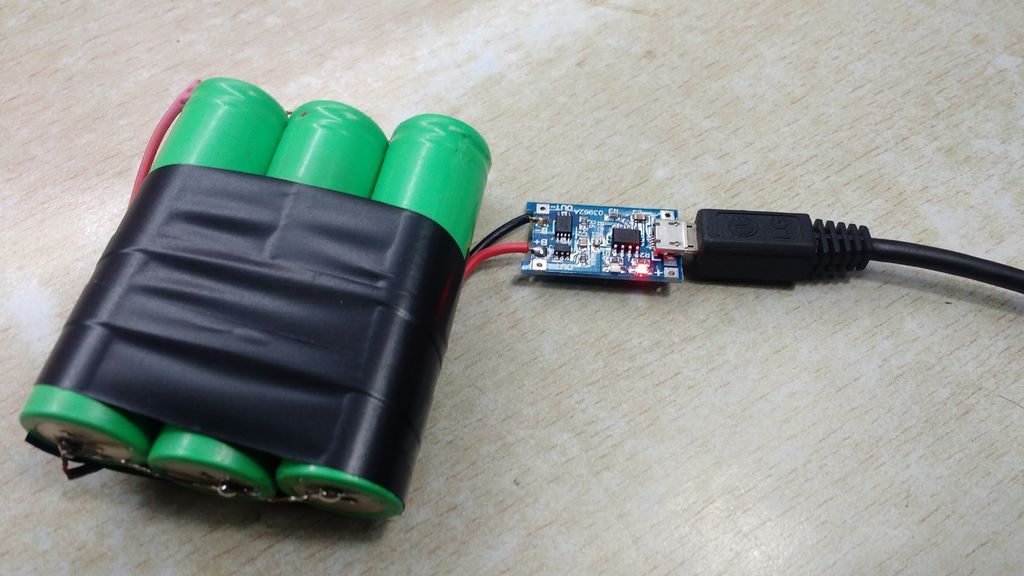
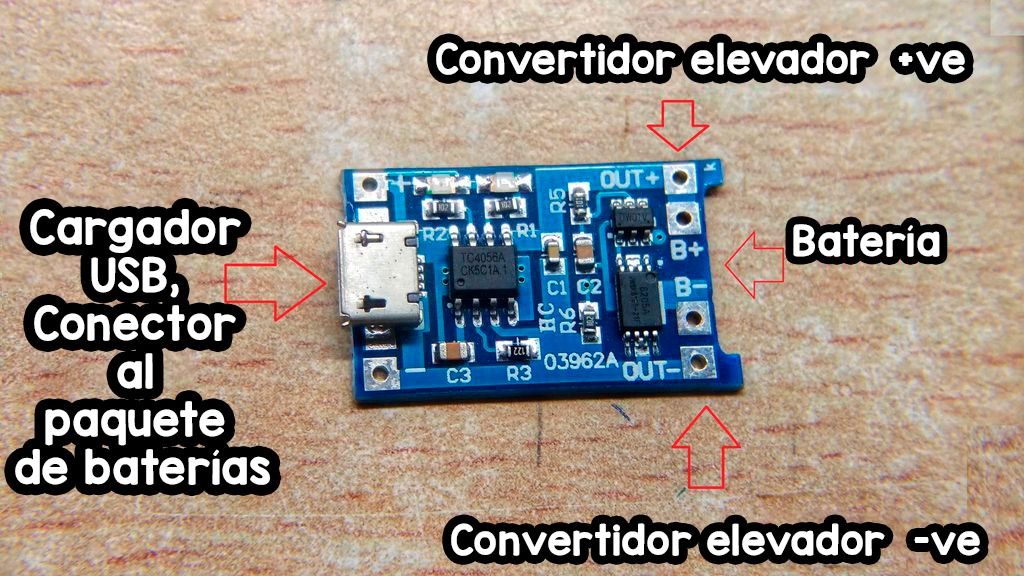
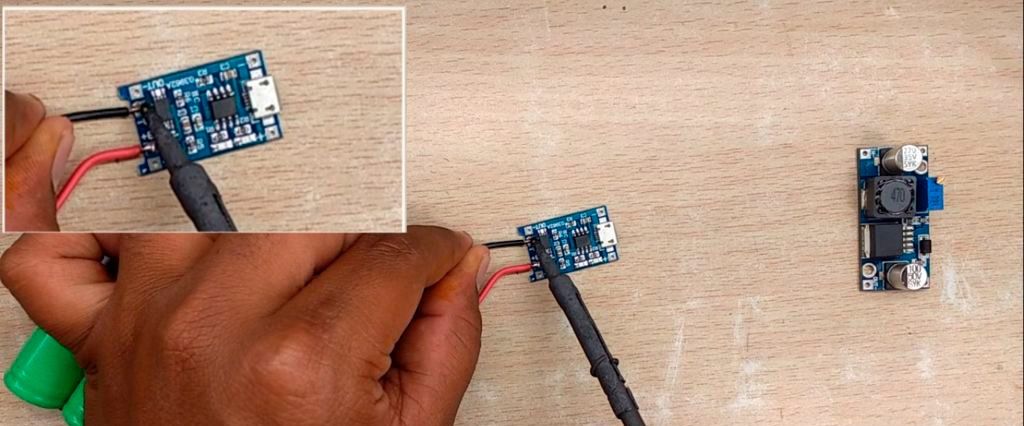
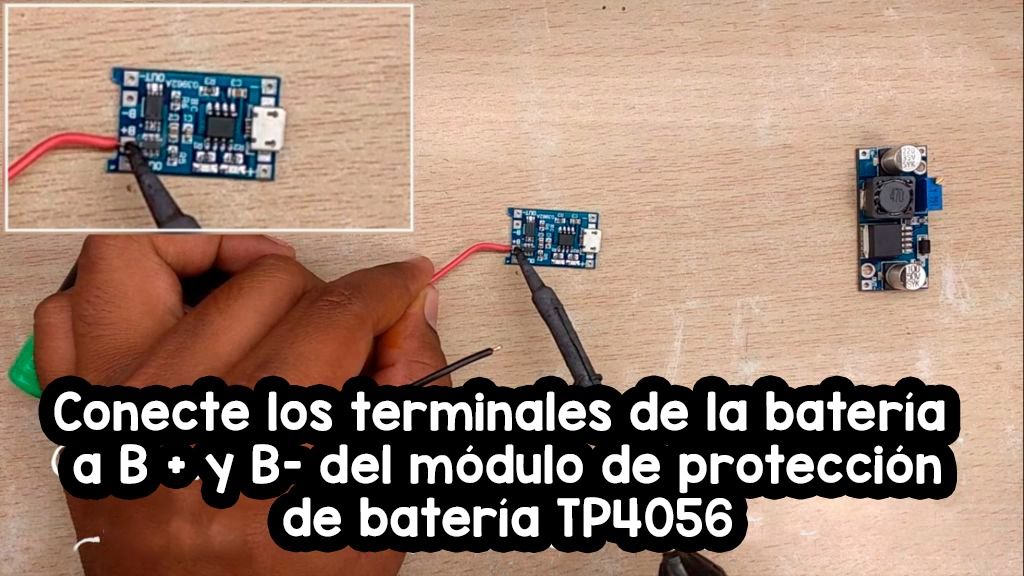
- The terminals of the TP4056 battery protection module are indicated by symbols.
- The battery must be connected to terminals B+ and B-.
- The output is connected to the Output + and Output - terminals. Any mobile phone charger with USB can be used to charge the battery.
- The TP4056 module protects the battery against overcharging and short circuits. Lithium batteries should be handled with care. The voltage level should be in the range of 2.7V to 4.2V*. 2.7 V indicating 0% state of charge and 4.2 V 100% state of chargecharging status.
The LEDs on the dashboard indicate the charging status of the batteries.
- RED LED – Charging
- GREEN LED – Charge complete.
The range mentioned is for lithium-ion batteries and may vary for other types of lithium batteries.
Step 4: Converter Circuit
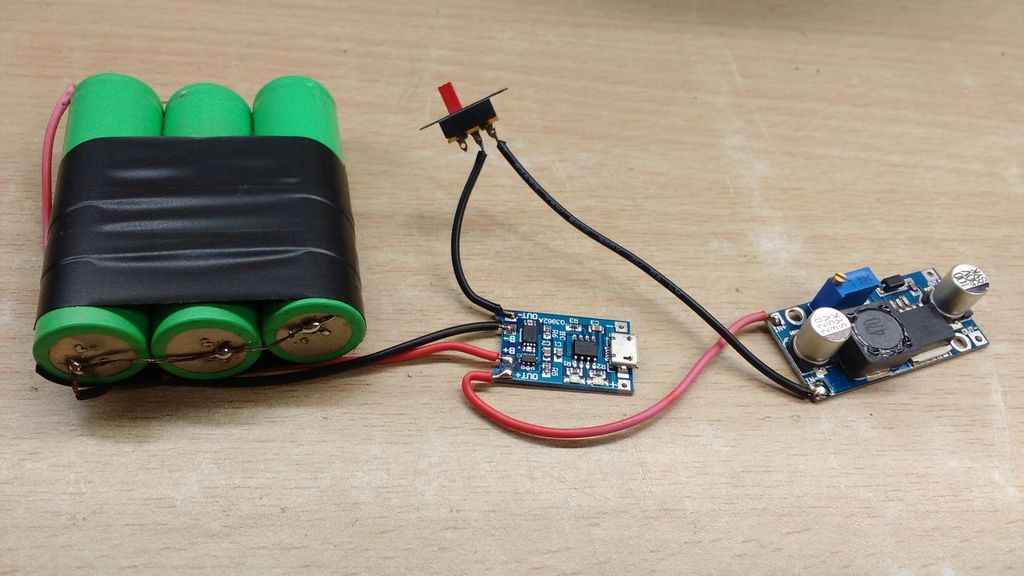
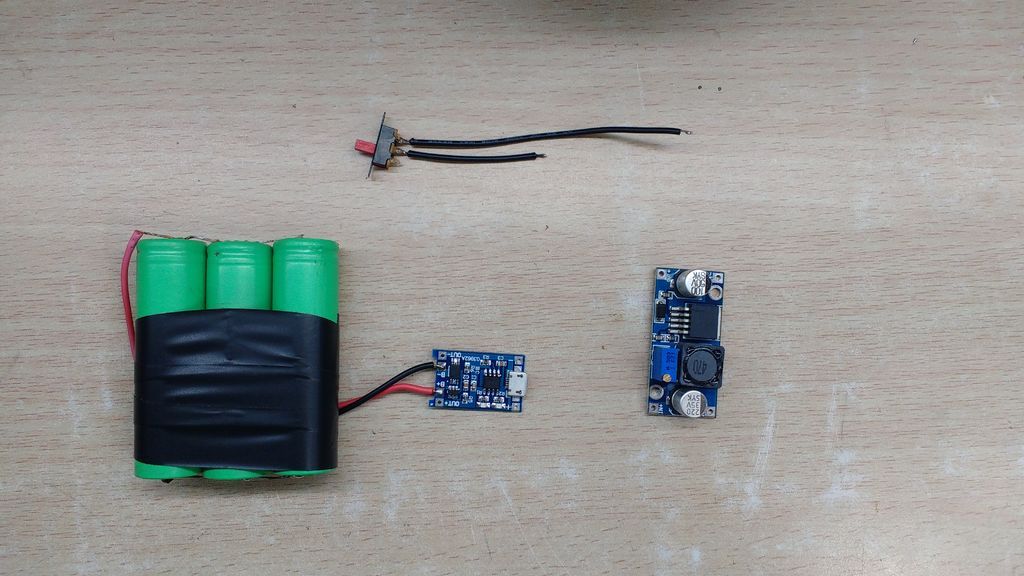
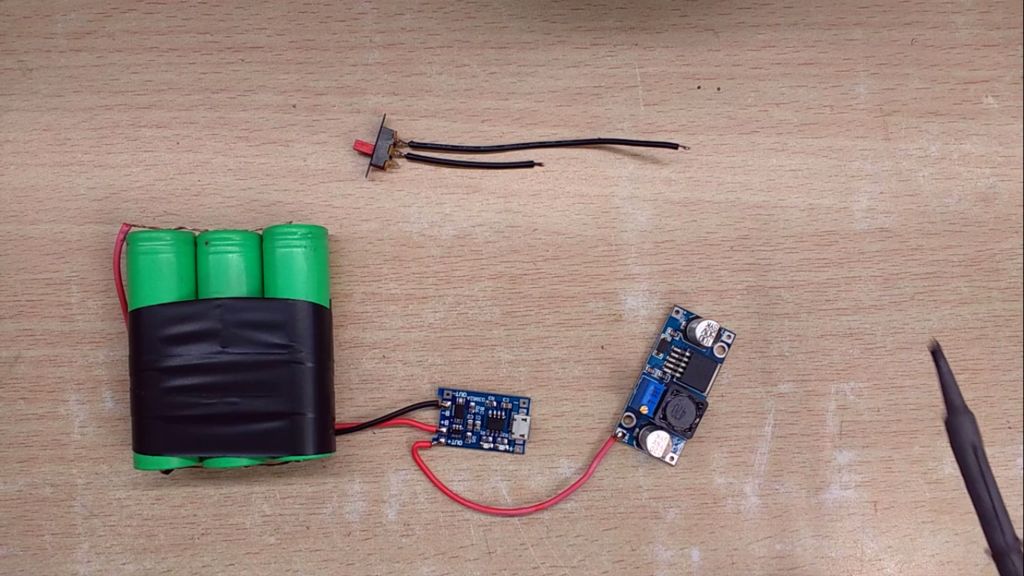
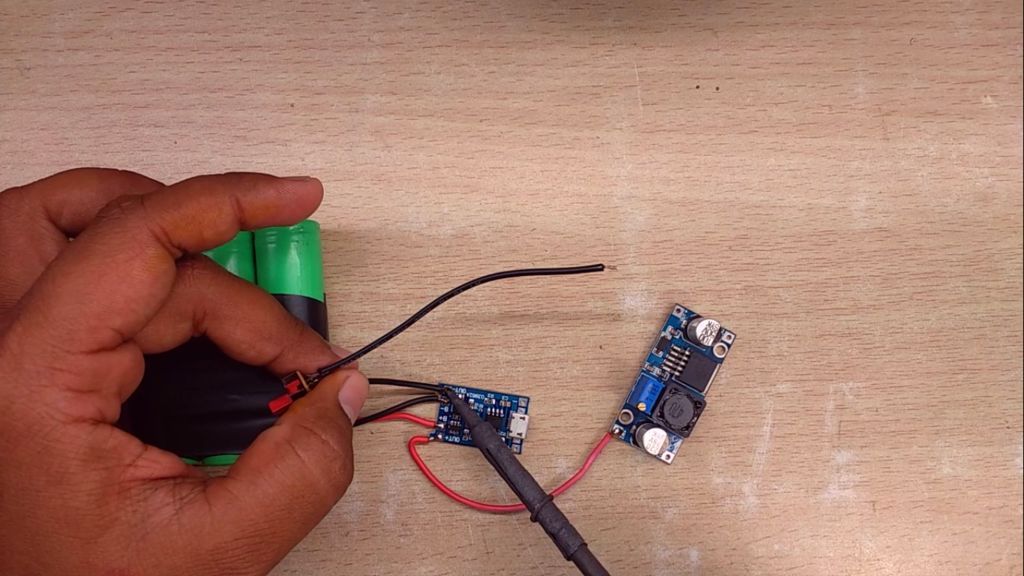
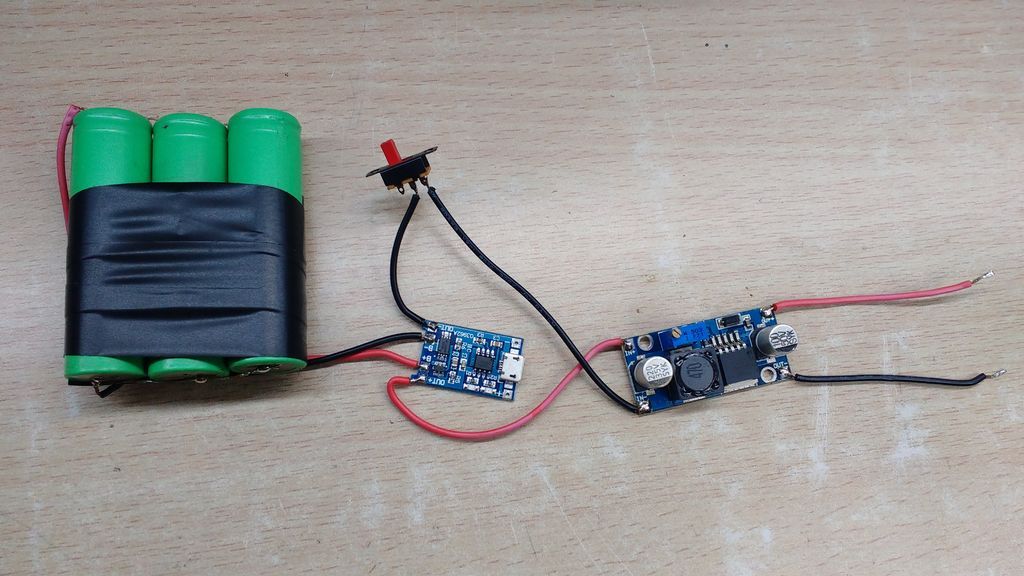
Refer to the image for the circuit connections or watch the video for easy understanding.
- Connect the output of the TP4056 module to the IN+ and the boost converter module IN-.
- Add a switch before the IN – serial terminal.
- The job of the 6009 boost converter module is to increase the battery voltage (3.7v nominal) to a stable 5V.
- The (Trimmer) potentiometer on the boost converter is varied to set the output voltage to 5V. Place several meter probes at the outlet to measure the voltage. Make sure the output voltage is 5V before connecting the mobile phone.
Note: The output of the boost converter should never exceed 5V.
Step 5: USB output connection
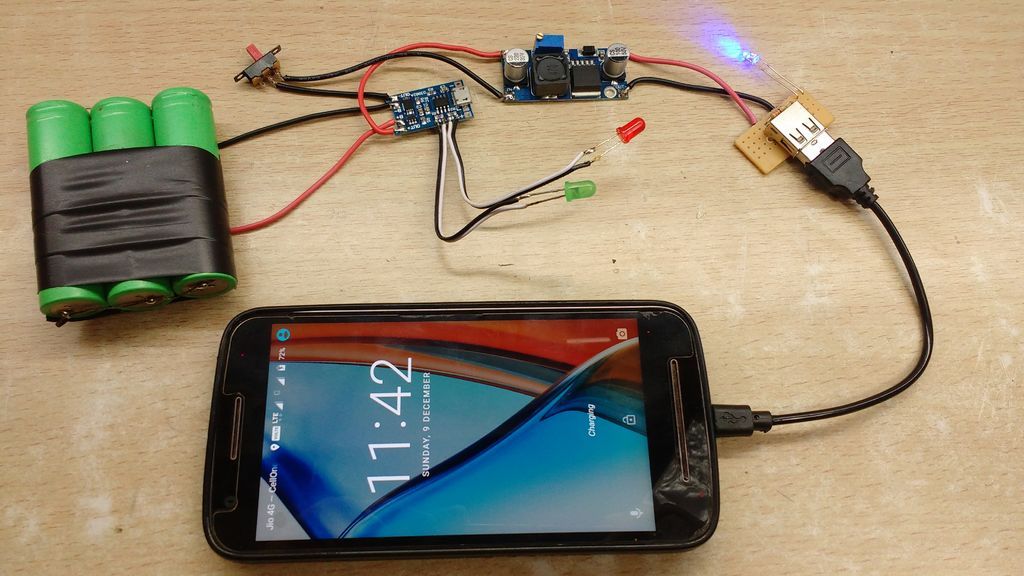
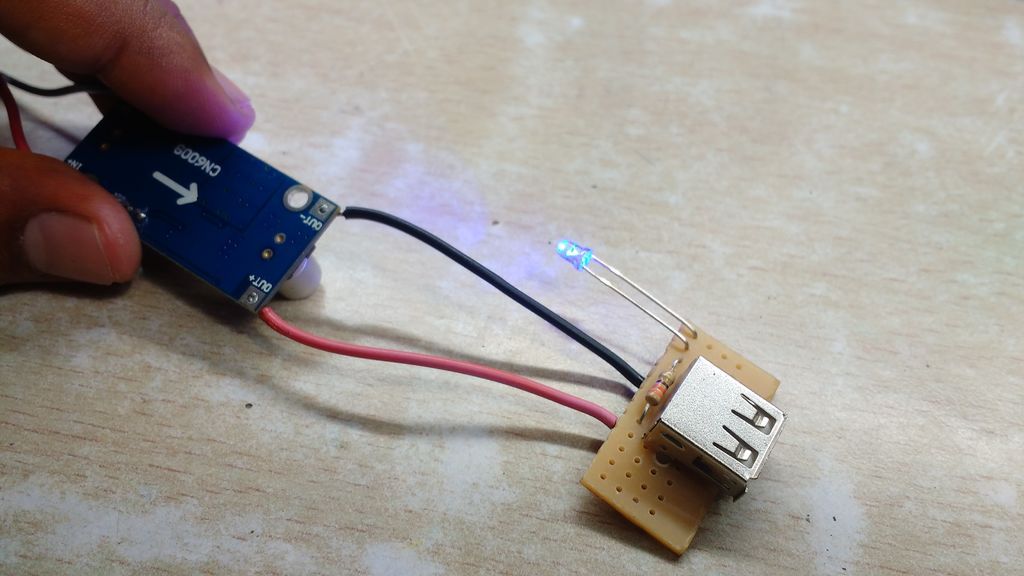
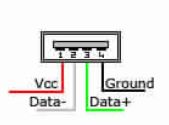
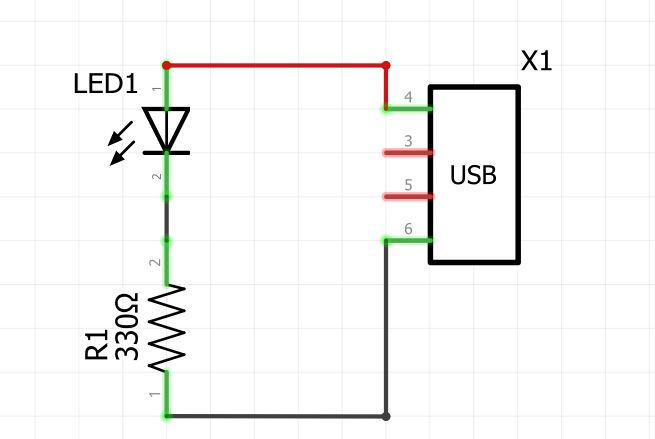
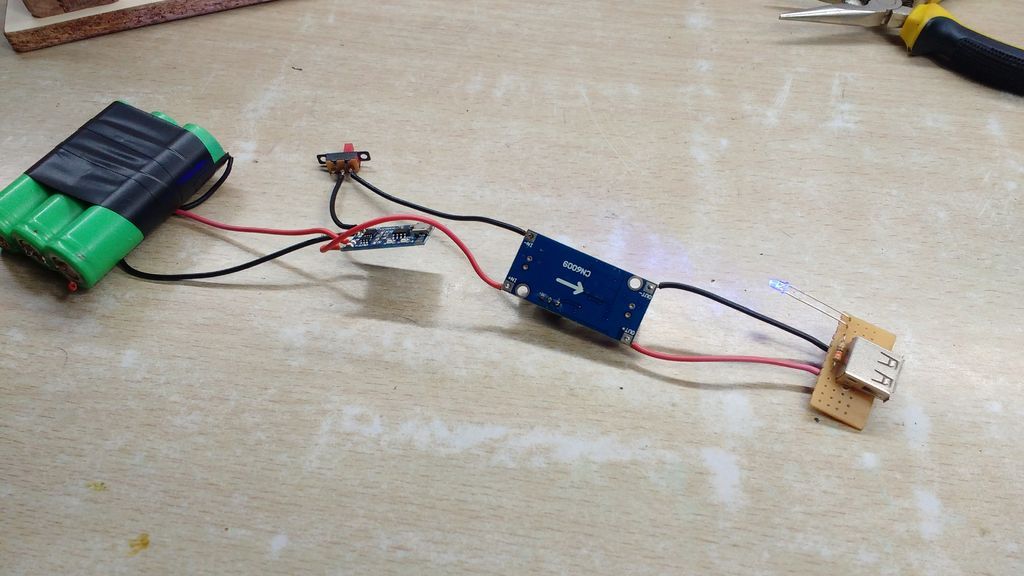
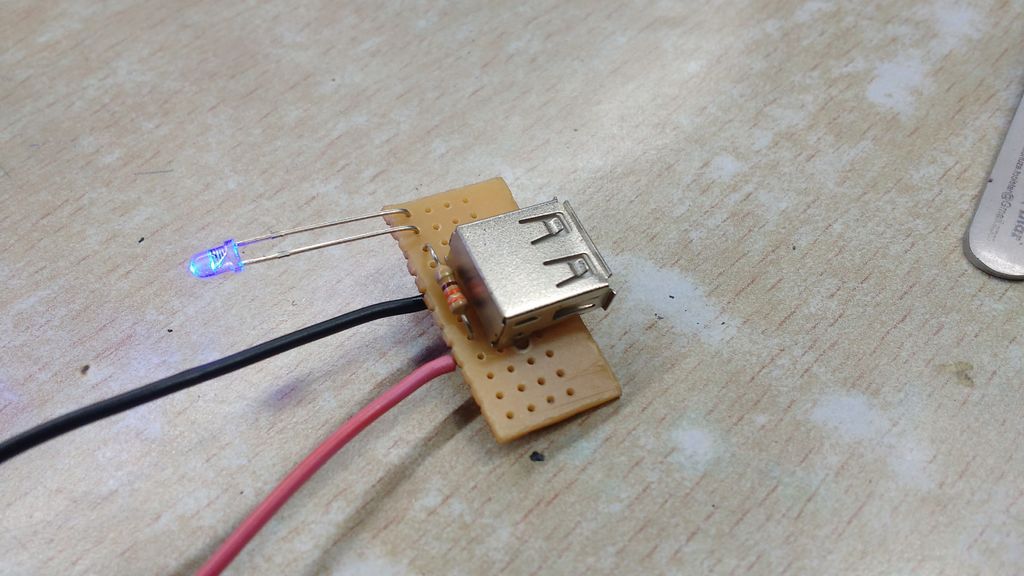
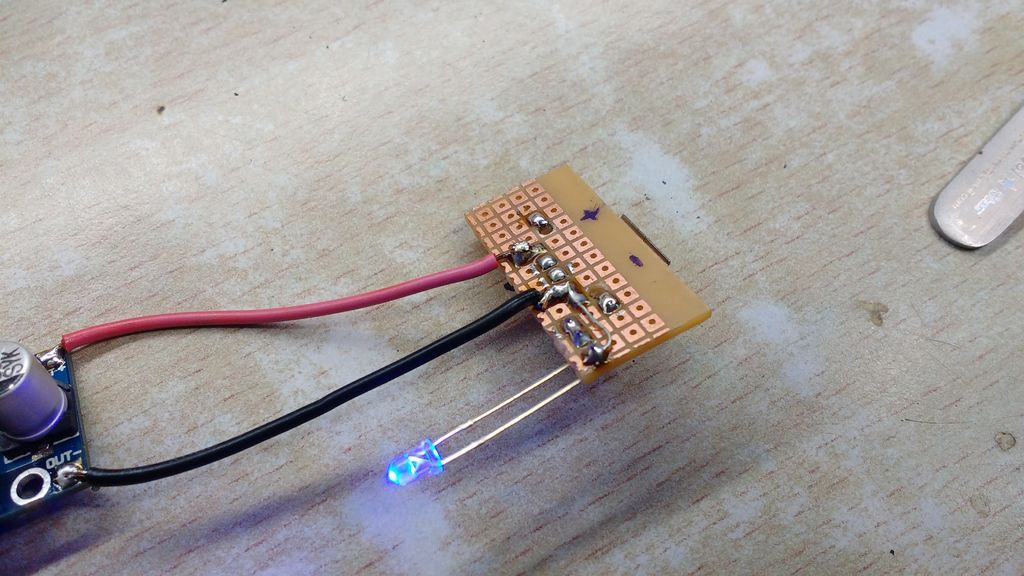
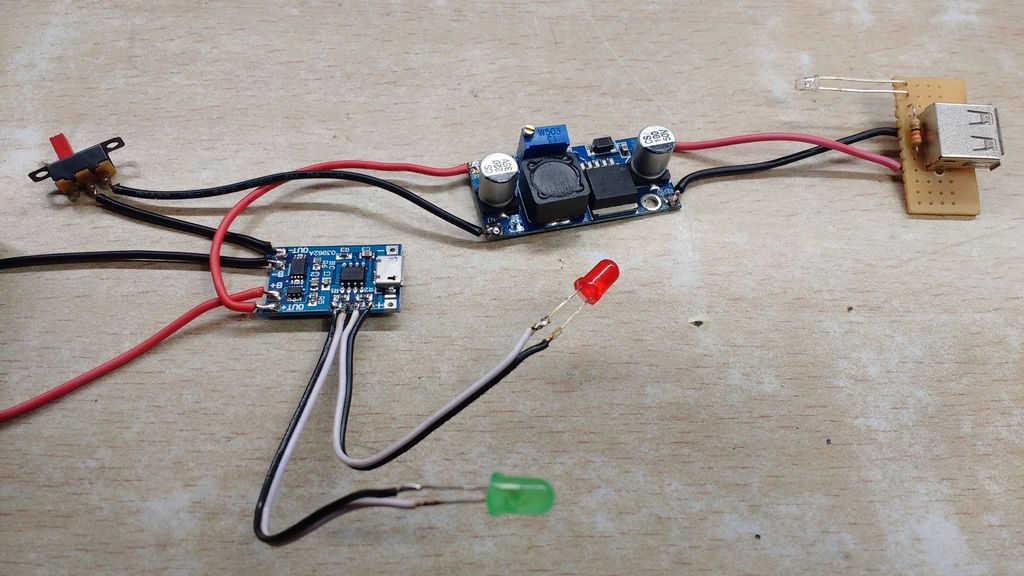
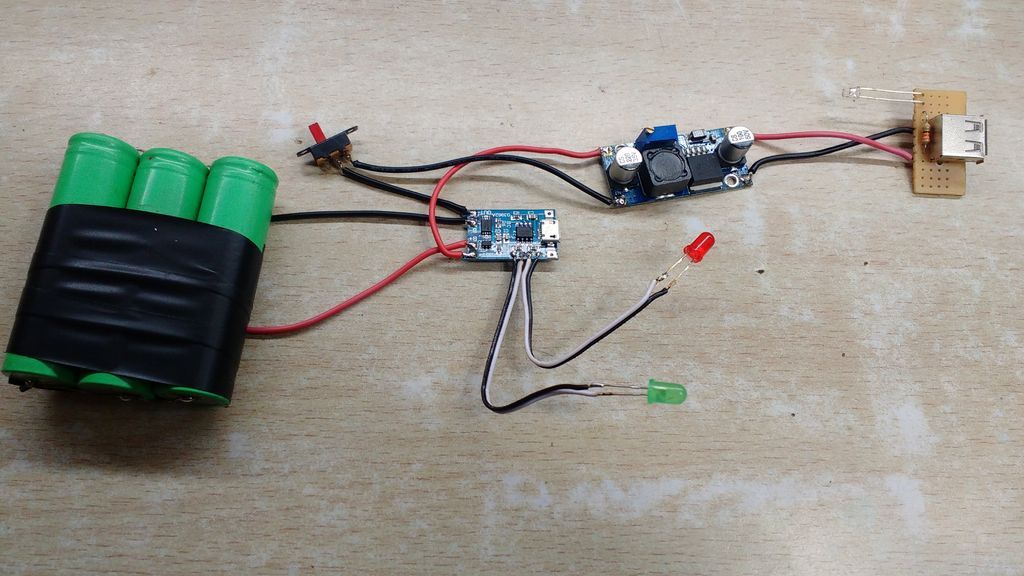
- The output of the boost converter is connected to the USB female socket. The image shows the pin configuration of the USB connector.
- I soldered the USB to a piece of prefabricated board and connected the cables coming from the boost converter. I also connected two blue LEDs in parallel to the output and it lights up when the power bank is active. The circuit diagram is in the images attached above.
- I soldered the SMD charging LED indicators on the TP4056 module and soldered some extension wires and soldered the 5mm RED and GREEN LEDs that will be installed in the case.
- Before proceeding to the next step, I tested if the circuit works correctly by connecting it to my phone via a USB cable and it works!
Step 6: Make the wooden casing
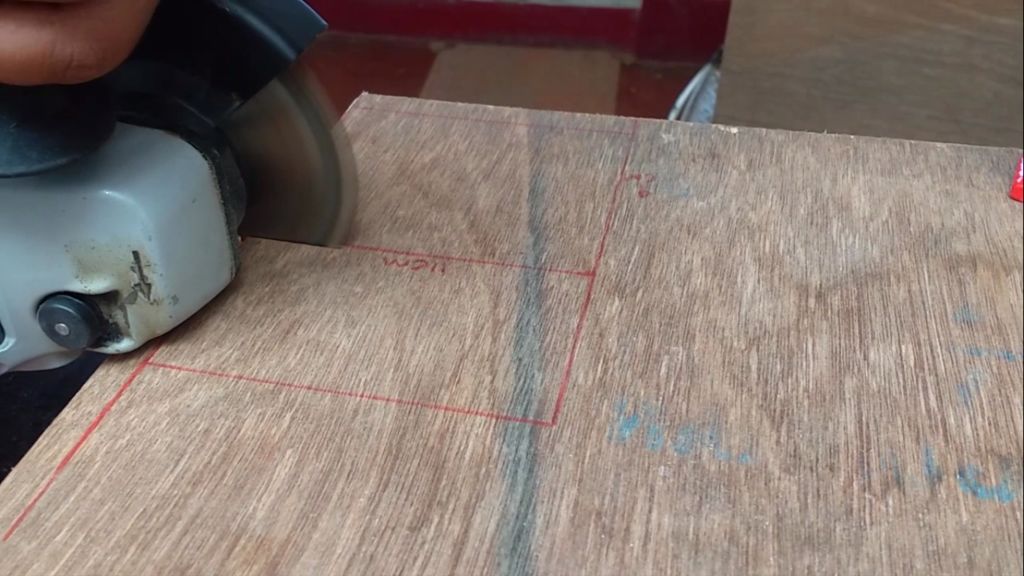
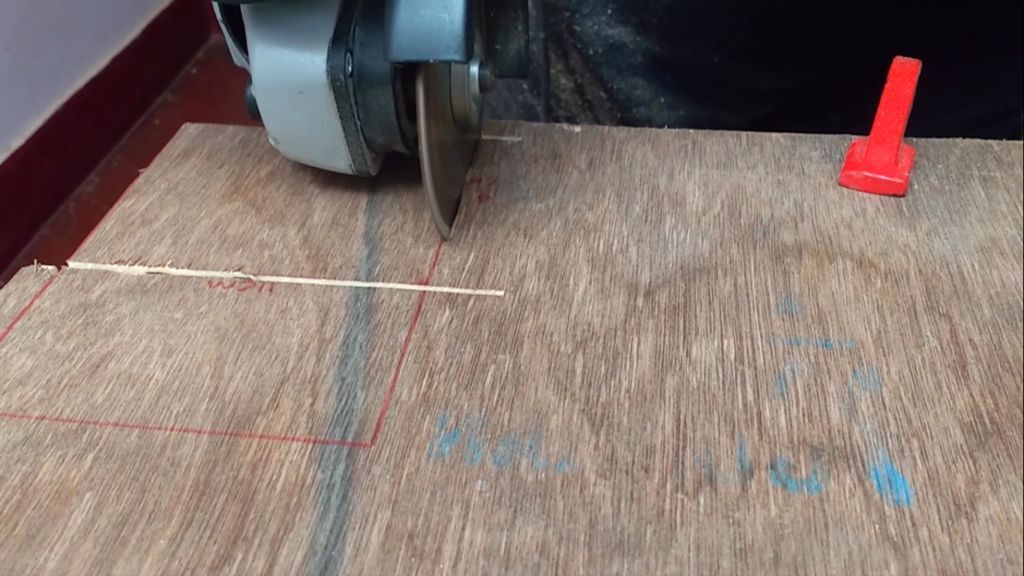
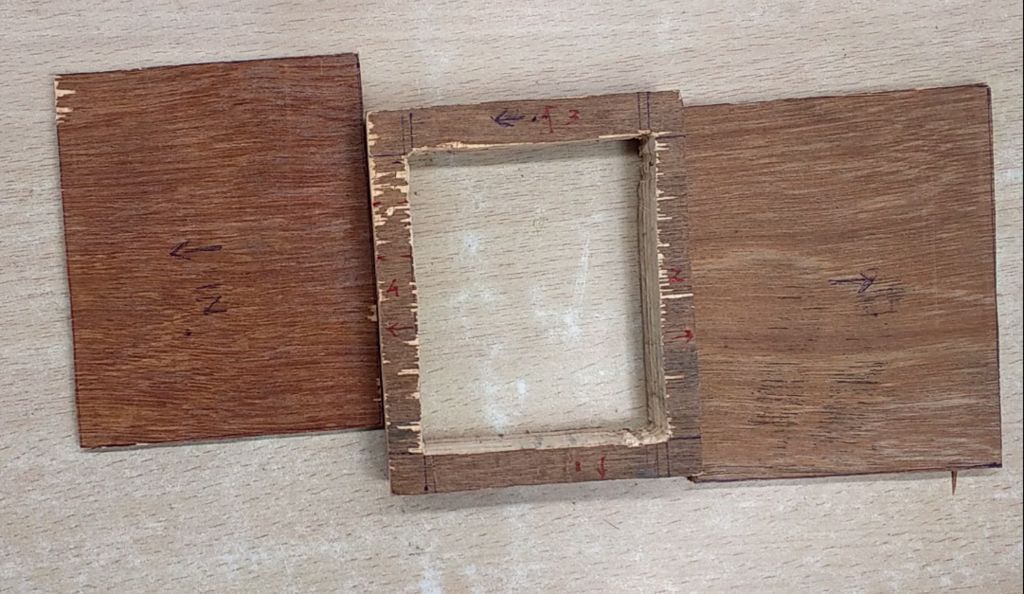
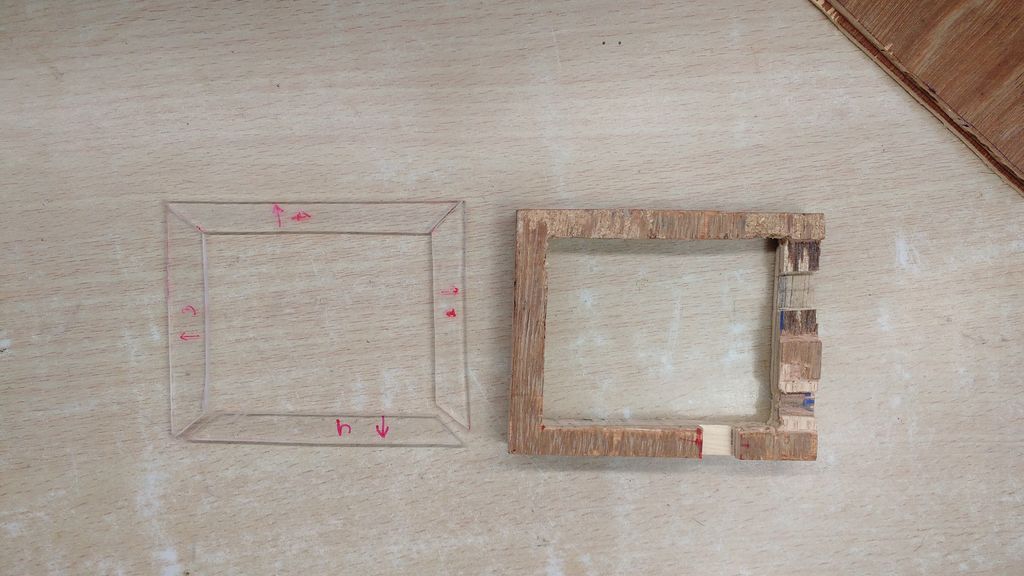
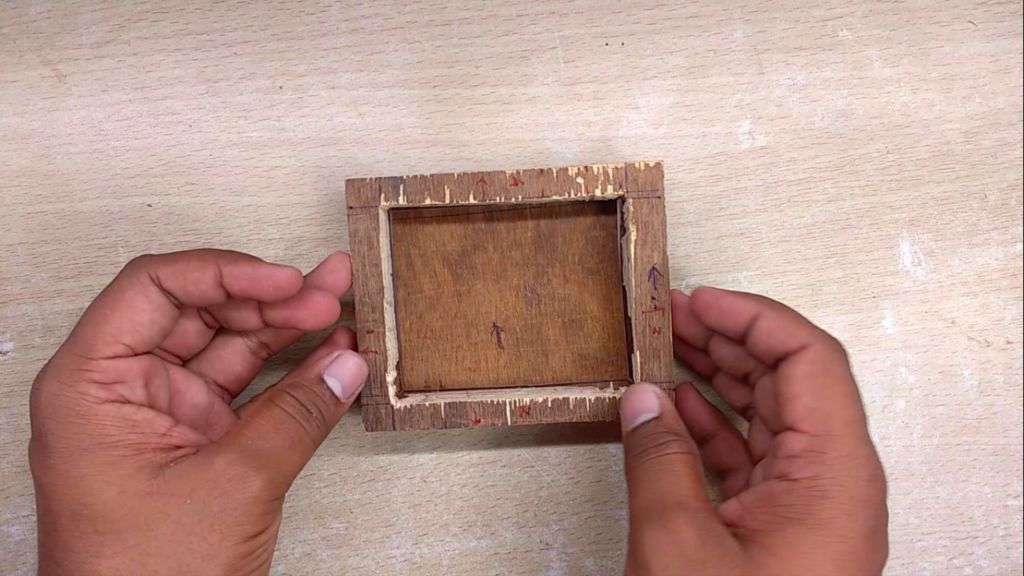
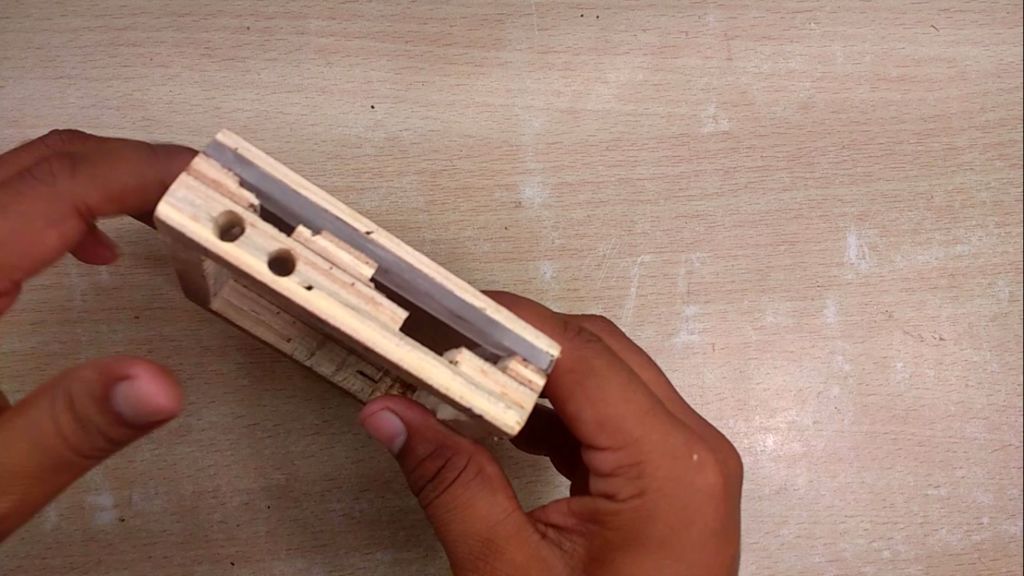
- I gathered all the required dimensions of the wood. The idea is to drill a square hole in a 3/4″ piece of wood with a 1cm wall on all sides. All components are fixed inside that.
- A thin sheet of plywood is then covered on both sides to make it into a box.
- The holes for mounting the LED and the USB connection are made with the cont3/4″ streak. As part of the aesthetic feel, I wanted to add the acrylic sheet to the perimeter of the box and the LED illuminates it every time the switch is turned on. We decided to cut 4 pieces of 1 cm each and glue them to the wood.
- If you are interested, my box dimension was 11cm * 9.5cm. This may vary depending on the design and number of batteries.
- Later, I sanded the wood with 100 grit sandpaper and applied 2 coats of wood polish with a rag to get a nice surface finish.
Last step: Assembly
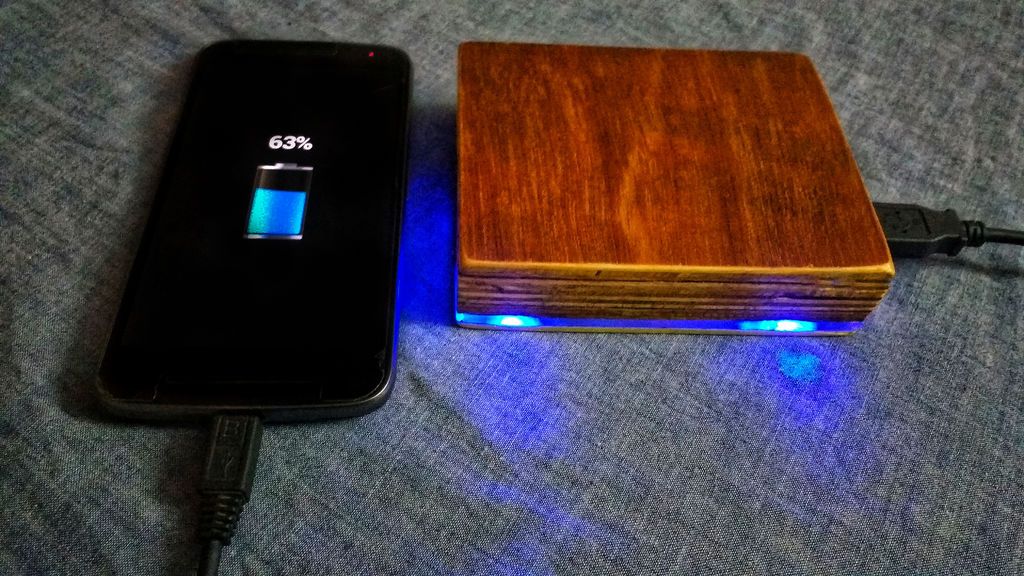
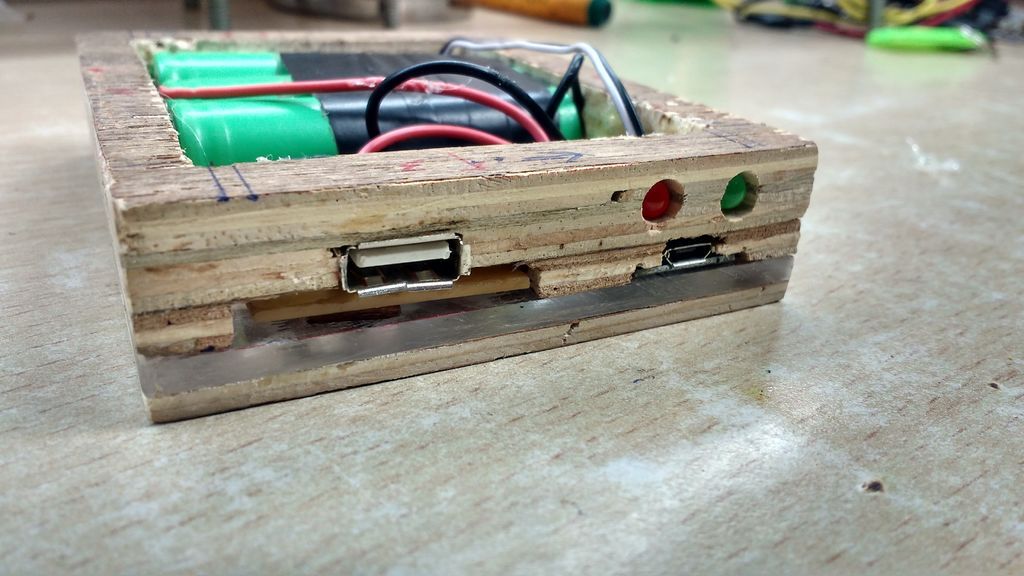
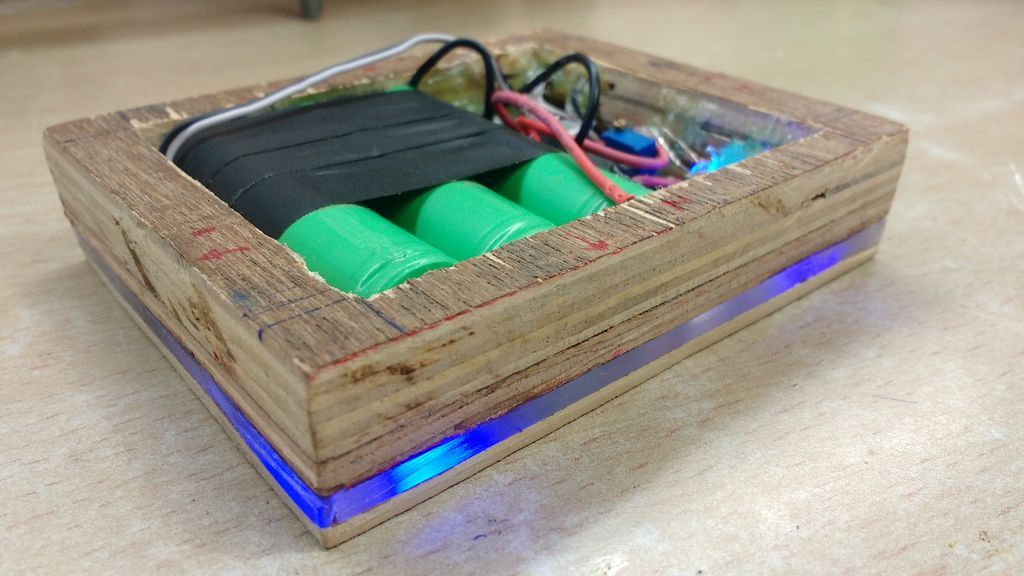
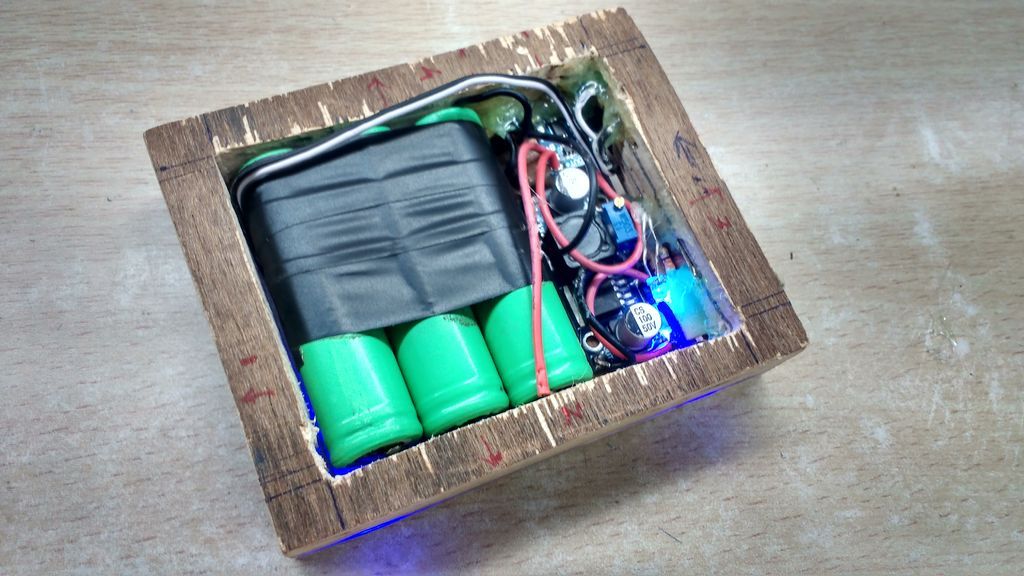
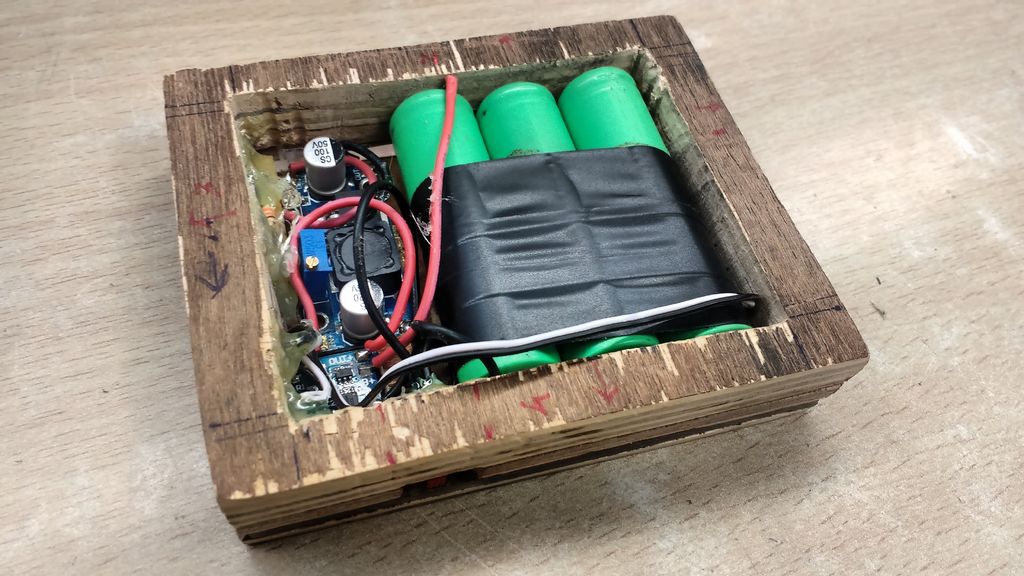
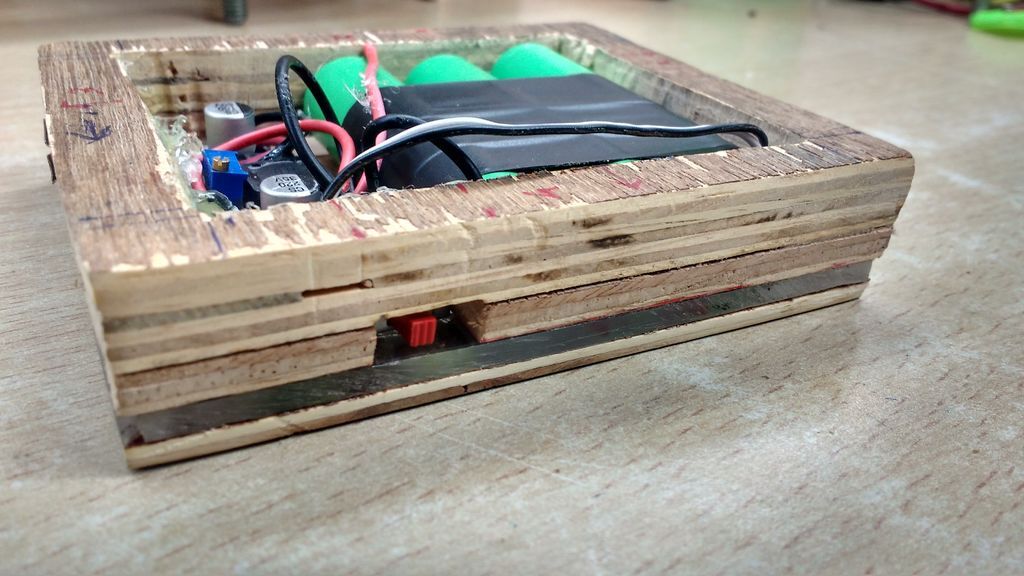
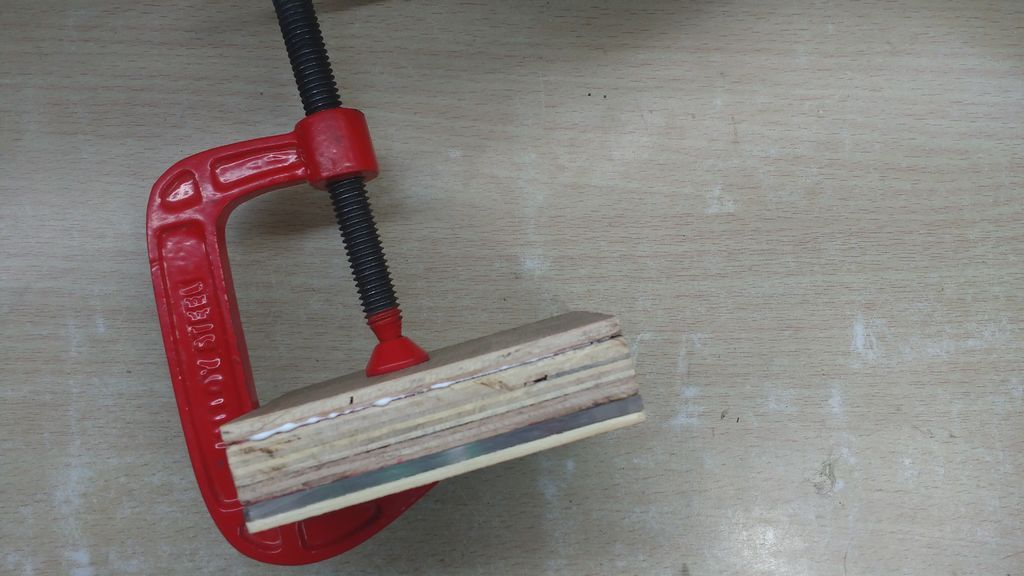
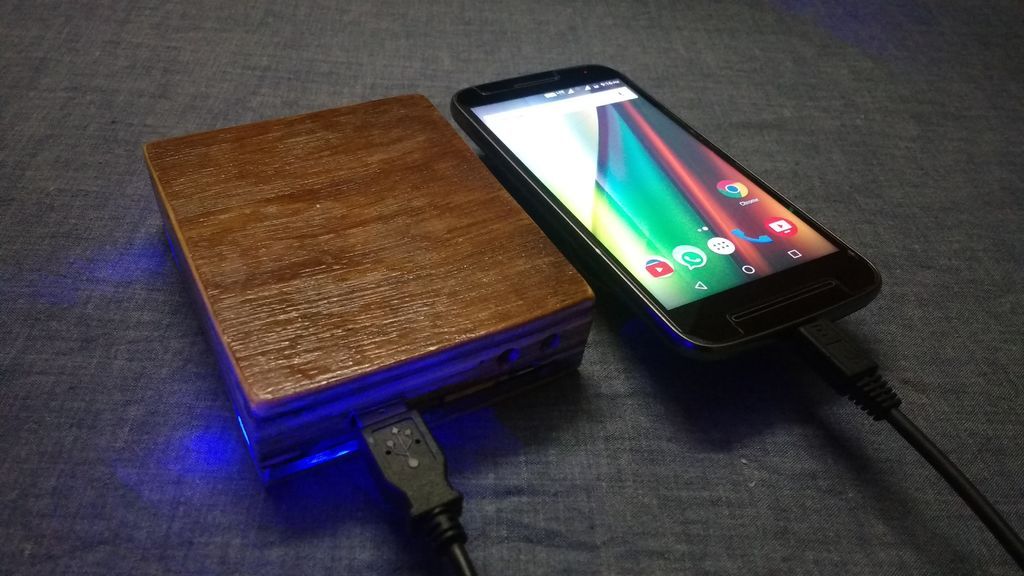
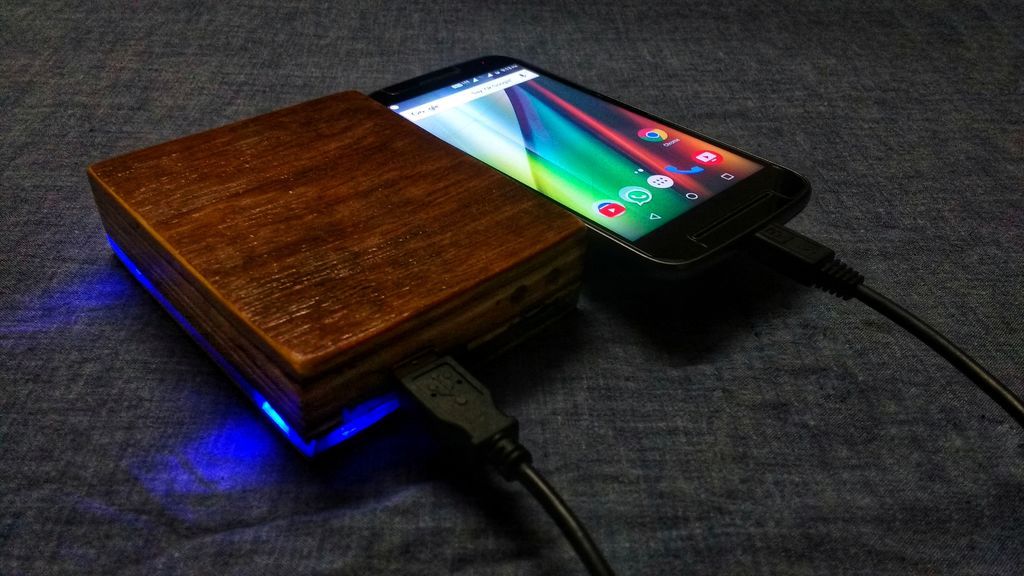

- I tested if the circuit is working and glued all the components on the wooden box using hot glue.
- Then I used some wood glue to attach the other piece of plywood to complete the assembly and held it until the glue was dry. You can refer to the images on how I put together the circuit.
I have been using this power bank for 2 weeks and am making good use of it. I can charge my phone once. I think this could be improved by using new batteries.
I also suggest using the ready-made power bank kits if you want to avoid soldering and the case is similar to the commercial ones. But I wanted this kind of custom-made power bank that not only works great but also looks cool.
Please leave a comment if you have any questions or suggestions. Thank you!
Get more information at Perfectidea.com and on our Facebook for more How to Make a Mobile Power Bank.
Popular Content
How to make a rocket stove for outdoors
Cardboard Drawers Lined with Jeans
Ideas and Advantages of Window Grilles for the Home!
Latest Articles
How to make a refrigerator out of insulating material: Practical step-by-step guide
How to make a Kilim for the Home: Complete Step by Step Guide
How to protect ourselves from accidents in our workplace: Complete prevention and safety guide
Related Content
Ideas to decorate the garden with bricks
How to easily open a combination lock
How to Reuse Your Old Sewing Machines
Wall Desk Ideas Built with Pipes
Creative Home Decor Ideas to Transform Every Space
Refreshing your home starts with smart design choices that combine comfort, personality, and functionality. Whether you want to modernize a small apartment, upgrade outdoor areas, or create cozy rustic interiors, these trending ideas can completely change the atmosphere of your space.
Outdoor Spaces That Increase Style and Functionality
Outdoor living continues to dominate modern home trends. Homeowners are increasingly investing in practical entertainment zones inspired by these BBQ shed ideas, which create the perfect setup for gatherings and weekend cooking sessions.
First impressions also matter when designing exteriors. Elegant farm entrance gates design ideas help properties stand out while improving privacy and curb appeal.
Compact living solutions are also gaining popularity. These inspiring 16x40 shed house interior design ideas show how smaller spaces can still feel luxurious and functional.
To enhance patios and entryways, homeowners are adding stylish protection with these creative porch awning exterior DIY ideas that blend aesthetics with practicality.

Rustic and Cozy Interior Design Trends
Warm and natural interiors remain timeless. These charming rustic decor ideas combine wood textures, vintage accents, and earthy tones to create welcoming spaces.
Bedrooms are becoming more personalized with curated wall arrangements. Many homeowners use these stylish picture wall ideas for bedroom spaces to display memories and artwork creatively.
Textured wall treatments are another major trend. Installing a board and batten wall adds architectural character while keeping interiors elegant and modern.
Similarly, bold accent wall ideas can instantly transform plain rooms into eye-catching focal points without requiring a full renovation.
Smart Kitchen and Organization Inspiration
Functional kitchens are essential for modern homes. These practical kitchen wall cabinet ideas maximize storage while maintaining a clean and stylish appearance.
Organization also starts at the entrance. Well-designed mud room ideas help families keep shoes, coats, and daily essentials neatly arranged.
Colorful and Personalized Home Styling
Vibrant interiors are becoming increasingly popular thanks to playful dopamine decor ideas that use bright colors and joyful accessories to improve mood and energy.
Gallery walls also continue to evolve as a major decorative feature. These trendy gallery wall inspiration ideas offer creative ways to combine prints, photos, and statement art.
Young renters and new homeowners are especially embracing these stylish first apartment aesthetic ideas to create sophisticated interiors on a budget.
Finally, selecting the right shades can dramatically influence any room’s atmosphere. These modern trendy color ideas help homeowners choose palettes that feel fresh, elegant, and timeless.
Final Thoughts
From rustic charm and colorful interiors to outdoor entertaining areas and functional storage solutions, today’s home decor trends focus on creating spaces that feel both beautiful and livable. By combining smart layouts, modern textures, and personalized decorative elements, any home can become more stylish, comfortable, and inspiring.
Browse the Shop
 Acacia frida deluxe solid wood bed frame |
Bedroom bench |
Bed chest drawers |
Lingerie dresser |
Frame base |
Mirror with jewelry storage |
30 Bathroom Vanity |
Memory foam queen mattress |
Mattresses for back pain |
Nightstand set of 2 |
Grand Goldman Shop |
Civil Lawyer
Deutschland Trikot WM 2026
Acacia frida deluxe solid wood bed frame |
Bedroom bench |
Bed chest drawers |
Lingerie dresser |
Frame base |
Mirror with jewelry storage |
30 Bathroom Vanity |
Memory foam queen mattress |
Mattresses for back pain |
Nightstand set of 2 |
Grand Goldman Shop |
Civil Lawyer
Deutschland Trikot WM 2026







