
Today we will learn how to make AA batteries from very inexpensive household materials that you can easily purchase.
An AA battery is a standard-sized cylindrical battery commonly used in portable electronic devices.

The exact terminal voltage and capacity of a AA-size battery depends on the cell chemistry, but is typically rated at about 1.5 volts.
An AA cell measures 49.2–50.5 mm in length including the terminal and 13.5–14.5 mm in diameter.
Steps on how to make AA batteries:
Do you think this would be useful in an emergency? Is this a viable and renewable energy source? Would this be a good way to teach children about science?
Step 1: What you will need


Materials to make AA batteries:
- (1) Strip of corrugated paper (cardboard box)
- (12) Copper Flat Washers [Size #10]
- (14-16) Zinc Flat Washers [Size #10]
- (1) Shrink Plastic Tubing [2.5"x1"]
- (4oz.) Distilled water
- (1oz.) Vinegar
- (4 Tblspns) Table salt (NaCl)
You will also need the following tools:
- Welder
- Welding
- Mixing bowl
- Digital multimeter
- Scissors
- Sand paper
- Needle nose pliers
- Lighter (or heat gun)
- An old AA battery (for reference)
Step 2: Prepare copper and zinc


The copper and zinc flat washers will serve as your anodes and cathodes for your battery separated by an electrolyte. This battery will be built with 11 cells in series to create a robust 1.5 volt.
Copper and zinc washers should be clean, free of debris and abraded with 100 grit sandpaper and cleaned until shiny.
Step 3: Cut Cardboard


Next, we are going to cut our corrugated paper into 11 squares. These will serve as a small sponge to absorb and suspend the electrolyte between our copper and zinc anodes and cathodes.
When cutting the cardboard squares, make sure they are exactly the size of the washers. If they are too large they will create a short; If they are too small they will not retain enough electrolyte.
When you finish put them aside.
Step 4: Prepare the electrolyte


Voltage is a potential difference that we find with copper and zinc. The electrolyte is the medium through which this charge can pass.
To prepare the electrolyte, first mix the 4 tablespoons of table salt into the 4 oz. of distilled water until the water has reached its maximum salinity and the salt no longer dissolves. The water should look milky white. Make sure to mix well before adding the vinegar.
Once set, add 1 oz. of vinegar, mix and let it rest.
Step 5: Soak the paper


Once the electrolyte mixture has been allowed to sit for approximately 5 minutes, you can insert the squares de cardboard to let soak. Be sure to submerge all squares, stir, and allow them to float until ready to use.
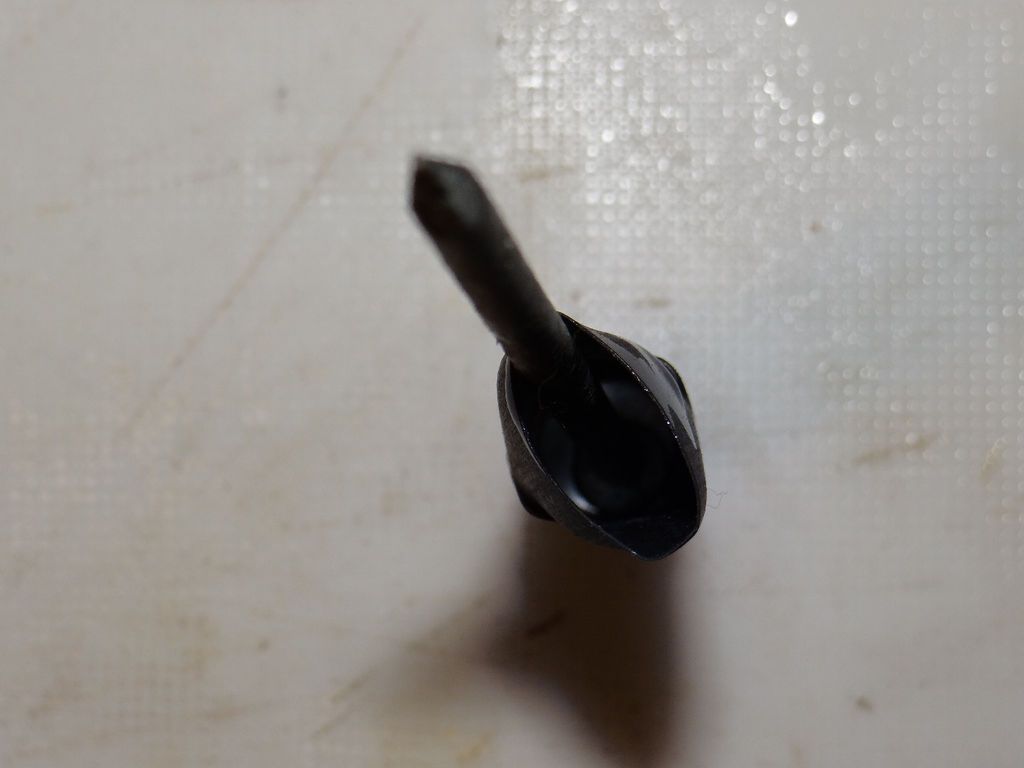
Step 6: Stretch the plastic wrap


To ensure a perfect fit, we have selected a shrink wrap that is slightly smaller in diameter than our washers. We will have to stretch it temporarily to insert our washers and paper squares.
Insert the closed needle pliers and open them slowly while working around until they stretch to 110% diameter. Repeat on the other side.
A washer should now fit snugly when placed on the tube horizontally.
Step 7: Test Components


As discussed, we will be building 11 cells consisting of copper, electrolyte and zinc. Before building our battery, we will make a cell to test our components.
Simply stack a copper washer, a square of soaked cardboard and cover it with a zinc washer.
Next we will test it with our digital multimeter. The red wire should be in the Voltage slot, the black wire in the COM slot and the Multimeter should be set at or near 20vDC. Then, contact the black wire from the copper washer and the red wire from the zinc to make sure they are insulated and not touching each other or anything else. You should now see a display somewhere between 0.05 and 0.15 volts!
If your reading is higher than this, don't worry, the voltage may rise but will then decrease. If it's reading is lower than this, check your components and try again. Remember that if the reading is zero, check your contacts and make sure your multimeter is set correctly.
Step 8: Plan core construction


Before you begin, take a look at the image showing how the construction of the cells will make your battery.
Note the order: copper, zinc, electrolyte, repeat.
Step 9: Build the core


To build the core, we will stack the components making sure they are flat, without gaps and without compressing the electrolyte mixture.
First insert a copper washer by pushing it in 1/4″ from the end and making sure it is horizontally straight. Next, place a zinc washer on top and then add one of your electrolyte soaked squares. It's helpful to have a pen or nail to push the cardboard down evenly, but be sure not to press too hard.
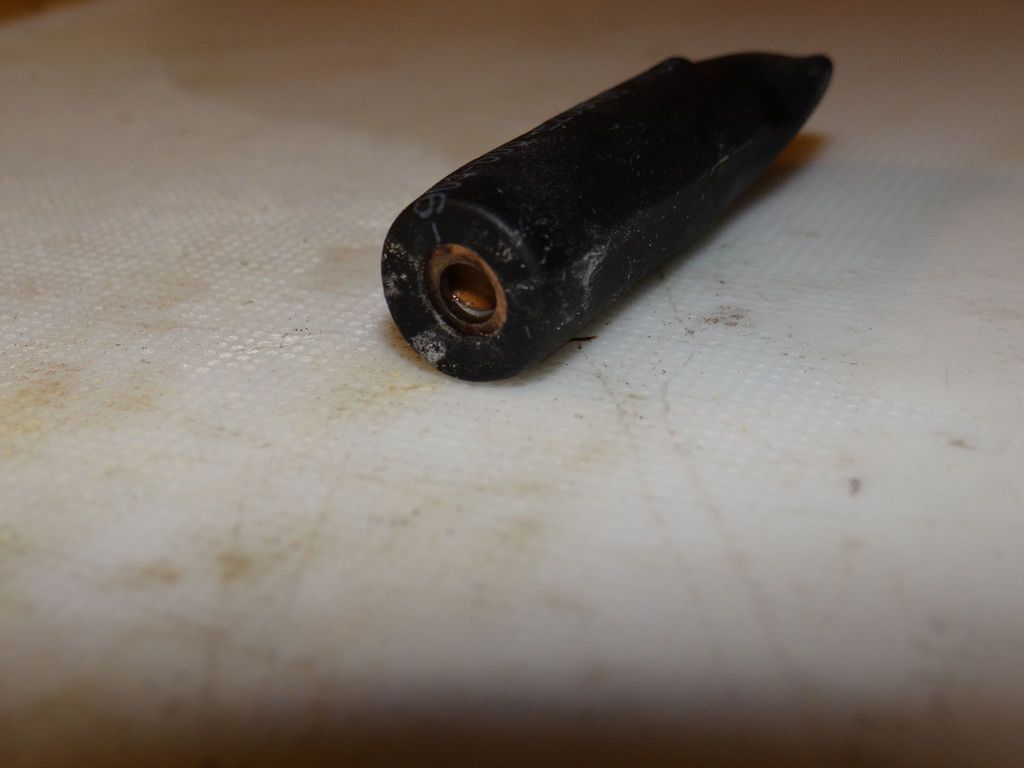
Then repeat, Copper, Zinc, Electrolyte, tap down, Copper, Zinc, Electrolyte, tap down... Until the last zinc washer covers the battery. Before sealing the battery, compare it with a standard AA battery to ensure the correct length. If necessary, add more zinc washers until the correct length is reached. Please note that the protruding bump on the positive side will be added later with soldering.
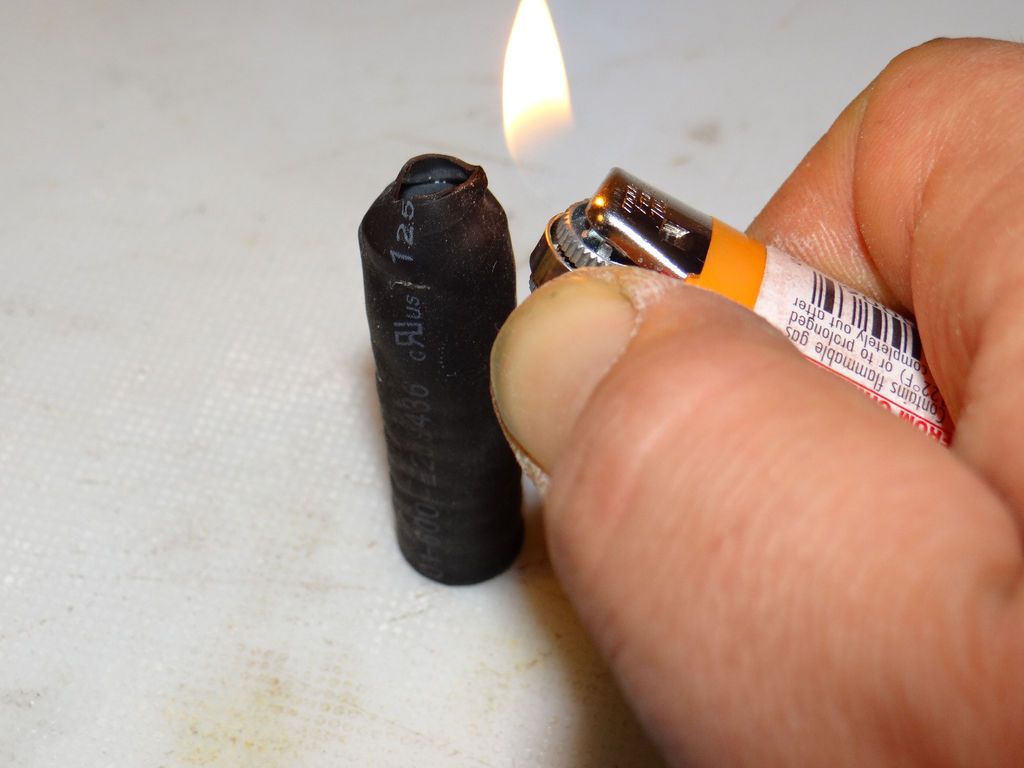
Once the cor length is reachedstraight, begin heating the end you started with, making sure to make a tight seal. Next, heat the sides of the battery until the heat shrink tube fits into the crimps on the washers. Then, trim off the excess leaving just 1/4″ and heat until an airtight seal forms on the other end.
Step 10: Add terminals


Now let's add our terminals. Plug in your soldering iron and wait until it is hot.
Secure your battery with the copper side facing up (the side you started with). You will then apply heat to the solder while holding it over the hole formed in the end of the battery. As it melts, press the solder into the hole until it is full and end up with a small bead of solder on top.
Once it has cooled, turn the battery over so the zinc side is up. If you added additional washers, this side will require quite a bit more welding. Repeat the process until complete and cover with a large bead of solder to indicate the positive side. More or less solder can be added at this point to exactly match the correct length.
Step 11: It's done! Time to try it!


Your battery is full!
If you've done everything correctly, you should be able to plug in your multimeter (same setup as before) and get a reading of about 1.5 volts!
Compare it to a standard AA battery to see how you fared!
Troubleshooting: It is normal for your voltage to be high at first and then level off. If your voltage is slightly low, try pulling the battery out by the ends to stretch it a bit. If your voltage is too low, you may have a short circuit (the electrolyte is not properly aligned) or you may have components stacked in the wrong order.
Step 12: Use your new battery!


Your battery will fit any standard AA slot and provide the voltage you need to power all your favorite devices!
This homemade battery can power LED flashlights, portable recording devices, your computer mouse, or any other device that requires AA batteries.
Now you know how to make AA batteries in an easy and practical way!
Don't forget to follow us on our social networks for more news!
Popular Content
How to make a rocket stove for outdoors
Cardboard Drawers Lined with Jeans
Change the facade of your home with simple steps!
Latest Articles
How to make a refrigerator out of insulating material: Practical step-by-step guide
How to make a Kilim for the Home: Complete Step by Step Guide
How to protect ourselves from accidents in our workplace: Complete prevention and safety guide
Related Content
Concrete: Learn to Decorate your Home with This Element!
Ideas to decorate the garden with bricks
Repair a push button sink
Sculptural Wall Clock – Shou-Sugi-Ban Technique
Creative Home Decor Ideas to Transform Every Space
Refreshing your home starts with smart design choices that combine comfort, personality, and functionality. Whether you want to modernize a small apartment, upgrade outdoor areas, or create cozy rustic interiors, these trending ideas can completely change the atmosphere of your space.
Outdoor Spaces That Increase Style and Functionality
Outdoor living continues to dominate modern home trends. Homeowners are increasingly investing in practical entertainment zones inspired by these BBQ shed ideas, which create the perfect setup for gatherings and weekend cooking sessions.
First impressions also matter when designing exteriors. Elegant farm entrance gates design ideas help properties stand out while improving privacy and curb appeal.
Compact living solutions are also gaining popularity. These inspiring 16x40 shed house interior design ideas show how smaller spaces can still feel luxurious and functional.
To enhance patios and entryways, homeowners are adding stylish protection with these creative porch awning exterior DIY ideas that blend aesthetics with practicality.

Rustic and Cozy Interior Design Trends
Warm and natural interiors remain timeless. These charming rustic decor ideas combine wood textures, vintage accents, and earthy tones to create welcoming spaces.
Bedrooms are becoming more personalized with curated wall arrangements. Many homeowners use these stylish picture wall ideas for bedroom spaces to display memories and artwork creatively.
Textured wall treatments are another major trend. Installing a board and batten wall adds architectural character while keeping interiors elegant and modern.
Similarly, bold accent wall ideas can instantly transform plain rooms into eye-catching focal points without requiring a full renovation.
Smart Kitchen and Organization Inspiration
Functional kitchens are essential for modern homes. These practical kitchen wall cabinet ideas maximize storage while maintaining a clean and stylish appearance.
Organization also starts at the entrance. Well-designed mud room ideas help families keep shoes, coats, and daily essentials neatly arranged.
Colorful and Personalized Home Styling
Vibrant interiors are becoming increasingly popular thanks to playful dopamine decor ideas that use bright colors and joyful accessories to improve mood and energy.
Gallery walls also continue to evolve as a major decorative feature. These trendy gallery wall inspiration ideas offer creative ways to combine prints, photos, and statement art.
Young renters and new homeowners are especially embracing these stylish first apartment aesthetic ideas to create sophisticated interiors on a budget.
Finally, selecting the right shades can dramatically influence any room’s atmosphere. These modern trendy color ideas help homeowners choose palettes that feel fresh, elegant, and timeless.
Final Thoughts
From rustic charm and colorful interiors to outdoor entertaining areas and functional storage solutions, today’s home decor trends focus on creating spaces that feel both beautiful and livable. By combining smart layouts, modern textures, and personalized decorative elements, any home can become more stylish, comfortable, and inspiring.


