
Tired of conventional umbrellas? Then learn how to make an umbrella with LED lights in a practical and simple way with us.
After a hard day at work, many of us are on a mission to get home and relax, sometimes forgetting to pay attention to the bustle of traffic around us.

It's a little ironic that we're all in such a hurry to get home and relax.
#1: Materials and tools
Materials to make an umbrella of LED lights:
- LED flashlight
- Vinyl poncho (or other lightweight, translucent plastic/nylon)
- Umbrella (cavity handle a bonus)
- 2 CR2032 button batteries (1.5v)
Tools:
- Glue gun
- Welder
- Drill (or rotary tool)
- Needle nose pliers
- Hobby knife
- Tape measure
- Protective glasses
#2: Disassemble the LED flashlight
This particular style of LED flashlight is separated into the housing and half of the push button and half of the light assembly. You're going to need everything except accommodation for both halves.
Rear half:
- Battery pack
- Clicker on/off
- Conductor for the Clicker to the negative terminal
- Battery and handle housing
Medium light assembly:
- LED matrix (+ terminals)
- Reflector
- Accommodation
#3: Hole/Wire Opening

Perforation:
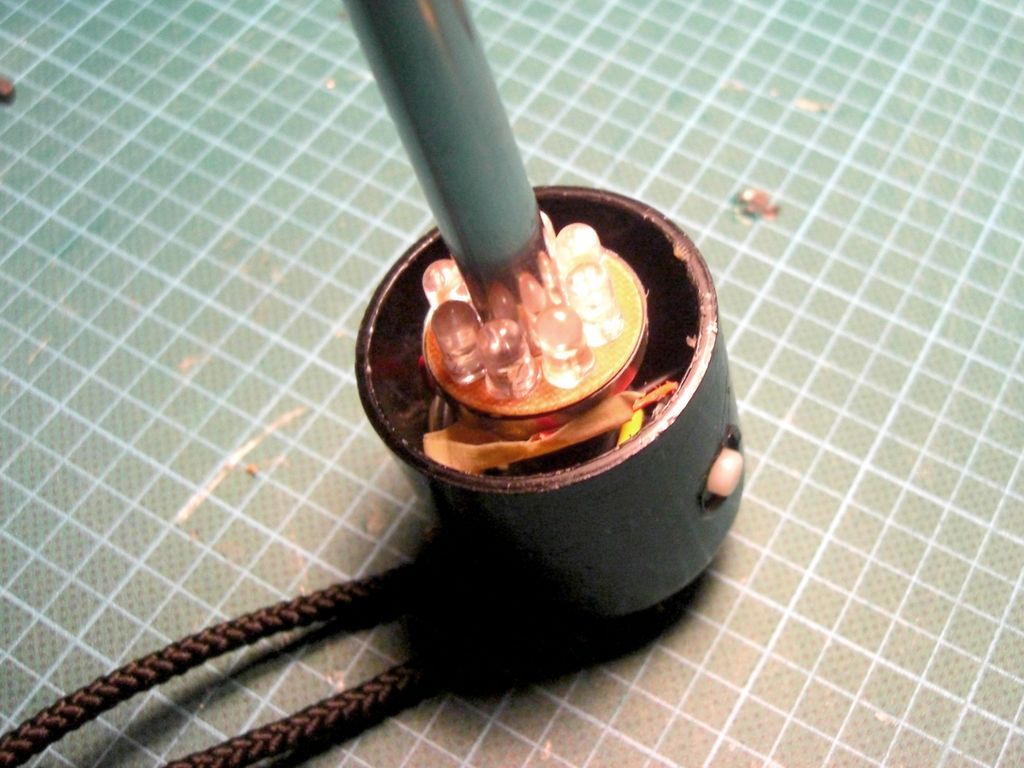
- The LED assembly I purchased was made as a disk with the positive (+) terminal on the inside and the negative (-) terminal on the outside.
- I was able to remove the center LED and drill a hole large enough to allow the umbrella shaft to pass through the center.
- I glued some emery cloth to the drill and sanded the opening to make it large enough for the umbrella shaft to easily pass through (feel free to use the appropriate tool for the job, such as a rotary tool with the appropriate bit).
Weld:
- The first solder was to connect the clicker to the negative terminals.
- The on/off button was connected to a ring that stayed in place when the flashlight was screwed on.
- We no longer have the housing to hold the ring in place, so we need to solder that ring in place on the negative terminals.
- Your next solder is for the positive terminals.
- Drilling removed the original location where the batteries connected to the positive terminals, a new soldered connection is required.
- Be careful here as the exposed wires may touch the shaft of the metal umbrella when inserted.
- I managed to solder my wires with enough room for the umbrella shaft to pass through without touching them. The wires were coated with hot glue afterwards to ensure a solid connection and no further contact.
#4: Drilling of the On/off control
- Remove the umbrella handle. This may seem easy, but those smart manufacturers have no intention of taking their product apart. You may need to use your hulk strength.
- Once removed, drill an opening for your control button.
- Be sure to research the location from the inside too, there may be an obvious location to install your button or you may have to get creative.
- I was lucky and found a cavity inside the handle that was a suitable spot.
- Drill and remove burrs.
- Running the tip of a glue gun into the opening gave a smooth look and eliminated any jagged edges, use sparingly or the opening may be too large!
- Once the opening is drilled and roughed out, glue the clicker in place.
#5: Reassembly
- Connecte the wires from the button to the batteries and then to the LED matrix (see diagram in the second image).
- Insert the umbrella shaft into the opening and then replace the handle with a little glue.
- You can leave the LED array unglued, this way you can access and change the batteries later without damaging the assembly.
#6: Make a light sock
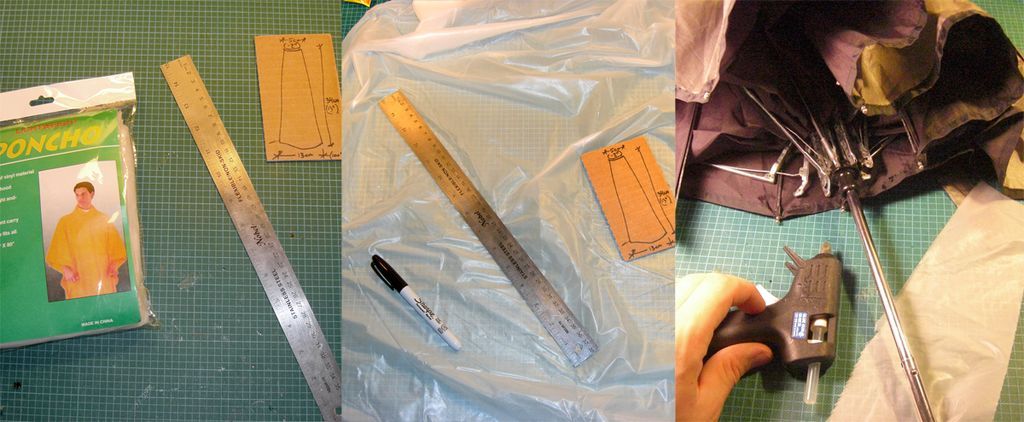
Open the umbrella upwards and measure from the top edge of the handle along the shaft to the sliding handle. The shape will resemble a truncated triangle with a curved top and bottom.
Individual measurements will vary, for mine reference they were:
- Height: 33cm (13″)
- Top length: 5 cm (-2″)
- Bottom length: 13 cm (-10″)
#7: Fixing and sewing the sock

- Start by placing the truncated tip around the slider at the top of the umbrella. Then form the cone shape by gluing the bottom of your cut to the handle.
- Depending on the material you use, the methods for closing the seam will vary. The material I chose is thin and melts smoothly under the heat of the glue gun (without glue).
- Carefully and carefully, I was able to close the sock; the seam may warp slightly but still looks good. (I recommend practicing on scrap material first, it's very easy to cast directly through the sock.
- A problem that is difficult to repair and can compromise the awesomeness of your umbrella).
#8: Sock finishing
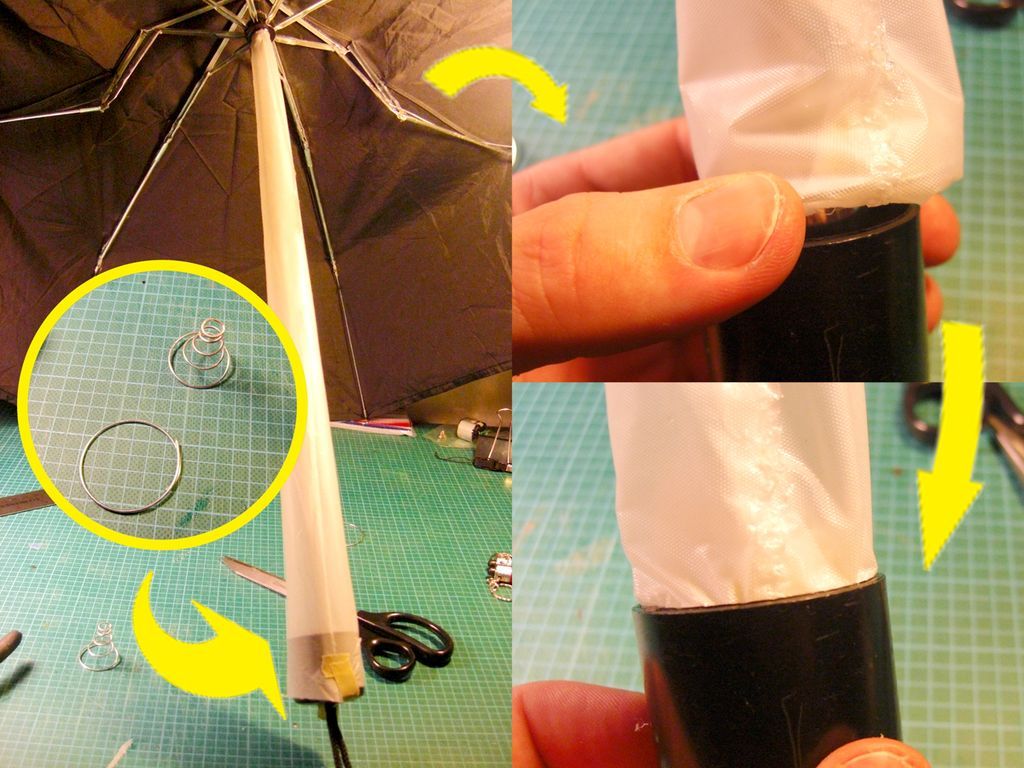
- Since I wanted to keep the electronics in the handle accessible, I decided to attach the end of the sock with a friction ring.
- I took a spring coil from an old battery flashlight and cut a ring off the large end spring. Using pliers, I manipulated it into a ring slightly larger than the opening for the umbrella handle.
- The ring was inserted into the sock, then the excess sock was inserted into the handle, the ring slides on the inside edge of the handle for the last time.
- Spring unwind compression keeps the sock in place and allows easy access to the electronics when removing the ring and lifting the sock.
#9: Results
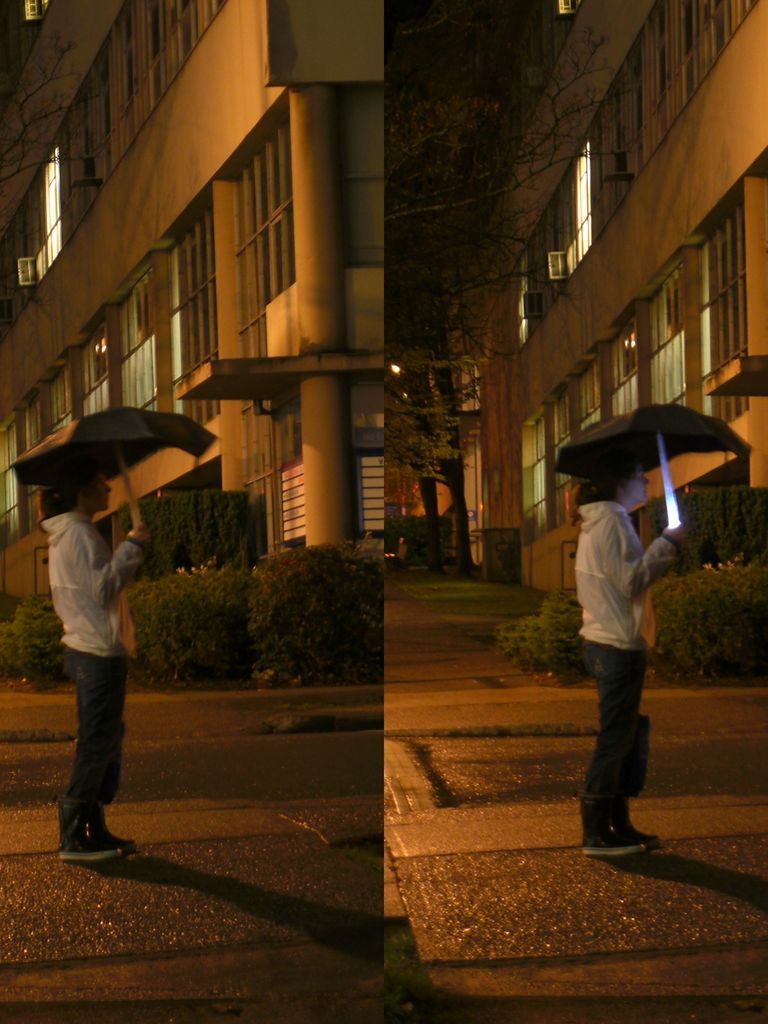


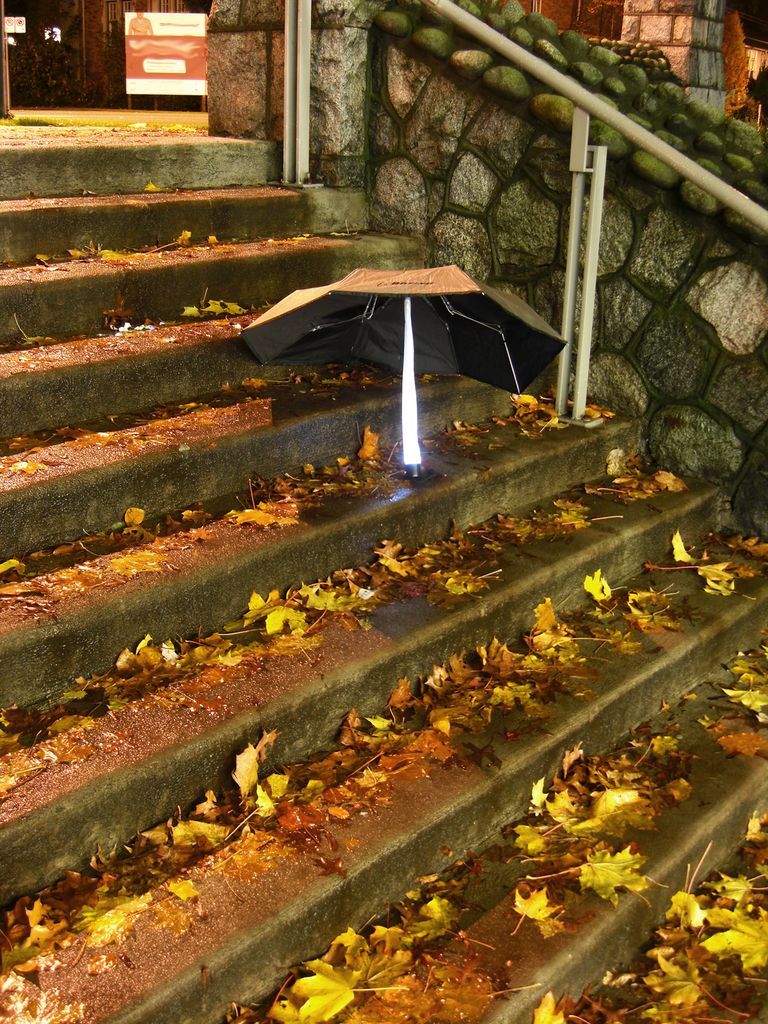
These photographs were taken around 9:00 pm, quite dark for fall in the North Pacific.
The photos shown are not manipulated in any way, they are a direct comparison using the default settings on a simple point and shoot camera to show lighting values.
In the images below we can see a marked difference with the umbrella light off and then on.
A little idea that can alert drivers and cyclists about your position on these dark and rainy nights.
Remember that you can make an LED umbrella easily by following all the steps in this article.
Don't forget to follow us on our social networks for more news!
- Tags
- LED
Popular Content
How to make a rocket stove for outdoors
Cardboard Drawers Lined with Jeans
Change the facade of your home with simple steps!
Latest Articles
How to make a refrigerator out of insulating material: Practical step-by-step guide
How to make a Kilim for the Home: Complete Step by Step Guide
How to protect ourselves from accidents in our workplace: Complete prevention and safety guide
Related Content
How to Decorate the Home with Pallets
How to Build Concrete Floating Shelves!
Tricks to Keep Your Kitchen Super Organized!
How to Build a Pot Heater
Creative Home Decor Ideas to Transform Every Space
Refreshing your home starts with smart design choices that combine comfort, personality, and functionality. Whether you want to modernize a small apartment, upgrade outdoor areas, or create cozy rustic interiors, these trending ideas can completely change the atmosphere of your space.
Outdoor Spaces That Increase Style and Functionality
Outdoor living continues to dominate modern home trends. Homeowners are increasingly investing in practical entertainment zones inspired by these BBQ shed ideas, which create the perfect setup for gatherings and weekend cooking sessions.
First impressions also matter when designing exteriors. Elegant farm entrance gates design ideas help properties stand out while improving privacy and curb appeal.
Compact living solutions are also gaining popularity. These inspiring 16x40 shed house interior design ideas show how smaller spaces can still feel luxurious and functional.
To enhance patios and entryways, homeowners are adding stylish protection with these creative porch awning exterior DIY ideas that blend aesthetics with practicality.

Rustic and Cozy Interior Design Trends
Warm and natural interiors remain timeless. These charming rustic decor ideas combine wood textures, vintage accents, and earthy tones to create welcoming spaces.
Bedrooms are becoming more personalized with curated wall arrangements. Many homeowners use these stylish picture wall ideas for bedroom spaces to display memories and artwork creatively.
Textured wall treatments are another major trend. Installing a board and batten wall adds architectural character while keeping interiors elegant and modern.
Similarly, bold accent wall ideas can instantly transform plain rooms into eye-catching focal points without requiring a full renovation.
Smart Kitchen and Organization Inspiration
Functional kitchens are essential for modern homes. These practical kitchen wall cabinet ideas maximize storage while maintaining a clean and stylish appearance.
Organization also starts at the entrance. Well-designed mud room ideas help families keep shoes, coats, and daily essentials neatly arranged.
Colorful and Personalized Home Styling
Vibrant interiors are becoming increasingly popular thanks to playful dopamine decor ideas that use bright colors and joyful accessories to improve mood and energy.
Gallery walls also continue to evolve as a major decorative feature. These trendy gallery wall inspiration ideas offer creative ways to combine prints, photos, and statement art.
Young renters and new homeowners are especially embracing these stylish first apartment aesthetic ideas to create sophisticated interiors on a budget.
Finally, selecting the right shades can dramatically influence any room’s atmosphere. These modern trendy color ideas help homeowners choose palettes that feel fresh, elegant, and timeless.
Final Thoughts
From rustic charm and colorful interiors to outdoor entertaining areas and functional storage solutions, today’s home decor trends focus on creating spaces that feel both beautiful and livable. By combining smart layouts, modern textures, and personalized decorative elements, any home can become more stylish, comfortable, and inspiring.


