


Making Amazing Sunglasses from Paper Bags, I love the look of wooden sunglasses, but I didn't have the right equipment to make them. I thought maybe I could make them with these old paper bags. What the hell? I'll try it. So, this is how I did it.
Materials:

- Paper bags
- Polyurethane
- Paint brush
- Paper and pen
- Scissors
- Knife
- Old pair of sunglasses
- 6 Small Hex Nuts
- 2 Nails with nail heads
Step 1: Create the template


I had an old pair of broken sunglasses and used them for the lenses and also to create the template. I added the lenses and disassembled the glasses. I set the lenses aside and traced the frames and arms to create the template. It can be a little complicated due to the curve in the frames and arms.
Step 2: Get the frame and arms cut out


After I was happy with the layout, I colored the solid so I could use our cutter to make multiples. While the blade was cutting, I cut the grocery bags to fit the machine. You can always use a knife and scissors.
You must cut with precision. Overall, I ended up using 4 bags.
Step 3: Create the elements


After cutting all the elements, I used polyurethane and a brush to join all the layers. First place a sheet of freezer wrap with the waxy side facing up.
Place a layer of polyurethane directly on top of the freezer wrap, then place the first frame piece down and cover that piece with more poly.
Be sure to saturate each piece. Next, place another frame piece on top of it, lining it up perfectly with the one below.
Paint that with more polyurethane. Repeat this step over and over again keeping everything aligned until you have the desired thickness.
For me it ended up being around 24 to 26 pieces. I lost count. Repeat this same process for the arms.
Step 4: Compress the layers

Once you have the desired thickness of both the frame and arms, you can fold over the wrap and place them on a flat surface.
Place the frame pack face down and add a book on top being careful not to change anything, and then take the packyou arms, place them on the book and place another book on top of that.
Weigh everything with whatever you can. I used a couple of bricks and a couple of 10 pound weights. The idea here is to keep everything flat.
Leave this all sitting overnight.
Step 5: Getting the curves


Approximately 24 hours later you can unwrap your frame and assemble packages. Carefully remove them from the wrapper.
If there is anything stuck to the wrapper, they are not ready yet. Leave them for a few more hours. When you can easily peel them off the wrapper, they are ready. They should be dry, but still a little soft and pliable.
This is where they are flexible enough that you can create a curve without risking separating the layers of the paper bag.
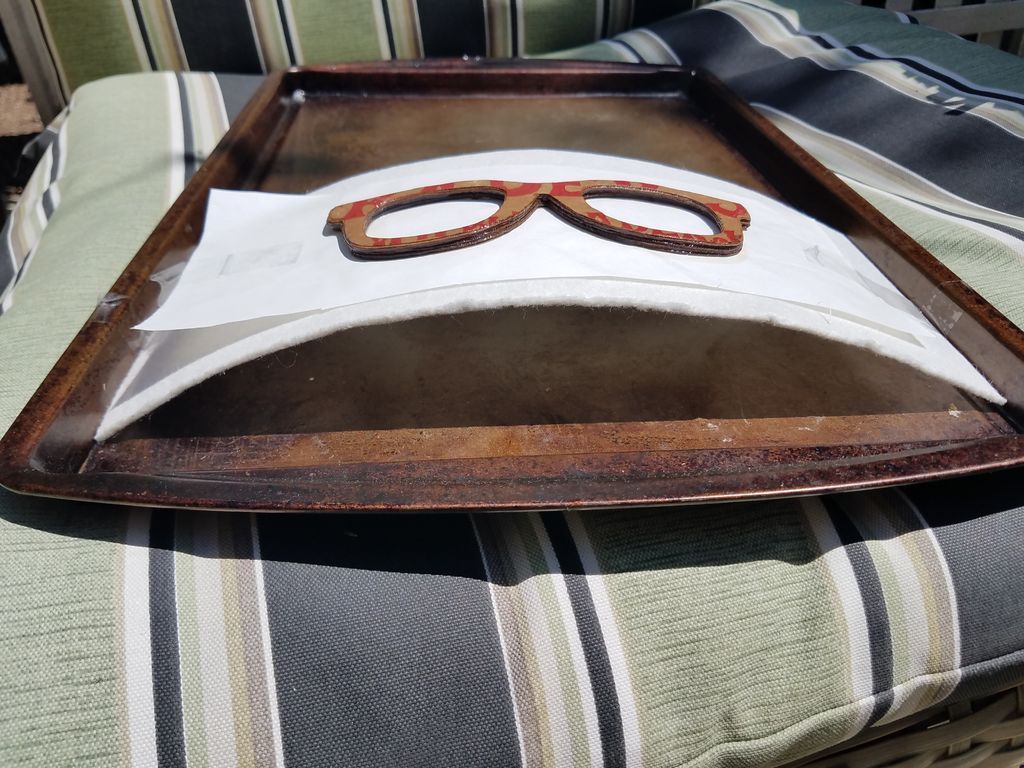
To get the curve, I used a piece of stiff cardboard and pressed it against the sides of a cookie sheet. I inspected the curve and found that it was too high.
No problem, just cut a piece of the cardboard until it has the desired curve.
I tried to keep the curve the same as my old broken glasses. It's very slight. For the arms, I used the old arms to create the curves.
Because the curve was only halfway up the arm and this was the most precise way to achieve this.
Now put all this aside to finish drying. You will know when it is completely dry because it will be hard as a rock. I put mine in the sun to finish drying and it took about 6 hours.
Step 6: Making room for the lenses

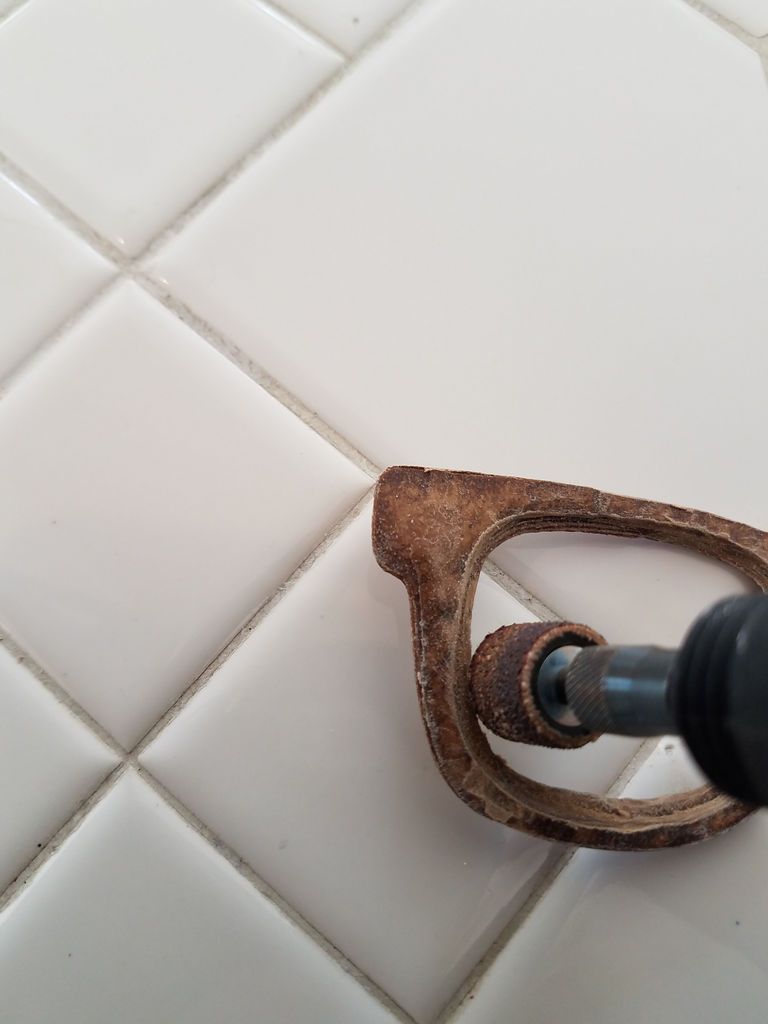


To make room for the lenses, I used a Dremel with a coarse sanding barrel to carve an edge for the lenses to nest in the frame.
It takes a little time but go slow and keep checking the fit. I also dug a little with an Exacto knife to give it a slight internal grove so it could catch the edge of the lens. Check the fit.
You may have a better tool than me for putting in a real grove for the lens. But this way it worked for me.
Step 7: Putting Everything Together


Now that all your pieces are dry and you've created a space for the lenses, it's time to assemble them. I originally found another pair of glasses to remove the hinges, but it didn't work as well and I won't bore you with the details. So, I had to be creative and find another way. I found these really small nuts in my big box, which is full of nuts, screws, nails, washers, etc. When I studied the old glasses I discovered that there are 2 holes in the frame andone on the arm. So I imitated that with the walnuts...
Something like that. I lined the 3 nuts in a row on the frame with a photo of the teeth to prevent slipping, but I only glued the top and bottom nut to the frame. (For measurements, I simply lined up the arm with the edge of the frame and glued the 2 nuts there (with super glue) while holding everything in place.
Next, I removed the middle nut and glued it to the center of the arm. Repeat this on both sides. After all the glue had dried, I aligned the 3 nuts by holding the arm in place, sliding the arm nut between the other 2 nuts.
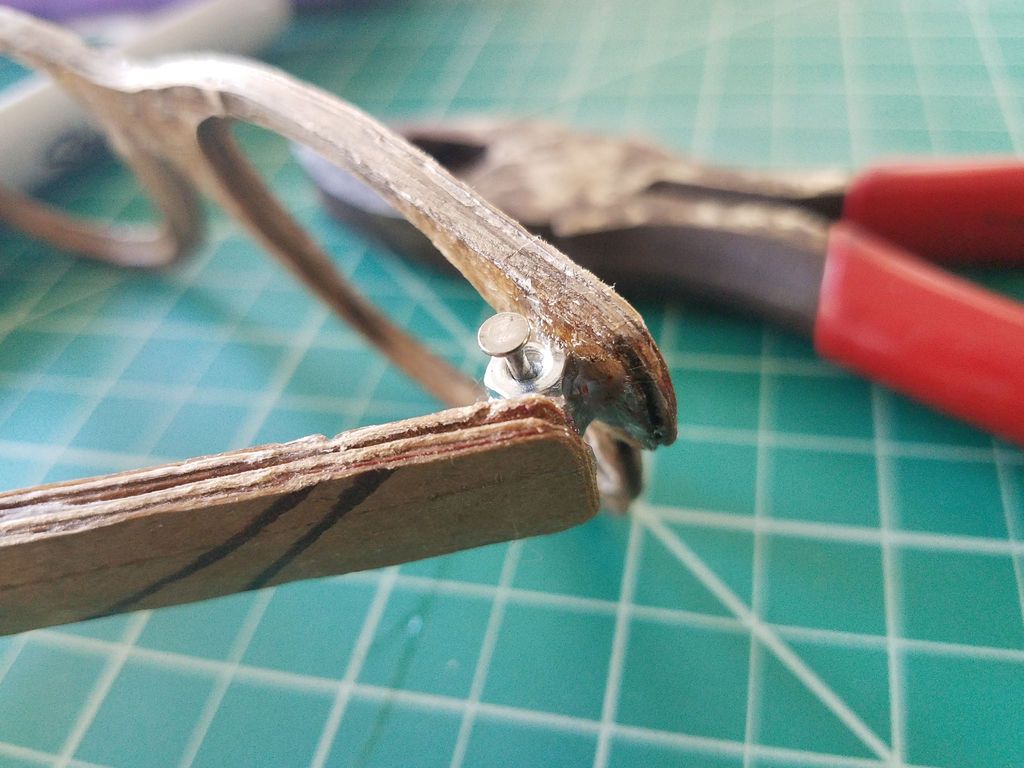
Going back to my box I found a couple of small nail head nails and they slid through the center of the three nuts.
I marked where the tip of the nail meets the bottom nut, slid it back and cut off the sharp end. After reinserting the now trimmed nail to go through the nuts, I placed a bead of glue on the head of the nail and the top nut.
This secured it so it won't come off, but the hinge will still work.
Step 8: Try them!


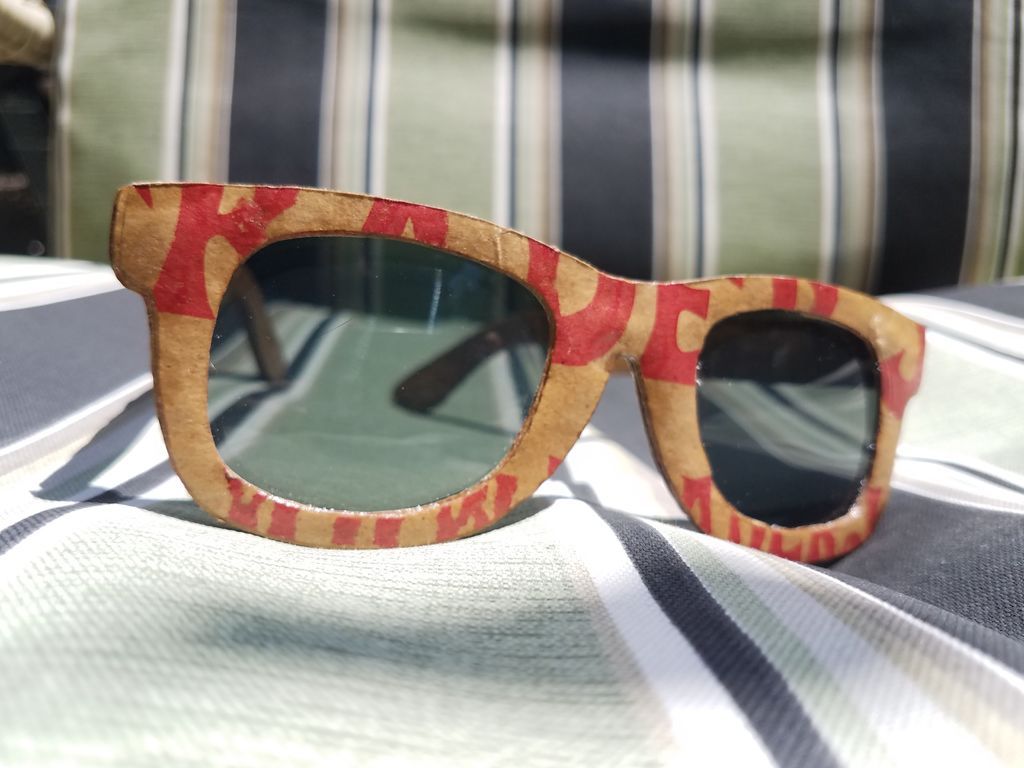


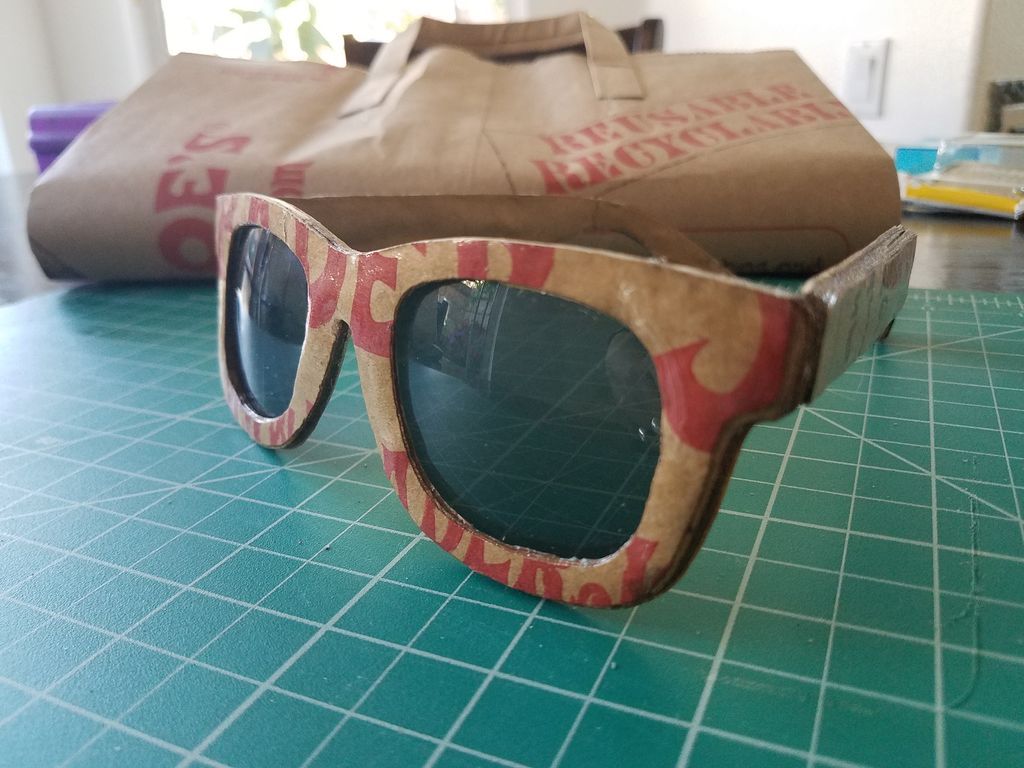


All you have to do now is open the lenses and try them on and... You're ready! Thank you very much for taking a look at this article!
- Tags
- Paper
Popular Content
How to make a rocket stove for outdoors
Cardboard Drawers Lined with Jeans
Ideas and Advantages of Window Grilles for the Home!
Latest Articles
How to make a refrigerator out of insulating material: Practical step-by-step guide
How to make a Kilim for the Home: Complete Step by Step Guide
How to protect ourselves from accidents in our workplace: Complete prevention and safety guide
Related Content
Rustic Sliding Doors Made of Wood
Ideas and Designs to Have Your Own Kitchen Bar
Furniture Made of OSB!
Incredible Stone and Concrete Paths
Creative Home Decor Ideas to Transform Every Space
Refreshing your home starts with smart design choices that combine comfort, personality, and functionality. Whether you want to modernize a small apartment, upgrade outdoor areas, or create cozy rustic interiors, these trending ideas can completely change the atmosphere of your space.
Outdoor Spaces That Increase Style and Functionality
Outdoor living continues to dominate modern home trends. Homeowners are increasingly investing in practical entertainment zones inspired by these BBQ shed ideas, which create the perfect setup for gatherings and weekend cooking sessions.
First impressions also matter when designing exteriors. Elegant farm entrance gates design ideas help properties stand out while improving privacy and curb appeal.
Compact living solutions are also gaining popularity. These inspiring 16x40 shed house interior design ideas show how smaller spaces can still feel luxurious and functional.
To enhance patios and entryways, homeowners are adding stylish protection with these creative porch awning exterior DIY ideas that blend aesthetics with practicality.

Rustic and Cozy Interior Design Trends
Warm and natural interiors remain timeless. These charming rustic decor ideas combine wood textures, vintage accents, and earthy tones to create welcoming spaces.
Bedrooms are becoming more personalized with curated wall arrangements. Many homeowners use these stylish picture wall ideas for bedroom spaces to display memories and artwork creatively.
Textured wall treatments are another major trend. Installing a board and batten wall adds architectural character while keeping interiors elegant and modern.
Similarly, bold accent wall ideas can instantly transform plain rooms into eye-catching focal points without requiring a full renovation.
Smart Kitchen and Organization Inspiration
Functional kitchens are essential for modern homes. These practical kitchen wall cabinet ideas maximize storage while maintaining a clean and stylish appearance.
Organization also starts at the entrance. Well-designed mud room ideas help families keep shoes, coats, and daily essentials neatly arranged.
Colorful and Personalized Home Styling
Vibrant interiors are becoming increasingly popular thanks to playful dopamine decor ideas that use bright colors and joyful accessories to improve mood and energy.
Gallery walls also continue to evolve as a major decorative feature. These trendy gallery wall inspiration ideas offer creative ways to combine prints, photos, and statement art.
Young renters and new homeowners are especially embracing these stylish first apartment aesthetic ideas to create sophisticated interiors on a budget.
Finally, selecting the right shades can dramatically influence any room’s atmosphere. These modern trendy color ideas help homeowners choose palettes that feel fresh, elegant, and timeless.
Final Thoughts
From rustic charm and colorful interiors to outdoor entertaining areas and functional storage solutions, today’s home decor trends focus on creating spaces that feel both beautiful and livable. By combining smart layouts, modern textures, and personalized decorative elements, any home can become more stylish, comfortable, and inspiring.


