
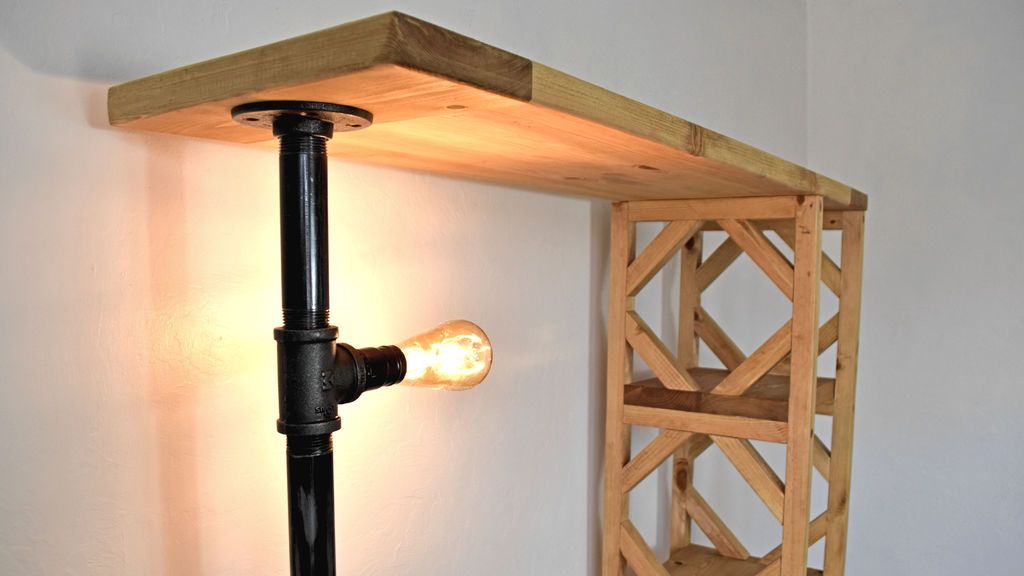
How to Build a Super Rustic and Modern Desk at the same time, I will show you how to build a rustic style desk with shelves and a lamp. This project has a few steps, but is very doable for a novice maker. If I can do it, anyone can! This desk features a trestle style table base. I also used 1 inch iron pipe for the left vertical support of the shelf, and added a light bulb for just the right amount of light. This farmhouse style desk is wide enough to fit my 27″ computer with plenty of room for book storage.


Step 1: Building the table base


The table bases are made from 4x4 Douglas Fir wood milled to 3x3. You can leave them in 4×4 if you have limited tools. I used my jointer to get flatter surfaces before moving on to the table saw.
I used (2) 8 foot long 4x4s for this project. All the materials I used came from my local warehouse. Sometimes non-pressure treated 4x4s are in short supply, so you may have to search. DO NOT USE PRESSURE TREATED! You don't want those types of chemicals in your home.
On a miter saw cut the following:
- 2 @ 23 1/12″ (for the trestle posts), 4 @ 24″ (for the top and bottom horizontal trestle)
- 8 @ 12 1/2″ (for angle trestle supports)
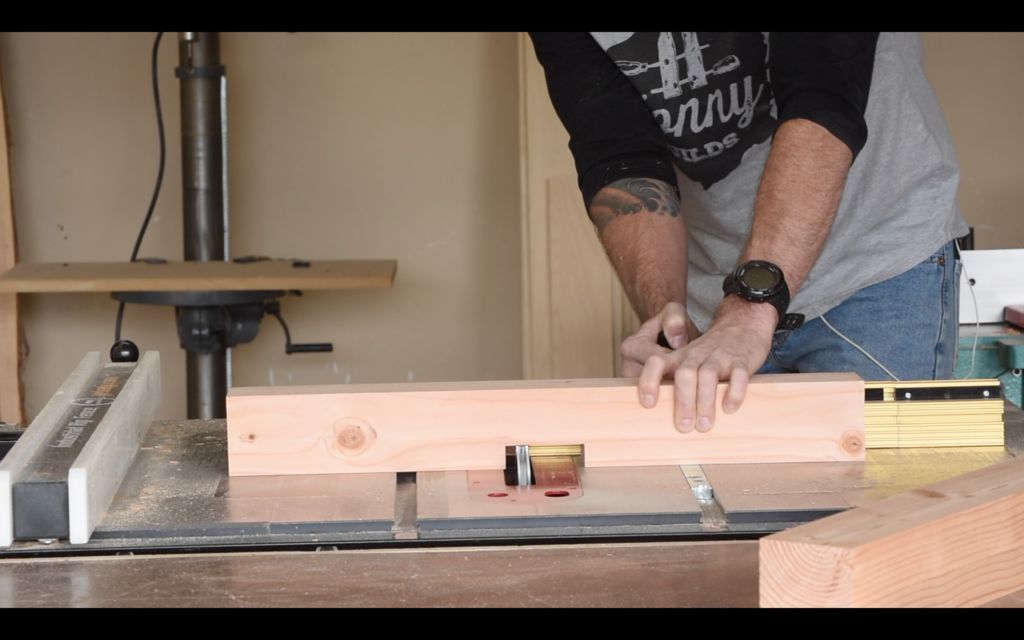
- Set the table saw fence at 3 inches, and cut each 4x4 down to 3″ x 3″.
- Set the saw blade to a little more than half the thickness and cut slowly. Flip the piece over and cut the other half of that face. Repeat for the perpendicular face.
- Now it's time to add a 1-inch gap to the horizontal trestles (the 24″ beams). I achieved this by using a slotted blade which allows me to remove more material faster and have more precise cuts. You can accomplish the same thing using a circular saw and speed square.
- Use one of the trestle posts to measure the width of the gap, and mark this in the center of the horizontal at (this should measure 10 1/2″ to 13 1/2″ along the length of the horizontal. Now cut the bevel at the end of the horizontals.
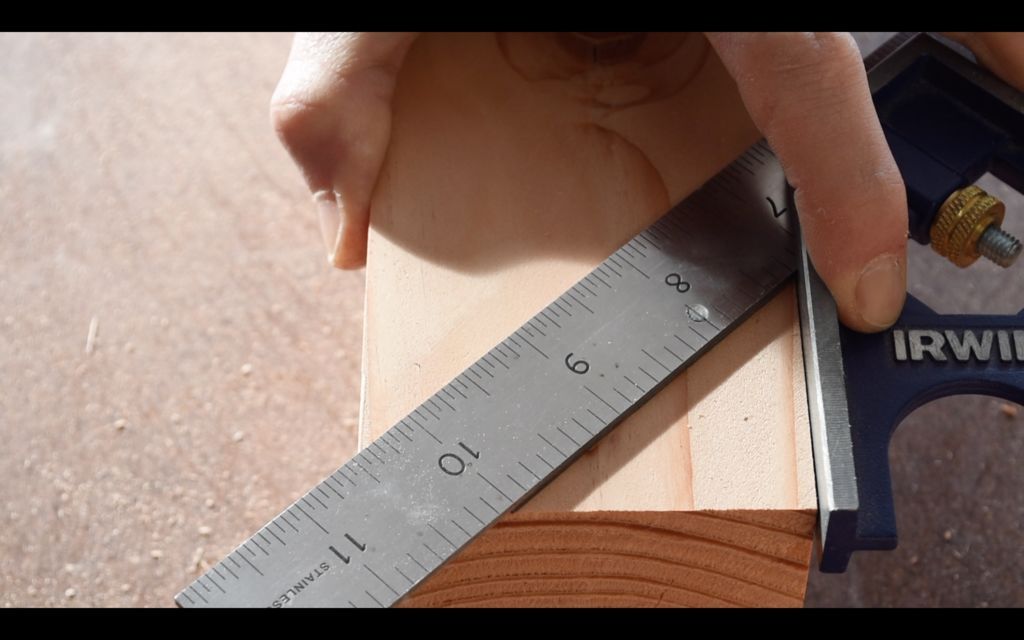
- Measure from bottom to top 1 inch. Then mark a line at 45 degrees as shown in the image. Set your miter saw to 45 degrees and cut along this line. Each horizontal gets a bevel at both ends.
- Mount the posts on the top and bottom horizontal beams. Drill 4 holes in the center of the horizontal where the post grove cuts. I used (4) 3 inch screws to attach the top and bottom horizontals to the center beams. Now the base is starting to take shape, it's time to add the diagonal supports.
- I cut these so they sit about 1 1/2 inches from the bevel. Cut these to fit on a miter saw set to 45 degrees. Set up a stop block to ensure that all 8 diagonals are the same size. Mine were about 10 inches, but I didn't measure this part.
- Drill two fixing holes on each diagonalwith a 1/2″ drill bit. Then place 4 diagonals per trestle base as shown in the photo above. Plug the holes with 1/2 dowels.
- Rinse the pins once the glue has dried and sand the bases.
Step 2: Make the tabletop and shelves


The table surface is 27″ x 48″, and features simple cutting board style ends. The table top is made from (9) 2x4s cut to 3 inches wide and laminated. The ends of the breadboard are 2x6s cut to 5 inches wide. Take your time at home and choose the straightest boards you can find in the pile.
- Cut the following lengths of 2x4s on the miter saw: 9 @ 38 1/2 inches (for table top), 4 - 34 1/2 inches (for top shelf). The extra 1/2 length will give you room to work later to properly square the table and shelf.
- I ran my 2x4s through my jointer to make them super straight and flat. This will help give a smooth surface to the table without empty spaces. Then scrape these to 3 inches wide on the table saw. Then return them all to an even dimension. My boards ended up about 1 1/4″ thick. The most important thing is to ensure uniform thickness.
- Place the top 9 table tops and arrange them to vary the grain pattern and knots as you like.
- Use a T-square to mark alignment locations for the dominoes.
- Cut dominoes or cookies. Join them and glue the table.
- Now it's time to cut the 2x6s on the miter saw for the ends of the breadboard for the top shelves of the table, as well as the two smaller book shelves. Cut the following: 2 to 29 inches (for the table plates), 2 to 14 inches (for the shelf top plates, and 4 to 12 1/2″ (for the two book shelves)
- Grind and flatten the test boards and shelves to the same thickness as the 2x4 table tops. Cut them to 5 inches wide on the table saw.
- Attach the ends of the board to the table top and top. I used a larger domino here, but you can also use crackers or dowels. Simply cut the holes a little to allow the table to expand and contract.
- The shelves are each 10″ x 12″, so you need to pull out the 4 5-inch shelves and glue them together in two pairs. Cut the length up to 12 inches.
Step 3: Building the Shelving Structure


- I built the shelf studs from the remaining 2x4′. Cut off one of the rounded ends on the table saw or rip it on a jointer like I do. Use the thickness of one of the shelves to attach the table saw fence.
- Tear the 2x4s down. Mine were approximately 1 1/4″.
I had (4) 8 foot sections of 1 1/4″ x 1 1/4″ boards. I taped 4 of these together into a square as shown in the picture above and then cut these on the miter saw to 39 inches. (This matches the height of the iron pipe structure on the opposite side. - Cut the following (6) 1 1/4″ x 1 1/4″ boards to 10 inches long on the miter saw for the deck frame cross braces.
To assemble each side of the deck frame, I set a ruler on my workbench so I would have a 90-degree surface to refer to. - I cut two spacer blocks to 12 1/2″ using material larger than 1 1/4″ x 1 1/4″.
Set in spacer blocks on each side, and then rest a 10-inch cross on top. Attach by drilling a pilot hole, and then cut in a 1/2″ hole that will be plugged later to hide the screws. Cross bracing is attached with 2-inch screws. Repeat using the spacer blocks for the other two cross braces. I will make two of these sides of the shelf structure. - Place the shelves in place on the two bottom cross braces to join the two sides together as shown in the image. The top cross supports are to support the top shelf of the board. Position the shelves in the same way as the cross braces.
- Cap all holes with 1/2″ dowels to hide the screws.
- You will now need to cut 24 shelf support diagonals using more of the 1 1/4″ x 1 1/4″ stock you made. This is another piece that I have not measured. I just cut to what I thought looked good, and then set up a 45 degree stop block to get 24 of these out faster. I think mine ended up around 5 inches long. Use a miter saw set at 45 degrees to make these cuts.
Step 4: Assemble the iron pipe and clean


In the previous step you built the shelf structure, but to know the exact height you need to assemble the 1 inch iron pipe that makes the left side shelf support and the lighting structure. My goal was for the 5 pieces of tubing that make up the left side support to be equal to 38 3/4″ when all together. They ended up being 39 inches exactly, but this is close enough. As long as you cut the shelf structure at the same height
You will need the following 1-inch iron pipe and fittings: one 6″ pipe, one approximately 28″ pipe, a “T” connector, and two floor flanges.
You will also need a 1/2″ iron pipe for the stretcher. I used 1/2″ because the flanges are 3″ to match the width of the bases. You need the following: 2 floor flanges, a 36″ pipe.
Use acetone and an abrasive pad to clean the pipe for a smooth finish. Assemble both pipe sections as shown, and then add a couple of coats of spray lacquer. This will prevent rust and provide a smooth, clean surface.
Step 5: Final Assembly


We will finish soon!
- Do dry fitting of the shelves and iron pipe structure.
- Center the iron pipe flange on the top shelf.
- Mark all hole locations with a pencil. Drill a hole in the table that will be covered by the pipe flange. This will allow the light cord to be threaded through the tubing and out the underside of the table.
- Mark the center of the inside of both table bases and secure the stretcher with 4 screws on each side.
- Place the table top on the base, and mark where the hole you drilled for the cable meets the table base.
- Chiseled a hole that allows the light cord to exit through the back of the table base.
- Center the table top on the base and secure it with the brackets of your choice. I made my own using dominoes and wooden blocks.
- Pass the light wire through the bottom of the iron pipe and pull it out. I used an 8 foot cable here. Tape the end of the cable to temporarily hold it in place to the T fitting while you connect the tubing to the table top.
- Attach the pipe frame to the table top with (4) 1 1/4″ screws.
Wire in the light socket. I used a simple assembly where I just had to screw two cables together and join them together. Simply read the instructions carefully for the kit you choose. - Mix up some 5 minute epoxy and use it to mount the light socket to the T fixture. I used painter's tape to hold it in place while the epoxy dried.
- Attach the platform structure. Place it in place and mark the location of the 4 legs. Next, drill a hole in the top of the table for each of the 4 legs. Put the shelf frame in place and fix it with 4 screws from the bottom.
- Place the top shelf in place. Attach the left side iron pipe flange with (4) 1 1/4″ screws. Attach the shelf frame with 4 screws drilling from the top side.
Add a light bulb and you're done!
So, there's a lot to do in this project, but every step is accessible and easy for wood newbies. Thanks for taking a look. Greetings
Get more information at perfectionidea.com and on our Facebook for more How to Build a Super Rustic and Modern Desk at the same time.
Popular Content
How to make a rocket stove for outdoors
Cardboard Drawers Lined with Jeans
Change the facade of your home with simple steps!
Latest Articles
How to make a refrigerator out of insulating material: Practical step-by-step guide
How to make a Kilim for the Home: Complete Step by Step Guide
How to protect ourselves from accidents in our workplace: Complete prevention and safety guide
Related Content
Mobile Shelf foryour Woodworking Tools!
The Best Bedroom Design Ideas
How to Make a Heng Lamp
Building a Train Bed for Kids!
Creative Home Decor Ideas to Transform Every Space
Refreshing your home starts with smart design choices that combine comfort, personality, and functionality. Whether you want to modernize a small apartment, upgrade outdoor areas, or create cozy rustic interiors, these trending ideas can completely change the atmosphere of your space.
Outdoor Spaces That Increase Style and Functionality
Outdoor living continues to dominate modern home trends. Homeowners are increasingly investing in practical entertainment zones inspired by these BBQ shed ideas, which create the perfect setup for gatherings and weekend cooking sessions.
First impressions also matter when designing exteriors. Elegant farm entrance gates design ideas help properties stand out while improving privacy and curb appeal.
Compact living solutions are also gaining popularity. These inspiring 16x40 shed house interior design ideas show how smaller spaces can still feel luxurious and functional.
To enhance patios and entryways, homeowners are adding stylish protection with these creative porch awning exterior DIY ideas that blend aesthetics with practicality.

Rustic and Cozy Interior Design Trends
Warm and natural interiors remain timeless. These charming rustic decor ideas combine wood textures, vintage accents, and earthy tones to create welcoming spaces.
Bedrooms are becoming more personalized with curated wall arrangements. Many homeowners use these stylish picture wall ideas for bedroom spaces to display memories and artwork creatively.
Textured wall treatments are another major trend. Installing a board and batten wall adds architectural character while keeping interiors elegant and modern.
Similarly, bold accent wall ideas can instantly transform plain rooms into eye-catching focal points without requiring a full renovation.
Smart Kitchen and Organization Inspiration
Functional kitchens are essential for modern homes. These practical kitchen wall cabinet ideas maximize storage while maintaining a clean and stylish appearance.
Organization also starts at the entrance. Well-designed mud room ideas help families keep shoes, coats, and daily essentials neatly arranged.
Colorful and Personalized Home Styling
Vibrant interiors are becoming increasingly popular thanks to playful dopamine decor ideas that use bright colors and joyful accessories to improve mood and energy.
Gallery walls also continue to evolve as a major decorative feature. These trendy gallery wall inspiration ideas offer creative ways to combine prints, photos, and statement art.
Young renters and new homeowners are especially embracing these stylish first apartment aesthetic ideas to create sophisticated interiors on a budget.
Finally, selecting the right shades can dramatically influence any room’s atmosphere. These modern trendy color ideas help homeowners choose palettes that feel fresh, elegant, and timeless.
Final Thoughts
From rustic charm and colorful interiors to outdoor entertaining areas and functional storage solutions, today’s home decor trends focus on creating spaces that feel both beautiful and livable. By combining smart layouts, modern textures, and personalized decorative elements, any home can become more stylish, comfortable, and inspiring.


