
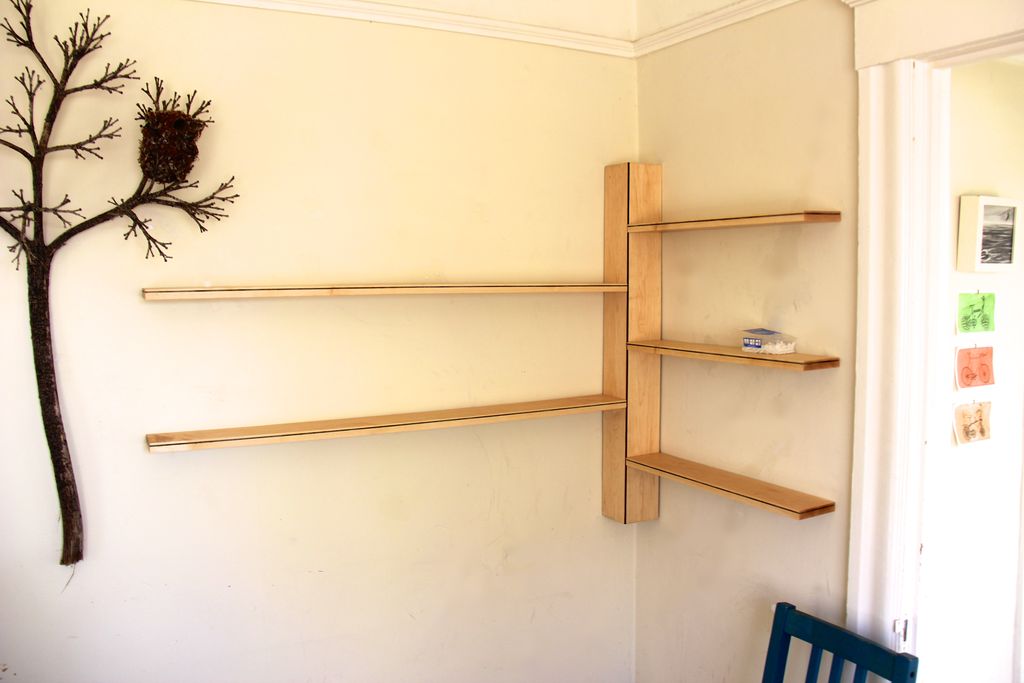
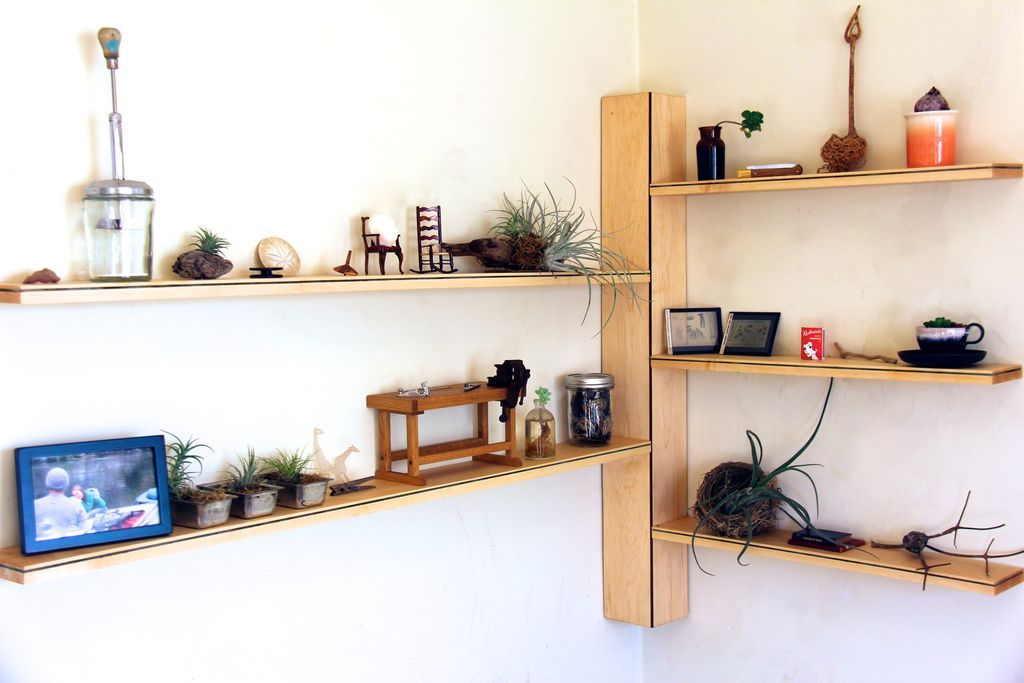
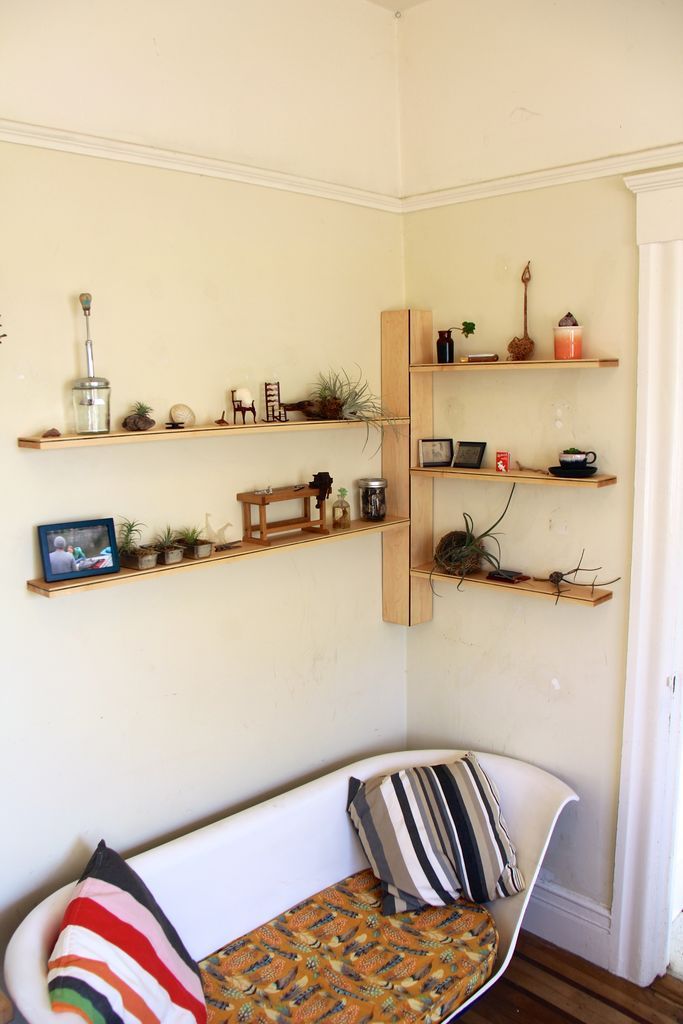
Building corner shelves can help you save space in your bedroom and can be hung on two adjacent walls.
The shelves are medium duty as they are supported by minimal amounts of blind hardware to give the appearance of being truly floating cantilever shelves.

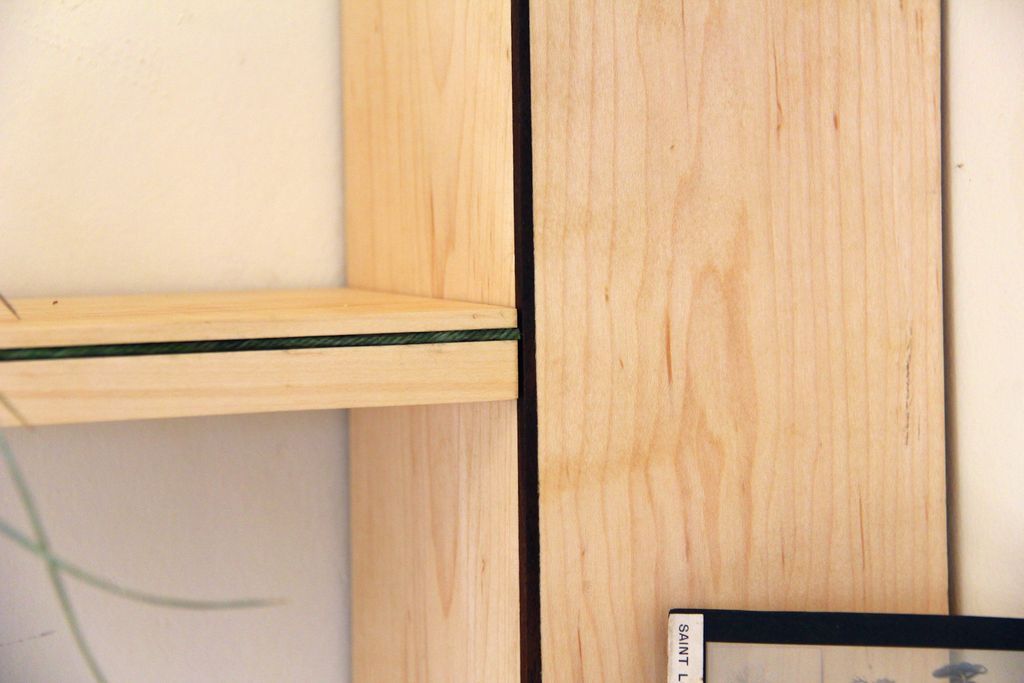
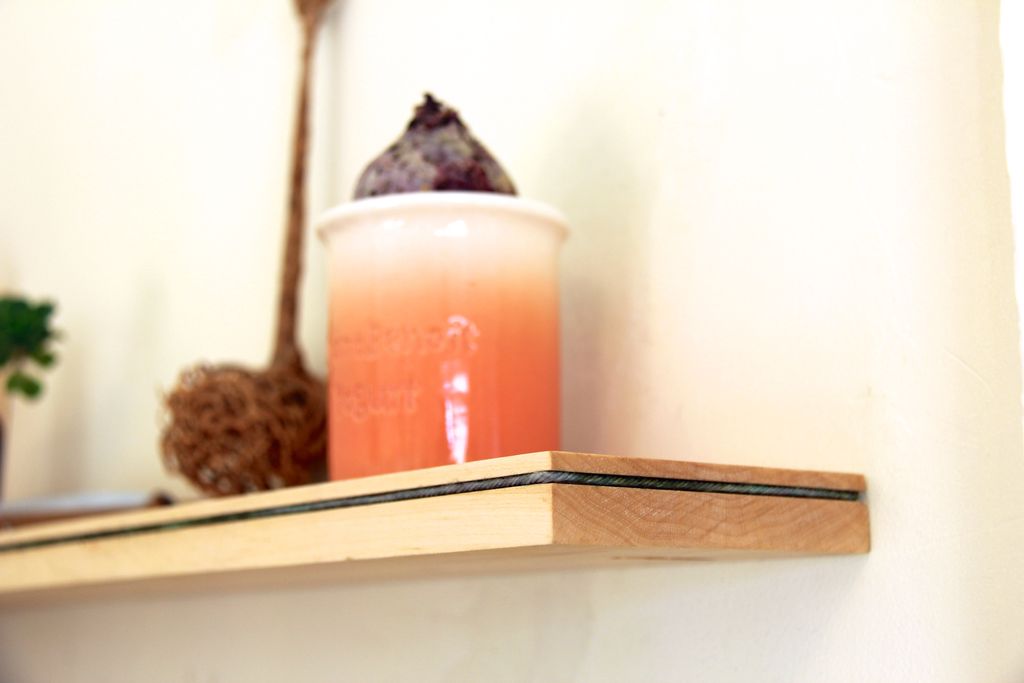
The shelves are made of maple and have two different types of inlays.
The first inlay is made of walnut and is a corner inlay.
The second inlay is actually made of knitting thread.
It just so happens that many threads fit perfectly inside the 1/8″ saw blade of a table saw blade.
The thread is easy to embed, is flexible around corners and curves, and is unlimited in terms of color and texture. This was something new that I wanted to try and share.
#1: Materials
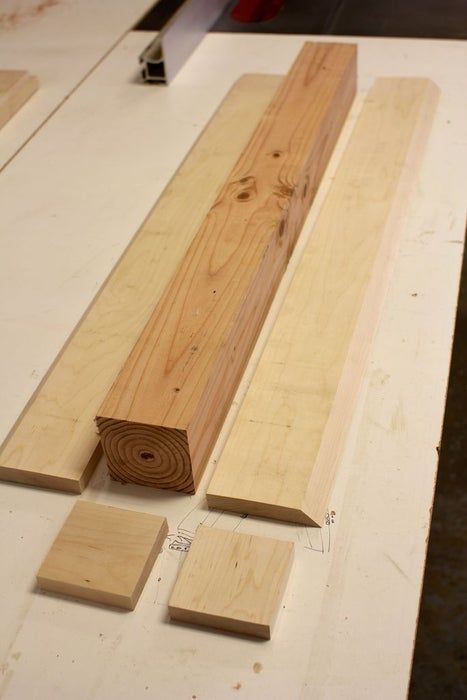
Materials to build corner shelves:
- 4″x 4″ Douglas Fir Wood Post
- 3/4″ maple boards
- Lock hangers
- Plaster plugs
- Walnut strip
- Nice thread
- Wood glue
- White glue
- Danish oil
- Nails
#2: Maple pole
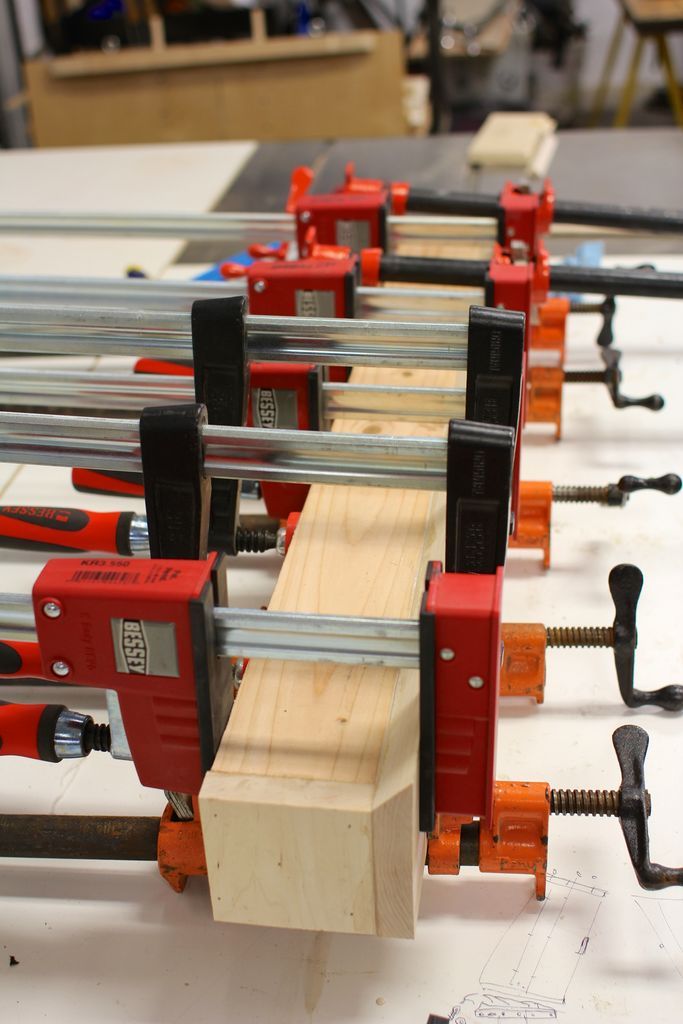
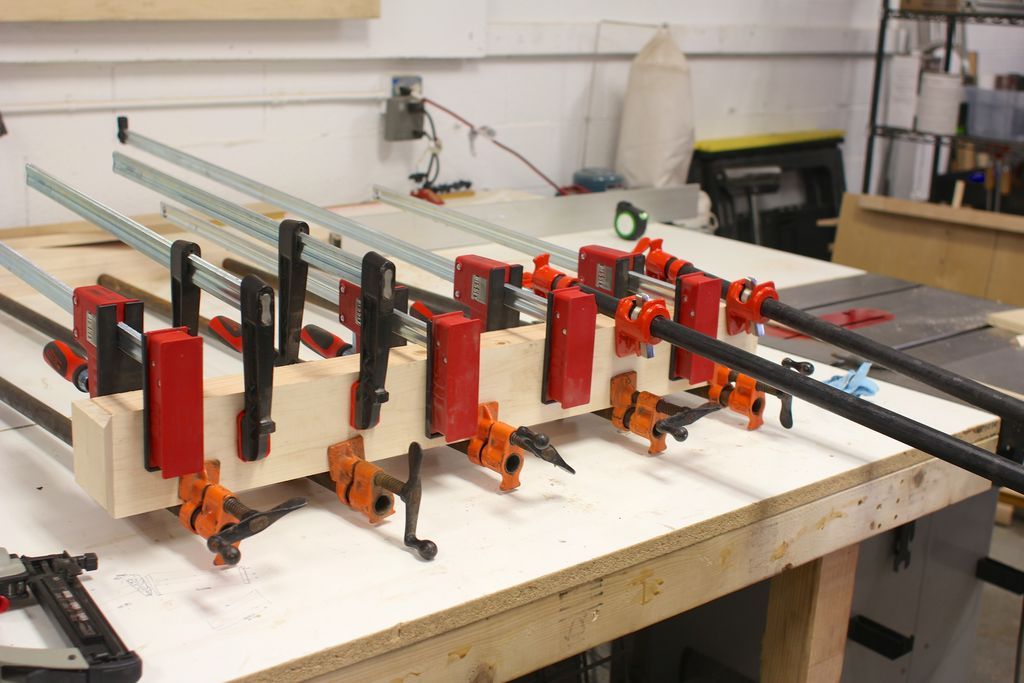
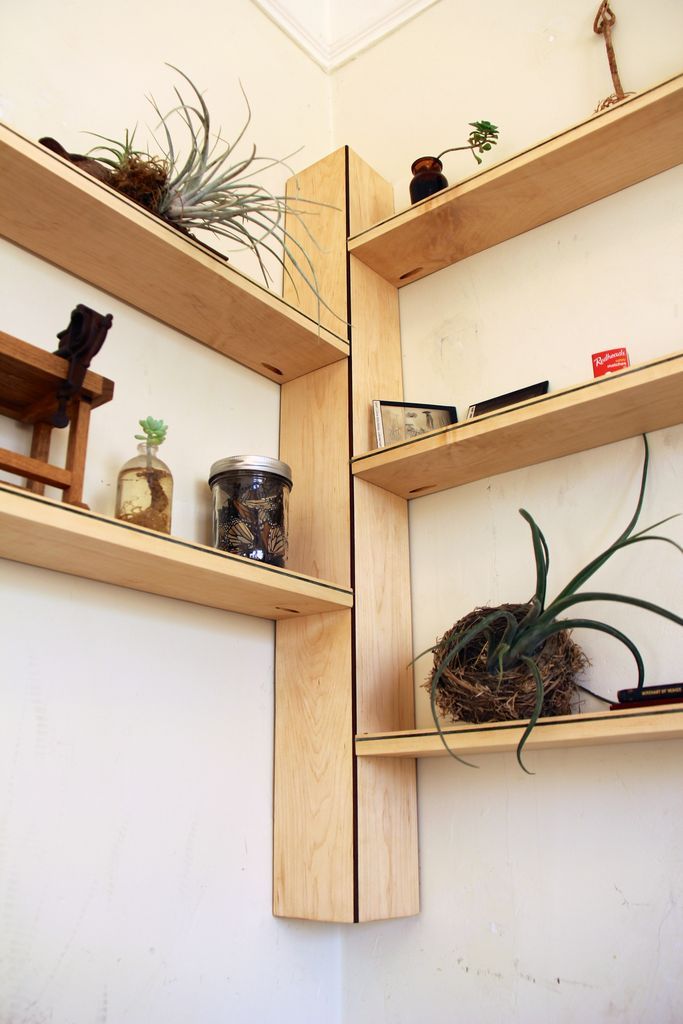
- In the center of these shelves is a 4x4 post that has been covered with 3/4″ maple boards to make it look like one solid piece of maple. Getting a solid maple pole of this dimension would be significantly more expensive, and be honest, a waste of good maple.
- Cut two lengths of maple the length of your 4x4 and mitigate the adjoining edge.
- Apply glue to the back of the two boards, glue and fasten with nails to nail them into position.
- Cut two square caps that fit the top and bottom of the post, glue and secure those in place as well.
- First I glued one maple panel, then the other, since attaching two pieces of maple simultaneously seemed like a challenge.
- The 4×4 needs only two of its sides to be covered with maple, the other two sides are against the wall.
#3: Build sleigh
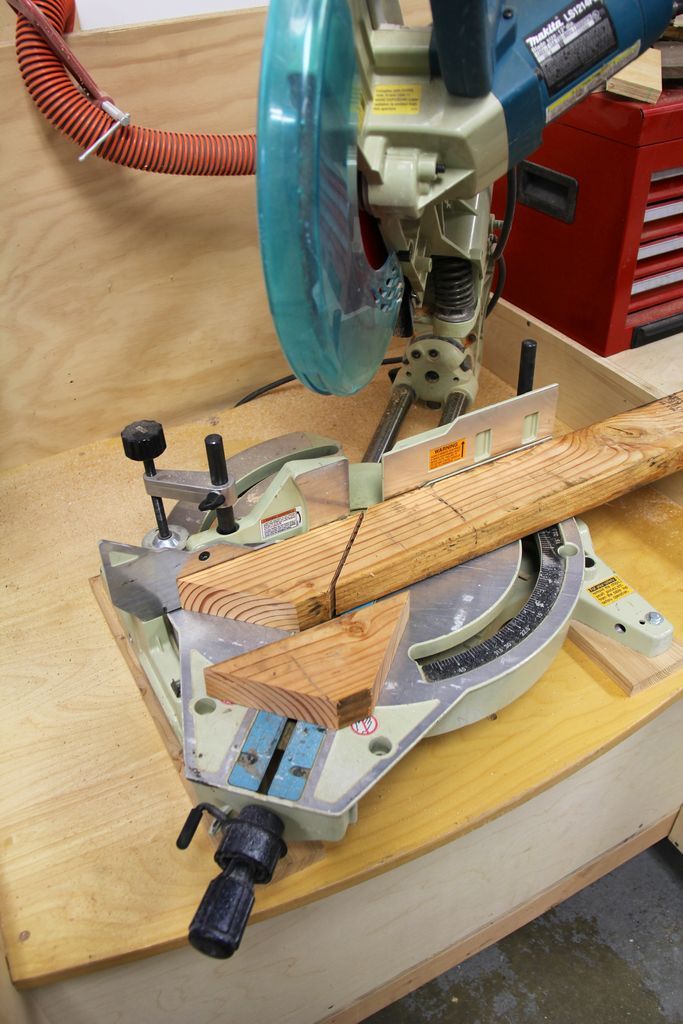
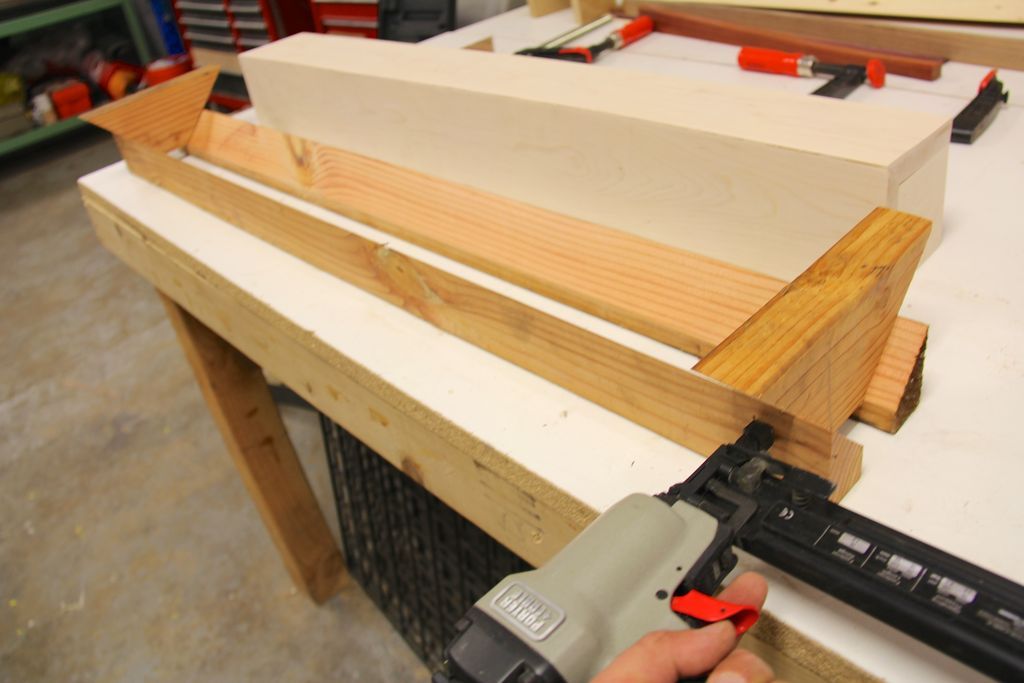
- To create the cutout for the inlay on the maple corner post, I first had to build a sled that would hold the maple post in the correct position.
- Cut a piece of scrap wood in half on the table saw with the blade set at 45 degrees. The length of the scrap wood should be 4″ longer than the corner post.
- Head to the saw and cut two 2x4 triangular pieces (pictured above) with the saw also at 45 degrees.
- Use a gun to assemble the sled as shown in the image above.
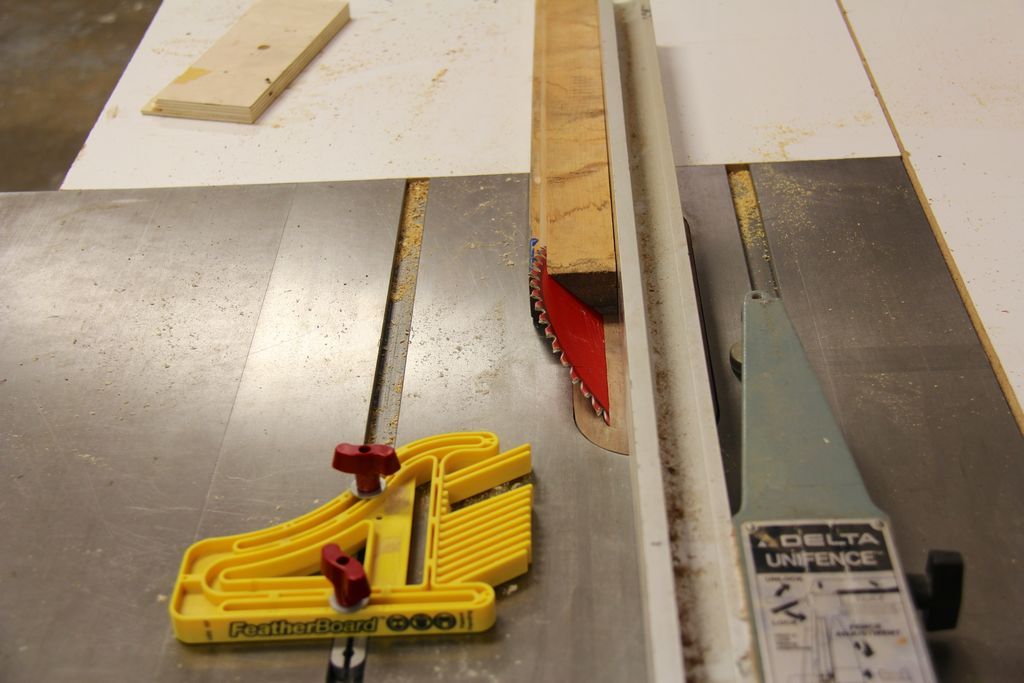
#4: Cut the slot to embed
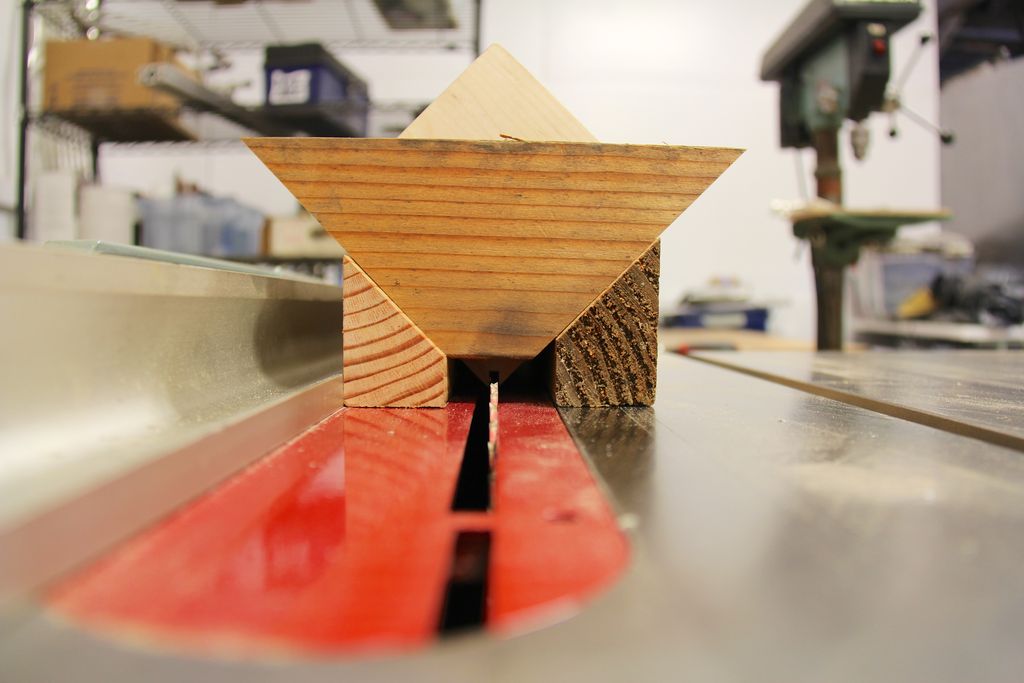
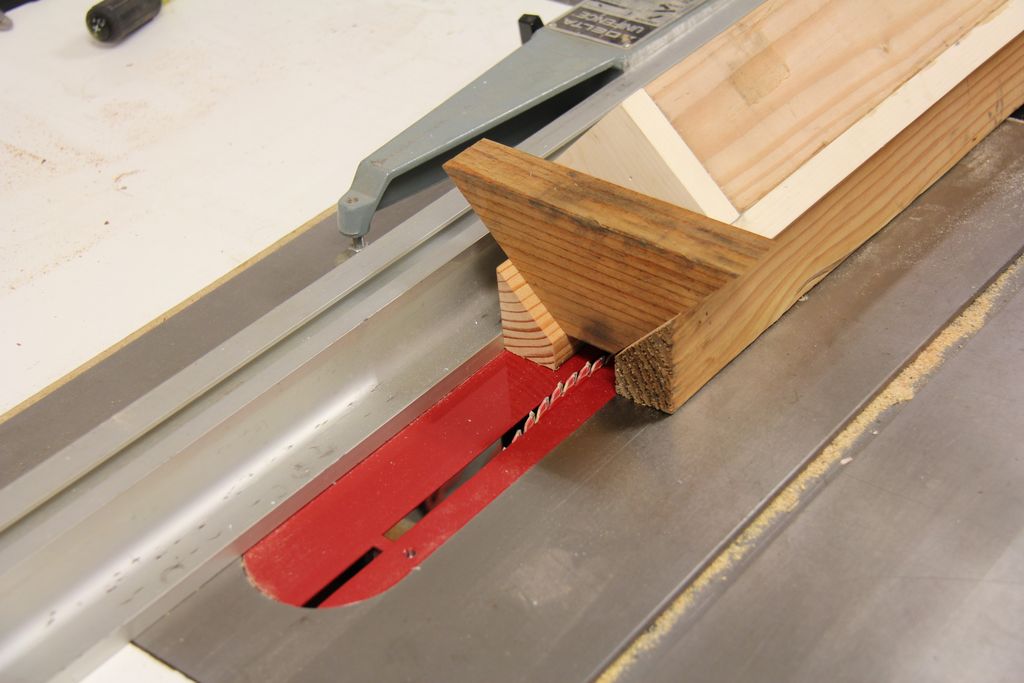
- The sled should hold the corner post exactly on its edge on the table saw blade.
- Push in the corner post and slide across the table saw cutting a 1/8″ wide grove that extends vertically the entire length of the post.
- Cutting depth is not very important, I cut mine to 1/4″ or less.
Note: I had to turn my table saw fence 90 degrees to its "low" position to clear the top of the sled, which extends further to the side than the base of the sled. If your table saw fence doesn't have a "low" setting, simply cut away these protruding pieces when you design your sled.
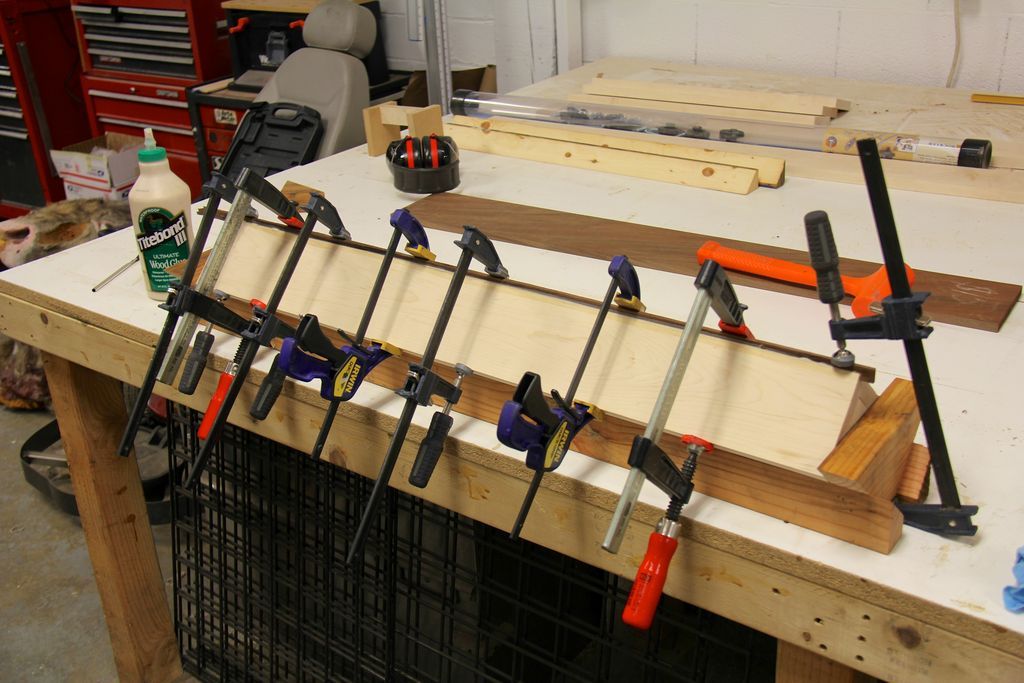
#5: Create inlays and glue

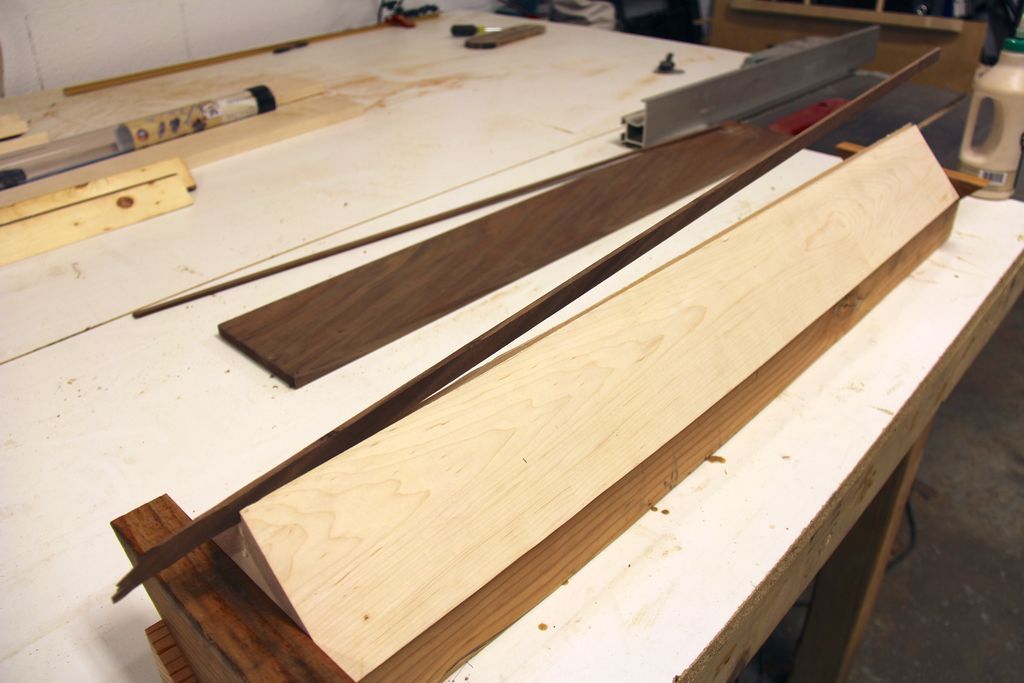
- I sent a long strip of scrap walnut through the planer several times to knead it to the correct thickness so it would fit perfectly into the grove I just cut on the table saw.
- The height of the embed doesn't matter as much as the width. Any excess material will be trimmed in the following steps.
- Take the inlay and tap it into position and glue it into place.
#6: Plane and Cutout

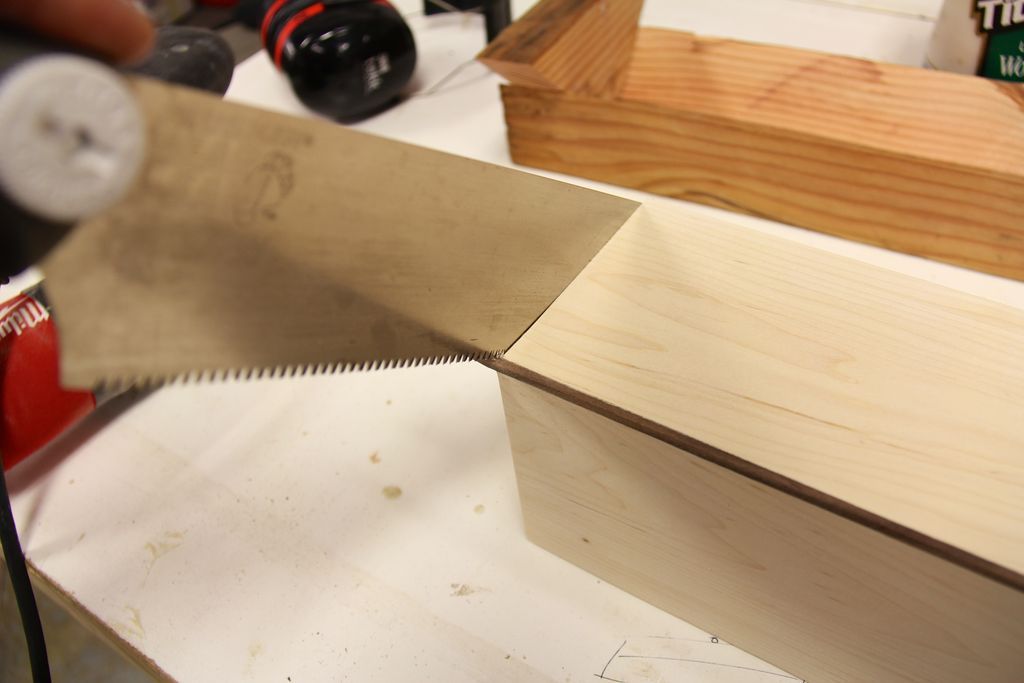
- While there are many different ways to trim the size of the inlay, I decided to send the entire post through the planer to flatten everything out and make the inlay perfectly flush with the adjacent maple boards.
- A hand plane would be a good tool to use here, much more appropriate and suited to the task, but unfortunately I don't have a hand plane, so I made do with what I have.
- Send the post through the planer on one side, then rotate it 90 degrees and send it through a little further to size the inlay.
- I trimmed the inlay to a minimum using a flush saw.
#7: Build a drilling guide

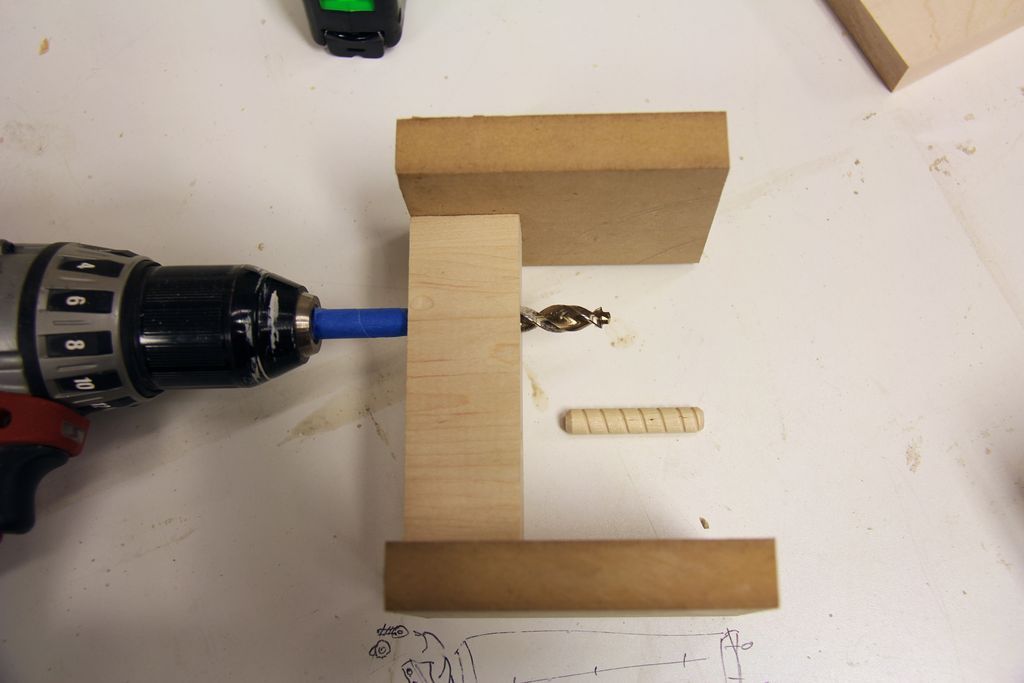
- The shelves are attached to the corner post using wooden dowels. The holes that hold the pins must be drilled in the exact same position and spacing in the shelves as in the post.
- That means making another jig to help me consistently drill the holes in the 5 shelves and the 5 locations where they meet the post.
- To build the jig, cut a piece of maple that is the same width as your post and drill two holes that are the same diameter as your wooden pegs.
- Drill these holes in the drill press to make sure they are straight and perpendicular to the piece of wood.
- Glue two pieces of MDF to the sides of this piece of maple which will hold it in place on the shelves and corner post.
- Its size does not matter.
- Mark the drill bit used to drill the holes for the wood dowels with tape that correctly shows the depth to which it should be inserted into the template so that you end up with holes that are not too deep for the dowels.
- I didn't put my two holes exactly in the middle of my shelves at their x, or y locations.
- So, I made sure to mark the front of my template with an arrow so I could line it up with the shelves and place it the right way making sure not to tip anything over.
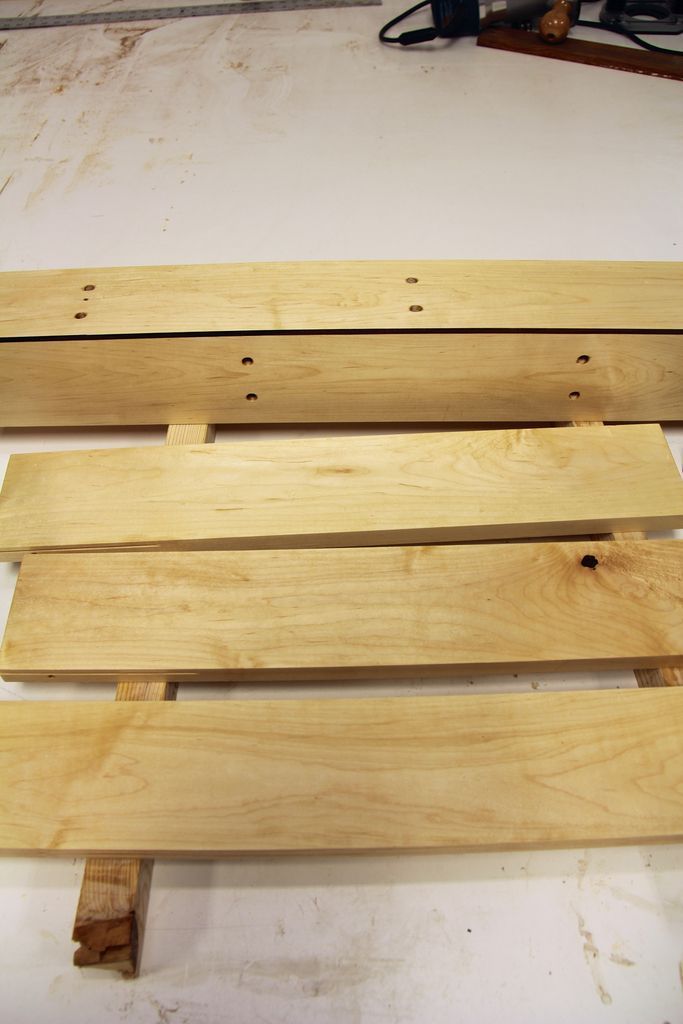
#8: Drilling holes for the pins

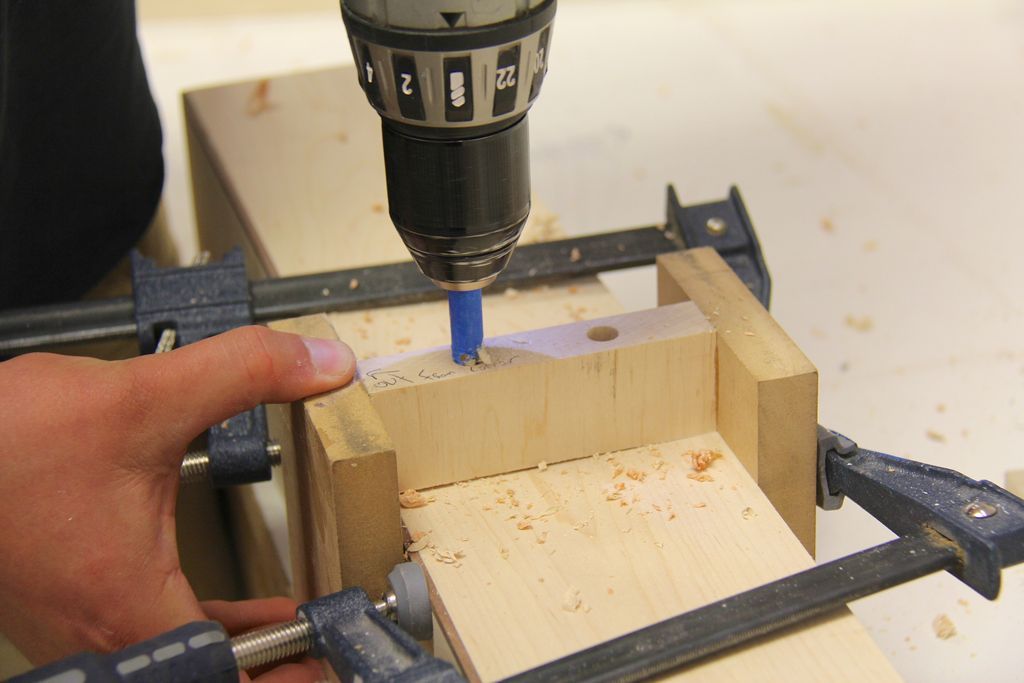
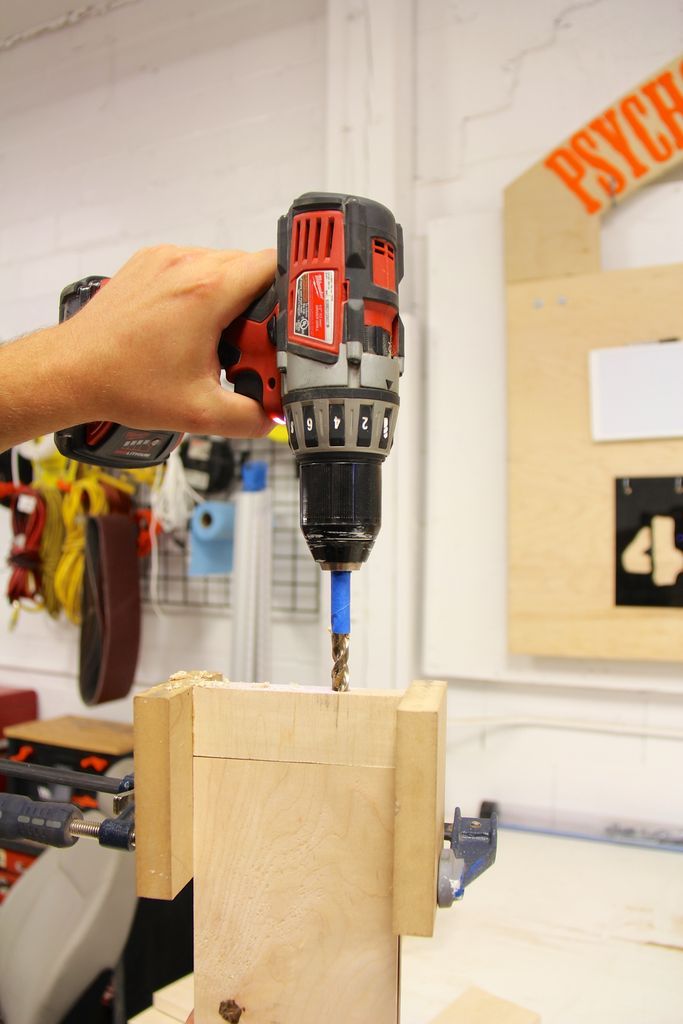
- Mark the places where you want the shelves to go (I space the shelves evenly along the post in an alternating pattern with two long shelves on one side and 3 shorter shelves on the other) and place the template in position and drill the holes that will accept the wooden dowels.
- Test a few pegs to make sure everything lines up.
#9: Drill the pocket holes
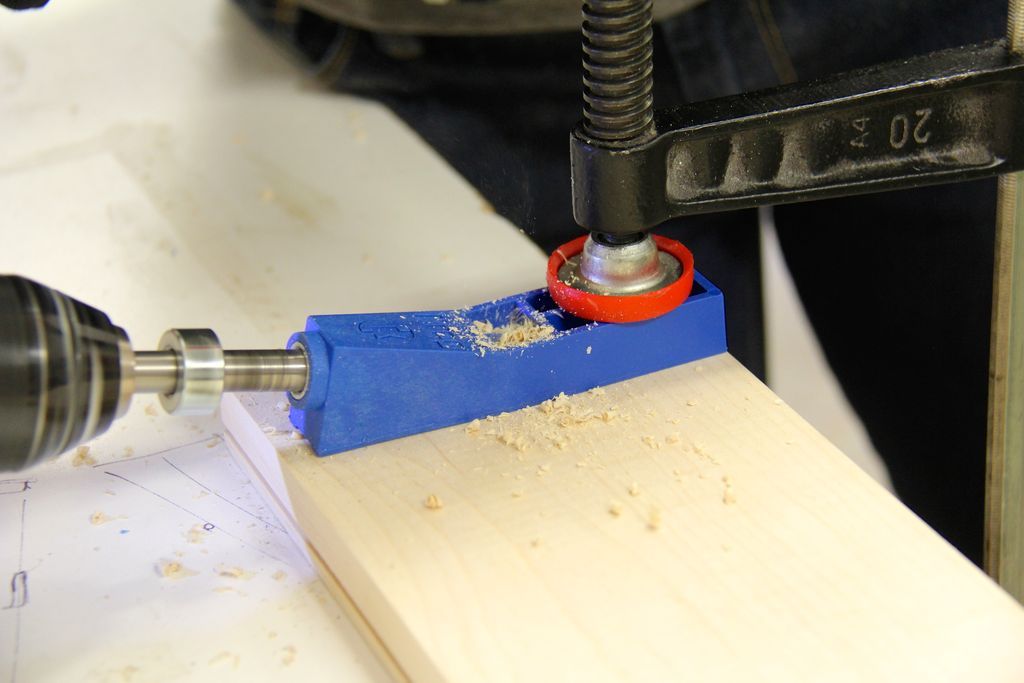
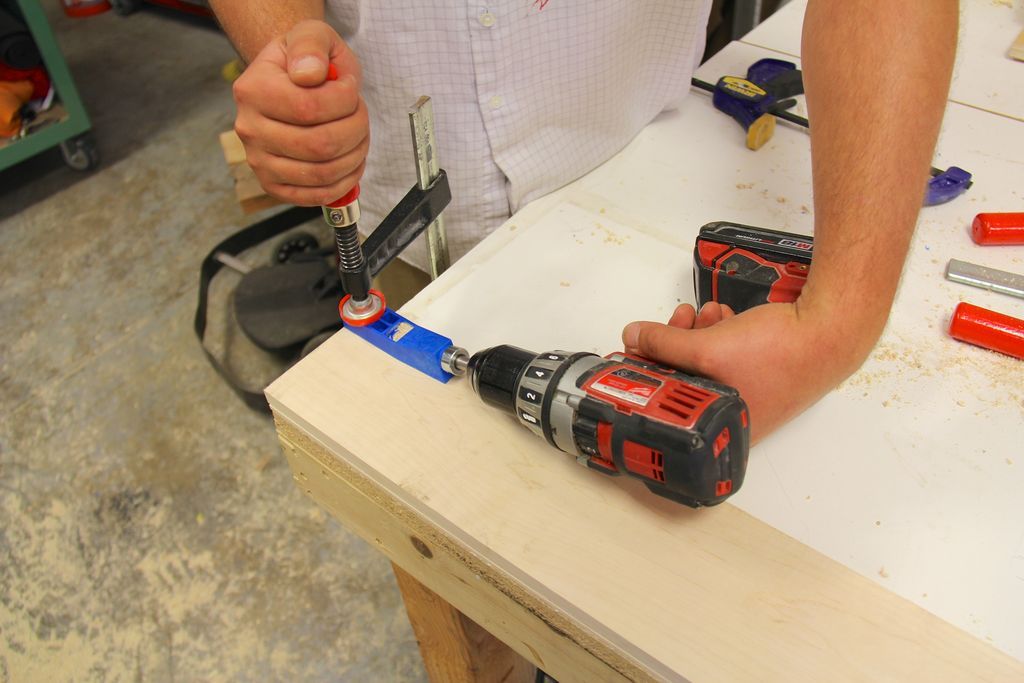
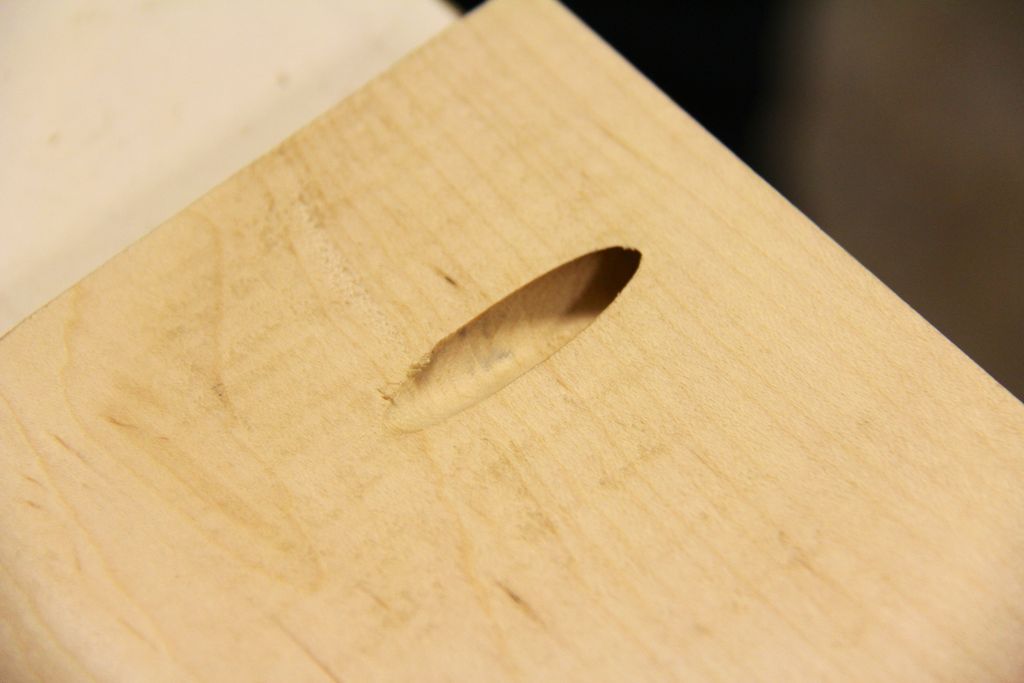
- While one end of the shelf is held in place with the pins and corner post I just made, the other cantilevered side is held in place using a pocket hole created with a Kreg Pocket Drill Guide.
- These pocket holes will receive screws that will be placed into plastic anchors that will thenor I will place on the plaster wall.
- Drill a pocket hole in the end of each shelf, and another pocket hole facing the corner post that can be used to lock the pin connection in place.
#10: Cut the Thread

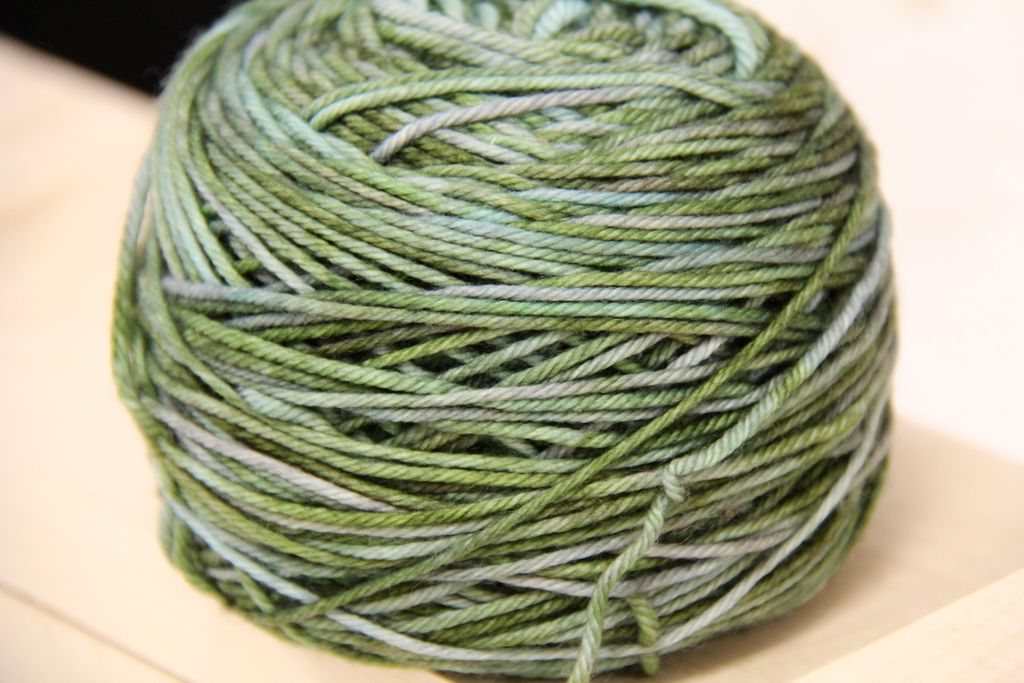
- Cut a 1/8″ grove with the slot of the table saw blade along the front face, with the side facing away from the shelves and even a few inches along the back of the shelf facing the wall so that the end of the thread has a place to finish.
- The width of the table saw blade perfectly fits most normal gauge thread types.
- I chose a multi-colored green yarn that I thought went really well with the maple and walnut.
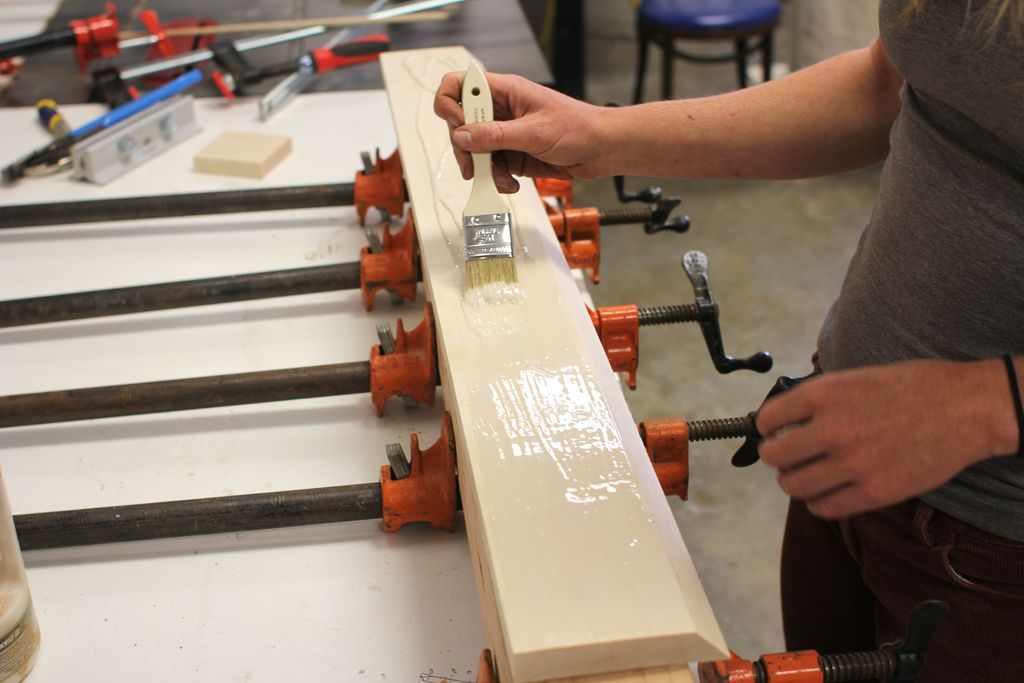
#11: Glue on Thread

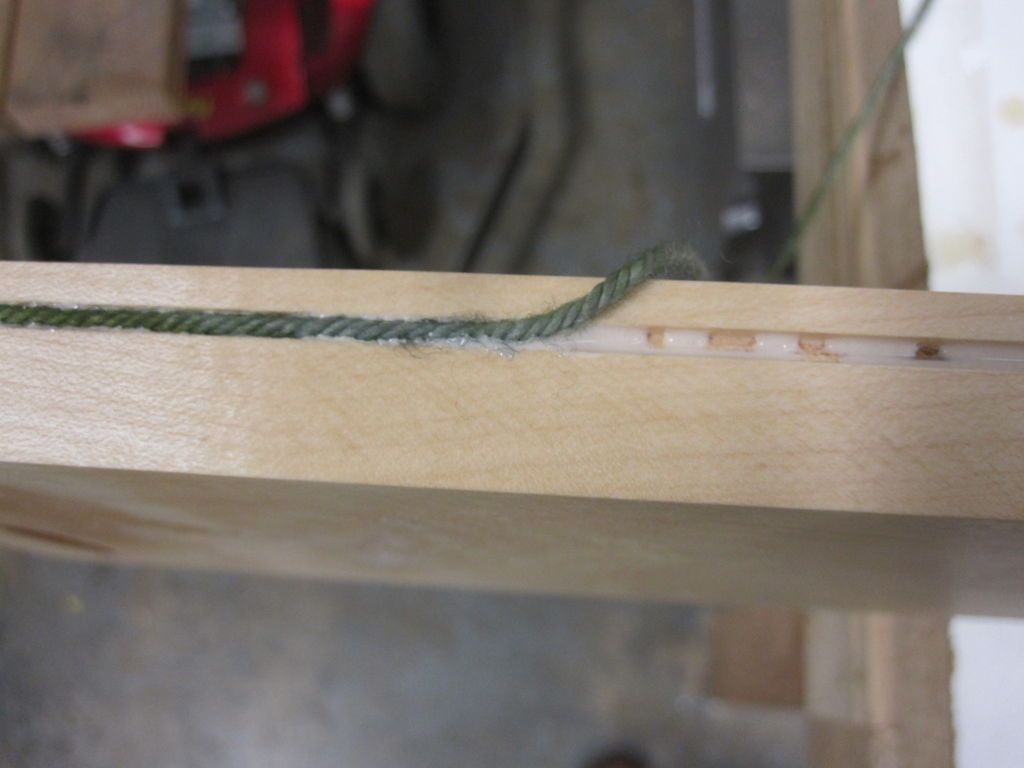
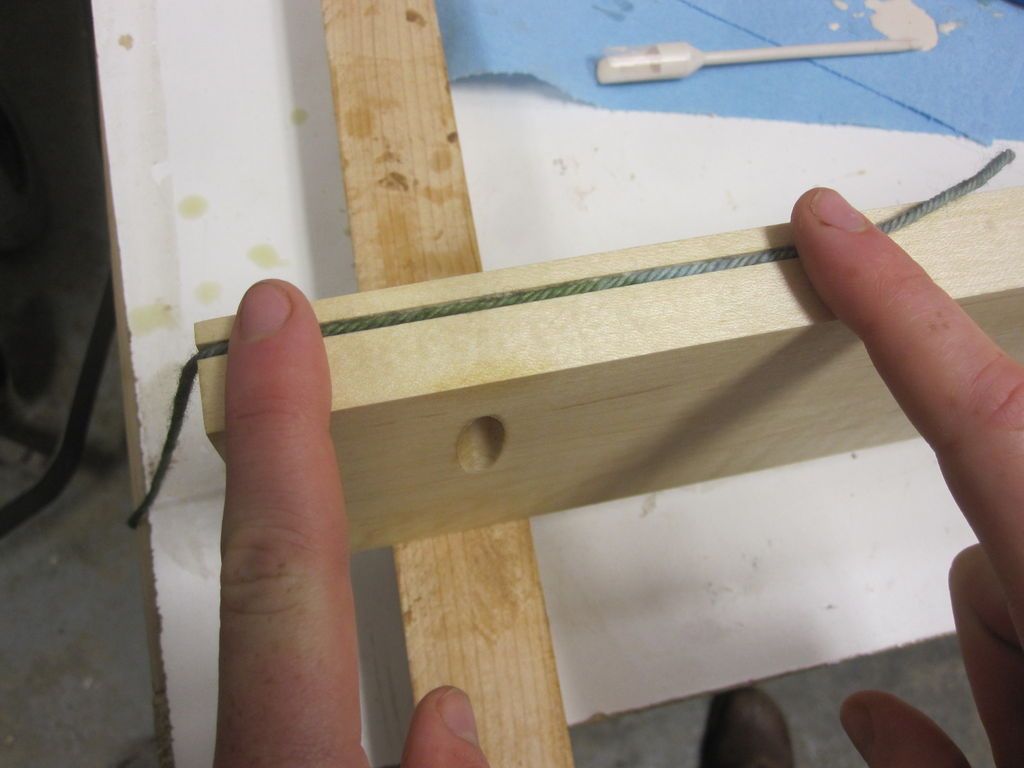
- Place the thread on the cut grove next to the table saw and place small dots of white glue along the path to hold it in place.
- Wrap the thread around the corner tightly and end it in the grove at the back of the shelf.
#12: Route for future illumination

- I placed a grove on the back of the corner post with the expectation that one day after hanging it on the wall I would want to add some type of lighting in that corner of the room.
- The grove will allow the light cable to pass behind the shelf.
- Grab a 1/2″ or 3/4″ straight router bit, position the router guide, and remove the back corner of the post in several passes.
#13: Assembly of hanging hardware
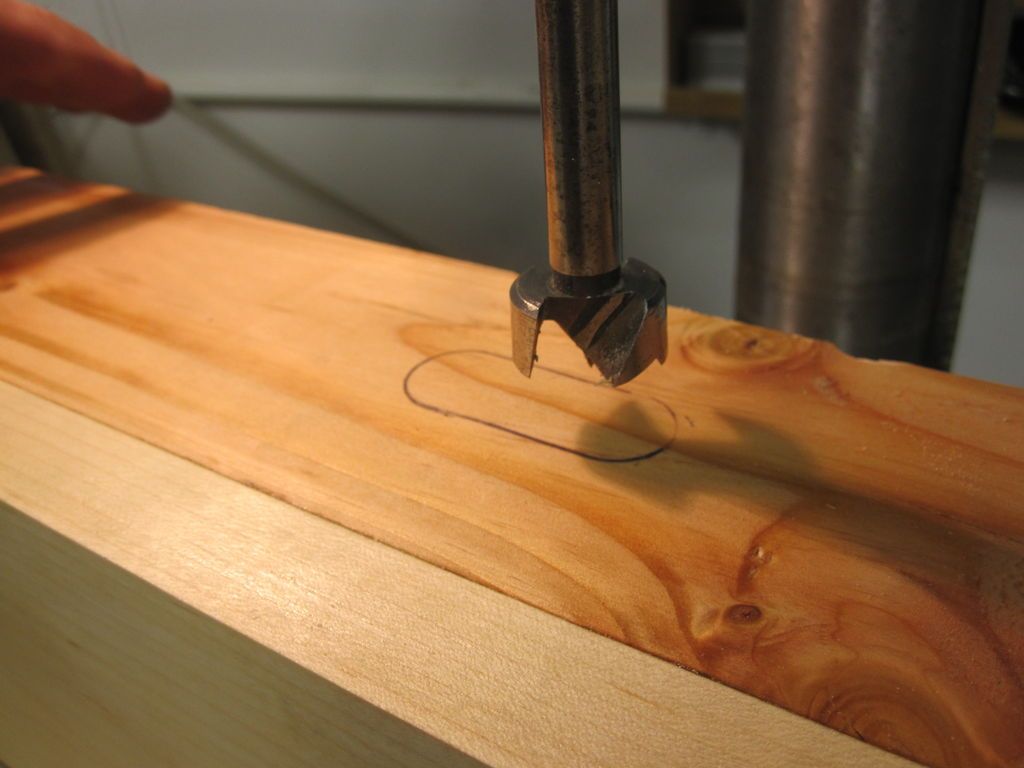
- I mounted two keyhole hooks on the adjacent corner sides of the post.
- These keyhole hooks are blind mounting hardware that allows the post to slide into a screw head that goes into the wall that will hold it in place.
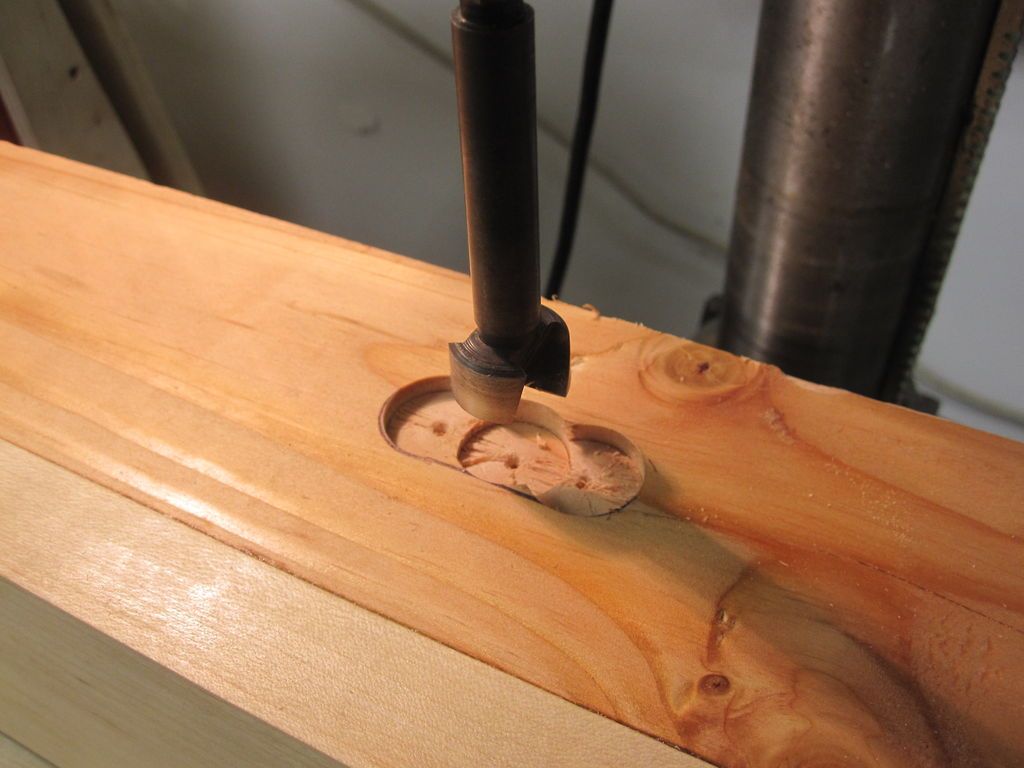
- Lay out the keyhole hanger, load a front bit into the drill press, set the depth so as not to remove too much material, and drill holes to remove wood inside the pencil line.
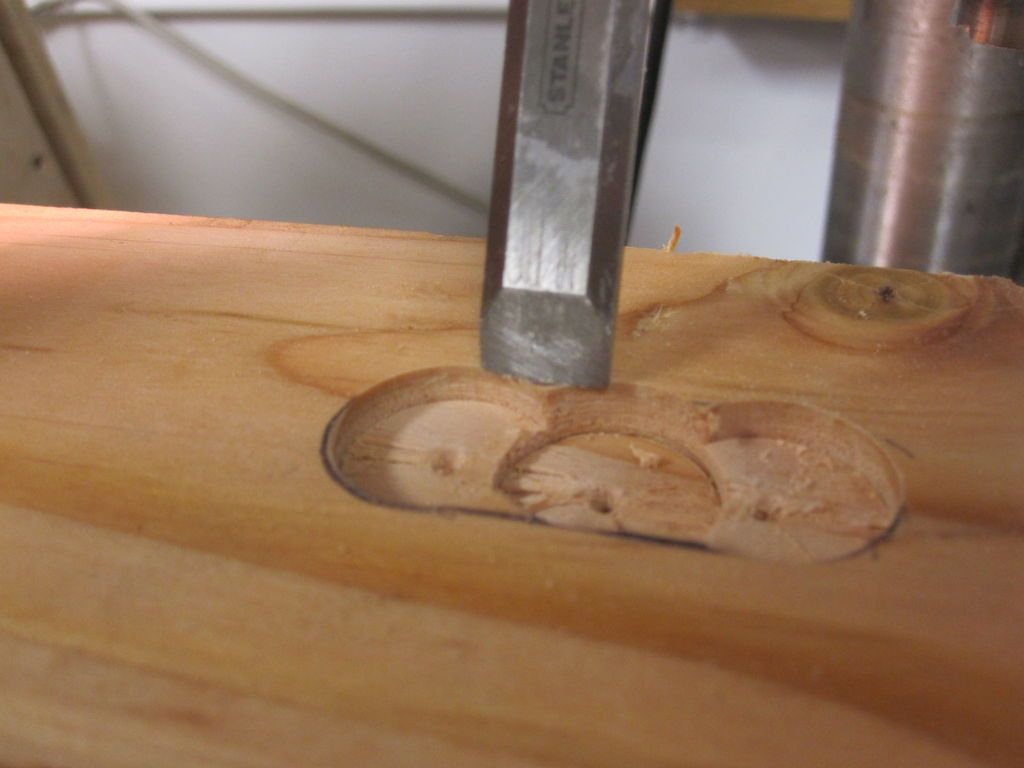
- I cleaned things up with a chisel and mounted the lock hook.
#14: Sand
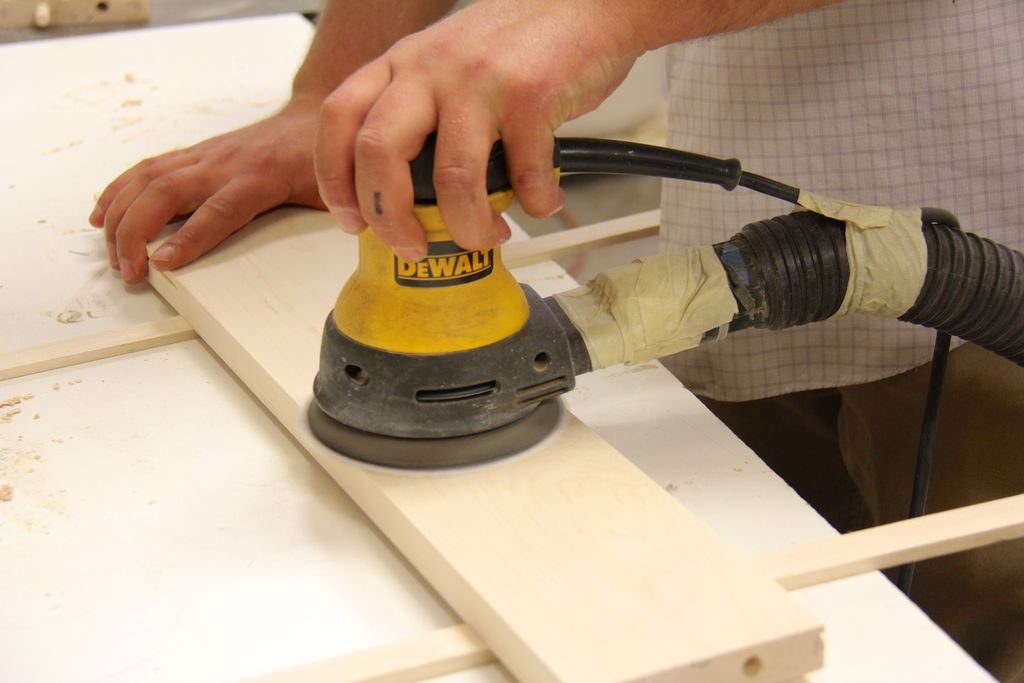

- Sand all surfaces with 120 then 220 grit sanding discs and a random orbital sander.
#15: Apply a finish

- Apply a finish of your choice. We're using Danish oil on this project because it's a simple finishing wipe that will bring out the grain of the maple and walnut without making things too bitter.
#16: Install – Corner Post

- Place the location of the keyhole hangers on the wall, carefully measuring their location with a tape measure or calipers, drill the anchors into the wall and secure the corner post.
#17: Install – Shelf Pins
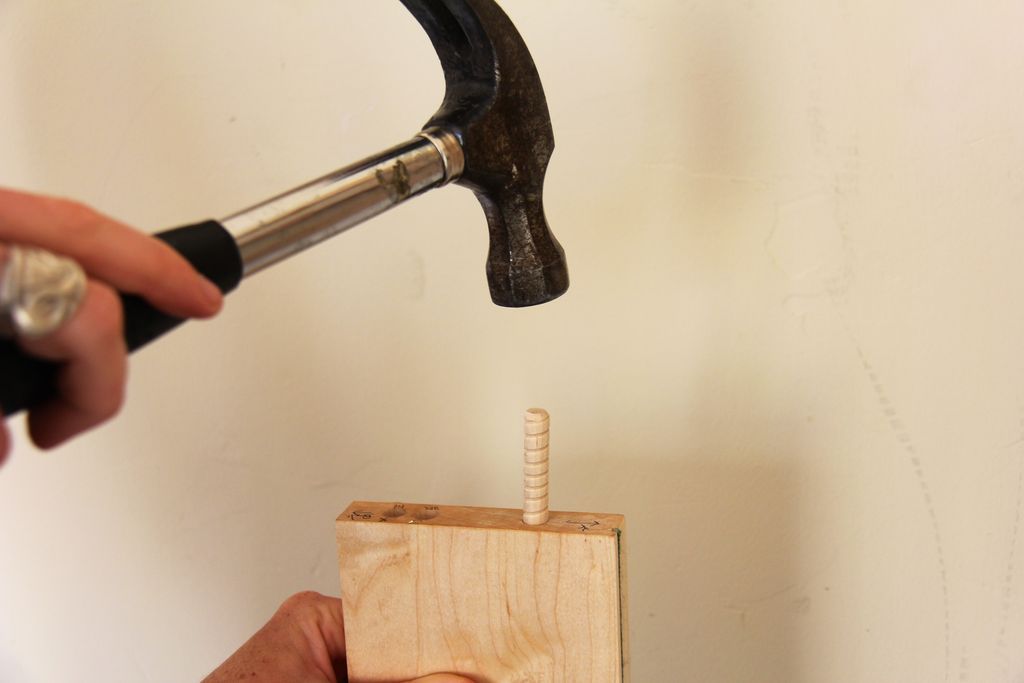
- Place the pegs into position on the shelf and tap lightlyAttach the shelf to the corner post.
- Be careful not to let the unsupported end of the shelf hang down and put undue pressure on the pins.
- Getting someone to help you with this installation process helps a lot.
#18: Install – Level, mark and drill an anchor hole
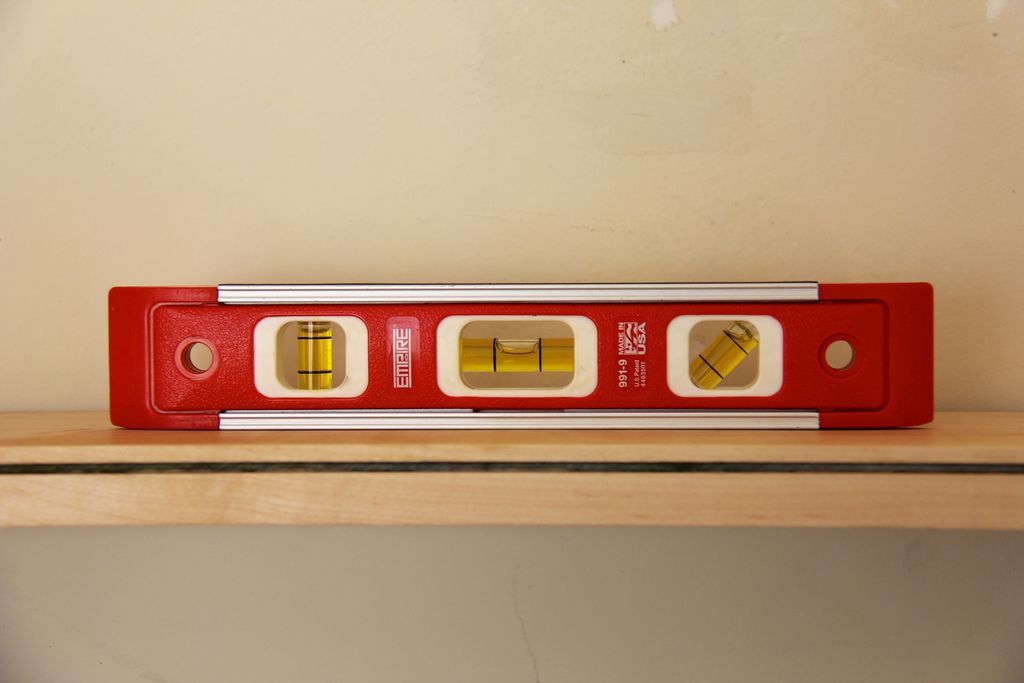
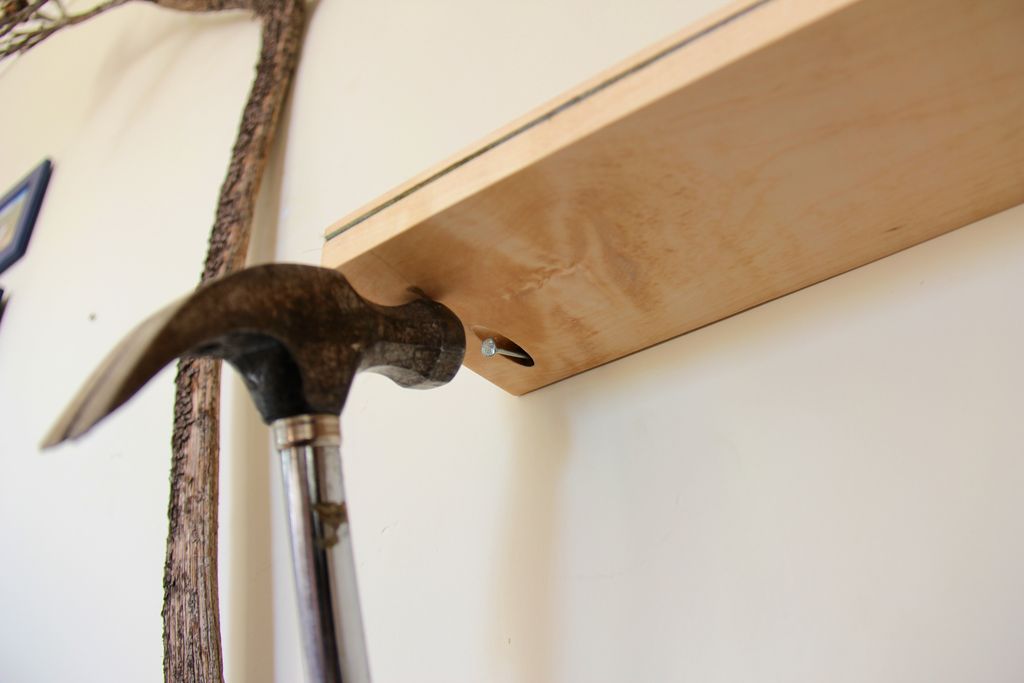
- Make sure the shelf is level. Once that's done, mark a spot on the wall through the pocket hole at the end of the shelf.
- A really thin pencil would work for this, but I used a hammer and nail and lightly tapped a small dent in the wall where the anchor should go.
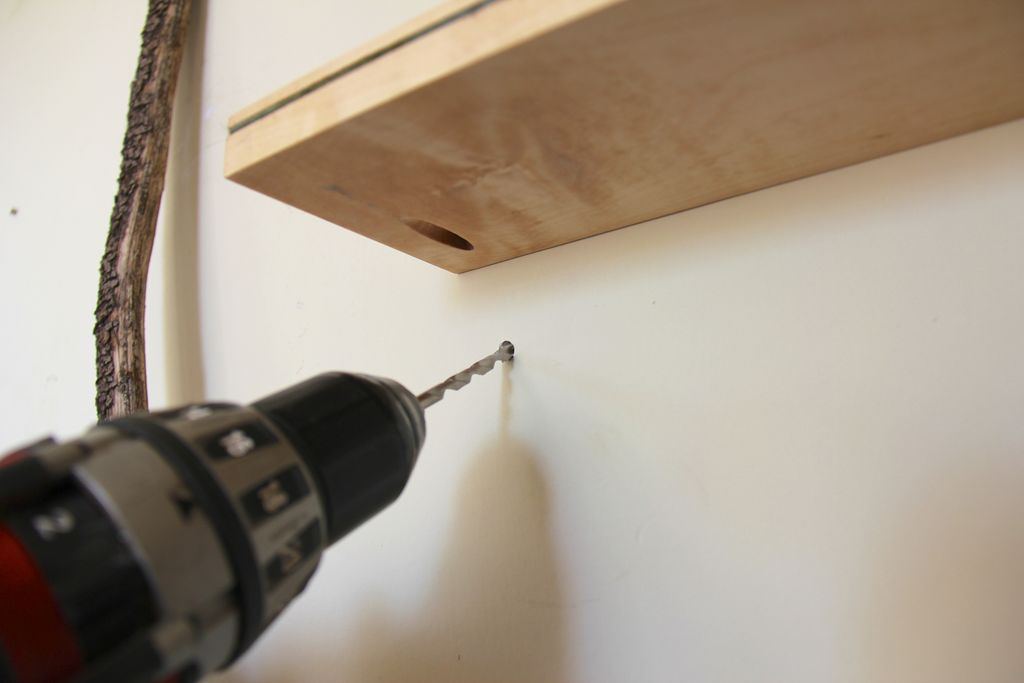
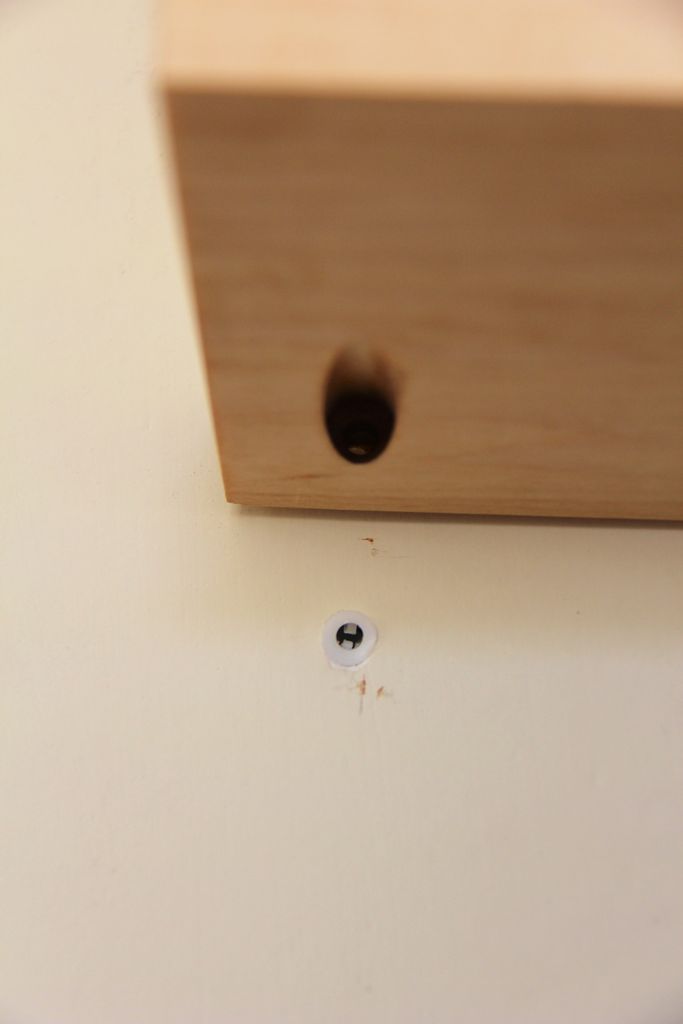
- Remove the shelf and drill a hole in the drywall to attach the plastic anchor.
- Drill the hole in the wall at a slight angle to simulate the angle of the bag hole and the screw you will soon accept.
Step 19: Install – Screw to post and wall
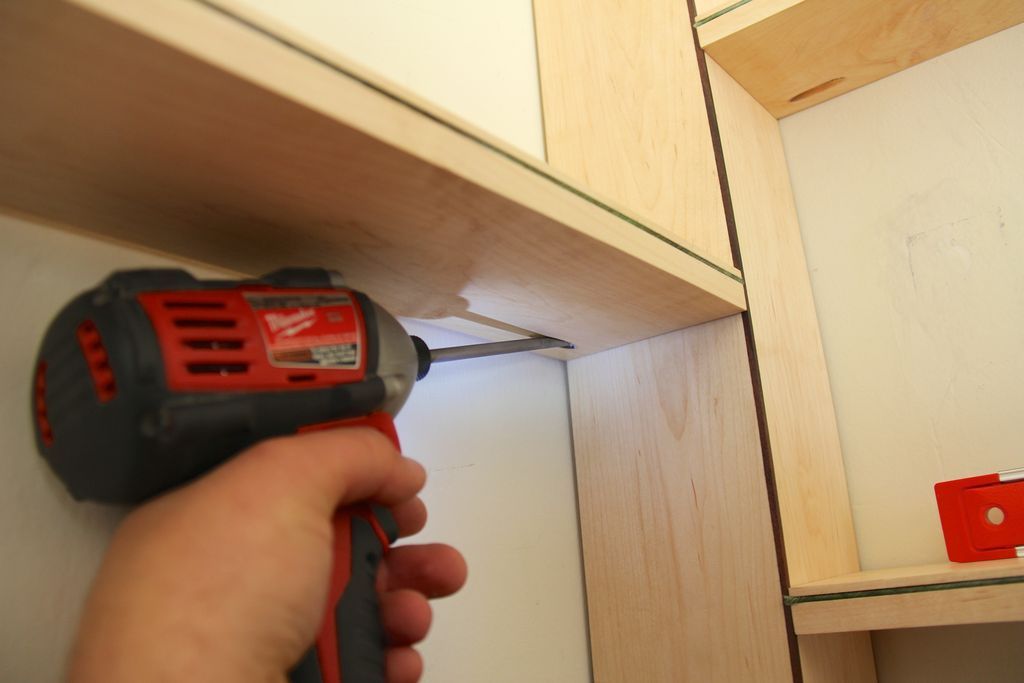
- Align the pocket hole on the end of the shelf with the anchor (you can see through the pocket hole in the wall) and replace the pins into the corner post.
- Take a Kreg screw and put it through the pocket hole in the post. I chose to screw this connection in instead of using glue in case I ever wanted to move this thing to a different wall. Reinstallation requires undoing this connection, as the anchor for the shelf at the far end must be placed with the shelf out of the way.
- Take a second screw and place it into the anchor that is on the wall at the far end of the shelf.
- Repeat this installation process for the remaining 4 shelves.
Finally remember that you can build corner shelves anywhere in the home.
Don't forget to follow us on our social networks for more news!
Popular Content
How to make a rocket stove for outdoors
Cardboard Drawers Lined with Jeans
Bedroom furniture with secret compartments!
Latest Articles
How to make a refrigerator out of insulating material: Practical step-by-step guide
How to make a Kilim for the Home: Complete Step by Step Guide
How to protect ourselves from accidents in our workplace: Complete prevention and safety guide
Related Content
Bamboo Projects for your Home
Ideas for Using the Space Under Stairs
Wireless Charging Desk for Cell Phones!
Die of Envy with the Most Impressive Pools in the World
Creative Home Decor Ideas to Transform Every Space
Refreshing your home starts with smart design choices that combine comfort, personality, and functionality. Whether you want to modernize a small apartment, upgrade outdoor areas, or create cozy rustic interiors, these trending ideas can completely change the atmosphere of your space.
Outdoor Spaces That Increase Style and Functionality
Outdoor living continues to dominate modern home trends. Homeowners are increasingly investing in practical entertainment zones inspired by these BBQ shed ideas, which create the perfect setup for gatherings and weekend cooking sessions.
First impressions also matter when designing exteriors. Elegant farm entrance gates design ideas help properties stand out while improving privacy and curb appeal.
Compact living solutions are also gaining popularity. These inspiring 16x40 shed house interior design ideas show how smaller spaces can still feel luxurious and functional.
To enhance patios and entryways, homeowners are adding stylish protection with these creative porch awning exterior DIY ideas that blend aesthetics with practicality.

Rustic and Cozy Interior Design Trends
Warm and natural interiors remain timeless. These charming rustic decor ideas combine wood textures, vintage accents, and earthy tones to create welcoming spaces.
Bedrooms are becoming more personalized with curated wall arrangements. Many homeowners use these stylish picture wall ideas for bedroom spaces to display memories and artwork creatively.
Textured wall treatments are another major trend. Installing a board and batten wall adds architectural character while keeping interiors elegant and modern.
Similarly, bold accent wall ideas can instantly transform plain rooms into eye-catching focal points without requiring a full renovation.
Smart Kitchen and Organization Inspiration
Functional kitchens are essential for modern homes. These practical kitchen wall cabinet ideas maximize storage while maintaining a clean and stylish appearance.
Organization also starts at the entrance. Well-designed mud room ideas help families keep shoes, coats, and daily essentials neatly arranged.
Colorful and Personalized Home Styling
Vibrant interiors are becoming increasingly popular thanks to playful dopamine decor ideas that use bright colors and joyful accessories to improve mood and energy.
Gallery walls also continue to evolve as a major decorative feature. These trendy gallery wall inspiration ideas offer creative ways to combine prints, photos, and statement art.
Young renters and new homeowners are especially embracing these stylish first apartment aesthetic ideas to create sophisticated interiors on a budget.
Finally, selecting the right shades can dramatically influence any room’s atmosphere. These modern trendy color ideas help homeowners choose palettes that feel fresh, elegant, and timeless.
Final Thoughts
From rustic charm and colorful interiors to outdoor entertaining areas and functional storage solutions, today’s home decor trends focus on creating spaces that feel both beautiful and livable. By combining smart layouts, modern textures, and personalized decorative elements, any home can become more stylish, comfortable, and inspiring.


