


If you are looking to decorate the windows of your home, then this little tutorial on how to etch images on glass with a Dremel will be ideal for you.
It turned out to be easier than I expected and I am very happy with the results.

Let me show you what you need and how to do it. You can watch the video or read the steps here, whichever you prefer.
Video:
Click to see the Video.
What you will need:
- Rotary tool (like a Dremel)
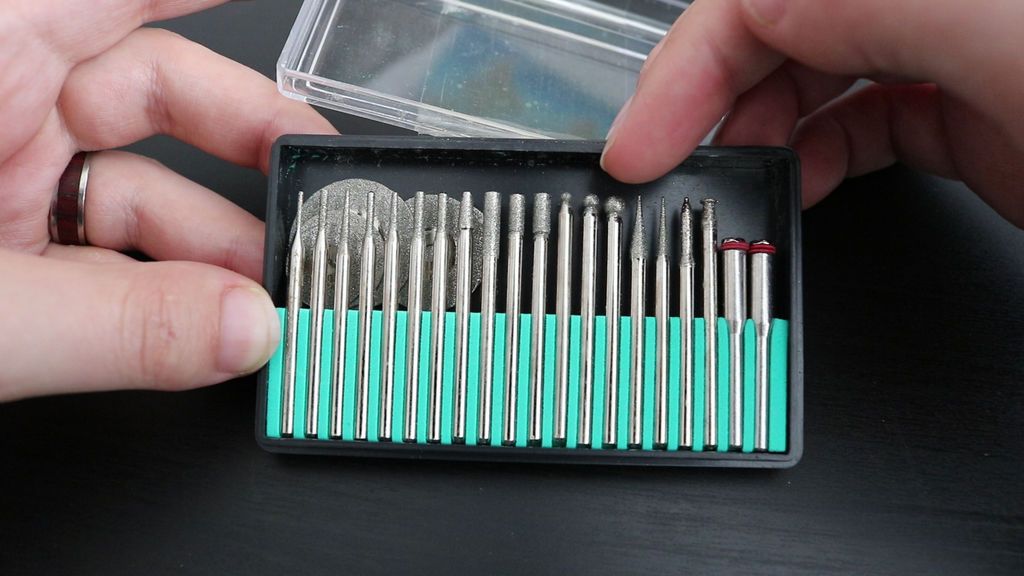
- Diamond-coated drill bits (at least one ball-shaped)
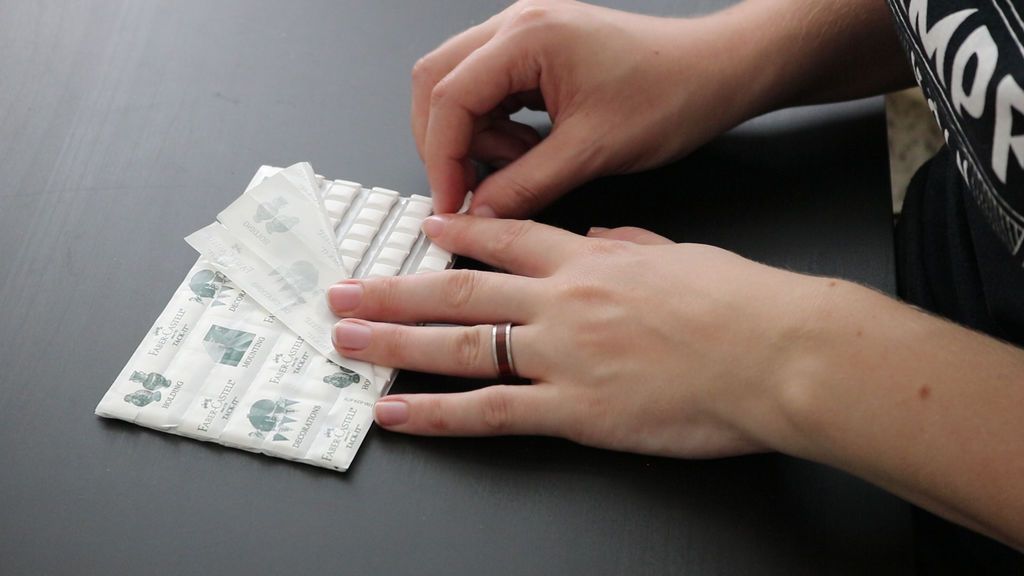
- Removable Putty Decal
- Print of the design.
- Tape
- A damp cloth and a bowl of water
- Towel
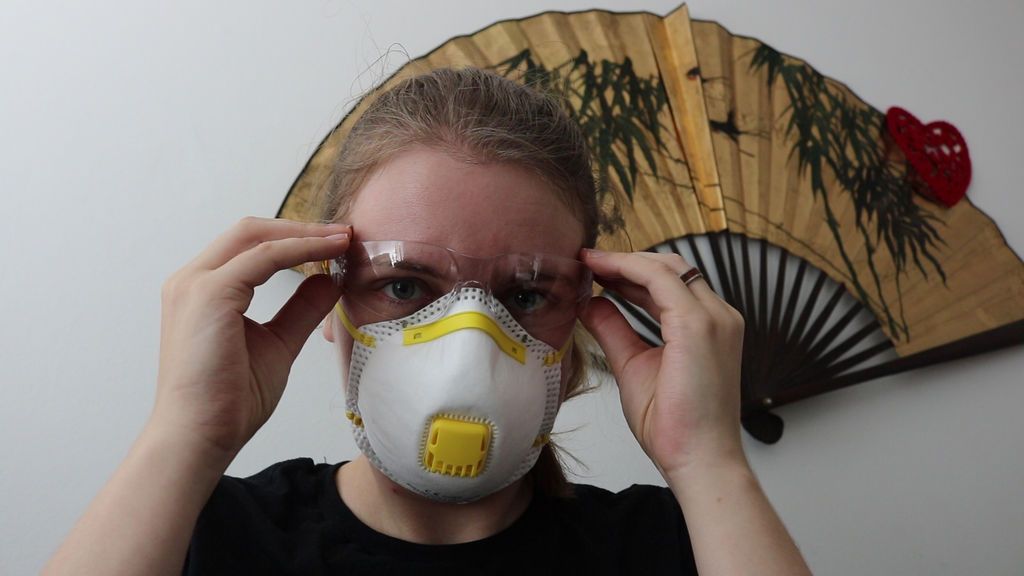
- Dust mask
- Safety glasses
Engraving Images on Glass with a Dremel step by step:
Step 1: Getting Ready

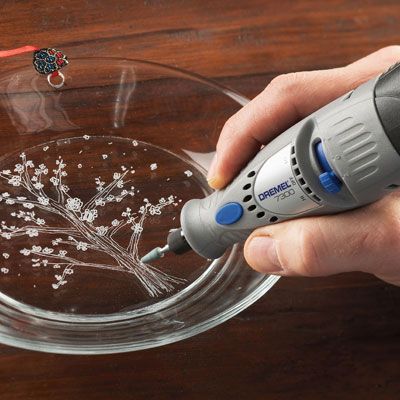
I'm using a standard rotary tool with a flexible shaft extension. The extension makes it a little easier to do more detailed work, but you can also do it without it.
Since glass is very hard, I will use a set of diamond coated drill bits. There are many different bits in this set, but a good place to start is with a ball-shaped one.
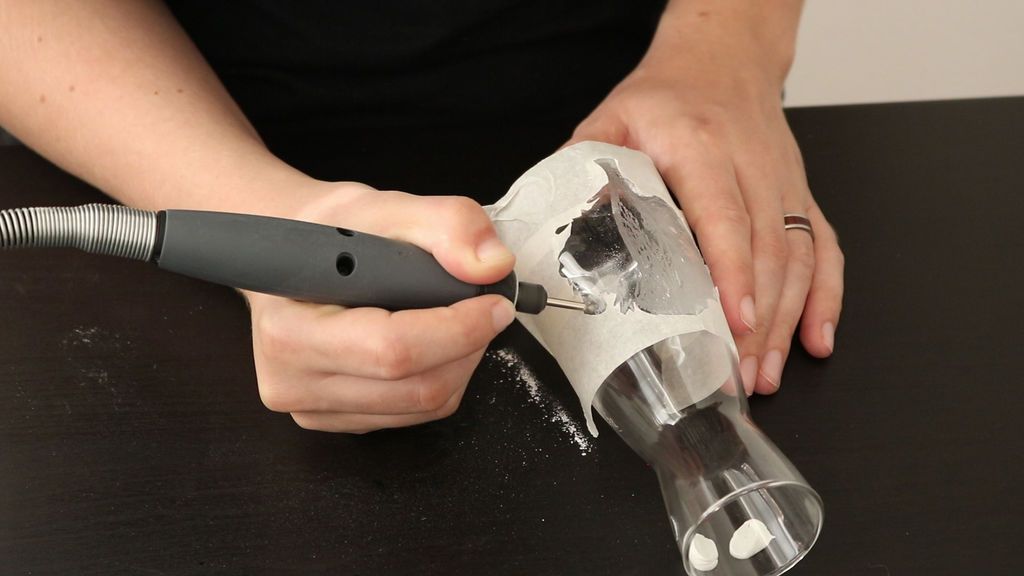
Etching will cause a lot of fine glass dust, so be sure to wear a dust mask and eye protection.
I'm using removable putty decal to support the piece I'm working on. This will keep it stable without you having to hold it.
Step 2: Have an idea of the tool
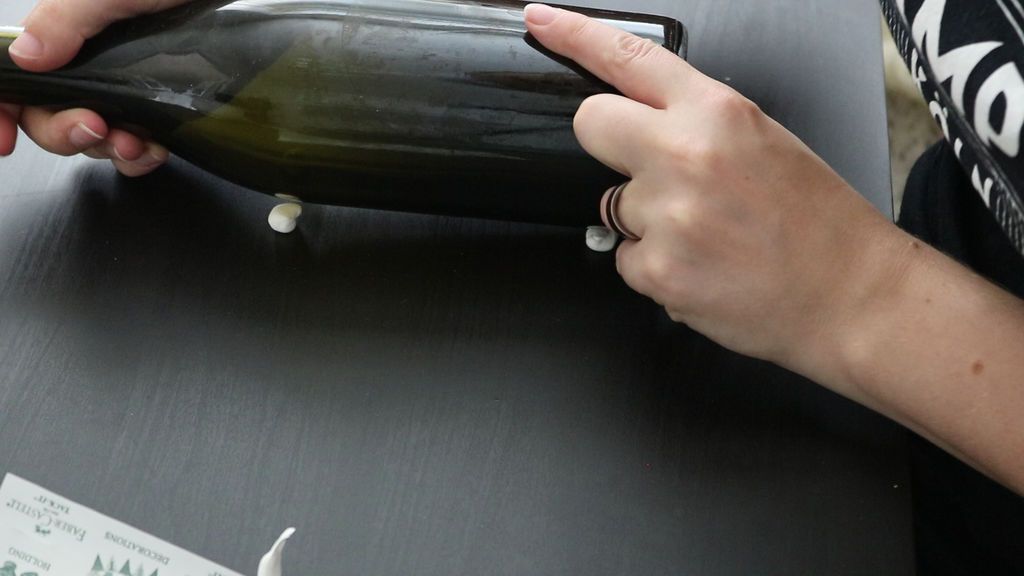
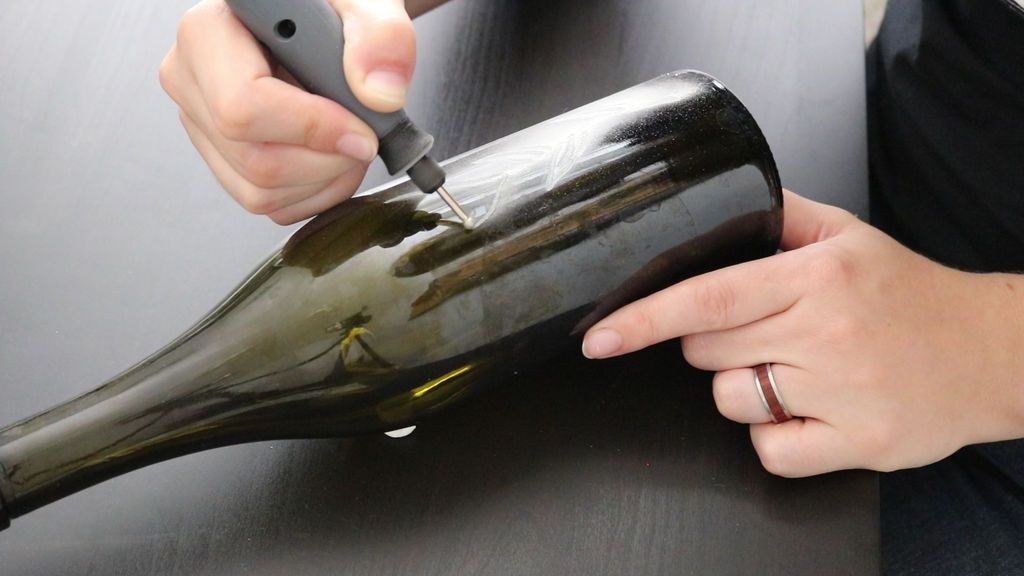
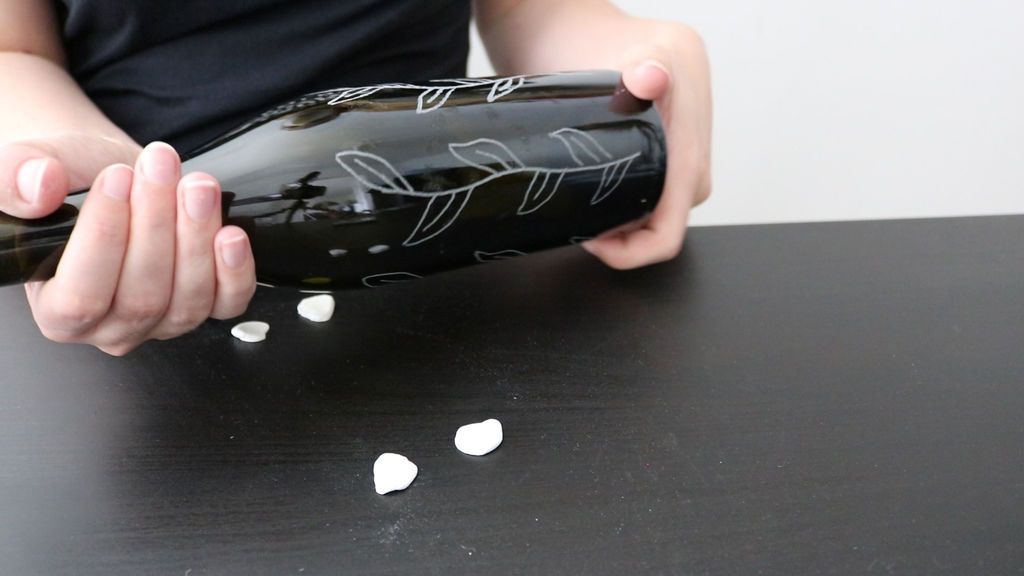
I've never used this Dremel before, so to get an idea of how engraving works, I'm going to practice a little on an old wine bottle. I set the Dremel to medium speed and started engraving.
For now, I'm just giving a design by hand. I quickly realized that you don't have to push down hard on the glass, just a light touch is needed. It's about letting the tool do the work.
One engraving direction will work better than the other. This is due to the direction of rotation of the tool. For me, it made the best cut by pulling the tool towards me, so I drew lines on the glass that way and lifted the tip in the middle.
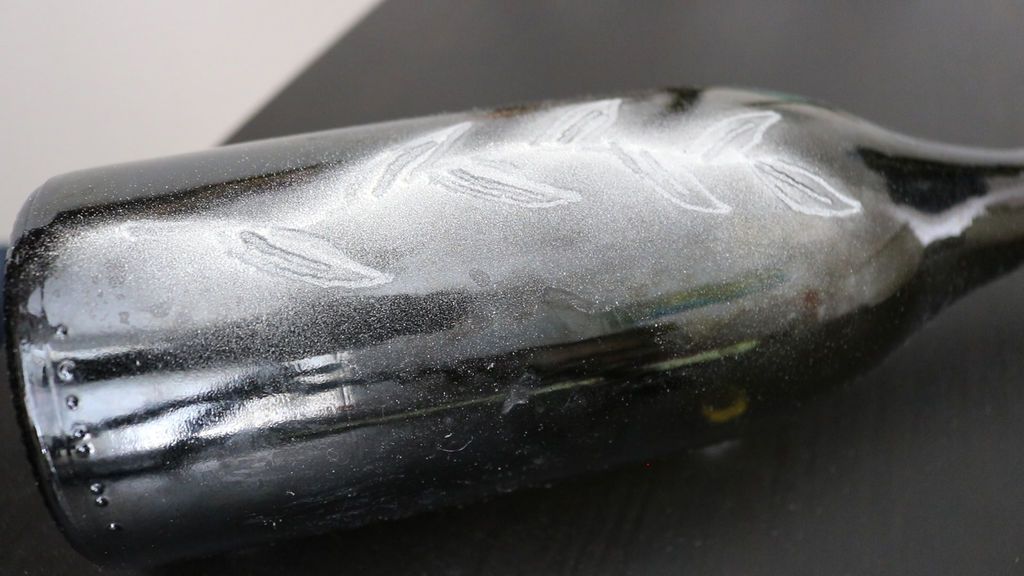
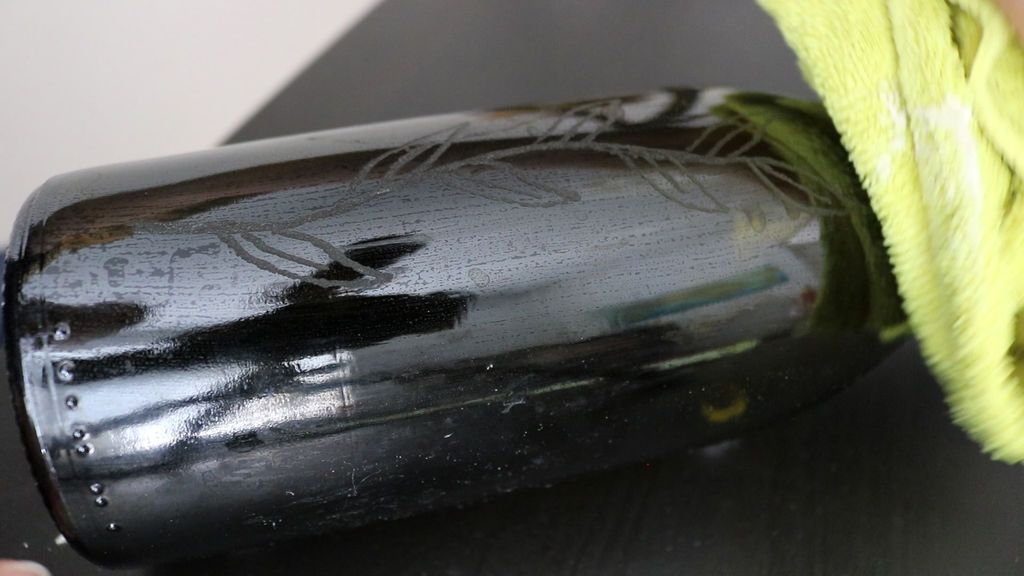
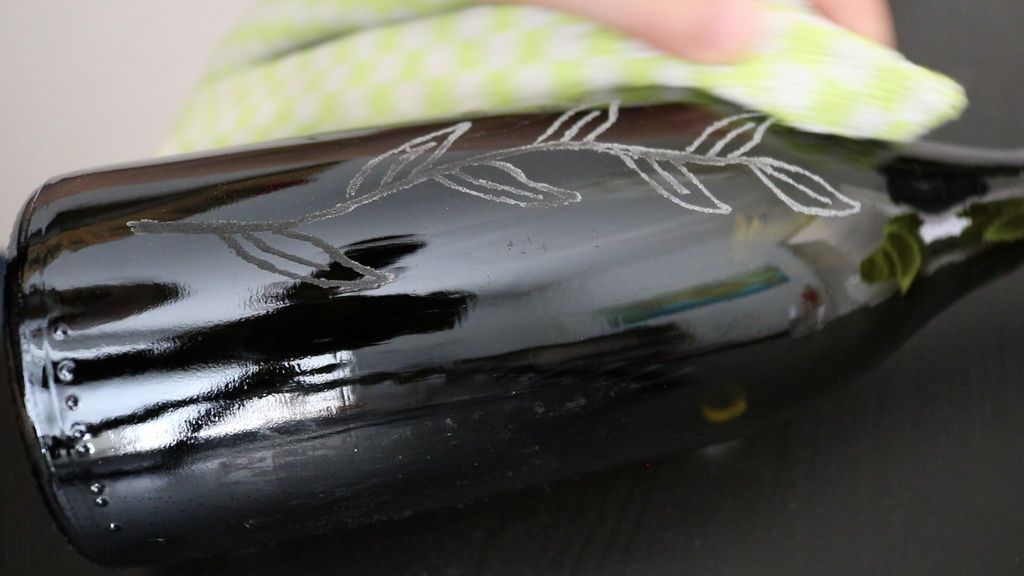
Etching creates a reasonable amount of glass dust, which can make it difficult to see what you are doing. Keep a damp cloth and a bowl of water nearby so you can wipe off dust regularly. This makes it look like your design is disappearing, but don't worry, once you dry the glass it will appear again.
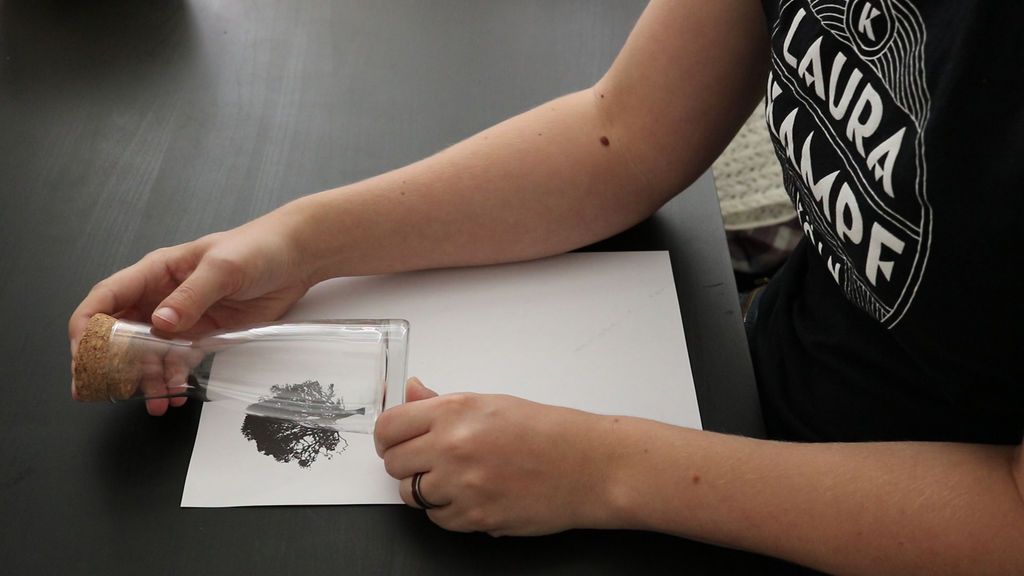
Step 3: Laying out a design
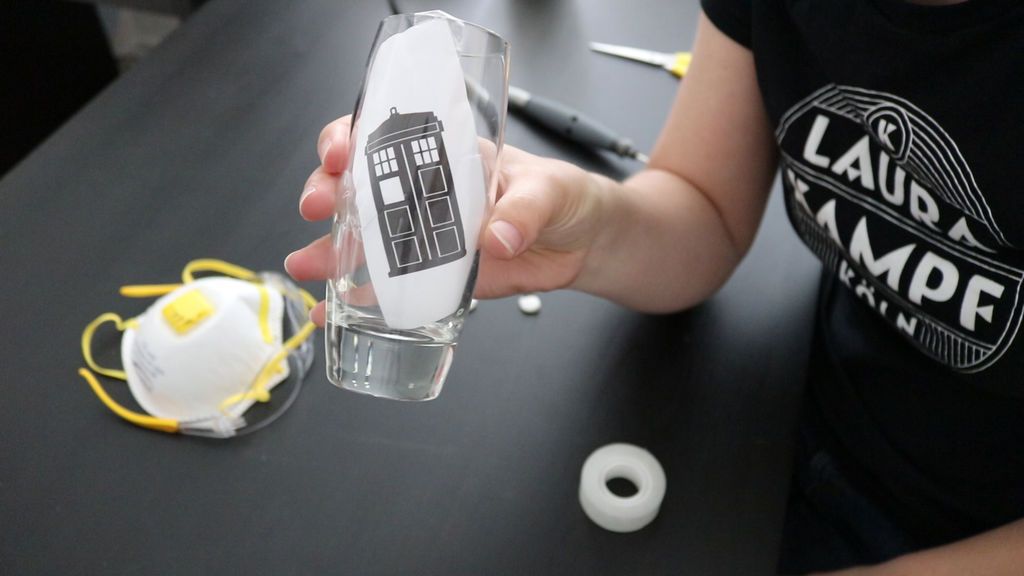
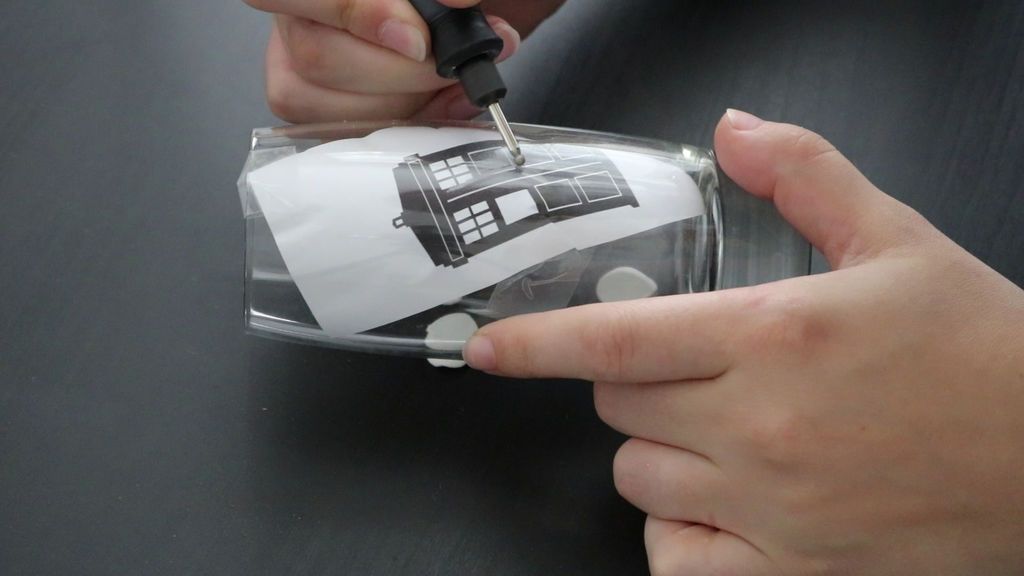

Now that I have an idea of the tool, I can move on to making a more detailed design. I'm not going to be free, so I printed the design, cut it out, and glued it to the inside of the glass. This way, all I had to do was trace the design onto the glass.
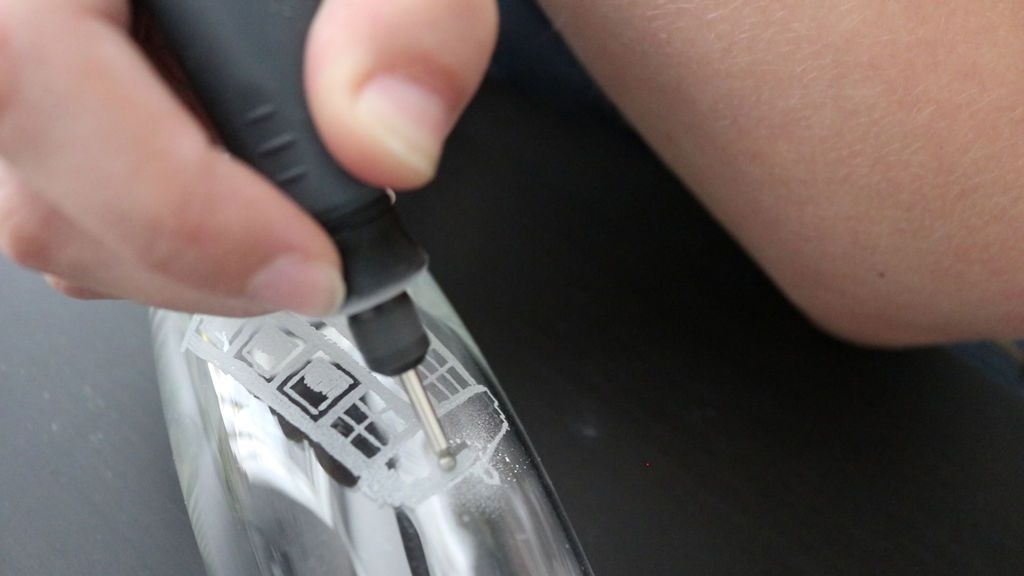
I switched to a smaller ball shaped bit to allow for finer detail. I changed the orientation of the glass several times along the way to make etching easier.
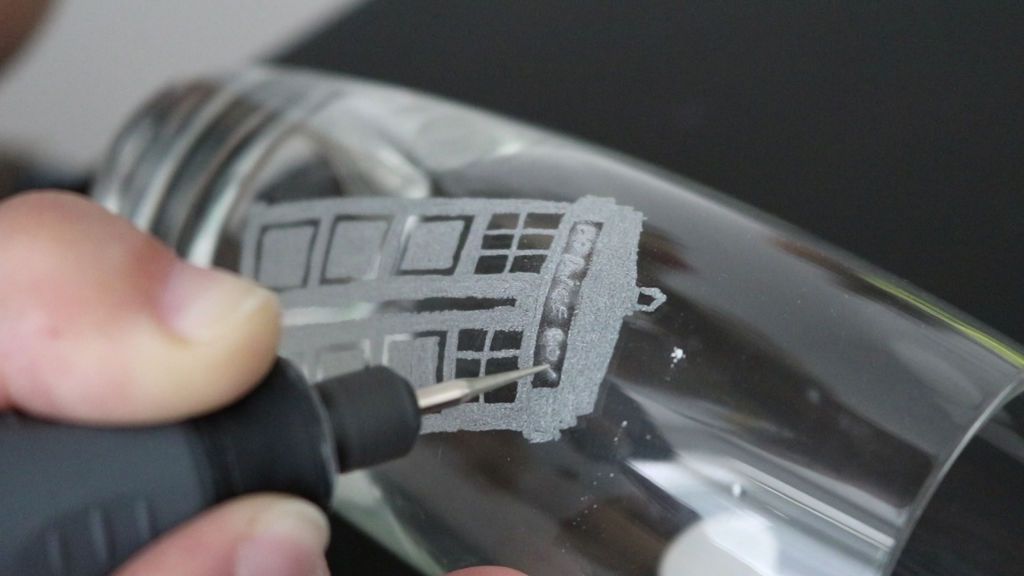
For the final details I switched to the thinnest part I had, which allowed me to write the tiny letters there.
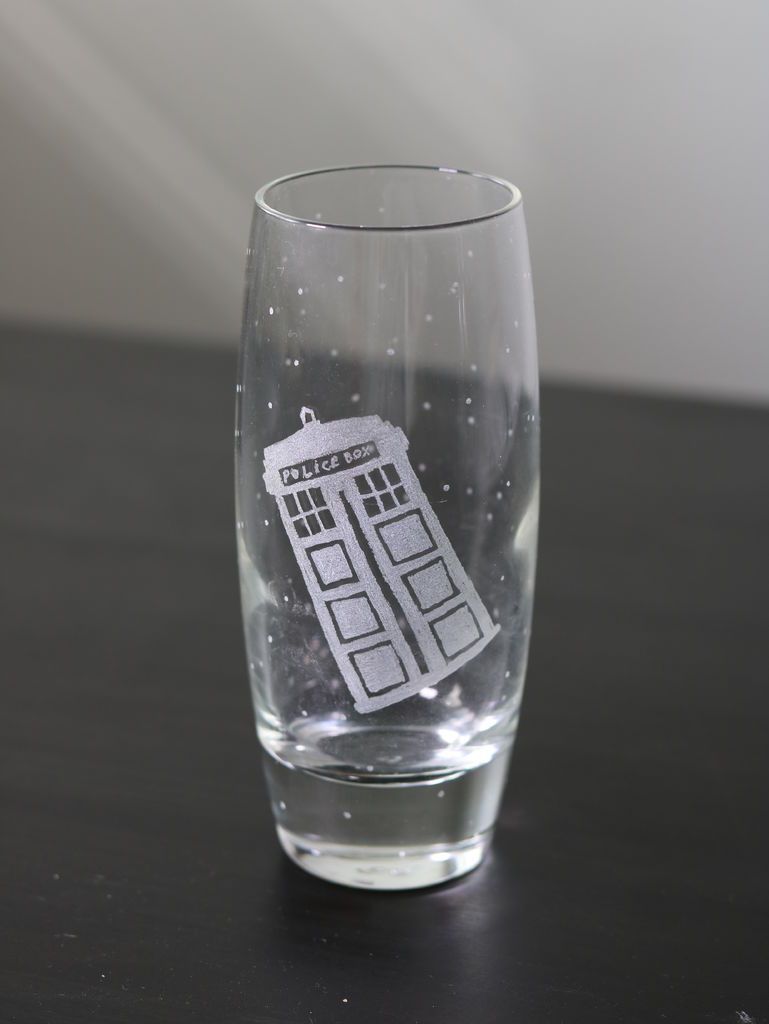
Finally,I used the ball bit again to add random stars around the glass to make the Tardis(Drawing) look like it's floating in space.
Step 4: Drawing an outline
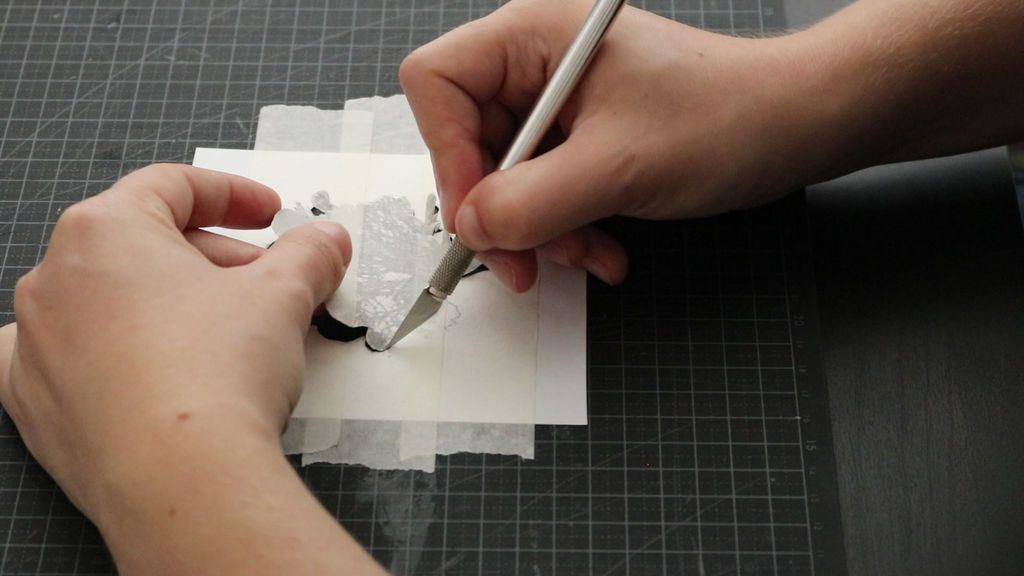
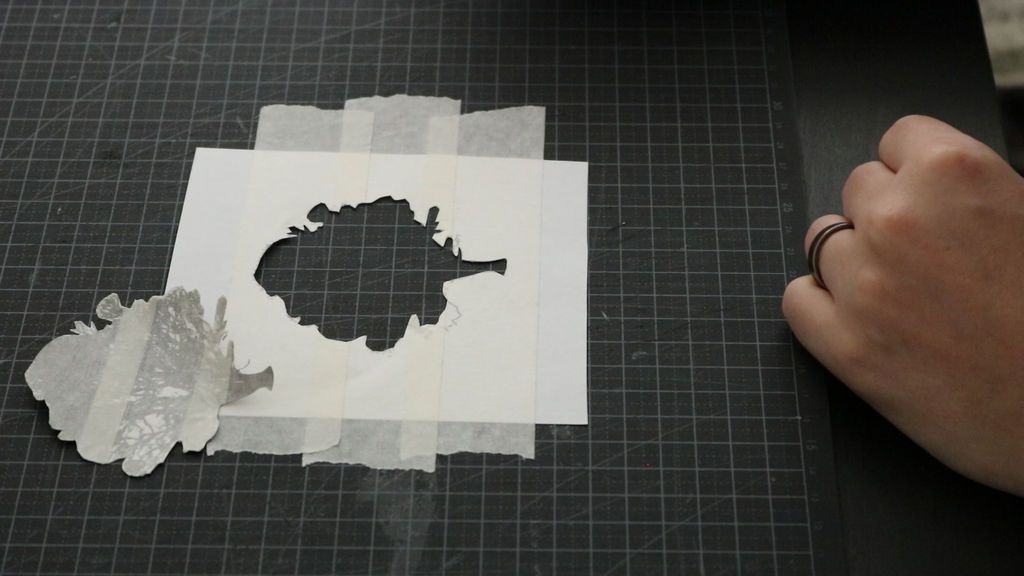
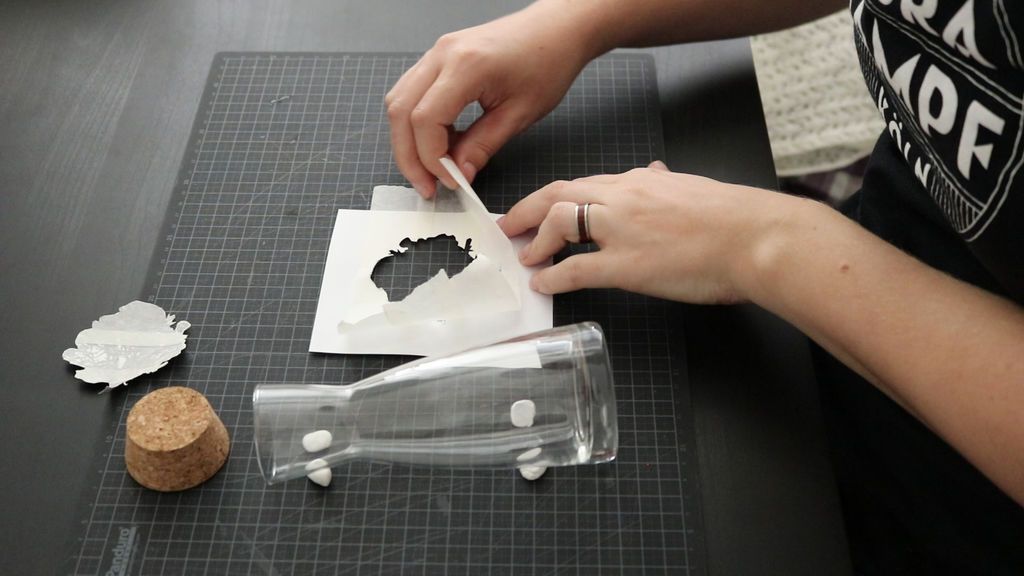
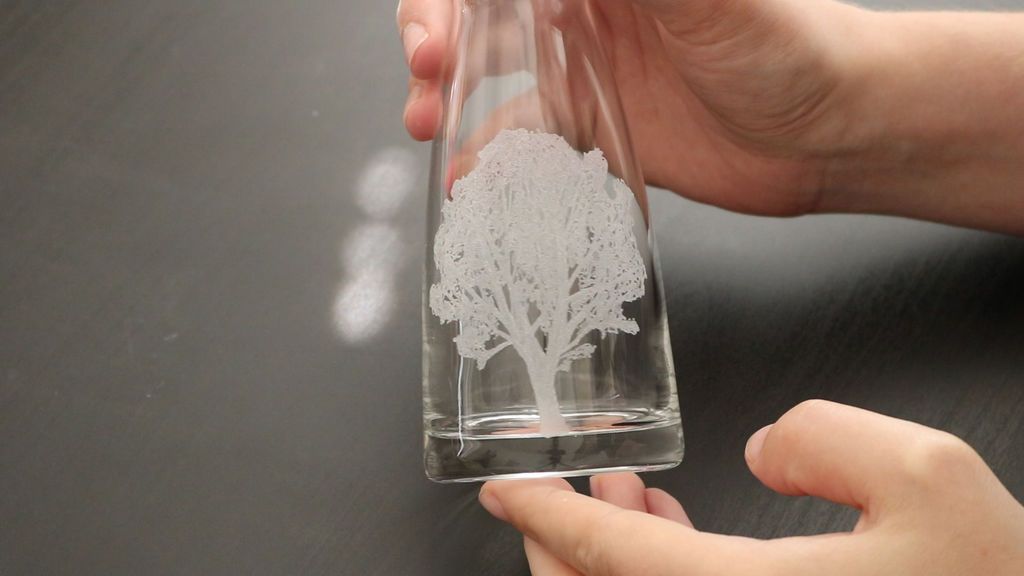
In some cases, it will not be possible to glue your design to the inside of the glass, such as with this small jug.
So I took a wide painter's tape and covered the print with it, making sure the pieces overlapped. I then cut out the inside of the design, leaving me with a silhouette.
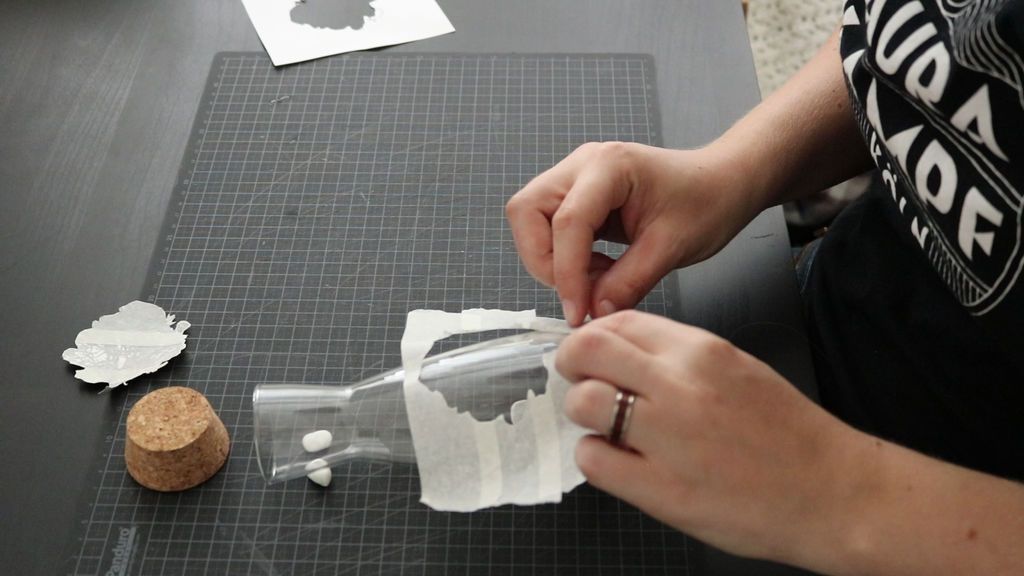
Carefully, I peeled the tape off the paper and placed it on the glass.
I still had to freehand touch the branches and leaves, but being able to trace the outline definitely helped a lot.
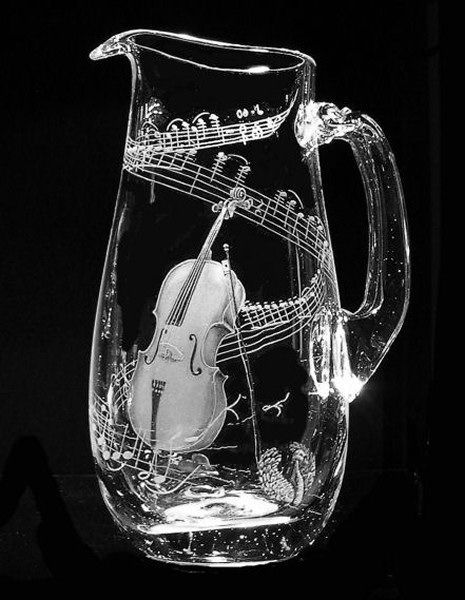
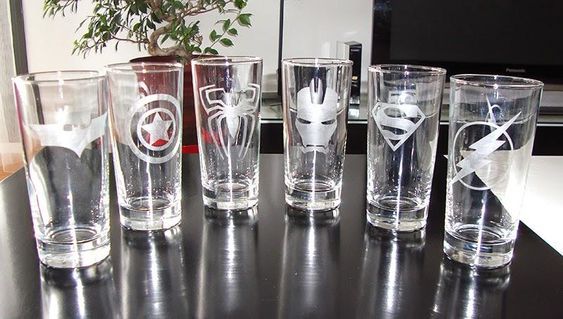
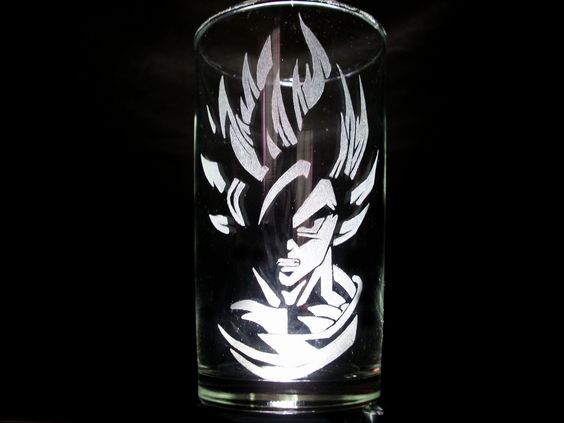
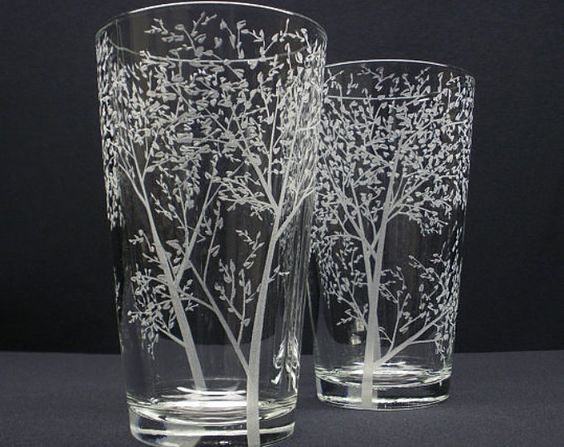
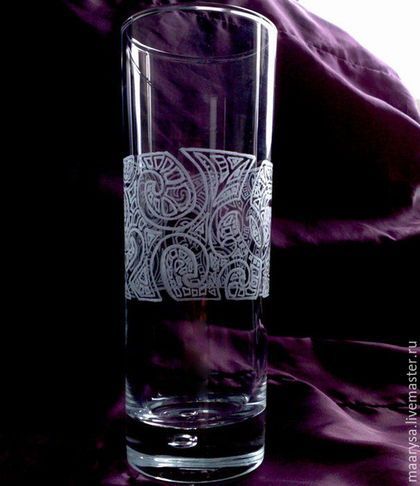
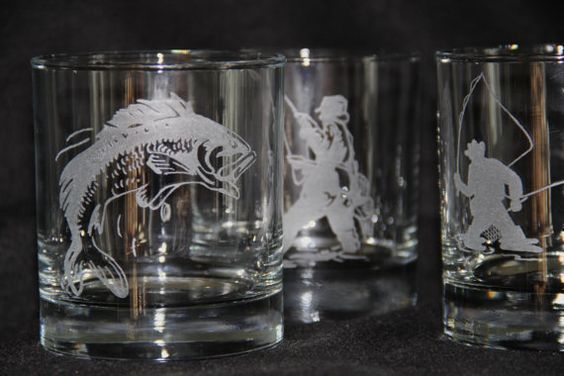
More Designs:

That's all. Thanks for coming to read.
Popular Content
How to make a rocket stove for outdoors
Cardboard Drawers Lined with Jeans
Ideas and Advantages of Window Grilles for the Home!
Latest Articles
How to make a refrigerator out of insulating material: Practical step-by-step guide
How to make a Kilim for the Home: Complete Step by Step Guide
How to protect ourselves from accidents in our workplace: Complete prevention and safety guide
Related Content
Die of Envy with the Most Impressive Pools in the World
Build an Inexpensive and Interactive Activity Chart for Babies!
Tips for Using Shelves to Separate Spaces
Ideas for Painting Furniture and Making It Vintage Style
Creative Home Decor Ideas to Transform Every Space
Refreshing your home starts with smart design choices that combine comfort, personality, and functionality. Whether you want to modernize a small apartment, upgrade outdoor areas, or create cozy rustic interiors, these trending ideas can completely change the atmosphere of your space.
Outdoor Spaces That Increase Style and Functionality
Outdoor living continues to dominate modern home trends. Homeowners are increasingly investing in practical entertainment zones inspired by these BBQ shed ideas, which create the perfect setup for gatherings and weekend cooking sessions.
First impressions also matter when designing exteriors. Elegant farm entrance gates design ideas help properties stand out while improving privacy and curb appeal.
Compact living solutions are also gaining popularity. These inspiring 16x40 shed house interior design ideas show how smaller spaces can still feel luxurious and functional.
To enhance patios and entryways, homeowners are adding stylish protection with these creative porch awning exterior DIY ideas that blend aesthetics with practicality.

Rustic and Cozy Interior Design Trends
Warm and natural interiors remain timeless. These charming rustic decor ideas combine wood textures, vintage accents, and earthy tones to create welcoming spaces.
Bedrooms are becoming more personalized with curated wall arrangements. Many homeowners use these stylish picture wall ideas for bedroom spaces to display memories and artwork creatively.
Textured wall treatments are another major trend. Installing a board and batten wall adds architectural character while keeping interiors elegant and modern.
Similarly, bold accent wall ideas can instantly transform plain rooms into eye-catching focal points without requiring a full renovation.
Smart Kitchen and Organization Inspiration
Functional kitchens are essential for modern homes. These practical kitchen wall cabinet ideas maximize storage while maintaining a clean and stylish appearance.
Organization also starts at the entrance. Well-designed mud room ideas help families keep shoes, coats, and daily essentials neatly arranged.
Colorful and Personalized Home Styling
Vibrant interiors are becoming increasingly popular thanks to playful dopamine decor ideas that use bright colors and joyful accessories to improve mood and energy.
Gallery walls also continue to evolve as a major decorative feature. These trendy gallery wall inspiration ideas offer creative ways to combine prints, photos, and statement art.
Young renters and new homeowners are especially embracing these stylish first apartment aesthetic ideas to create sophisticated interiors on a budget.
Finally, selecting the right shades can dramatically influence any room’s atmosphere. These modern trendy color ideas help homeowners choose palettes that feel fresh, elegant, and timeless.
Final Thoughts
From rustic charm and colorful interiors to outdoor entertaining areas and functional storage solutions, today’s home decor trends focus on creating spaces that feel both beautiful and livable. By combining smart layouts, modern textures, and personalized decorative elements, any home can become more stylish, comfortable, and inspiring.


