


How to Build a Japanese Wooden Planer Plane, the main difference with Western planes is that the Japanese plane is pulled, not pushed.
The plane is made of Japanese red or white oak, while the blade is a lamination of hard iron to softer iron.

I'm going to make a smoothed plane that is similar to a Stanley No. 4 in its function. A Japanese planer plane is available for purchase, although I just want to see if I can make one out of scrap wood and metal with minimal tools and effort.
In fact, the only material I bought was epoxy.
Step 1: Laminate the blade


The body of the plane is made only after the blade is in hand. Therefore, the first step is to make the planes cut.
The blade is composed of a very thin layer of hard, high-carbon steel welded to a large section of mild iron or soft low-carbon steel.
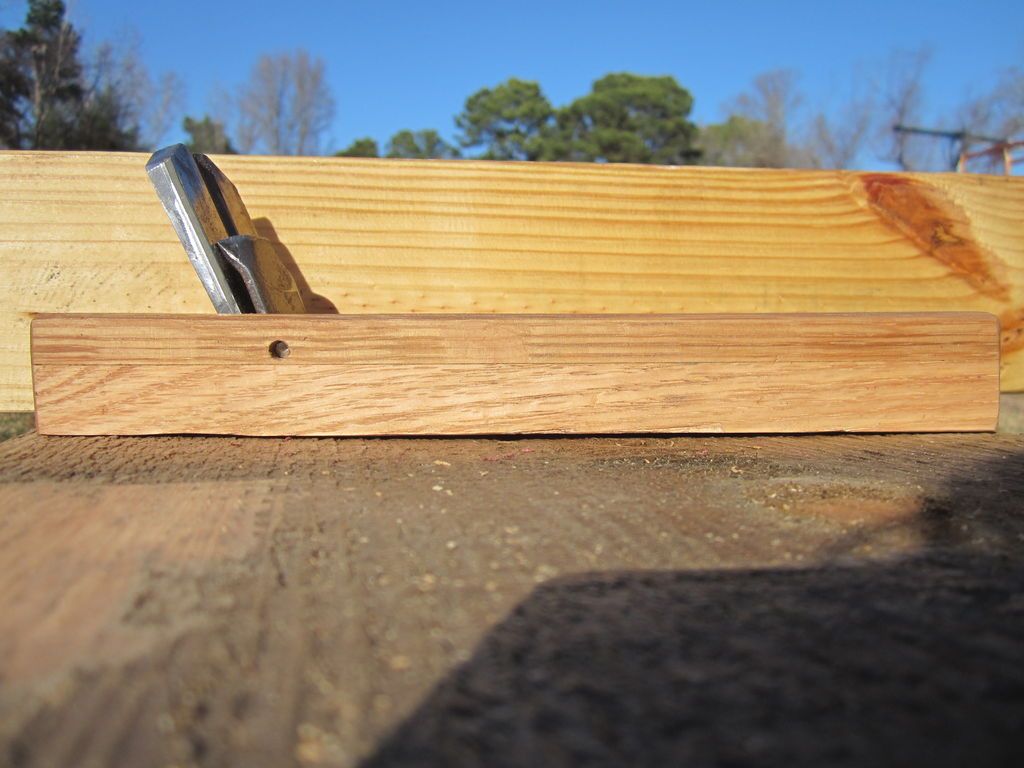
As you see in the image above with my materials, I have an old blade, which will be the hardest blade, any good steel will work.
The flat bar is a cheap, soft metal that will form the wedge of the blade, while the serrated blade will add thickness between the soft and hard metal. The blade measures about 4 inches long and 2 inches wide. The thick end is 5/16″ and the thin end is 3/16″.
I forced the wedge before laminating with an angle grinder. Remember not to burn the hard metal.
After shaping, weld to hold the three layers of metal together. After a day of letting the epoxy dry, he flattened the blade to a 25-degree angle and sharpened it to a razor's edge.
Step 2: The body of the planer plane


For the body, any hard, durable wood will work. I had a sawn white oak left over from some stairs I'm going to use.
The wood is only 3/4 inch thick, so two pieces will be glued together for a thickness of 1.5 inches.
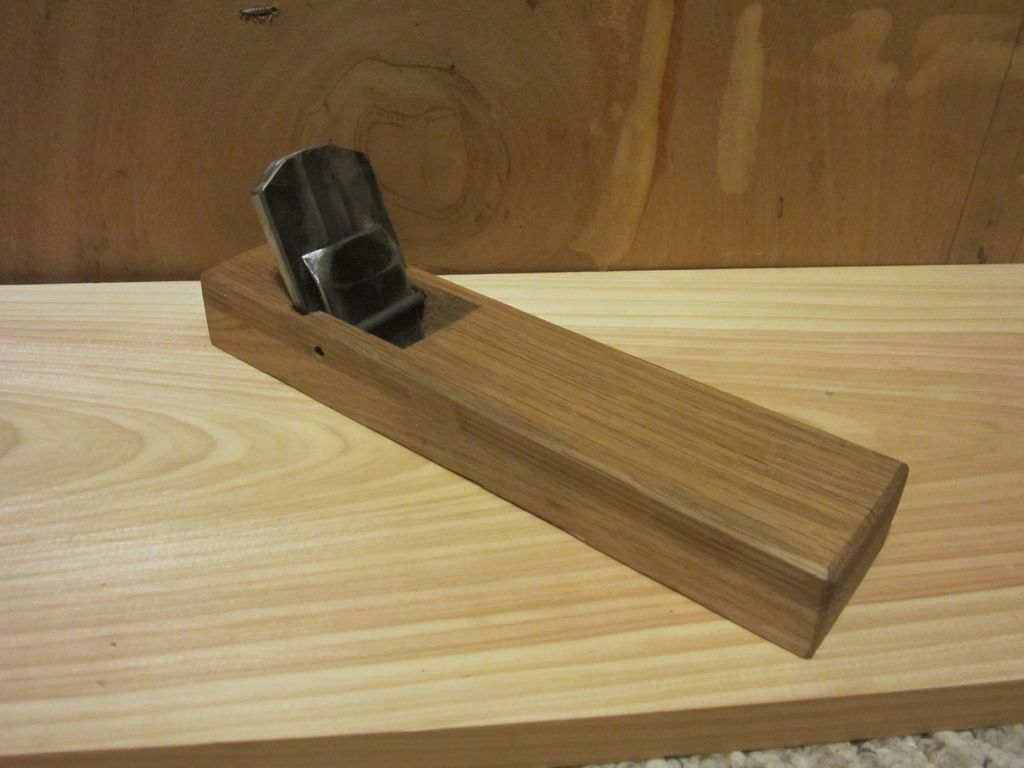
Final dimensions of the body will be 9.5 inches long and 1 3/8 inches thick. Body width is the width of the blades plus 1/4 inch on each side (Image #4 above).
Before gluing it, I sketched the outline on the white oak. For the glue I put I let it dry for 24 hours.
Step 3: Shape the beds
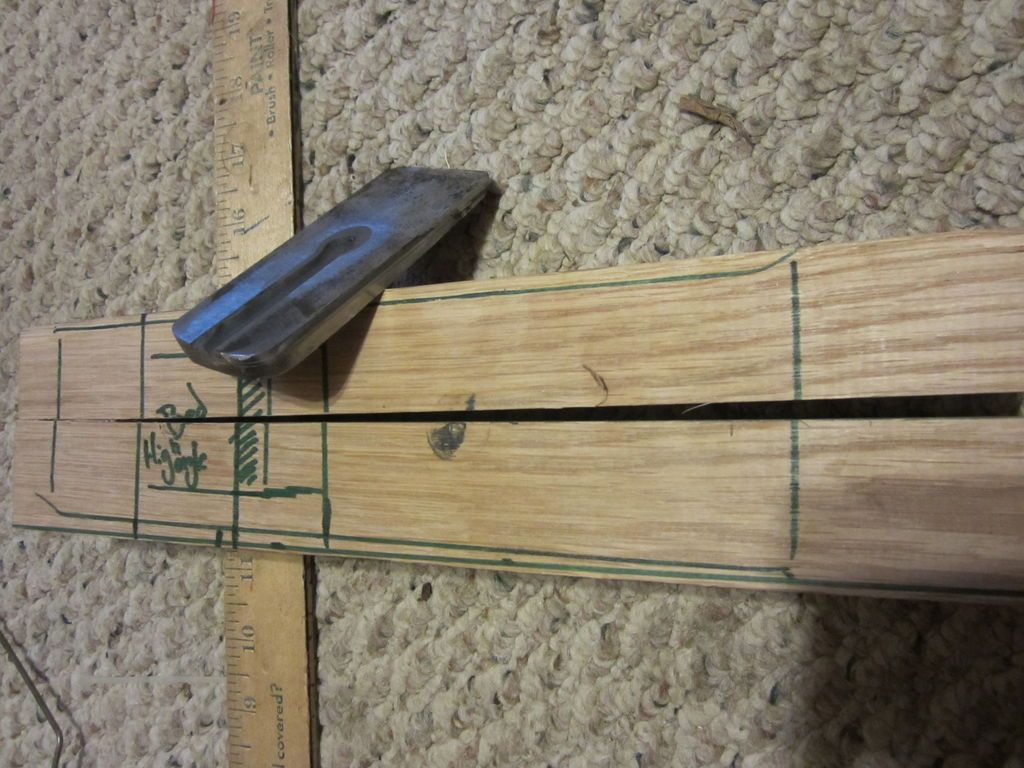

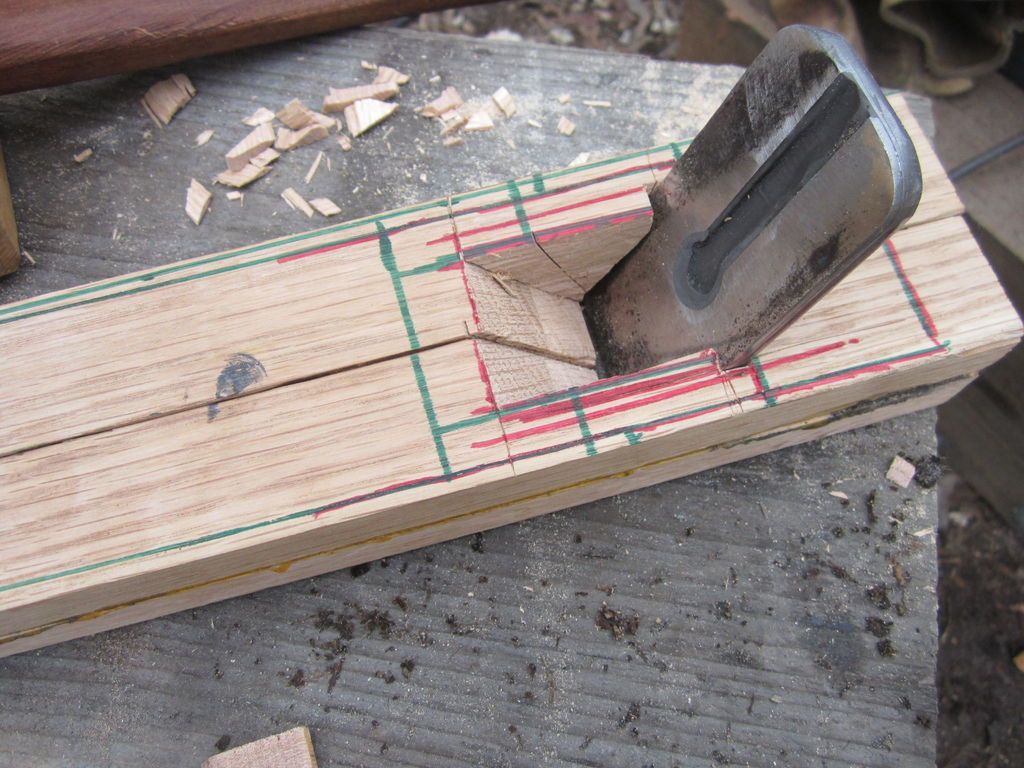
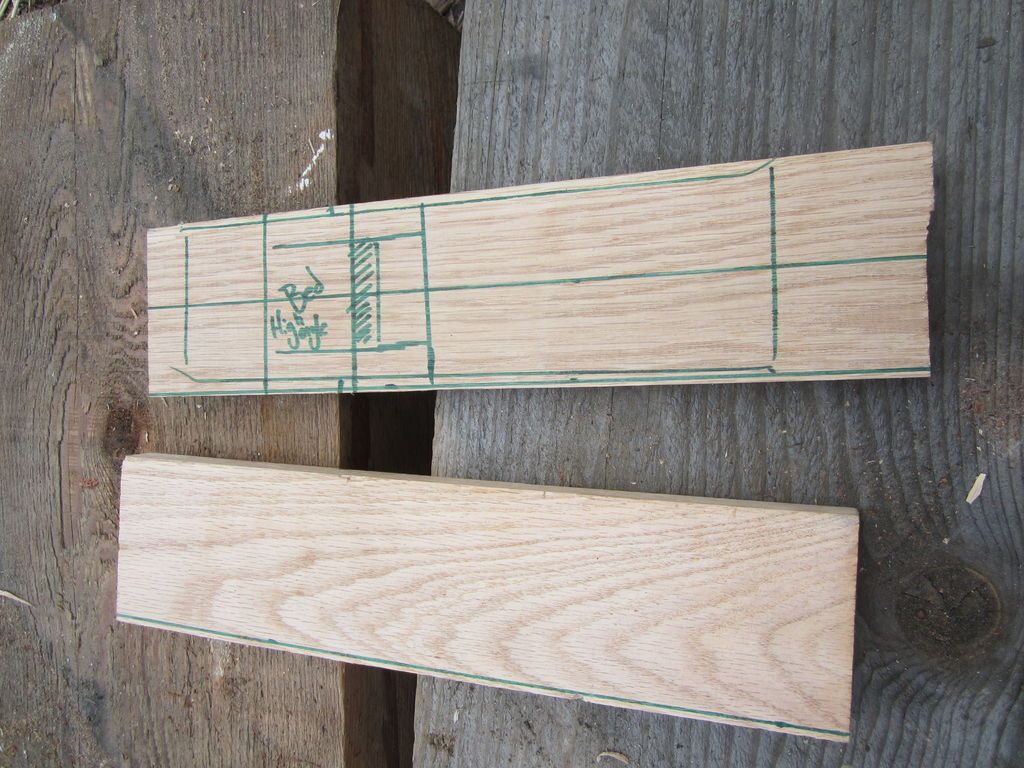
There are many ways the blade bed is cut. The standard method is to mortise the bed with a chisel. Instead, I cut the blank body in half with a handsaw and sketched out the final dimensions (photo #2).
I'm doing a high angle shot at 65 degrees, although the normal blade angle is around 45 degrees.
The blade is a wedge that tightens the more the blade is adjusted. Therefore, the blade slot is shaped like the blade (picture No. 5). So draw the angle of the blade bed and then trace the wedge-shaped blades over it with the blade about 1/8 inch away from the mouth (photo #4).
The cut should be the width of the blade.
The next thing is to draw the cut of the bed where the chips come out. I want a closed mouth so it measures close to the blade. The angle of this cut is around 55 degrees and is not as deep as the blade groove.
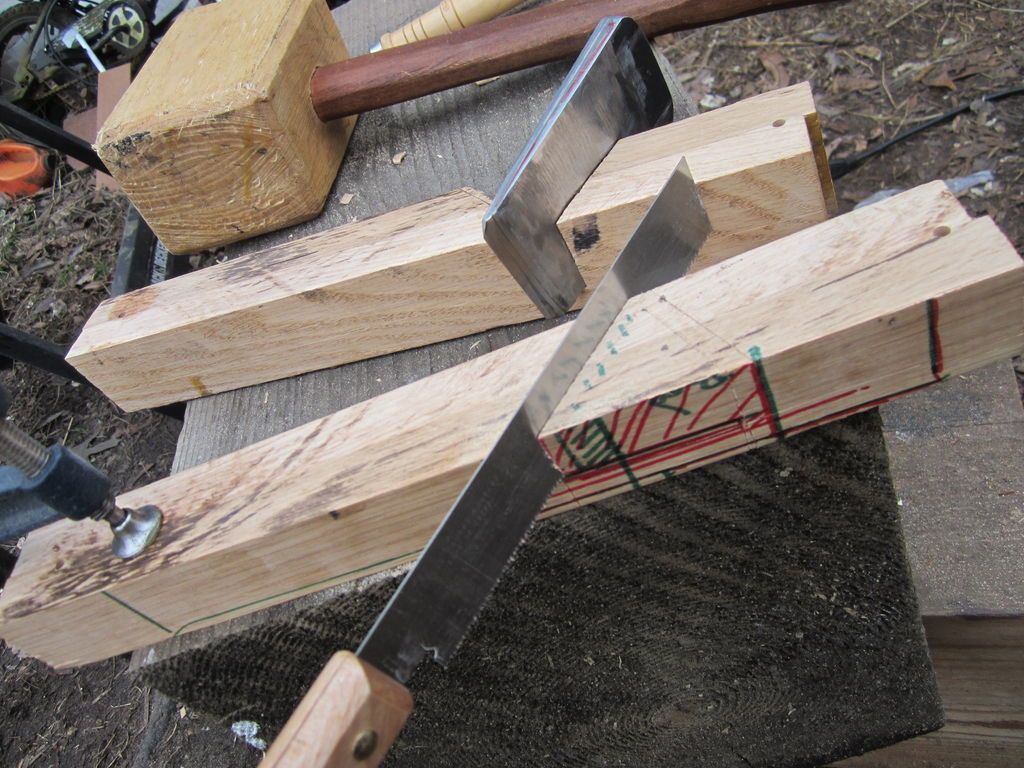
This cut is 1/4 inch shorter than the width of the blade on each side. After making the cuts, chisel away the waste and join the two halves (image No. 6).
Step 4: Assembling the blade


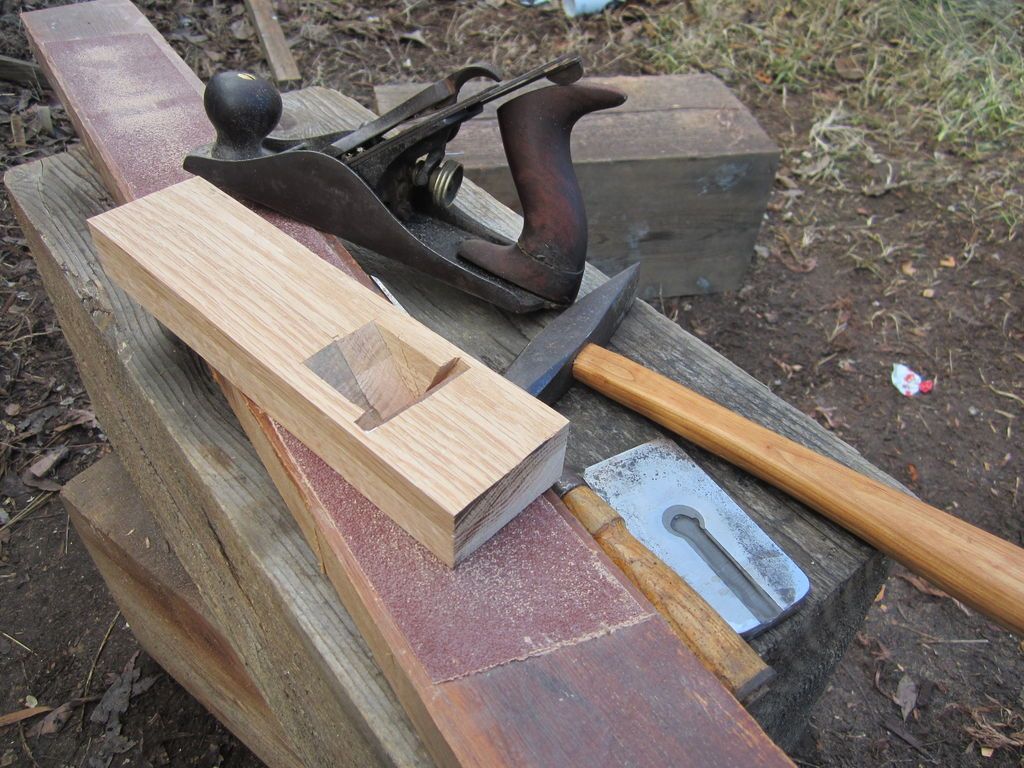
If the halves don't line up or the blade doesn't fit, chisel away the scrap. As seen in image No. 3, my blade is low, but there is no problem.
Just stick a piece of thick paper on the blade bed. This should add thickness to the bed and the blade will be pressed against the cheeks.
The correct position for the blade to sit (image #4) is approximately 1/8 inch from the mouth opening.
Step 5: Shaping the body

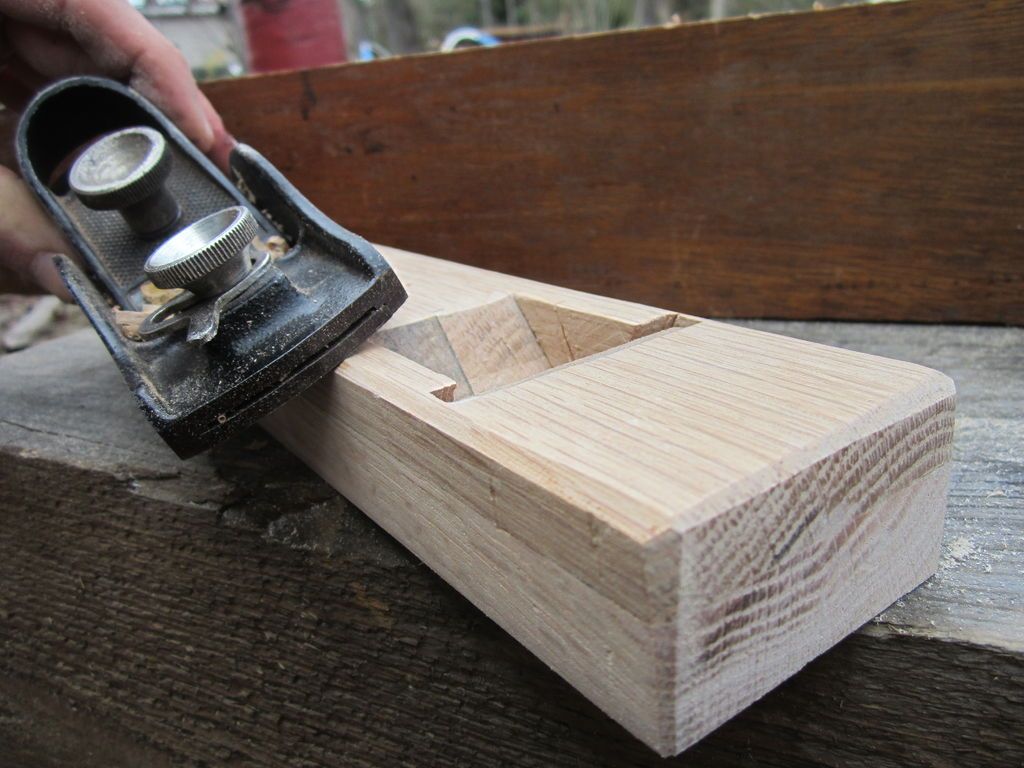


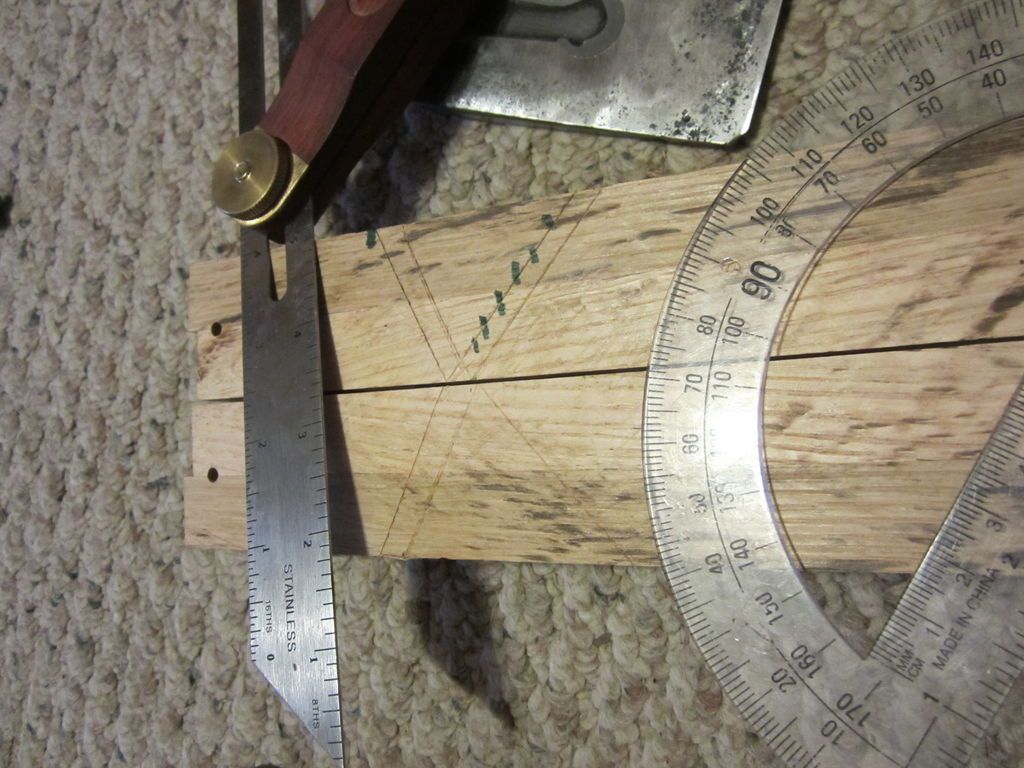
Now is the time to square the body by brushing the sides, top and bottom. Add a bevel to the top edges for convenience, but don't touch the bottom edges - they should remain square. The bottom should be perfectly flat at this stage, like image No. 4.
The Japanese planer plane is unique because the bottom is not flat. For a smoothing plane, the bottom only touches the wood at the front of the plane and just before the blade (photo #5 and #6).
There are special planes used to shape the bottom of the plane, although I just use the plane blade at a 90 degree angle in a scraping motion.
Step 6: Chipbreaker
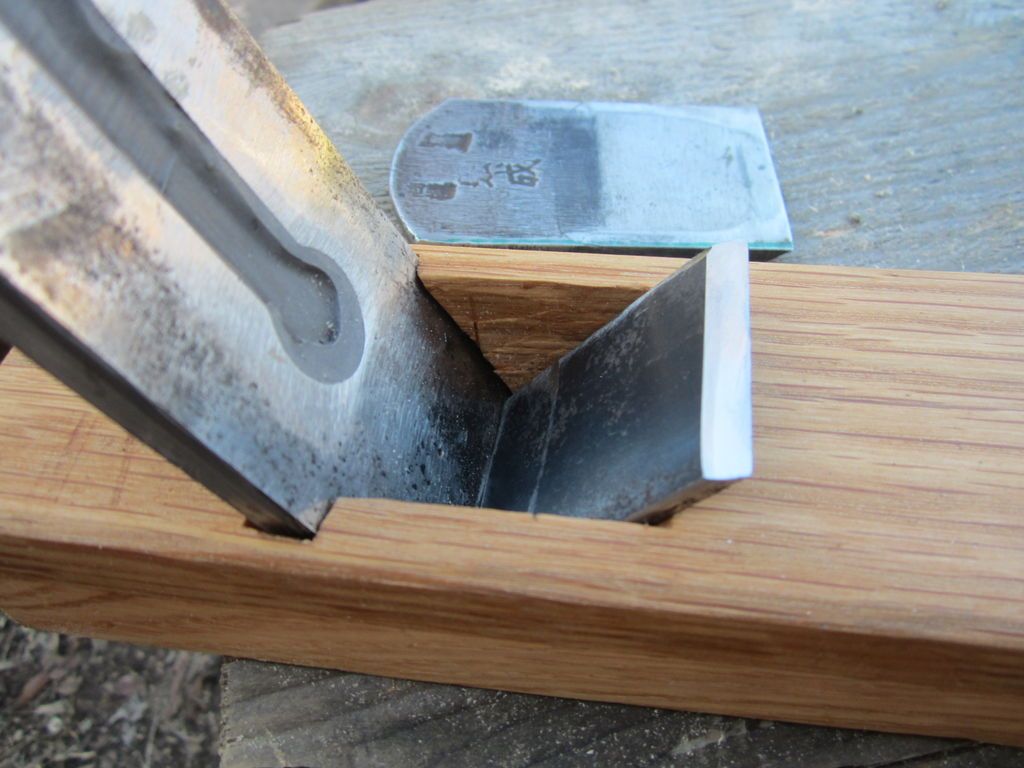
The chipbreaker or secondary blade is not necessary for the plane, but I will add one for demonstration.
The chipbreaker is the width between the cheeks of the body (photo N ° 1). My chipbreaker is half the length of the blade and is made of soft metal.
The switch is sharpened like the blade and is held in place with a rod, I used a nail (image #2). The corners of the hammer drilled to create a tight fit between the blade and the rod.
I used a vise to hold the blade and bent the corners with a hammer. I used soft metal because it is easy to bend without breaking.
Step 7: Ready!


Finally, the planer plane is finished. I added a couple of coats of linseed oil to seal the wood.
I then tried the high angle plane on a very hard wood, and the plane removed fine chips leaving a nice shiny finish.
Overall, I spent about 4 hours making the plane, although I had to wait several days to let the glue dry. If you have any suggestions or questions, just comment.
Get more information at perfectionidea.com and on our Facebook for more How to Build a Japanese Wood Planer Plane.
Popular Content
How to make a rocket stove for outdoors
Cardboard Drawers Lined with Jeans
Ideas and Advantages of Window Grilles for the Home!
Latest Articles
How to make a refrigerator out of insulating material: Practical step-by-step guide
How to make a Kilim for the Home: Complete Step by Step Guide
How to protect ourselves from accidents in our workplace: Complete prevention and safety guide
Related Content
Unique Pots that Add Personality to the House
Great “Floating” Night Lamp with a Simple Design and Easy to Make!
Tutorial to Make a Laminate Countertop for the Kitchen
Guide and Plan for Building Bed Frames with Storage!
Creative Home Decor Ideas to Transform Every Space
Refreshing your home starts with smart design choices that combine comfort, personality, and functionality. Whether you want to modernize a small apartment, upgrade outdoor areas, or create cozy rustic interiors, these trending ideas can completely change the atmosphere of your space.
Outdoor Spaces That Increase Style and Functionality
Outdoor living continues to dominate modern home trends. Homeowners are increasingly investing in practical entertainment zones inspired by these BBQ shed ideas, which create the perfect setup for gatherings and weekend cooking sessions.
First impressions also matter when designing exteriors. Elegant farm entrance gates design ideas help properties stand out while improving privacy and curb appeal.
Compact living solutions are also gaining popularity. These inspiring 16x40 shed house interior design ideas show how smaller spaces can still feel luxurious and functional.
To enhance patios and entryways, homeowners are adding stylish protection with these creative porch awning exterior DIY ideas that blend aesthetics with practicality.

Rustic and Cozy Interior Design Trends
Warm and natural interiors remain timeless. These charming rustic decor ideas combine wood textures, vintage accents, and earthy tones to create welcoming spaces.
Bedrooms are becoming more personalized with curated wall arrangements. Many homeowners use these stylish picture wall ideas for bedroom spaces to display memories and artwork creatively.
Textured wall treatments are another major trend. Installing a board and batten wall adds architectural character while keeping interiors elegant and modern.
Similarly, bold accent wall ideas can instantly transform plain rooms into eye-catching focal points without requiring a full renovation.
Smart Kitchen and Organization Inspiration
Functional kitchens are essential for modern homes. These practical kitchen wall cabinet ideas maximize storage while maintaining a clean and stylish appearance.
Organization also starts at the entrance. Well-designed mud room ideas help families keep shoes, coats, and daily essentials neatly arranged.
Colorful and Personalized Home Styling
Vibrant interiors are becoming increasingly popular thanks to playful dopamine decor ideas that use bright colors and joyful accessories to improve mood and energy.
Gallery walls also continue to evolve as a major decorative feature. These trendy gallery wall inspiration ideas offer creative ways to combine prints, photos, and statement art.
Young renters and new homeowners are especially embracing these stylish first apartment aesthetic ideas to create sophisticated interiors on a budget.
Finally, selecting the right shades can dramatically influence any room’s atmosphere. These modern trendy color ideas help homeowners choose palettes that feel fresh, elegant, and timeless.
Final Thoughts
From rustic charm and colorful interiors to outdoor entertaining areas and functional storage solutions, today’s home decor trends focus on creating spaces that feel both beautiful and livable. By combining smart layouts, modern textures, and personalized decorative elements, any home can become more stylish, comfortable, and inspiring.


