
How to Make a Mountain-Shaped Bookshelf, if you have a lot of hardcover books. A mountain of books. Our apartment has exactly zero shelves. But there is 16 feet of free wall space that a bookcase can go into.
So these are my plans to make a proper bookshelf. The project is not so expensive when you do it yourself.

Step 1: Tools and materials


Tools:
- Safety glasses
- Circular saw/table saw/jig saw/cross-cut hand saw
- Drill
- Hand sander
- Workbench
- Wood drill bit
- Angle drilling guide
- 3/8″ dowels
- Clamps
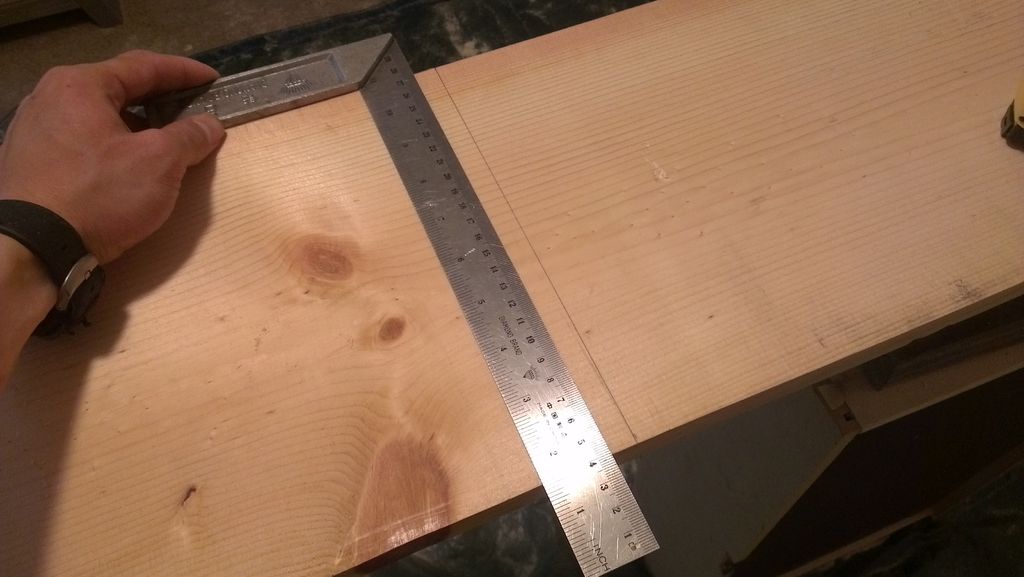
- Carpenter's square
- Tape measure
Materials:
- 5 Softwoods – 8′ Lengths of 1 x 10
- 14 Softwoods – 6' lengths of 1 x 10
- 132 3/8″ x 2″ Hardwood Bolts
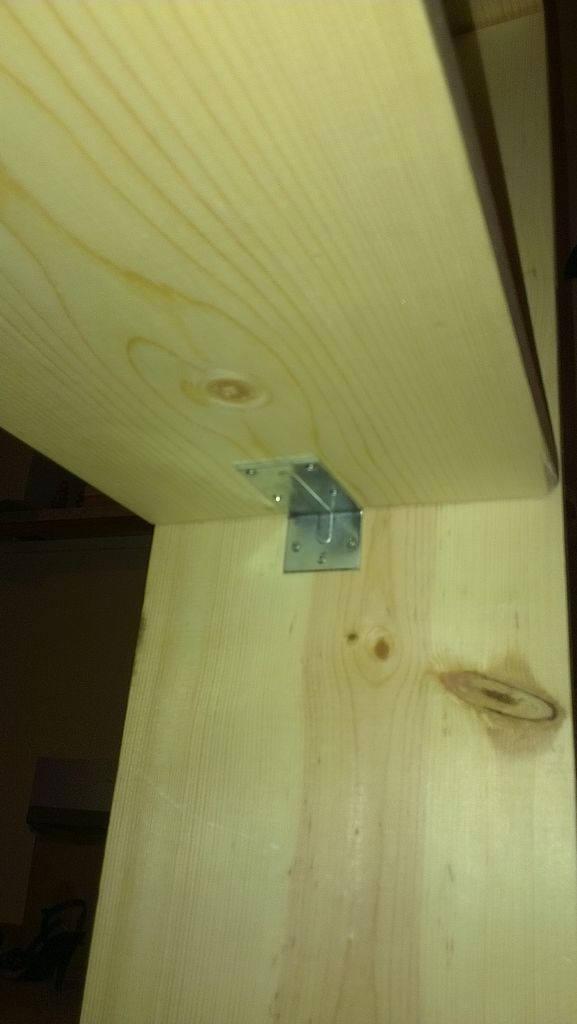
- 24 2½” x ½” Corner Braces
- 4 2″ Corner Brackets
- 4″ connection plates
- Wood finish and protection of choice
- Wood glue
- Wood screws
Another option instead of Fir/Pine is to use a good quality ¾” plywood. A 4'x8' board cut into 1'x8' boards is a cheaper option if you don't mind seeing the plywood edge.
Step 2: The design
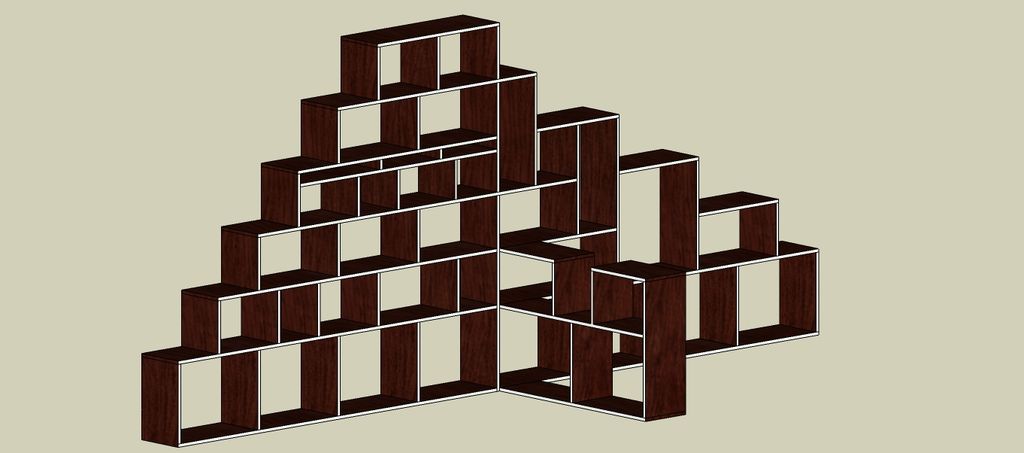

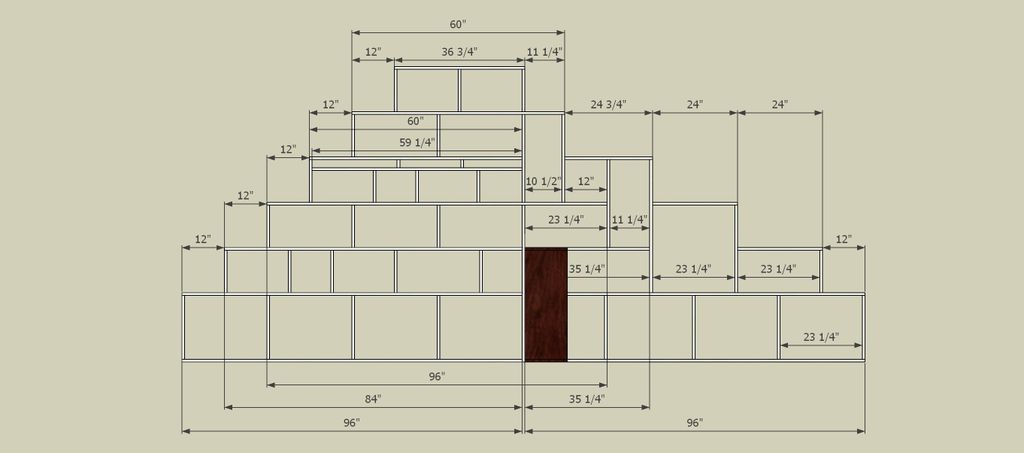


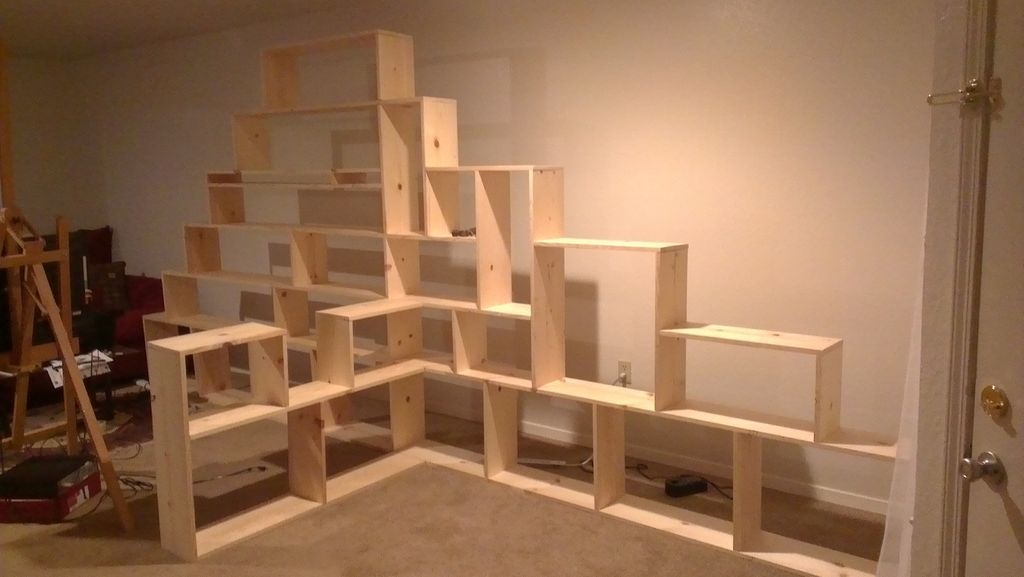
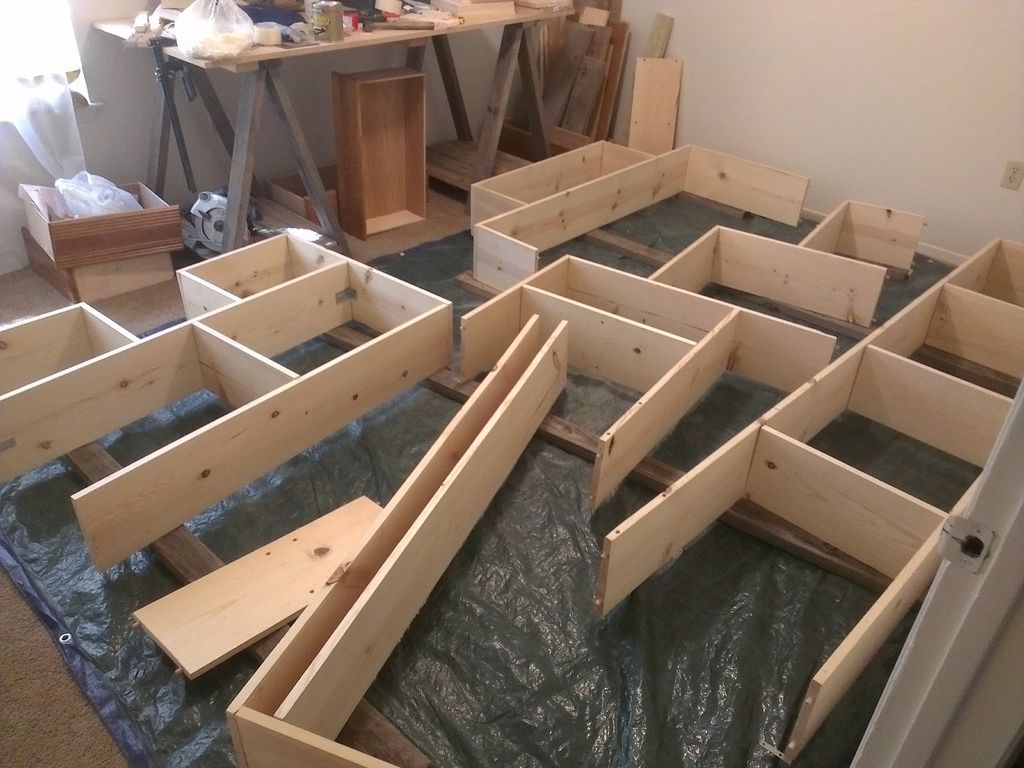
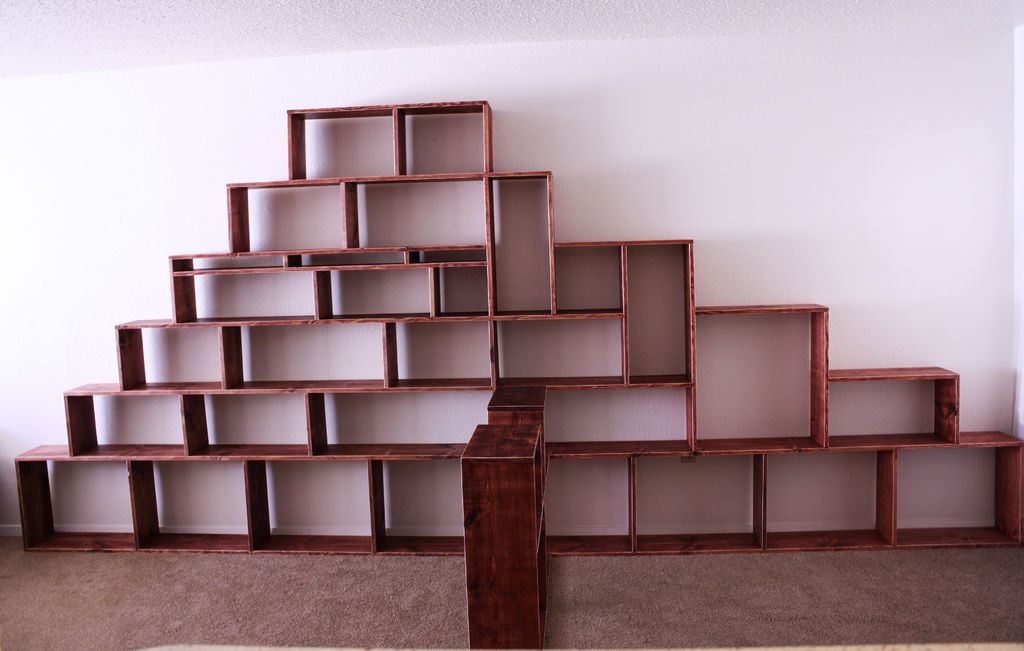
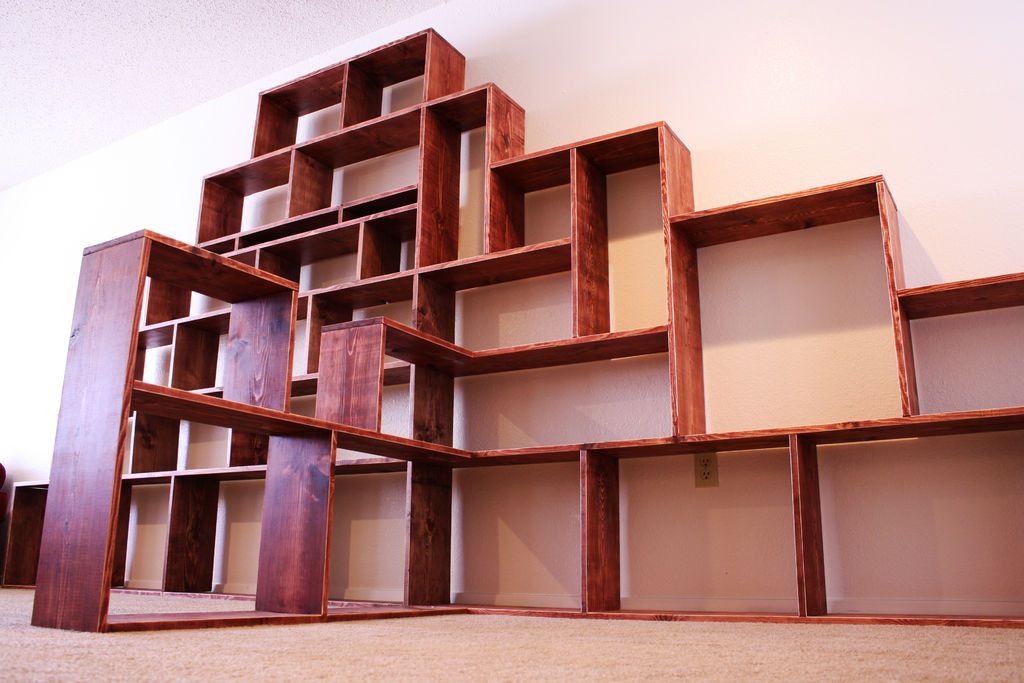
I opted for a slightly unusual mountain-shaped design. The left side is a set of straight shelves in decreasing lengths with one of the lower shelves for placing DVDs. The right side is a set of compartments of various sizes for books, tall things or other decorations. Each shelf measures 12″ high except for the bottom tier which measures 18″ high. The T-section protrudes 4' from the shelf and measures 2½' tall and helps divide the room into a living room and study area.
Step 3: Cuts
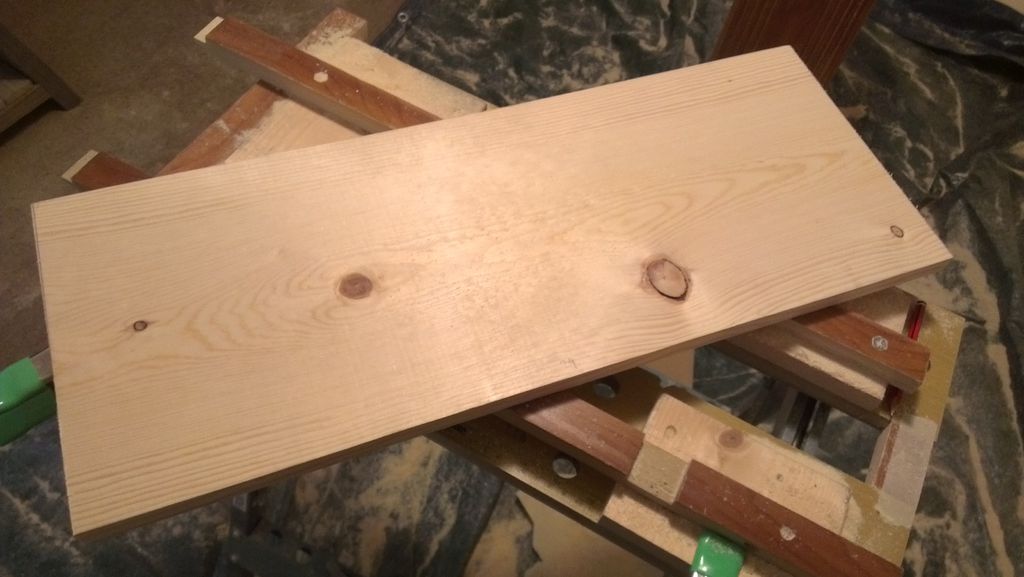
I didn't have a table saw or router for this project, so there are no joints or mortise and tenon joints. The boards are connected with pins fixed at the ends and some corner brackets at the back to support the external corners and prevent the entire construction from stacking.
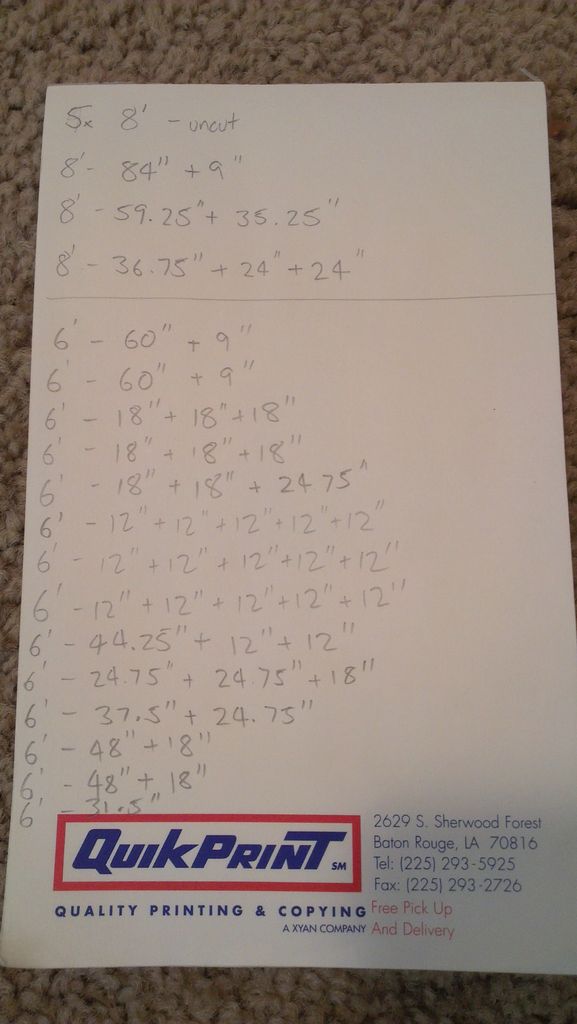
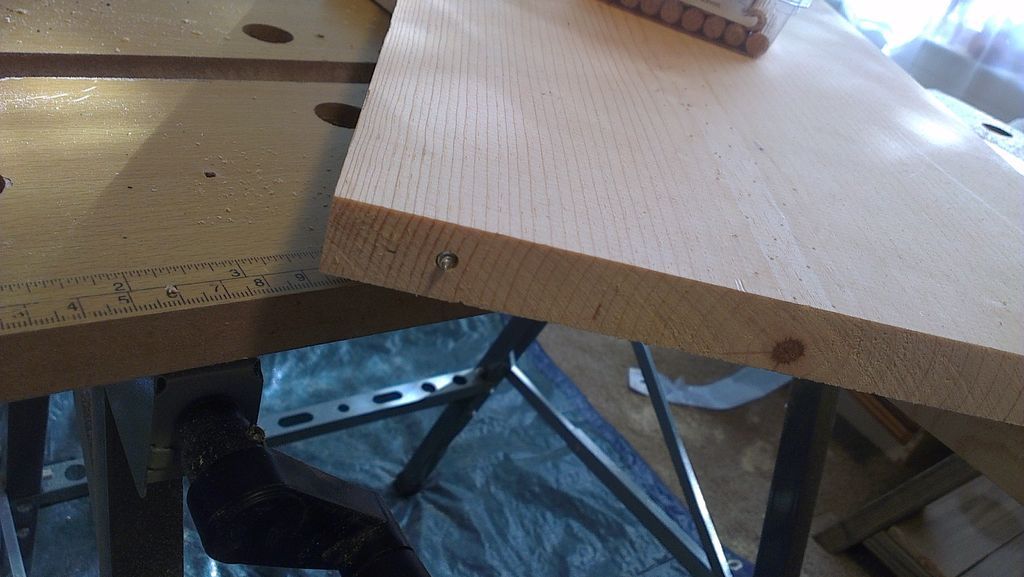
I planned the cuts by hand since I couldn't find a good plate calculator. Having the 3D model is useful to draw dimensions for the cut that already take into account the thicknesses of the plate. I used a circular saw to make all the cross cuts to cut the boards to size. 49 cuts in total. To help speed things up, I made a sled that my saw rides to make cuts perpendicular to my mark line.
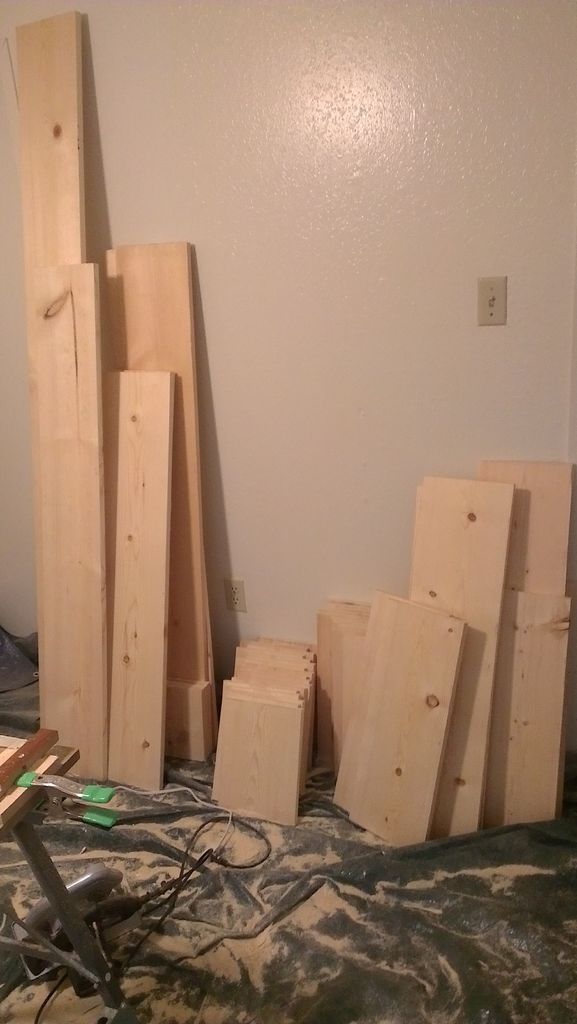
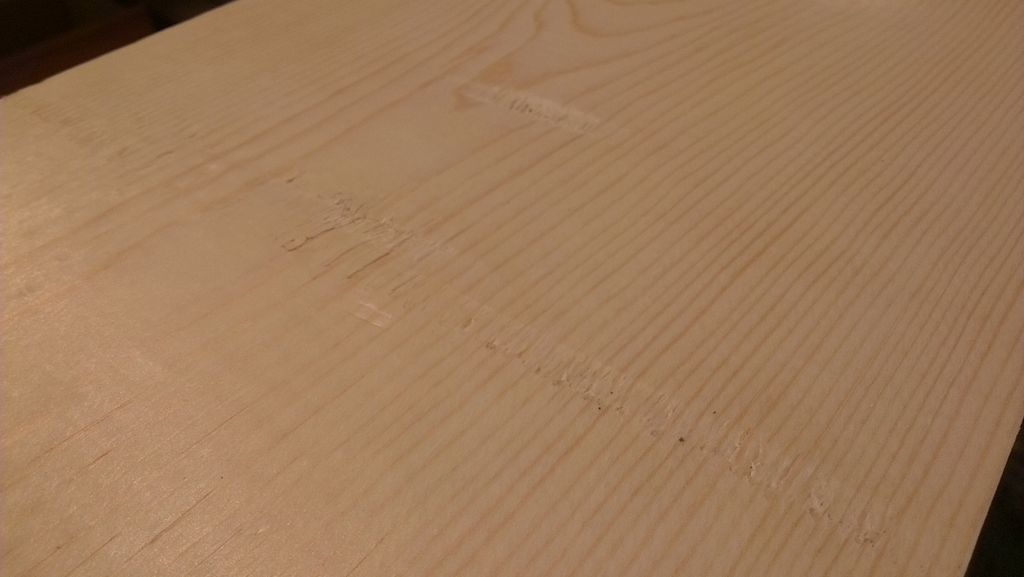
The boards were the cheapest you can find at a big box store, so careful selection of the straightest, least cupped boards was pulled from the stacks. Arrange the boards so that the best side is visible. And be careful of eLabel the boards with their length after cutting. The cut list should give you all the pieces for the plan.
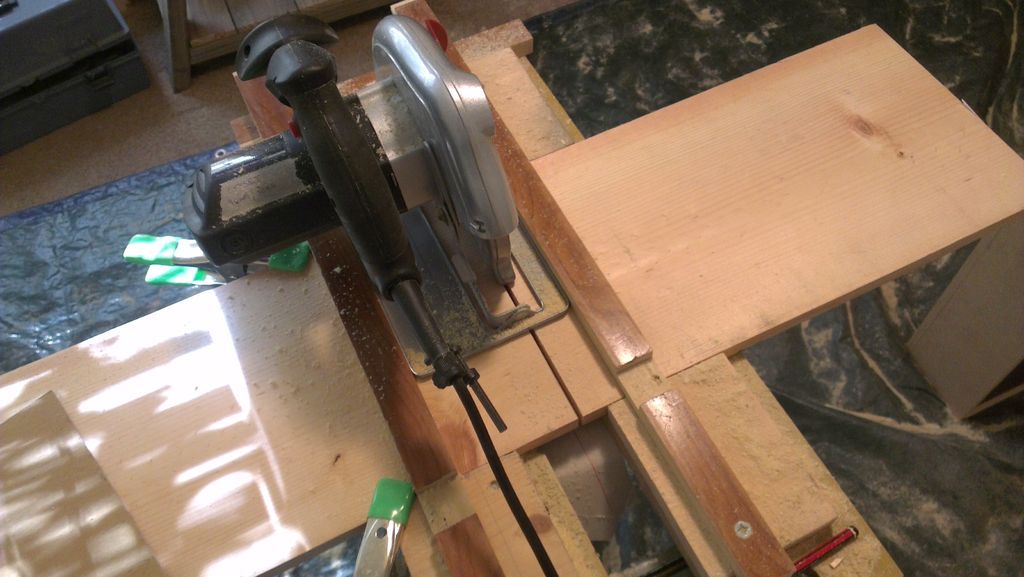
Step 4: Drilling
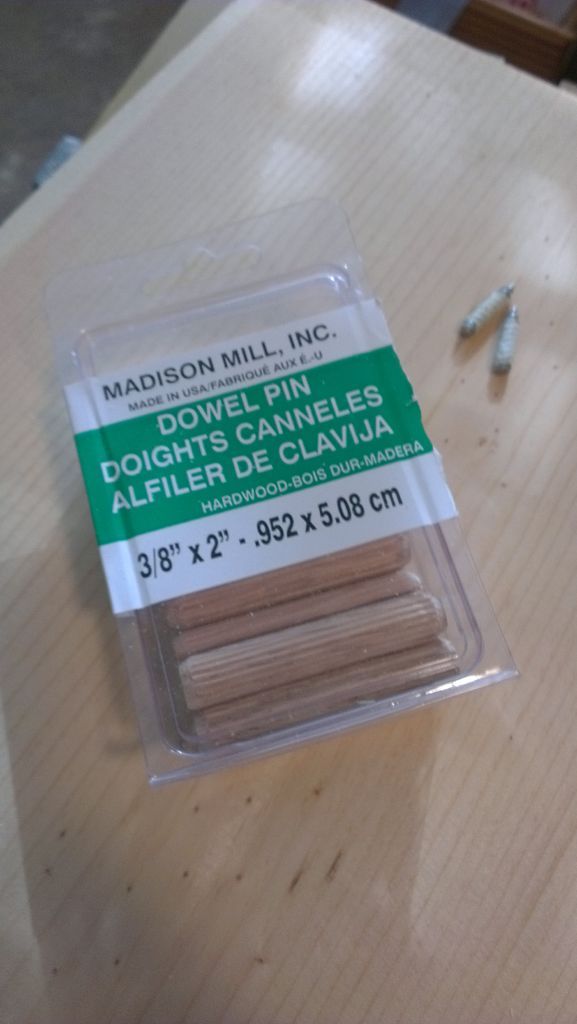
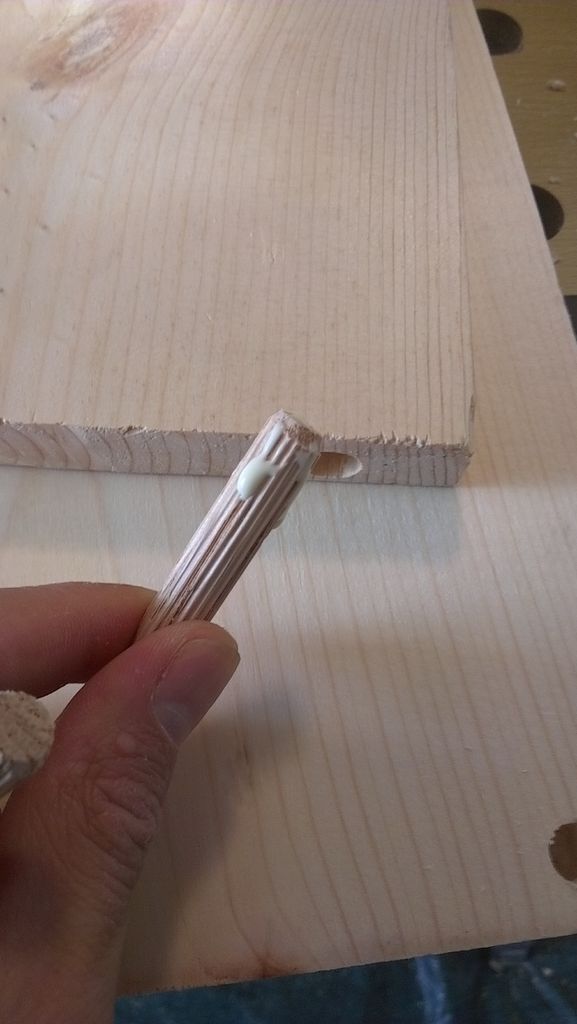
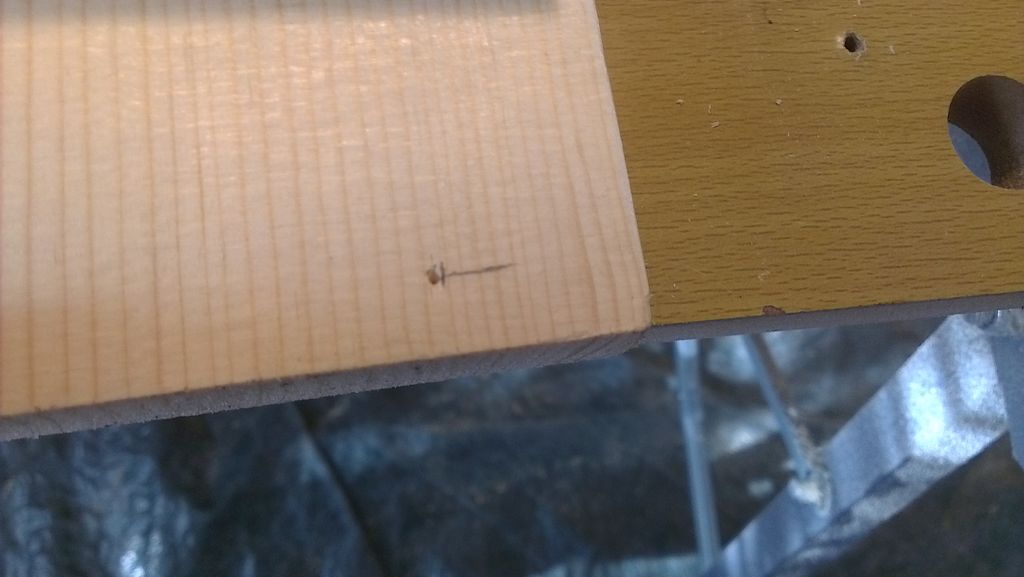

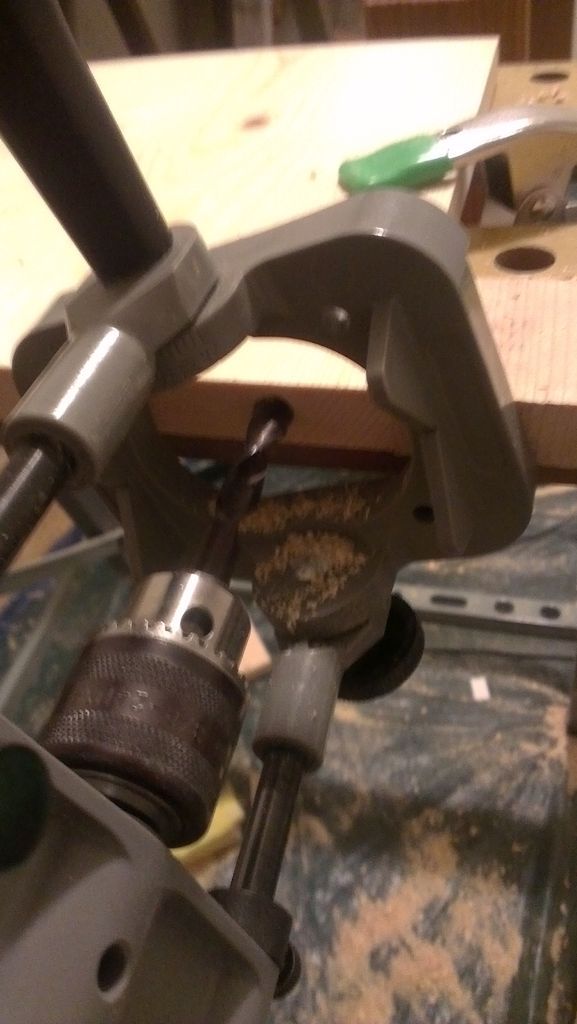
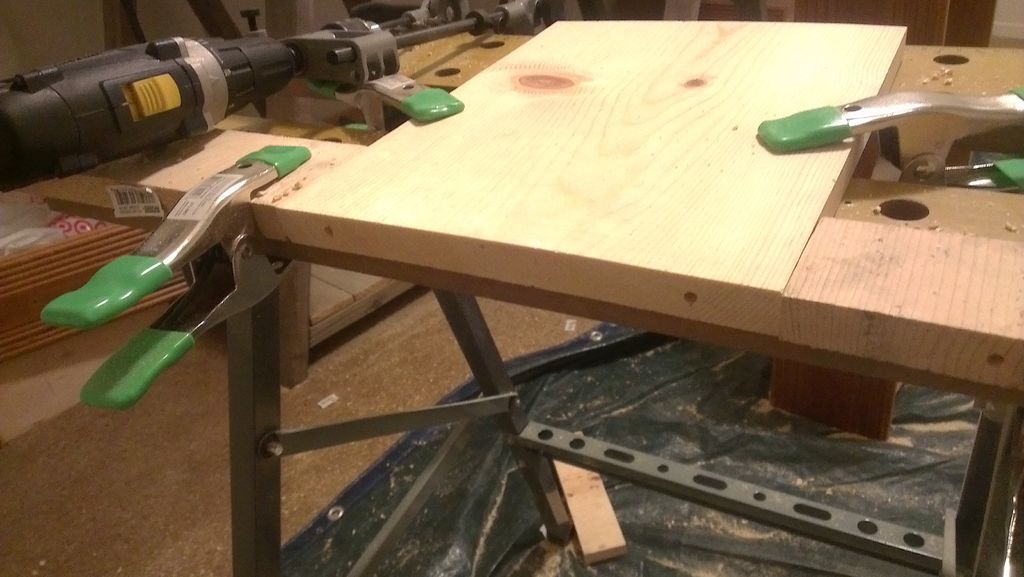
I bought a discounted drilling guide to help me drill the holes for the dowels as close to 90° on the ends of the boards. It also provided me with stops for drilling depth. Most of the holes are 1″ from the edge of the board. Vertical pieces have the hole at the end of the grain 1 3/8″ deep, horizontal pieces are 5/8″ deep. Hold the plate and secure two scrap pieces on each side to provide more surface area for the drill guide to rest on. If you have more appropriate dowels, drill the 3/8″ hole first in the end grain of the vertical pieces and through the horizontal pieces with the drill centers in place to mark where the corresponding holes will be.
I didn't have drill centers so I cut off the heads of the two screws to leave the thread and the tip, I covered the thread with masking tape to fit my 5mm pilot hole. The pilot hole is drilled so that only the tip of the screw is sticking out and when it lines up with the joint board it will put two marks that I can center my holes with. This ensures that my pins will always fit and line up. If you can measure and drill perfectly accurately then this is not necessary, but it is rarely perfect so it offers a best case scenario.
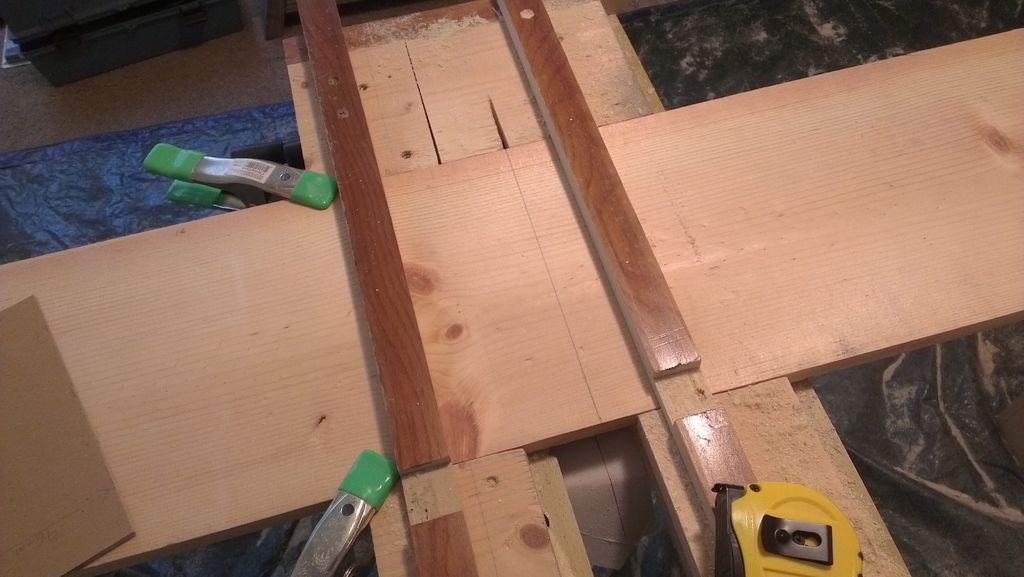
While the outer upright boards have dowels and clamps to connect them, the inner upright pieces between the shelves on the left side have no pins or fixings at all. These pieces simply float like the ends of books between the shelves and can be positioned and moved according to the needs of the shelf. The weight of the books will hold the boards in place, and I recommend not having a shelf span of more than 3 feet, for fear that a particularly heavy encyclopedia will break the shelf in half.
With the holes drilled, drop the dowels with a little wood glue into the end grain holes (i.e. the dowels are aligned with the planks). This makes it easy for the library to be disassembled into flat, easily transportable pieces.
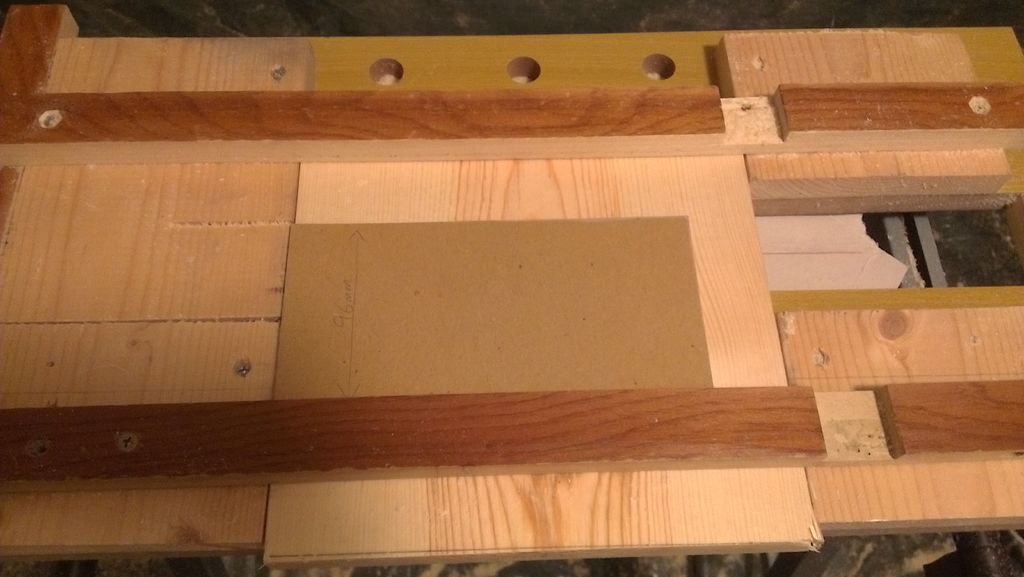
Step 5: Assemble!
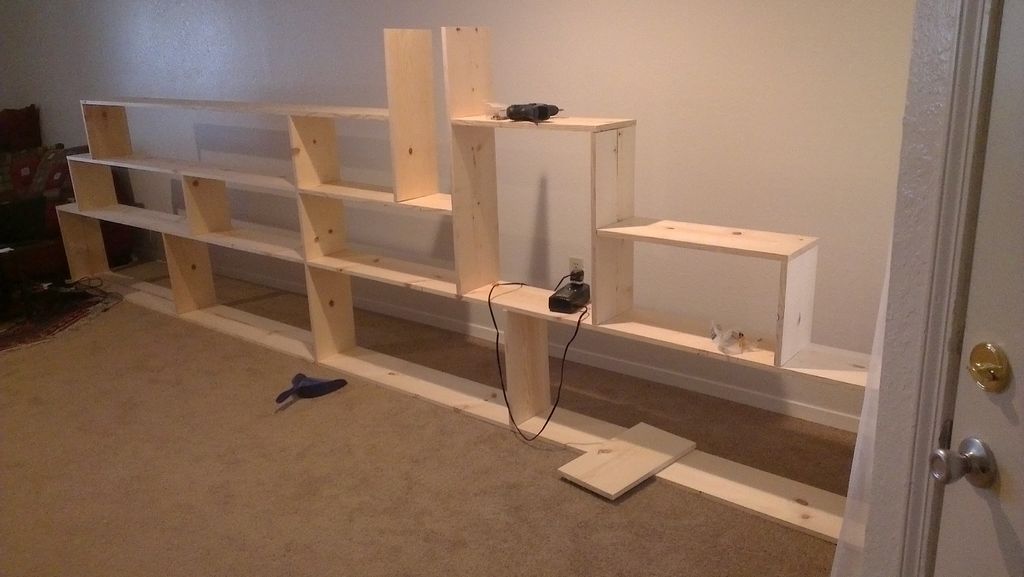

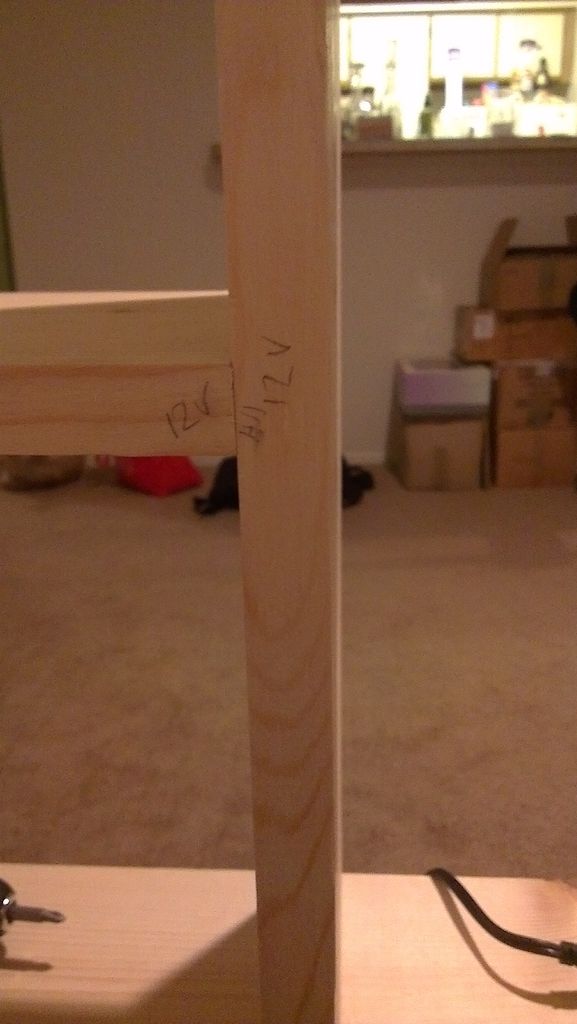
With the pieces cut, drilled, and doweled, perform a dry fit on all the pieces to make sure they fit together in the correct order. With the dry fit complete, take the time to label the back of the boards to aid in later assembly. I marked the boards "V" for vertical and "H" for horizontal and then numbered from the floor up and from left to right. This gives each piece a unique designation. At the intersection of each piece, write the piece it connects to at the ends to give a specific position and order. Place the corner clamps at the outside corners (i.e. the outermost intersections around the perimeter) on the back to prevent stacking.
Step 6: Disassemble!
Once you're done admiring your shelves, you could stop there and be satisfied. However, softwood is unprotected. I opted for dark paint and a polyurethane finish to add some depth and substance to the relatively thin shelves. Separate the shelves and place them face down on some wooden slats to lift them up.or the floor and allow better access.
Step 7: Finishing

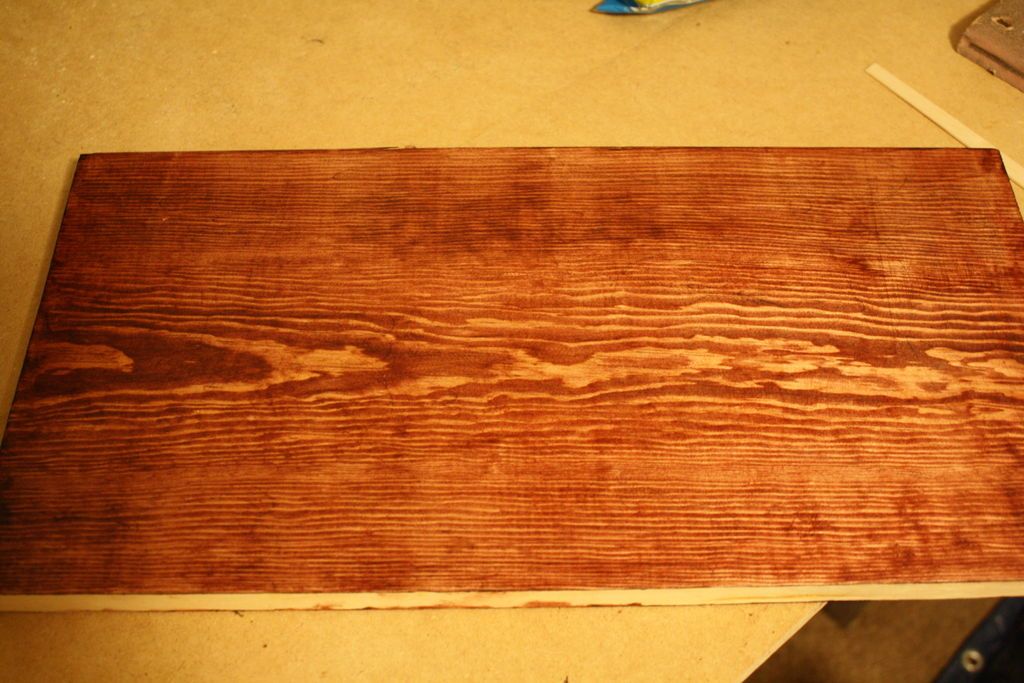

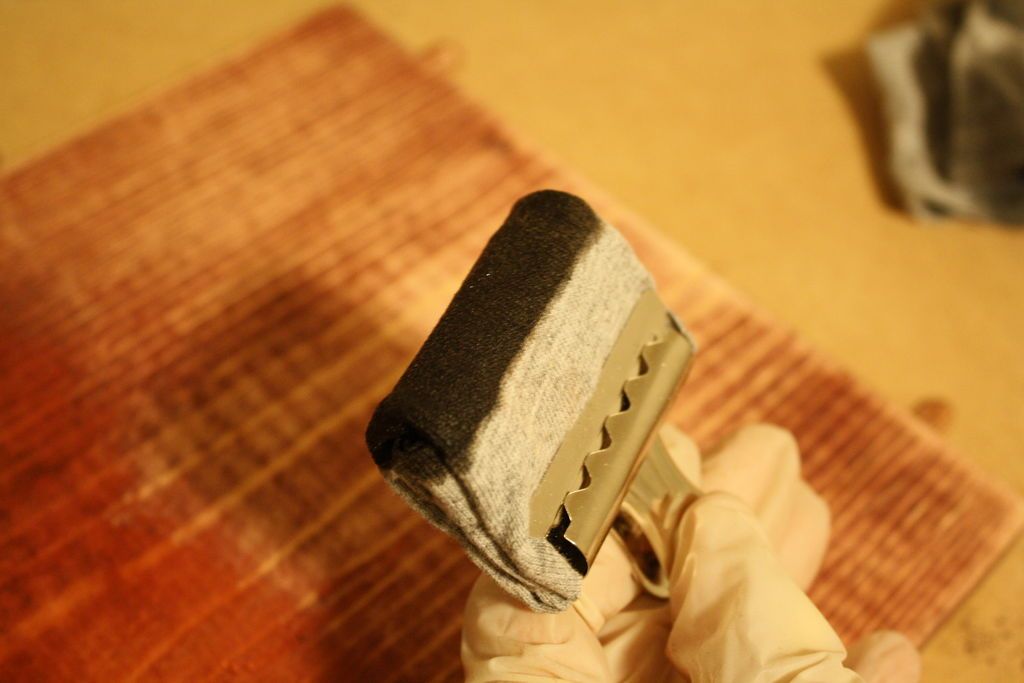
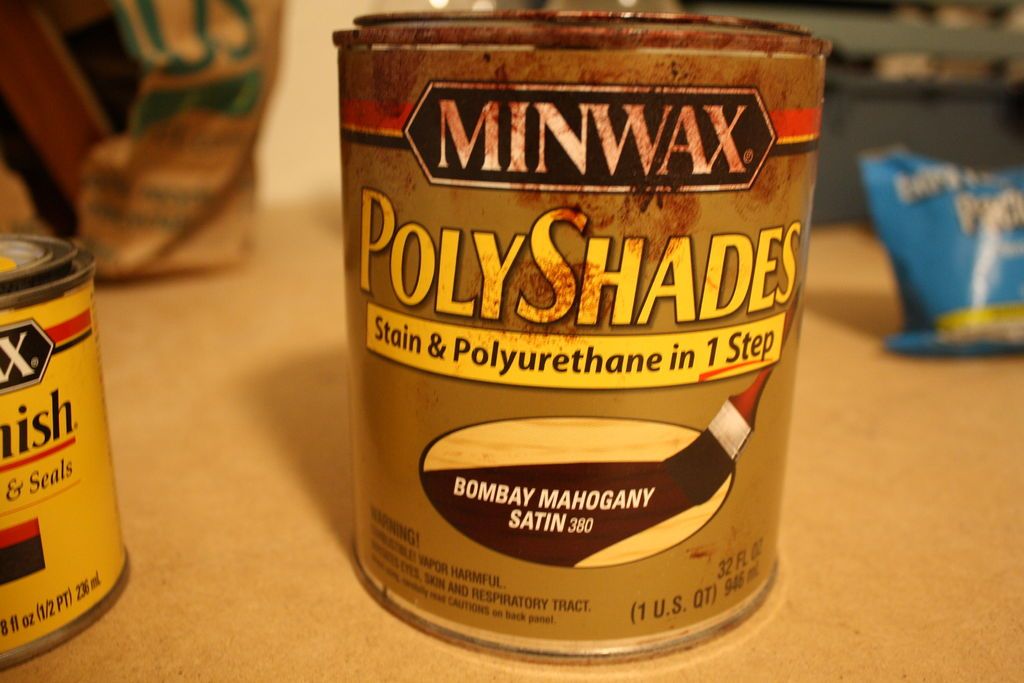
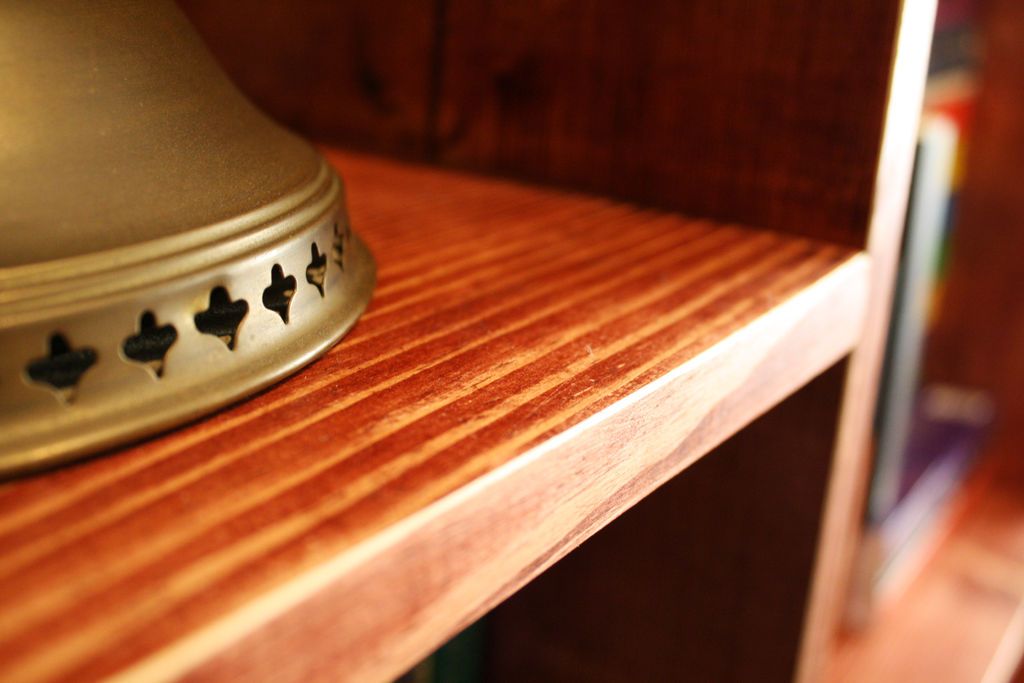
The first coat is dried overnight and then sanded with 80 grit paper and an electric sander to remove the stain from the high grit levels. Next, I applied another coat of mahogany mixed with Minwax Ebony Stain at 5 parts mahogany to 1 part ebony to further darken the wood. This is applied to the boards to give more depth to the color and give the wood a more aged appearance.
Step 8: Details
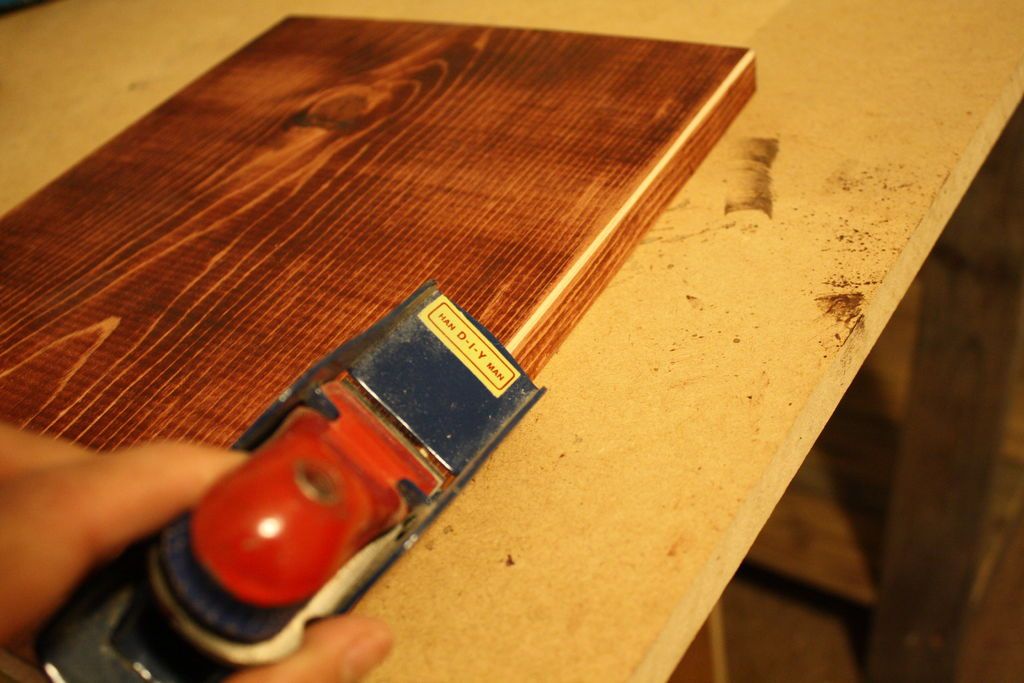
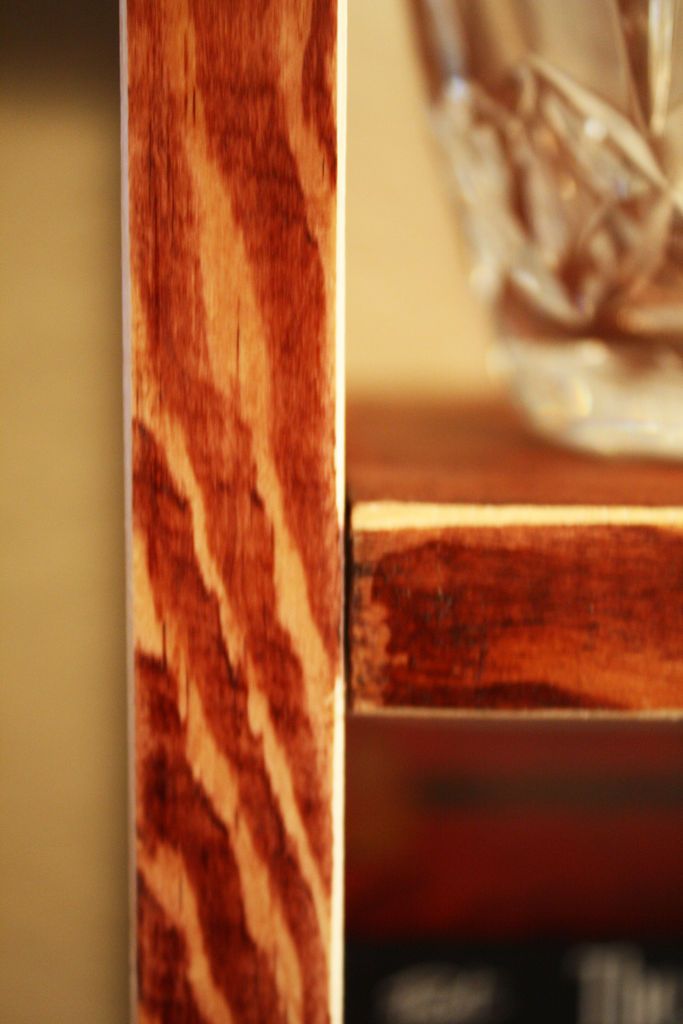
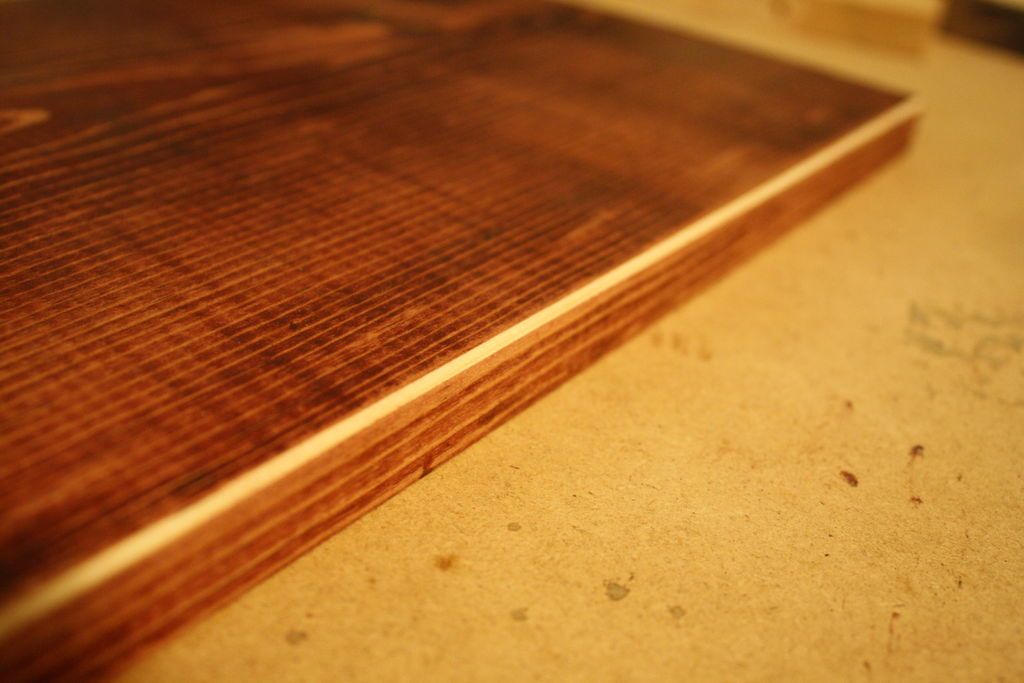
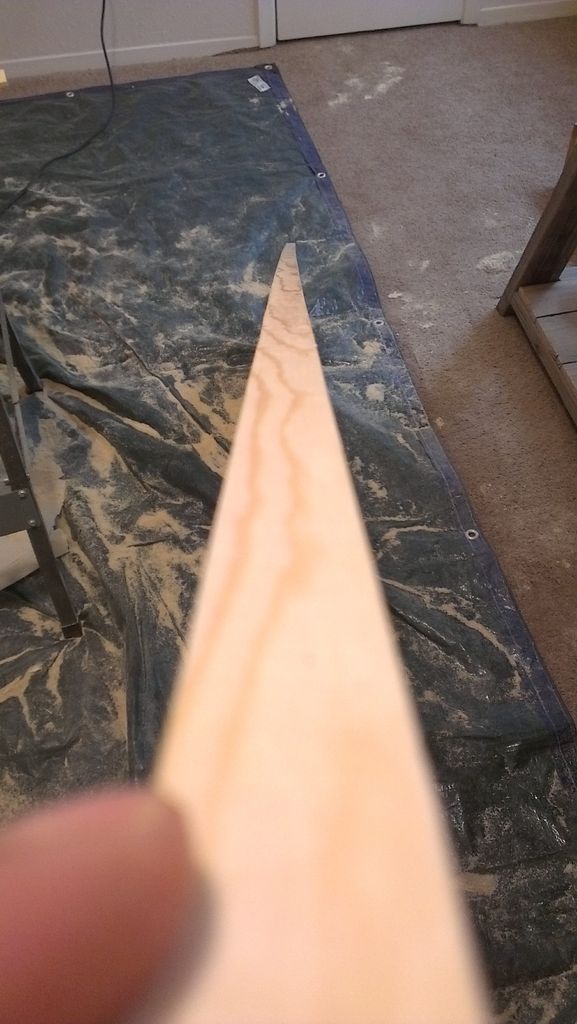
With the paint dry, bevel all edges of the boards with a plane and utility knife to leave approximately a 3/16″ (2 mm) chamfer. Where there were intersections, I left the edge square so the pieces would meet and the chamfer would continue on the other side. This left a nice line of lighter color around all the pieces which helped give more depth to a single color tone.
Step 9: Reassemble
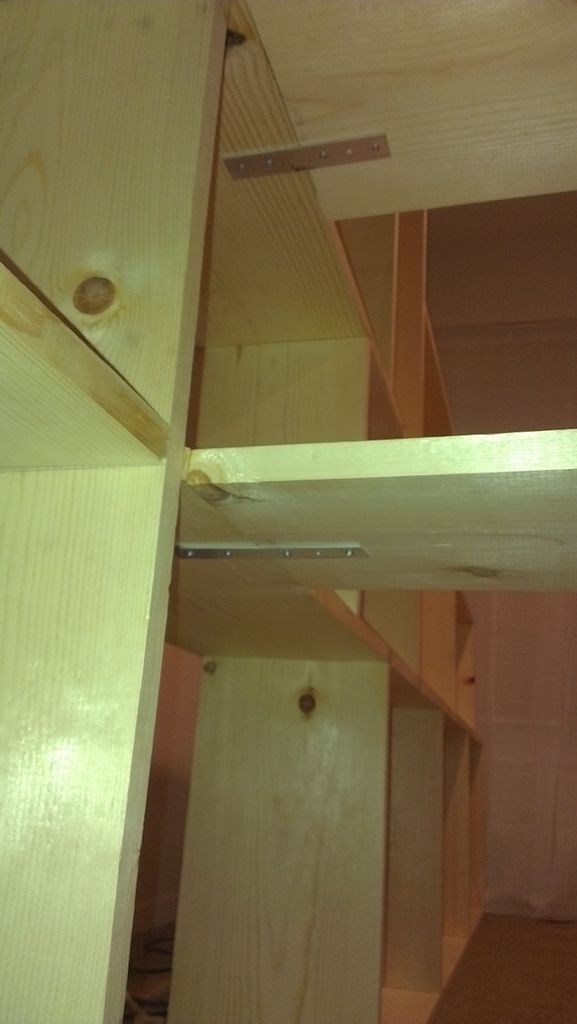

Join all the pieces together in the order you expected to mark. The protruding T section is also joined by pins at the intersection, but also has flat connection plates screwed into the bottom to hold them together. There is also a corner support on the vertical panel to keep it aligned with the other pieces.
Step 10: Security
As the entire unit measures over 16′ long and 6.5′ tall, it needs to be anchored to the wall to prevent it from falling and trapping any small plants or children. Use the remaining 3 corner brackets screwed to the bottom of a shelf and then to a wall stud.
Step 11: Everything finished!

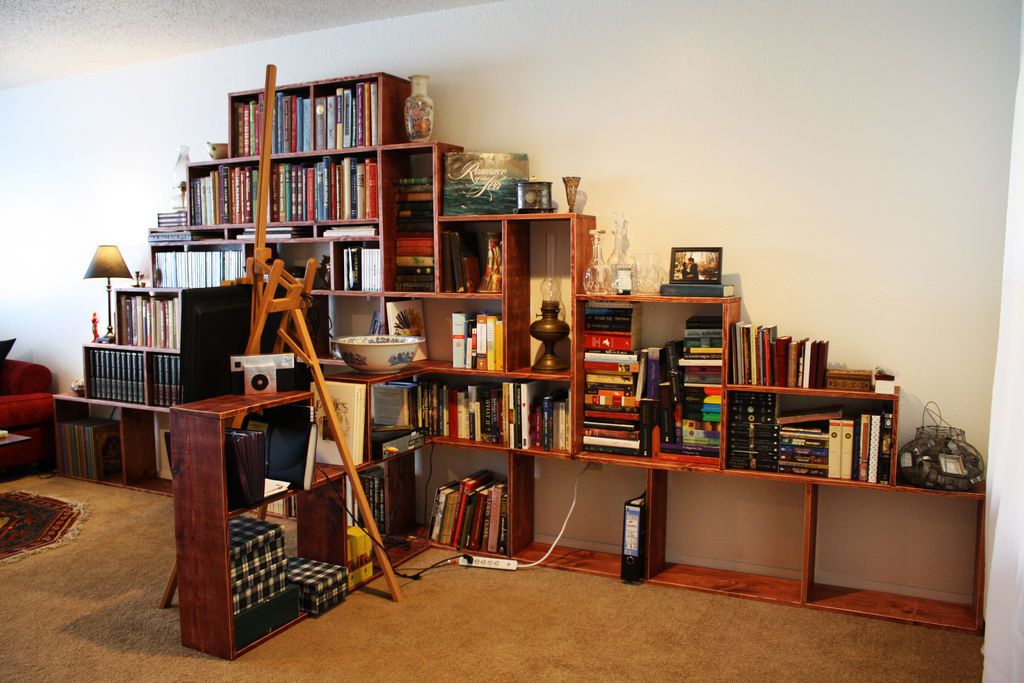
With the secure shelving, you can admire your alternative shelving solution and display all your books and pieces. Look at your mountain of books! I was a little worried about the weight distribution with the offset shelves, but everything holds up very well with the immense mass of books.
Get more information at perfectionidea.com and on our Facebook for more How to Make a Mountain-Shaped Shelf.
Popular Content
How to make a rocket stove for outdoors
Cardboard Drawers Lined with Jeans
Ideas and Advantages of Window Grilles for the Home!
Latest Articles
How to make ua refrigerator made of insulating material: Practical step-by-step guide
How to make a Kilim for the Home: Complete Step by Step Guide
How to protect ourselves from accidents in our workplace: Complete prevention and safety guide
Related Content
How to Build a Concrete Block Retaining Wall!
Cloud Shaped Loungers
Watercolor Painted Walls that Explode the World of Dreams
Colorful Interiors for Home Decoration
Creative Home Decor Ideas to Transform Every Space
Refreshing your home starts with smart design choices that combine comfort, personality, and functionality. Whether you want to modernize a small apartment, upgrade outdoor areas, or create cozy rustic interiors, these trending ideas can completely change the atmosphere of your space.
Outdoor Spaces That Increase Style and Functionality
Outdoor living continues to dominate modern home trends. Homeowners are increasingly investing in practical entertainment zones inspired by these BBQ shed ideas, which create the perfect setup for gatherings and weekend cooking sessions.
First impressions also matter when designing exteriors. Elegant farm entrance gates design ideas help properties stand out while improving privacy and curb appeal.
Compact living solutions are also gaining popularity. These inspiring 16x40 shed house interior design ideas show how smaller spaces can still feel luxurious and functional.
To enhance patios and entryways, homeowners are adding stylish protection with these creative porch awning exterior DIY ideas that blend aesthetics with practicality.

Rustic and Cozy Interior Design Trends
Warm and natural interiors remain timeless. These charming rustic decor ideas combine wood textures, vintage accents, and earthy tones to create welcoming spaces.
Bedrooms are becoming more personalized with curated wall arrangements. Many homeowners use these stylish picture wall ideas for bedroom spaces to display memories and artwork creatively.
Textured wall treatments are another major trend. Installing a board and batten wall adds architectural character while keeping interiors elegant and modern.
Similarly, bold accent wall ideas can instantly transform plain rooms into eye-catching focal points without requiring a full renovation.
Smart Kitchen and Organization Inspiration
Functional kitchens are essential for modern homes. These practical kitchen wall cabinet ideas maximize storage while maintaining a clean and stylish appearance.
Organization also starts at the entrance. Well-designed mud room ideas help families keep shoes, coats, and daily essentials neatly arranged.
Colorful and Personalized Home Styling
Vibrant interiors are becoming increasingly popular thanks to playful dopamine decor ideas that use bright colors and joyful accessories to improve mood and energy.
Gallery walls also continue to evolve as a major decorative feature. These trendy gallery wall inspiration ideas offer creative ways to combine prints, photos, and statement art.
Young renters and new homeowners are especially embracing these stylish first apartment aesthetic ideas to create sophisticated interiors on a budget.
Finally, selecting the right shades can dramatically influence any room’s atmosphere. These modern trendy color ideas help homeowners choose palettes that feel fresh, elegant, and timeless.
Final Thoughts
From rustic charm and colorful interiors to outdoor entertaining areas and functional storage solutions, today’s home decor trends focus on creating spaces that feel both beautiful and livable. By combining smart layouts, modern textures, and personalized decorative elements, any home can become more stylish, comfortable, and inspiring.


