
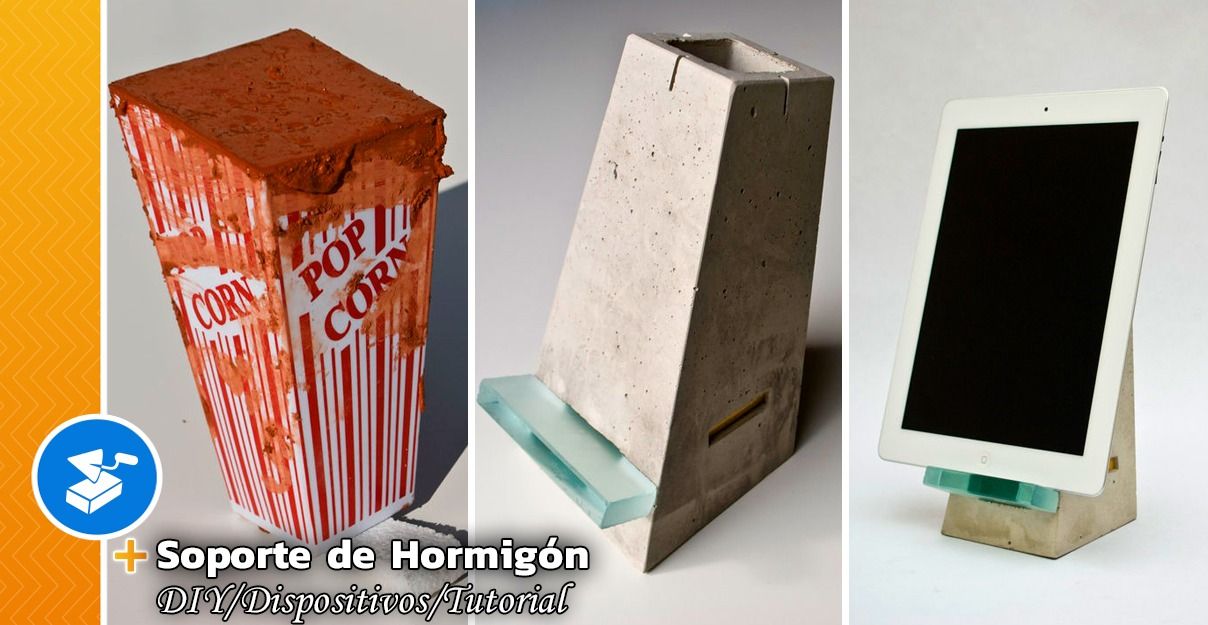
In this article we will teach you how to make a concrete stand for your iPad in a plastic popcorn bucket in a practical way.
You do not need to have prior experience working with concrete, but you should be comfortable cutting thin plastic with a hand saw, molding Styrofoam, and mixing and pouring concrete.

Cutting the plastic shape, sanding the base and making the shelf that supports the device out of wood or tile.
Steps to build your own concrete stand for your iPad:
Time required: 1-2 hours + 2 days to dry
Weight: 4-6 pounds
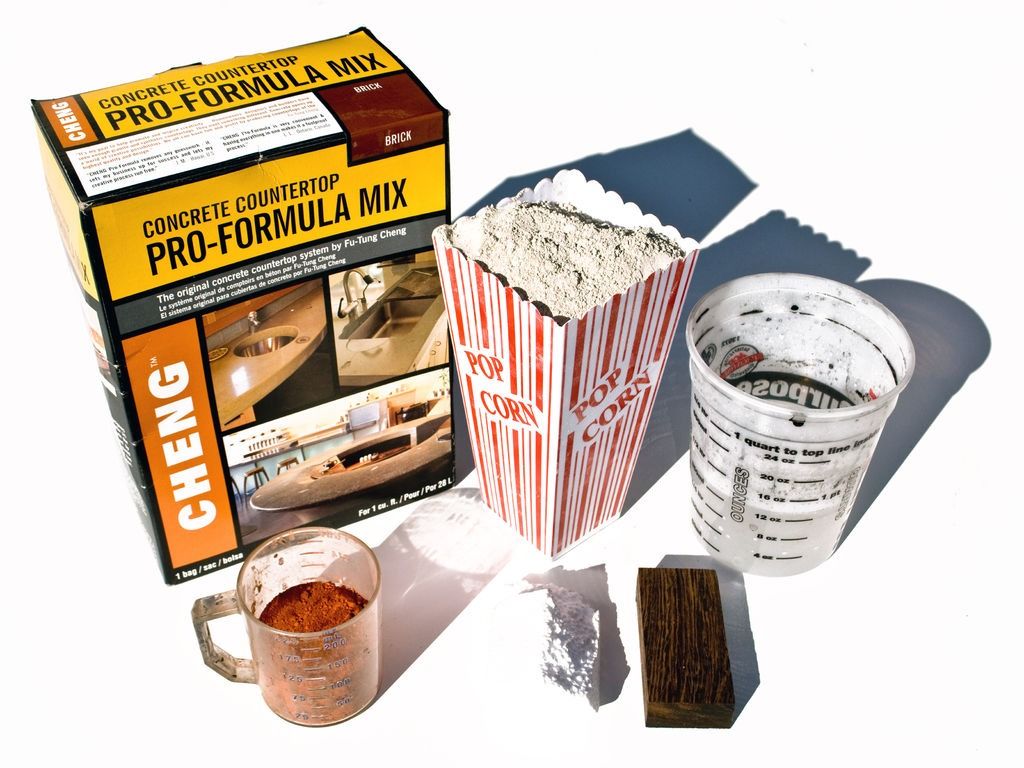
Materials to make the concrete support for your iPad:
- Plastic popcorn shape
- Bag concrete mix: non-aerated, 5000 psi is ideal (a 60 lb. bag will make about 12 of these shapes)
- Pro-Formula Mix (1 cubic foot box per two 60 lb. bags)
- Sealer
- Wax
- Styrofoam (small pieces of scrap metal)
- Wood (5″ thick)
- 2 Parts epoxy
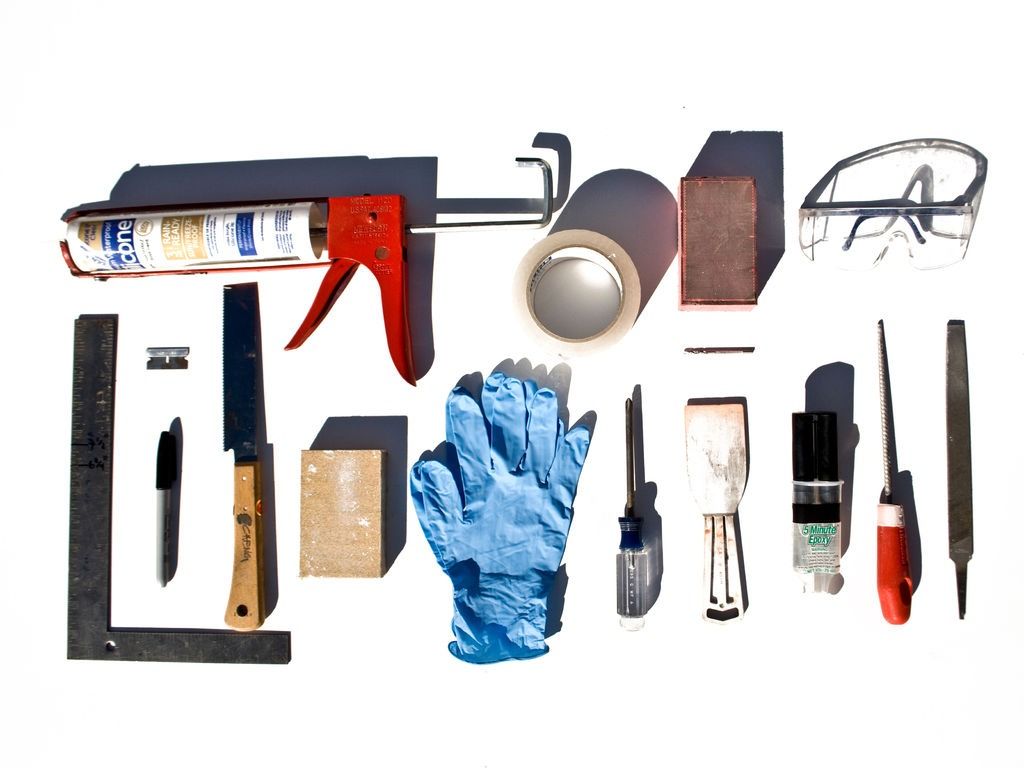
Tools:
- Rule
- Permanent marker
- Transparent packing tape
- Hand saw (Japanese style with fine/medium teeth)
- Razor Blade/Utility Knife
- Sandpaper/Handheld Diamond Polishing Pad
- Slotted Screwdriver/Phillips Screwdriver
- 1/16″ Drill Bit
- Silicone (100% silicone, door and window sealant)
- Rubber gloves
- Safety glasses
- Mixing Buckets
- Plastic scraper
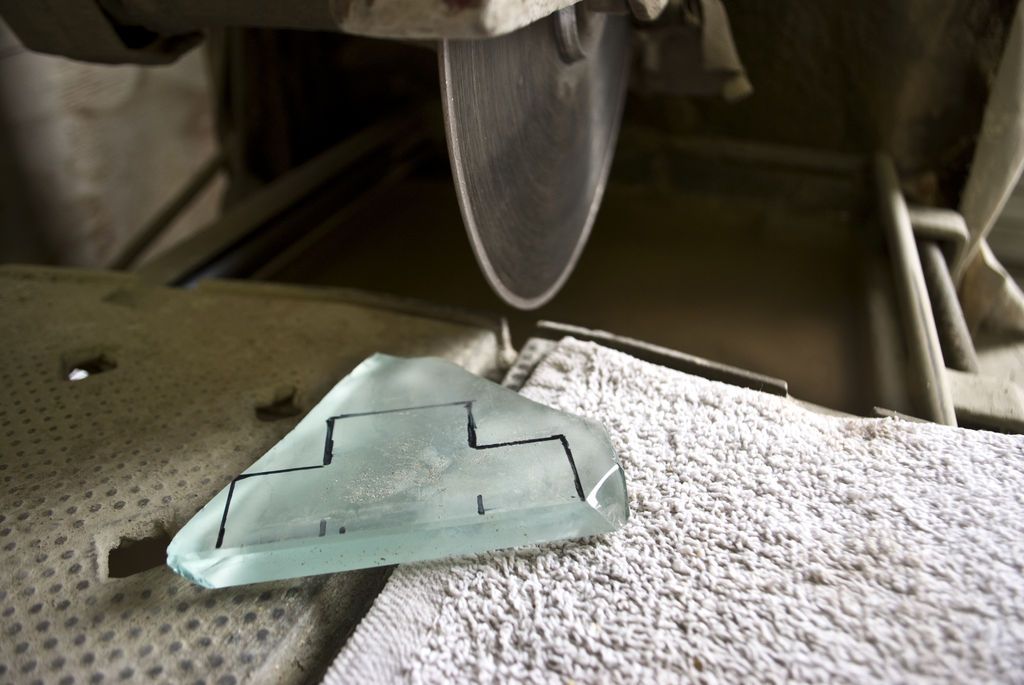
Step 1: Measure, Mark + Cut the concrete shape

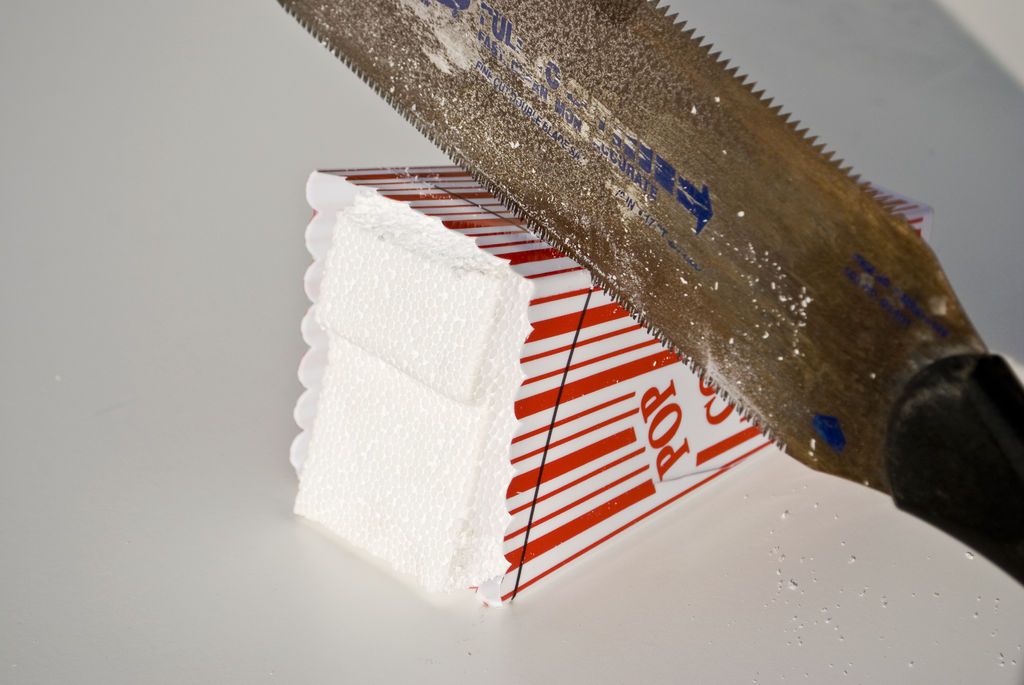
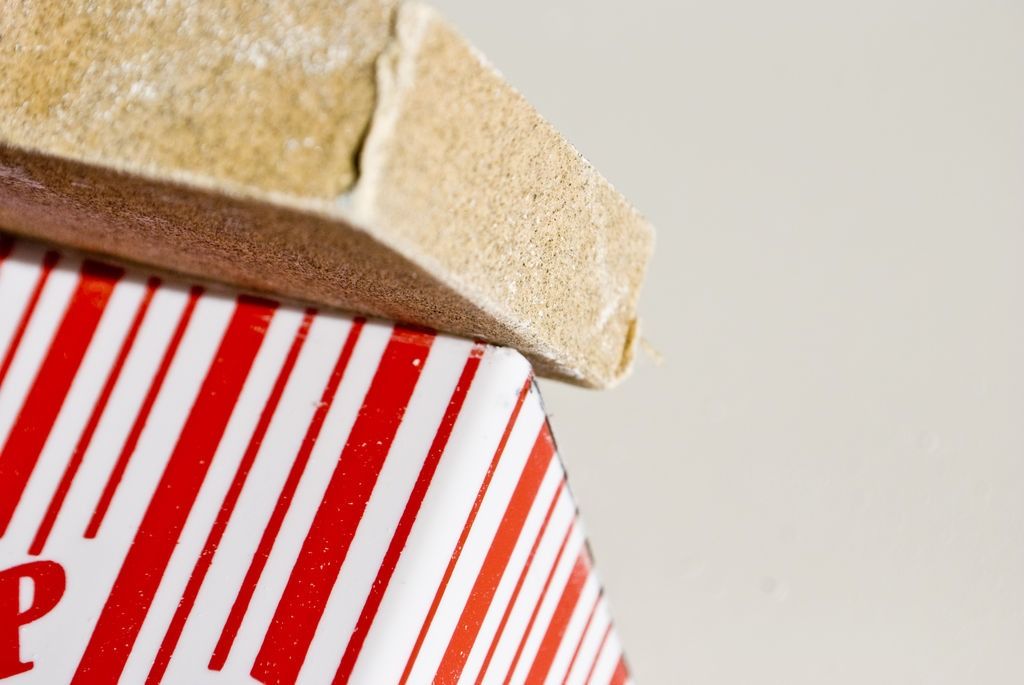
- Mark two adjacent corners at 7½” and the other two at 6¾”. Draw four lines connecting the dots with the permanent marker. This is the cut line.
- To help support the plastic container while cutting, cut a block of Styrofoam (about 3¾" x 3¾") and push it into the opening of the form.
- Starting from a corner, I gently saw back and forth to begin a straight cut. Go slowly at first, alternating back and forth between the corners until you can connect the slices and cut them. Repeat on remaining sides until cutting is complete.
- Clean the edges of the plastic with some coarse sandpaper (80-100 grit) and be careful not to scratch the inside of the form (any scratches will transfer to the concrete).
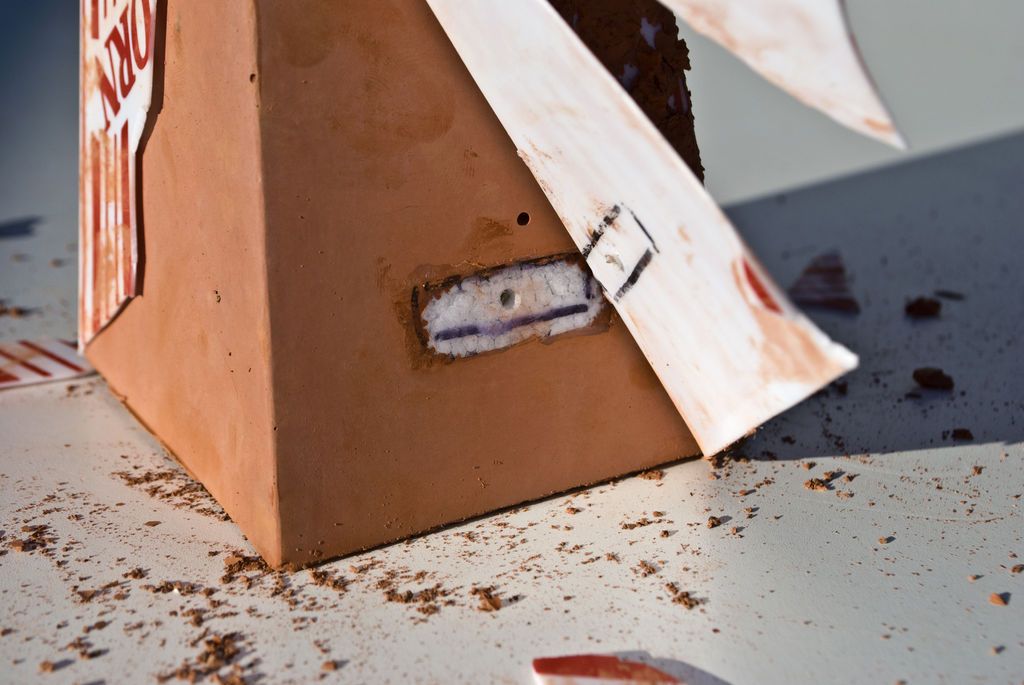
Step 2: Make, tape, silicone + Install the foam

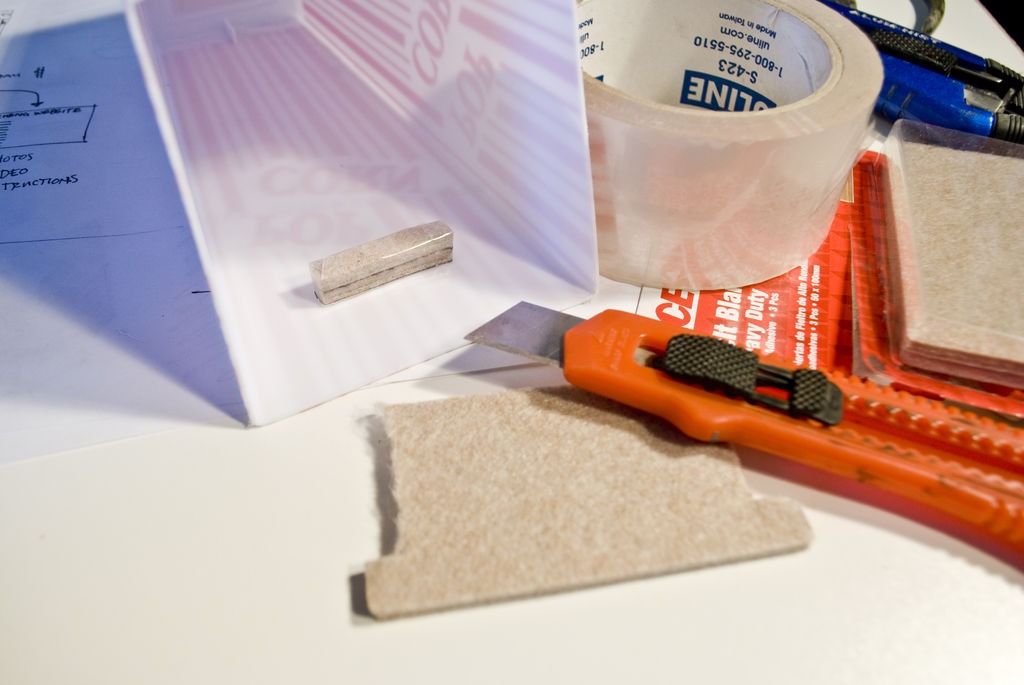
- A piece of foam, rubber, plastic, felt, etc. which is clamped inside the form to create a void, gap or opening in the concrete. For this piece we will use a small one to create a gap for the "shelf" to slide in. It should be about ¼” thick if you are gluing the shelf in place.
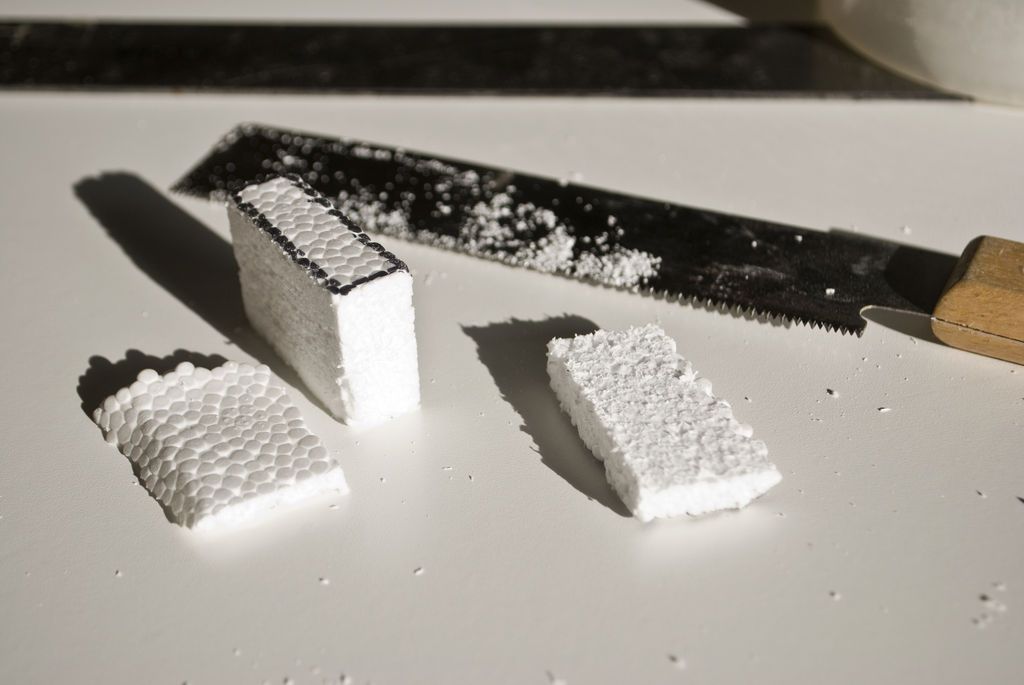
Styrofoam:
- Cut a small piece of Styrofoam with a saw or knife into a rectangle and sand to (1½” wide x ½” tall x ¼”- ½” deep).
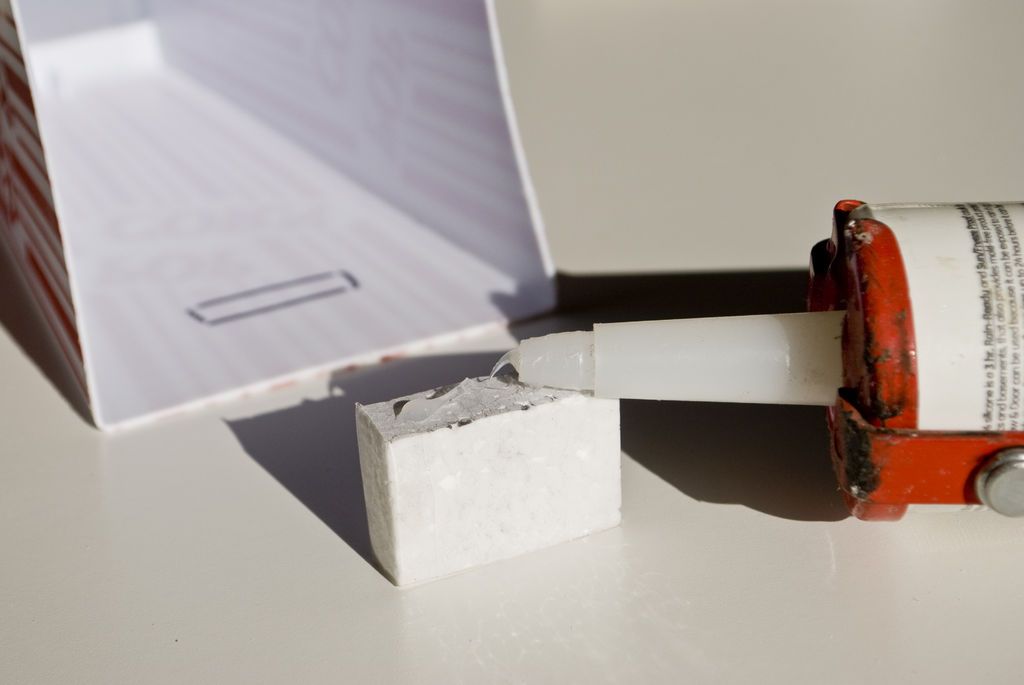
- Wrap the Styrofoam with clear packing tape. This will prevent it from adhering to the concrete and will give us a smooth surface.
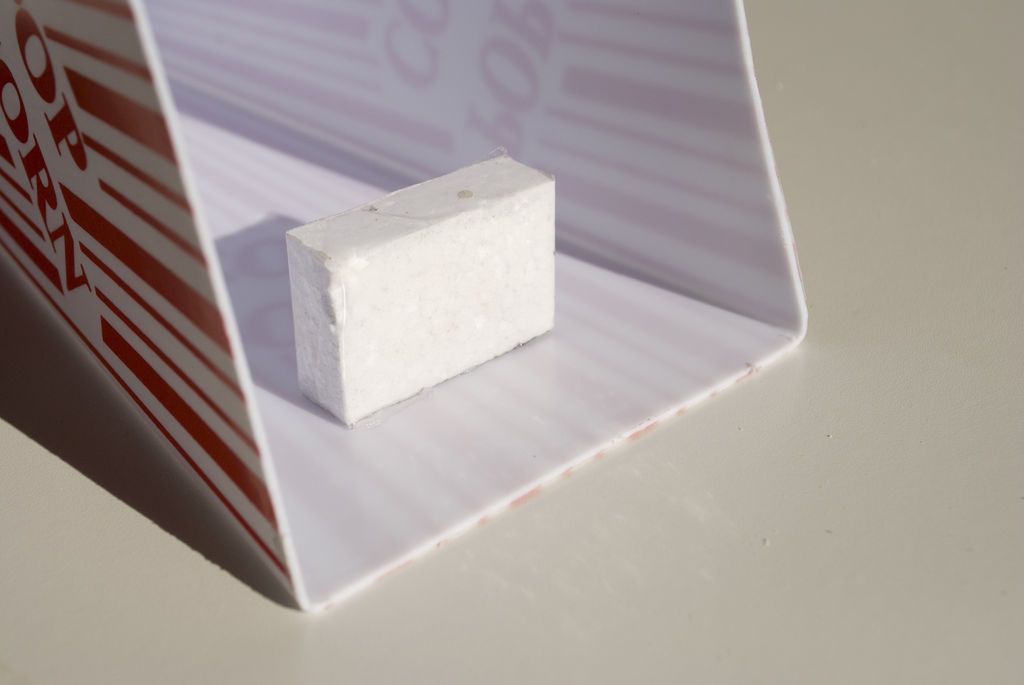
- It might be helpful to make a small cardboard template to use as a guide to center the foam on the form. Apply a thin layer of silicone to one of the ½” faces and press it down to remove any excess silicone that squeezes out and wait a few hours for it to dry.
- Drill or cut a holesmall (1/16″) hole behind the knockout and install a short 1″ screw so the knockout does not move away during pouring. (The silicone will prevent the concrete from seeping between the blind hole and the wall of the form. If that happens, the blind disc will move and could be lost completely. The silicone also prevents the foam from floating to the surface: the foam floats on water and the concrete contains water: the screw will hold the foam in case the silicone does not.
- After the silicone has dried completely (at least 3-6 hours and up to 24), remove the excess with denatured alcohol and remove any residue from the form.
Adhesive backed felt foam:
- Find a heavy-duty felt with an adhesive on the back, cut it to the size of the foam, stack two or three pieces together.
- Wrap the felt pile with clear adhesive tape, remove the adhesive and secure it to the inside of the form. The advantage of this method is that you don't have to wait for the silicone to dry. The downside is finding and paying for felt!
Step 3: Mix, pour, vibrate, cover and dry the concrete
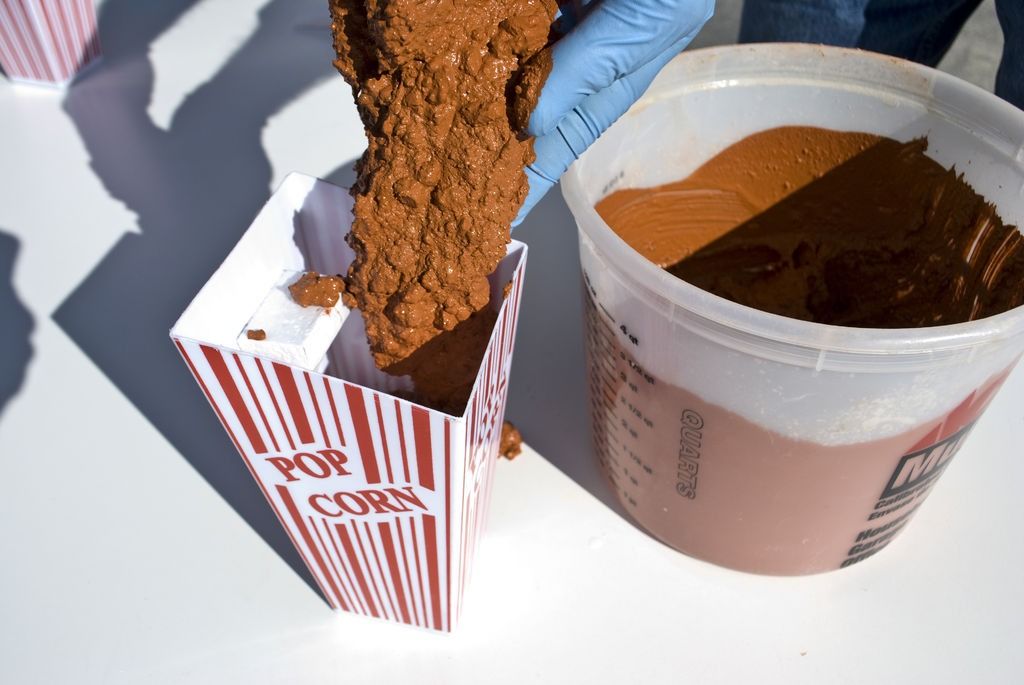
- Start with a one-gallon bucket (or an old bowl). Measure out 1 ½ popcorn containers (about 6 pounds) of scooped concrete and pour it into the bucket. Add Pro-Formula Mix (1/24th of 1cu). Mix well and break up any large clumps of material. Agregue alrededor de 6 onzas de agua a la mezcla, siga revolviendo a mano o con una espátula o paleta, siempre raspando los lados y el fondo del cubo. Gradually add about 6 ounces more water until the consistency is like liquid oatmeal.
THE IDEAL CONCRETE MIX
When mixing concrete, it is important to keep in mind that the least amount of water used relative to the cement produces the least amount of shrinkage and produces the strongest, most durable concrete. At the same time, the mixture should be fluid enough to fill all the gaps in the mold. A mixture that is too dry is difficult to pour and vibrate; A mixture that is too wet is likely to shrink excessively and crack.
When concrete is fully mixed, you have approximately 20 to 30 minutes before it hardens and becomes unworkable. You can shake the concrete by squeezing it in your hands to regain some fluidity if it gets too hard.
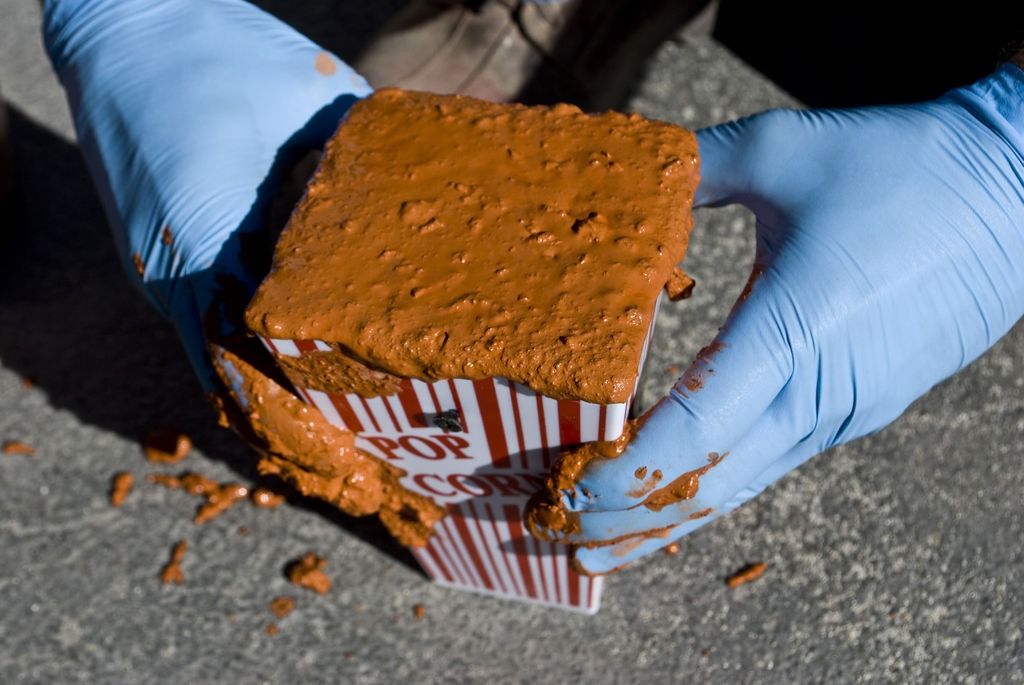
- Pour the concrete into the form, but be careful not to dislodge the foam. While pouring, rub the concrete around the inside walls of the form and under the knockouts to cover the surface with concrete. This will help minimize trapped air.
- To help air bubbles rise to the surface, vibrate the concrete by touching the base of the mold on the table for a few minutes. Your final piece will always have some air bubbles if you are not using a commercial concrete vibrator. If you're not getting results that you like by hand vibration, you can try using a handheld orbital sander or saw without the blade and vibrating it against the form walls.
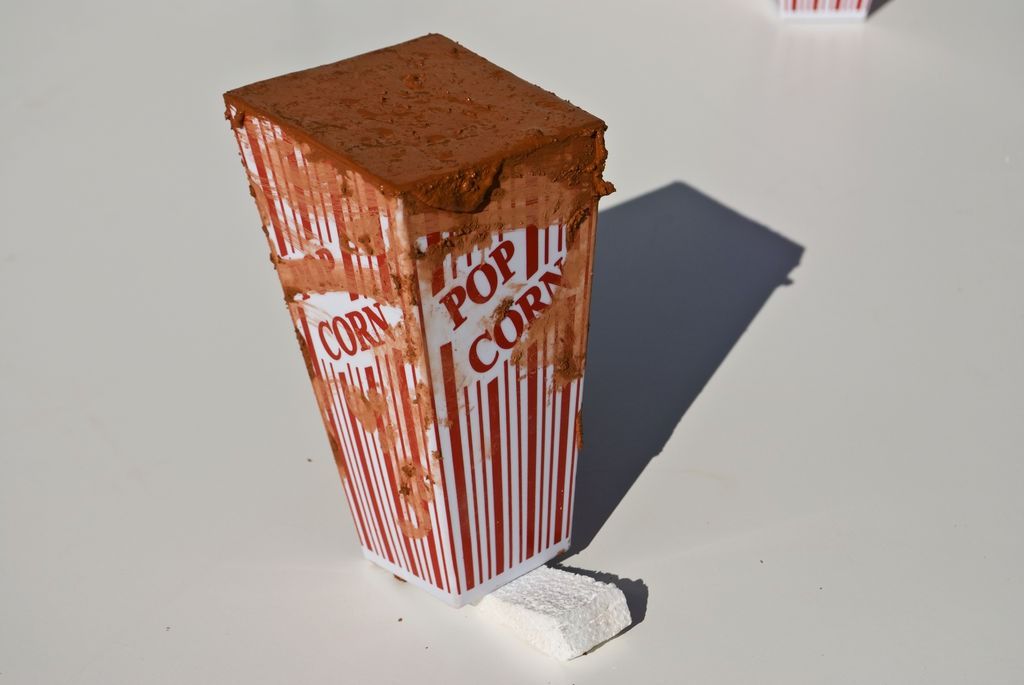
- After the form is vibrated, place a ¼” piece of foam under one side of the container so the top surface is level.
- Smooth/Flatten the surface with a plastic scraper. Take some time to remove excess concrete from the sides of the container, and get the top surface as smooth as possible (this will minimize sanding later).
- Carefully move the form to a place where it can dry for up to 2 days. Cover with a plastic bag or painter's plastic wrap. This helps keep heat and moisture in the concrete so it doesn't dry out too quickly and crack. For this reason, DO NOT place the concrete to dry in direct sunlight, keep it indoors or in the shade.
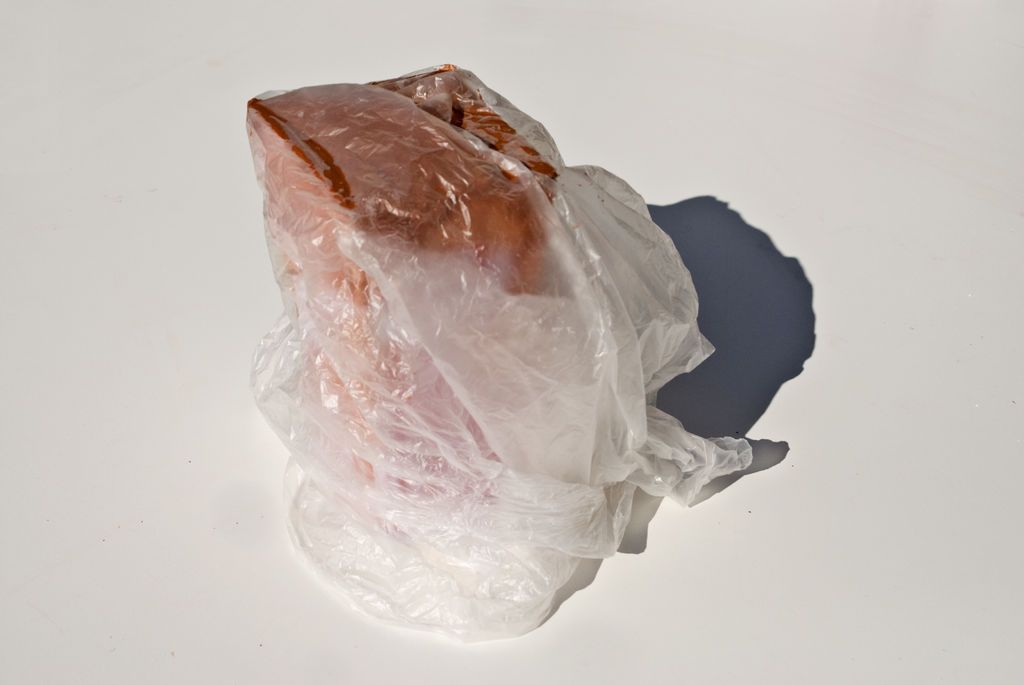
Step 4: Unmold the form

Stripping is when the forming materials are removed from the dried concrete. Sometimes the concrete can be removed without destroying the form, but in this case we are going to separate the plastic little by little. Any cuts you make through the plastic will scratch into the concrete, so be careful not to cut, pry, or scrape the concrete in any of the following steps!
- Wearing rubber gloves and safety glasses, prepare to unmold. Scrape excess concrete from the plastic form with a razor blade.
- Start at the opening of the container, peeling off the plastic by hand and cutting it with a razor blade.
- Break the plastic with your hand or pliers. Remove a little at a time. Peel back, cut, break. Do this as carefully as possible, being careful not to scratch or chip the concrete.
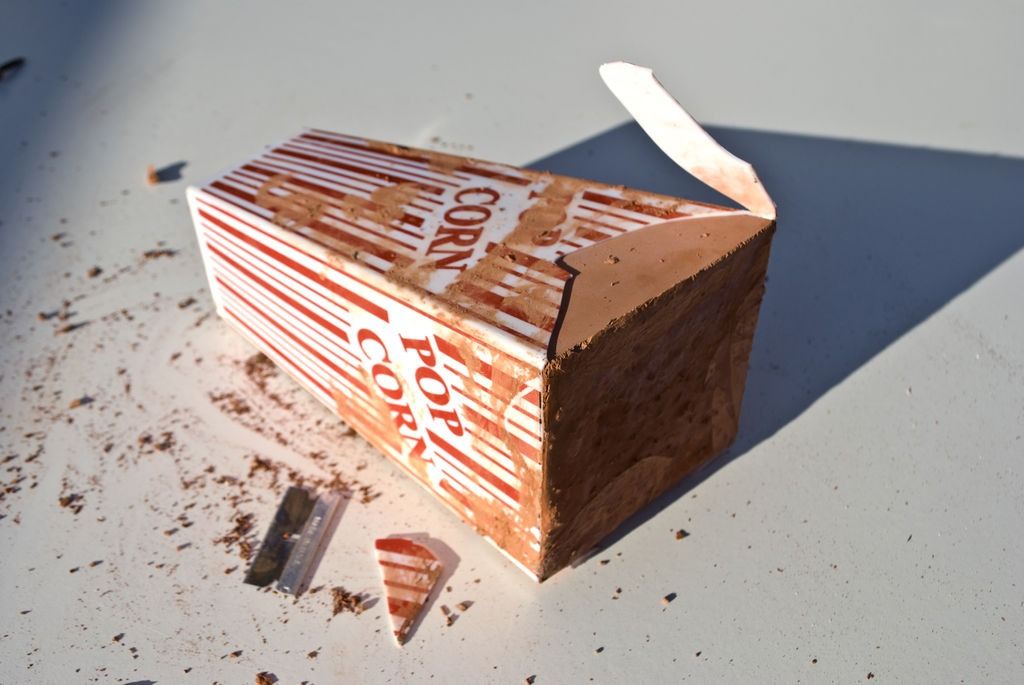
- Be very careful when removing the bottom of the container. On each side of the form there is a tab. A small screwdriver or chisel and a quick tap of a hammer will help free those tabs.
- Once the plastic form has been removed, pry off the cover with a flat screwdriver.
Step 5: Sand, grind + make the concrete shelf for the iPad
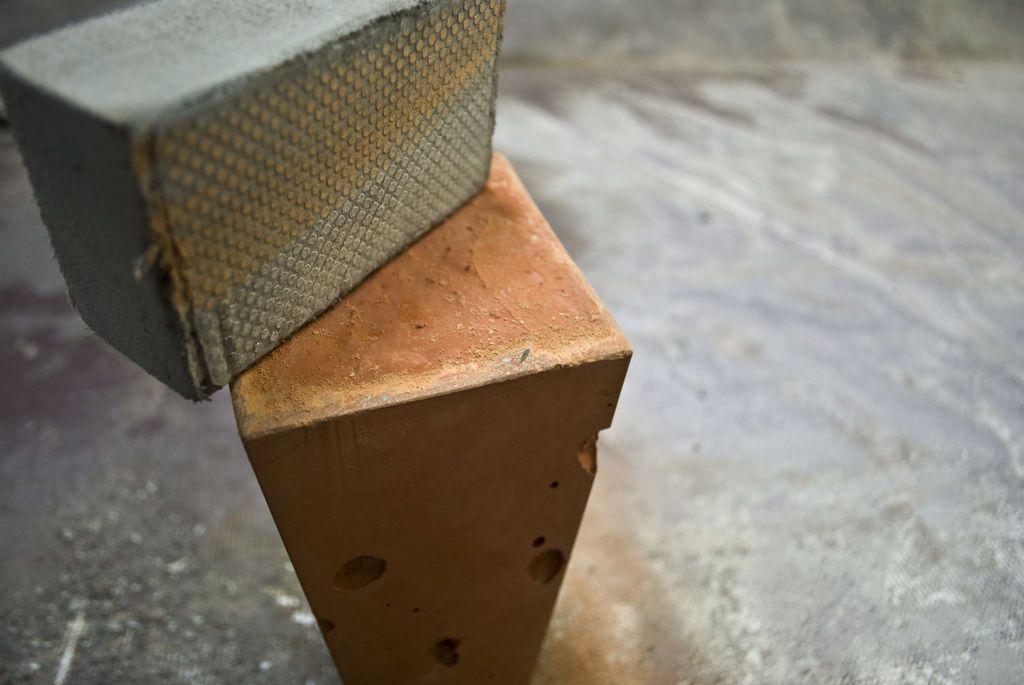


- Flatten the base by sanding the bottom surface with a rough 120 grit handheld diamond polishing pad. Alternatively, use a belt sander and ideally a 5" wet polisher with diamond pads suitable for concrete.
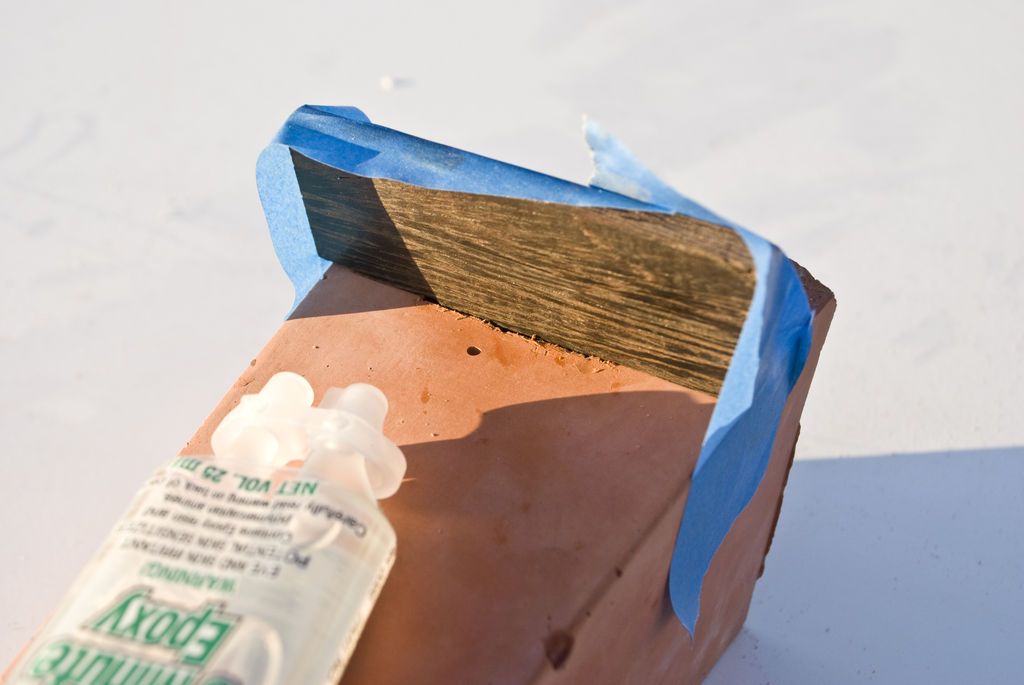
- Using a hand saw, band saw, or tile saw, cut a cornice that fits into the groove created by the foam. It would be easiest to start with a piece of wood that is the same thickness as the knockout (in this example, ½”). Softer woods will be easier to cut with hand tools if you don't have access to a belt. You don't really need power tools for something like this.
- Apply to concrete with sealer and wax before gluing trim in place with two-part epoxy.
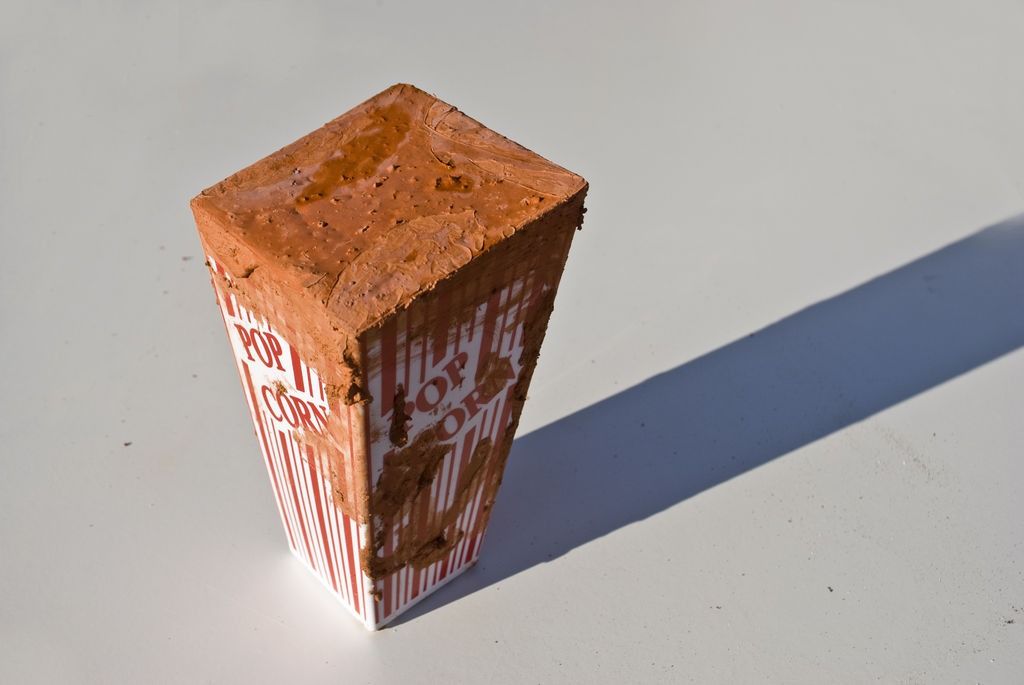
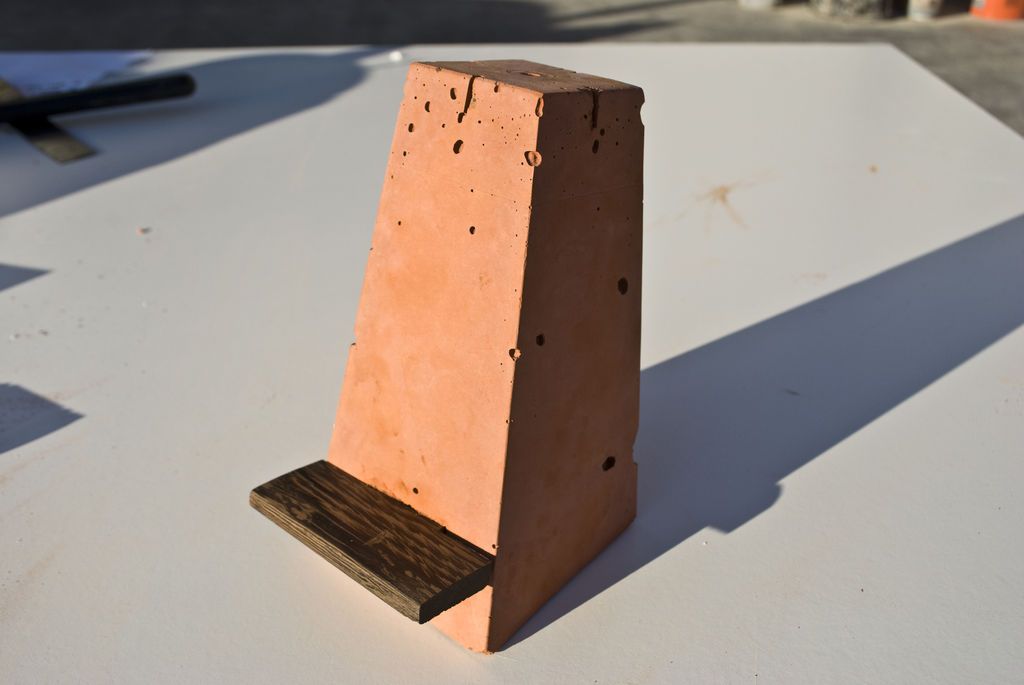
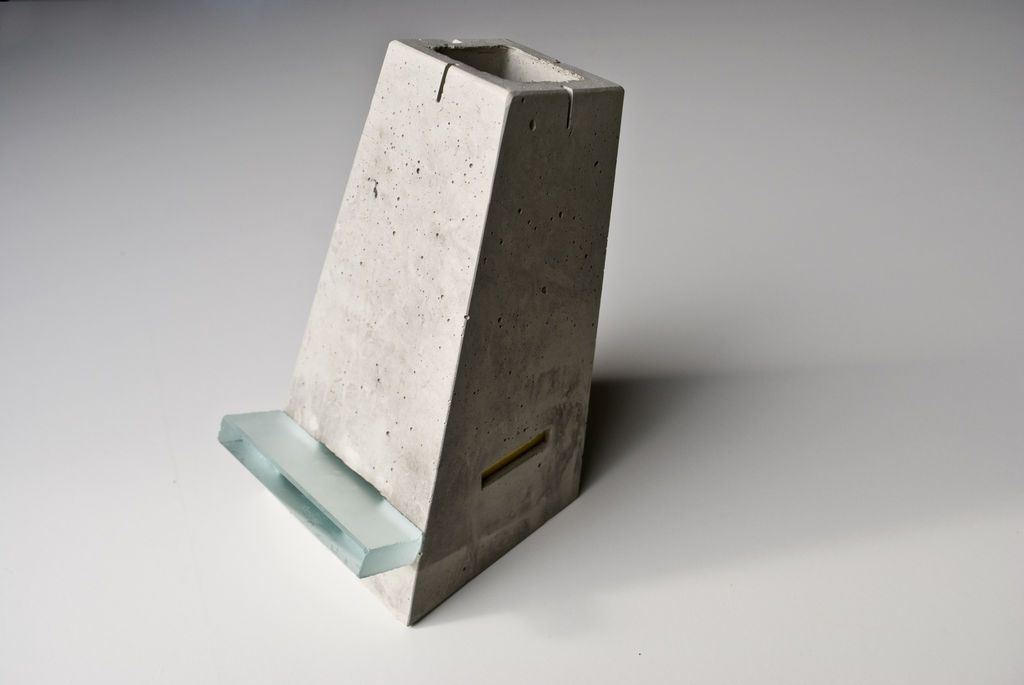
Step 6: Concrete iPad Stand, Finished Images
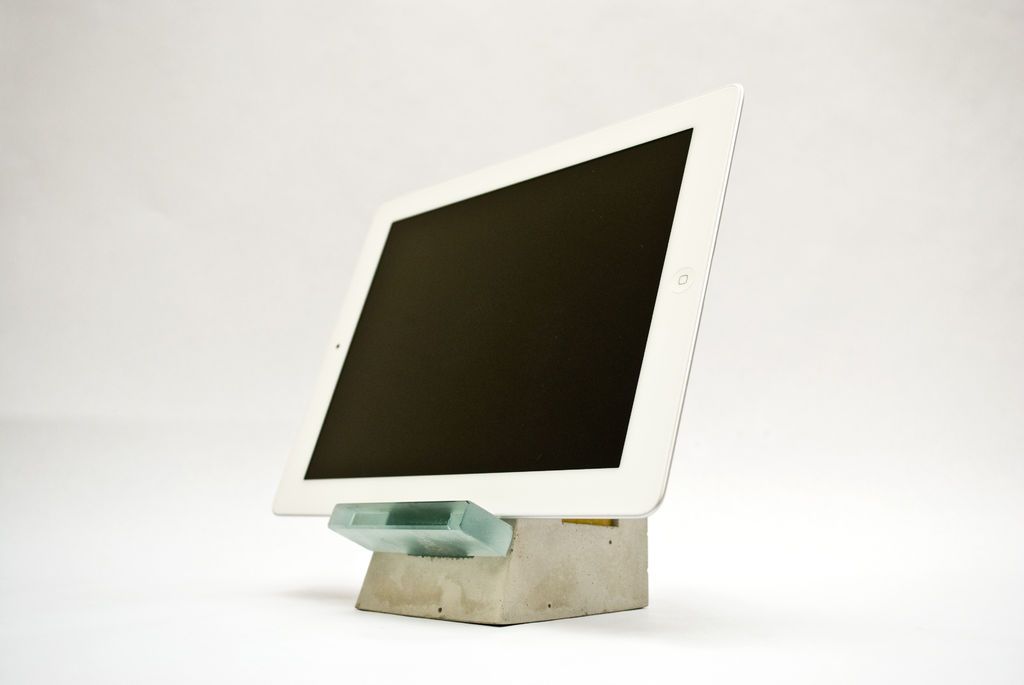
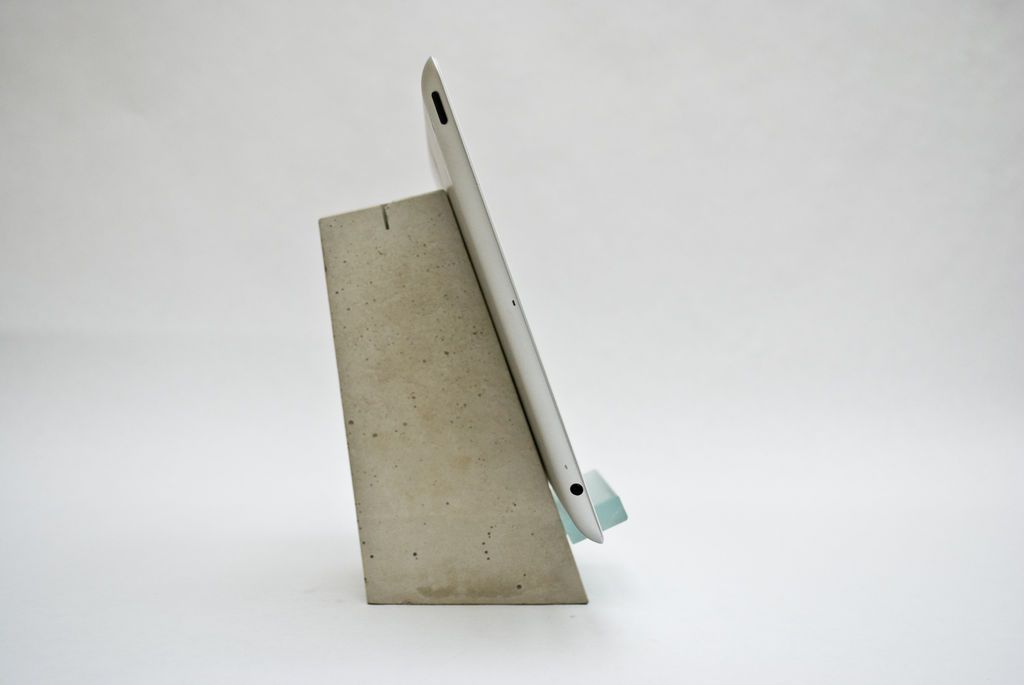
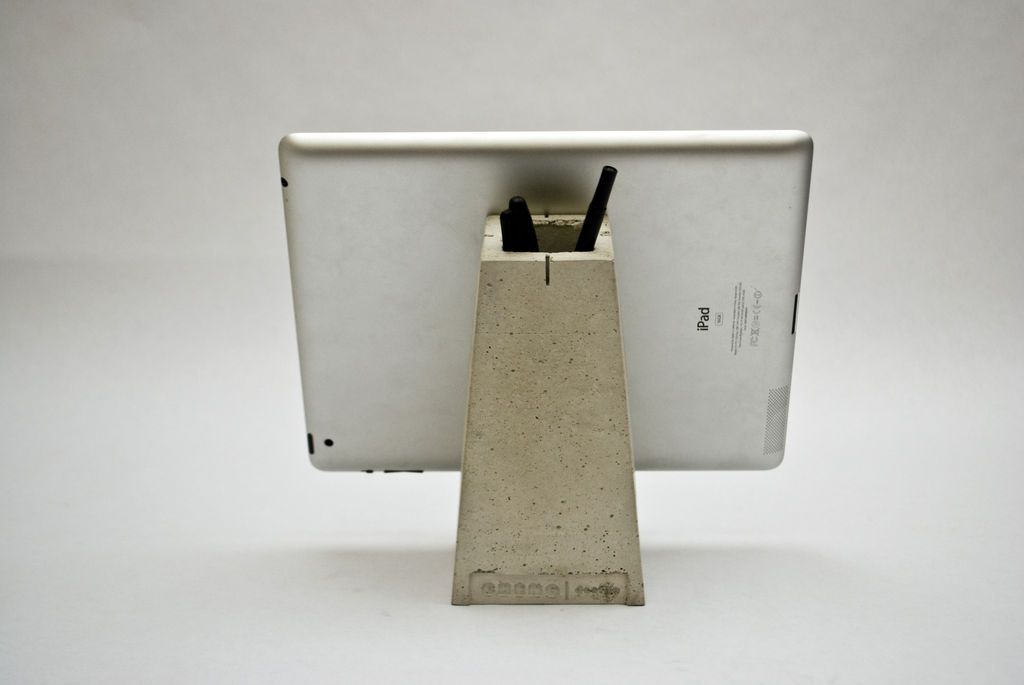
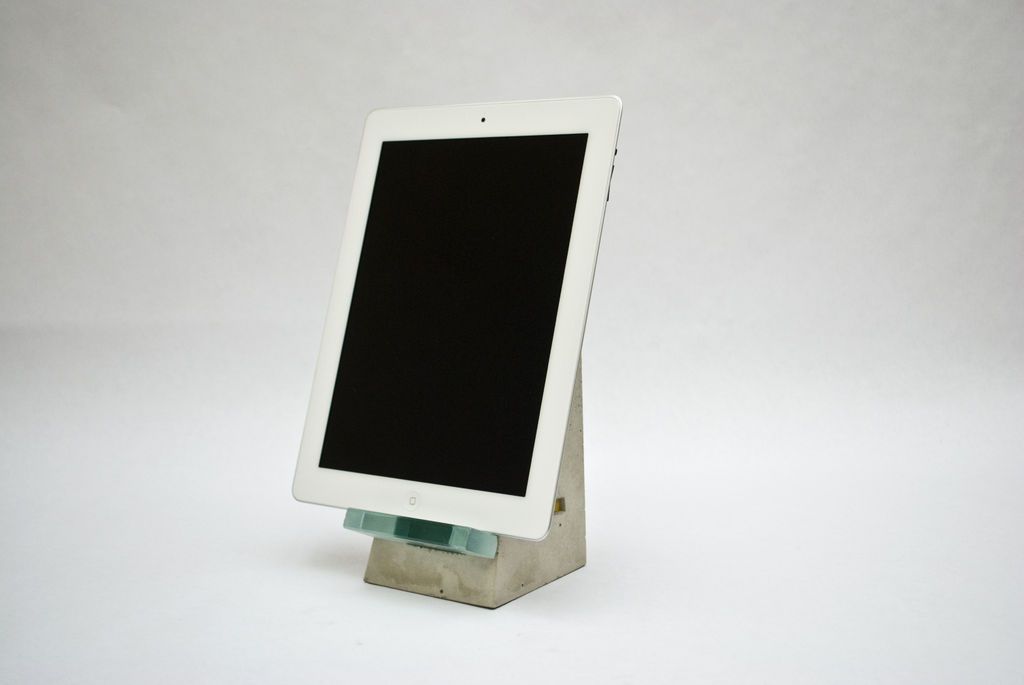
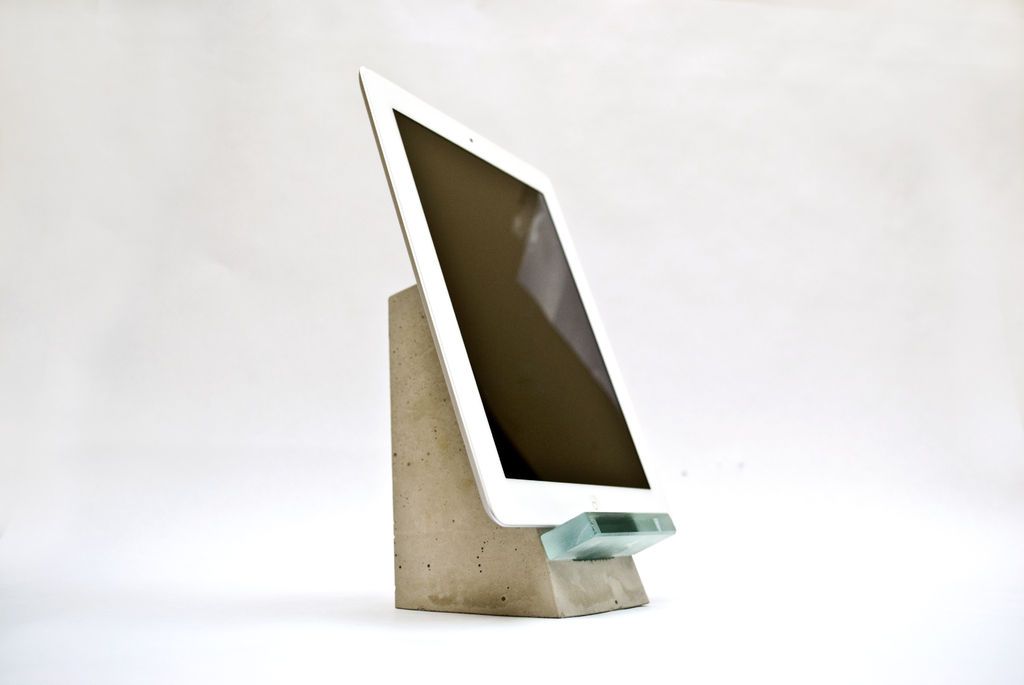
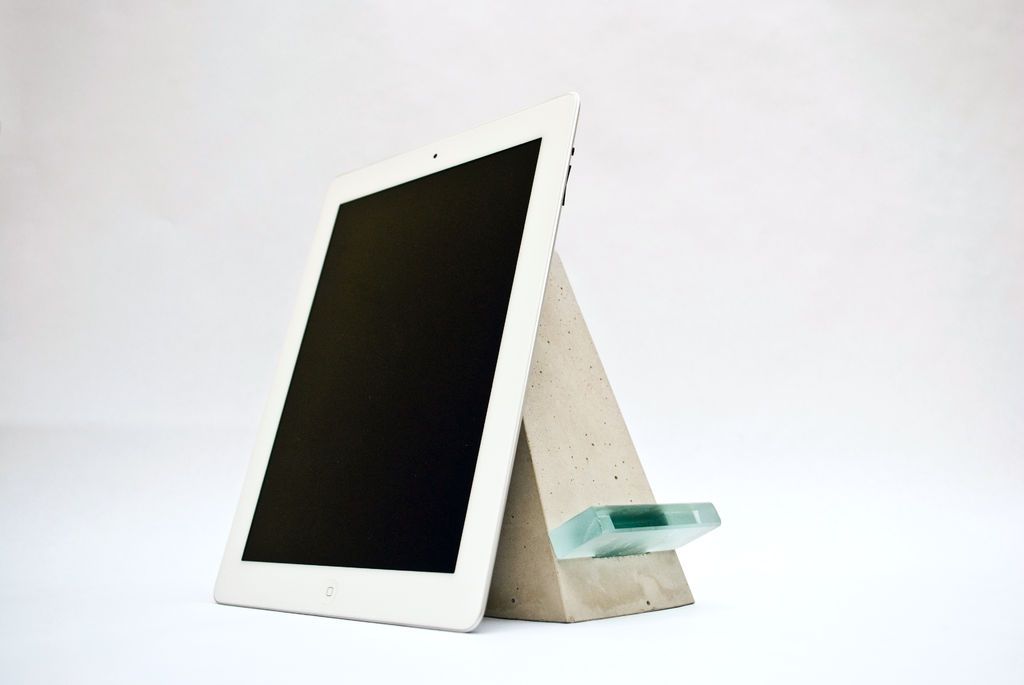
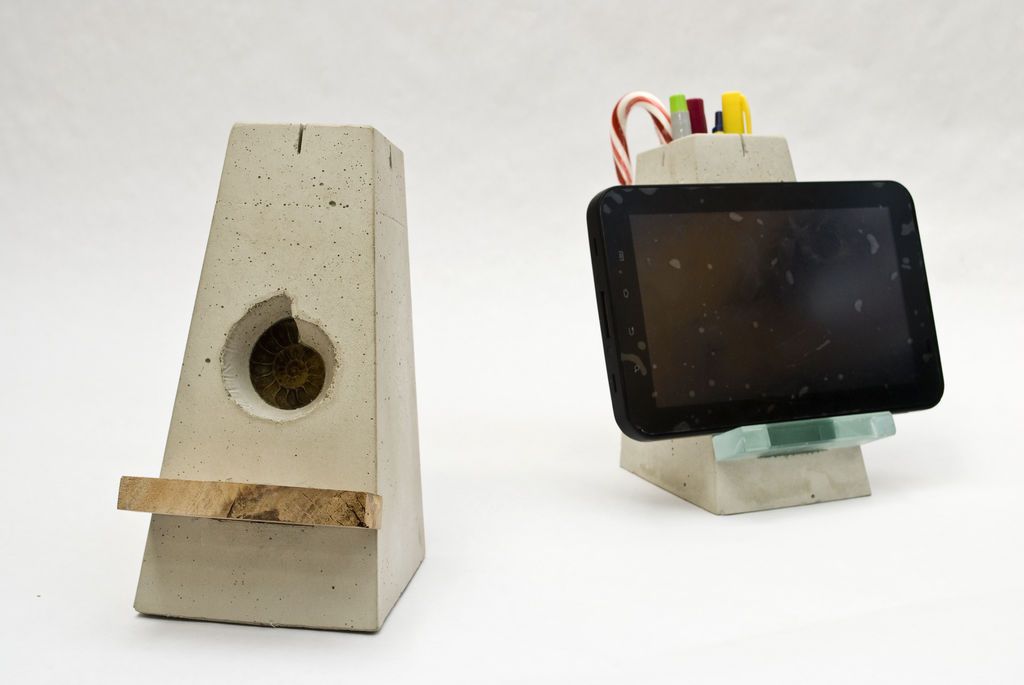
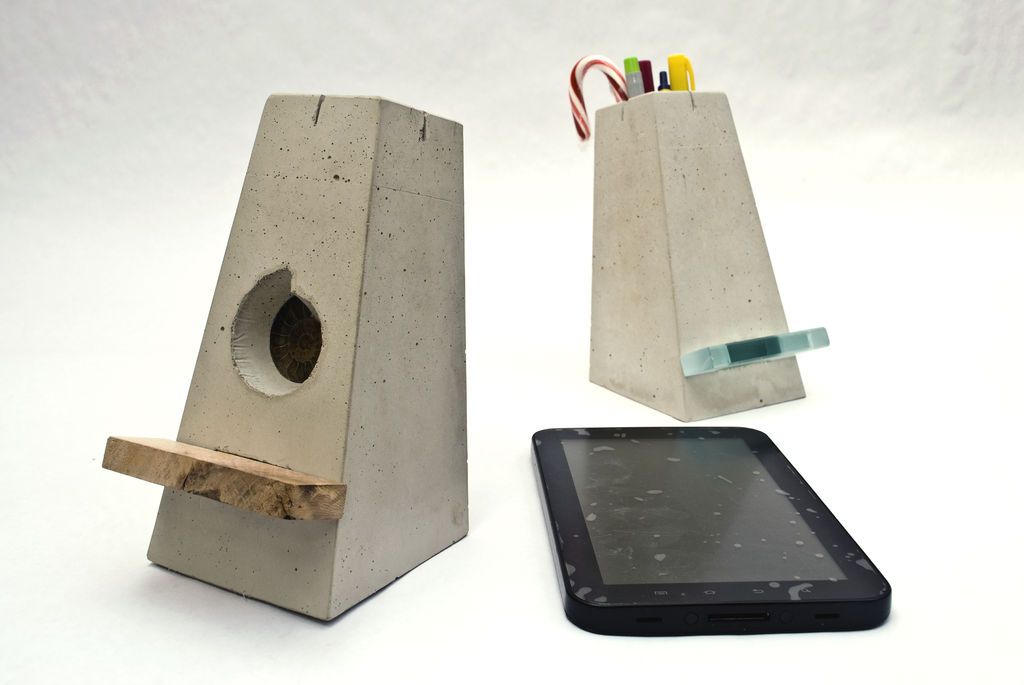
Your concrete iPad stand is now complete. We believe design is dynamic, always fluid, so we've rounded up a few other projects made from this humble popcorn container.
We're sure you can come up with plenty of your own ideas for this clever container; We'd love to hear from you and see what you've created.
Popular Content
How to make a rocket pa stoveoutdoor ra
Cardboard Drawers Lined with Jeans
Change the facade of your home with simple steps!
Latest Articles
How to make a refrigerator out of insulating material: Practical step-by-step guide
How to make a Kilim for the Home: Complete Step by Step Guide
How to protect ourselves from accidents in our workplace: Complete prevention and safety guide
Related Content
Sturdy Shelf with Nylon Rope Joints!
Tutorial to Make a Bench with the Back Door of a Car
How to Clean Stainless Steel Appliances
Scaffold Storage System
Creative Home Decor Ideas to Transform Every Space
Refreshing your home starts with smart design choices that combine comfort, personality, and functionality. Whether you want to modernize a small apartment, upgrade outdoor areas, or create cozy rustic interiors, these trending ideas can completely change the atmosphere of your space.
Outdoor Spaces That Increase Style and Functionality
Outdoor living continues to dominate modern home trends. Homeowners are increasingly investing in practical entertainment zones inspired by these BBQ shed ideas, which create the perfect setup for gatherings and weekend cooking sessions.
First impressions also matter when designing exteriors. Elegant farm entrance gates design ideas help properties stand out while improving privacy and curb appeal.
Compact living solutions are also gaining popularity. These inspiring 16x40 shed house interior design ideas show how smaller spaces can still feel luxurious and functional.
To enhance patios and entryways, homeowners are adding stylish protection with these creative porch awning exterior DIY ideas that blend aesthetics with practicality.

Rustic and Cozy Interior Design Trends
Warm and natural interiors remain timeless. These charming rustic decor ideas combine wood textures, vintage accents, and earthy tones to create welcoming spaces.
Bedrooms are becoming more personalized with curated wall arrangements. Many homeowners use these stylish picture wall ideas for bedroom spaces to display memories and artwork creatively.
Textured wall treatments are another major trend. Installing a board and batten wall adds architectural character while keeping interiors elegant and modern.
Similarly, bold accent wall ideas can instantly transform plain rooms into eye-catching focal points without requiring a full renovation.
Smart Kitchen and Organization Inspiration
Functional kitchens are essential for modern homes. These practical kitchen wall cabinet ideas maximize storage while maintaining a clean and stylish appearance.
Organization also starts at the entrance. Well-designed mud room ideas help families keep shoes, coats, and daily essentials neatly arranged.
Colorful and Personalized Home Styling
Vibrant interiors are becoming increasingly popular thanks to playful dopamine decor ideas that use bright colors and joyful accessories to improve mood and energy.
Gallery walls also continue to evolve as a major decorative feature. These trendy gallery wall inspiration ideas offer creative ways to combine prints, photos, and statement art.
Young renters and new homeowners are especially embracing these stylish first apartment aesthetic ideas to create sophisticated interiors on a budget.
Finally, selecting the right shades can dramatically influence any room’s atmosphere. These modern trendy color ideas help homeowners choose palettes that feel fresh, elegant, and timeless.
Final Thoughts
From rustic charm and colorful interiors to outdoor entertaining areas and functional storage solutions, today’s home decor trends focus on creating spaces that feel both beautiful and livable. By combining smart layouts, modern textures, and personalized decorative elements, any home can become more stylish, comfortable, and inspiring.


