
Construction of a Rock and Gravel Path for the Garden, separated by about 15 feet with a paver and gravel path. The original plan was to move the wood out of the way. This focused my attention on the trail, which had nice cobblestones, I didn't really like the location of the trail itself.
Hence my decision to move it. Pulling out the pavers was easy, but for the new location I needed to accomplish two goals: first, lift up all of the existing gravel and larger stones that the pavers had rested on so I could plant grass, and second, separate the gravel.

I'll note up front that I am not a landscape professional (this may be very obvious) and I basically made this up as I went along. But in the end this turned out pretty well.

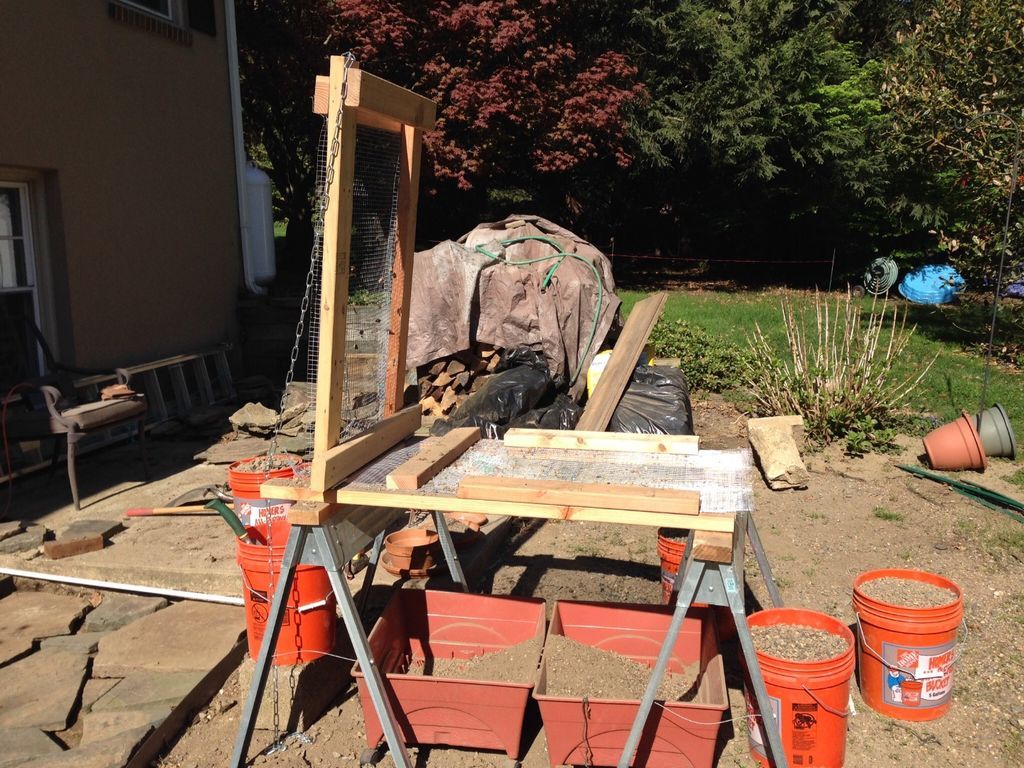
Step 1: Building the sieve
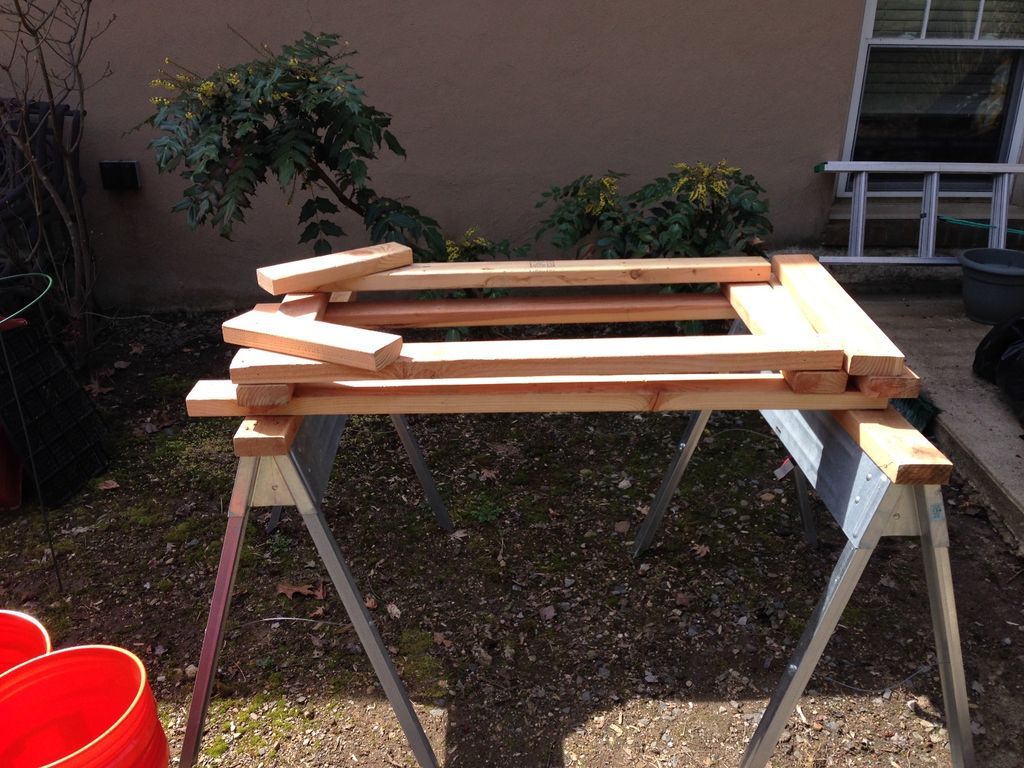

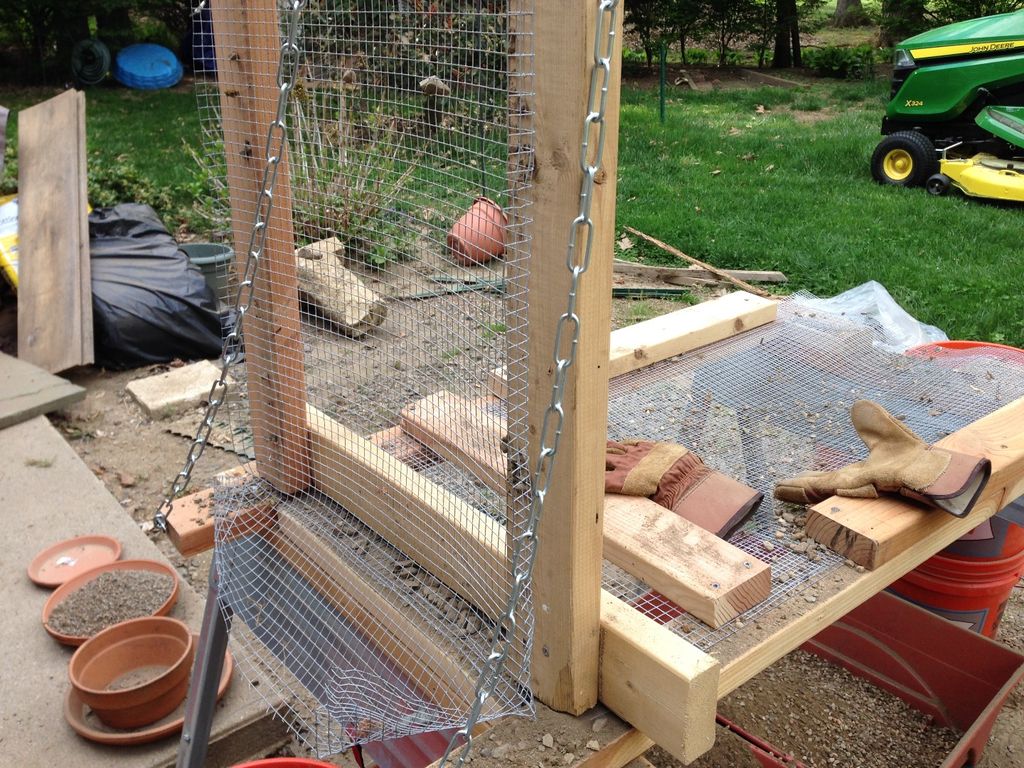
I built a fairly simple dual-screen sieving apparatus of about 1/2″ and 1/4″, very handy from random lengths of 2x4s and a couple of sawhorses.
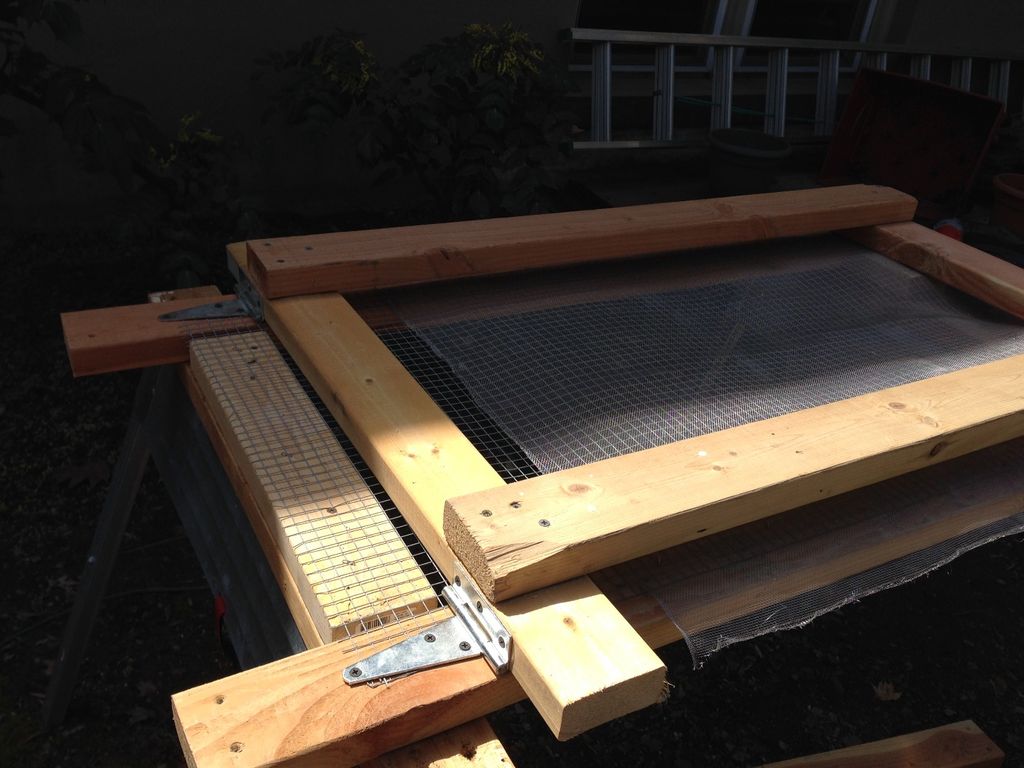
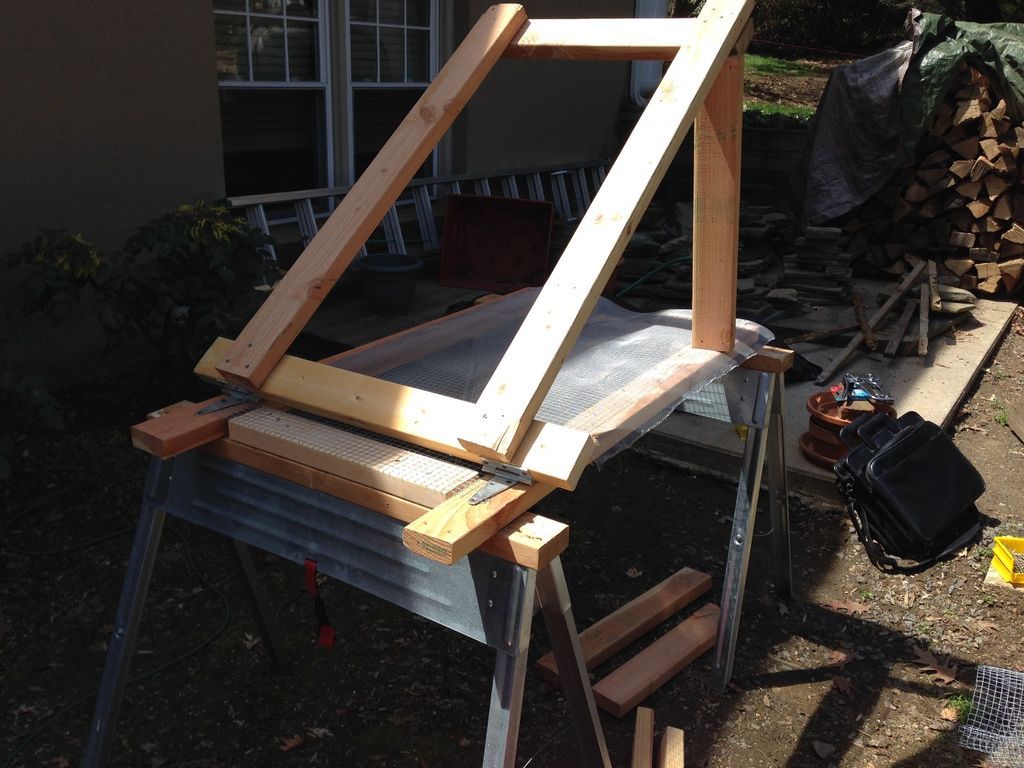
For the top level I used the 1/2″ fence to separate the larger stones, and added hinges to make it easier to pour the rocks into a bucket, as well as to get that level out of the way so I could work on the bottom screen.
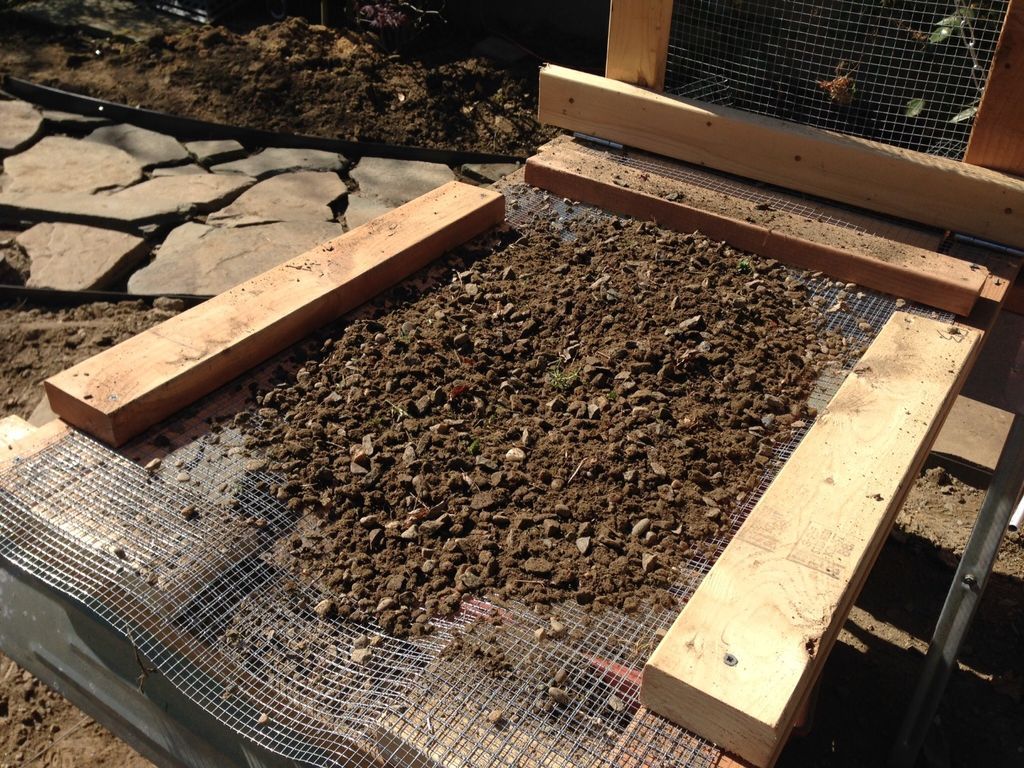
The lower level was a double layer, which consisted of 1/4″ fencing over a 1/2″ layer. The 1/2″ fence was a heavier gauge wire, so I put that in for overall strength, I didn't want the screen to tear mid-process.
The first attempt for the lower level was the 1/2″ fence with an overlay of window screen material, instead of the 1/4″ fence.
I thought I would lose too much "good" gravel through the 1/4″ fence, so I went with the very fine mesh (some of the pictures are of this version).
Step 2: Rocks and Gravel
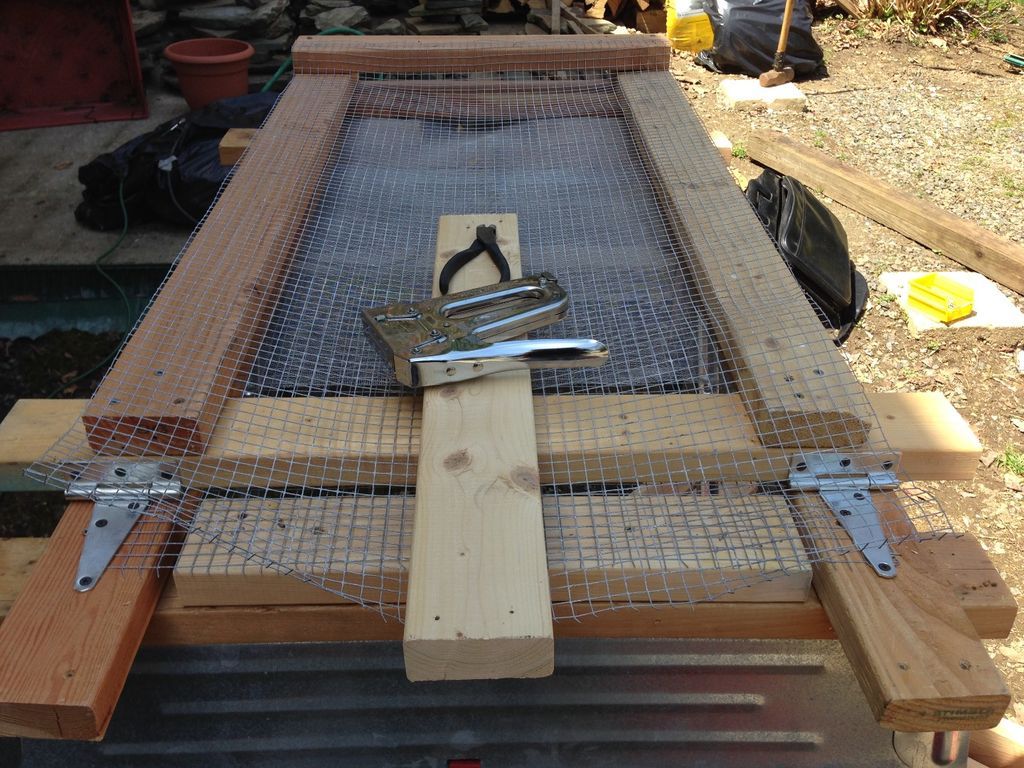
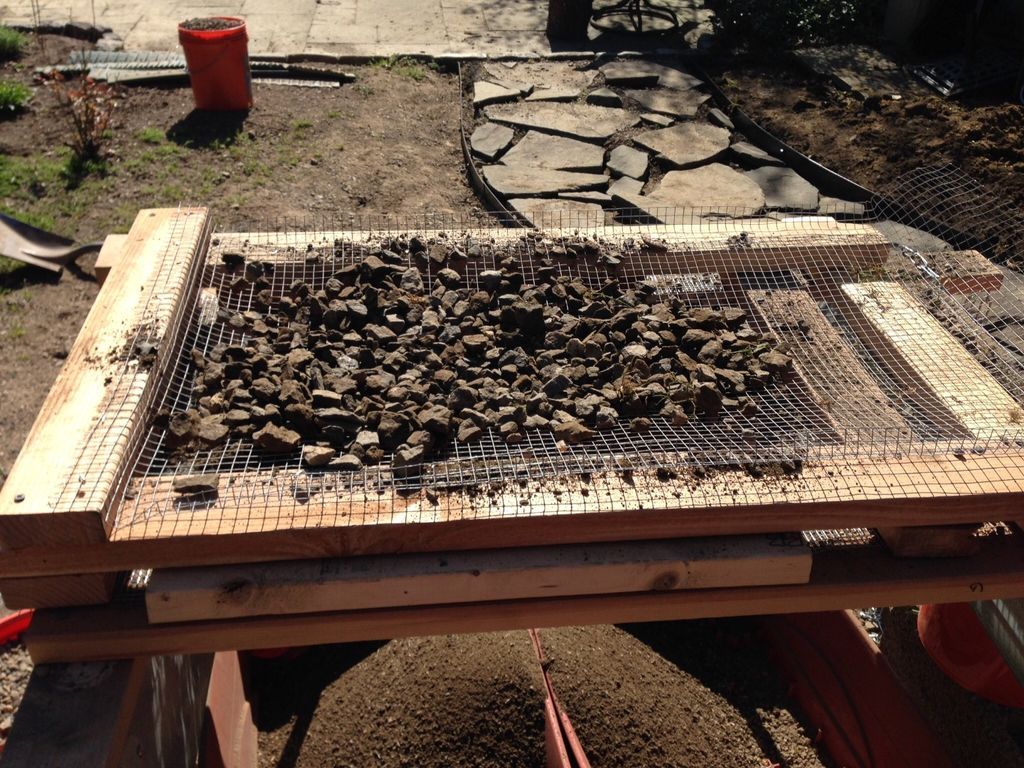

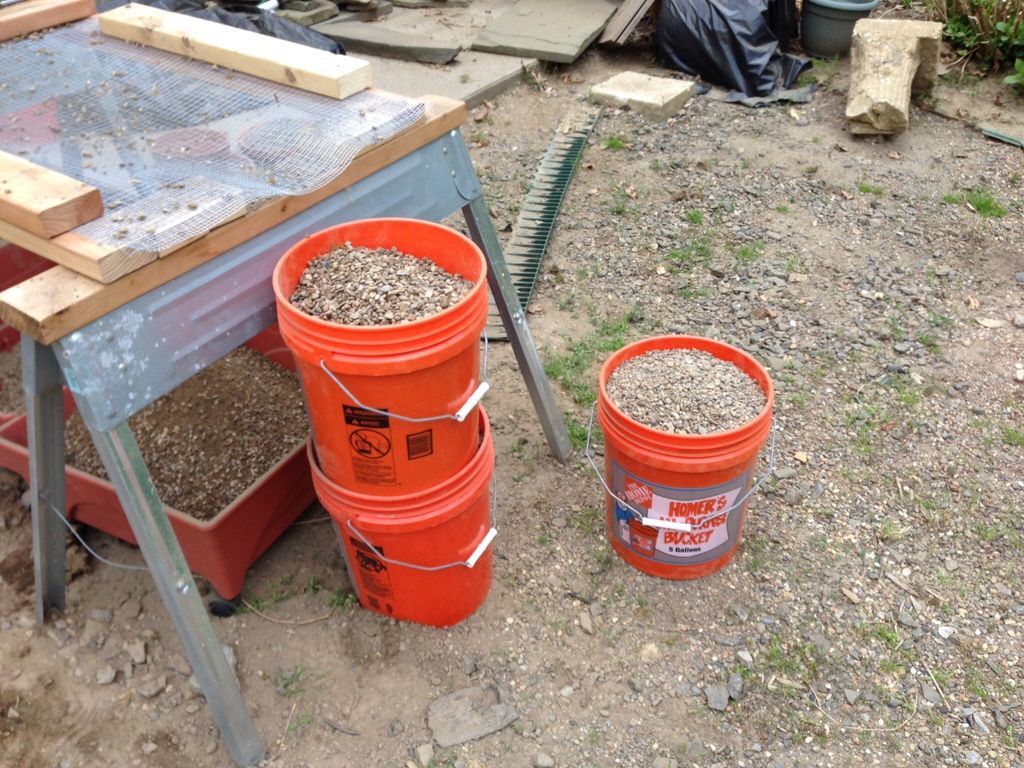
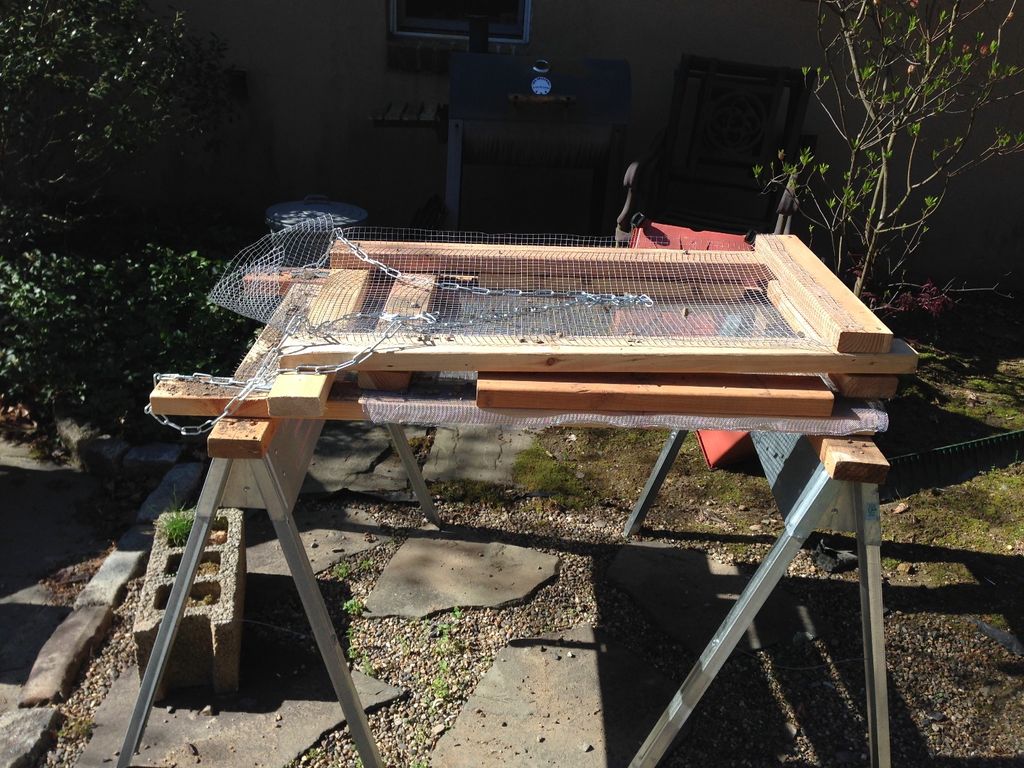
At the hinged end of the screen, I forced a dip in the top screen to channel the rock flow, and placed a collection bucket below that.
Similar for the opposite end of the lower screen: a dip in the screen aided by a rest on the 2x4 supports, plus another dip.
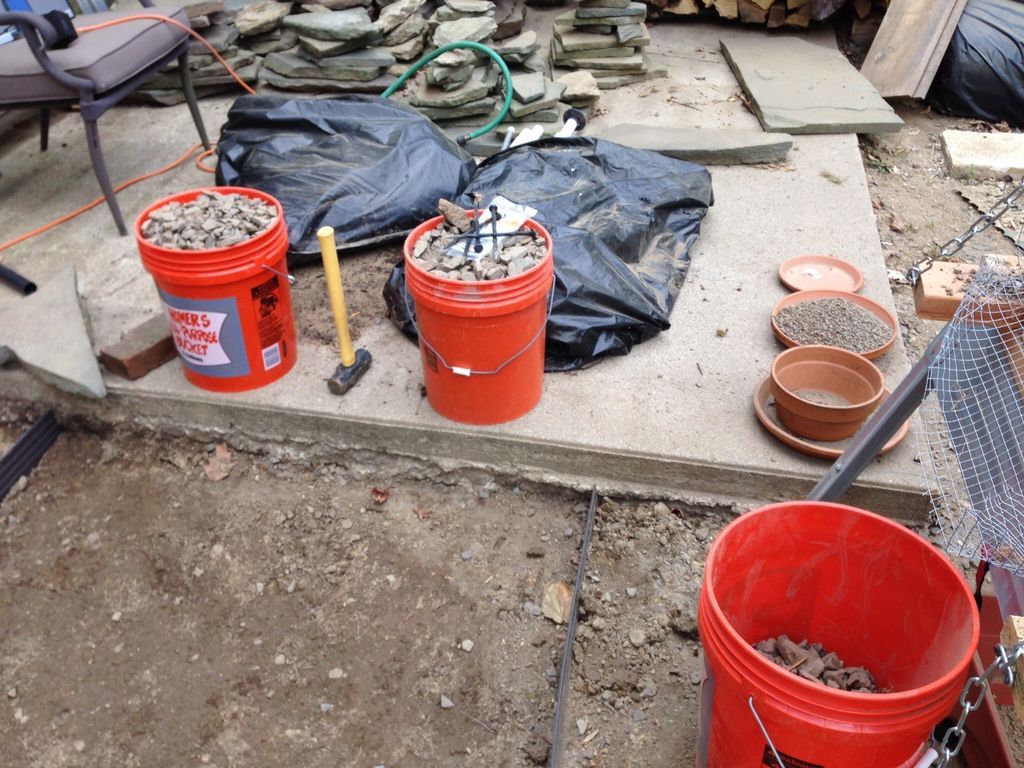
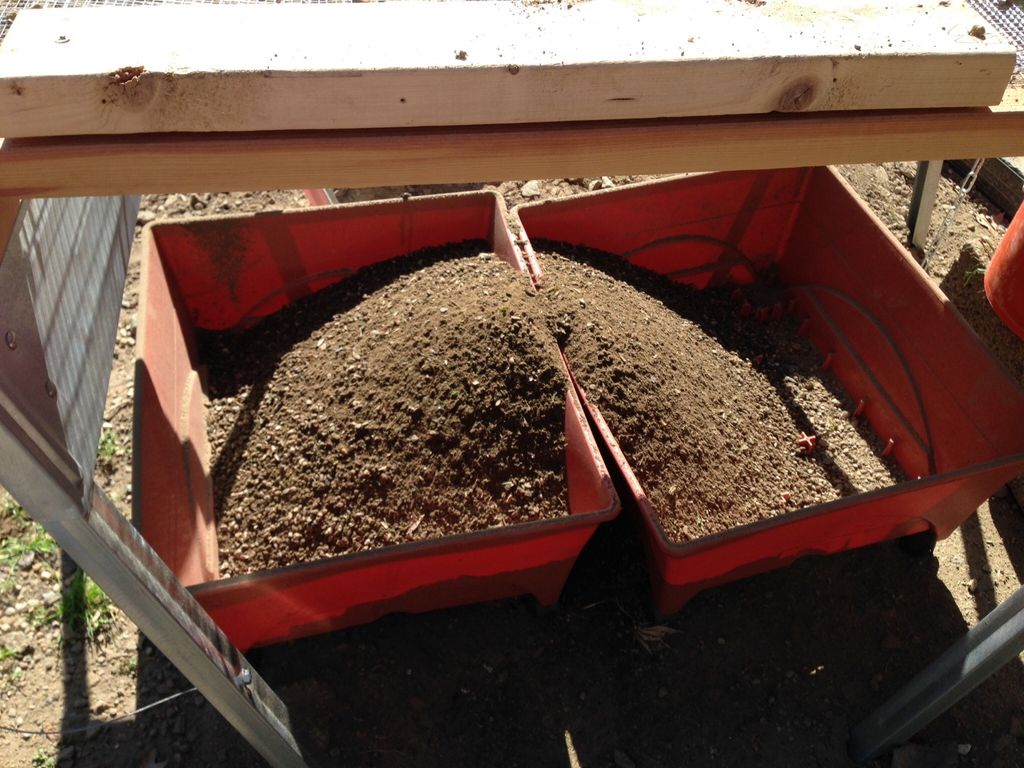
Underneath everything, I put a couple of wide planters to catch sifted dirt and very small rocks.
The final touch was a safety chain mounted to hold the top screen when I was working on things on the bottom. Therefore, no one suffered a concussion during the operation.
The harvesting process was then a straightforward matter of about a million shovels (that's what it seemed like) of the rock matrix on the sieve and a lot of manual manipulation to achieve it. Heavy leather gloves were important.
Step 3: Lining the path
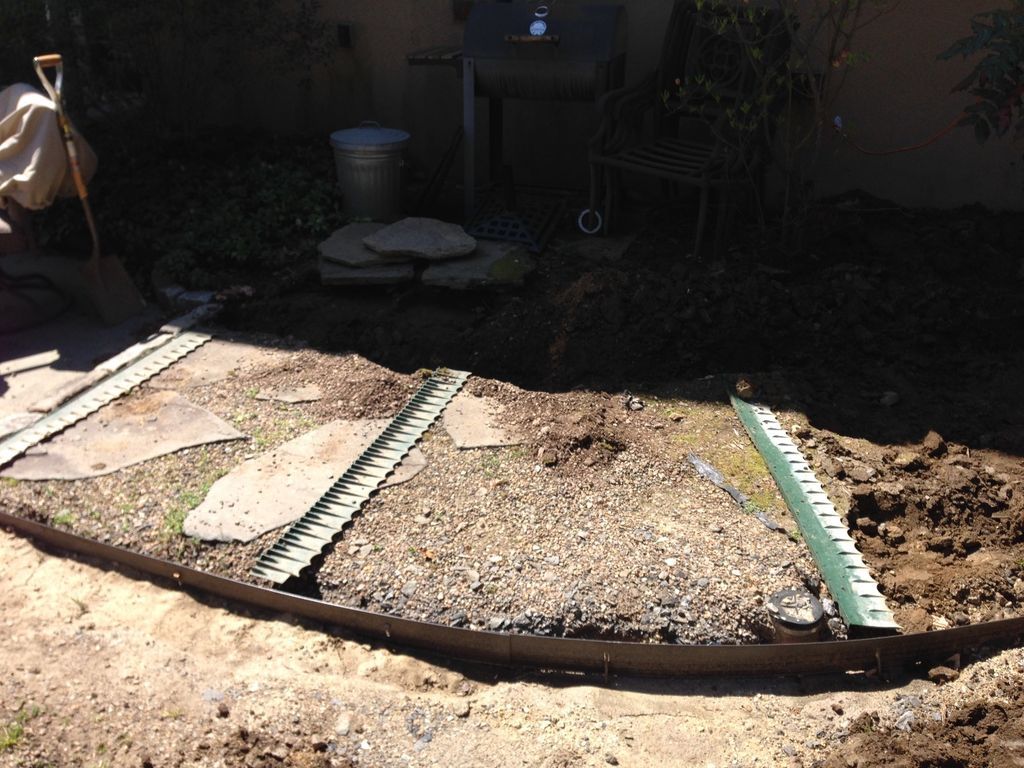
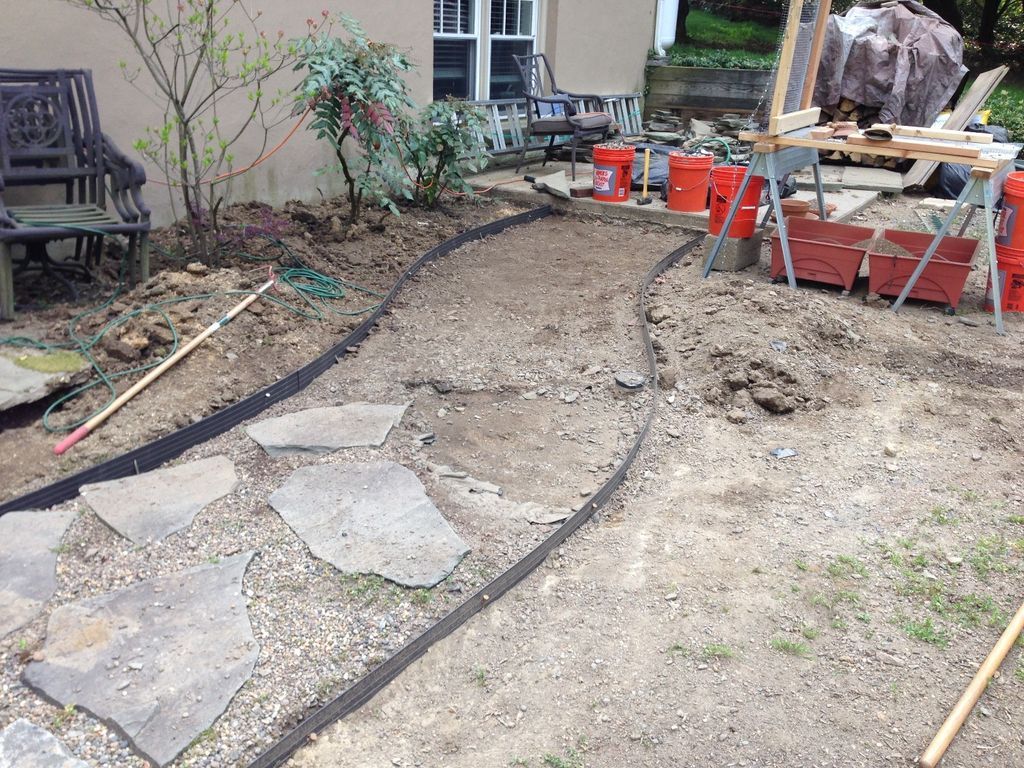
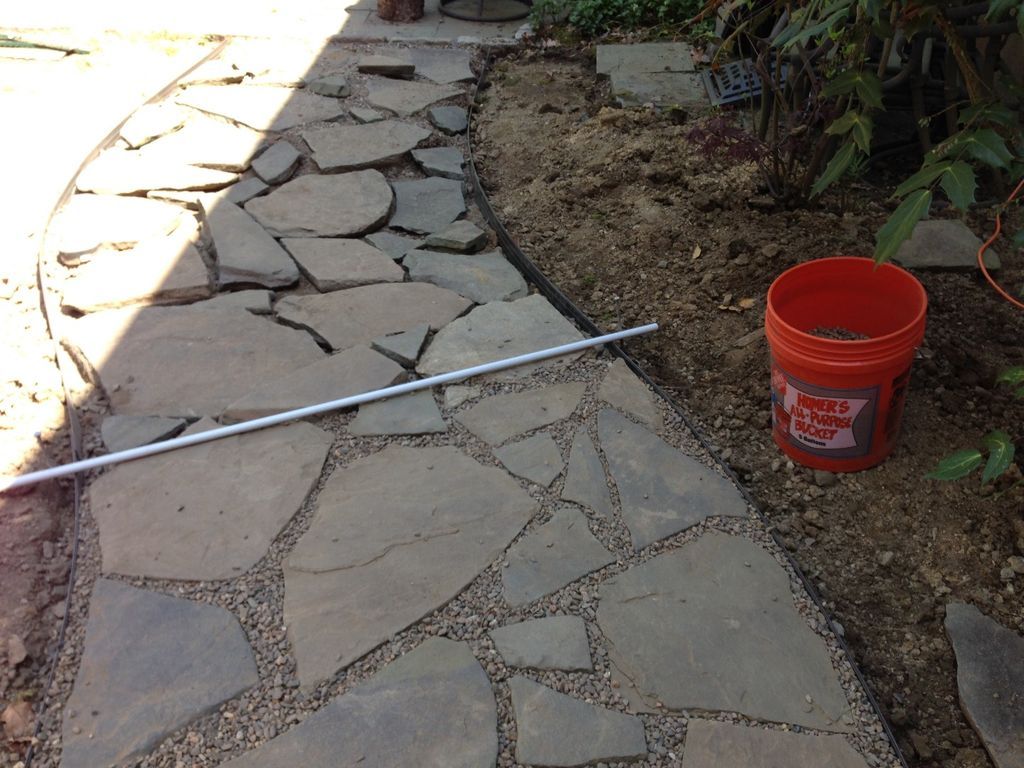
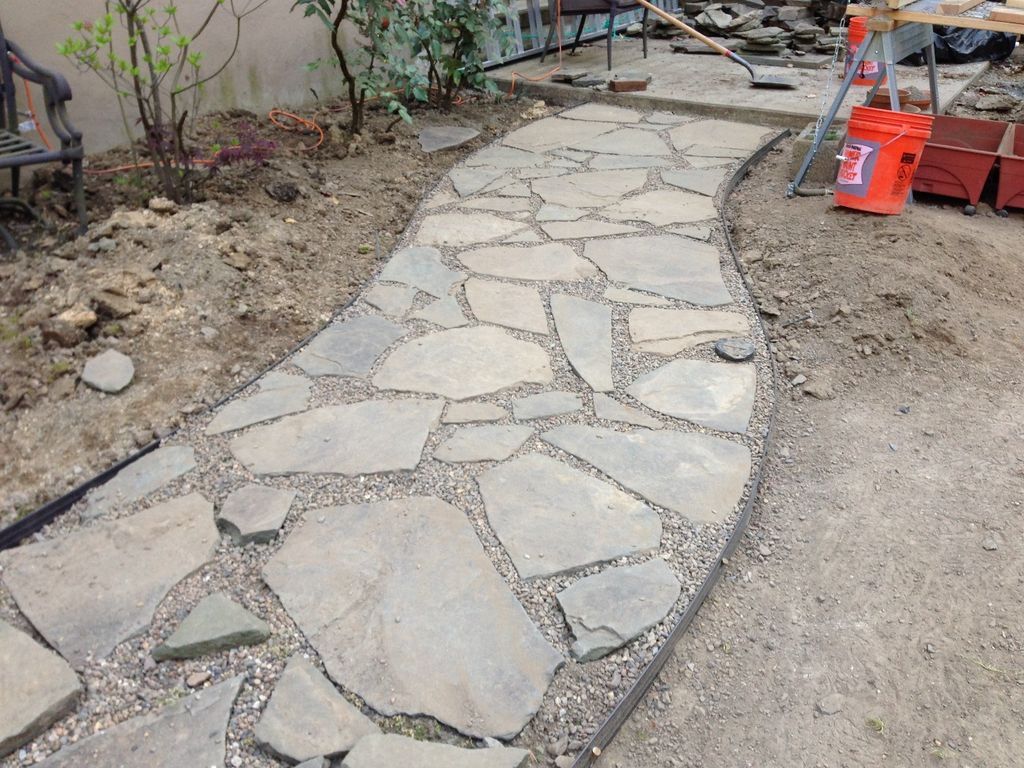
The original route was lined with sections of plastic edging. For aesthetic reasons and personal collisions, I prefer to use metal edges. Easy to use, strong and looks good.
I set a border to define the general shape of theroute. On the other hand, I was careful to use a level to ensure the correct relative elevation.
The side closest to the house was intentionally two inches higher than the other, to help with drainage, but given the width of the road, this difference is invisible to the eye.
Easy trick to accomplish this: I cut a shallow copse along a 2cm piece of 2x4, balanced this on the first edge (farthest from the house), and then rested the level on that and the second edge (closest to the house).
He set the second edge level, slid down a few feet, adjusted the elevation there, and continued that way to the end.
Step 4: Paver Planning

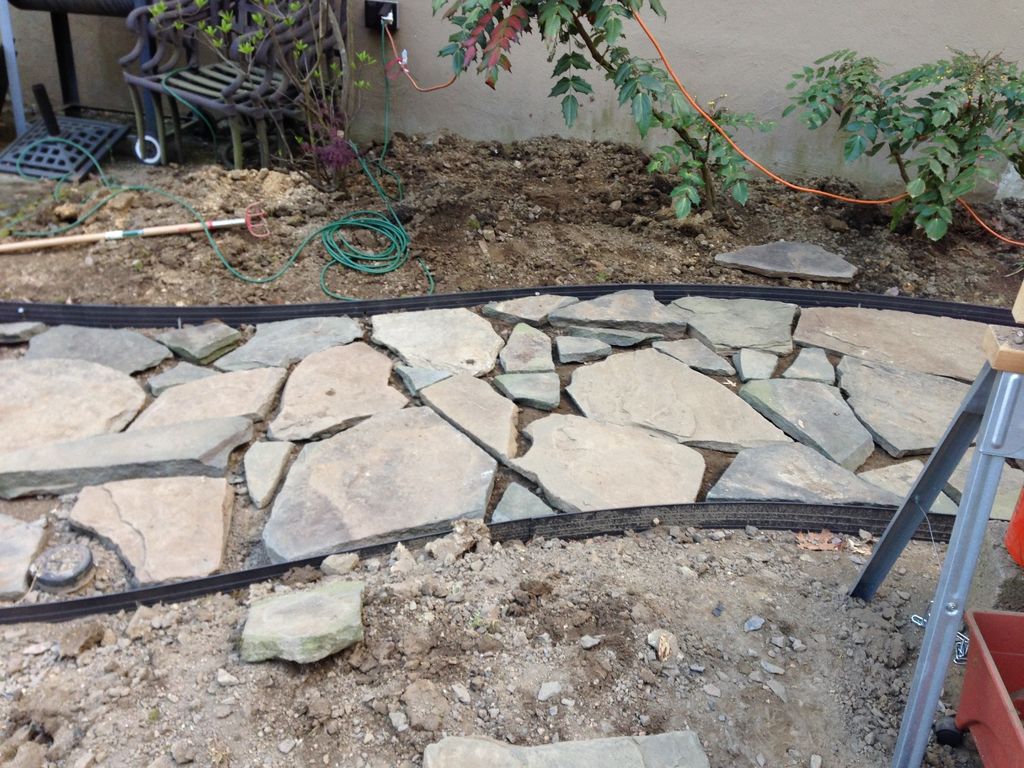
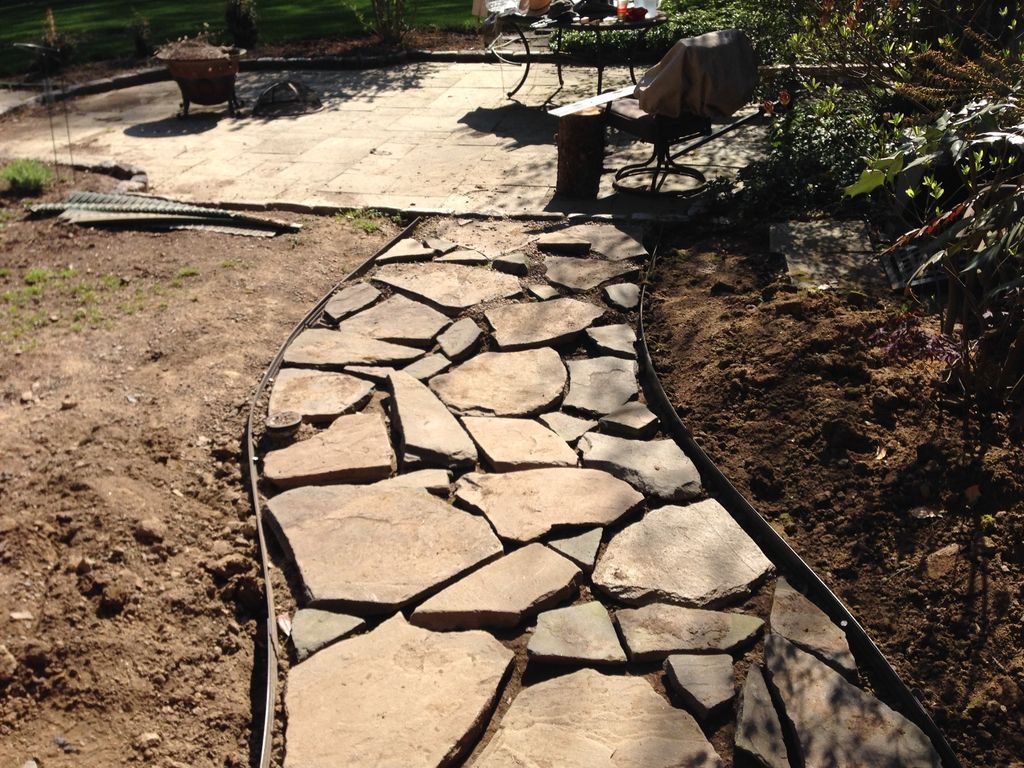

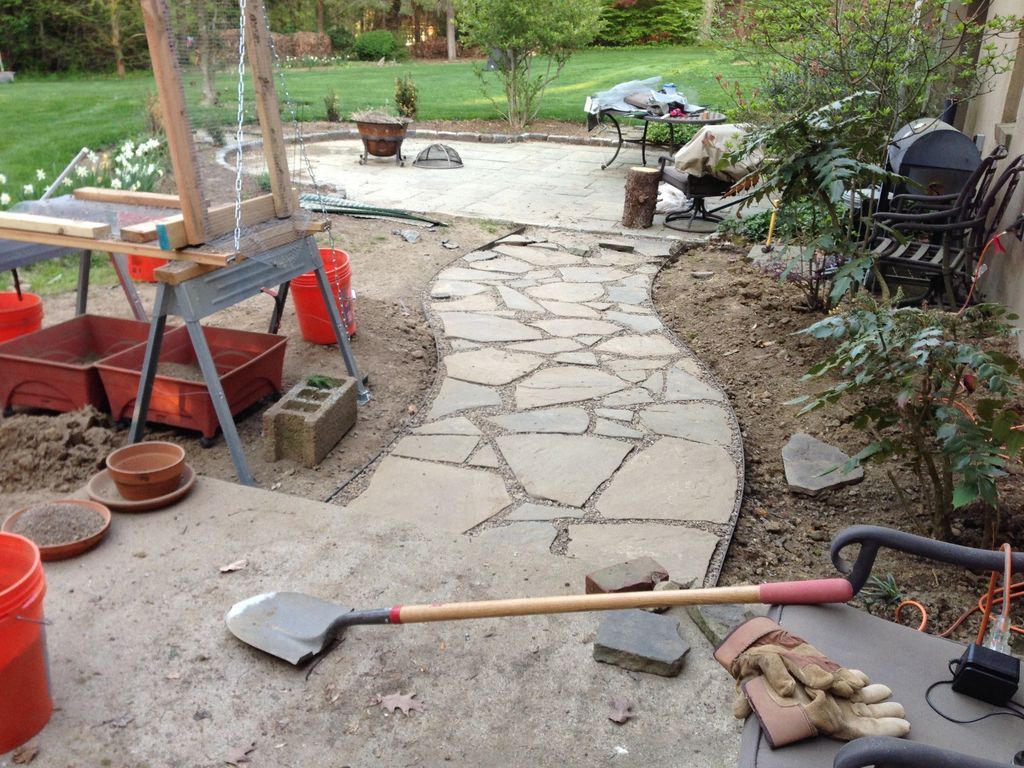
The cobblestones recovered from the old road were, fortunately for me, in a wide variety of sizes and shapes. Like packing a shopping bag, you start with the big pieces and then fill with the smaller ones. When doing this type of thing, it is important to lay out everything beforehand, before final placement. This ensures an even distribution and no surprises at the end when the remaining pieces don't fill the way you want. During this process, there were many times where I stole a piece from a previous section because I found a better use for it.
The original route had fairly large gaps between the pavers, but I wanted something with fine gaps, partly to reduce opportunities for weeds, and partly because the gravel never really stays where you want it, so I wanted to minimize its use.
Once again I was lucky, as I was very successful in finding pieces that fit together quite well. The old and new path met the flagstone yard at the same location, so approximately 2 feet of the original route were maintained.
Again, the gaps were a little wider than I liked, so I found some smaller shims that I plan to insert into that section.
Some may notice that I did not use that black plastic "weed block" material under the rocks. Basically, I don't like it. That certainly doesn't guarantee you won't get weeds (nature will find a way, like in Jurassic Park), and it's more plastic trash that I'd rather not insert into the environment.
Yes, sharp-eyed critics will find dozens of environmentally unfriendly elements in my images, to which I say: "you need a better hobby."
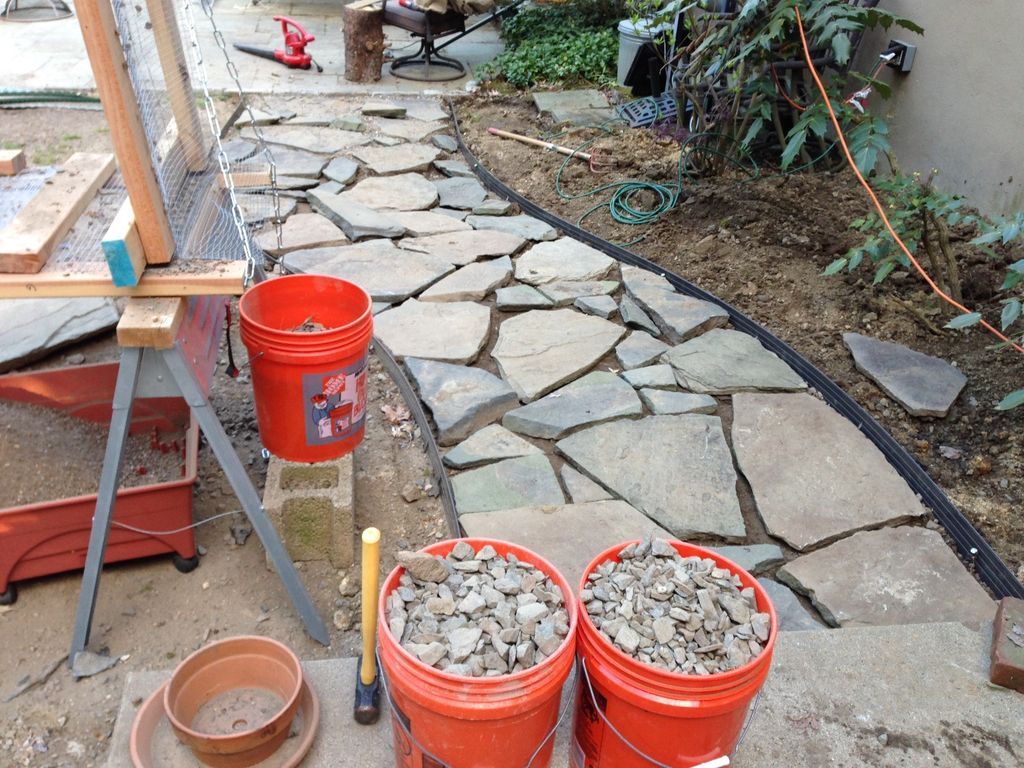
Step 5: Paver Leveling and Filling
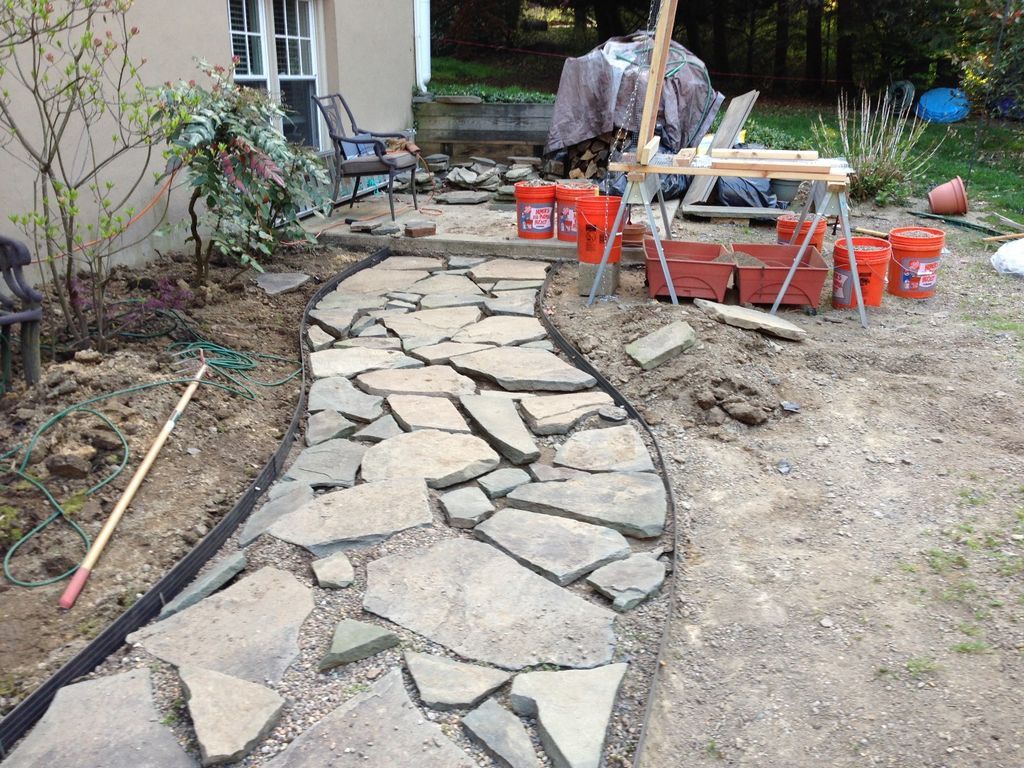
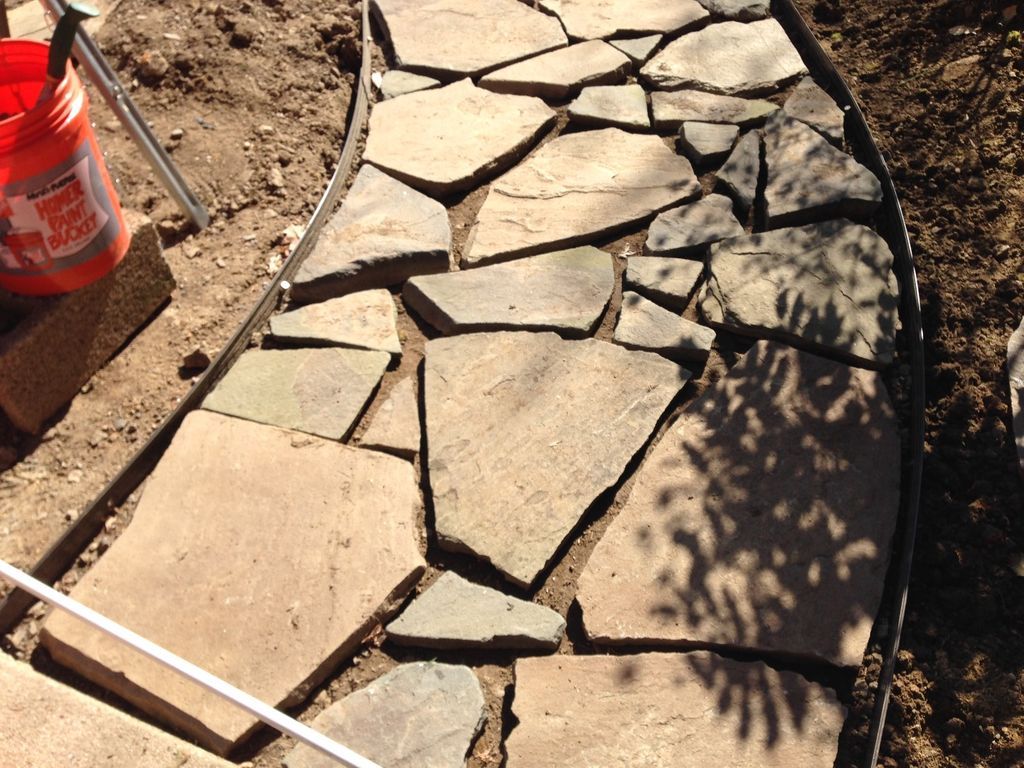

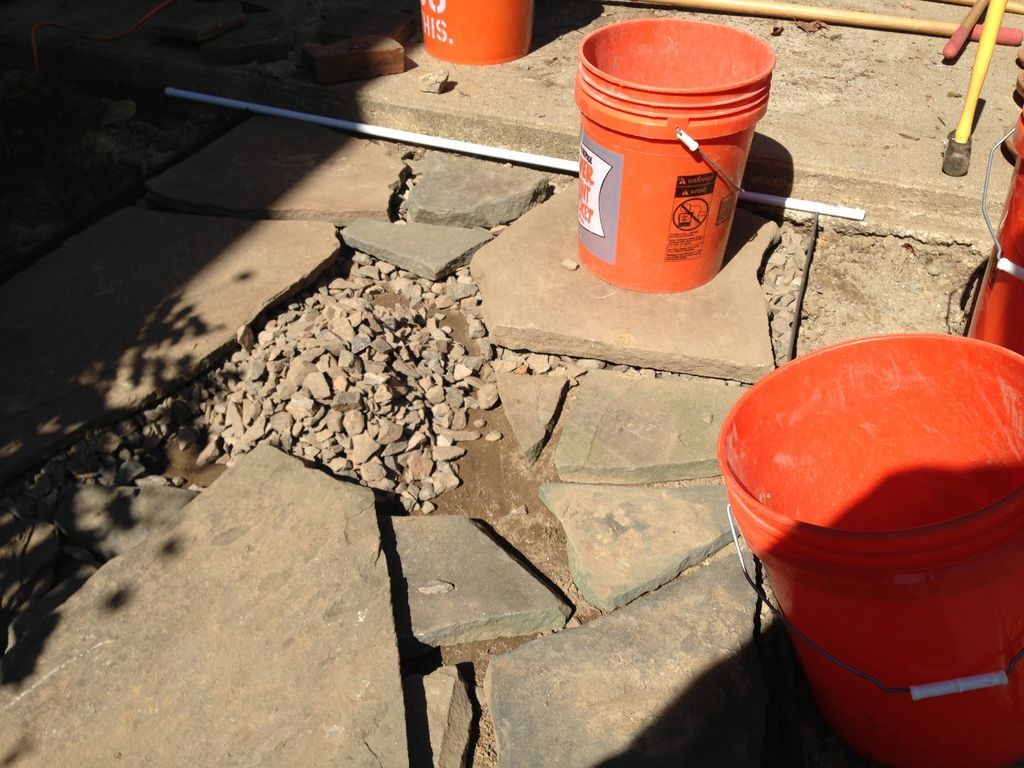
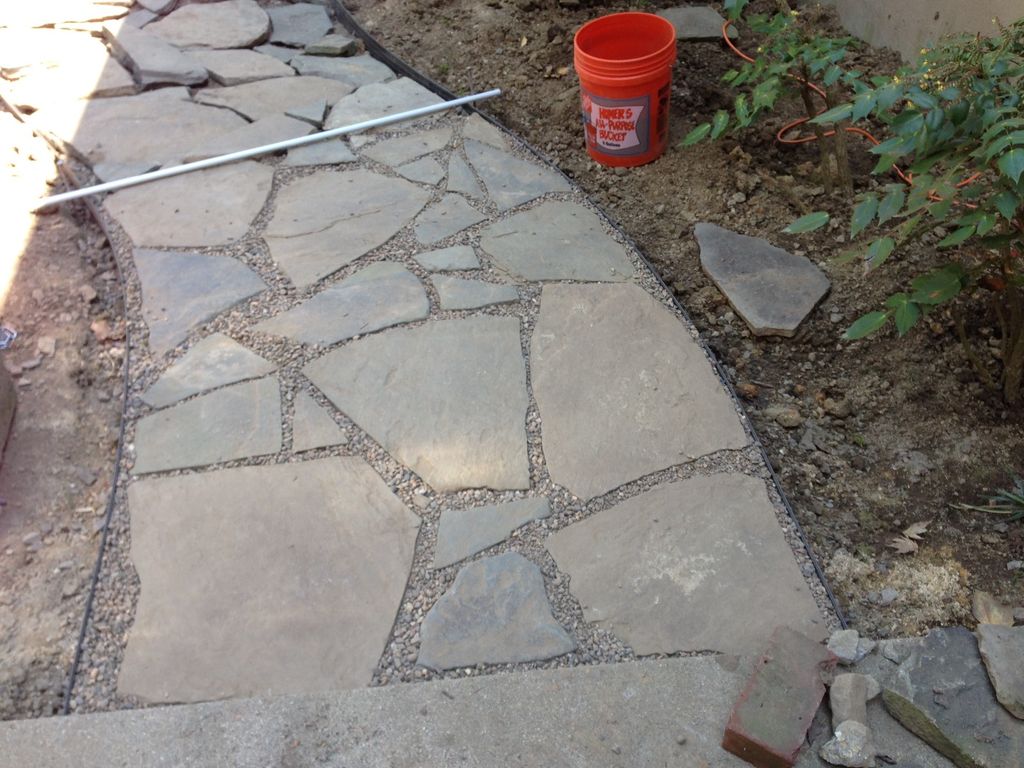
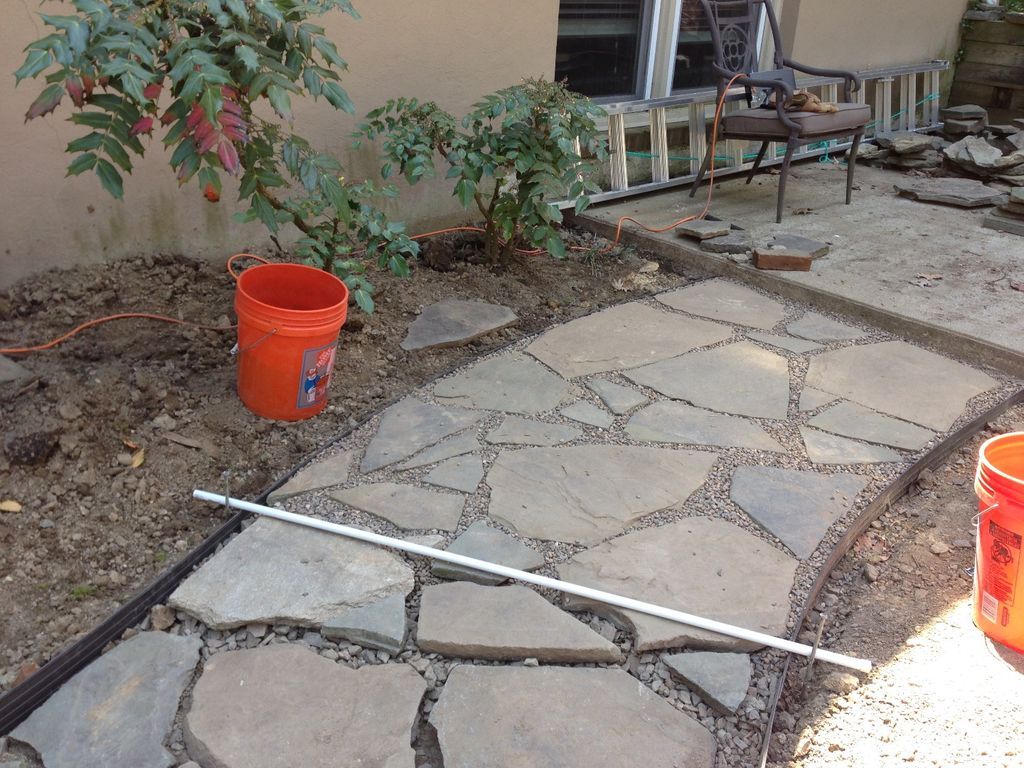
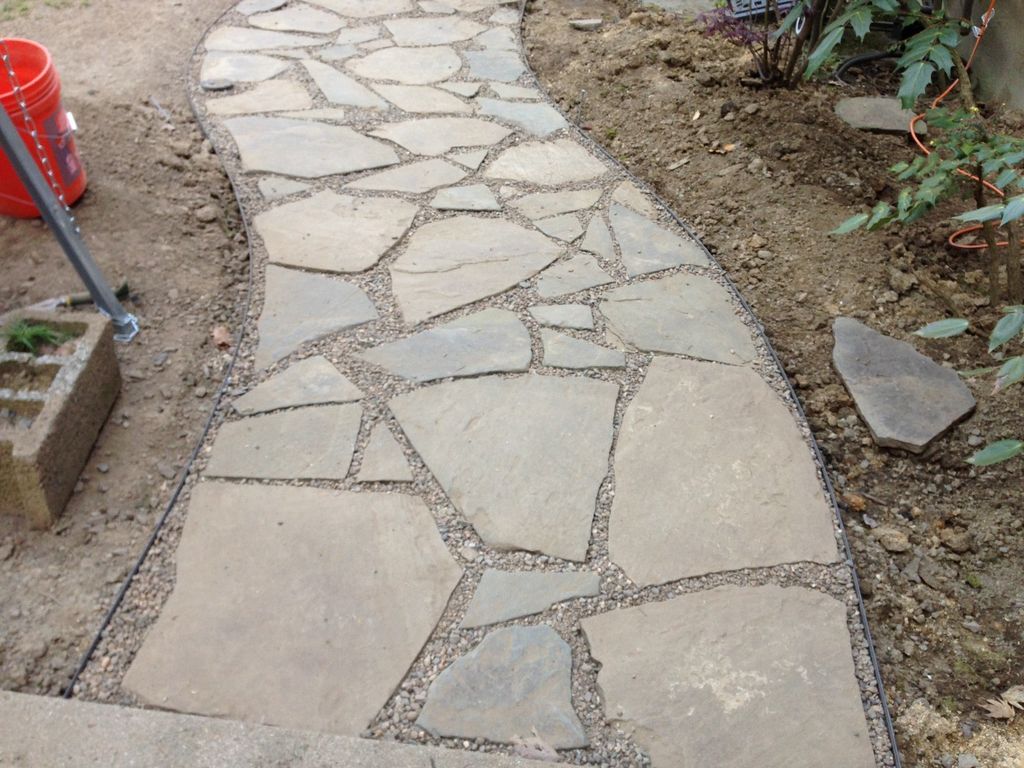
Now it was ready for final placement. The paving stones ranged in widely varying depths, from one inch to more than three inches, some with a constant thickness and others with bumps and arches. My goal, despite this, was to have the tops of all the pavers be level with each other. The edges helped a lot with this.
I got a long bar (the white one in the pictures) and use it to ensure I lift each paver to the correct height.
This was a repetitive process of observing the space beneath it, pouring in large rocks to bring it closer, setting the paver down to test the white bar, lifting it to add or remove rocks, and repeating. After a while, it feels good.
A good trick I found was to place the paver a little high, so the bar balanced on it and moved on one or both edges on either side.
Leave the bar resting on the paver and then, using a twisting pressing motion, move the paver toward thes rocks at the base. The bar swings back and forth with the movement of the paver until it suddenly stops moving. Its ends have just touched the edge and the paver levels itself perfectly. That worked very well.
I would do about two feet of path, laying and leveling pavers, then back up and start filling in with the gravel to keep everything in place. Pouring in the gravel to level the entire path was quite satisfying.
Step 6: Finish
Construction of a Rock and Gravel Path for the Garden
And that's all. As of this writing, I still need to reinsert the shims into the original section, and then apply over the area between the path and the house, finally laying down some topsoil for the other side to plant grass.
I hope you found it interesting and useful. Thanks for reading and good luck in your projects.
Get more information at perfectionidea.com and on our Facebook for more Construction of a Rock and Gravel Path for the Garden.
Popular Content
How to make a rocket stove for outdoors
Cardboard Drawers Lined with Jeans
Bedroom furniture with secret compartments!
Latest Articles
How to make a refrigerator out of insulating material: Practical step-by-step guide
How to make a Kilim for the Home: Complete Step by Step Guide
How to protect ourselves from accidents in our workplace: Complete prevention and safety guide
Related Content
Homemade Method to Remove Rust on Tools!
Revive Your Weather-Damaged Wooden Furniture Outdoors!
How to Make a Homemade Disc Sander!
Sliding Doors: Abuse of Them in Small Spaces
Creative Home Decor Ideas to Transform Every Space
Refreshing your home starts with smart design choices that combine comfort, personality, and functionality. Whether you want to modernize a small apartment, upgrade outdoor areas, or create cozy rustic interiors, these trending ideas can completely change the atmosphere of your space.
Outdoor Spaces That Increase Style and Functionality
Outdoor living continues to dominate modern home trends. Homeowners are increasingly investing in practical entertainment zones inspired by these BBQ shed ideas, which create the perfect setup for gatherings and weekend cooking sessions.
First impressions also matter when designing exteriors. Elegant farm entrance gates design ideas help properties stand out while improving privacy and curb appeal.
Compact living solutions are also gaining popularity. These inspiring 16x40 shed house interior design ideas show how smaller spaces can still feel luxurious and functional.
To enhance patios and entryways, homeowners are adding stylish protection with these creative porch awning exterior DIY ideas that blend aesthetics with practicality.

Rustic and Cozy Interior Design Trends
Warm and natural interiors remain timeless. These charming rustic decor ideas combine wood textures, vintage accents, and earthy tones to create welcoming spaces.
Bedrooms are becoming more personalized with curated wall arrangements. Many homeowners use these stylish picture wall ideas for bedroom spaces to display memories and artwork creatively.
Textured wall treatments are another major trend. Installing a board and batten wall adds architectural character while keeping interiors elegant and modern.
Similarly, bold accent wall ideas can instantly transform plain rooms into eye-catching focal points without requiring a full renovation.
Smart Kitchen and Organization Inspiration
Functional kitchens are essential for modern homes. These practical kitchen wall cabinet ideas maximize storage while maintaining a clean and stylish appearance.
Organization also starts at the entrance. Well-designed mud room ideas help families keep shoes, coats, and daily essentials neatly arranged.
Colorful and Personalized Home Styling
Vibrant interiors are becoming increasingly popular thanks to playful dopamine decor ideas that use bright colors and joyful accessories to improve mood and energy.
Gallery walls also continue to evolve as a major decorative feature. These trendy gallery wall inspiration ideas offer creative ways to combine prints, photos, and statement art.
Young renters and new homeowners are especially embracing these stylish first apartment aesthetic ideas to create sophisticated interiors on a budget.
Finally, selecting the right shades can dramatically influence any room’s atmosphere. These modern trendy color ideas help homeowners choose palettes that feel fresh, elegant, and timeless.
Final Thoughts
From rustic charm and colorful interiors to outdoor entertaining areas and functional storage solutions, today’s home decor trends focus on creating spaces that feel both beautiful and livable. By combining smart layouts, modern textures, and personalized decorative elements, any home can become more stylish, comfortable, and inspiring.


