


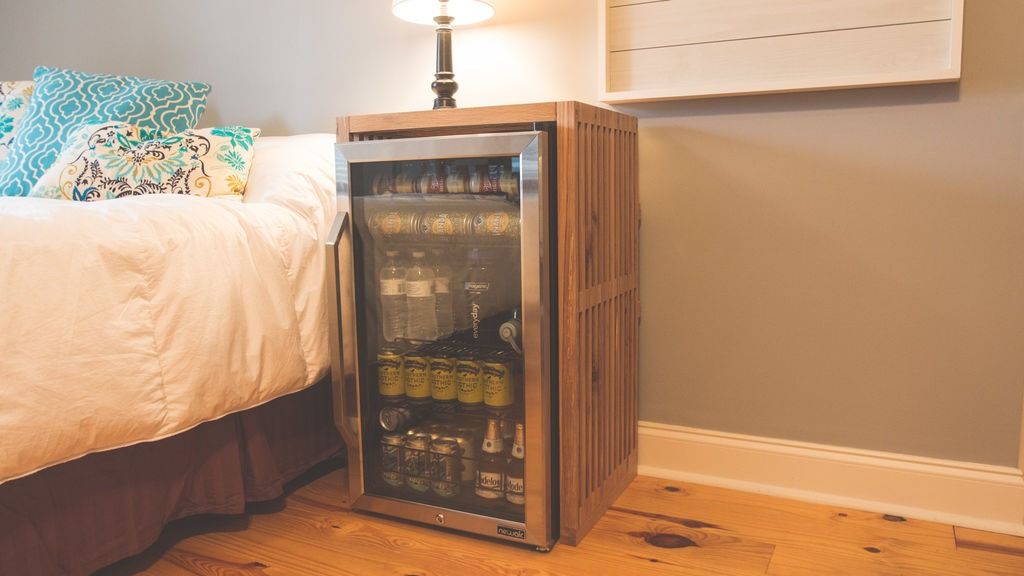
Side Table with Built-in Refrigerator, I was inspired by the classic Nelson Platform Bench and created a side table with a built-in mini refrigerator.
Step 1: Background

A company, NewAir, sent me this mini fridge to test. When I was contacted, I had the idea of integrating the mini beverage refrigerator into a side table or nightstand. They liked the idea, so here we are. Thanks to NewAir for sending me this! Look in the next section for a discount code where my followers can save 20% on this mini refrigerator.
Step 1: Tools and materials
- NewAir 126 beverage refrigerator
- Table saw
- Drum sander
- Router
- Random orbit sander
- Nail gun
- Nails
- Drill and bits
- Miter saw
- HP 1»JET 708457DXK JJ-6CSDX joints with 115/230-volt 1-phase quick knife system (I suggest going to a local for use)
- Spray lacquer
- Clamps
Step 3: Let's get started


There are a few things that many solid wood construction projects start with. Grinding wood from a rough state to some flat, square pieces is one of those things.
How is raw wood ground?
I'll give you a brief summary of how I did it this time. I start by cutting the pieces lengthwise on the miter saw.
I usually leave the pieces a little long at this point, so they can be refined later.
Then it goes to the assembler to get a flat face and an edge that is 90 degrees to that face. Then I take that flat face and put it in the planer. That is the reference face, and the planer will make the other side parallel to its plane.
Then the final step is to take it to the table saw and cut the strips, however I need them. That's a simplified version, but it will help you get started if you've never done it before.
Since I got my pieces from a few different boards, I took them to the planer so they were all the same thickness.
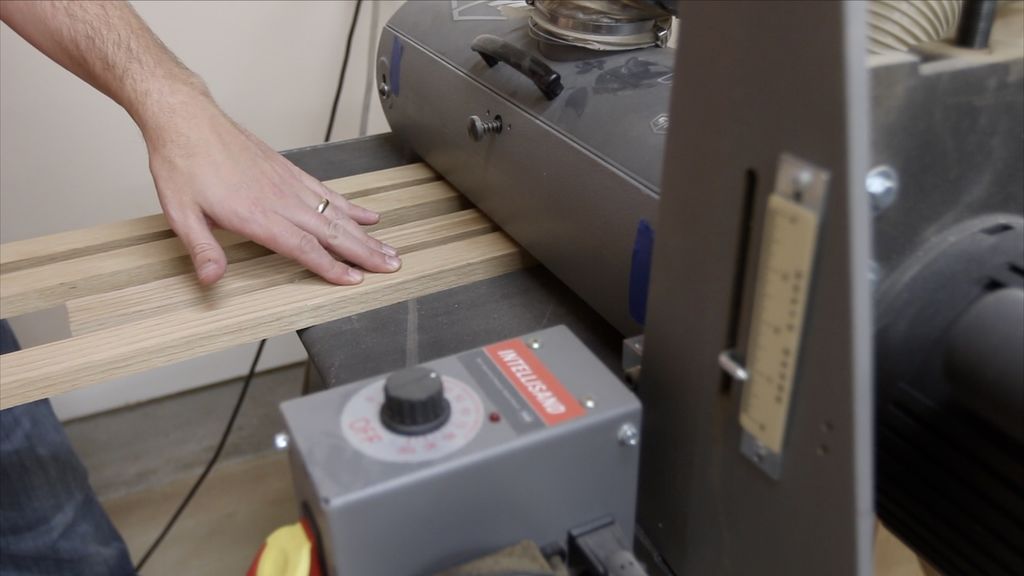
And before I started creating my grid pattern, I ran everything through the drum sander, since I wouldn't be able to sand those areas easily later in the project.
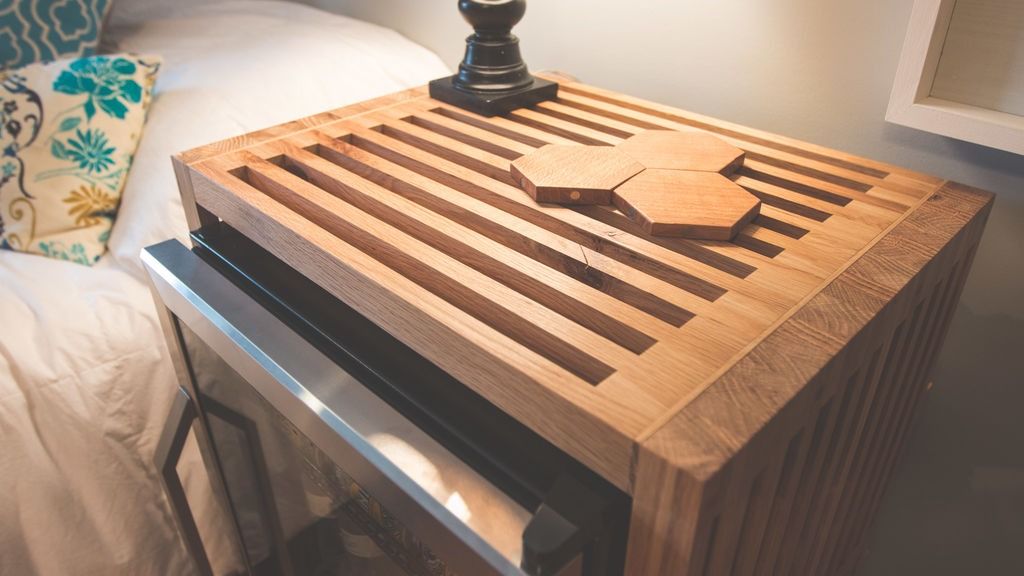
Step 4: Cut the Spacers
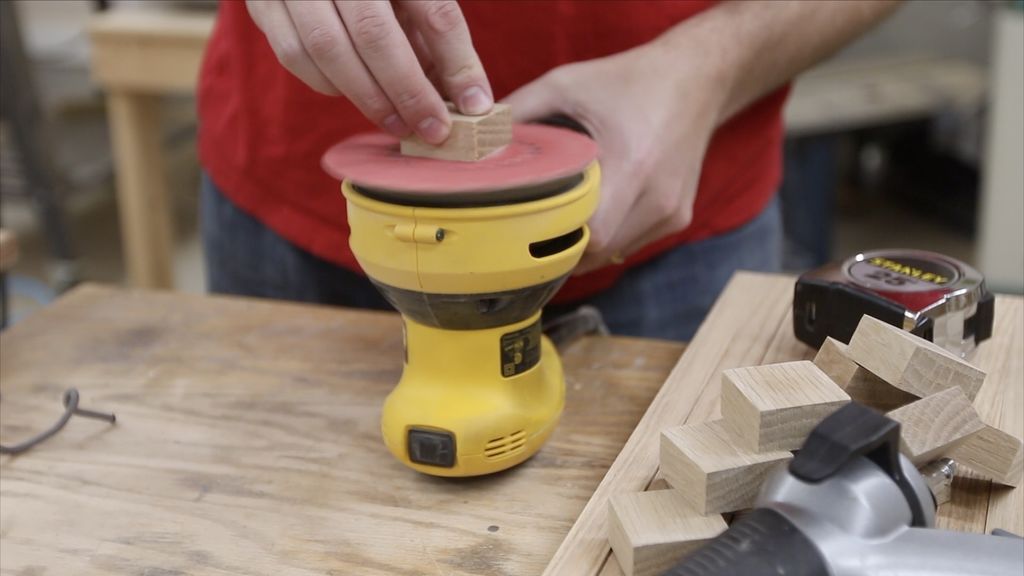
I needed about 30 spacer pieces for each of the surfaces (top and both sides), so I took some of the strips I cut on my cross sled, installed a one and a half inch stop block, and cut them all.
This left some splinters on a couple of the ends, so I just sanded them briefly on the random orbit sander.
I simply held the sander upside down and used it as a stationary sander.
Step 5: Arrange the pieces
Once all the strips were left after cutting the spacer pieces, I took a few minutes to place them the way I liked best.
It's really easy to get confused in the middle of the project, so it's very helpful to take a few minutes to get everything out of the way.
Step 6: Cut to final length
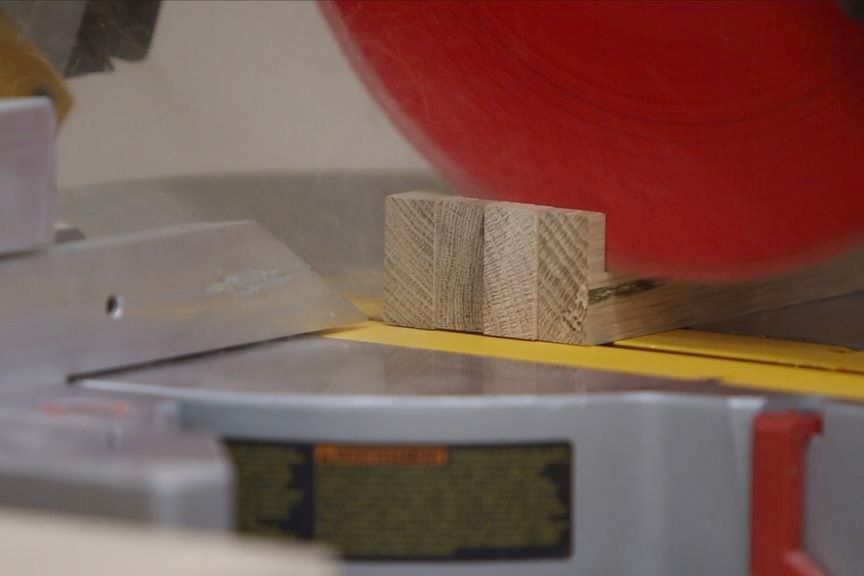
After arranging them how I wanted, I took them to the miter saw and cut them to final length.
I started out doing one at a time, but eventually I grabbed about 4 at a time and cut them all at once.
I used a stop block to help speed up this process and to make them more accurate.
Step 7: Create the scrolled panels
The next thing was a test of patience. It really helps when it comes to assembly.use these mesh panels to go slow and take your time.
The more careful you are to align all of this correctly, the less time you will have to spend sanding later.
In a traditional Nelson bench, I believe the spacer pieces are all one piece and a stack of dice is used to create a board with some fingers into which the slats fit. I didn't go that route because I thought it would be quicker to have the spacers and attach them all together. I'm not sure which would be faster.
This ended up taking me a lot longer than I originally thought.
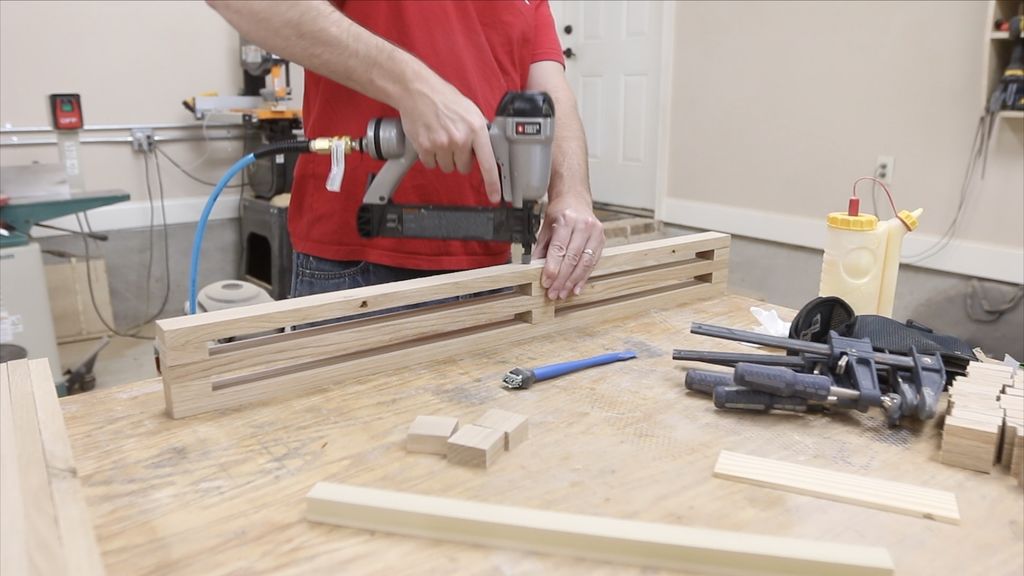
I used an 18ga brad nail gun and some wood glue to attach everything, and sort of built it up as I went.
Occasionally the nail would split the little spacer pieces, but not many of them did, and it wasn't that bad.
I made some spacers that could be spaced evenly from the small spacer all the way, towards the center, on both the top and the two side pieces.
That way, I didn't have to measure every one of the 12 times while building the grid panels.
I could use that piece, but take the little spacer up to it and nail it into place.
I continued building it until the entire panel was made.
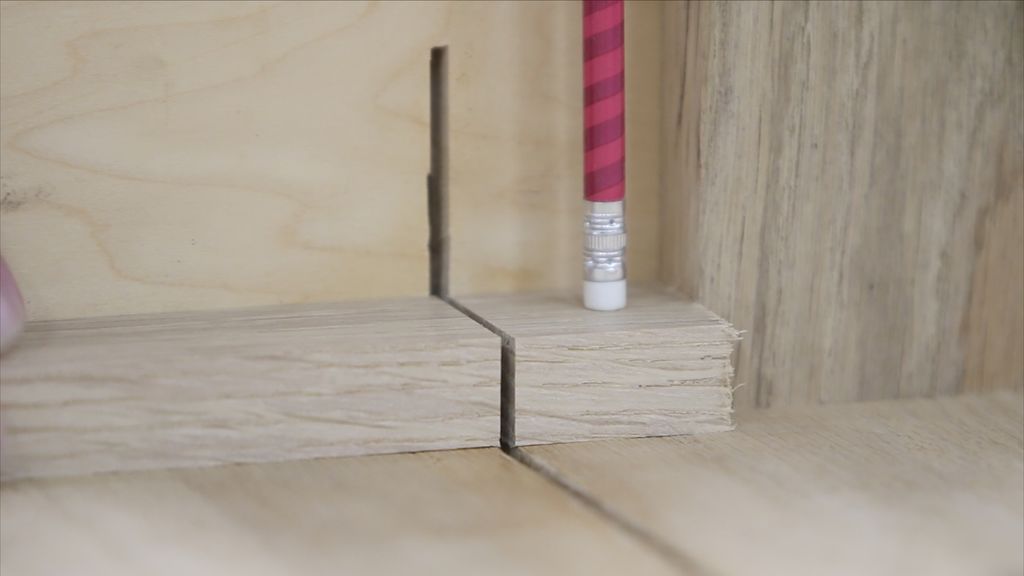
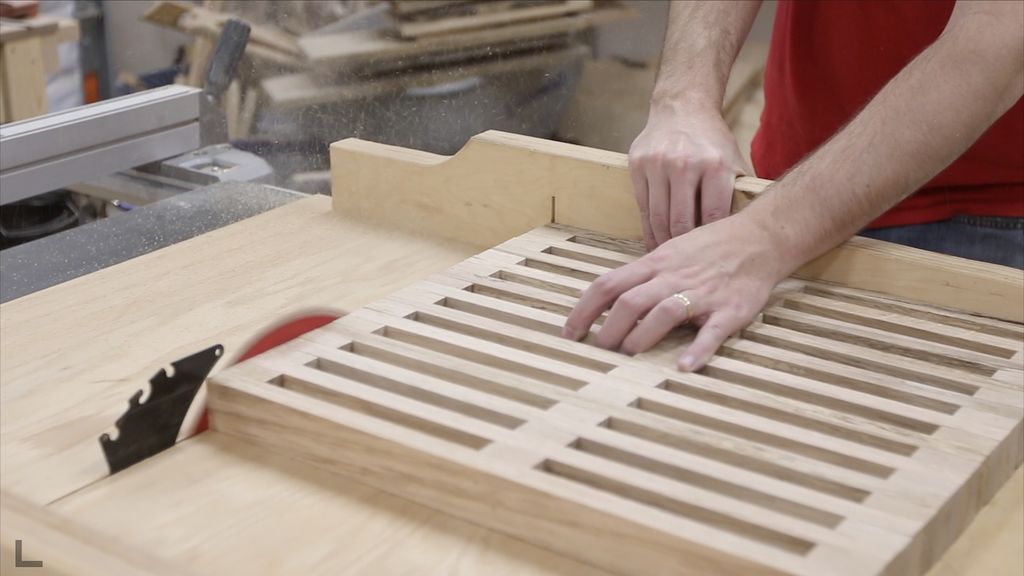
Then I took the panels to my crosscut sled and trimmed the ends so they were even.
This seemed like the easiest way to achieve it. Despite being very careful with gluing and nailing, there were still slight differences.
Then I ran them through the drum sander a few times on each side... And an even number of times. That way, they were all smooth and the same thickness.
ERROR ALERT:
I am wrong with my measurements regarding the height of the sides. I measured the height of the mini refrigerator, but I didn't take into consideration the height of the actual panel that was on top.
Well, the panels were about 1.5″, so I fell short. It was a pretty easy fix though, as I was only able to drive a couple of pieces onto stilts to make up for that height difference.
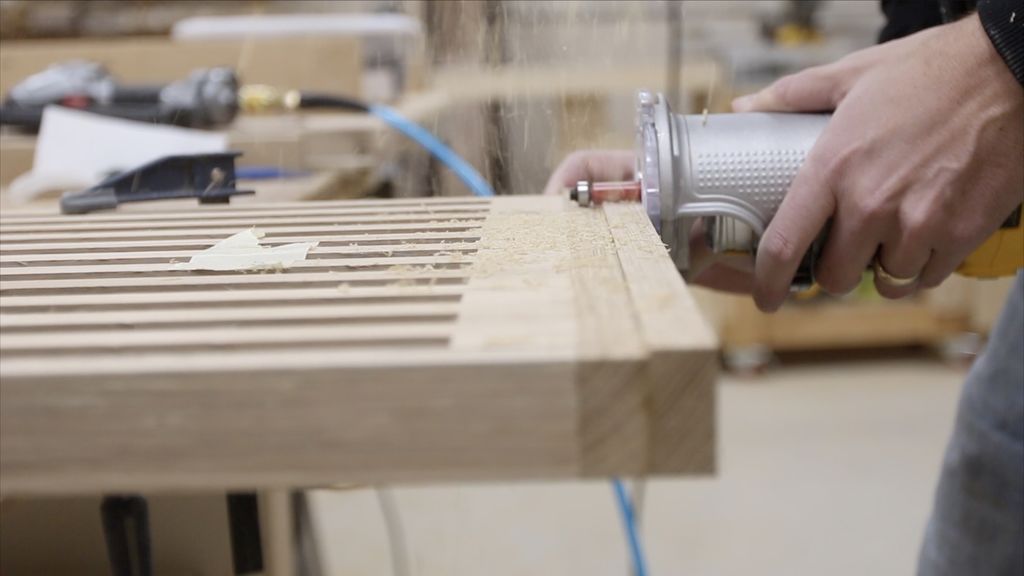
After adding the stilts to the bottom of each side, I tried two different methods of pulling them onto the slatted panels. The first was to use my router with a little adjustment..
This worked well, but I don't think it had enough support, because it wouldn't keep it perfectly flat, and I got a couple of places where the bit dug more than flush.
It's not a big deal. In the next one, I decided to simply measure the finished thickness of the slatted panels (remember, I sanded them a bit to make them less thick than originally planned) and cut the additional pieces to that same thickness. That worked much better.
The added pieces were a little longer than the slatted panels, so after I attached them, I simply went back with a flush fit saw and removed the part that was sticking out.
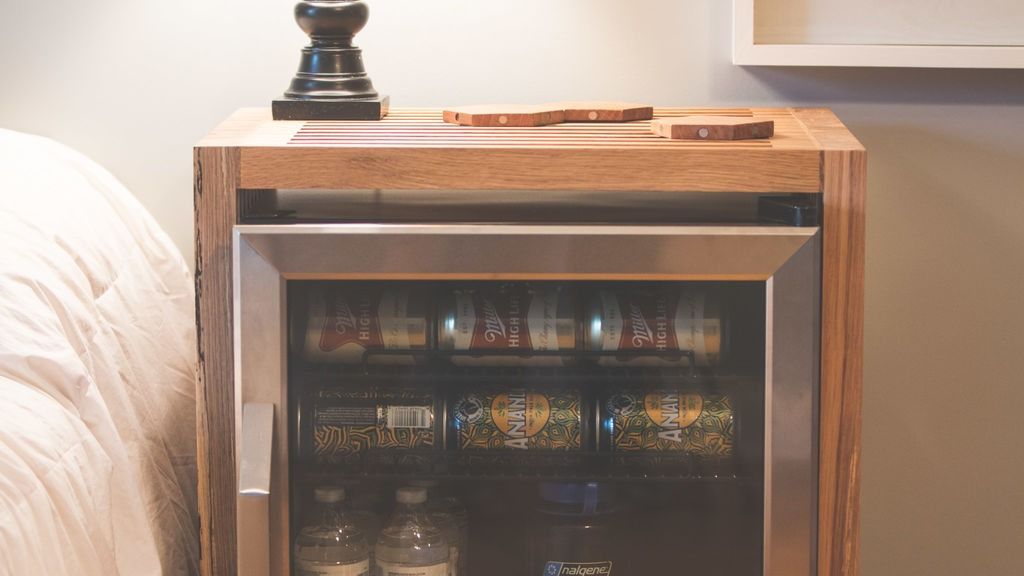
Another thing I had to do was put a small shim on each side of the top panel.
After squaring up the top panel, it was a little too narrow to fit the refrigerator. I'm glad I took the pieces to the mini fridge before gluing them all together!
Step 8: Sanding

There was a lot of sanding on this piece, despite my efforts to sand as far in advance as possible.
I ended up breaking down each of the edges and sharp edges by hand with 220 grit sandpaper. I wanted to keep the sharp look of the slats, but I didn't want them to be so sharp to the touch.
Step 9: Sides for the top panel
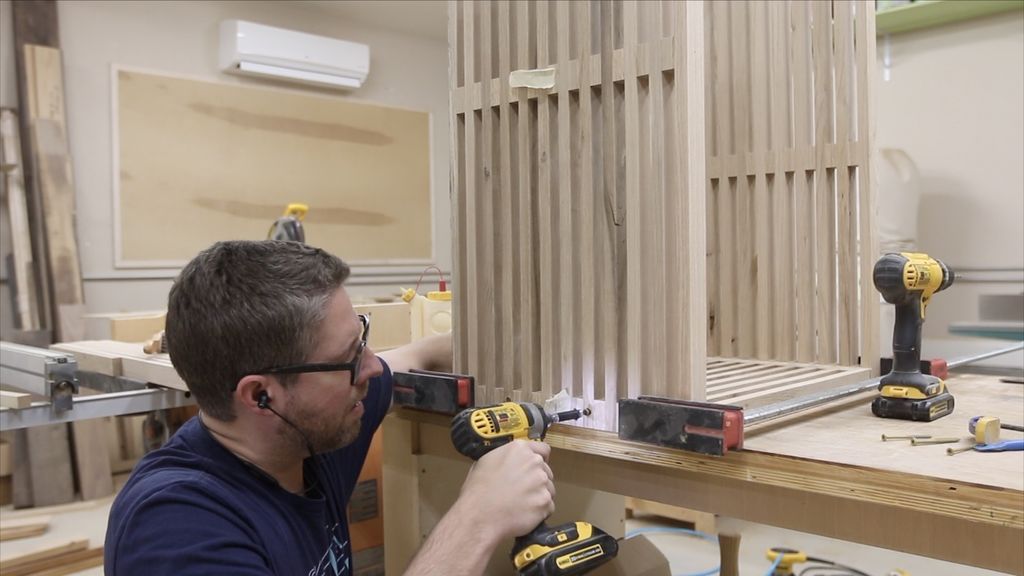
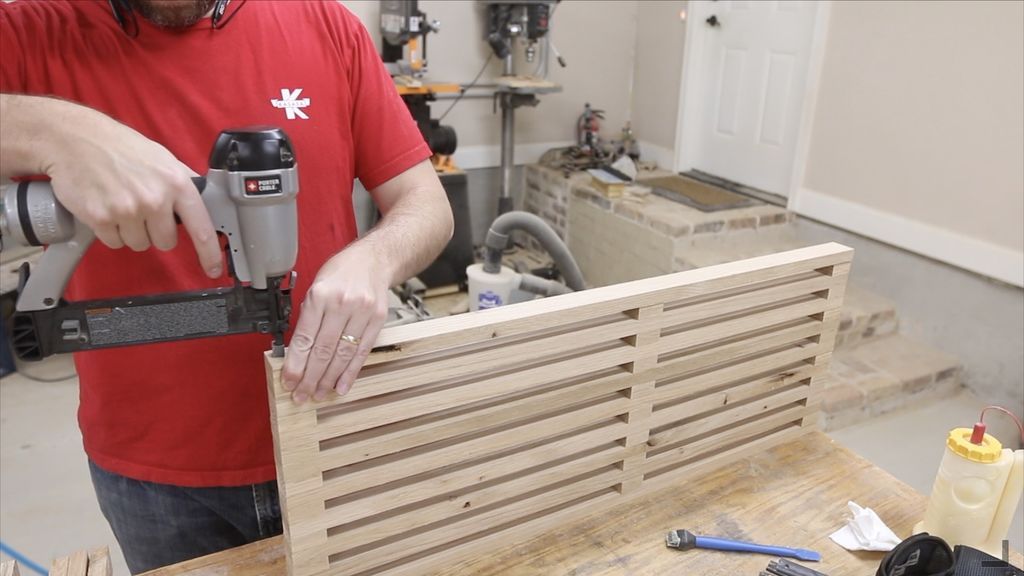
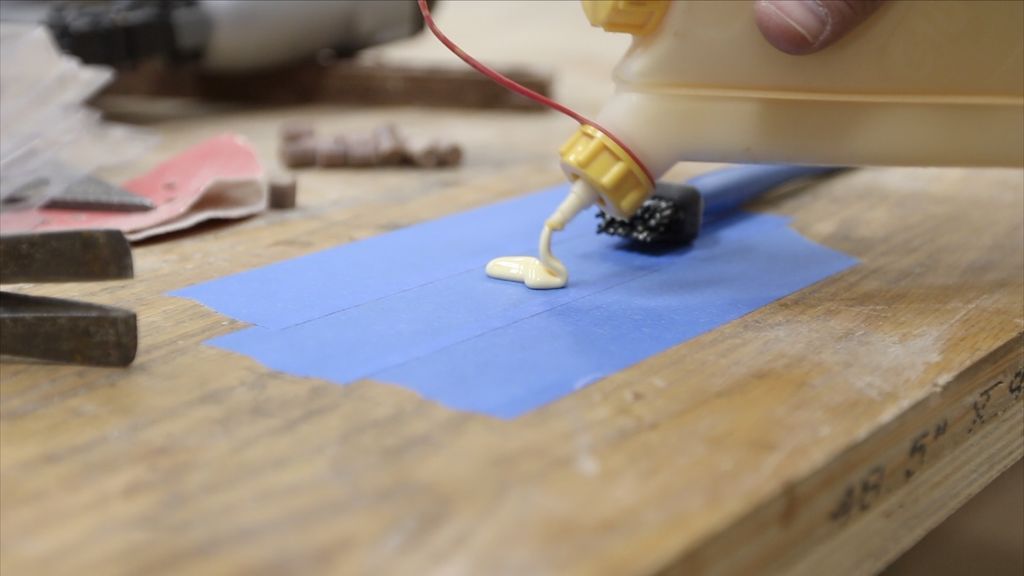
I used a pair of clamps to drill everything together, and while it was upside down and clamped.
I pre-drilled some holes from the outside of the side slat panels into the top slat panel. I did this on both sides before driving some screws.
Step 10: Supports
The side slatted panels wanted to lean inward a little, and the piece needed a little more lateral strength, so I secured a pair of cross braces to the back.
These won't really be seen, but they are important for the strength and rigidity of the final table. I just made sure to measure the width of the panel so I can keep it the same from top to bottom.
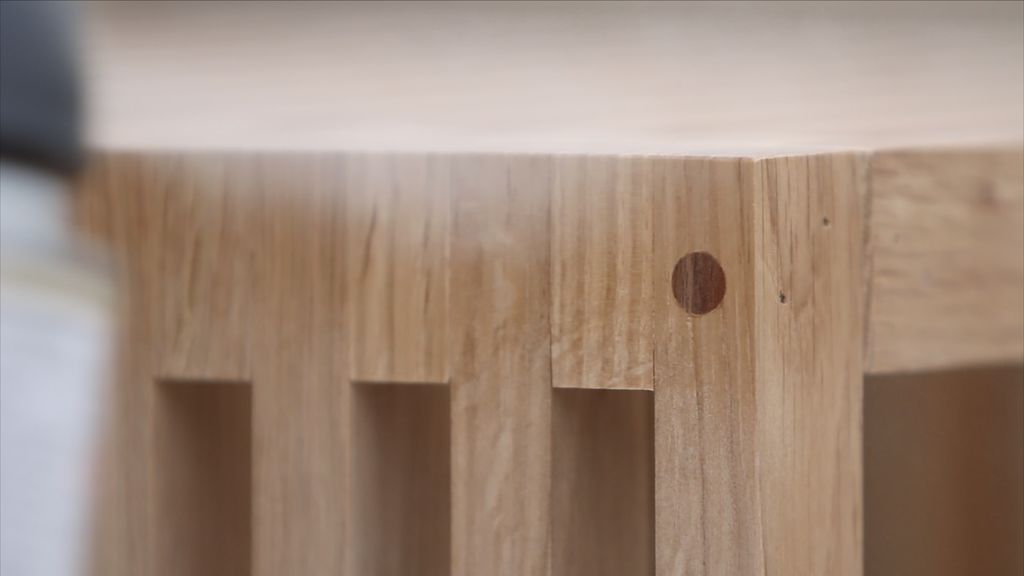
Step 11: The holes
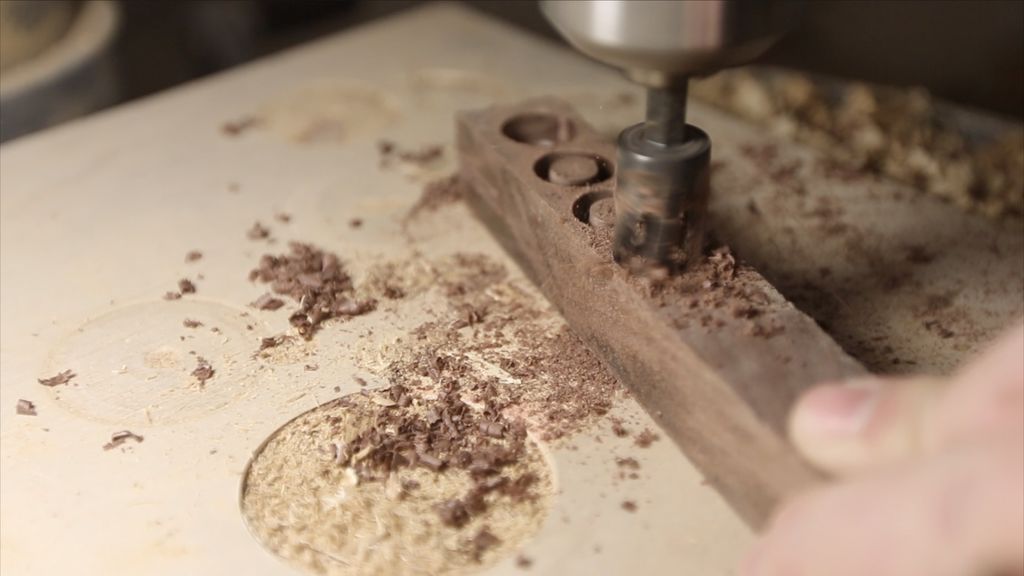
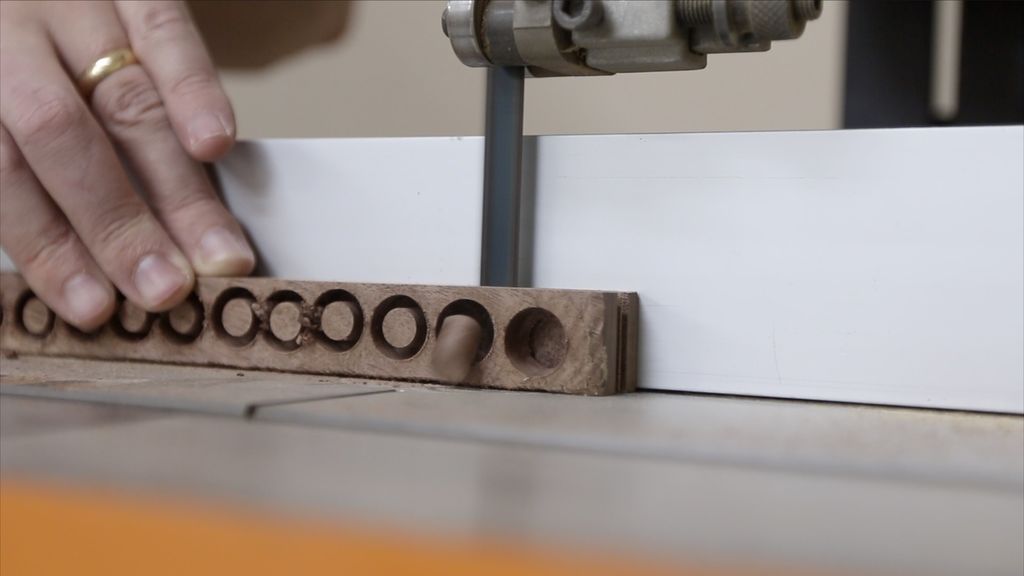
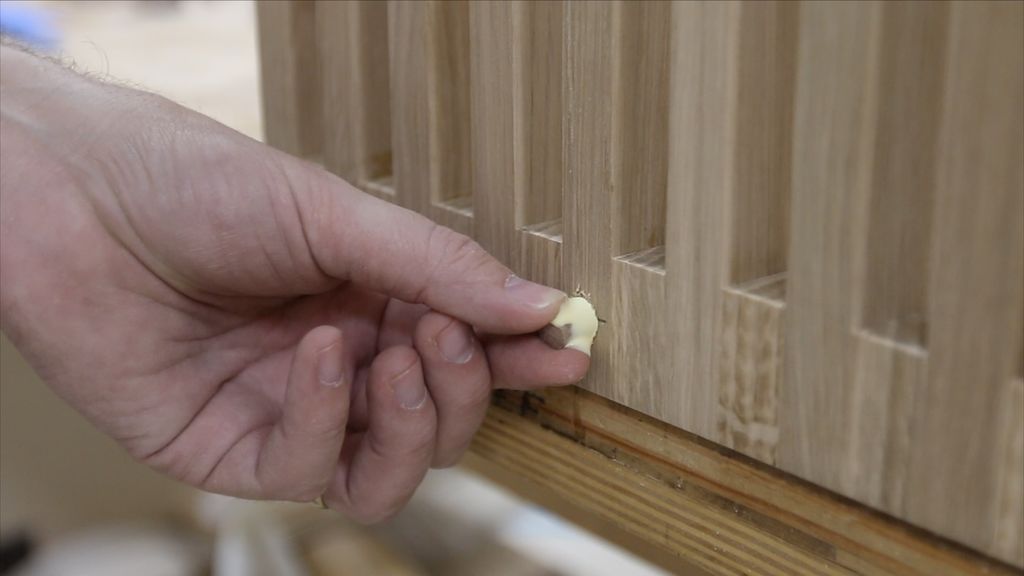
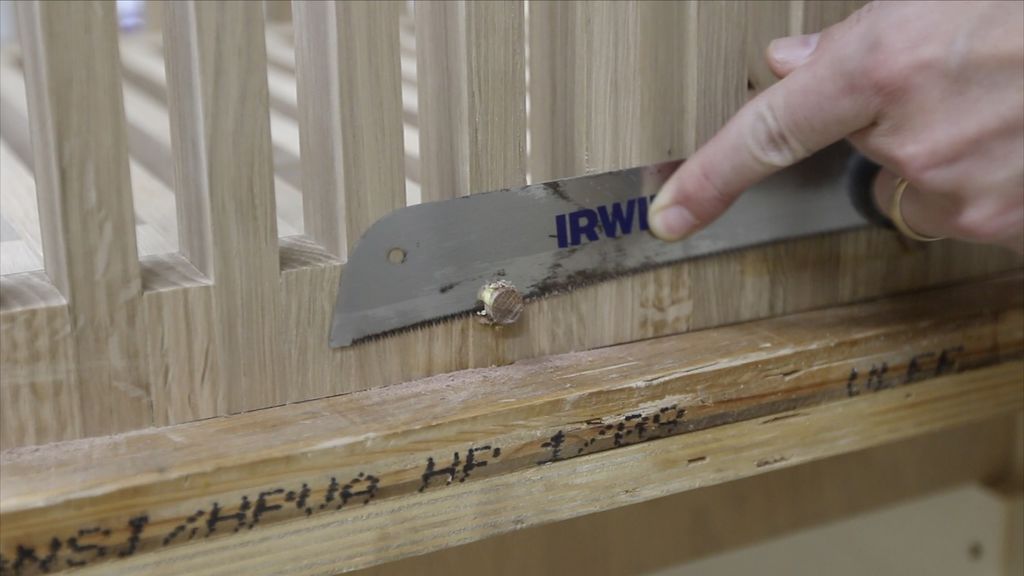
Next, I cut some plugs on the drill press using my cutting bit, and removed them by running the board through the band saw to remove the plugs which I secured in the screw holes with some wood glue.
I came back a little later and cut them flush.
Step 12: Applying the finish
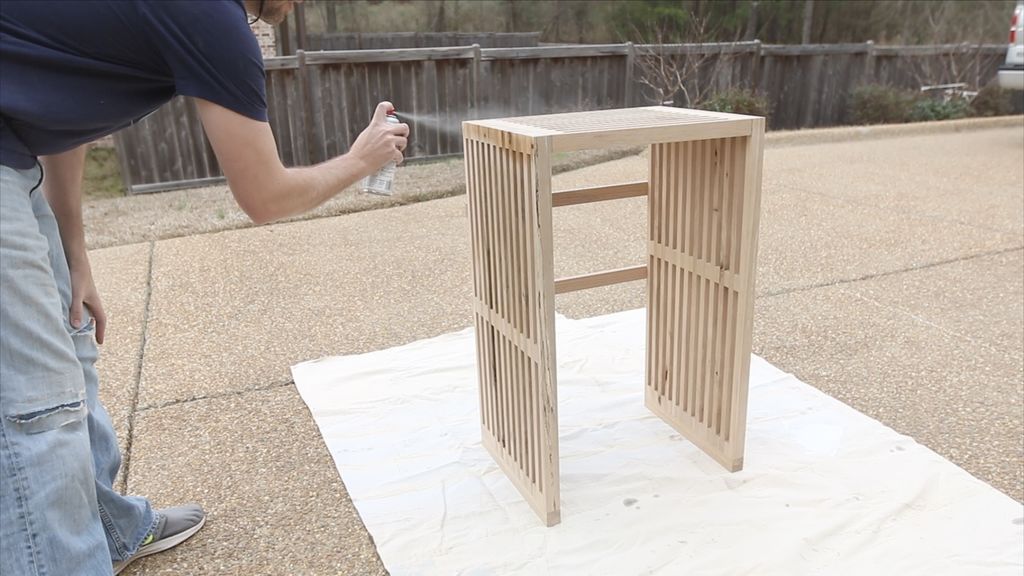
For the finish, I used spray lacquer.
I had a few cans of this, so I decided that spraying something with that many slats would definitely be more ideal than trying to brush or clean a finish.
I ended up applying 3 coats of hairspray, and then used a brown paper bag to push back the tips at the end. This leaves a great subtle shine!
Step 13: Conclusion
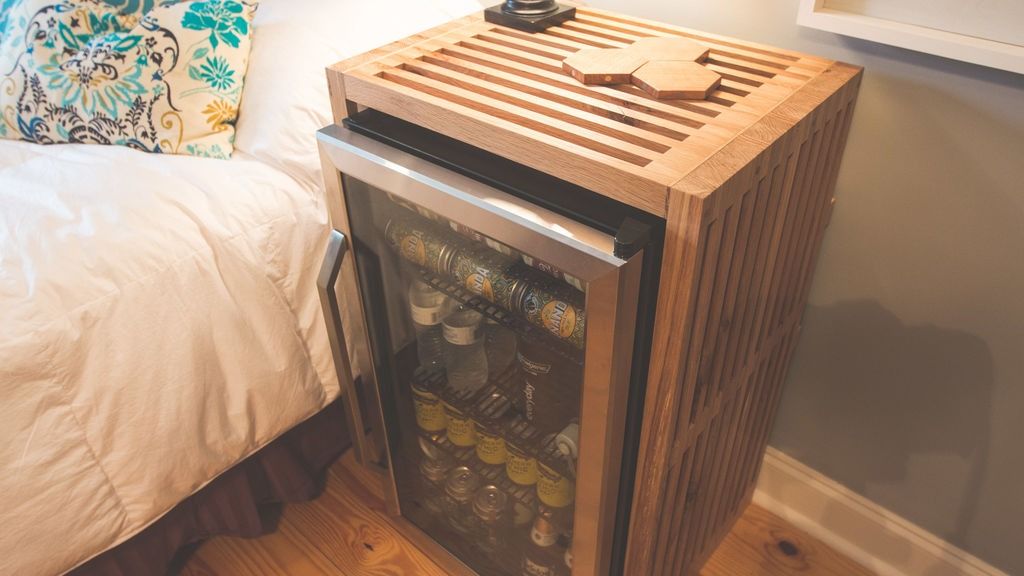

I really like that this project turned out as I had imagined at the beginning! Inspired by the Nelson platform bench, I really think this piece pays homage to that one.
Video:
Video link.
Tell me what you think below. Do you like the style? Does it work with the refrigerator? Thanks for continuing with this project! I appreciate you taking the time, and if you would share it with someone, that would really help me!
See you on the next project!
Get more information at perfectionidea.com and on our Facebook for more Side Table with Built-in Refrigerator.
Popular Content
How to make a rocket stove for outdoors
Cardboard Drawers Lined with Jeans
Ideas and Advantages of Window Grilles for the Home!
Latest Articles
How to make a refrigerator out of insulating material: Practical step-by-step guide
How to make a Kilim for the Home: Complete Step by Step Guide
How to protect ourselves from accidents in our workplace: Complete prevention and safety guide
Related Content
Tree and Mushroom Shaped Picnic Table Ideas
How to Build a Cool Floating Book Shelf!
How to Build an Infinity Mirror Clock
Children's Furniture with Dinosaur Designs
Creative Home Decor Ideas to Transform Every Space
Refreshing your home starts with smart design choices that combine comfort, personality, and functionality. Whether you want to modernize a small apartment, upgrade outdoor areas, or create cozy rustic interiors, these trending ideas can completely change the atmosphere of your space.
Outdoor Spaces That Increase Style and Functionality
Outdoor living continues to dominate modern home trends. Homeowners are increasingly investing in practical entertainment zones inspired by these BBQ shed ideas, which create the perfect setup for gatherings and weekend cooking sessions.
First impressions also matter when designing exteriors. Elegant farm entrance gates design ideas help properties stand out while improving privacy and curb appeal.
Compact living solutions are also gaining popularity. These inspiring 16x40 shed house interior design ideas show how smaller spaces can still feel luxurious and functional.
To enhance patios and entryways, homeowners are adding stylish protection with these creative porch awning exterior DIY ideas that blend aesthetics with practicality.

Rustic and Cozy Interior Design Trends
Warm and natural interiors remain timeless. These charming rustic decor ideas combine wood textures, vintage accents, and earthy tones to create welcoming spaces.
Bedrooms are becoming more personalized with curated wall arrangements. Many homeowners use these stylish picture wall ideas for bedroom spaces to display memories and artwork creatively.
Textured wall treatments are another major trend. Installing a board and batten wall adds architectural character while keeping interiors elegant and modern.
Similarly, bold accent wall ideas can instantly transform plain rooms into eye-catching focal points without requiring a full renovation.
Smart Kitchen and Organization Inspiration
Functional kitchens are essential for modern homes. These practical kitchen wall cabinet ideas maximize storage while maintaining a clean and stylish appearance.
Organization also starts at the entrance. Well-designed mud room ideas help families keep shoes, coats, and daily essentials neatly arranged.
Colorful and Personalized Home Styling
Vibrant interiors are becoming increasingly popular thanks to playful dopamine decor ideas that use bright colors and joyful accessories to improve mood and energy.
Gallery walls also continue to evolve as a major decorative feature. These trendy gallery wall inspiration ideas offer creative ways to combine prints, photos, and statement art.
Young renters and new homeowners are especially embracing these stylish first apartment aesthetic ideas to create sophisticated interiors on a budget.
Finally, selecting the right shades can dramatically influence any room’s atmosphere. These modern trendy color ideas help homeowners choose palettes that feel fresh, elegant, and timeless.
Final Thoughts
From rustic charm and colorful interiors to outdoor entertaining areas and functional storage solutions, today’s home decor trends focus on creating spaces that feel both beautiful and livable. By combining smart layouts, modern textures, and personalized decorative elements, any home can become more stylish, comfortable, and inspiring.


