


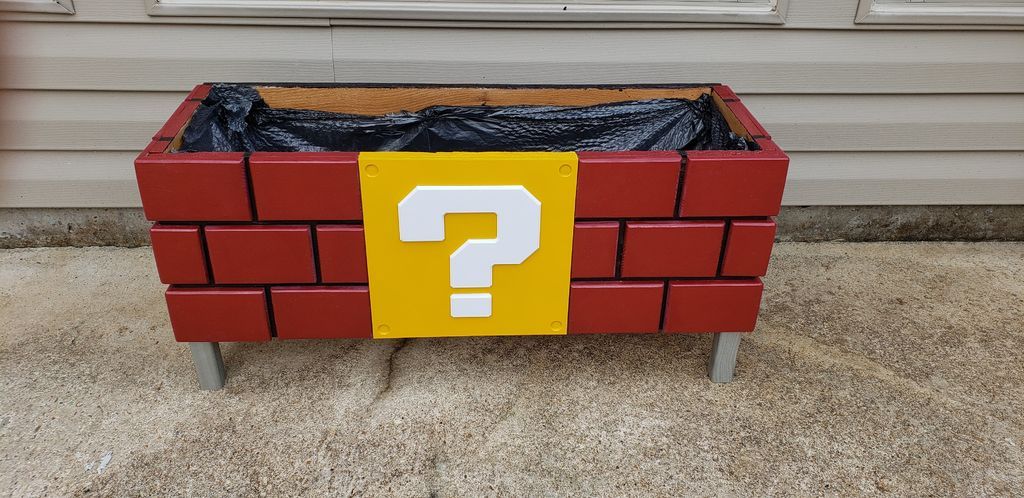
Great Planter with Super Mario Bros Decoration, a planter with Mario or question mark blocks is not a completely original idea, however, I did not find constructions that really gave life to the block in three dimensions.
That was my goal for this project.

Step 1: Materials
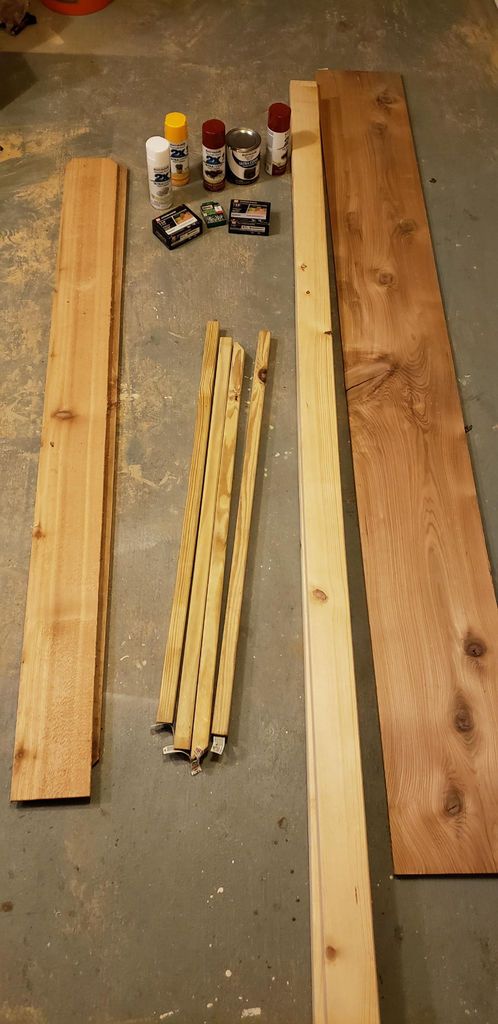


Materials:
- 1 12″x8′ cedar board (box walls)
- Kiln drying after 2″x4″ treatment (KDAT – For bricks)
- 4 2″x2″x42″ Pressure Treated Yellow Pine Baluster
- 1 6-foot cedar board
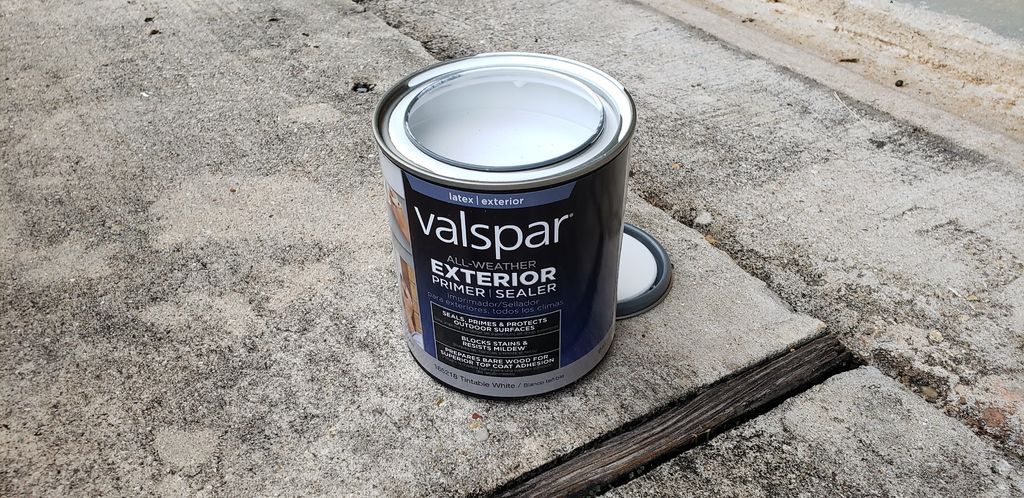
- Red paint for exteriors
- Yellow exterior paint
- Black exterior paint for base color
- 2 Spray Cans on Primer Filler
- Gray spray paint (optional to attach the legs to the concrete)
- Roller
- Outdoor screws
- 150-220 grit sandpaper (or similar)
- Wood glue
Note: KDAT can be difficult to find and will likely require a special order. Some other options may include:
- Use wood with regular pressure messages, but it must be dried before painting, which can take months.
- Use another cedar wood board, but it may be difficult to smooth.
- Use regular kiln dried wood, use a paint treatment, but you will need to use screws in each brick instead of glue.
- Use a much more expensive exterior wood like those listed here.
Electrical tools/equipment:
- Table saw
- Router
- 3D printer (not necessary if you can cut the question mark by hand)
- Miter saw (also not necessary since all the cuts could be made while watching the table saw, but it helps)
- Clamps (corner, regular and long)
- Brushes and rollers
- Belt sander
Step 2: Cut and assemble the walls


Cut the four side walls from the single 12″ cedar board (11.25″ actual width).
Next, cut the “Base Frame” from the 2x2 pressure treated yellow pine balusters. These cuts will need to be cut at 45 degrees. Finally cut the bottom boards of the cedar fence board.
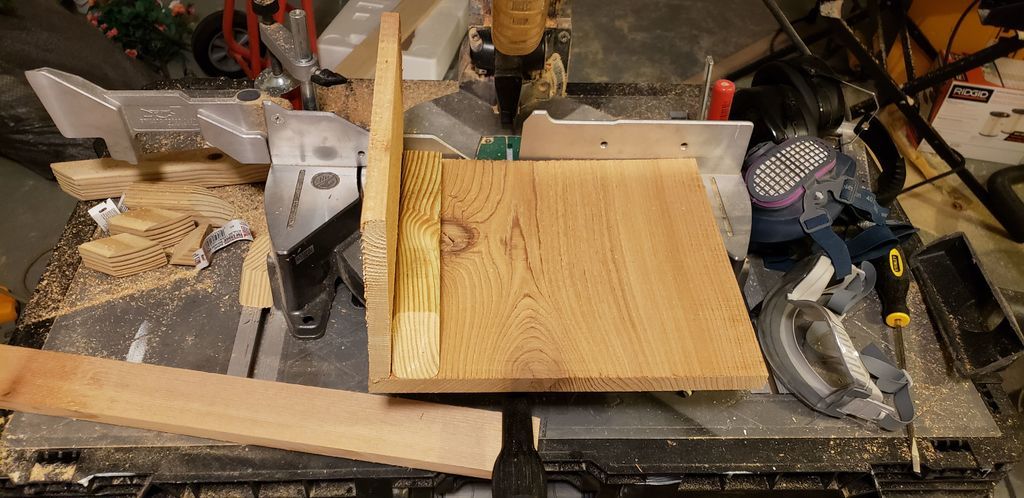
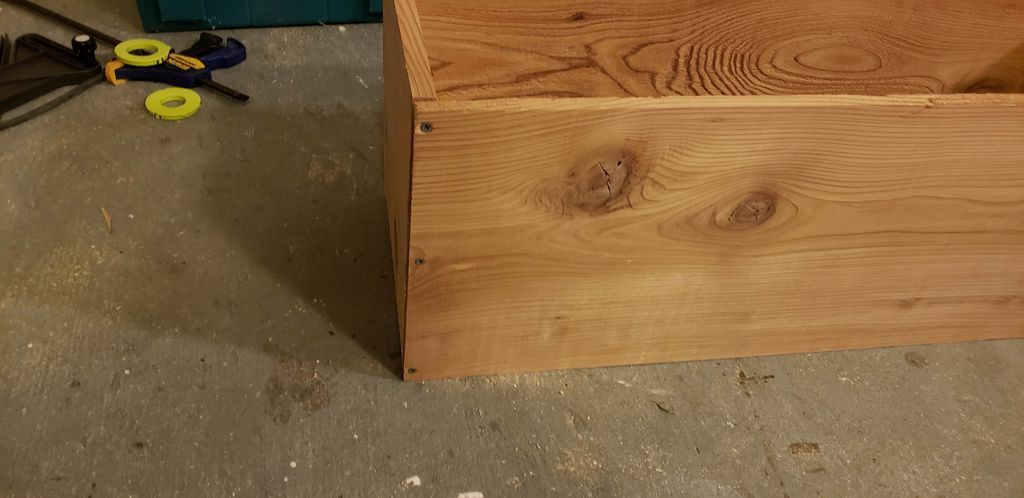
Now use a fence board as a guide to separate the base frame from the bottom of the planter wall (see photo). This will ensure that when you place the bottom it is level. Also make sure the base frame pieces are centered on the walls. The longer pieces should be shorter than the side walls to account for the shorter sides that screw on the inside. In my case, one side of the cedar was smooth while the other was rough, so I made sure the face had the smooth side facing out to avoid having to sand lightly.
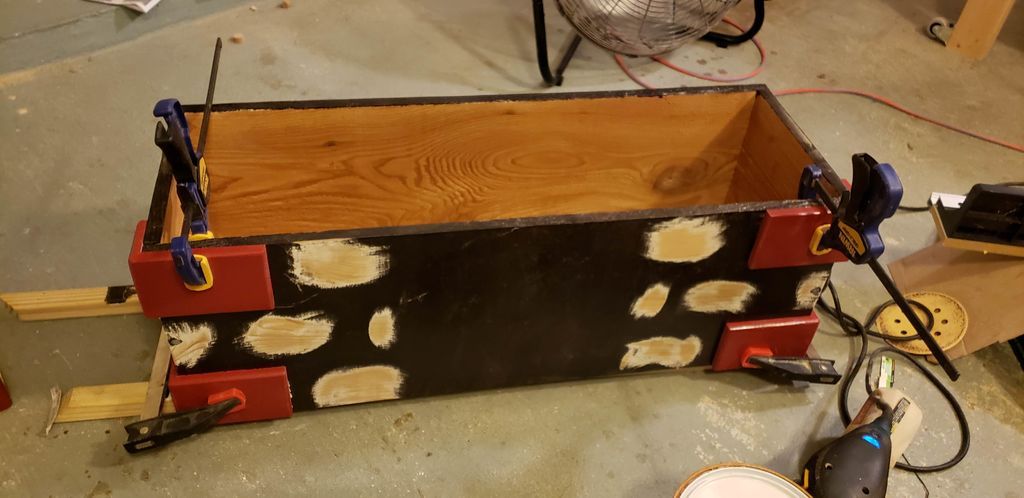
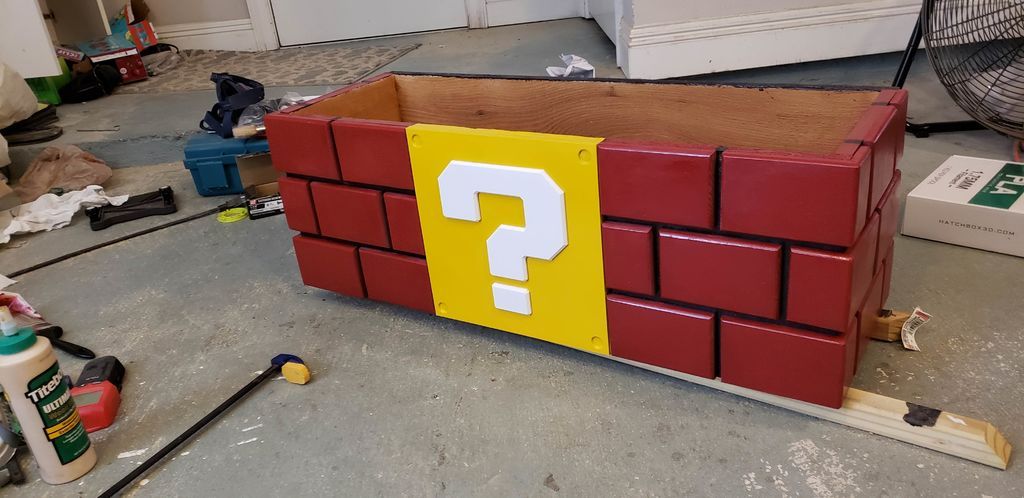
Step 3: Assemble the Planter Base
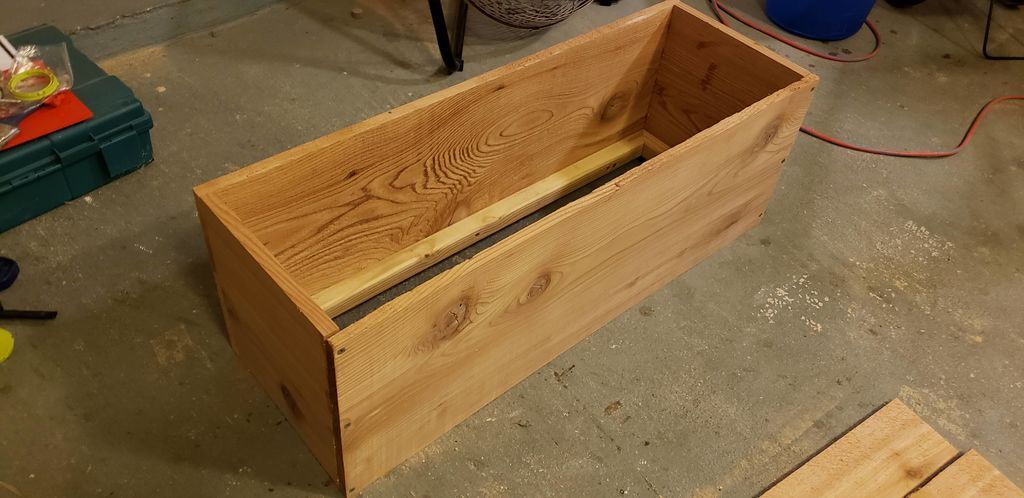

I added an optional wood glue and then pressed the walls to fassemble a box. Then pre-drill 3 pilot holes in each corner before screwing them all the way in and removing the clamps. The joint is a simple butt joint with the shorter sides on the inside of the pot. The screws will be covered by the bricks, so make sure they are flush with the wood or recessed a little.
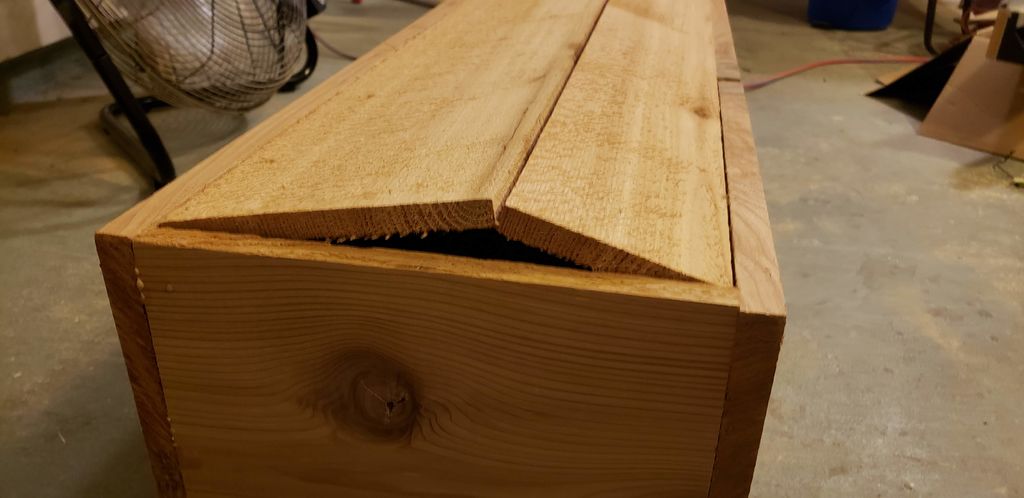
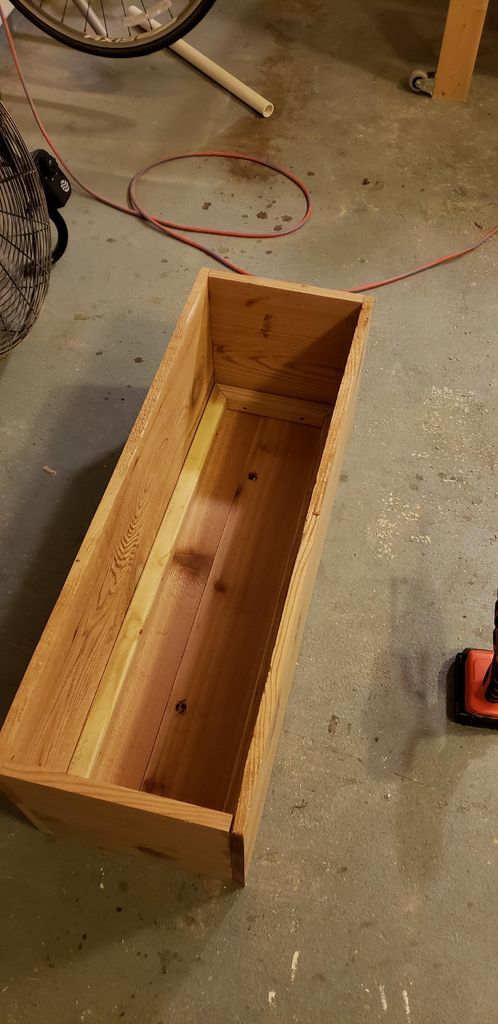
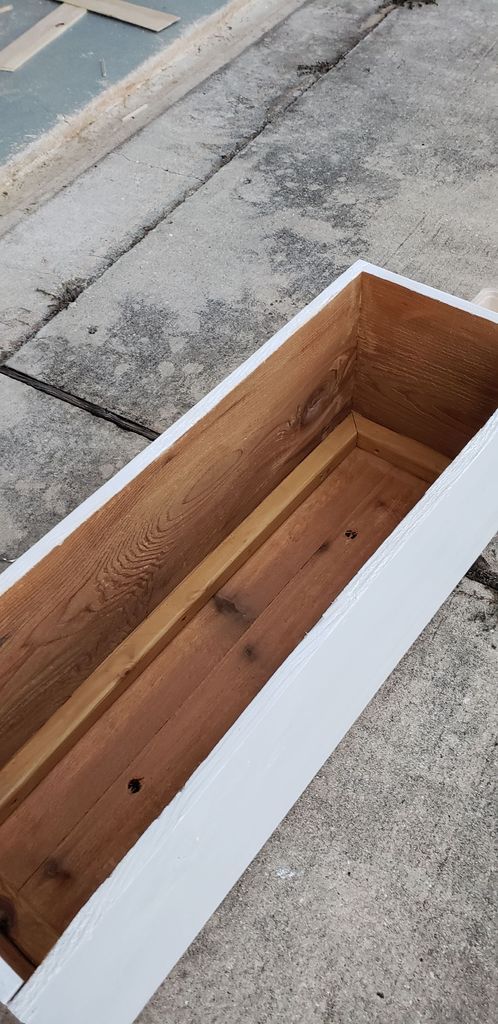
Then I turned the box over to put the bottom boards in place. They are often tight due to the imperfect nature of fence board edges. I suggest placing them so they are resting on each other (see photo) before pressing them down to place them. Then pre-drill and screw them through the base frame. I was pretty liberal with the screws placing them 4″ apart.
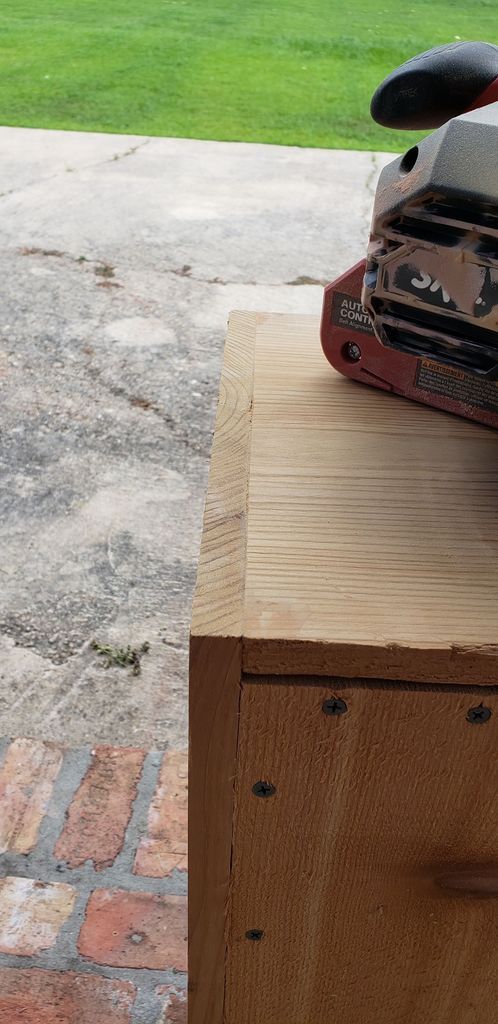
Next, drill drainage holes in the bottom of the pot. I drilled a couple of 1/4″ holes. Finally, I sanded the joints with a belt sander and 80 grit sandpaper because my wood had a slight warp and the joints were smooth so the "bricks" would roll (see photo).
Step 4: Cut the bricks
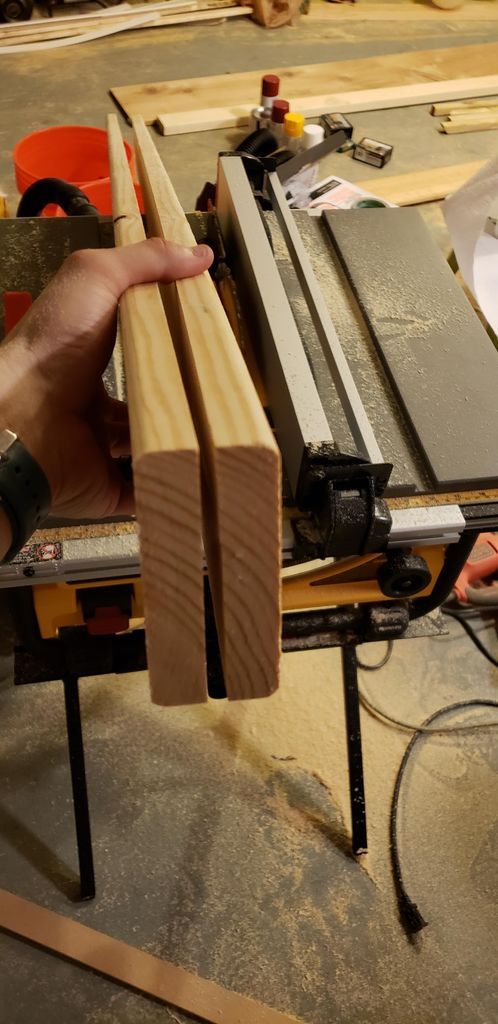
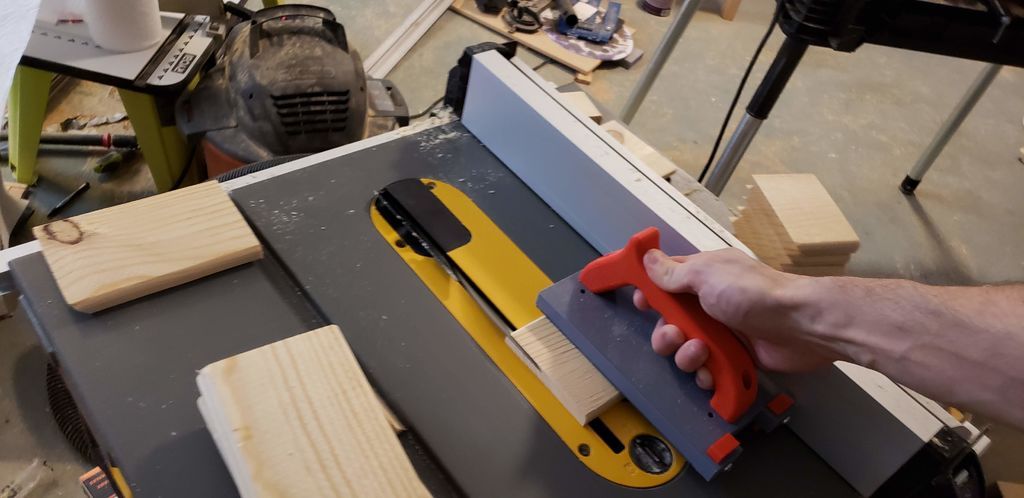
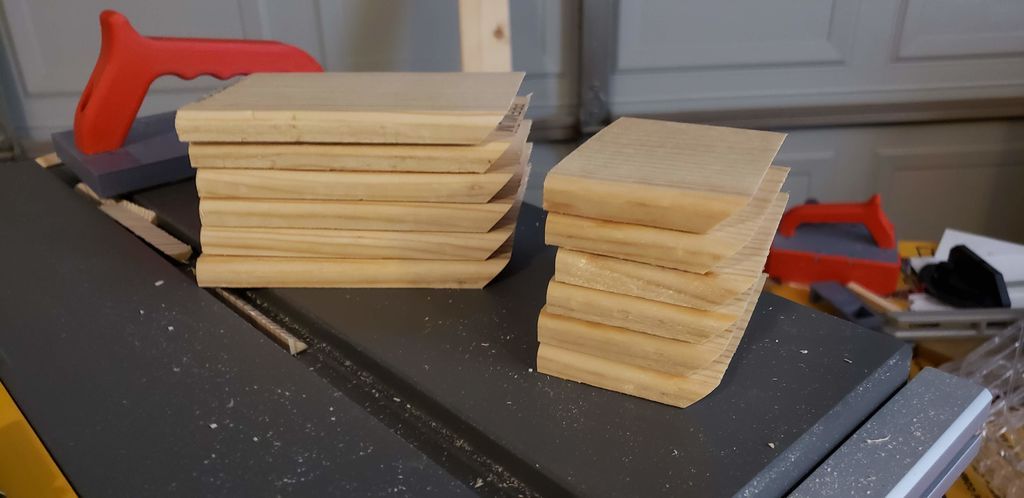
Cut the 2″x4″ so that each side is only 1/2″ thick. In the initial photo, the board was cut directly in half. But I found it to be too thick, so I re-cut each half to shave it down to 1/2″. With my 10″ table saw I couldn't cut in one pass, so I had to flip it over to complete the cut. Once you have the 1/2″ board, you can begin cutting the individual bricks.
You will need:
- 18 Full Bricks (3.5″x5 11/32″)
- 12 Side Bricks (3.5″x2.5″)
But I would cut some extra in case I find defects.
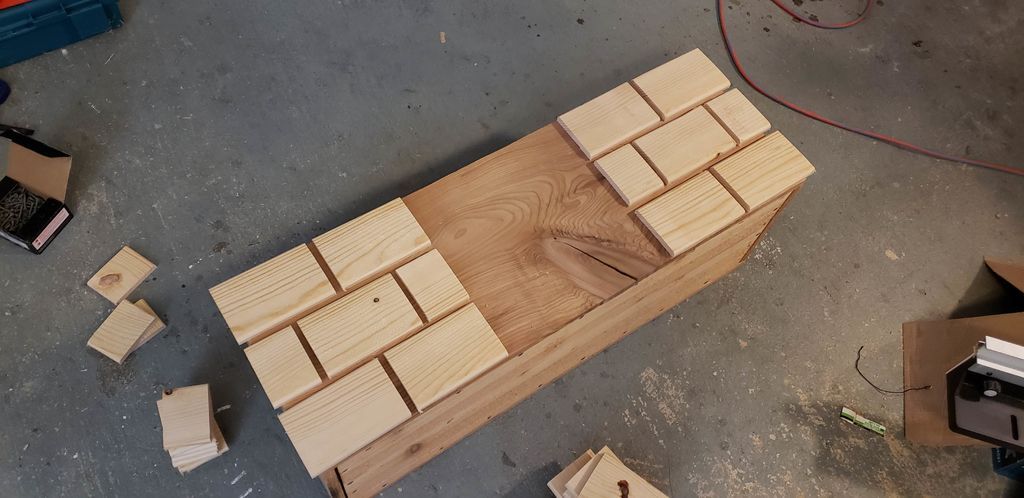
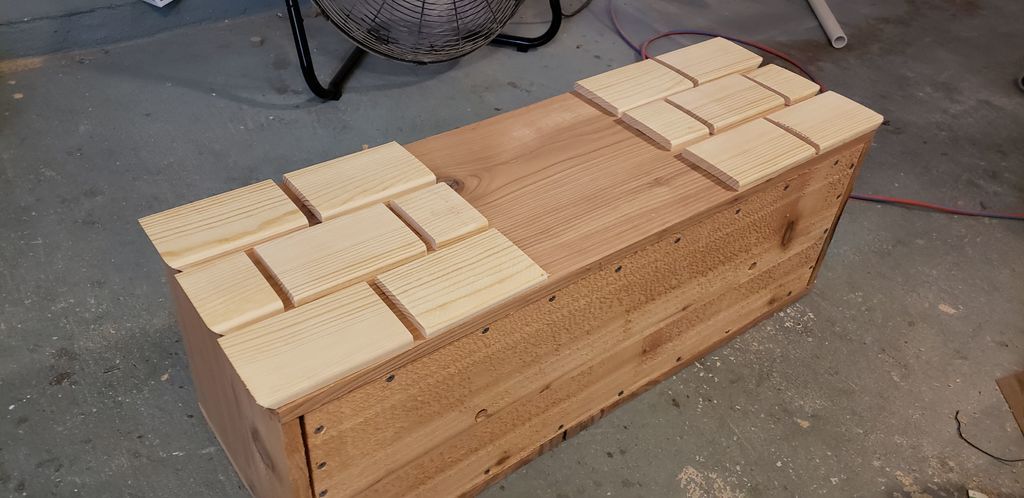
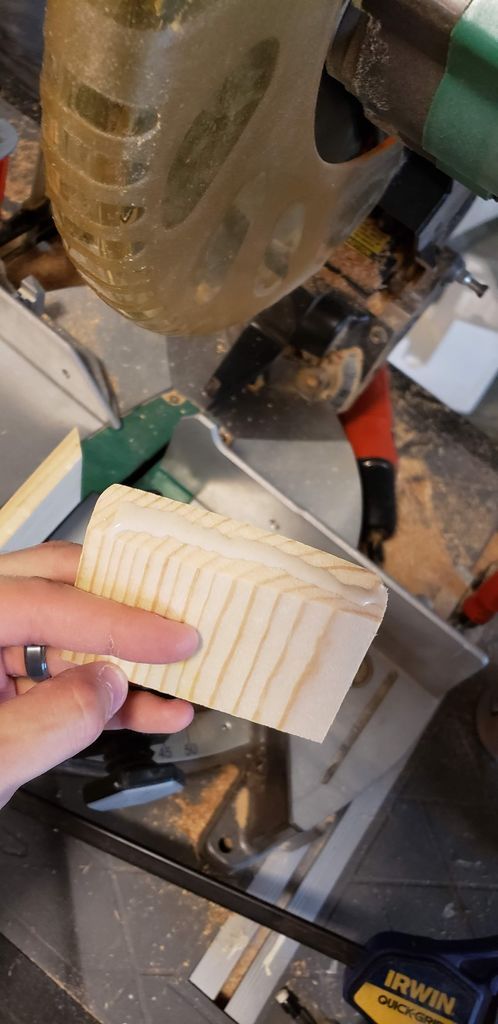
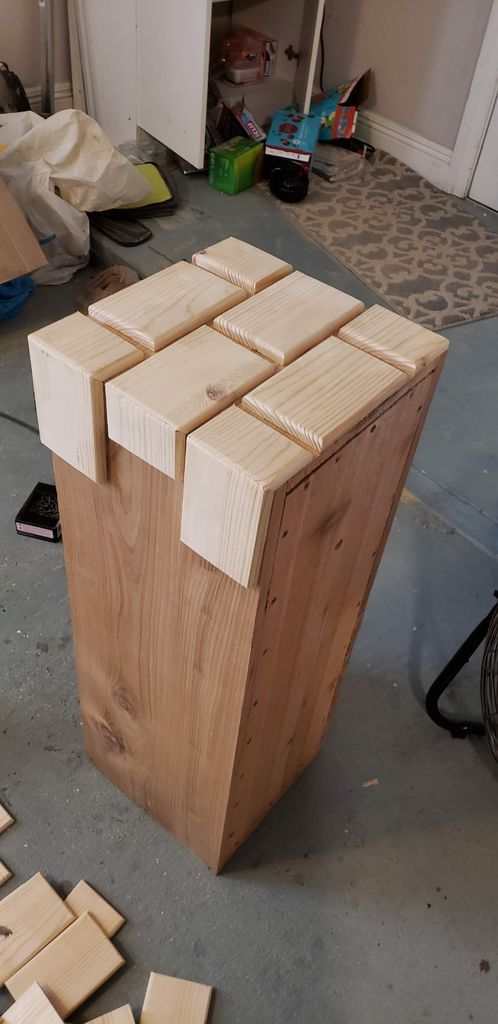
Once they are cut, it is really satisfying to make a test design. The space between bricks is 3/8″ (or .375″). But I ended up spotting the space for mine pretty easily. Finally, miter a 45 degree cut from 6 of the full bricks and 6 of the side bricks. Make sure the longest side (which should be the rounded top side) is still the original length of the brick and you are only cutting enough material to create the miter cut.
Once again I placed the test layout with the new miter cuts in place and measured the center square to be right at 11.25″
Step 5: Finish building the bricks
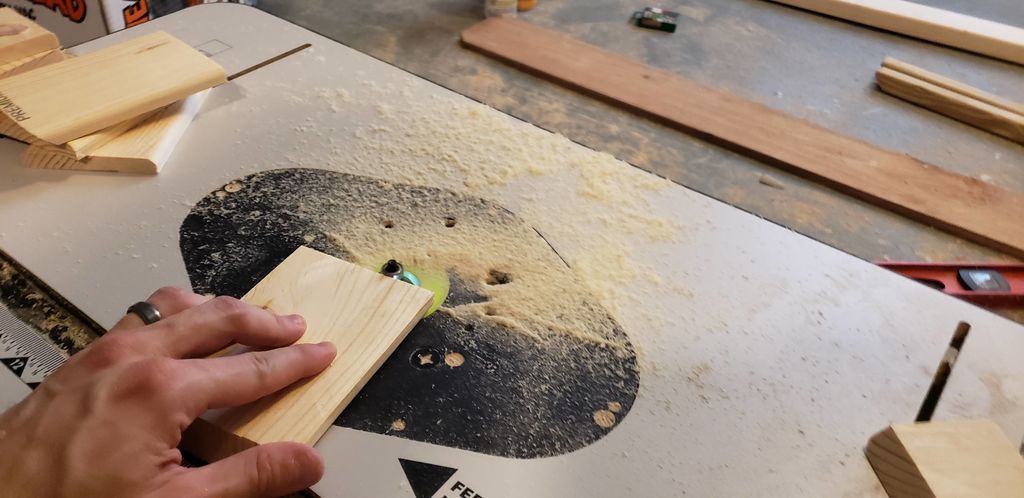
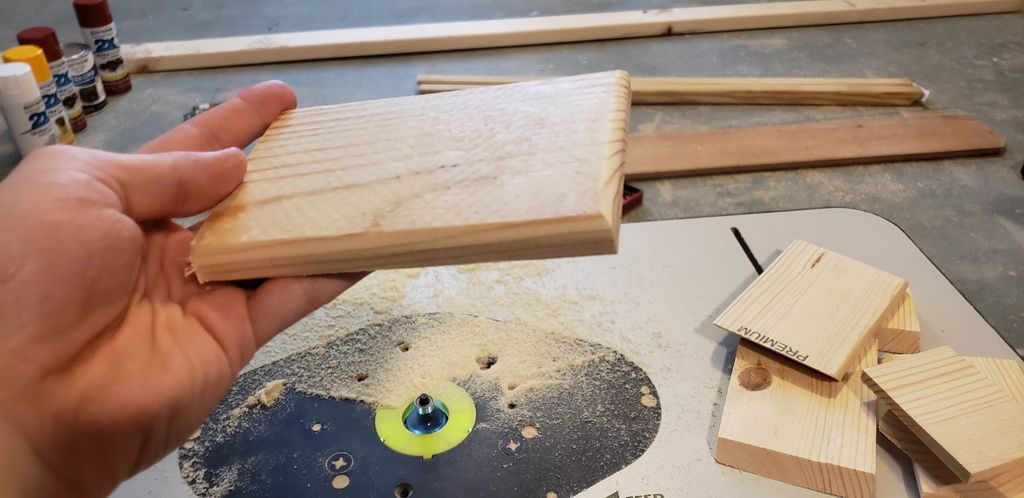
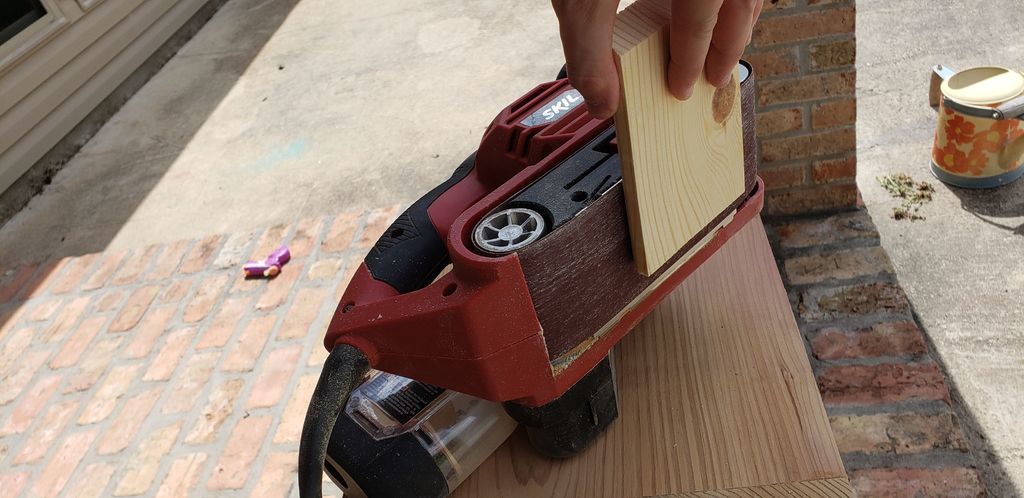
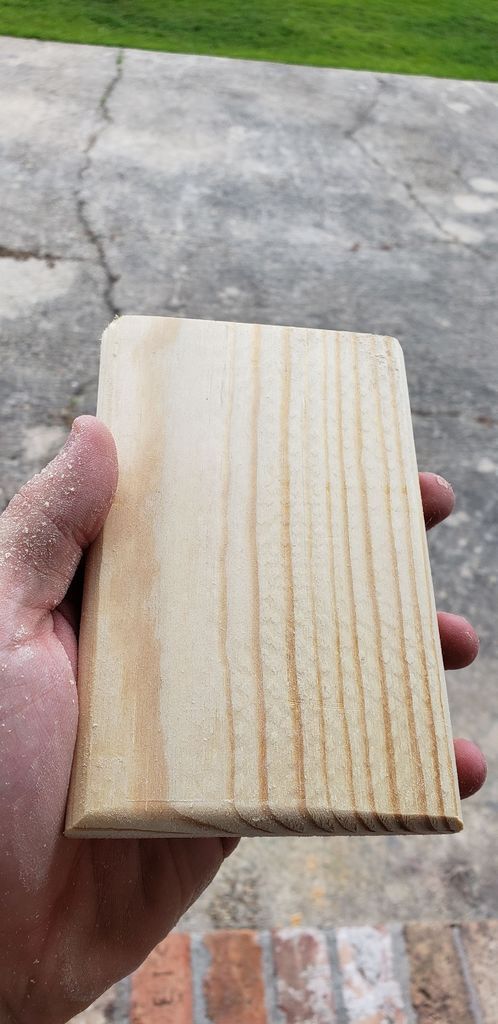
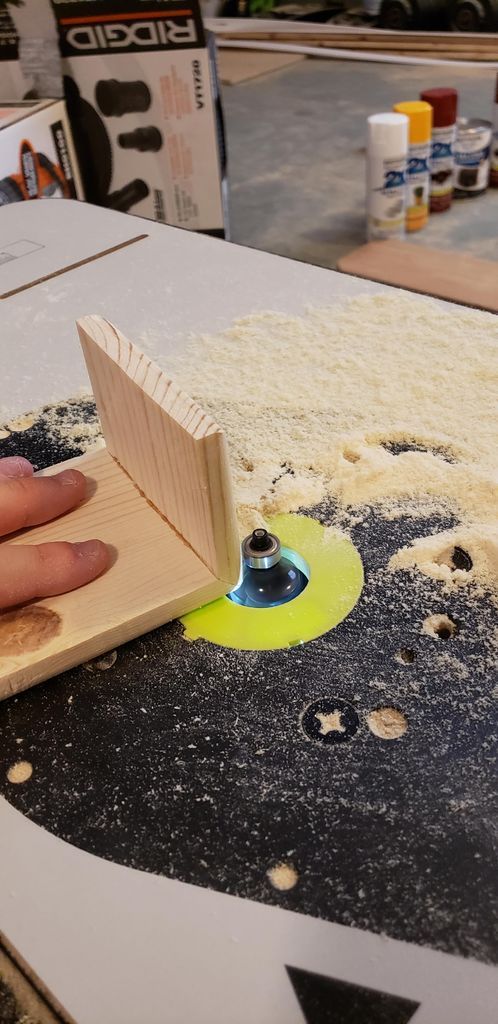
To complete the bricks we first have to round all the hard edges left on the face using a Router so that all sides are rounded.
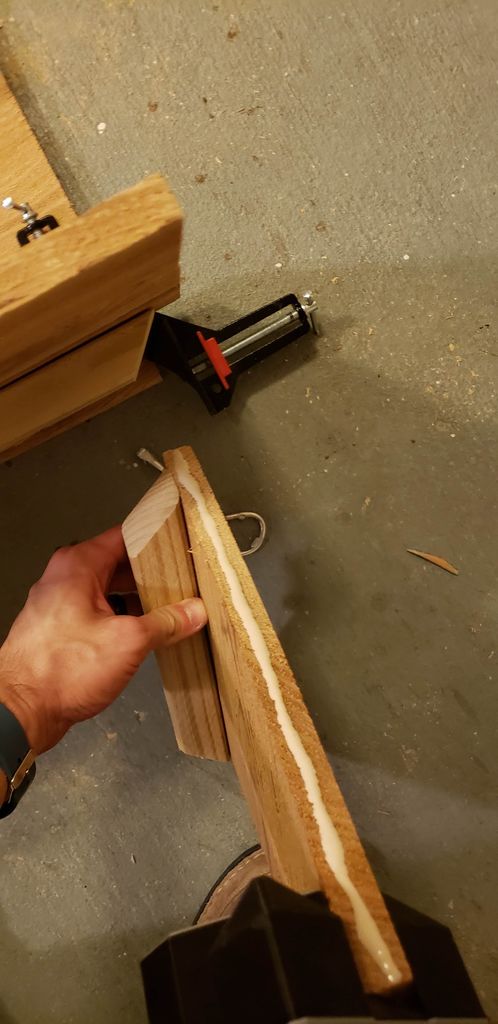
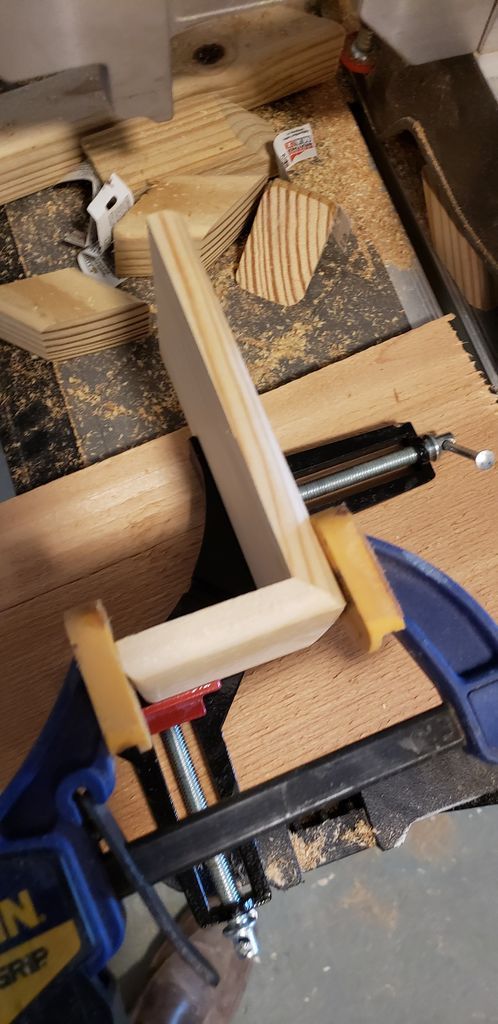
Next, I leaned a belt sander on its side and quickly smoothed all the top faces of the bricks with 240-grit sandpaper. This should take less than 10 seconds per brick. After smoothing the bricks, you can glue all the pieces together with some joints and hold them together with corner clamps, although in my case I used to make a single corner clamp and a basic clamp to ensure it fit evenly. You will have 6 games that always match a full brick and a side brick.
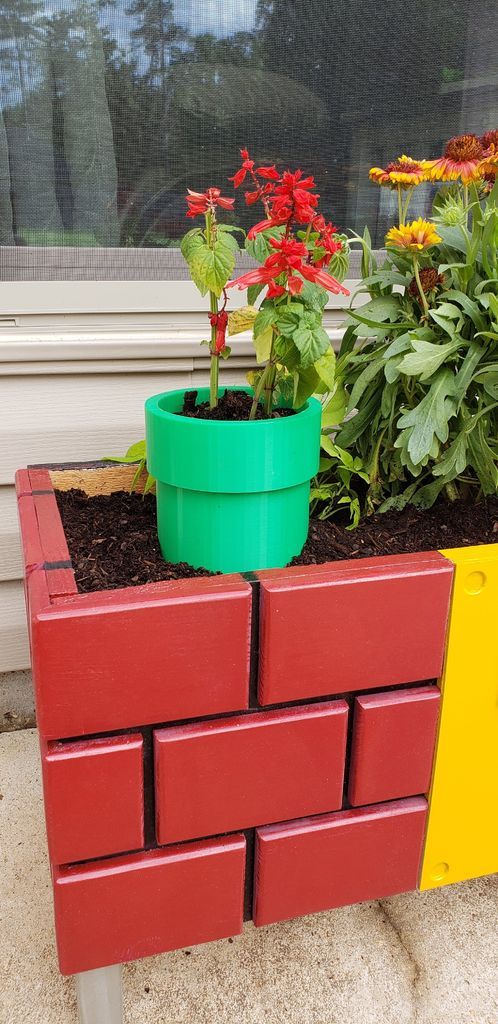
Once the corners are glued and dry, you can round the corners where the pieces meet and then make another test layout with your new brick wrap.
Step 6: Painting the bricks

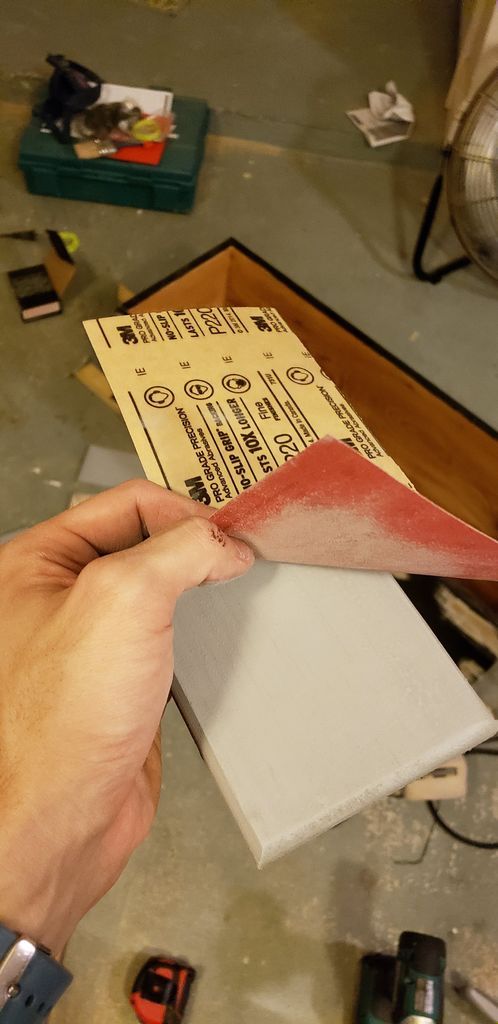
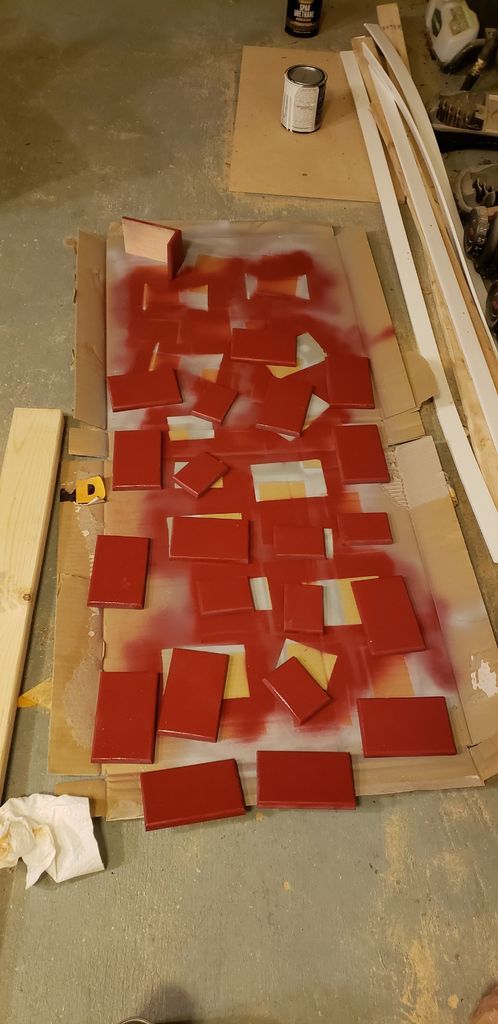
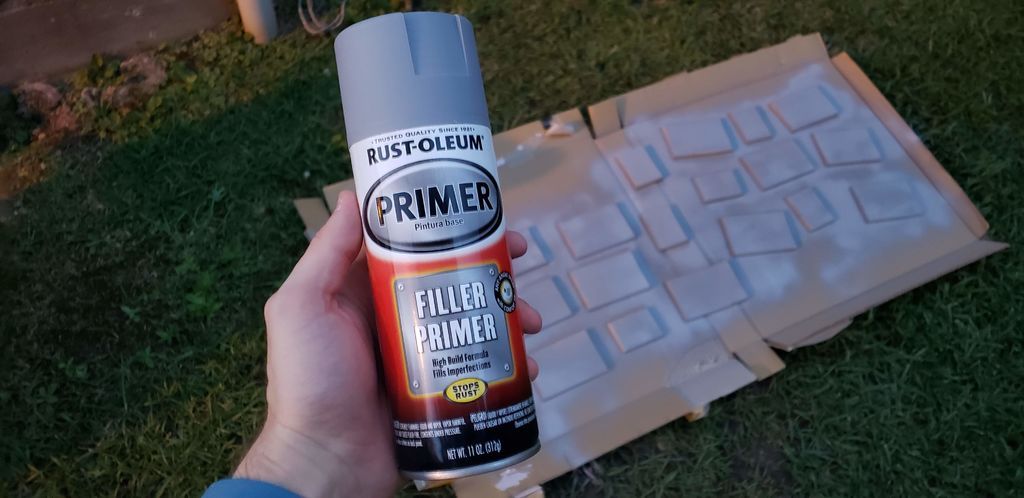
Nothing unexpected here... I just used a primer filler to help build a slightly smoother surface and fill in any small grain textures. I then LIGHTLY sanded each brick by hand (again about 5 seconds per brick) but making sure not to sand the primer. Finally, I sprayed the painted red bricks with some Rust-Oleum.
Step 7: Paint the box
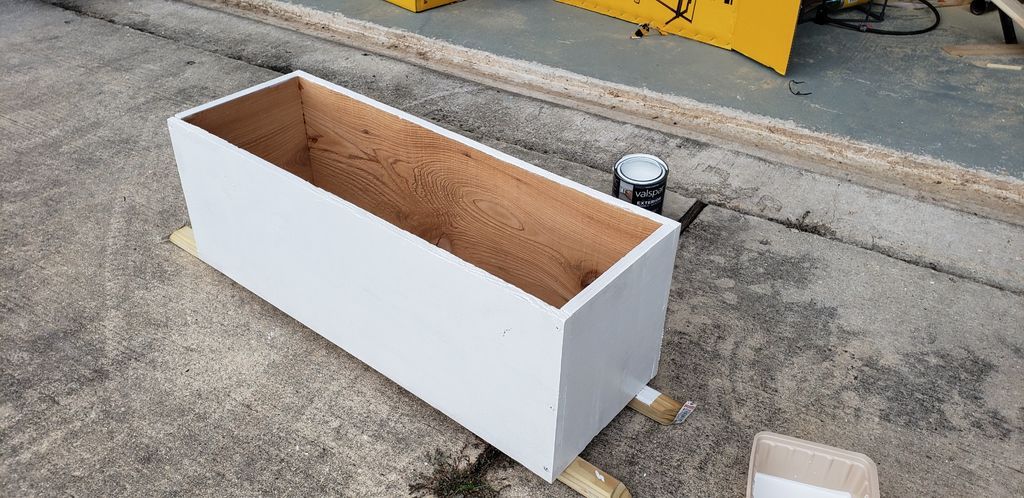
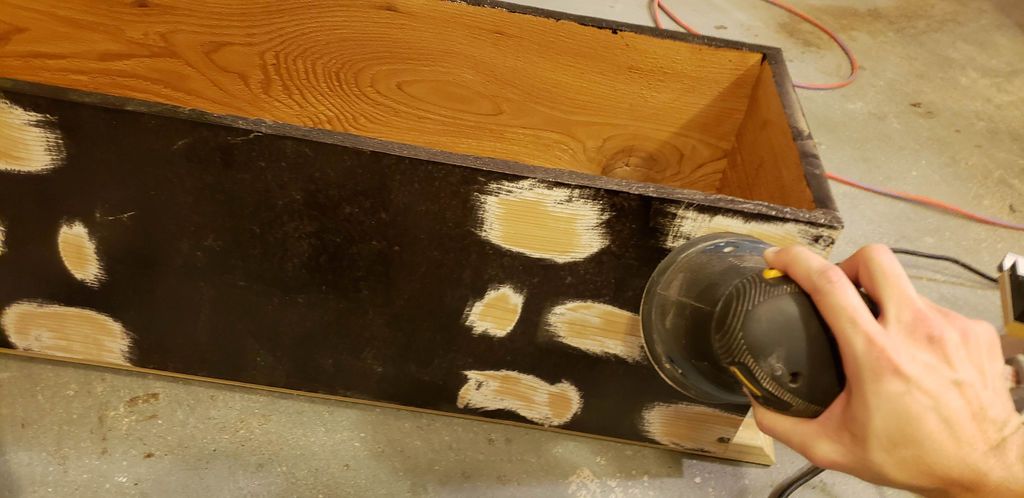
First, lightly and quickly sand the outside of the box with 150-grit sandpaper to polish the surface smooth for painting. Something I would suggest doing differently, if you plan on gluing the bricks, is to place pieces of painters tape behind each brick. Then, once it's primed and painted, you can peel off the tape to reveal the raw wood to glue on. For this reason, it doesn't need to be the entire shape of the brick, just a middle section.
Then I applied some primer. While it was drying, I brushed a coat of waterproofing sealant onto the inside of the box. I'm not sure if this is necessary or would help extend the life of the planter, but I figured it couldn't hurt. Once the primer dried, I used over my dark paint (Rust-oleum Metallic Oil Rubbed).
As you can see in my last photo, if you don't use the painters tape method and decide to use glue, you will need to sand parts of the paint behind each brick to get a good wood.
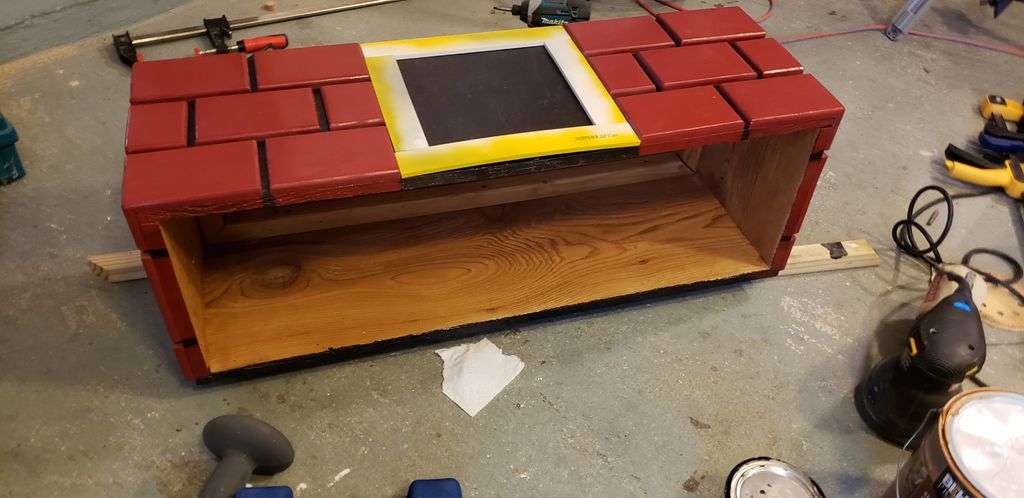
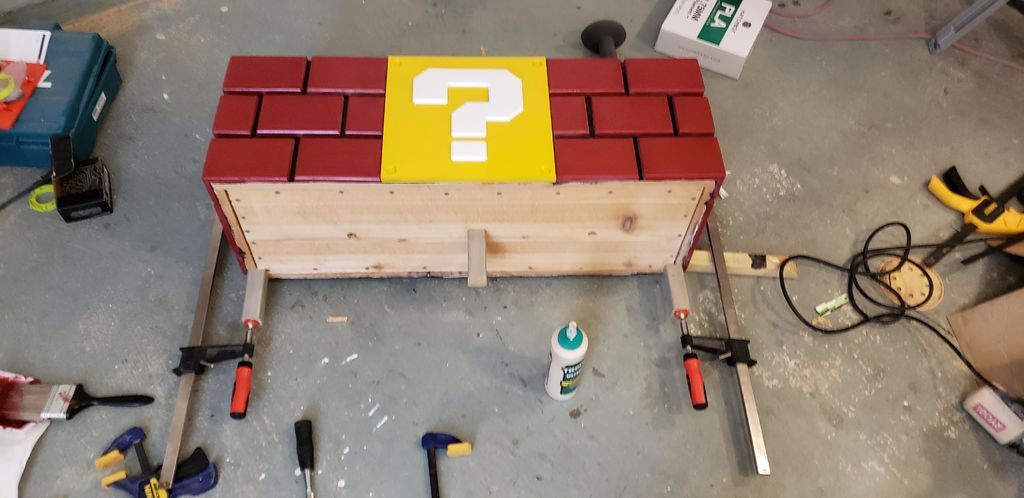
Step 8: Fixing the bricks
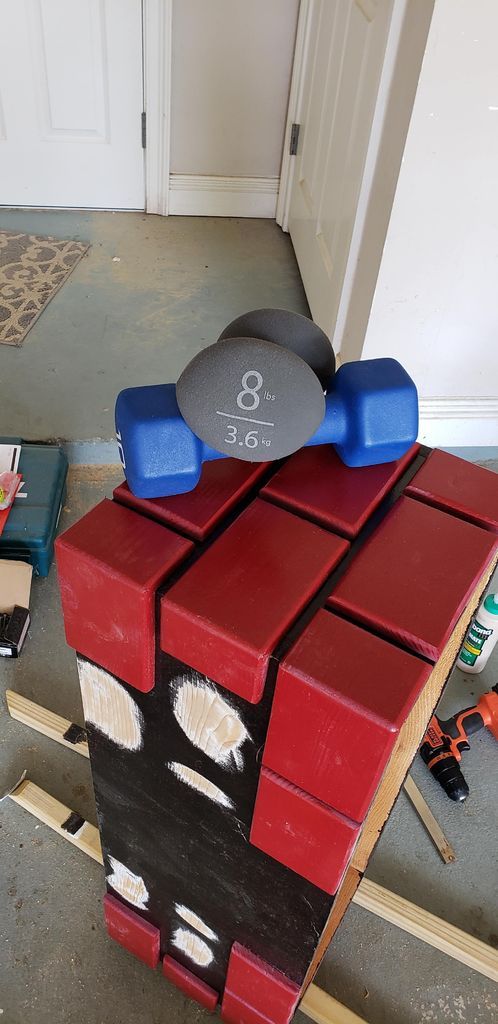
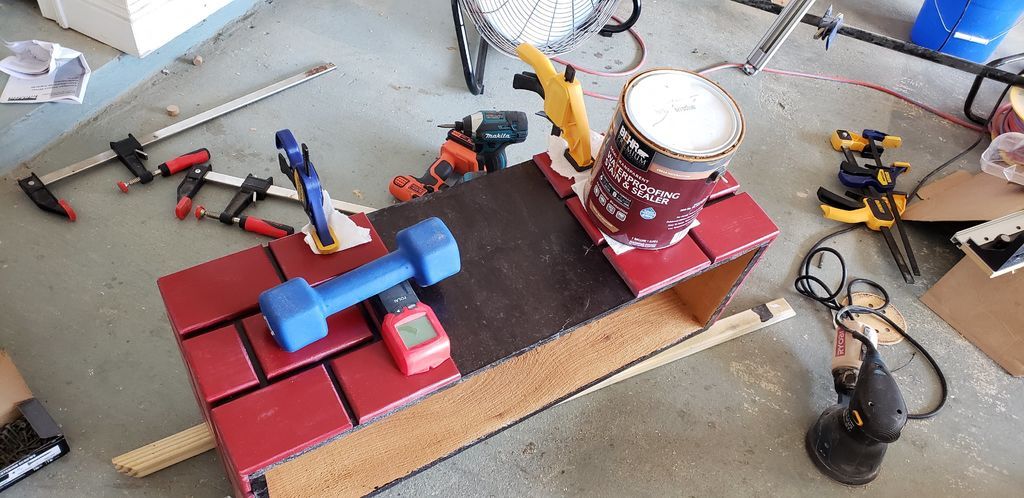
Start holding and gluing wooden bricks by leaving them pressed for 30 minutes to 1 hour. Once all the clamp-accessible bricks were glued together, I had to start improvising. But it only requires objects with a little weight and a flat surface.
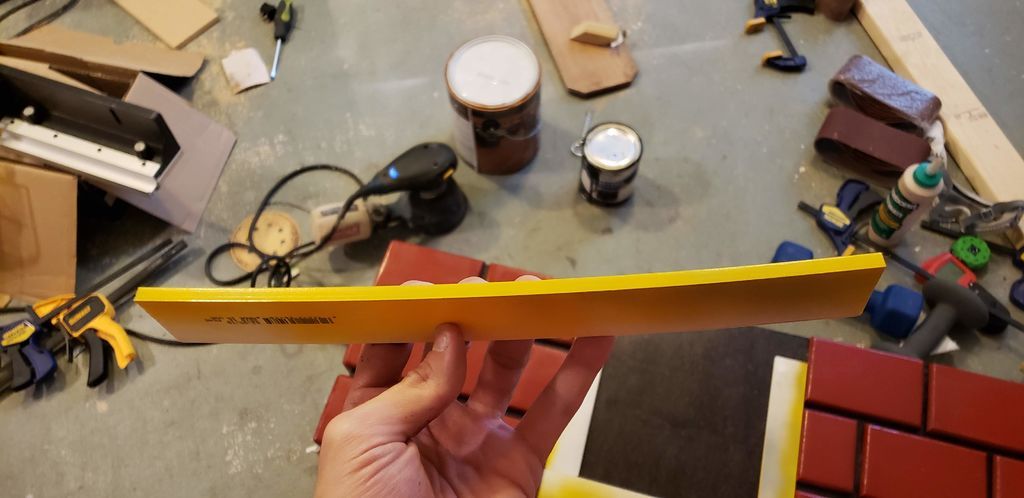
An optional, but nice touch was to paint the top edge of the box so that it feels like a continuation of the brick (This will be visible in the photos of future steps because I forgot to photograph it at this stage).
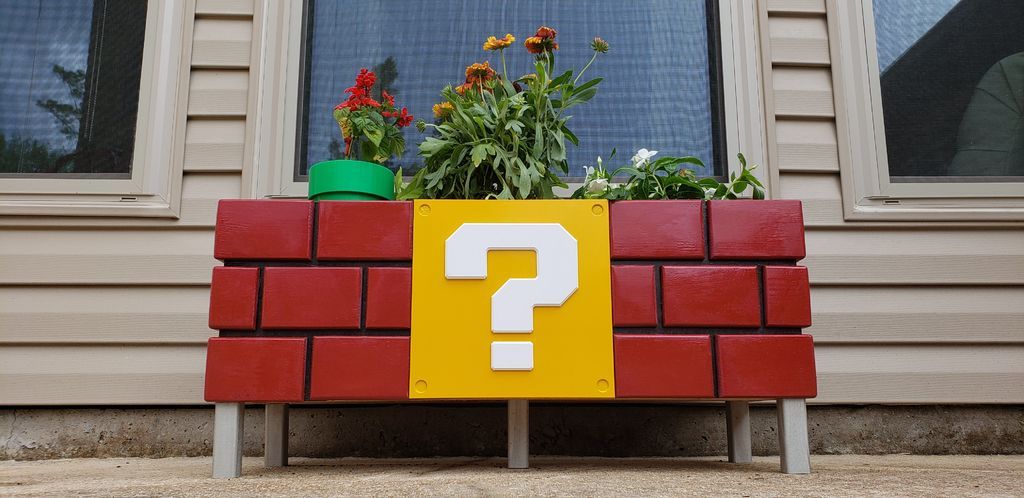
Step 9: Create the question block
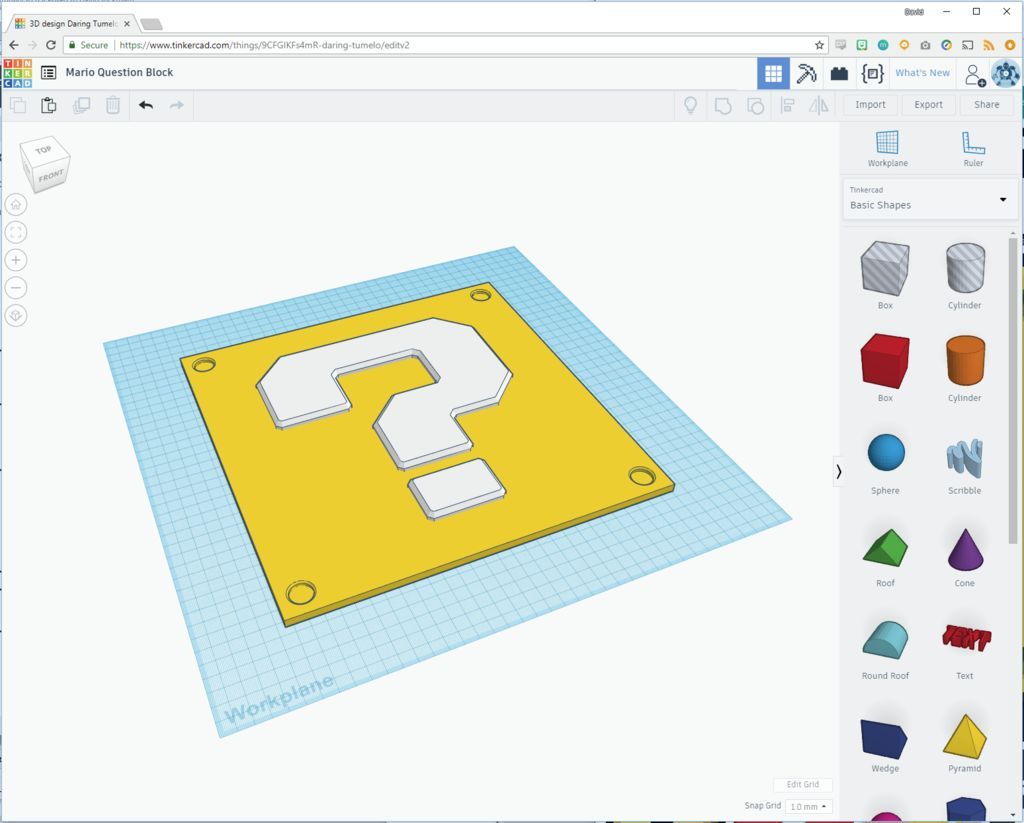
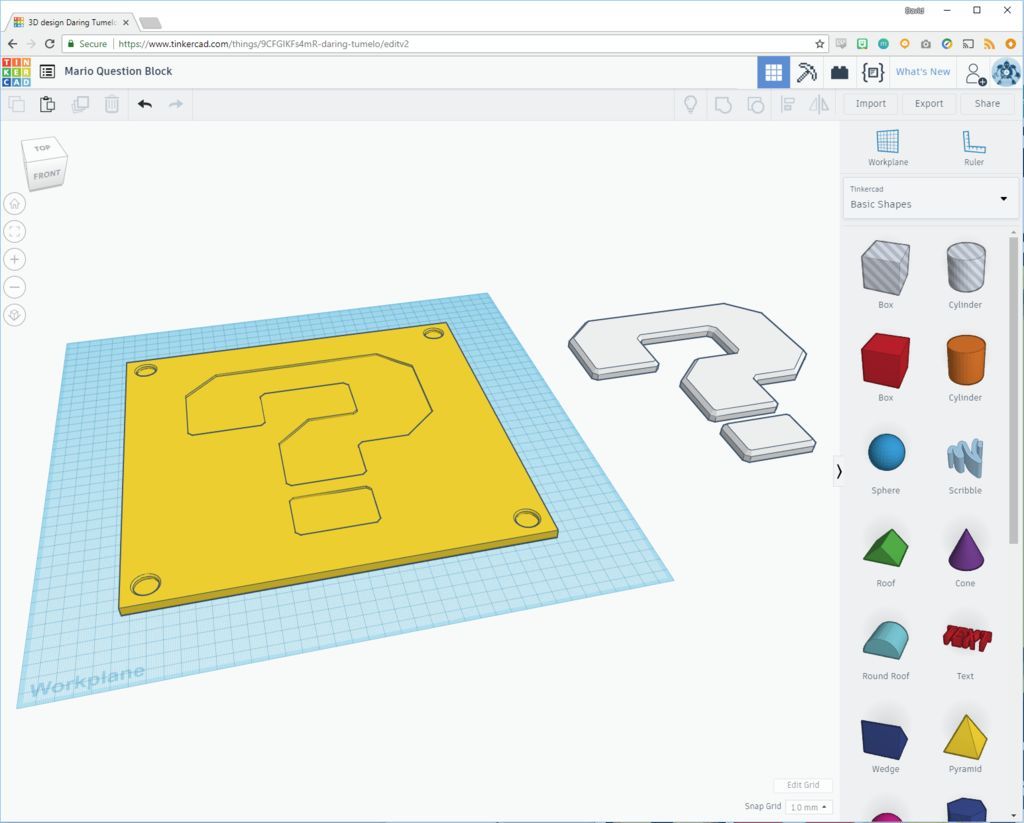
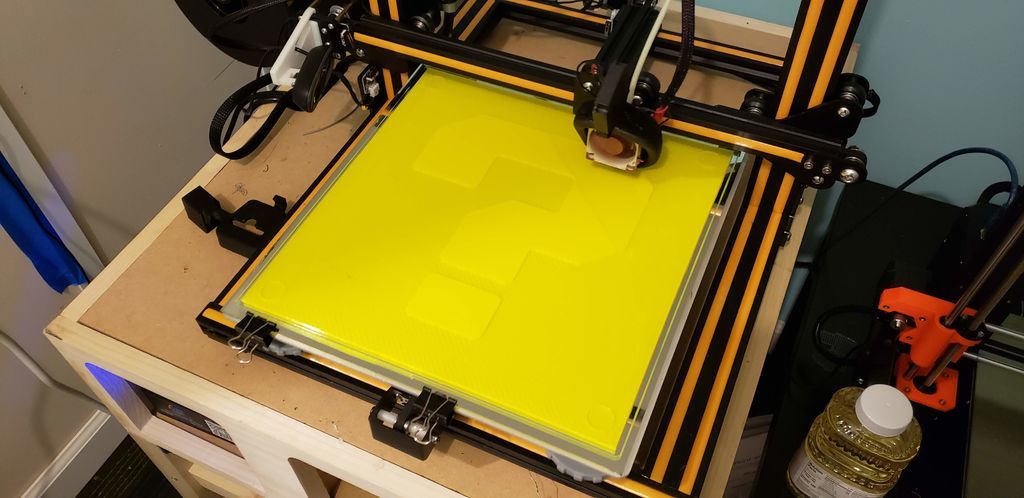

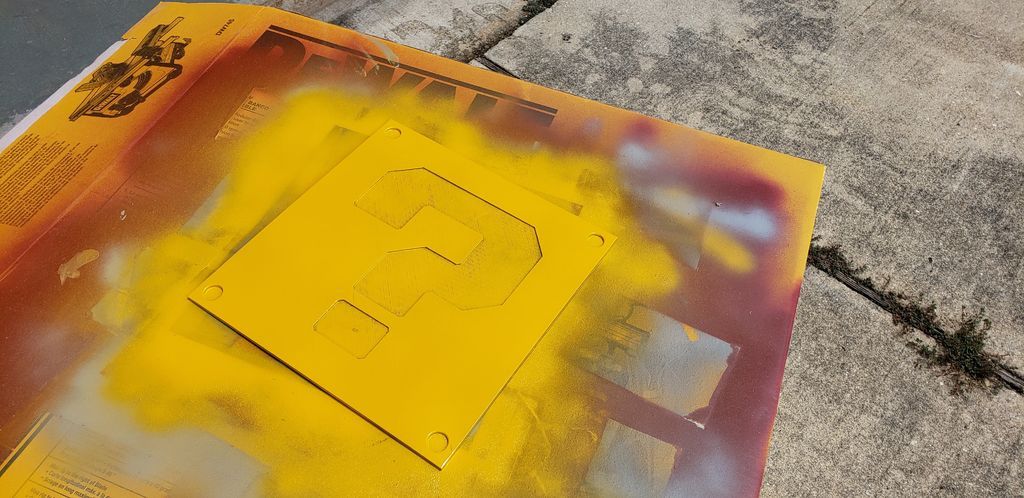
The question mark panel was designed in Tinkercad and will require a large printer capable of printing an 11.25″ square. I have the popular CR-10 and it barely fits in the bed. There are 2 versions of the block bottom (FULL and THIN). This is because I saved on print time by printing a full version and using trimmed PVC as a spacer (see in the next step). But if you prefer to print the full version as a single piece, you have that option. Although the background of the block was printed in yellow, it was not the yellow I wanted. So I decided to spray it with Rust-oleum's Golden Sunset paint.
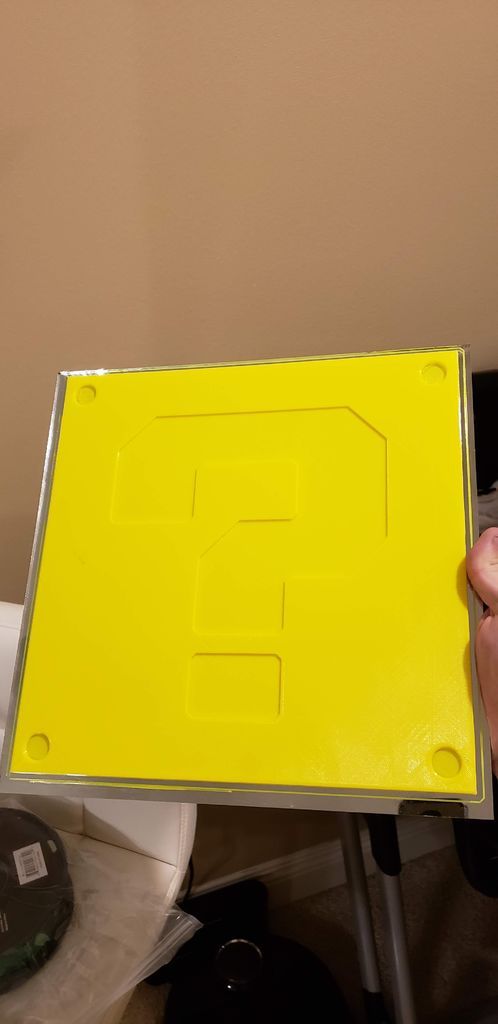
First I suggest putting SOME painters tape inside the question mark slot because we are going to tape it in place and plastic to plastic would be a better option. I had to reuse the primer which made a great print look terrible. Once it dried I had to sand the primer with 220 grit sandpaper. Then once it dried I hice everything again, I did it 2 more times.
Finally, once it was smooth I hit it with a decent coat of the gold paint.
Download Files.
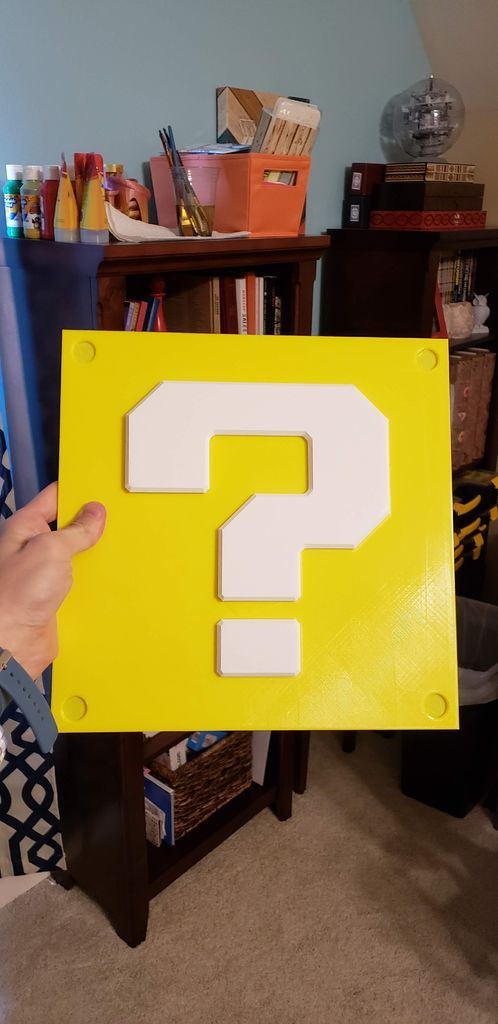
Step 10: Attach the question block
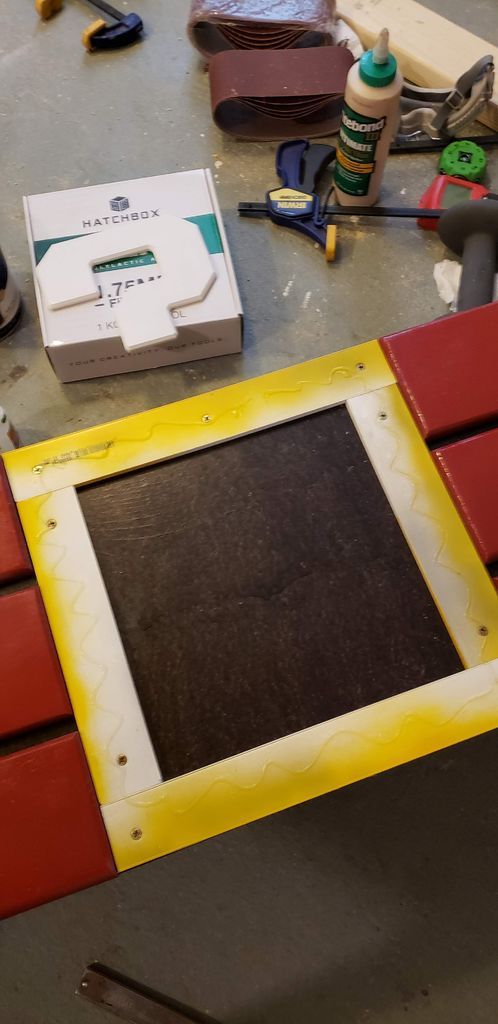

This is an optional approach and I'm sure there are better ways but as I mentioned in the previous step, I had a 1/4″ thick PVC border so I decided to print the question mark block thinner (to save printing time) then paint and screw the border directly to the box. This way you could just glue the question mark into the cutout, leaving you with a screwless finish. Also paste the question mark at the same time. If you do this don't use the edge, you can screw directly through the question mark block or find a good adhesive for wood and plastic.
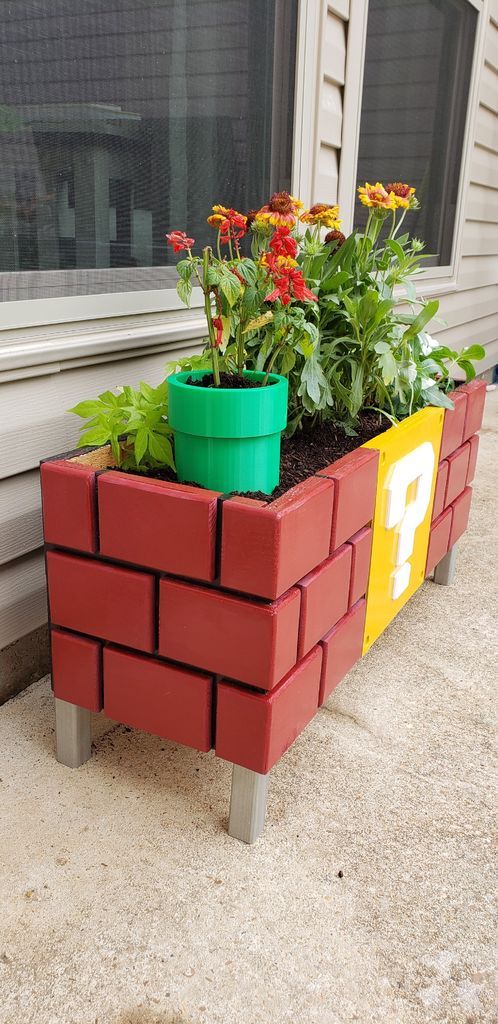
Step 11: Cutting and fixing the legs
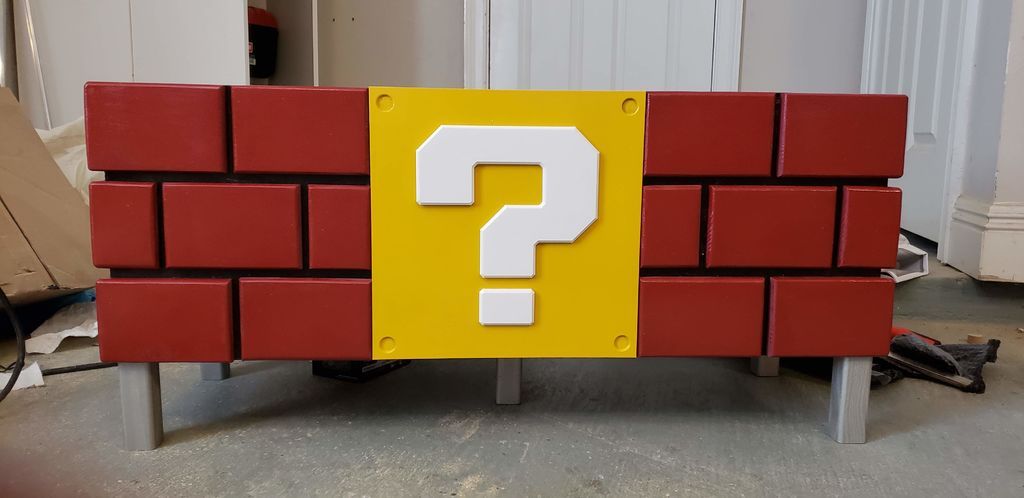
Using the same 2″x2″ pine baluster from the previous steps, I sprayed some gray I had to further blend into my concrete. I cut the legs about 3″ tall, but it all depends on preference.
To attach the legs I used wood glue, but only because of the length of the leg. If they had been shorter, I certainly would have opted to use screws instead. You will need fairly long clamps (15″ or more).
Step 12: Print the tube
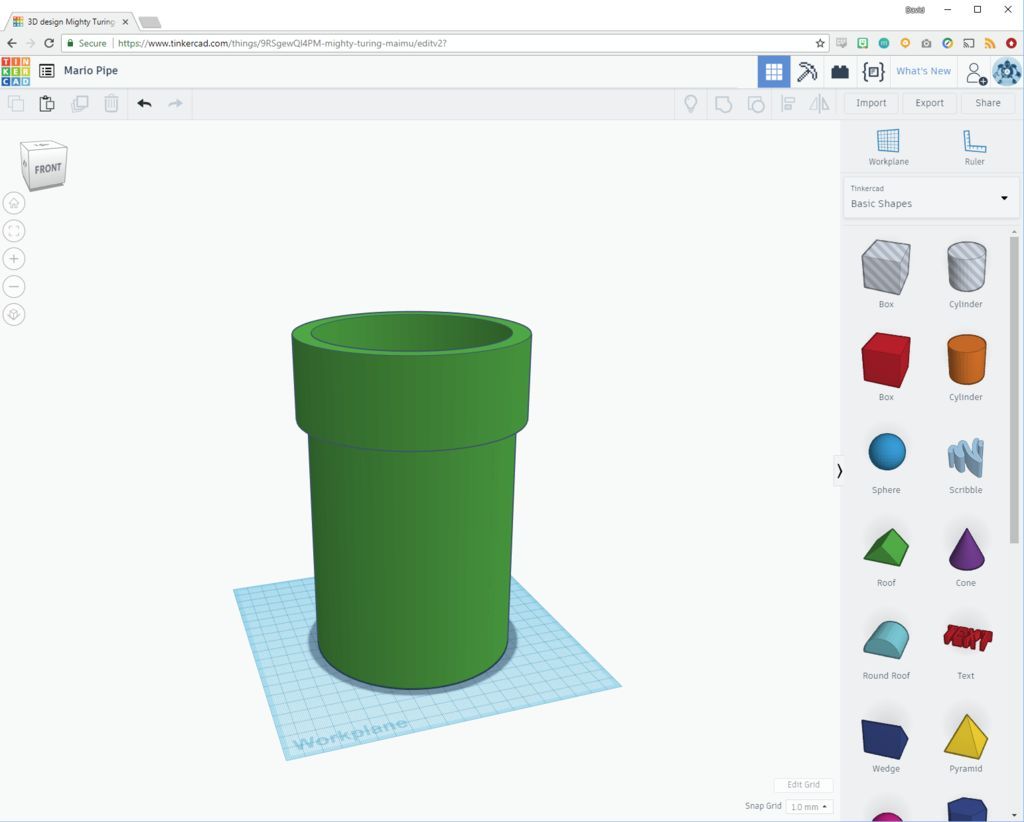
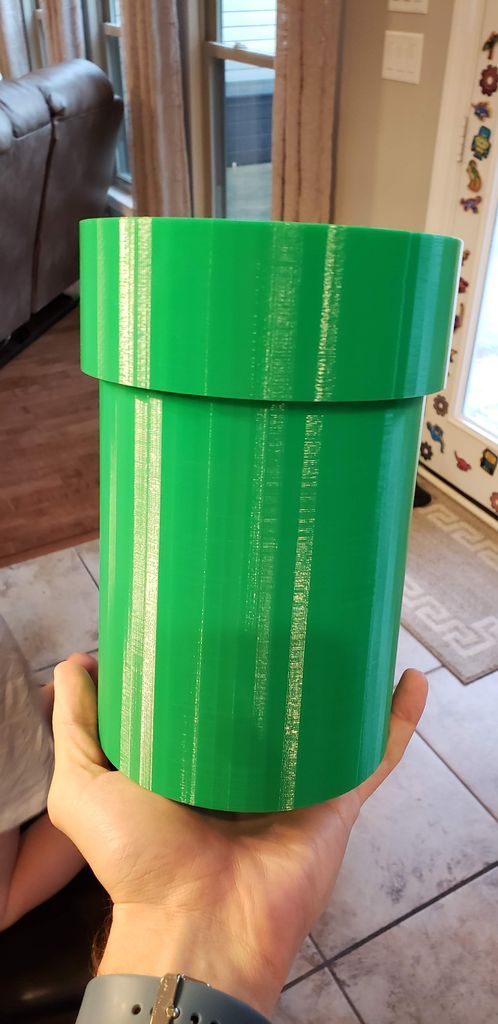
The pipe was also created in Tinkercad and 3D printed on the same CR-10 as the question mark. But it should also fit medium-sized printers. I suppose this could easily be created with PVC pipe, a fitting, and then painted, but I have a printer and green filament, so why not use those?
Download file.
Step 13: Finished product
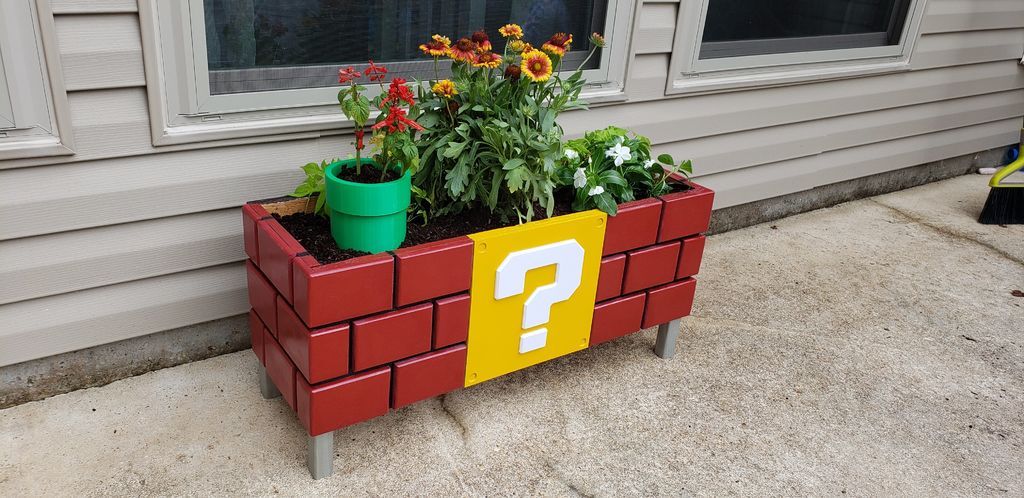
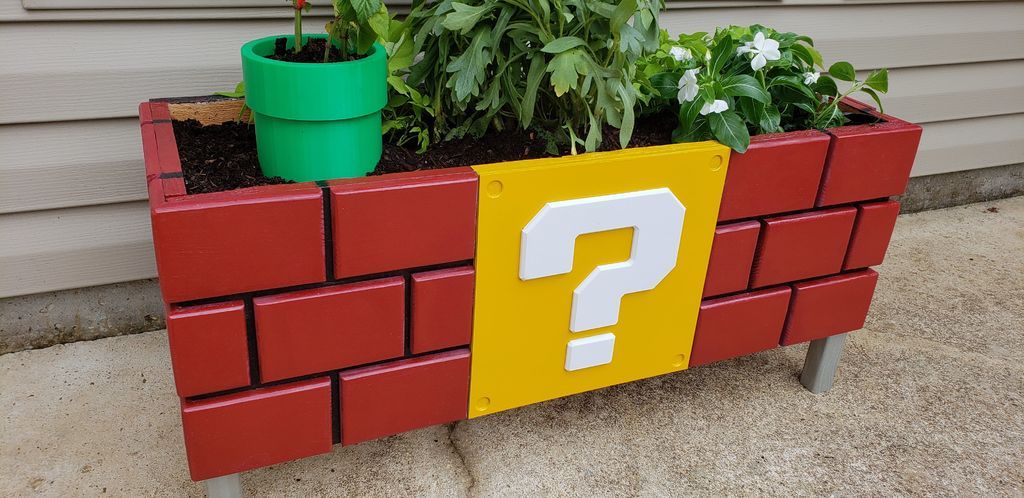
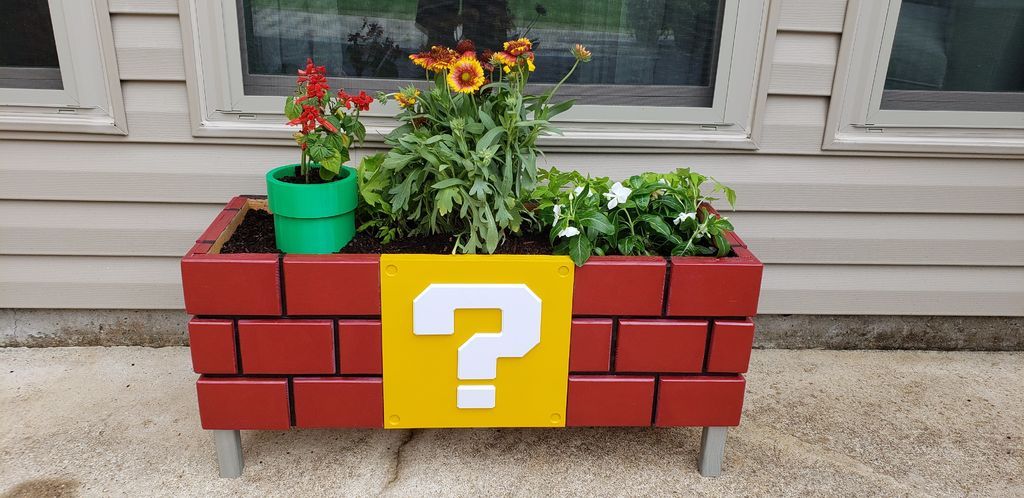

Before adding flowers, I stapled them to a trash bag as a liner and poked drainage holes. I can't say if this is completely necessary, but it seemed like another way to extend the life of the planter. After that, I filled the box with soil and started planting. I was very happy to find a red to yellow daisy that works like a fire flower.
I hope this project is useful for all modern or retro gaming enthusiasts who want to add a special touch to their landscape. Thanks for reading!
Get more information at perfectionidea.com and on our Facebook for more Great Planter with Super Mario Bros. Decoration.
Popular Content
How to make a rocket stove forexterior
Cardboard Drawers Lined with Jeans
Ideas and Advantages of Window Grilles for the Home!
Latest Articles
How to make a refrigerator out of insulating material: Practical step-by-step guide
How to make a Kilim for the Home: Complete Step by Step Guide
How to protect ourselves from accidents in our workplace: Complete prevention and safety guide
Related Content
How to Make a Kumiko Pendant Lamp
8 Things You Would Like to Know About Prefabricated Houses
Projects with Recycled Oak Wood
How to Build a Marking Meter
Creative Home Decor Ideas to Transform Every Space
Refreshing your home starts with smart design choices that combine comfort, personality, and functionality. Whether you want to modernize a small apartment, upgrade outdoor areas, or create cozy rustic interiors, these trending ideas can completely change the atmosphere of your space.
Outdoor Spaces That Increase Style and Functionality
Outdoor living continues to dominate modern home trends. Homeowners are increasingly investing in practical entertainment zones inspired by these BBQ shed ideas, which create the perfect setup for gatherings and weekend cooking sessions.
First impressions also matter when designing exteriors. Elegant farm entrance gates design ideas help properties stand out while improving privacy and curb appeal.
Compact living solutions are also gaining popularity. These inspiring 16x40 shed house interior design ideas show how smaller spaces can still feel luxurious and functional.
To enhance patios and entryways, homeowners are adding stylish protection with these creative porch awning exterior DIY ideas that blend aesthetics with practicality.

Rustic and Cozy Interior Design Trends
Warm and natural interiors remain timeless. These charming rustic decor ideas combine wood textures, vintage accents, and earthy tones to create welcoming spaces.
Bedrooms are becoming more personalized with curated wall arrangements. Many homeowners use these stylish picture wall ideas for bedroom spaces to display memories and artwork creatively.
Textured wall treatments are another major trend. Installing a board and batten wall adds architectural character while keeping interiors elegant and modern.
Similarly, bold accent wall ideas can instantly transform plain rooms into eye-catching focal points without requiring a full renovation.
Smart Kitchen and Organization Inspiration
Functional kitchens are essential for modern homes. These practical kitchen wall cabinet ideas maximize storage while maintaining a clean and stylish appearance.
Organization also starts at the entrance. Well-designed mud room ideas help families keep shoes, coats, and daily essentials neatly arranged.
Colorful and Personalized Home Styling
Vibrant interiors are becoming increasingly popular thanks to playful dopamine decor ideas that use bright colors and joyful accessories to improve mood and energy.
Gallery walls also continue to evolve as a major decorative feature. These trendy gallery wall inspiration ideas offer creative ways to combine prints, photos, and statement art.
Young renters and new homeowners are especially embracing these stylish first apartment aesthetic ideas to create sophisticated interiors on a budget.
Finally, selecting the right shades can dramatically influence any room’s atmosphere. These modern trendy color ideas help homeowners choose palettes that feel fresh, elegant, and timeless.
Final Thoughts
From rustic charm and colorful interiors to outdoor entertaining areas and functional storage solutions, today’s home decor trends focus on creating spaces that feel both beautiful and livable. By combining smart layouts, modern textures, and personalized decorative elements, any home can become more stylish, comfortable, and inspiring.


