
Replace the bathtub with a shower cabin, following the reasoning of how many times a year we take a tub bath and how many times we shower, we propose removing the tub and replacing it with a cabin, which will also leave more useful space to move around or put furniture. One of the benefits of a shower cabin is that it allows comfortable entry into it, without the need to lift your legs; which is appreciated when a family member is elderly or has travel difficulties.
Materials to use:
· Silicone with transparent fungicide
· Porcelain adhesive
· Set
· Curved cabin
· Adhesive for ceramics
· Rubber cap

1 cut the tub seals and stonework
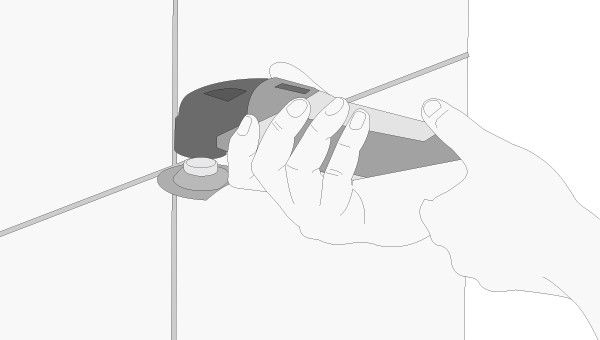
- The first step in disassembling the tub is to cut the silicone seals or the material with which it was waterproofed. This procedure is done with a multifunction tool using its cutting blade.
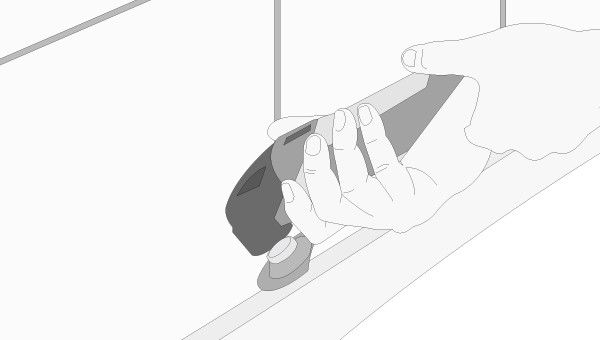
- With the same tool, cut the setting and adhesive from the stonework of the ceramics that are in contact with the tub.
- This step should also be done if there is a soap dish attached to the wall.
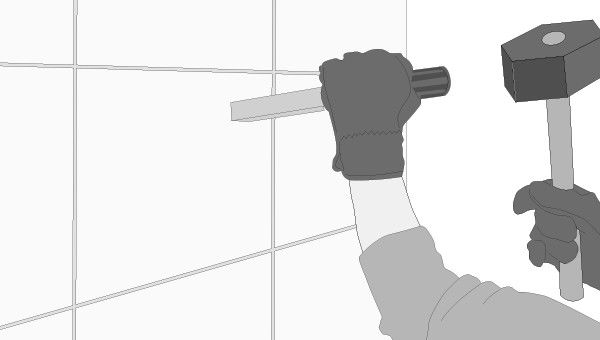
2 eliminate ceramics
- Use a combo and a chisel to remove the ceramic palmets that you marked in the previous step. This procedure is dirty, so it is recommended to constantly remove debris. Use a mask and glasses to protect yourself from suspended particles or those that could fly away.
3 remove the tub and support
- After the previous step, the support of the tub will be exposed, most of the time made with wooden beams that form a structure where the tub rests nested. First disconnect the water inlet and drain pipe.
- The procedure for removing it consists of unscrewing it, lifting it and moving it. This operation cannot be carried out by a single person. If the tub is in good condition, you can consider reusing it.
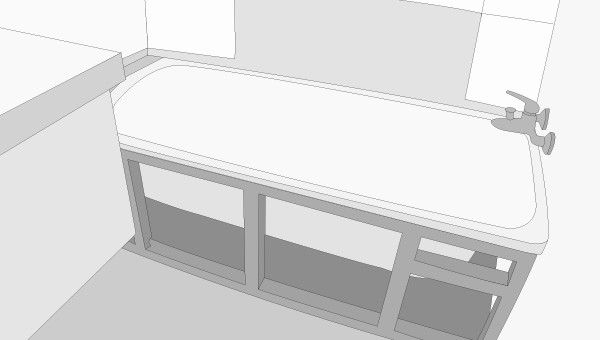
- Without the tub in the bathroom, the floor and walls where it was placed are exposed, where most likely there is no ceramic coating. Remove everything that corresponds to the old installation and clean thoroughly when finished.
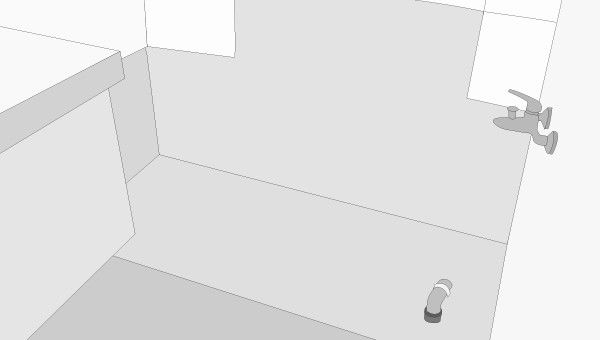
4 install the ceramics
- The shower cabin is an implement that, unlike the bathtub, rests on a level and finished surface, so the next step is to cover the exposed areas (floor and wall) with ceramics.
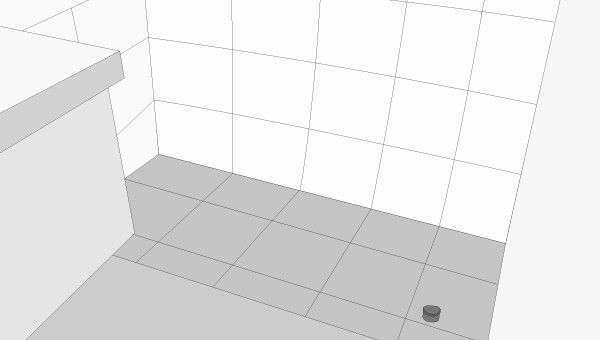
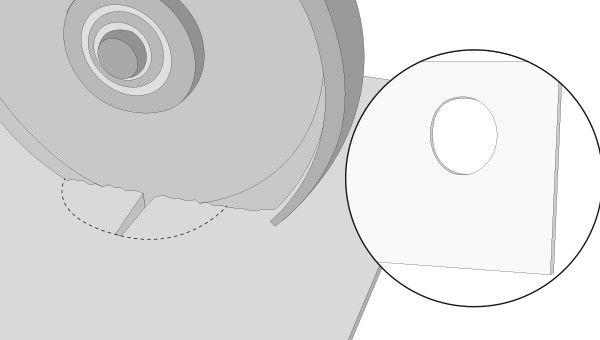
- The circular cuts to fit the water inlets and the drain outlets are made with an angle grinder with a diamond cutting disc. It is worn on the back of the palmette and then with a screwdriver the enamel part is broken.
- You can see the installation of the ceramics in How to install ceramics?
5 identifies the pieces
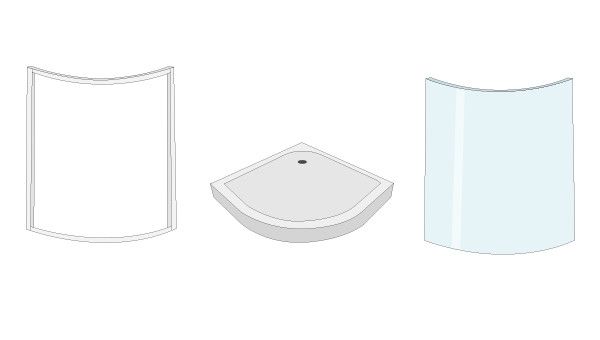
- This type of product comes packed in more than one box, where you can identify the frame (in this case aluminum), the tempered glass (with curved doors in our model) and the receptacle (the piece where the structure is placed, generally made of fiberglass). Also locate the manual to read before assembly, emphasizing the specific details of the product.
6 locate the receptacle
- Present the receptacle in the location you have chosen, of course considering the position of the tub's water inlets and outlets.
- The receptacle must be level, so adjust it by turning the plastic knobs on its legs. Use a spirit level to check that it is straight, it is not necessary to consider an extra inclination for the water to drain into the drain because it already comes with the necessary slope.

- Connectto the flexible conduit that the receptacle has implemented, with the drain. And so that it is perfectly sealed, join both ducts using a rubber cap.

7 assemble the frame
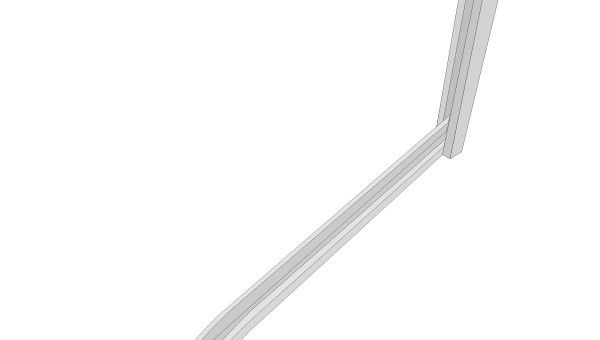
- The aluminum structure of a cabin must be assembled with the same screws that come with the kit you have chosen. Special care must be taken at the junctions between the vertical and horizontal pieces (the one we used for this project consists of four profiles, two straight and two curved), since the screws could bump into each other inside. Therefore, use the screws included in the kit and make the fixings only in the marks indicated on the pieces.
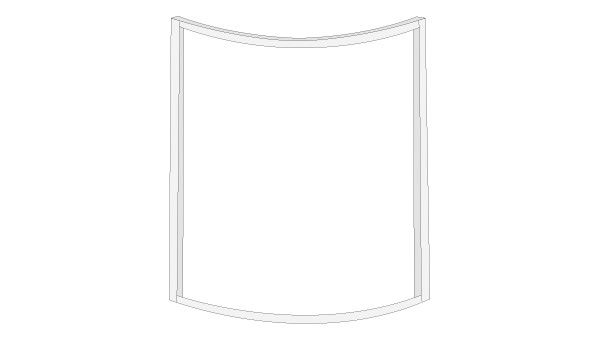
- This particular product includes curved doors, so the vertex of the frame that will be the entrance to the cabin must have the paths along which the door cars will travel aligned.
- After assembly, place the frame in its final position, without making any type of fixation yet.
8 assemble the fixed doors
- In addition to its two sliding doors, this product has two straight tempered glass panels that are fixed on the sides, emerging from the parts of the frame that are attached to the walls perpendicularly. These aluminum pieces have a slot where you must first put a rubber that will seal the fit.
- Insert the panel into the slot with the rubber, making sure that it is aligned along the entire length of the panel. The result should be a joint that does not vibrate or make sounds when handled.
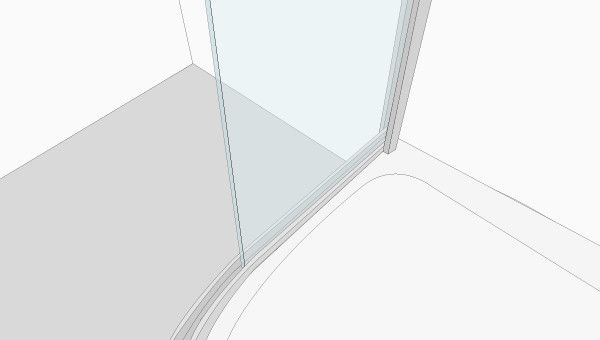
- Also install the seals on the outside of the panels. These will be the ones that will come into contact with the sliding doors.
9 Assemble the curved doors
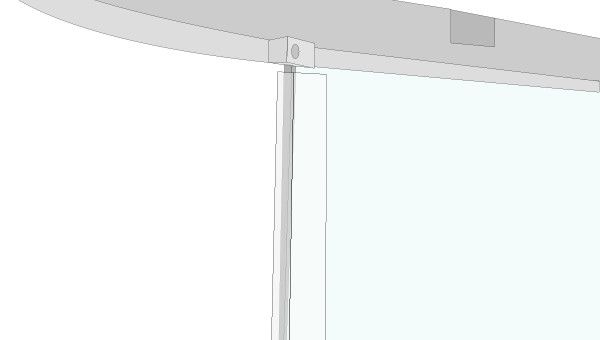
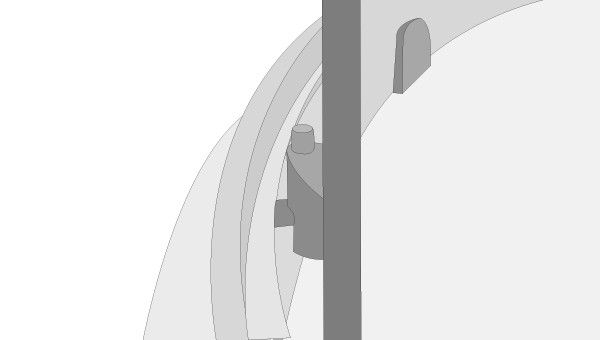
- The sliding system of the curved tempered glass doors is through cars that guide it along the paths that the structure has predetermined. For this reason, before joining these pieces to the rest of the cabin, these cars must be fixed to them. To fix the cars, identify the perforations in the curved glass, which are used to hook the cars, which in turn have a body made to function as a retainer.
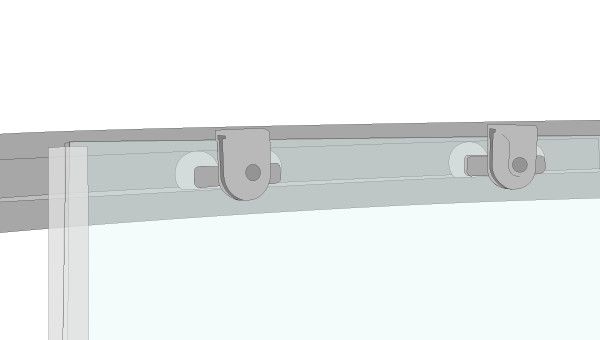
- Attach their respective vertical seals to the doors.
- Hang the doors by hooking the top carriages into the slot in the frame. Those at the bottom have a small spring implemented that allows them to be fitted, remaining fixed in the same action.
10 fixes the panels and the shower column
- For this procedure you must move the cabin until it allows you to work behind it. When you do this, be careful not to step on or strangle the flexible hose that goes under the receptacle.
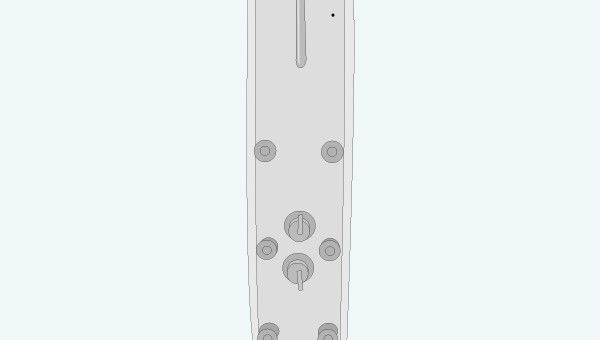
- On both sides of where the column will go, and attached to the two walls at the vertex of the corner where you will install the shower, are two smooth panels that are screwed to the frame at their vertical meeting.
- Place the column in the place where it will go to make the water connections.
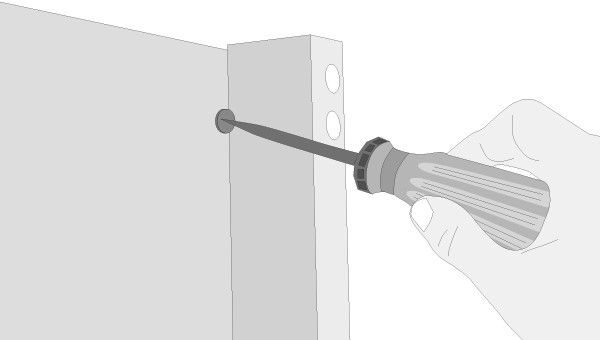
- The column is fixed only to the sides, using the perforations that the glass panels already have and drilling the plastic from which the column is made. This operation is done with a drill and a 3 mm metal drill bit.
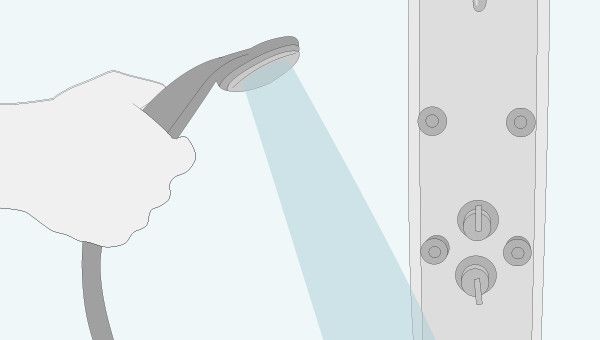
11 Test and seal
- After checking that everything is in order, turn on the water in the house and test that the shower works correctly: that the water comes out through the column devices (in this case through the vertical shower, telephone and hydromassage jets). Carry out this process before sealing in case it is necessary to go back to correct.
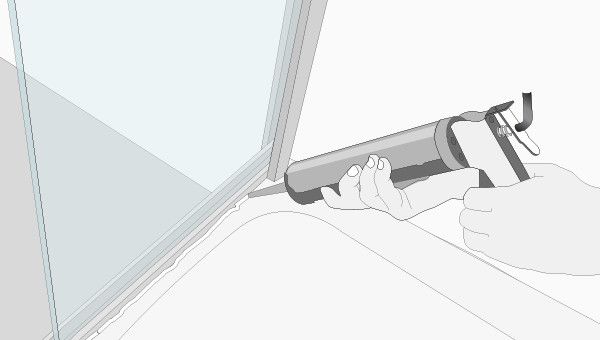
- Using anti-fungal silicone and a caulking gun, seal all areas where the tub is in contact with the floor, the wall, and the lower areas of the receptacle and the back of the tub.and the panels. Let dry for 24 hours before using the shower.
pdf of the project:
https://www.hagaloustedmismo.cl/files/pdf/proyectos/ba-in13_%20como%20reemplazar%20la%20tina%20por%20una%20cabina%20ducha.pdf
Get more information at perfectionidea.com and on our Facebook for more. Replace the bathtub with a shower cabin.
Popular Content
How to make a rocket stove for outdoors
Cardboard Drawers Lined with Jeans
Change the facade of your home with simple steps!
Latest Articles
How to make a refrigerator out of insulating material: Practical step-by-step guide
How to make a Kilim for the Home: Complete Step by Step Guide
How to protect ourselves from accidents in our workplace: Complete prevention and safety guide
Related Content
Roads with Futuristic Technology to Care for the Environment
Build a 360-degree shower for your pet
Consoles and retro objects that can decorate your home
Project: learn how to install a garden treillage
Creative Home Decor Ideas to Transform Every Space
Refreshing your home starts with smart design choices that combine comfort, personality, and functionality. Whether you want to modernize a small apartment, upgrade outdoor areas, or create cozy rustic interiors, these trending ideas can completely change the atmosphere of your space.
Outdoor Spaces That Increase Style and Functionality
Outdoor living continues to dominate modern home trends. Homeowners are increasingly investing in practical entertainment zones inspired by these BBQ shed ideas, which create the perfect setup for gatherings and weekend cooking sessions.
First impressions also matter when designing exteriors. Elegant farm entrance gates design ideas help properties stand out while improving privacy and curb appeal.
Compact living solutions are also gaining popularity. These inspiring 16x40 shed house interior design ideas show how smaller spaces can still feel luxurious and functional.
To enhance patios and entryways, homeowners are adding stylish protection with these creative porch awning exterior DIY ideas that blend aesthetics with practicality.

Rustic and Cozy Interior Design Trends
Warm and natural interiors remain timeless. These charming rustic decor ideas combine wood textures, vintage accents, and earthy tones to create welcoming spaces.
Bedrooms are becoming more personalized with curated wall arrangements. Many homeowners use these stylish picture wall ideas for bedroom spaces to display memories and artwork creatively.
Textured wall treatments are another major trend. Installing a board and batten wall adds architectural character while keeping interiors elegant and modern.
Similarly, bold accent wall ideas can instantly transform plain rooms into eye-catching focal points without requiring a full renovation.
Smart Kitchen and Organization Inspiration
Functional kitchens are essential for modern homes. These practical kitchen wall cabinet ideas maximize storage while maintaining a clean and stylish appearance.
Organization also starts at the entrance. Well-designed mud room ideas help families keep shoes, coats, and daily essentials neatly arranged.
Colorful and Personalized Home Styling
Vibrant interiors are becoming increasingly popular thanks to playful dopamine decor ideas that use bright colors and joyful accessories to improve mood and energy.
Gallery walls also continue to evolve as a major decorative feature. These trendy gallery wall inspiration ideas offer creative ways to combine prints, photos, and statement art.
Young renters and new homeowners are especially embracing these stylish first apartment aesthetic ideas to create sophisticated interiors on a budget.
Finally, selecting the right shades can dramatically influence any room’s atmosphere. These modern trendy color ideas help homeowners choose palettes that feel fresh, elegant, and timeless.
Final Thoughts
From rustic charm and colorful interiors to outdoor entertaining areas and functional storage solutions, today’s home decor trends focus on creating spaces that feel both beautiful and livable. By combining smart layouts, modern textures, and personalized decorative elements, any home can become more stylish, comfortable, and inspiring.


