
How to Build a Cantilever Desk in a Corner of the Room, any work surface that is not attached to the wall or floor inevitably shifts back and forth as the cart clatters, row after row.
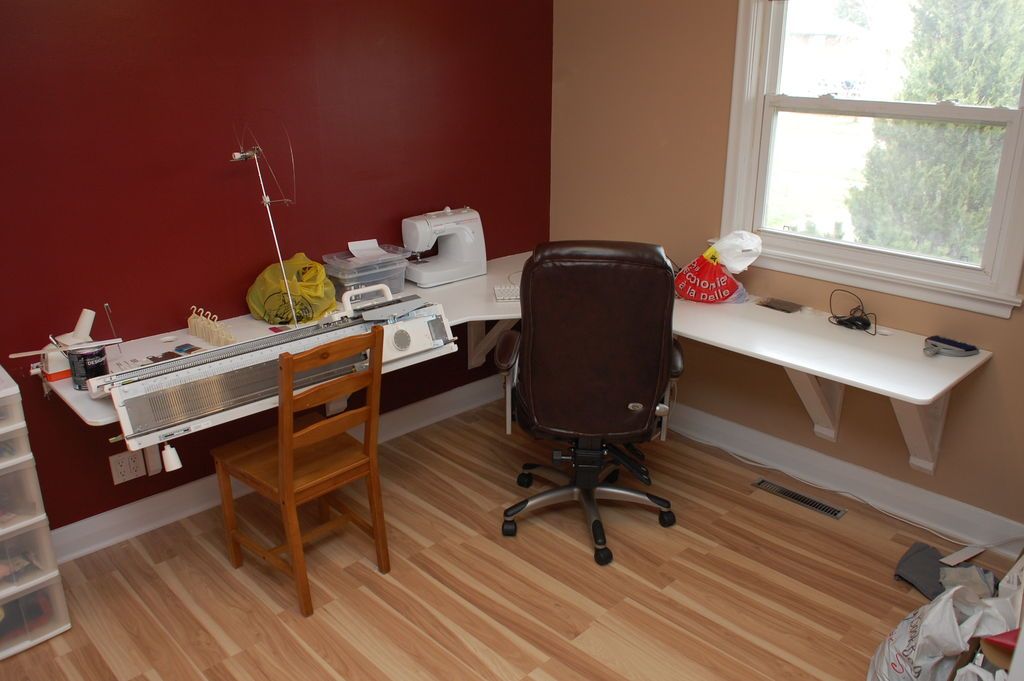
So, I built this simple desk for her. I had made one just like it for myself a few years before, so I know it holds up well. The main criterion was that the desk not move, not even a little. However, cost and simplicity were also factors, and I know I got all three on this job!

Made from simple 2x4 lumber and a plywood top and lots of screws. The tool list is small, and everything can be built in a weekend.
Step 1: Tools and materials
The amount of materials will naturally scale with the size of the desk to be built. The design of this room called for an L-shaped desk against the adjacent walls. The desk is only two feet deep to accommodate the knitting machines, but it doesn't protrude too far into the room.
I used almost an entire sheet of 4x8 foot plywood. To build the desktop as shown in this illustration, you will need the following:
- A 4x8 foot sheet of 3/4″ thick veneered plywood, either stain grade or paint grade.
- Six (and maybe one extra) 2x4x8 pieces of pine wood. Make sure they are straight!
- Eight to ten 2″ L-brackets
- Two flat supports
- 100 Pack 5/8″ Long Flat Head Screws
- 3″, 2.5″ and 2″ construction screws.
- Painting (optional)
More tools will make some jobs easier and the finish nicer. If this will be used in a workshop, you can get away with just the essentials.
- 10″ or larger compound miter saw
- Drill, with countersink bit and 2.25″ hole bits
- Screwdriver
- Bubble level
- Stud finder or magnet and plumb line
- Tape measure
- Circular saw (optional, not required if you have the plywood cut at the store)
- Router with a 1/4" bullnose (optional, to round the edges)
- Random oscillation sander (optional, for sanding the surface)
- Impact driver (optional, to drive screws faster)
- Brush (if painted)
Step 2: Basic idea


Triangles! Aren't they deliciously stiff? They are what makes the desk so strong. That and the dozens of screws holding the desk to the walls.
The desktop surface supports two main shapes; a 2x4 that runs the length of the wall itself, and evenly spaced “cantilever” supports that distribute the weight of the desk over the wall. These are all screwed into studs on the wall. The supports are placed approximately every 32″, although they could be placed every 16″ if you want to support the weight of a small car.
Each overhang supported my weight on its own (about 180 pounds), so three or four of these under the desk should be enough. The desk surface is attached to the horizontal 2x4s and supports using screws and brackets.
Construction begins by identifying where the studs are hidden behind the walls and deciding the size of the desk. The amount of supports can be determined. In my case, I needed six sets of supports.
Step 3: Checking the area


The easiest way to find studs in a modern home is with a stud finder. Simply slide it along the wall until it beeps and mark the location. You can also use a strong magnet; will adhere to the wall's drywall screws, which are (for the most part) drilled into the studs. Mark the centers of the posts with pieces of masking tape. They should be spaced 16″ apart.
Either way, find the bolts, because the brackets must be screwed into them to achieve any semblance of strength. Mark all the centers you find in the space where the desk will be.
Step 4: Cut and assemble the horizontal support


First, determine how tall you would like the desk to be. This may depend on the chair you plan to sit in, the type of equipment you are using, or the job you are doing. And of course, your own height! Subtract the thickness of the plywood table top and you will know how tall the horizontal support should be.
In my case, the height was 28.25″, since my wife decided that the top surface should be 29″.
First I added some bevel to the ends of the brackets with a miter saw. This is not necessary, but it looks nice. With the help of a friend, mount the bracket to the wall with a 3″ screw in the center of the bracket.
The bracket should now be able to pivot on this screw. Place the spirit level in the center of the stand, and align it perfectly. Next, add screws to each end of the bracket, back to the bolts. I used two 3″ screws at each intersection (i.e. two screws every 16 inches).
If the desk is being built in a corner, clamp the second bracket over the first to make sure they stay aligned where they meet. Screw the second support piece together like the first.
Step 5: Calculate and Cut Cantilever Beam Supports


I knew the desk surface was 24″ deep, and I needed room around the edge to hold things. Therefore, I set the maximum support length to 20″. To keep things simple, I decided to make the brackets perfect right triangles (90-45-45), so the section screwed to the wall also had to be 20″. But that measurement is only a guide.
The section (1) that runs along the bottom is actually 18.5″, due to the thickness (about 1.5″) of the horizontal bracket already mounted to the wall.
The section mounted directly on the wall (2) is only 16.5″, due to the width of the 2x4 (approximately 3.5″). And of course the angle section (3) can be calculated from there. I chose a length of 21.5″, a length that angled the section about 1″ from the ends of the wall and desk sections.
A fourth piece (4) holds one end of the section that extends along the bottom of the desk and provides a convenient place to place more screws. It also attaches the horizontal support to the wall section, adding additional redundancy.
I should point out that being super precise here really isn't necessary. There will be no complex joinery here, and no part relies on any other part for a perfect fit. So don't give up like an eighth of an inch here or there.
So how much support do you need? Make sure there is one at each end of the desk to start. In my case, one end of the desk was supported by the horizontal bracket screwed to the wall, so a bracket was placed as close to the other end as the studs would allow. Then, simply place the supports 32″ away from there. Again, this will depend on how long the desk is sitting. In total, I needed six sets of supports for the top of the desk, which are 8 feet on one side and seven on the other.
A miter saw is all you need to cut the 2x4 lumber into sections. Pieces 1, 2 and 4 were cut with a 90 degree cut on one end and a 45 degree bevel on the other. The bevel looks good for one thing, but it also prevents bruised knees.
Piece 3 was cut with a bevel on both ends as it will be screwed at an angle to the others. Cut one set to test fit, then cut the rest.
Step 6: Screw the Cantilever Brackets


Start by joining the wall sections (piece 2). Using the location marks on your bolt, drive at least two screws into each piece. The wood should be flat against the wall; If not, remove the screw again and reinsert it while applying pressure to the part. The purpose of this lumber is to distribute the weight of the lumber evenly on the wall; It will wobble if not flush.
Next, connect piece 3 using two pieces of wood as a guide. Remember, piece 1 must fit in the space at the top. Secure part 3 with four screws: two in the horizontal support and two in part 2. Again, make sure it is as level as possible. Piece 1 is next.
Hold it in place so that it is level with the horizontal bracket and reasonably square with the wall. Insert two screws into piece 4. You may want to pre-drill the holes with a countersink bit, to prevent the edge of the wood from separating. Piece 1 may still be a little wobbly, that's okay! Just try not to run into it.
The last one is piece 4. This is the difficult part. Set a level across piece 1 and hold piece 4 in place so the bubble is level. Pre-drill the holes with a countersink bit, two screws on each end. Remove the screws by hand with a screwdriver. Check the level again once all screws are engaged.
At this point, the stand should be able to handle the average weight of an adult. Go ahead and sit down! If it feels unstable, fix it now before it's too late...Complete the other supports this way, always checking the level.
Step 7: Preparing the desktop


I bought the 4x8 sheet of plywood and cut it myselfmyself, as I needed a shape that they couldn't (or wouldn't) easily cut for me at the store. But of course; If all you need is an 8x3 section (or whatever), the store should definitely cut it for you; He usually has a large table saw or panel saw and will make a small number of cuts on site for free.
Measure the cut lines with a tape measure and a ruler. I cut the plywood using a jigsaw and had very good results; You could also use a circular saw. For lack of a better place to do the job, I simply placed some pieces of scrap 2x4 in the driveway and cut directly into the ground. Before doing this, make sure the blade height is set so that it does not touch the ground!
After the cut, I drilled several cable access holes with a 2.25″ saw. Before drilling these holes, be sure to measure where the cantilever brackets are. Otherwise, you could end up with a hole right above a stand! the edge of the hole is at least 1.5″ from the edge of the desk, to avoid overlapping the horizontal support beam. Drill as many holes as you think you'll need, then add an extra just in case.
There are a few ways to finish the table edge. You can quickly sand to remove any splinters, or you can apply a wood edge. I knew my wife would be working with textiles, which tend to snag on sharp corners. So, I decided to round the edges with a Router. I used a 1/4″ bullnose bit on the top and bottom of the table on all the outside edges as well as the cable access holes.
The last step is to sand the desktop. The surface is probably already very smooth; may not need sanding at all! But you'll probably want to sand down the cut edges a bit and some chips. I started by sanding the edges with a small portable random orbit sander. I sanded the cable access holes by hand. Finally, I sanded the desk surface with a 5″ random orbit sander.
If you wish, you can paint the table top now. If you are using a particularly smelly paint, or if you have any other reason why it would be better to paint the table top outside the room, do it now!
Step 8: Paint the supports


It is much, much easier to paint the supports before assembling the table top. Of course, painting the supports is completely optional. If you used nicer wood than lumber, or if you like the look, or don't really care either way, you can skip this step.
To paint the brackets, I used an inexpensive finishing paint. This part is tricky and watch out for paint drips! There are many corners and gaps where paint can pool and drip. Add as many coats as you like until you achieve the finish you want. Two coats should be sufficient in almost all cases.
Step 9: Assemble the desk


Once the paint on the brackets is dry, the table can be assembled!
Drag out those big pieces of plywood and dry them to make sure everything lines up. If your desk top is made of multiple pieces, attach the largest piece first. Align it flush against the wall. If possible, secure it to prevent it from moving while you work.
Tip: If you have clamps whose jaws can be removed, you can thread the bar through a cable access hole and replace the jaw on the other side of the desk surface. Then, attach the top of the desk to the support beam!
L brackets are used to attach the top of the deskitory to the horizontal support beam. I spaced them between the cantilever supports. Start in the middle and work outward; first attaching the bracket to the support beam and then to the table top. You may want to use a punch to mark the holes and give the screw a small hole.
Once the L-brackets are in place, drive 2″ screws through the cantilever support beam and into the top of the desk. Again, it's probably a good idea to pre-drill these holes with a countersink bit. one near the outside edge of the desk and one near the wall.
The L-shaped desk I built was made in two pieces. Unfortunately, the two pieces were out of vertical alignment by about 1/4 inch. After attaching the two pieces to their individual support beams, I pressed them together to align them. I then screwed on a pair of flat brackets to hold the pieces together.
Good! Almost finished. The desk should easily support the weight of an adult or two.
Step 10: Desktop ready


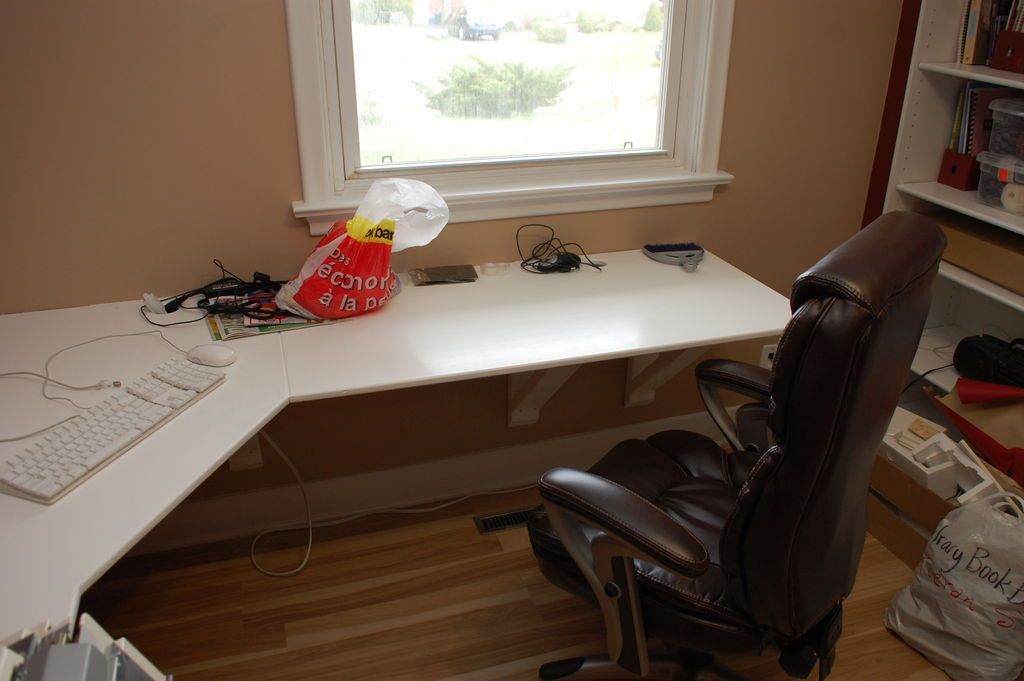
You're done! Go put things in and enjoy your new desk.
Wait a moment before putting something on the desktop. Often the paint feels dry to the touch, but is still wet underneath.
Putting something heavy on the paint before it is dry can result in permanent marks. The entire construction of the desk, as seen in the photograph, took approximately two days of work (16 hours), including painting. It's rock solid, supports a ton of weight, and ended up costing very little.
Get more information at Perfectidea.com and on our Facebook for more How to Build a Cantilever Desk in a Corner of the Room.
Popular Content
How to make a rocket stove for outdoors
Cardboard Drawers Lined with Jeans
Change the facade of your home with simple steps!
Latest Articles
How to make a refrigerator out of insulating material: Practical step-by-step guide
How to make a Kilim for the Home: Complete Step by Step Guide
How to protect ourselves from accidents in our workplace: Complete prevention and safety guide
Related Content
Modern d Lampe Infinity Mirror Table and LED Lights!
LED Lights in the Kitchen: Under Cabinet Lighting!
Compact Sand Pools: A New Concept in Design
Glass Jar Flashlight (With Independent Power)
Creative Home Decor Ideas to Transform Every Space
Refreshing your home starts with smart design choices that combine comfort, personality, and functionality. Whether you want to modernize a small apartment, upgrade outdoor areas, or create cozy rustic interiors, these trending ideas can completely change the atmosphere of your space.
Outdoor Spaces That Increase Style and Functionality
Outdoor living continues to dominate modern home trends. Homeowners are increasingly investing in practical entertainment zones inspired by these BBQ shed ideas, which create the perfect setup for gatherings and weekend cooking sessions.
First impressions also matter when designing exteriors. Elegant farm entrance gates design ideas help properties stand out while improving privacy and curb appeal.
Compact living solutions are also gaining popularity. These inspiring 16x40 shed house interior design ideas show how smaller spaces can still feel luxurious and functional.
To enhance patios and entryways, homeowners are adding stylish protection with these creative porch awning exterior DIY ideas that blend aesthetics with practicality.

Rustic and Cozy Interior Design Trends
Warm and natural interiors remain timeless. These charming rustic decor ideas combine wood textures, vintage accents, and earthy tones to create welcoming spaces.
Bedrooms are becoming more personalized with curated wall arrangements. Many homeowners use these stylish picture wall ideas for bedroom spaces to display memories and artwork creatively.
Textured wall treatments are another major trend. Installing a board and batten wall adds architectural character while keeping interiors elegant and modern.
Similarly, bold accent wall ideas can instantly transform plain rooms into eye-catching focal points without requiring a full renovation.
Smart Kitchen and Organization Inspiration
Functional kitchens are essential for modern homes. These practical kitchen wall cabinet ideas maximize storage while maintaining a clean and stylish appearance.
Organization also starts at the entrance. Well-designed mud room ideas help families keep shoes, coats, and daily essentials neatly arranged.
Colorful and Personalized Home Styling
Vibrant interiors are becoming increasingly popular thanks to playful dopamine decor ideas that use bright colors and joyful accessories to improve mood and energy.
Gallery walls also continue to evolve as a major decorative feature. These trendy gallery wall inspiration ideas offer creative ways to combine prints, photos, and statement art.
Young renters and new homeowners are especially embracing these stylish first apartment aesthetic ideas to create sophisticated interiors on a budget.
Finally, selecting the right shades can dramatically influence any room’s atmosphere. These modern trendy color ideas help homeowners choose palettes that feel fresh, elegant, and timeless.
Final Thoughts
From rustic charm and colorful interiors to outdoor entertaining areas and functional storage solutions, today’s home decor trends focus on creating spaces that feel both beautiful and livable. By combining smart layouts, modern textures, and personalized decorative elements, any home can become more stylish, comfortable, and inspiring.


