
Today I decided to make a coffee table with X legs, it has an industrial touch, but I kept the original design. I modified it to a full length shelf where you can hide remotes, magazines, coasters or whatever, and added a black iron pipe as a cross leg support for a better modern industrial finish.
The overall dimensions of the table are 47x22x17.

Steps to make a coffee table with X legs:
Step 1: Tools and materials
Here are the tools and materials I used for this coffee table.
Materials:
- (2) 2x4x8
- (1) 1x6x6
- (4) 1x6x8
- Black iron pipe
- Pipe nozzles
- (2) Couplings
- (2) End caps
- (50) 1-¼ Pocket Screws
- Wood conditioner
- Wood finish
- Polyurethane
- Danish oil
- Wood glue
- Wood filling
Tools:
- Table saw
- Miter Saw
- Pocket hole template
- Orbital sander
- Drill
- Clamps
- Putty knife
- 1 inch shovel
- Finishing Applicator Pads
- High density foam brush
Step 2: Assemble the panels


- First you will need to make two panels, each made up of four 1×6 boards. Start by pre-drilling pocket holes along the edge of 3 of the 4 boards that will be used to form the board and shelf. Place the first pocket hole about 2-3 inches from one end of the boards, then space the pocket holes every 6-8 inches.
- Once all the holes are pre-drilled, lay the 4 boards flat, edge to edge, to form a panel. Apply some glue and use clamps to hold them together tightly, making sure to check that the ends are square.
- With the clamps tight (don't overdo it, or the boards will bend) secure the boards with 1 ¼ pocket screws.
- Be sure to clean the squeezed material while the glue is still wet with a scraper or a damp paper towel.
- Repeat the same process for the second panel.
Step 3: Assemble the box


- To make things easier, I sanded both assembled panels at this point, as it will be difficult once the table is assembled. I sanded to 120 grit, then 220 grit using my orbital sander. I also sanded the 2 pieces that will make up the sides.
- Before assembling the box that will form the table, you will want to pre-drill pocket holes at each end of the top and bottom panels.
- Place the panel you want to use as the table top face down, with the table flat against your workbench (you should see the pocket holes). Use clamps to secure the 2 side pieces to each end, first apply glue. Secure with 1 ¼ screws in pre-drilled holes.
- Next, add the bottom shelf (again upside down), attach and secure with pocket screws.
Step 4: Fix imperfections


- Once the box is built, move forward and flip it up. If you see any gaps, fill them with some wood filler (or wood glue mixed with sawdust).
- The last step is to sand the top and edges to 220 grit.
Step 5: Build the X legs


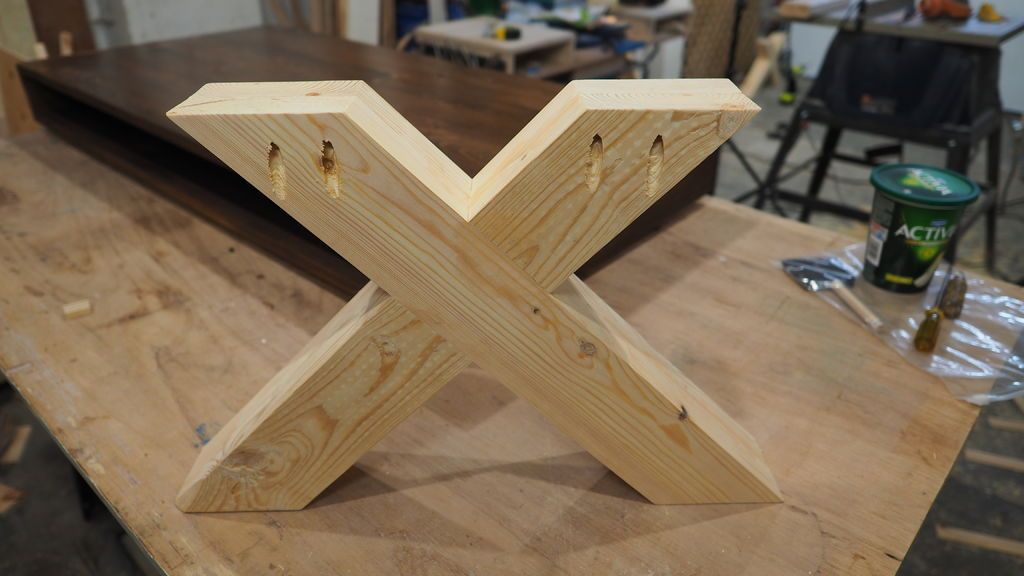
- For the legs, I used 2x4s that I cut to 3 inches with my table saw. I started by shaving ¼ inch on one side, then ¼ inch on the opposite side. This eliminates rounded edges and gives the boards a clean, modern look.
- I set my miter saw to 45° and cut all my pieces to size using a stop block for accuracy and repeatability. You will have 4 longer and 4 shorter pieces cut in half.
- The glue is the hard part. I decided to glue one side of the legs at a time. I used smaller clamps vertically to align the boards vertically, and larger clamps to hold the leg to my work table. I used wood glue and let it sit for 30 minutes before flipping the legs over and repeating the process on the other side.
- Once the glue was dry, I filled any gaps using stable wood filler and a putty knife. I let it dry for a couple of hours.
- Before moving on to finishing, I pre-drilled some pocket holes at the top of the X's on the inside face. These will be used to later attach the legs to the table.
Step 6: Finishing


- Rather than wait until the end, I chose to stain the table and legs at this point, thinking it would save me some headaches down the line.
- After vacuuming up all the sawdust and cleaning all the parts, I applied wood conditioner and let it sit for about 30 minutes. I find that the conditioner helps the stain penetrate the pine wood better and prevents stains.
- Then I applied Minwax wood stain to the entire table and legs.
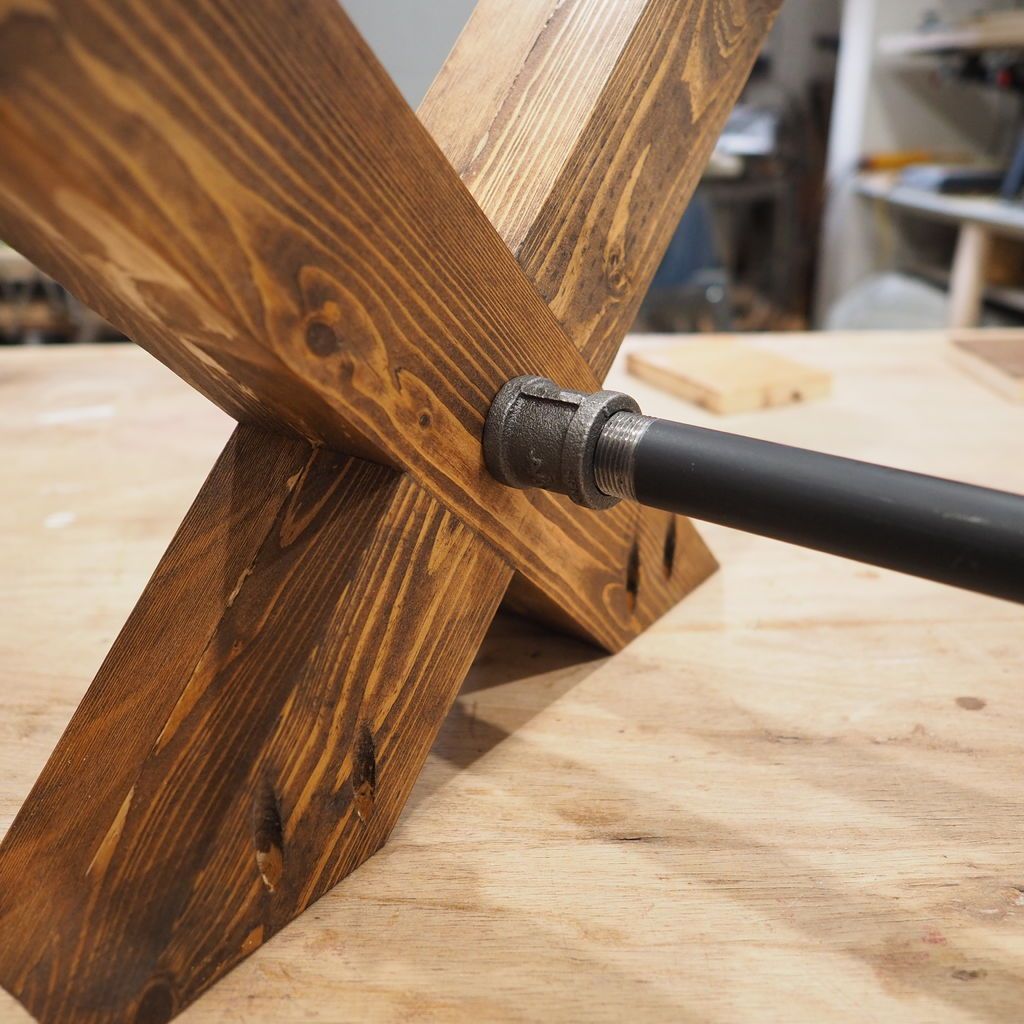
Step 7: Assemble the black iron tube
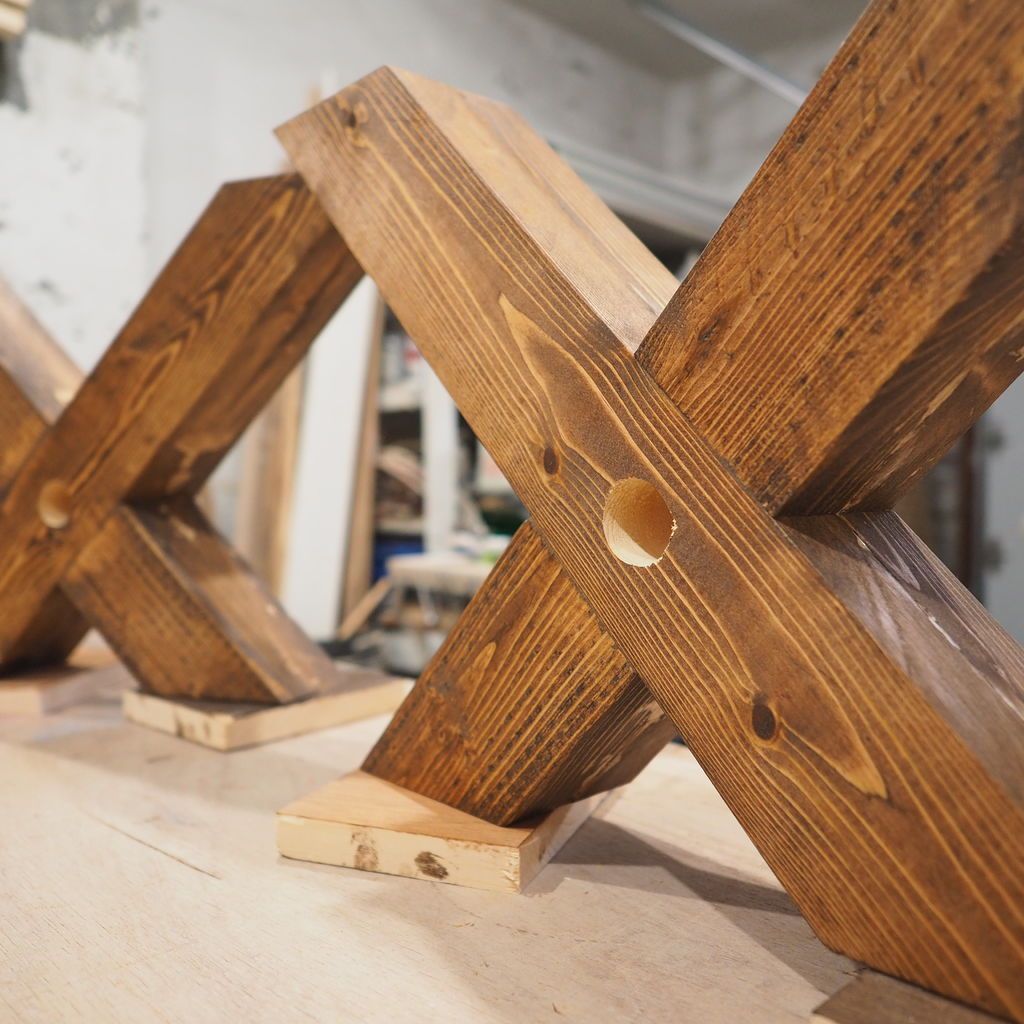


- I had my black iron pipe cut to size and threaded at a local hardware store, but you may be able to buy them off the shelf where you live.
- You will need to find the center of the X on each leg and drill a hole using a 1-inch spade bit. I used adhesive tape to prevent the tea from escaping.
- Screw an end cap onto each of the pipe nipples. Screw a coupling onto each end of the longer pipe. Slide the tubing nipple through the X leg and connect it to the other end of the coupling. Repeat for the second stage. Press.
Step 8: Assembly

- With the base and top assembled, all that remains is to connect the two together. Center the base under the table and secure with 1 ¼ pocket screws.
Step 9: Finished Work
This coffee table with X legs will be perfect to surprise your guests without a doubt.


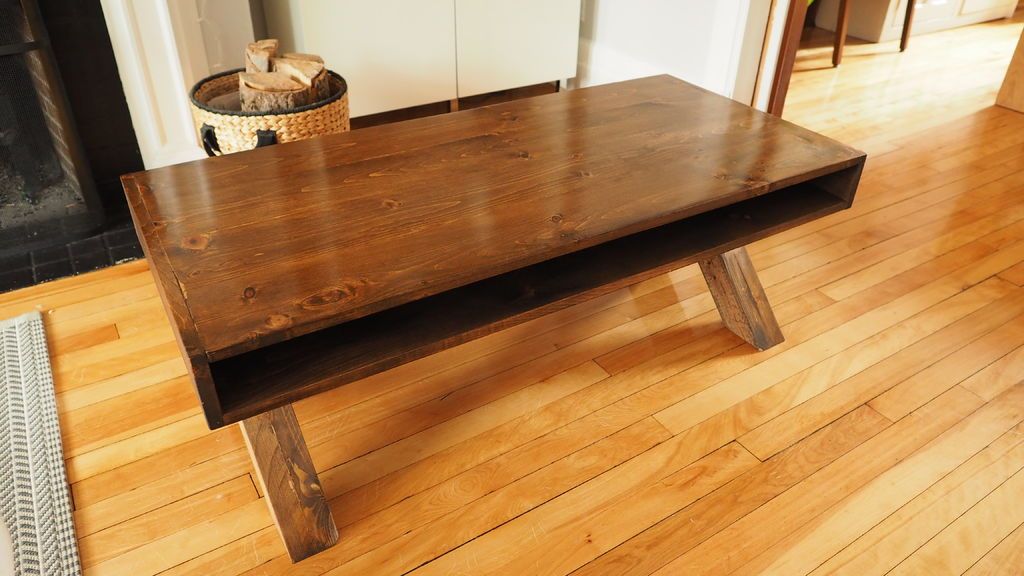

- To finish this project, you will need to seal the wood with a finish of your choice. I was feeling a little lazy, so I just rubbed a couple of coats of natural danish oil all over the table,except at the top. I used 3 coats of polyurethane varnish for the top as it will likely be exposed to moisture and liquids.
Don't forget to follow us on our social networks for more news!
Popular Content
How to make a rocket stove for outdoors
Cardboard Drawers Lined with Jeans
Change the facade of your home with simple steps!
Latest Articles
How to make a refrigerator out of insulating material: Practical step-by-step guide
How to make a Kilim for the Home: Complete Step by Step Guide
How to protect ourselves from accidents in our workplace: Complete prevention and safety guide
Related Content
Ideas that you can create with pallets
Learn How to Build a Floating Bed with These Simple Steps!
Painting Ideas and Techniques for DIY Designs
Know How to Build a Modern Kitchen Island!
Creative Home Decor Ideas to Transform Every Space
Refreshing your home starts with smart design choices that combine comfort, personality, and functionality. Whether you want to modernize a small apartment, upgrade outdoor areas, or create cozy rustic interiors, these trending ideas can completely change the atmosphere of your space.
Outdoor Spaces That Increase Style and Functionality
Outdoor living continues to dominate modern home trends. Homeowners are increasingly investing in practical entertainment zones inspired by these BBQ shed ideas, which create the perfect setup for gatherings and weekend cooking sessions.
First impressions also matter when designing exteriors. Elegant farm entrance gates design ideas help properties stand out while improving privacy and curb appeal.
Compact living solutions are also gaining popularity. These inspiring 16x40 shed house interior design ideas show how smaller spaces can still feel luxurious and functional.
To enhance patios and entryways, homeowners are adding stylish protection with these creative porch awning exterior DIY ideas that blend aesthetics with practicality.

Rustic and Cozy Interior Design Trends
Warm and natural interiors remain timeless. These charming rustic decor ideas combine wood textures, vintage accents, and earthy tones to create welcoming spaces.
Bedrooms are becoming more personalized with curated wall arrangements. Many homeowners use these stylish picture wall ideas for bedroom spaces to display memories and artwork creatively.
Textured wall treatments are another major trend. Installing a board and batten wall adds architectural character while keeping interiors elegant and modern.
Similarly, bold accent wall ideas can instantly transform plain rooms into eye-catching focal points without requiring a full renovation.
Smart Kitchen and Organization Inspiration
Functional kitchens are essential for modern homes. These practical kitchen wall cabinet ideas maximize storage while maintaining a clean and stylish appearance.
Organization also starts at the entrance. Well-designed mud room ideas help families keep shoes, coats, and daily essentials neatly arranged.
Colorful and Personalized Home Styling
Vibrant interiors are becoming increasingly popular thanks to playful dopamine decor ideas that use bright colors and joyful accessories to improve mood and energy.
Gallery walls also continue to evolve as a major decorative feature. These trendy gallery wall inspiration ideas offer creative ways to combine prints, photos, and statement art.
Young renters and new homeowners are especially embracing these stylish first apartment aesthetic ideas to create sophisticated interiors on a budget.
Finally, selecting the right shades can dramatically influence any room’s atmosphere. These modern trendy color ideas help homeowners choose palettes that feel fresh, elegant, and timeless.
Final Thoughts
From rustic charm and colorful interiors to outdoor entertaining areas and functional storage solutions, today’s home decor trends focus on creating spaces that feel both beautiful and livable. By combining smart layouts, modern textures, and personalized decorative elements, any home can become more stylish, comfortable, and inspiring.


