
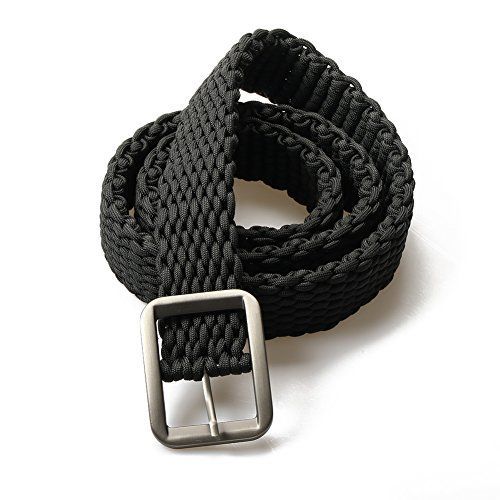
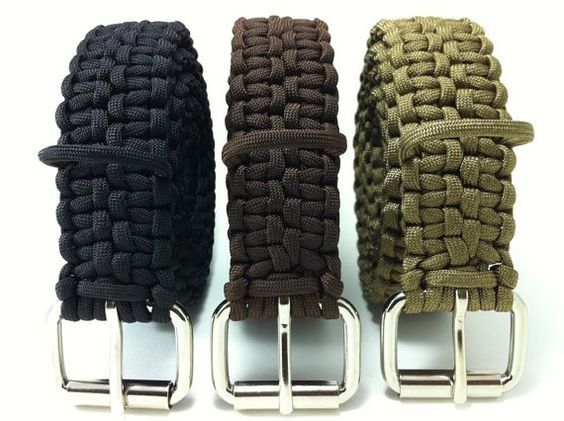
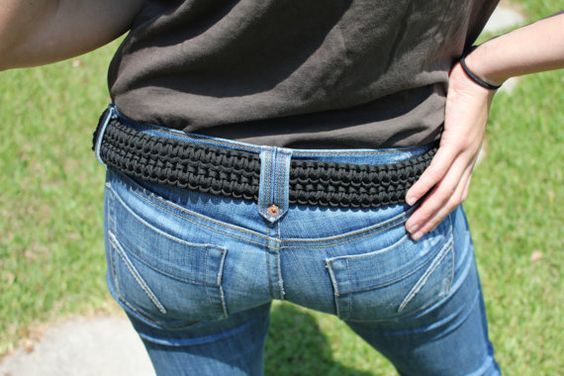
How to Make a Paracord Belt (Nylon), I will show you how to create a Paracord belt. While bracelets can be useful, they simply do not contain enough cord for a real emergency.
Sure, 8-12 feet can be useful in some situations, but think about what you can do with 50 feet!

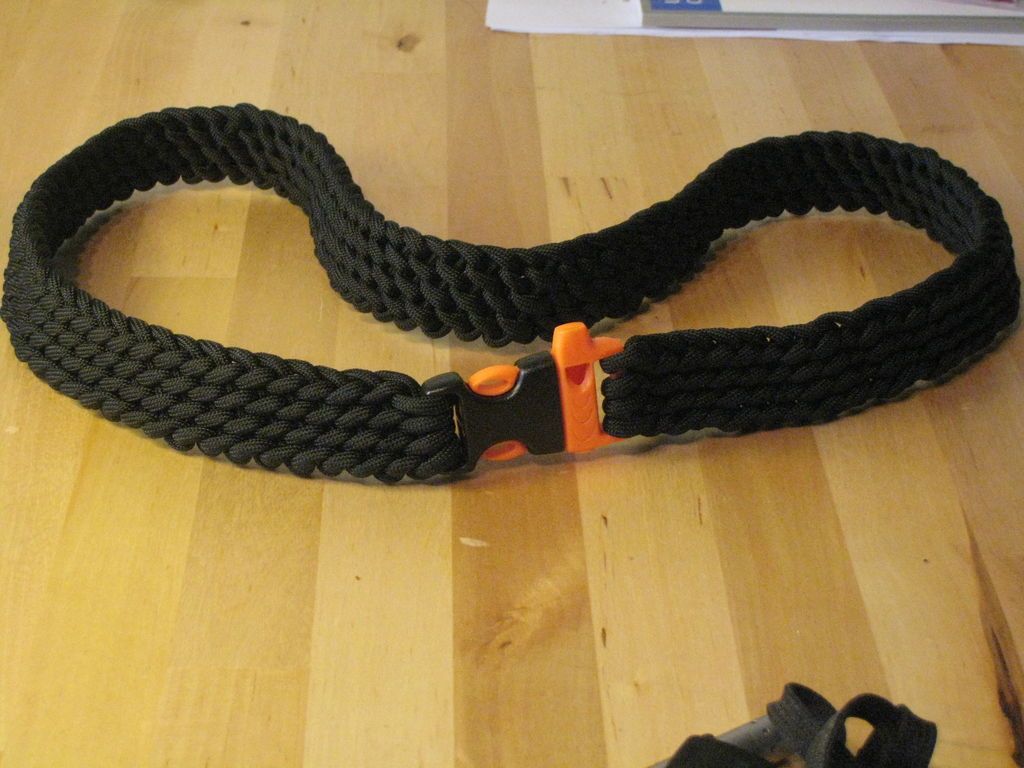
The belt essentially has two main functions:
- The buckle is a high-decibel whistle to attract attention
- The belt section itself is a single length of 550 Paracord that can be unraveled in literally seconds for a whole form of rescue techniques.
You can untangle the entire belt with a single pull, there is no need to undo a whole series of knots or weaves.
Depending on the method you use to weave and your waist size, the belt can provide you with a length of over 70 feet of rope.
This particular belt was used 50 feet for my 32″ waist, however I will explain how to increase or decrease the amount of cord it can carry while maintaining the same strap length.
Although the side release buckle means the belt is not adjustable, there is approximately 15% stretch in the belt, so you don't need to worry if you put on a little weight for the holidays, your belt should be able to accommodate it.
The elasticity also means that it will remain tight but flexible if you wear it during outdoor activities.
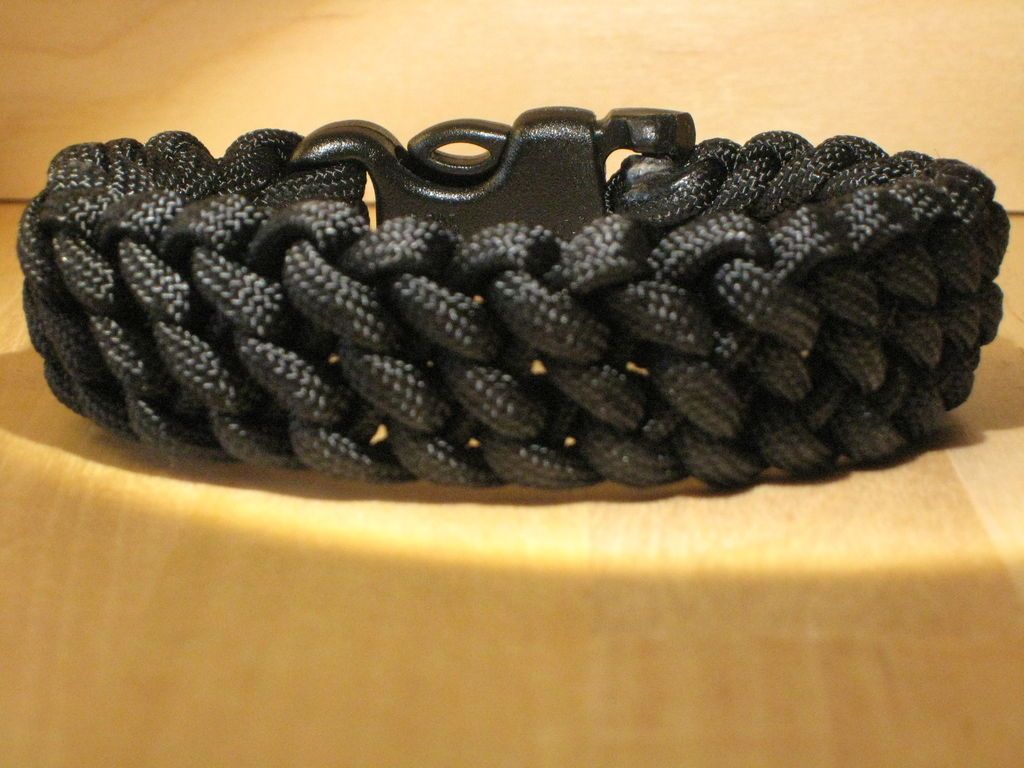
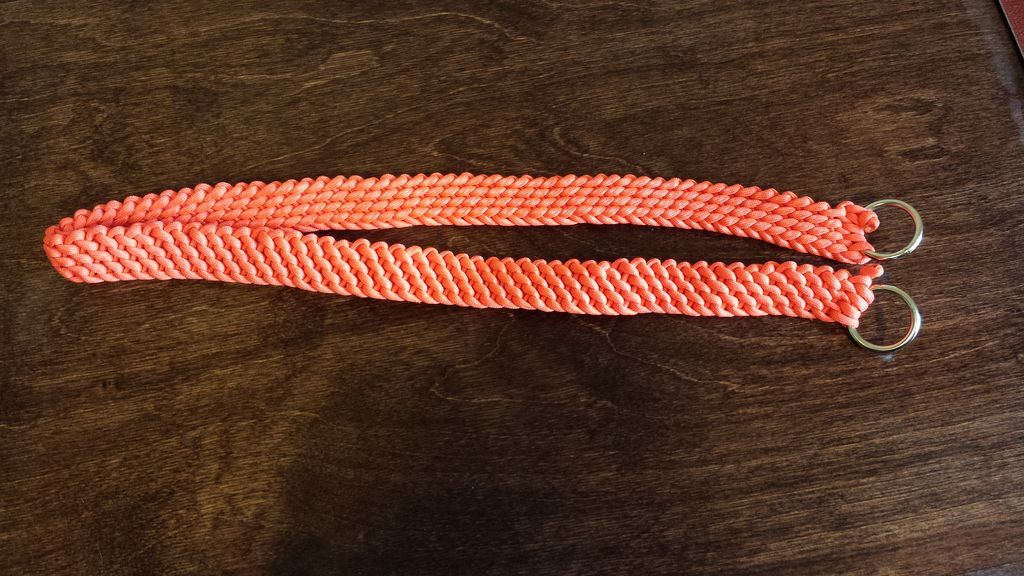
It is worth noting that this same technique can also be used to make a bracelet which I have illustrated at the end of the instruction.
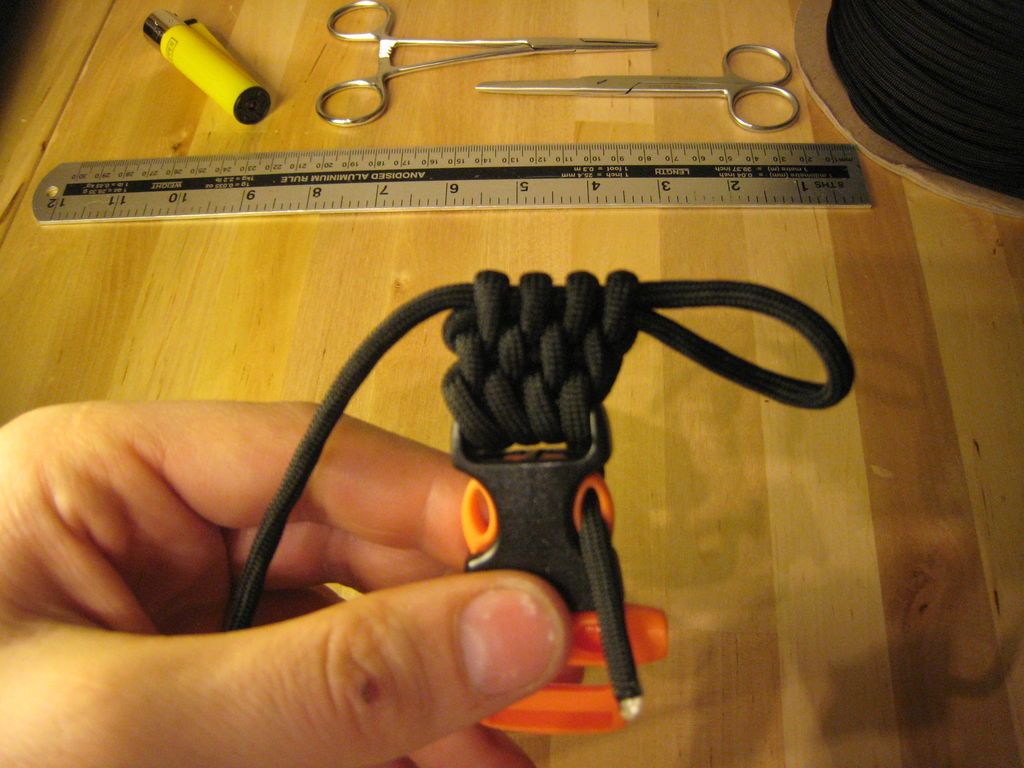
Step 1: Materials
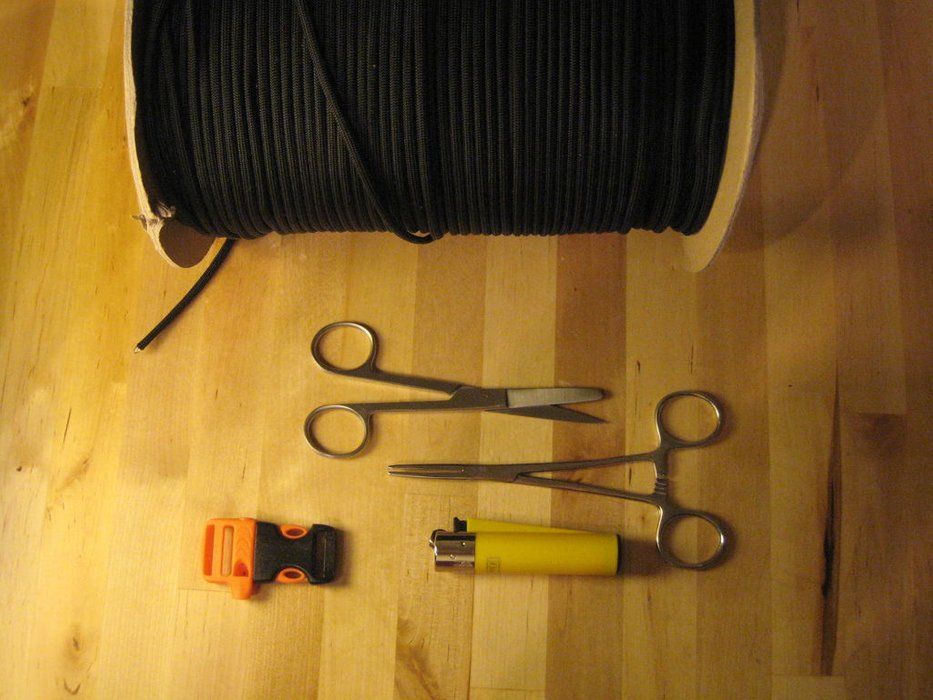
For best results use 550 Paracord.
- Paracord: You can use any color you like. You will need approximately 50 feet of cord for the belt shown.
- Fasten: I am using an emergency whistle side release buckle which can be picked up online or at any outdoor store.
- Scissors: To cut the cord
- Lighter: To seal the ends of the cable so that they do not fray.
- Forceps (optional): Depending on your dexterity, you may benefit from using forceps or needle nose pliers to help pull the cable, without handling the entire belt.
Step 2: Thread your buckle
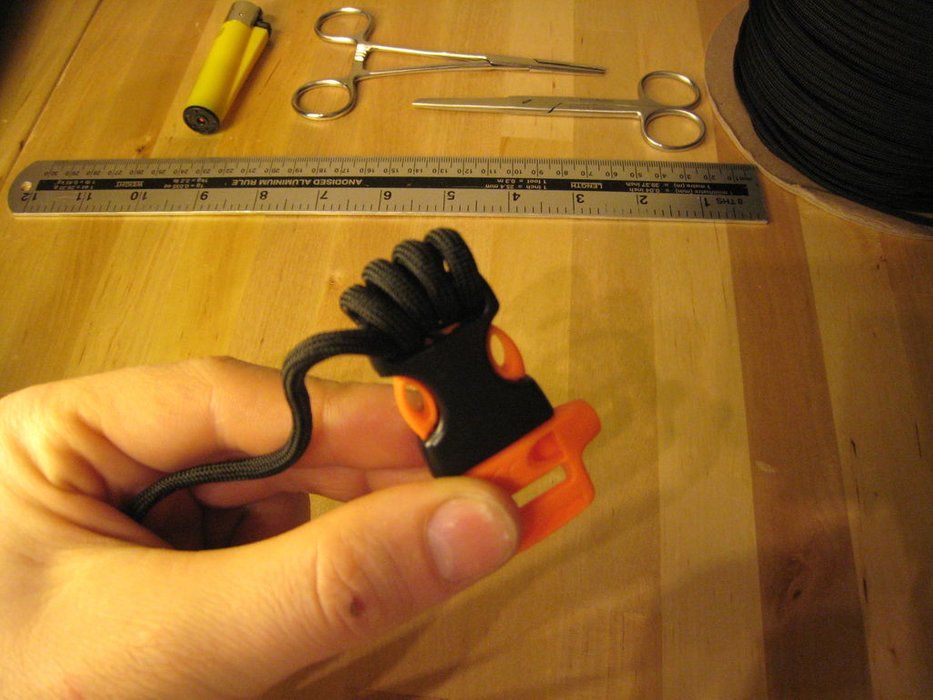
- First, make sure you have sealed the end of your cable with the lighter so it doesn't fray.
- There is no need to cut the length of the cable to size beforehand as the weaving method used means that the cable does not need to be cut from the reel until the desired length of the band is reached, this prevents wear and tear on the cable.
- Take your buckle and, from left to right, make 4 loops across the belt.
- Make sure the loops are loose enough to run some wire through the center.
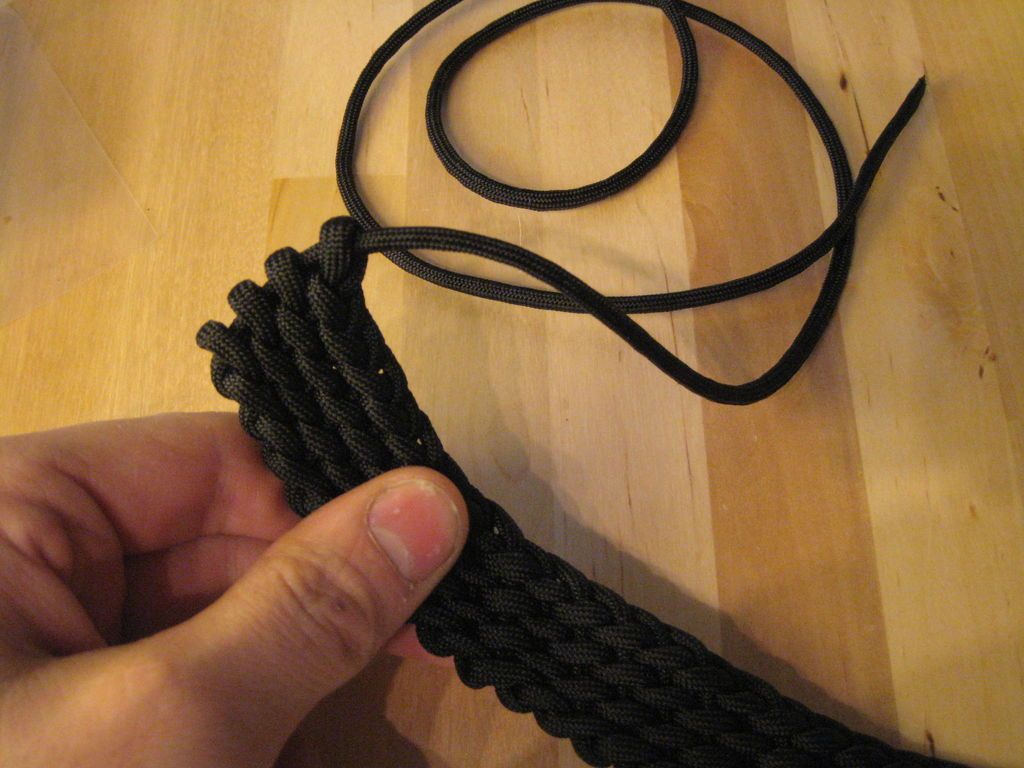
- Leave one end of the cable a few centimeters long and secure it to the buckle to prevent the cable from coming loose during the next steps. (I put it through the small hole in the orange section of the buckle to keep it in place)
- I have highlighted the 'working end' of the cable in the image, this is the piece you will use for all the additional knots.
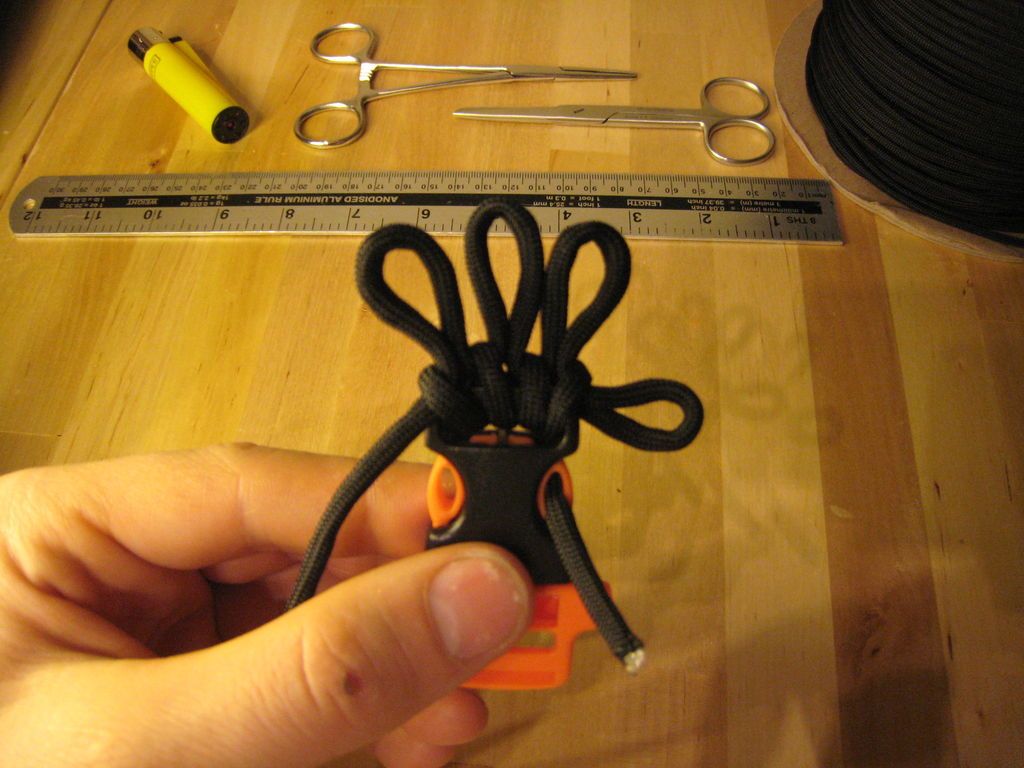
Step 3: Your first loop
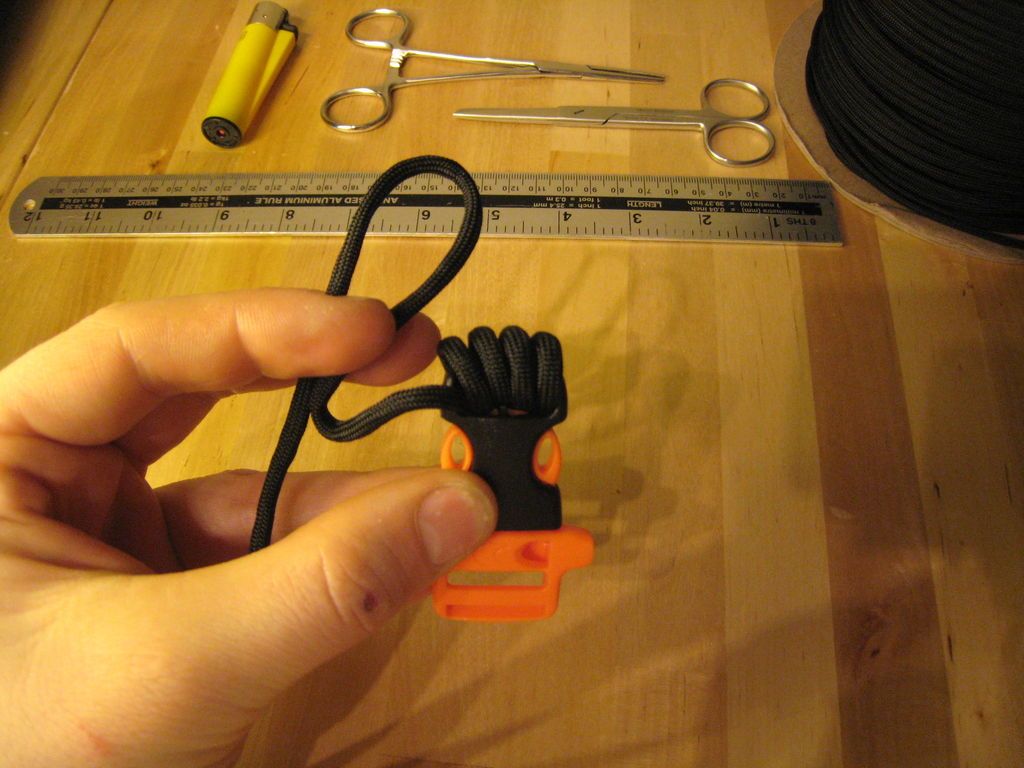

- Take the working end and make a loop in your hand.
- Now pass this through the center of the 4 loops you made on the buckle.
- Leave a couple of inches at the end on the right.
- Once you've inserted all of this, tighten the 4 loops surrounding the buckle. For greater consistency you should squeeze them from RIGHT to LEFT.
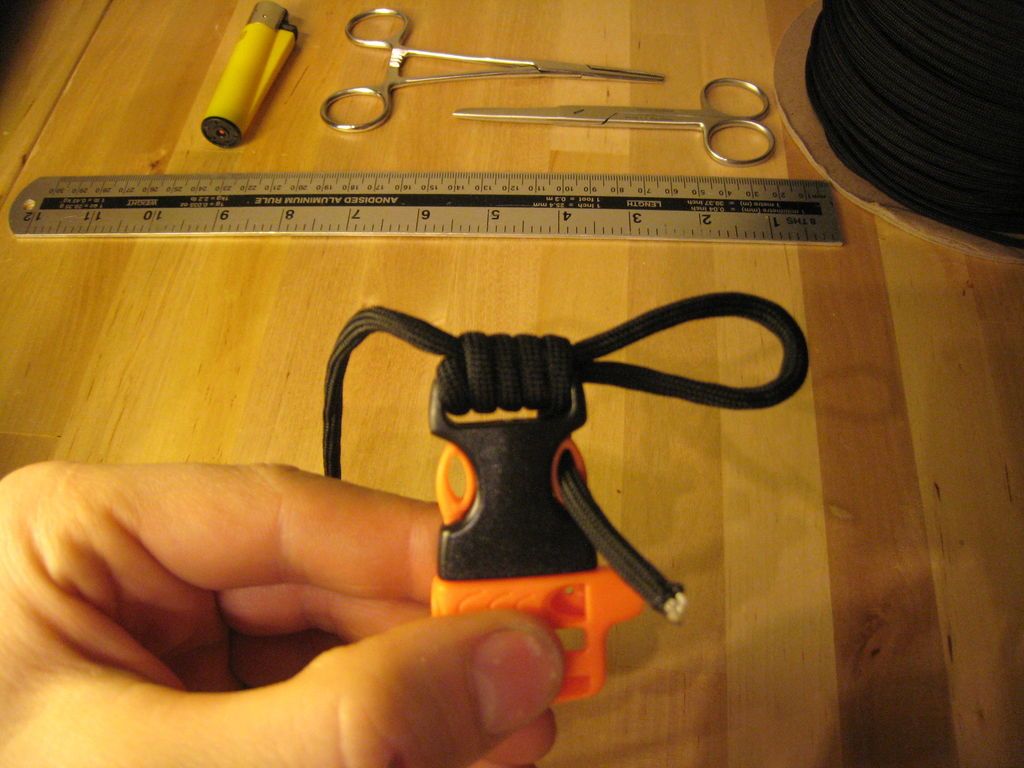
Step 4: More loops
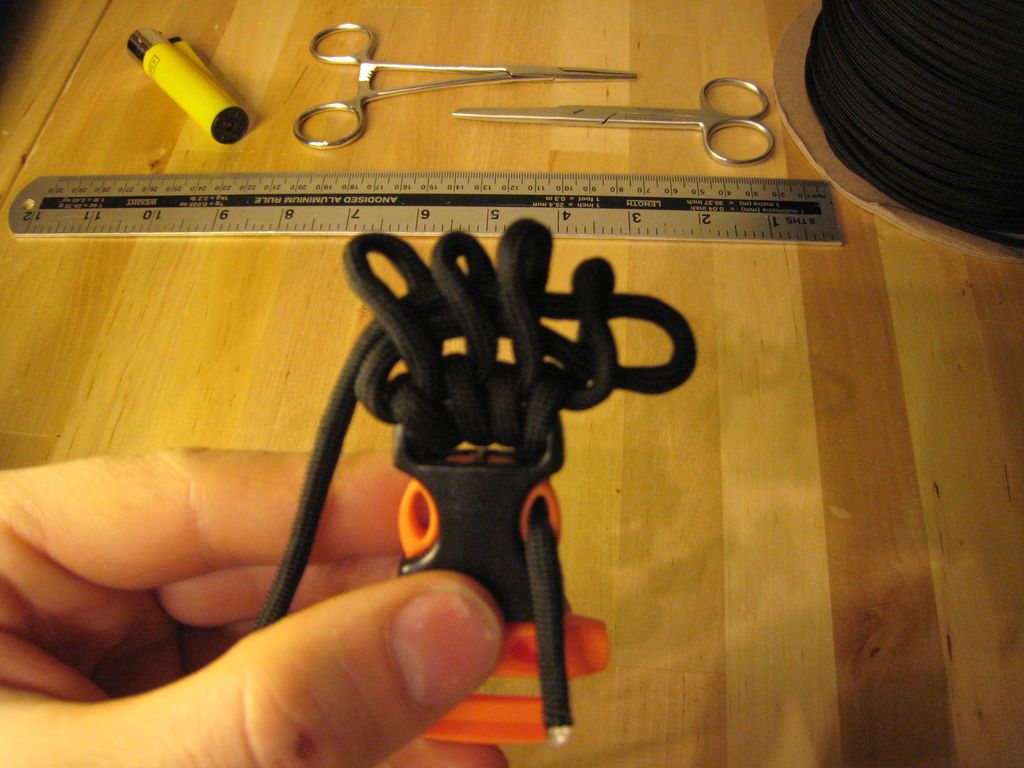
- Gently separate the 4 loops around the buckle.
- Using your fingers or tweezers, pull the end of the wire to form a total of 4 loops.
- It should consist of three that you go through and the loop to the left from the end of the last step.
- Twist the loopsis slightly in an COUNTER-CLOCK direction (so the left side of the loop is facing forward)
- Feed the end of the cable through the 4 loops, before letting a few inches stick out of the end again.
Step 5: Complete your first row

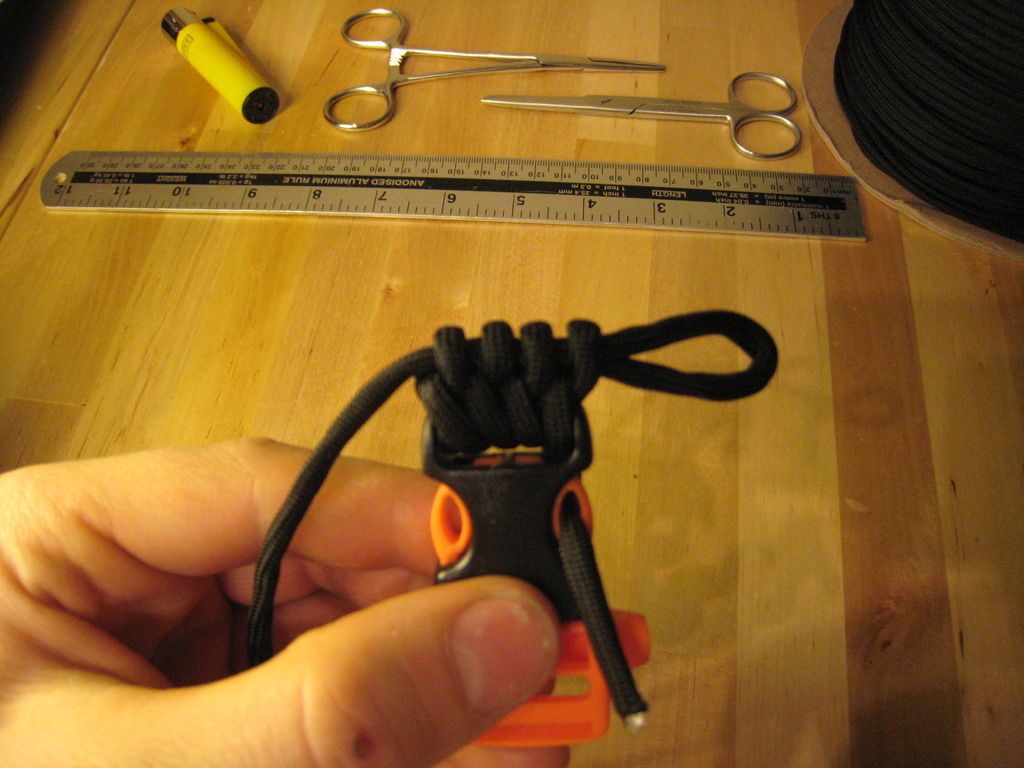
- To complete the first row, simply lighten the loops from RIGHT to LEFT
- Once you reach the left, pull the loop sticking out from the right end to tighten it completely.
IMPORTANT NOTE:
Because of all the loops we are putting in the cable, it naturally twists.
You must unscrew the cable while tightening each loop. If you don't do this, the finished fabric will look very messy.
Also, don't overtighten your loops.
Doing so will distort the final weaving pattern and again your belt will look messy.
Tightening too much will also make it harder to pull through the next row of loops.
Step 6: Repeat Repeat Repeat…
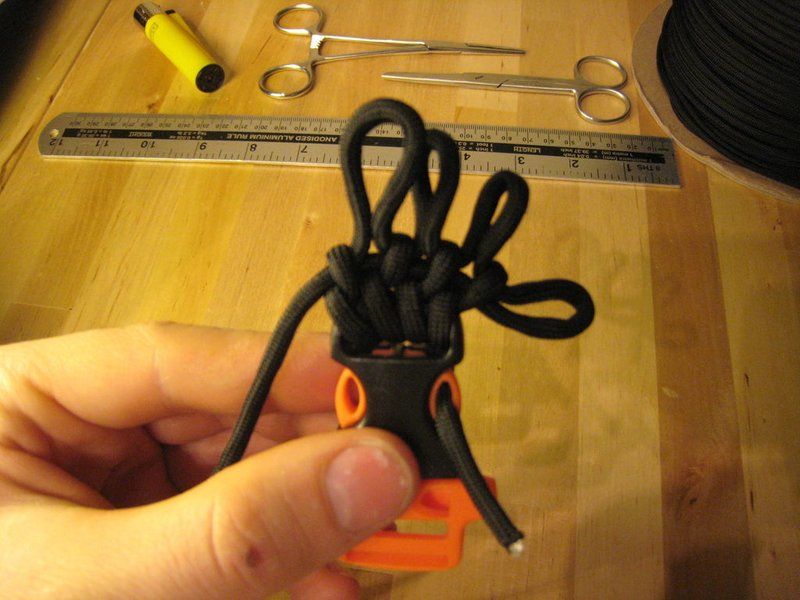
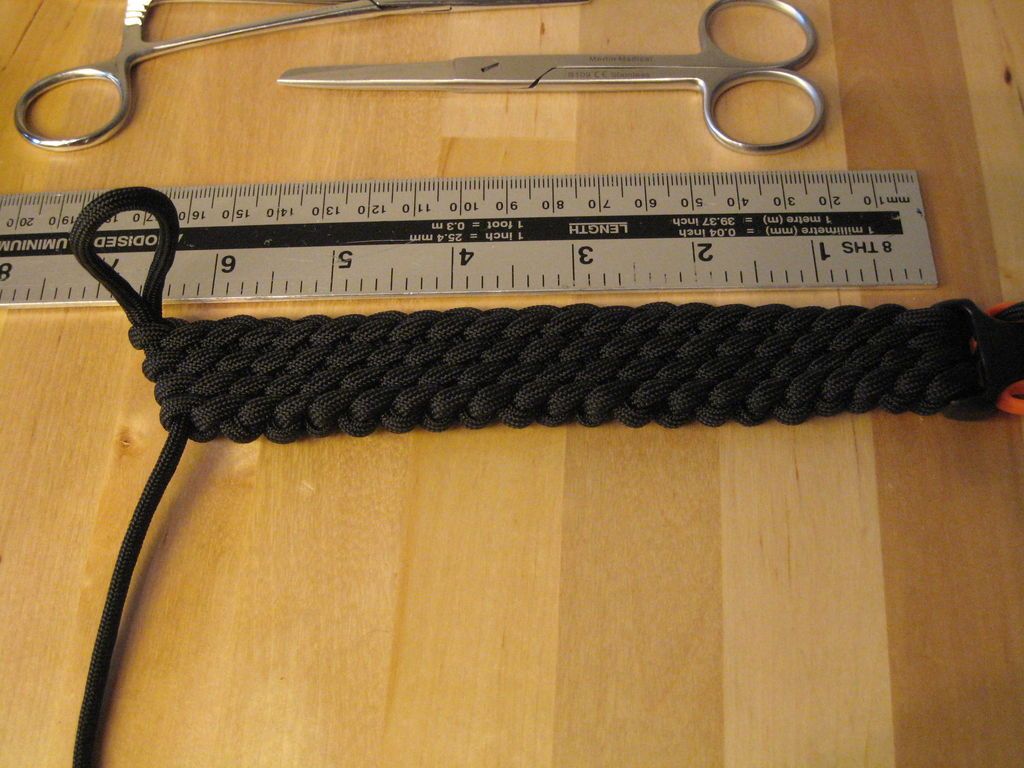
- To continue with your belt, simply repeat steps 3,4 and 5 over and over and over again until you get the desired length.
- This 6.5 inch length of belt uses 10 feet of cord.
- So for an average 32 inch waist you will use approximately 50 feet.
Step 7: Finishing your belt


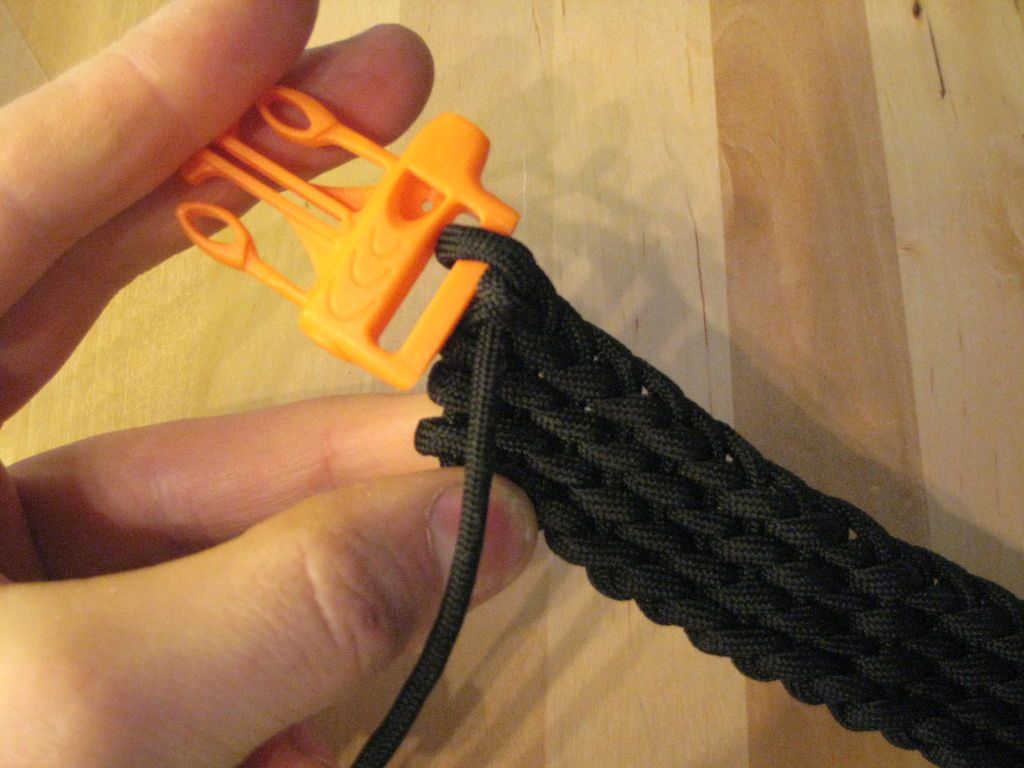

- Once you have reached the desired length of the belt, you can cut the cable from the main reel.
- Pull the working end all the way so it sticks out to the right.
- Separate your loops again slightly
- Get the other half of the buckle (make sure it is oriented the right way to fasten)
- Pass the working end through the buckle and then through the wire you exposed when separating the loops. Once you have looped it through the buckle and belt 4 times, you are ready to finish the belt.
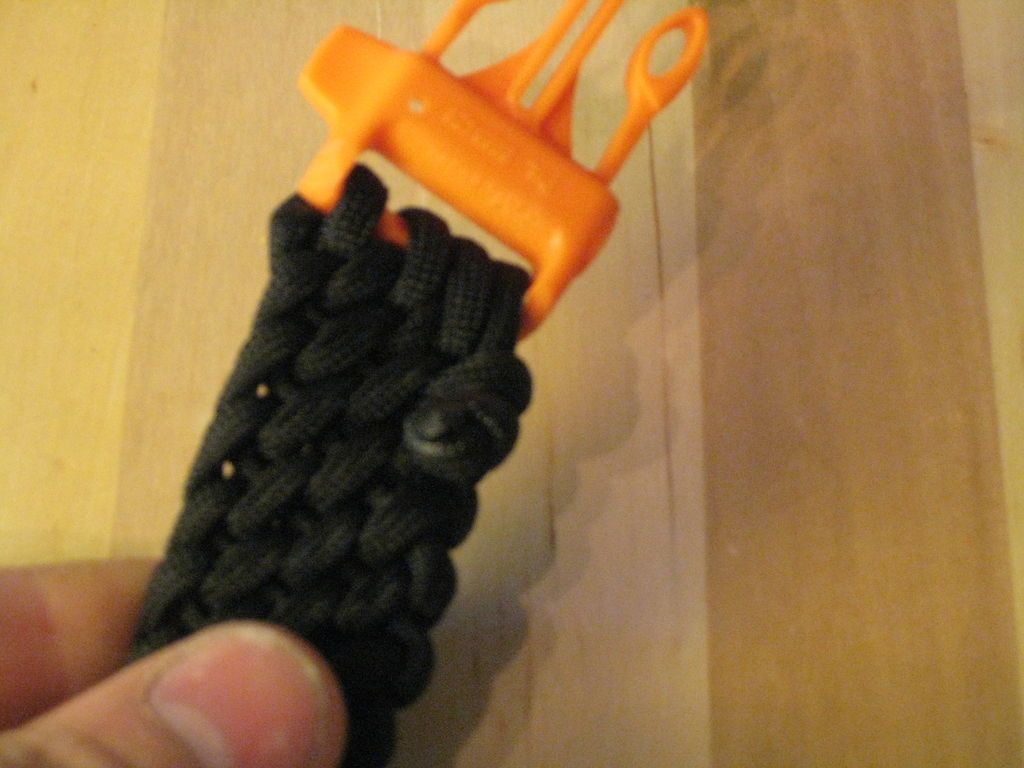
You have two options to finish.
- You can thread the end through any of the loops you want and, using the lighter, melt it into place on the belt.
- Pull the end through any loop you want and tie an overhand knot at the end to prevent it from coming through again.
The benefits of the second method are that you do not need scissors or anything else to free the end of the cable. If you need to untangle quickly, simply untie the overhand knot.
Step 8: How to use your belt


- To use your belt, simply untie the knot at the end of your cord.
- Undo the loops around the buckle (hold the buckle to draw attention)
- Pull the length of the cable back through the first 4 loops to free its working end
- Pull firmly on the working end and the entire belt will begin to unravel. From start to finish, you can undo the entire belt in about 20 seconds (a painful thought when you realize how long it took to do it).
- Alternatively, if you have a knife or a pair of scissors simply cut where shown, remove the end with the buckle and pull the rope you cut to untangle.
Paracord is a fantastic thing, but it cannot replacer to another pair of helping hands!
Step 9: Bracelet and Knot Diagram

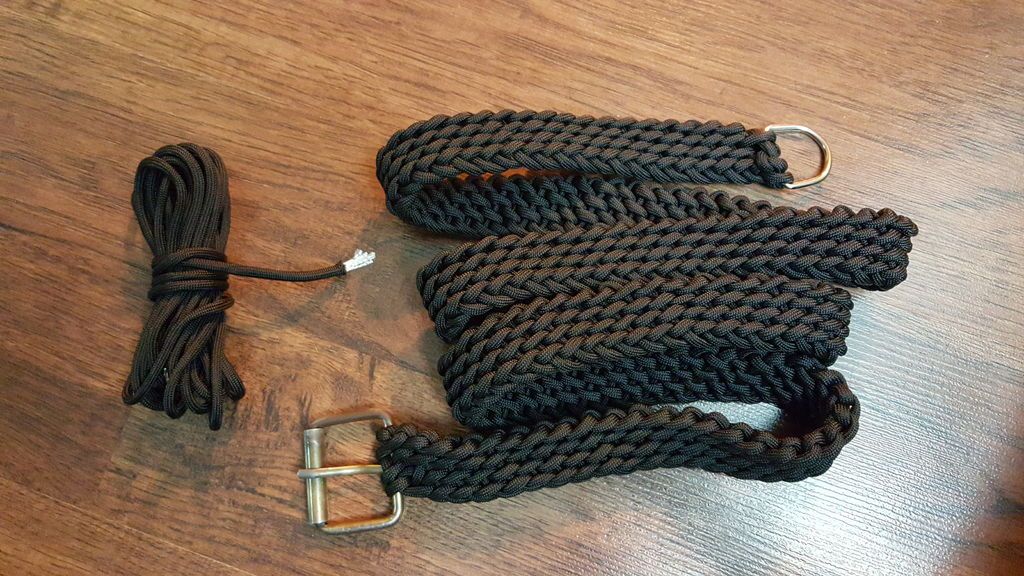

As I mentioned at the beginning of the article, you can use more or less cord to make the belt.
If you want a longer, wider cord on your belt, simply use 5 or 6 loops in each row instead of the 4 I used.
In theory, you can use as many loops as you want as long as your buckle is wide enough.
Likewise, if you want a thinner belt with less cord, use 3 loops as shown on the bracelet I made.
I made my belt after finding this diagram on the internet.
I would recommend anyone interested in Paracord crafts to purchase some of the many books on decorative and functional knots available.
Get more information at Perfectidea.com and on our Facebook for more How to Make a Paracord Belt (Nylon).
Popular Content
How to make a rocket stove for outdoors
Cardboard Drawers Lined with Jeans
Bedroom furniture with secret compartments!
Latest Articles
How to make a refrigerator out of insulating material: Practical step-by-step guide
How to make a Kilim for the Home: Complete Step by Step Guide
How to protect ourselves from accidents in our workplace: Complete prevention and safety guide
Related Content
Guide and Measurements to Make a Great and Resistant PVC Table!
Creating a Cool Laser Cutting Toolbox!
Chair Ideas to Add an Antique Touch
Great Magical Wooden Wallet!
Creative Home Decor Ideas to Transform Every Space
Refreshing your home starts with smart design choices that combine comfort, personality, and functionality. Whether you want to modernize a small apartment, upgrade outdoor areas, or create cozy rustic interiors, these trending ideas can completely change the atmosphere of your space.
Outdoor Spaces That Increase Style and Functionality
Outdoor living continues to dominate modern home trends. Homeowners are increasingly investing in practical entertainment zones inspired by these BBQ shed ideas, which create the perfect setup for gatherings and weekend cooking sessions.
First impressions also matter when designing exteriors. Elegant farm entrance gates design ideas help properties stand out while improving privacy and curb appeal.
Compact living solutions are also gaining popularity. These inspiring 16x40 shed house interior design ideas show how smaller spaces can still feel luxurious and functional.
To enhance patios and entryways, homeowners are adding stylish protection with these creative porch awning exterior DIY ideas that blend aesthetics with practicality.

Rustic and Cozy Interior Design Trends
Warm and natural interiors remain timeless. These charming rustic decor ideas combine wood textures, vintage accents, and earthy tones to create welcoming spaces.
Bedrooms are becoming more personalized with curated wall arrangements. Many homeowners use these stylish picture wall ideas for bedroom spaces to display memories and artwork creatively.
Textured wall treatments are another major trend. Installing a board and batten wall adds architectural character while keeping interiors elegant and modern.
Similarly, bold accent wall ideas can instantly transform plain rooms into eye-catching focal points without requiring a full renovation.
Smart Kitchen and Organization Inspiration
Functional kitchens are essential for modern homes. These practical kitchen wall cabinet ideas maximize storage while maintaining a clean and stylish appearance.
Organization also starts at the entrance. Well-designed mud room ideas help families keep shoes, coats, and daily essentials neatly arranged.
Colorful and Personalized Home Styling
Vibrant interiors are becoming increasingly popular thanks to playful dopamine decor ideas that use bright colors and joyful accessories to improve mood and energy.
Gallery walls also continue to evolve as a major decorative feature. These trendy gallery wall inspiration ideas offer creative ways to combine prints, photos, and statement art.
Young renters and new homeowners are especially embracing these stylish first apartment aesthetic ideas to create sophisticated interiors on a budget.
Finally, selecting the right shades can dramatically influence any room’s atmosphere. These modern trendy color ideas help homeowners choose palettes that feel fresh, elegant, and timeless.
Final Thoughts
From rustic charm and colorful interiors to outdoor entertaining areas and functional storage solutions, today’s home decor trends focus on creating spaces that feel both beautiful and livable. By combining smart layouts, modern textures, and personalized decorative elements, any home can become more stylish, comfortable, and inspiring.


