
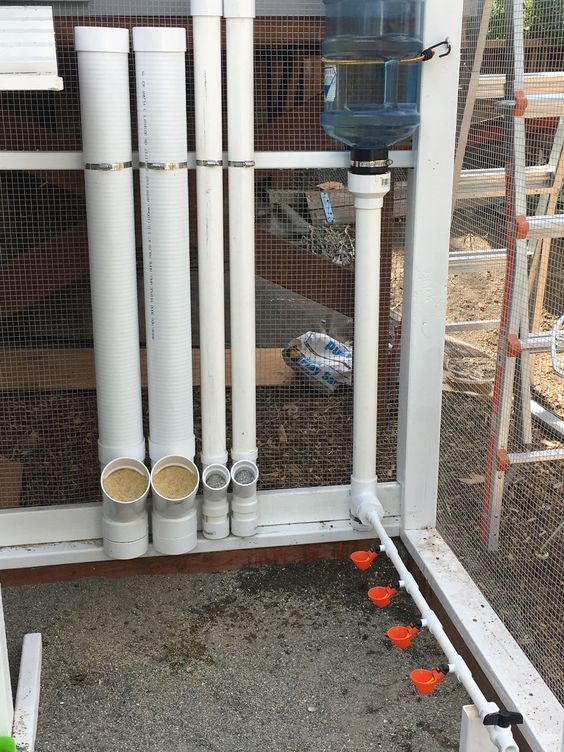
Waterer Made of PVC Pipes for Chickens, built with various PVC pipes and some ingenuity. It is not necessary to use any tool that is difficult to access or use, you can even do it with basic tools. Even a small child can build it. Below are the instructions to carry out this great project…
Step 1: Supplies
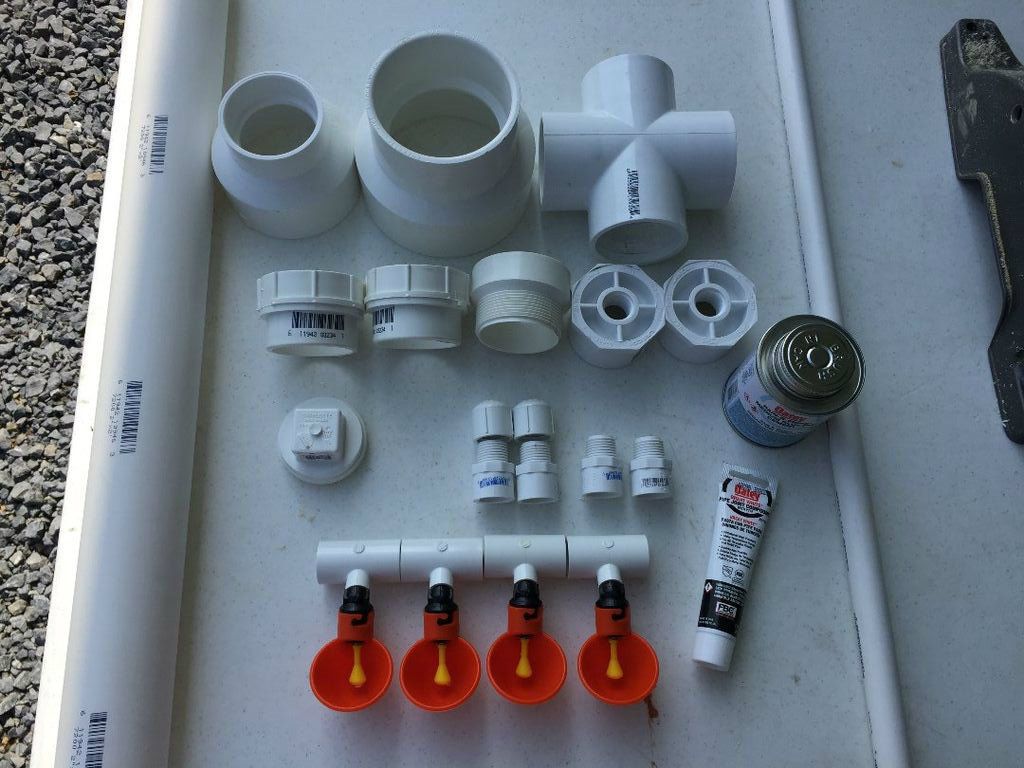

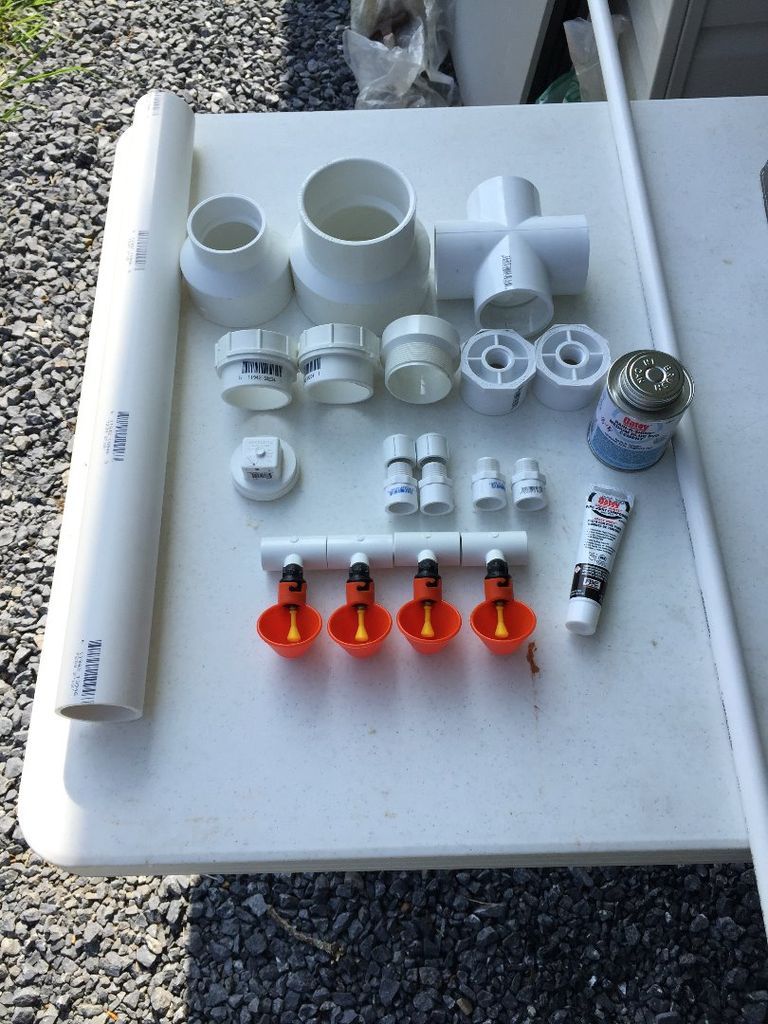
Here is a list of the supplies you will need for this project. I added a few pieces to the pipes to make them easier to disassemble and clean, but they could be left in to save money and simplify the project. I will explain each addition during the project.
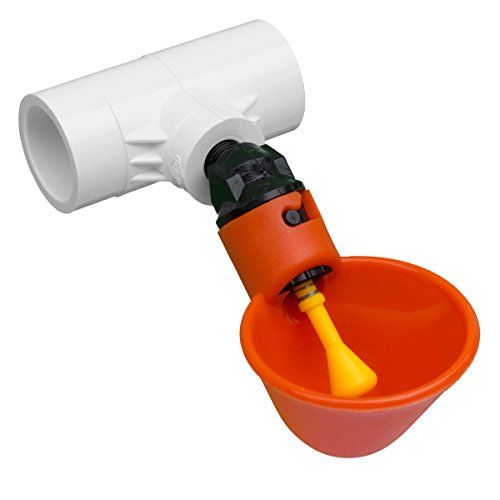
- 4 BeakTime Watering Cups
- 2 foot piece of 1/2 inch PVC pipe
- 2 foot piece of 2 inch PVC pipe
- 3 inch piece of 3 inch PVC pipe
- 4″ X 3″ PVC Coupling
- 3″ X 2″ PVC Coupling
- 4 1/2″ connectors (threaded male end)
- 2 1/2″ Threaded Caps
- 2 2″ Cleanout Drain Plug Connectors
- 2″ Cleanout Drain Plug (Threaded)
- 2" adapter
- 2″ 90 degree T connectors
- 2 2″ X 1/2″ Bearings
- Pipe joint compound
- PVC cement
- 3 gallon or 5 gallon water jug
- 3-foot 2x6 lumber
Step 2: Cut the necessary PVC
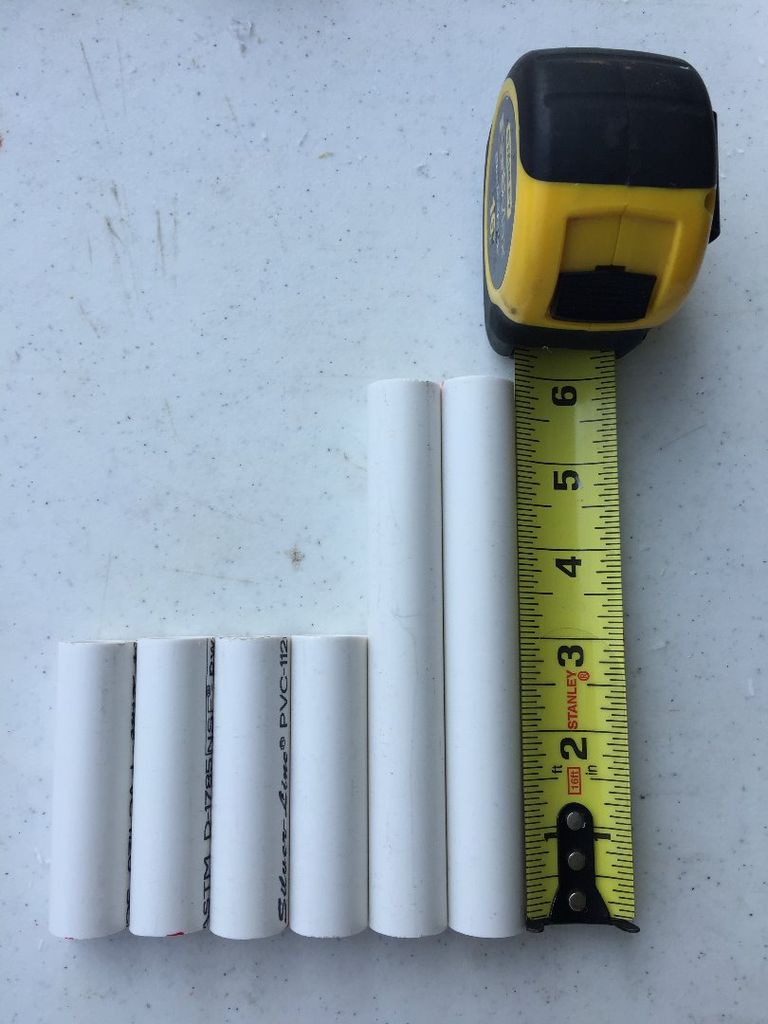
I used my compound miter saw to cut the PVC used in this project. It gives nice, clean edges.
Just remember to keep constant pressure on the pipe and saw blade, also try to move slowly.
Cut the following pieces:
- 1/2 inch pipe: Cut 2 pieces 6″ long and 4 pieces 3″ long
- 3-inch pipe: Cut a 3-inch section
While you get your saw out, cut the wood needed for the bracket. I cut 2 pieces 12″ long. Additionally, you need a 6-inch piece, with 45-degree angles on each end to make the support beam. The 6 inch length will be the longest length of the board.
Step 3: Put the Tee Connection together with the vertical shaft


First, assemble the T connection that will be on the base. Use the PVC cement to place the 2″ x 1/2″ ferrules on the left and right side of the T fitting.
Then place one of the adapters into the bottom opening.
Use joint compound on the plug and screw it to the cleanout adapter. Next, connect the 2″ pipe to the top opening (using cement).
On top of the 2″ pipe, glue the 2″ trap adapter connection. Set it aside to dry while you work on the horizontal beams.
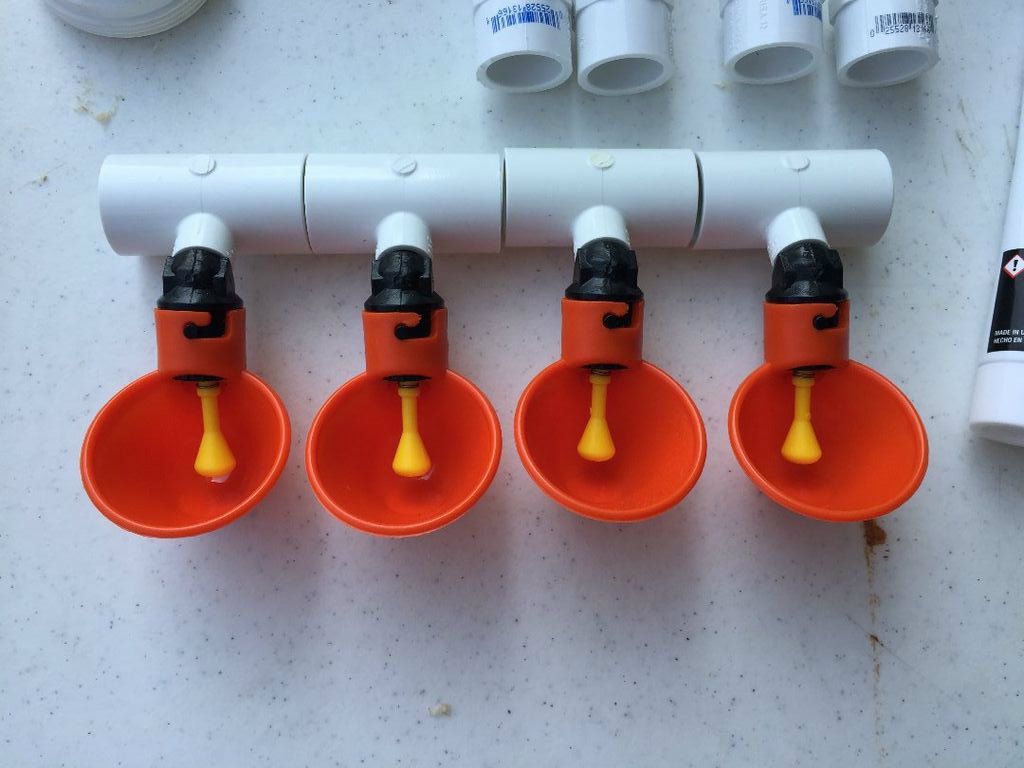
Step 4: Construction of horizontal beams
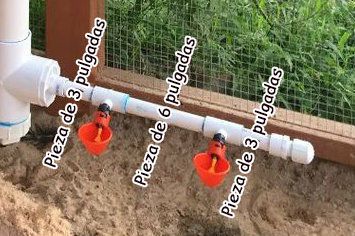
Start with 3″ 1/2″ tubing and glue on one of the watering rate couplers. I chose to order the ones with the 1/2″ PVC couplers, but they have other ways to add them to your system. This is the best way for us.
Next, add the 6-inch piece to the other end of the cup coupler. The next piece will be another cup coupler, followed by another piece of 3″ tubing.
Be sure to align the cups so they are straight. Repeat these steps to build the other side of the beam. On the outside end of each joist, install the 1/2″ adapters and screw in the plug using the PVC compound.
Add the other two 1/2″ adapters to the left and right sides of the tee with the PVC compound. Once both are in place, cement the left and right horizontal crossmember making sure the cups areThey are aligned and the cups sit flat so that water does not spill easily.
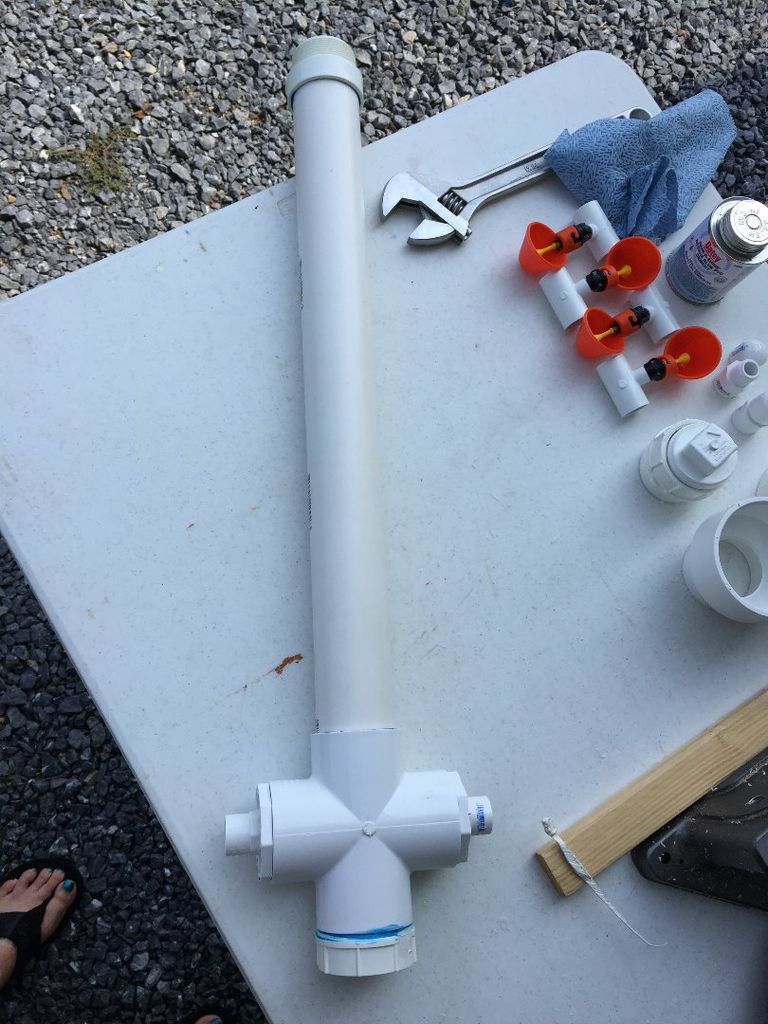
Step 5: Building the top
To connect the 4″ x 3″ coupler and the 3″ x 2″ coupler, use the 3″ PVC pipe and secure them with cement.
You can use a longer piece to give the top more height, but I find that the closer the jug is to the wooden stand, the less likely the jug will fall or wobble.
Add a cleaning adapter to the 2″ opening of the glued couplers and allow all parts to dry for 2 hours or whatever the recommendations of the pipe cement you are using.
Step 6: Mounting Bracket

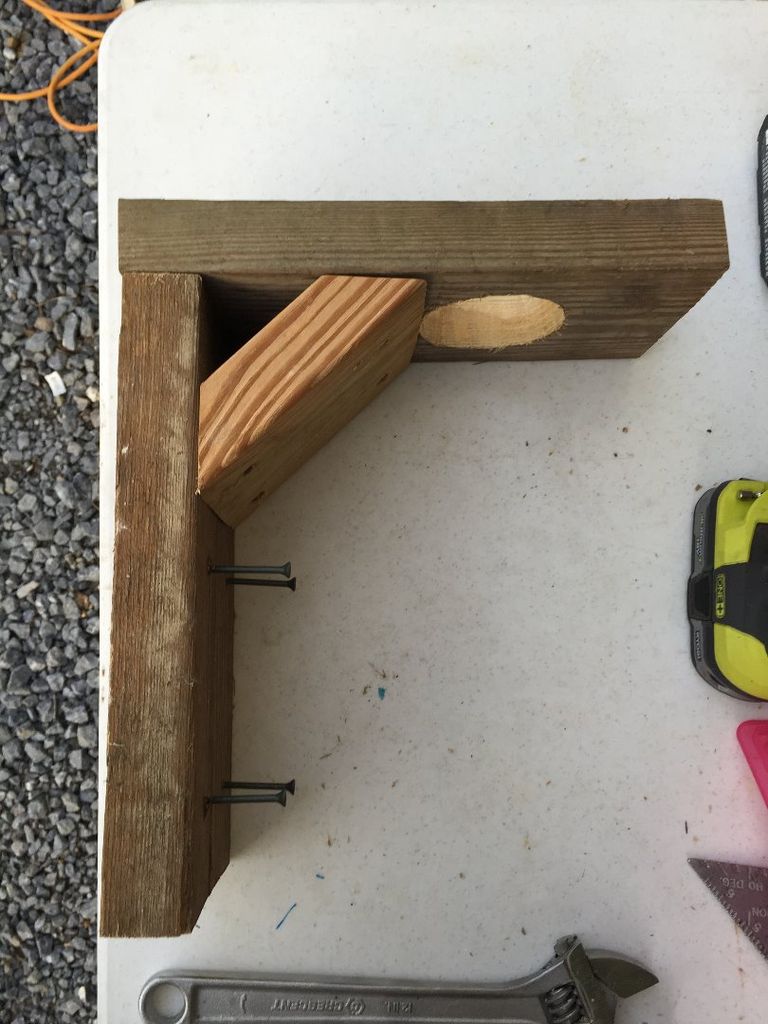
You will need to determine where the neck of the water bottle will be on the platform of the holder. Drill a 3-inch hole at that point so the cleanout adapter on the top piece will easily seat inside the opening. You will need space to be able to screw the cleaning adapter into the trap adapter on top of the lower shaft.
I used a jigsaw to cut the opening, however I would recommend a hole saw if one is available.
Ignore the first hole drawn that has the X in the middle. I chose not to use that one. I decided to push it a little further to have enough room for the support angle to be as long as possible. I wanted to make sure the holder was sturdy enough to support the weight of the water bottle when it is full.
Screw the top piece to the vertical piece that will attach to the stud or other area where you plan to install the waterer. Next, add the bracket piece to the bracket with screws. Remove the screws on the upright board to make it easier to position once the height for the bracket is determined.
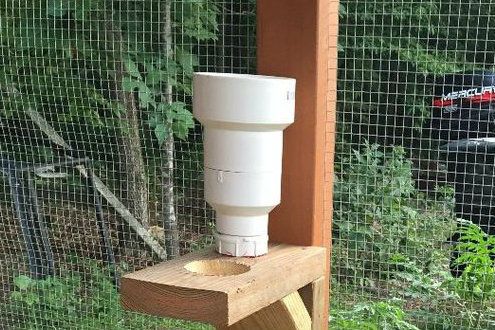
Step 7: Hang the Stand

To determine the height of the stand, place the top section into the hole in the stand and screw the bottom to the top. When determining the height of the watering cups, mark where the top of the stand should be.
Disconnect the top and bottom parts from the water. Mount the bracket securely in place. I rode mine to a stallion in our coop's running area. I centered the 2x6 board on the 2x4 and it worked great.
I'm also installing a piece of 2x4 to run behind the water jug and take up the space between the 2x4 stud and the jug. This will also give me an extra place to attach eye bolts and use bungee cords to hold the water jug on the bolt.
Step 8: Final!
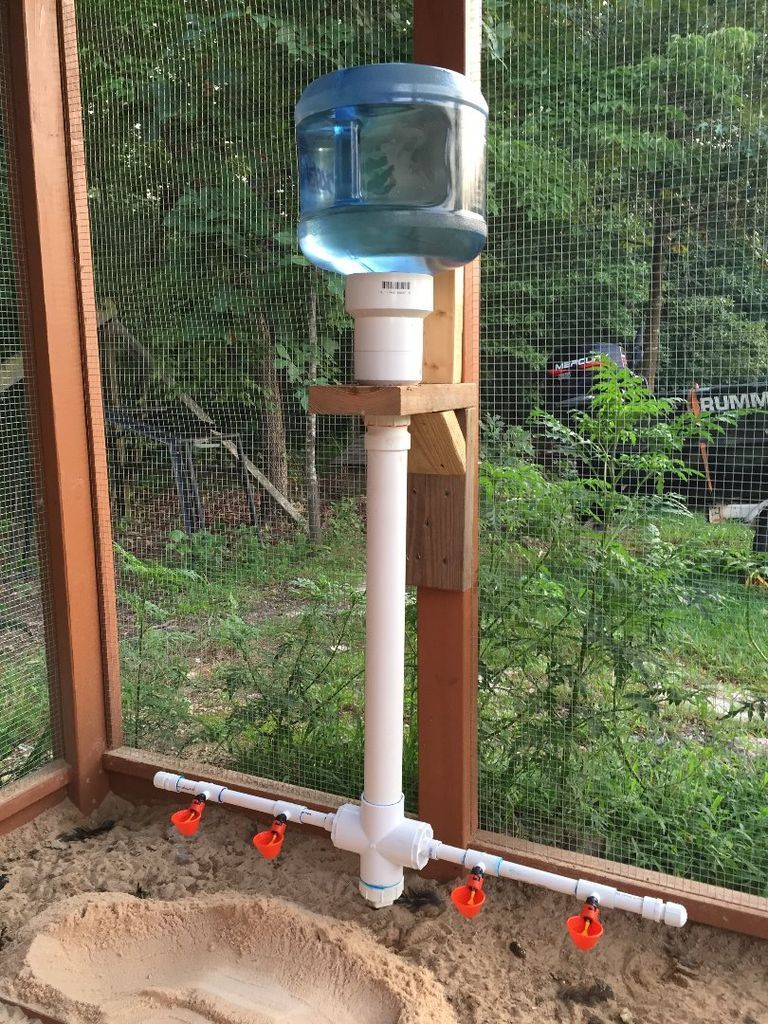
Using PVC joint compound, connect the top and bottom snugly. Check all joints to make sure they are tight and ready for water. Open the top of the jug and insert the neck into the top.
Watch for drips and tighten when necessary.
Note:
I have discovered that my chicks like to walk behind the canopy beam, which sometimes causes the waterer to squirm. I will add a new bracket with fixing points to prevent this from happening. I haven't caused any problems, others have forced me to come out and put it in its place. I just want to make sure it's as safe as it can be.
I hope this is useful to you! See you soon!
More Similar Ideas:
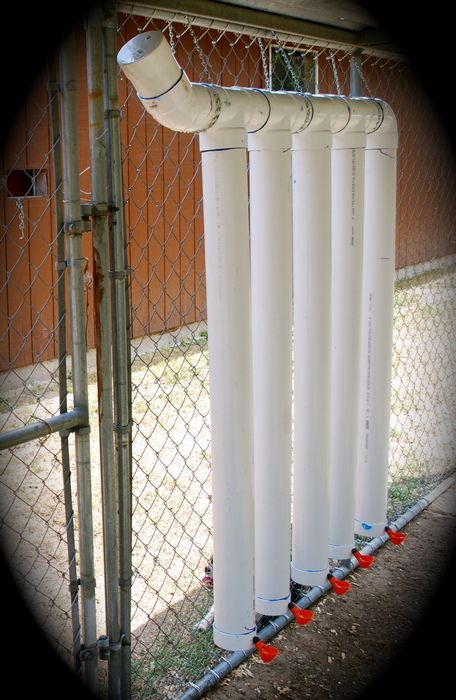
Get more information at perfectionidea.com and on our Facebook for more Waterers Made of PVC Pipes for Chickens.
- Tags
- PVC pipes
Popular Content
How to make a rocket stove for outdoors
Cardboard Drawers Lined with Jeans
Change the facade of your home with simple steps!
Latest Articles
How to make a refrigerator out of insulating material: Practical step-by-step guide
How to make a Kilim for the Home: Complete Step by Step Guide
How to protect ourselves from accidents in our workplace: Complete prevention and safety guide
Related Content
Steampunk Bedroom Ideas
Manufacturing Seats with Shock Absorbers Reusing Parts of a Disused Car!
Ideas you can do by reusing old cutlery
Furniture Ideas that Give Life to a Child's Bedroom
Creative Home Decor Ideas to Transform Every Space
Refreshing your home starts with smart design choices that combine comfort, personality, and functionality. Whether you want to modernize a small apartment, upgrade outdoor areas, or create cozy rustic interiors, these trending ideas can completely change the atmosphere of your space.
Outdoor Spaces That Increase Style and Functionality
Outdoor living continues to dominate modern home trends. Homeowners are increasingly investing in practical entertainment zones inspired by these BBQ shed ideas, which create the perfect setup for gatherings and weekend cooking sessions.
First impressions also matter when designing exteriors. Elegant farm entrance gates design ideas help properties stand out while improving privacy and curb appeal.
Compact living solutions are also gaining popularity. These inspiring 16x40 shed house interior design ideas show how smaller spaces can still feel luxurious and functional.
To enhance patios and entryways, homeowners are adding stylish protection with these creative porch awning exterior DIY ideas that blend aesthetics with practicality.

Rustic and Cozy Interior Design Trends
Warm and natural interiors remain timeless. These charming rustic decor ideas combine wood textures, vintage accents, and earthy tones to create welcoming spaces.
Bedrooms are becoming more personalized with curated wall arrangements. Many homeowners use these stylish picture wall ideas for bedroom spaces to display memories and artwork creatively.
Textured wall treatments are another major trend. Installing a board and batten wall adds architectural character while keeping interiors elegant and modern.
Similarly, bold accent wall ideas can instantly transform plain rooms into eye-catching focal points without requiring a full renovation.
Smart Kitchen and Organization Inspiration
Functional kitchens are essential for modern homes. These practical kitchen wall cabinet ideas maximize storage while maintaining a clean and stylish appearance.
Organization also starts at the entrance. Well-designed mud room ideas help families keep shoes, coats, and daily essentials neatly arranged.
Colorful and Personalized Home Styling
Vibrant interiors are becoming increasingly popular thanks to playful dopamine decor ideas that use bright colors and joyful accessories to improve mood and energy.
Gallery walls also continue to evolve as a major decorative feature. These trendy gallery wall inspiration ideas offer creative ways to combine prints, photos, and statement art.
Young renters and new homeowners are especially embracing these stylish first apartment aesthetic ideas to create sophisticated interiors on a budget.
Finally, selecting the right shades can dramatically influence any room’s atmosphere. These modern trendy color ideas help homeowners choose palettes that feel fresh, elegant, and timeless.
Final Thoughts
From rustic charm and colorful interiors to outdoor entertaining areas and functional storage solutions, today’s home decor trends focus on creating spaces that feel both beautiful and livable. By combining smart layouts, modern textures, and personalized decorative elements, any home can become more stylish, comfortable, and inspiring.


