


Today we will show you how to build a modern planter box with iron legs, which you can use for your plants.
Steps to build a planter box with iron legs:
#1: Tools and materials
Materials used in pot boxes:

- Steel mesh
- Plastic sheet
- 1 ¼” Outside Rated Screws
- 2″ Exterior Rating Screws
- Waterproof wood glue
- 2 ½” Outside Rated Screws
- Enamel spray paint
Tools used in pot boxes (affiliate):
- Miter saw
- Cordless drill
- Sander
- Pocket hole template
#2: Preparation of the material


- The first step in this project was to split the cedar boards into their final lengths.
- This construction is made from 1x4 cedar, 1x2 and pressure treated 2x6 pine.
- Cutting the boards lengthwise could be done with a circular saw, but I used my miter saw with a stop block and things went faster.
- After breaking down the cedar boards, I was able to begin assembling the panels that form the sides of the planter boxes.
- The short panels are made up of four of the 1×4 pieces and two of the 1×2 pieces.
#3: Panel assembly


- First, I marked 1 ½” from the bottom edge of the bottom board, which will indicate where I need to leave space for the 2x6s that will be added later.
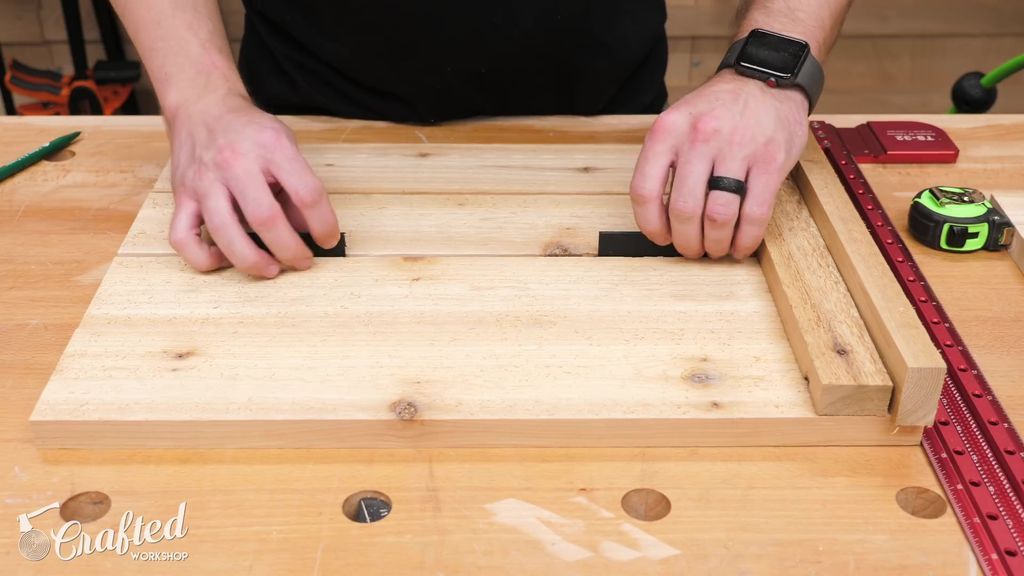
- Next, I squared up all the boards and laid out the 1x2 pieces. One of the pieces is only used to calculate the spacing, since these panels are blocked by having this offset in the corners.
- With the 1x2 spacer in place, I added glue where the other 1x2 would join, used some ⅛" spacers to set the distance between the boards, and then attached the 1x2 to the 1x4 behind it with some 1" broach nails.
- As you can see, I'm using a square to make sure things are right during this process, and this is extremely important.
- I continued moving down the panel, using the 'spacers' between each board, and then repeated the process on the other end of the panel.
- After building each panel, I went back and reinforced them with some 1 ¼” screws.
- This actually made the panels much stronger and should help them hold up to the elements much better.
#4: Long panels


- I was making two of these planter boxes, so I then repeated the process three more times to get my other short side panels, and then I was able to move on to the long side panels.
- These panels are built in exactly the same way, first joining the 1x2s with glue and nails, and then reinforcing them with screws.
- The only difference with these longer panels is the additional vertical support in the center of the panel, just to prevent the boards from flexing under the weight of the soil and plants.
- One thing I should also mention is that the 1x2 pieces should roughly line up with the top board.
- Doing so will ensure that your panels are the same size.
#5: Joining Panels Together


- Once all the panels were put together, I could begin assembling them into the planter boxes.
- Here you can see how the 1x2s contact each other at the corners, creating something along the lines of a locking fin joint at each corner.
- I also made sure to assemble the panels with the top edge resting on my work table, to ensure all the top edges were aligned.
- To make sure the connection between the corners was tight, I clamped them together, making sure there were no gaps, and then I could add some 2″ screws through the short side panels into the 1x2 of the long panel.
- I only added a screw to each corner at this point, so the panels could still pivot, so I could still hook the other end of the panels.
- Next, I turned the planter box over, fastened the top ends of the panels, and then added more screws.
- The screws should be about 1″ from the corner of the box, to ensure they connect with the 1x2 on the other panel.
#6: Add the bottom


- The bottom is made up of 2x6 pieces, and the first measurement was made to confirm the length of the pieces I needed.
- The bottom pieces are attached to the panels with pocket screws, so I went ahead and drilled three pocket holes in the end of each board.
- Setting up the settings here was a little tricky, but in the end I realized that the jig was set to the 1 ⅜" setting and the depth stop collar on the bit was set a little deeper than 1 ½".
- To install the bottom boards, I simply lined up the bottom edge of the 2x6 with the bottom edge of the panel, clamped it in place, and then drove in some 1 ¼” pocket screws.
- On this first board, I used these pocket hole clamps, but they actually left dents in the cedar, so I switched to the parallel clamps for the rest of the boards.
- With one board installed and my template settings dialed in, I could drill holes in the rest of the boards.
- This pressure treated wood was so wet it was clogging the drill bit, but I got over it, it just made a mess.
- Once all the pocket holes were drilled, I was able to install the rest of the bottom boards.
- As you can see, there is about a 1 ¼” gap between each of the boards to allow for drainage.
- You don't need to go crazy trying to get this measurement accurate, as it doesn't really matter.
- I just worked my way in from the ends, leaving a small gap and holding the boards in place while driving the screws.
#7: Adding top borders


- The last pieces of wood to add to the planter boxes were the trim around the top edges, but I sanded all the corners flush first before doing that, to make sure the trim was on properly.
- Next, I measured my actual finished length, about 47 ½ , and then moved to the saw to cut the angles.
- I would recommend a miter saw here.
- To cut the molding, I first cut a 45-degree miter on one end, then turned the board over, marked my length, and cut an opposite 45-degree miter on the other end.
- I always leave these pieces long at first, and then trim them to final size based on actual dimensions.
- After getting a piece the correct length, I used it as a template for the second long cutting piece, which you see me doing here.
- With the two long pieces cut to size, I attached them to the planter box with glue and 1 ½” brad nails.
- The 1x2 studs were a great place to drive nails here.
- I also made sure the edges of the 1x2s were flush with the outside of the panels.
- Once the long pieces were installed, I measured the length of the short pieces and cut them the same way on the miter saw.
- This is the fit you want, with the edge of the 1x2 flush with the panel. Also, it looks like there is a miter gap here, but the pieces are slightly different thicknesses.
- If you work with this type of cedar plank, you'll notice all kinds of inconsistencies like this, but fortunately it's not something that a little sanding can't fix.
#8: Pot lining


- Speaking of which, with all the wood pieces installed, I might go ahead and give the outside of the planter box a good sanding with 80 grit sandpaper.
- The key areas to focus on here are the corners, which you want perfectly aligned, as well as the trim.
- I also made sure to round the corners, since the angle iron I used for the legs has a rounded inside corner.
- After sanding, it was time to prepare this box for some planting.
- First, I lined the bottom with some galvanized steel mesh, to prevent dirt from leaking out of the gaps in the bottom if the plastic breaks.
- I used some to cut the mesh to size, formed it to fit the bottom of the planter, and then stapled it in place with ½” staples.
- I cut away the areas where the mesh came in contact with the 1x2 studs, so the mesh could lay flat.
- I repeated this process on the other half of the planter outside the chamber, making sure the mesh overlapped in the middle and then I could add some plastic to line the planter.
- Here I used a 2mil plastic drop cloth, which wasn't as thick as I wanted, so I folded it to make sure the plastic wouldn't break under the weight of all the dirt and then stapled it in place.
- After installing the plastic, I made some holes with a screwdriver for drainage.
#9: Steel legs


- The last step in this build was the legs, which I made from 2” angle iron. Since I used steel here, I cut the pieces on my hacksaw, but you could also use the aluminum angle and cut it on a regular miter saw.
- You can also get angle iron from a steel yard and they would cut the pieces to size for you.
- I set up a quick stop block to cut the pieces to size, as it is very important that they all match perfectly.
- After cutting the pieces to size, I rounded off all the sharp edges with my belt grinder, but an angle grinder and flap disc would also work great.
#10: Holes and paint on the legs


- Next I needed to drill holes for the screws I used to attach the legs to the planter boxes. I wanted all of these holes to line up nicely, so I marked them on the inside faces of the angle iron.
- A tip here, I love these paint pens for marking on steel.
- With all the hole locations marked, I drilled the holes in the drill press, making sure to use cutting fluid to prevent the bit from getting too hot.
- Once all the holes were drilled, I cleaned all the parts with Acetone to remove the paint pen, cutting fluid, and any other surface contaminants, and then sprayed a few coats of flat black enamel paint.
#11: Finishing
Our planter box with iron legs turned out excellent, and is ready to use.


- After letting the paint dry, I attached the legs to the corners of the planter boxes with construction adhesive and screws.
- I used 1 ¼” screws for the top two holes, but you could use 2 ½” screws in the bottom holes since the hole fit into those bottom 2x6 pieces.
- One thing to note is that there may be a screw under some of the holes, depending on where you placed the screws in the corners of the panels before.
- Also, I probably should have pre-drilled these holes, since I got a bit of clearance.
- The last little detail of this build was using the same flat black spray paint to touch up the screw heads to match the legs, then I could fill the planter boxes.
- Luckily, my mom was in town when I built these potting boxes and she's a master gardener, so we bought a bunch of plants and soil to fill the boxes and made them look great.
And with the added plants, these planter boxes were made!
Popular Content
How to make a rocket stove for outdoors
Cardboard Drawers Lined with Jeans
Ideas and Advantages of Window Grilles for the Home!
Latest Articles
How to make a refrigerator out of insulating material: Practical step-by-step guide
How to make a Kilim for the Home: Complete Step by Step Guide
How to protect ourselves from accidents in our workplace: Complete prevention and safety guide
Related Content
Ideas for Modifying a Wine Barrel in a Campfire!
Build Your Own Pallet Furniture with These Ideas
Super Creative Fire Pits
Auxiliary Tables Made with Industrial Pipe
Creative Home Decor Ideas to Transform Every Space
Refreshing your home starts with smart design choices that combine comfort, personality, and functionality. Whether you want to modernize a small apartment, upgrade outdoor areas, or create cozy rustic interiors, these trending ideas can completely change the atmosphere of your space.
Outdoor Spaces That Increase Style and Functionality
Outdoor living continues to dominate modern home trends. Homeowners are increasingly investing in practical entertainment zones inspired by these BBQ shed ideas, which create the perfect setup for gatherings and weekend cooking sessions.
First impressions also matter when designing exteriors. Elegant farm entrance gates design ideas help properties stand out while improving privacy and curb appeal.
Compact living solutions are also gaining popularity. These inspiring 16x40 shed house interior design ideas show how smaller spaces can still feel luxurious and functional.
To enhance patios and entryways, homeowners are adding stylish protection with these creative porch awning exterior DIY ideas that blend aesthetics with practicality.

Rustic and Cozy Interior Design Trends
Warm and natural interiors remain timeless. These charming rustic decor ideas combine wood textures, vintage accents, and earthy tones to create welcoming spaces.
Bedrooms are becoming more personalized with curated wall arrangements. Many homeowners use these stylish picture wall ideas for bedroom spaces to display memories and artwork creatively.
Textured wall treatments are another major trend. Installing a board and batten wall adds architectural character while keeping interiors elegant and modern.
Similarly, bold accent wall ideas can instantly transform plain rooms into eye-catching focal points without requiring a full renovation.
Smart Kitchen and Organization Inspiration
Functional kitchens are essential for modern homes. These practical kitchen wall cabinet ideas maximize storage while maintaining a clean and stylish appearance.
Organization also starts at the entrance. Well-designed mud room ideas help families keep shoes, coats, and daily essentials neatly arranged.
Colorful and Personalized Home Styling
Vibrant interiors are becoming increasingly popular thanks to playful dopamine decor ideas that use bright colors and joyful accessories to improve mood and energy.
Gallery walls also continue to evolve as a major decorative feature. These trendy gallery wall inspiration ideas offer creative ways to combine prints, photos, and statement art.
Young renters and new homeowners are especially embracing these stylish first apartment aesthetic ideas to create sophisticated interiors on a budget.
Finally, selecting the right shades can dramatically influence any room’s atmosphere. These modern trendy color ideas help homeowners choose palettes that feel fresh, elegant, and timeless.
Final Thoughts
From rustic charm and colorful interiors to outdoor entertaining areas and functional storage solutions, today’s home decor trends focus on creating spaces that feel both beautiful and livable. By combining smart layouts, modern textures, and personalized decorative elements, any home can become more stylish, comfortable, and inspiring.


