


3 Designs of Wooden Luggage Rack Roof Support for your Car, which is very simple to make and will help you transport whatever you want.
Step 1: The reason

My wife and I enjoy many outdoor activities, including camping, biking, cross-country skiing, canoeing, and kayaking. We generally use our truck to transport some of this equipment. We also own a 2010 Mazda 5 pickup truck that unfortunately did not include a roof rack.
Using our van would be more economical to transport skis, a kayak and other camping equipment.
I recently discovered that the Mazda 5 (and probably many other vehicles) actually have four bolt holes in the roof, allowing a grill to be easily attached to the vehicle.
These holes are covered with a plastic clip that can be easily removed. After discovering these holes, I looked into purchasing a roof rack system for my truck. The cost of most roof racks was quite expensive. That is the reason for this project.
Step 2: Tools and materials used
To complete this project, I used the following:
- Table saw
- Miter saw
- Router
- Sander
- Drill and bits of different sizes
Reclaimed material: oak pallet wood, satellite dish brackets, broken deck swings, broken office chair armrests
- Waste plywood
- Flaxseed oil
- Various screws, U-bolts.
- Airplane cable
Step 3: Wood for pallets


I love building with wood, so I decided to make the roof bar out of oak wood. I used repurposed oak from large old shipping pallets that I got for free from a local farm implement dealer.
The wood is solid oak and comes in a variety of dimensions.
The largest pieces I have found are 5″ x 8″ x 11 feet long.
This wood is usually quite rough and weathered, so I use my table saw and sometimes my thickness planer, to cut it to the dimensions I needed for some of the projects.
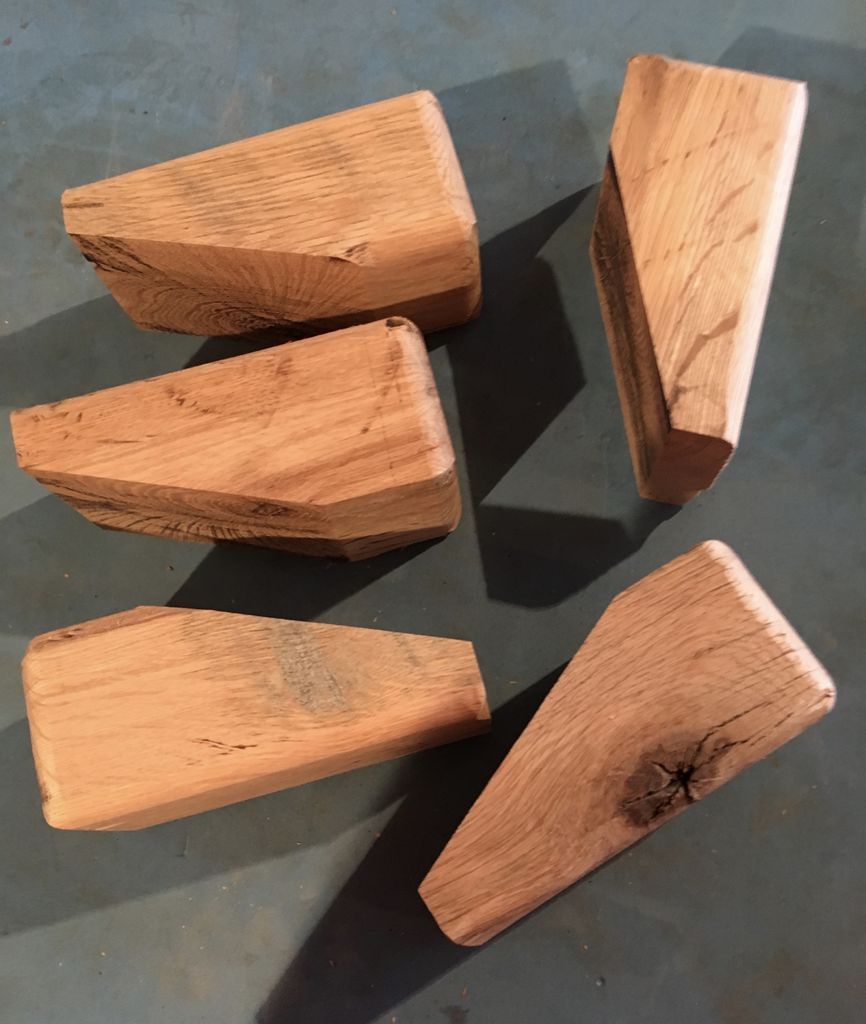
Step 4: Make the base blocks


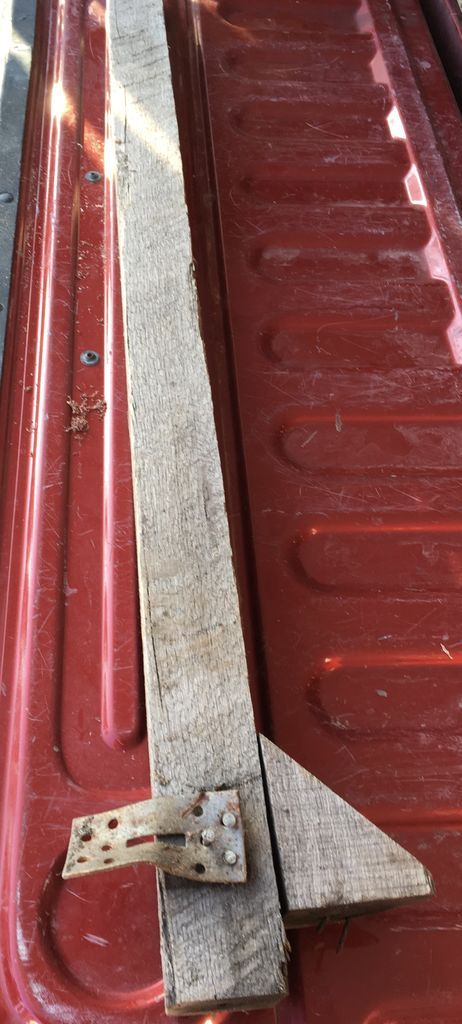
For the first part of this project, I used a piece of oak about 3.5″ square.
Using my table saw, I cut away the rough edges of the wood to reveal the pretty oak underneath.
I then cut the wood into four 6″ long pieces and then cut a bevel on each end of these four blocks, as shown in the picture.
To give them a nice round edge, I used a round tip on my Router. Finally, I finished the blocks by sanding them lightly.
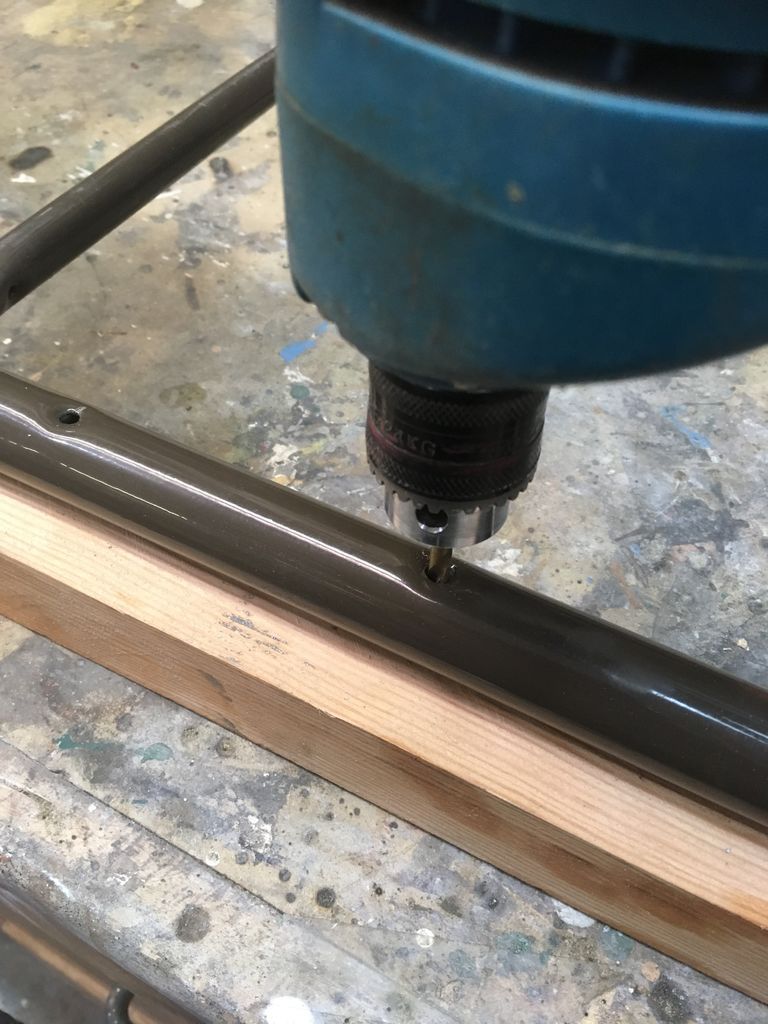
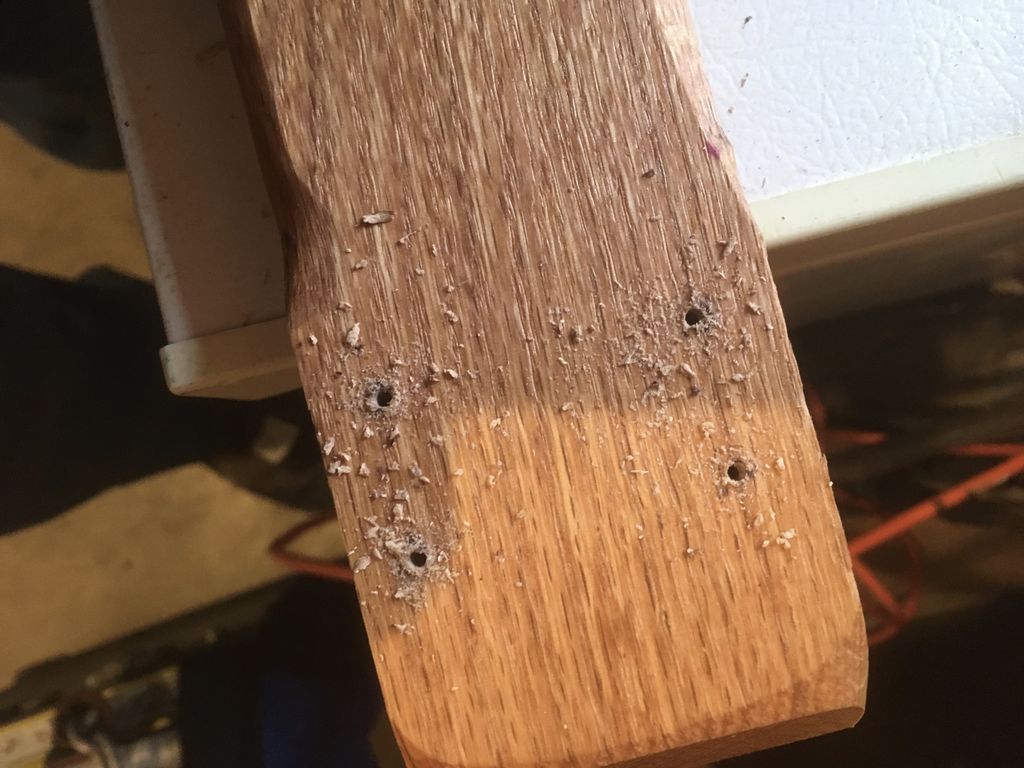
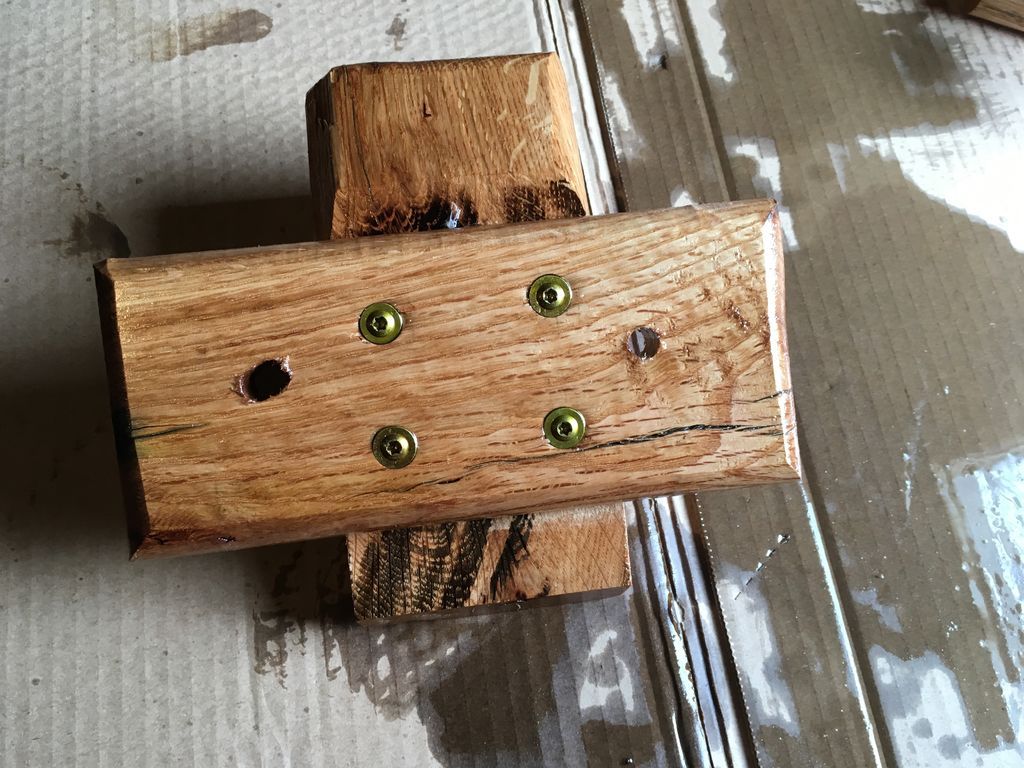
Step 5: Drill the holes in the blocks

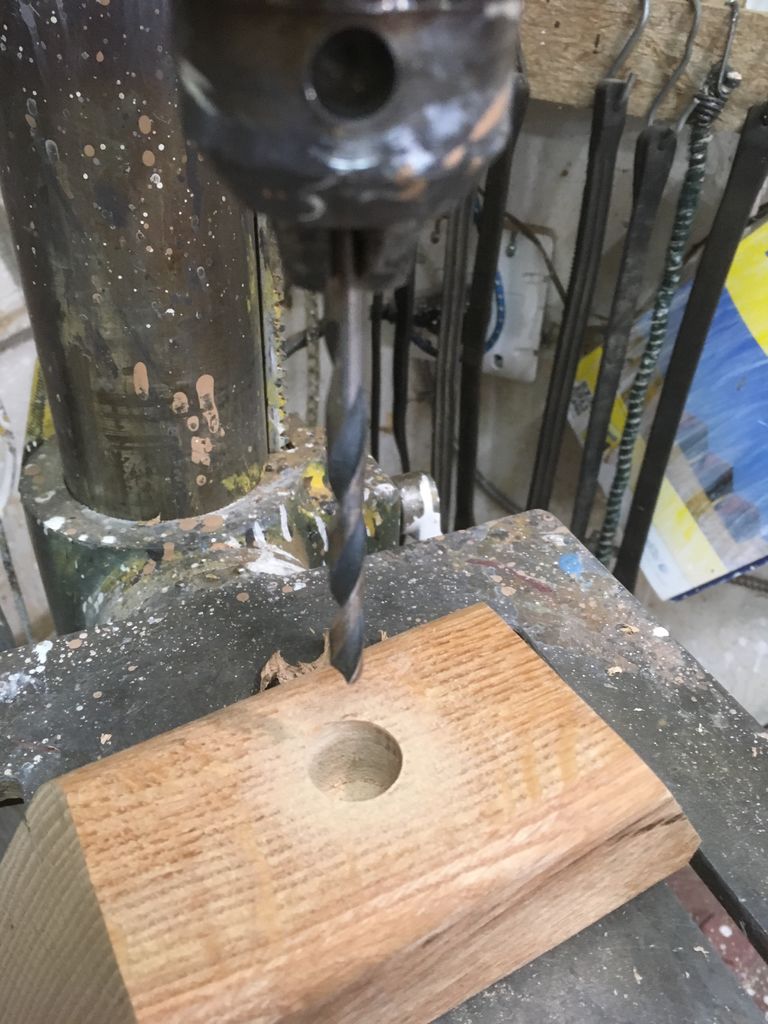

I drilled a large 1 inch hole in the center of these blocks. This hole was drilled approximately halfway through the block.
I then drilled a smaller 3/8″ hole through the remaining section of the block. I will use this hole to screw the block to the ceiling.
Step 6: Open the holes in the roof of the car


These four blocks will be the base points of the rack. To attach the blocks to the roof, I removed the plastic clips covering the bolt holes in the roof.
By trial and error, I determined that the bolt holes take a metric 6 bolt size.
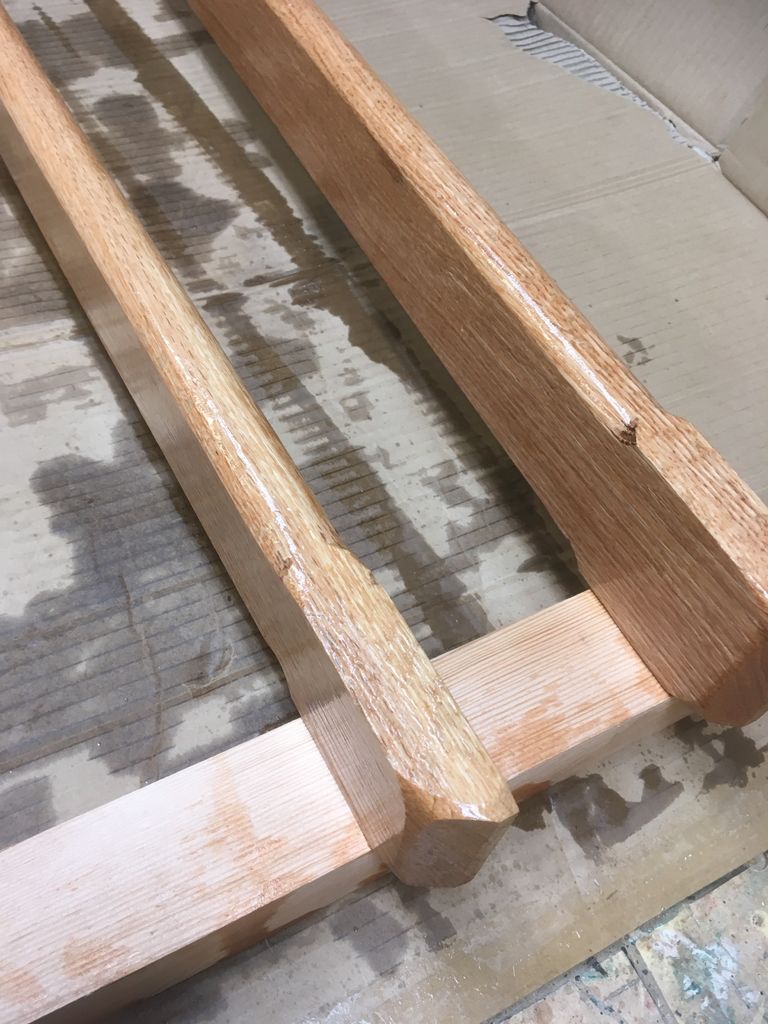
Step 7: Finishing the base block
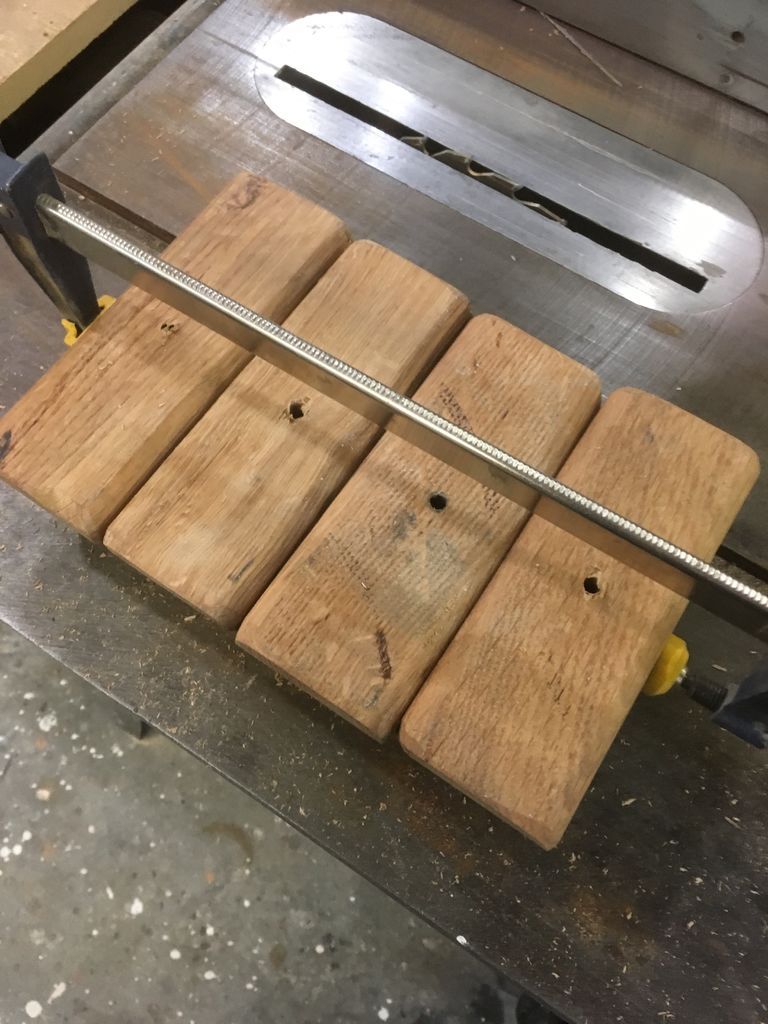


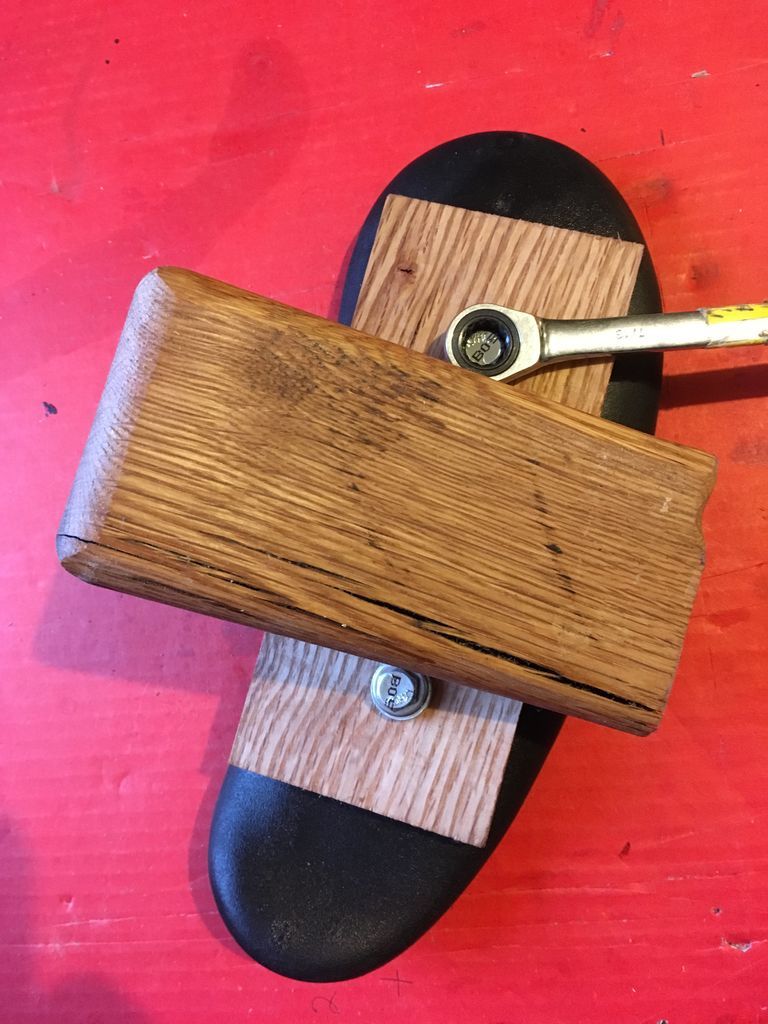
Before placing the blocks, I decided to cut a 3″ channel in the top of the blocks. This notch would be approximately 1/4″ deep and 3″ wide. The channel will be used to support the rails that will span the roof.
To cut the channel, I squeezed the four blocks together (as shown). Using my table saw, with the depth set to about 1/4″ and the table saw fence 2″ from the blade, I made the first cut on the four blocks.
Then, adjusting the distance of the fence about 1/8″ further from the blade, I made the second cut. I continued to adjust the fence further and further away from the blade, finally finishing the channel I wanted.
To protect the oak from the elements, I coated the blocks with linseed oil.
I used this instead of a urethane coating because linseed oil absorbs into the wood. This will allow me to redo the wood whenever necessary without having to sand it.
NOTE:
To add an extra level of strength to these blocks, I plan to coat the blocks with marine epoxy resin and fiberglass.
Step 8: Attach Base Blocks to Roof

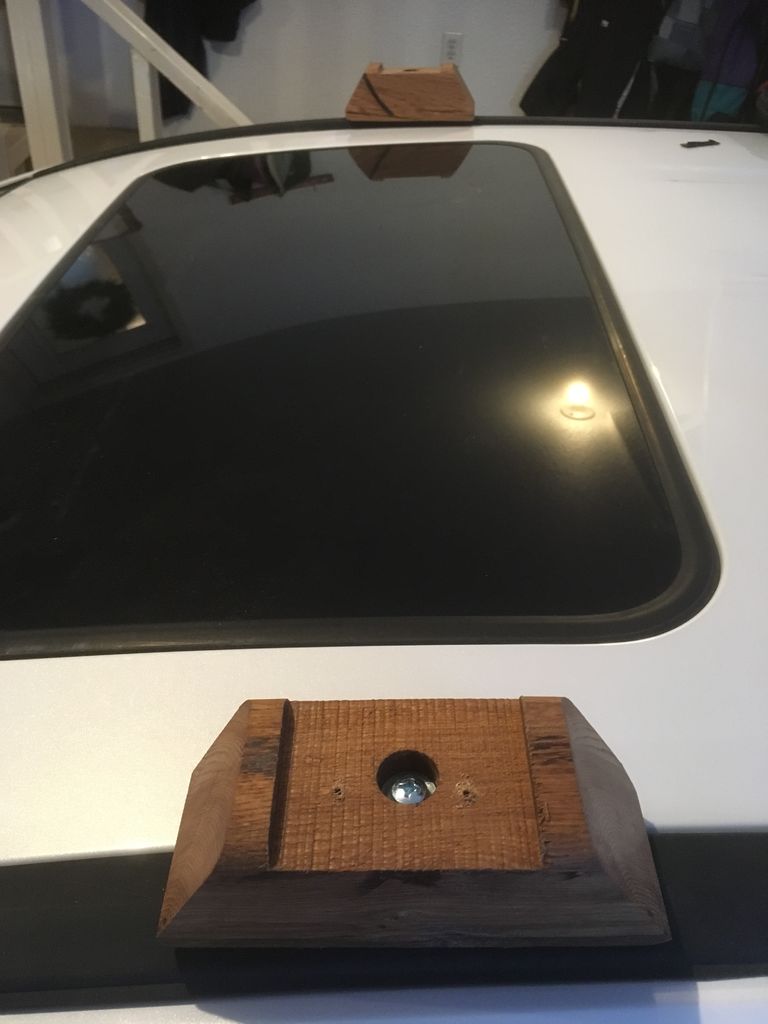
The blocks were now ready to be installed on the roof. Using a #6 metric screw and washer, I attached each block to the roof of the Mazda 5.
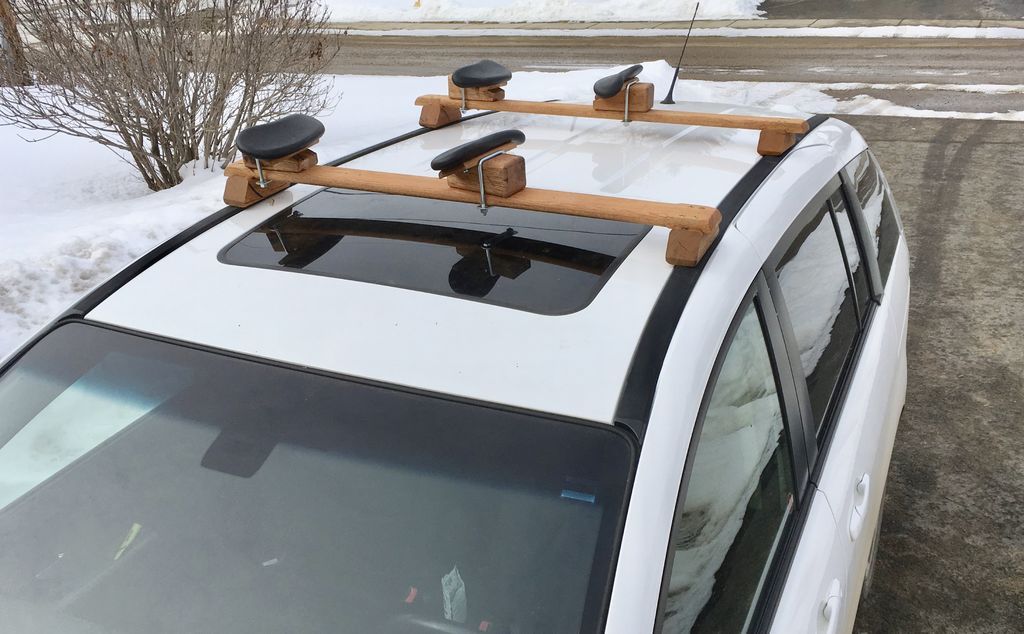
Step 9: Make the cross rails


The crossbars were next. Again, using oak from the pallets, my thickness planer, table saw, and miter saw, I cut two pieces 3″ wide, 1″ thick, and about 40″ long.
Then I used my Router a bit to round the edges of the rail again, leaving about 4″ on each end of the square.
This is the part of the rails that fit into the channel of each block. I sanded the rails, again, coated the rails with linseed oil.
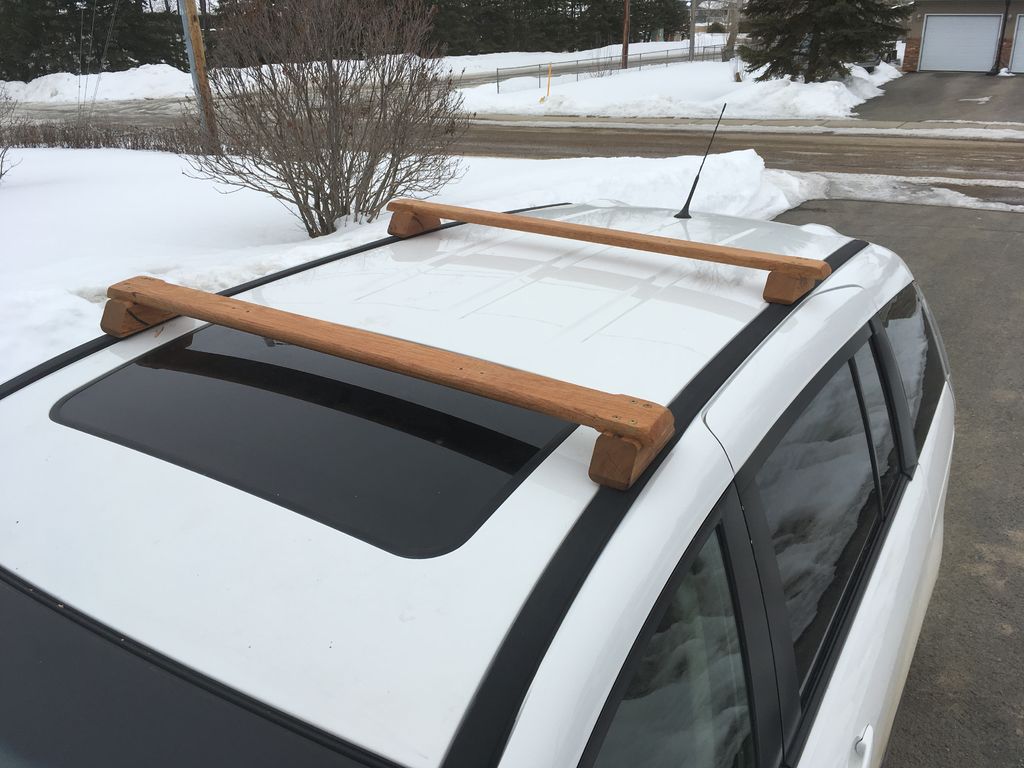
The next task was to attach the rails to the block. I used #8 x 2" GRK low profile washer head screws to attach the rail to the block.
I have pre-drilled the holes to prevent the rails from splitting. My luggage rack was now complete and ready to go. I was quite surprised and satisfied with how solid and strong the wooden luggage rack is.
NOTE:
Again, to add an extra level of strength to these rails, I plan to cover them with marine epoxy resin and fiberglass.
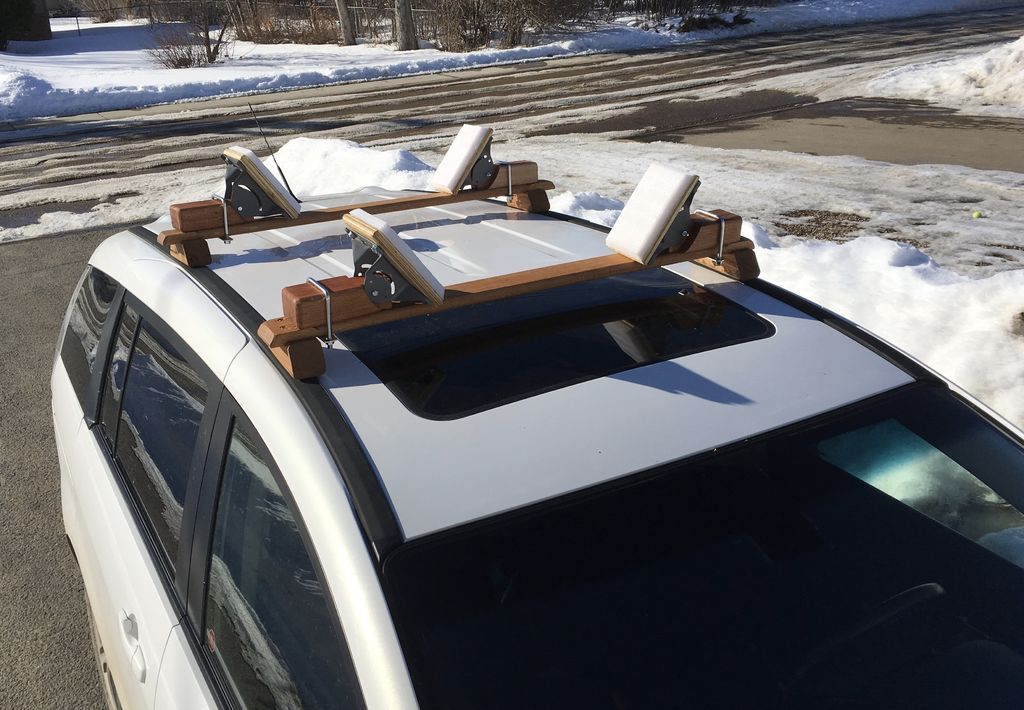
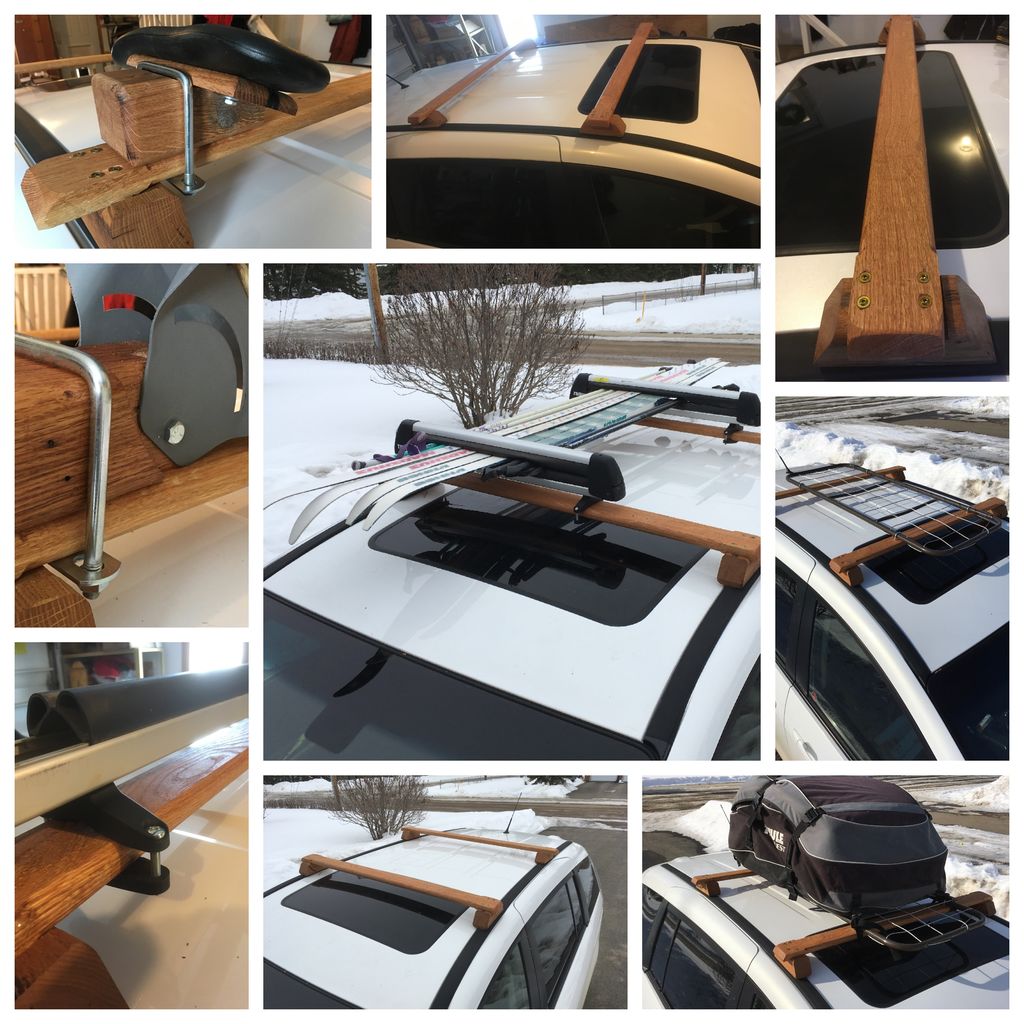
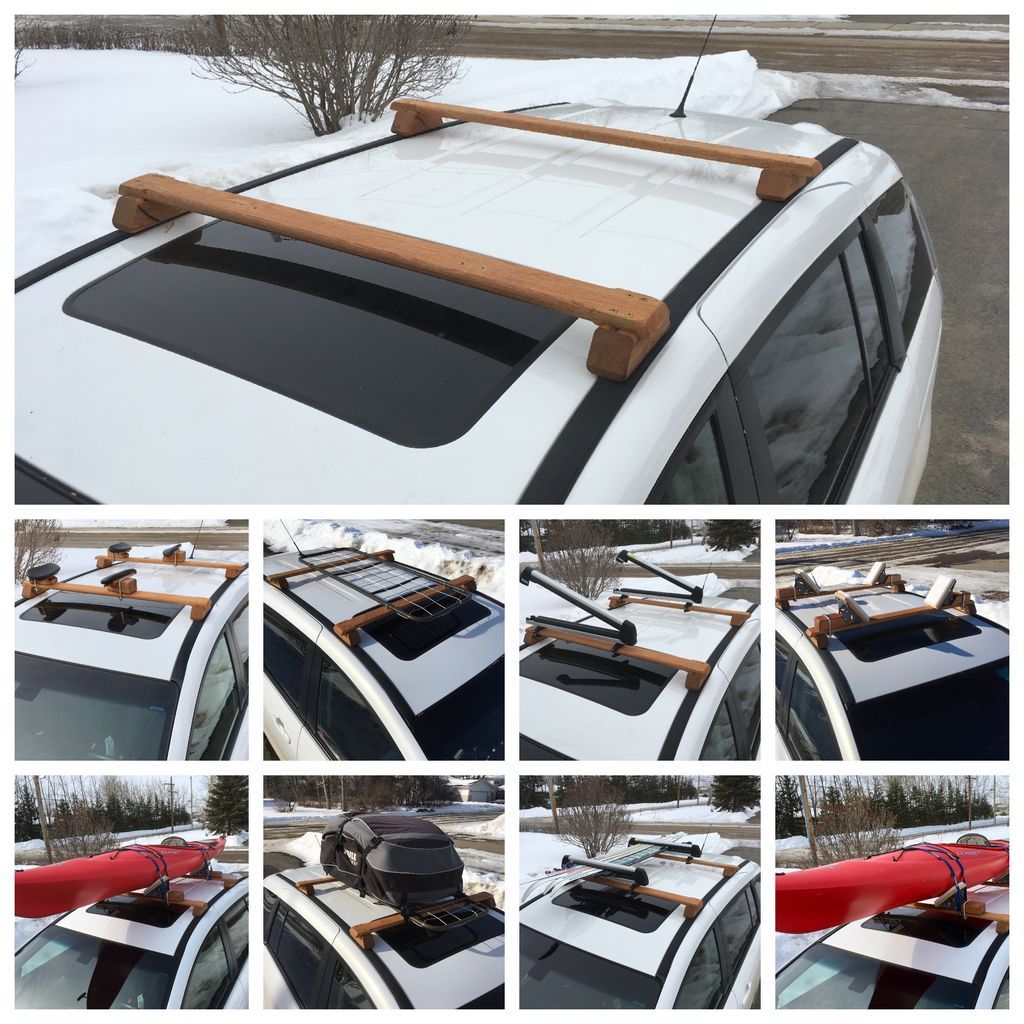
Step 10: Attach the ski rack

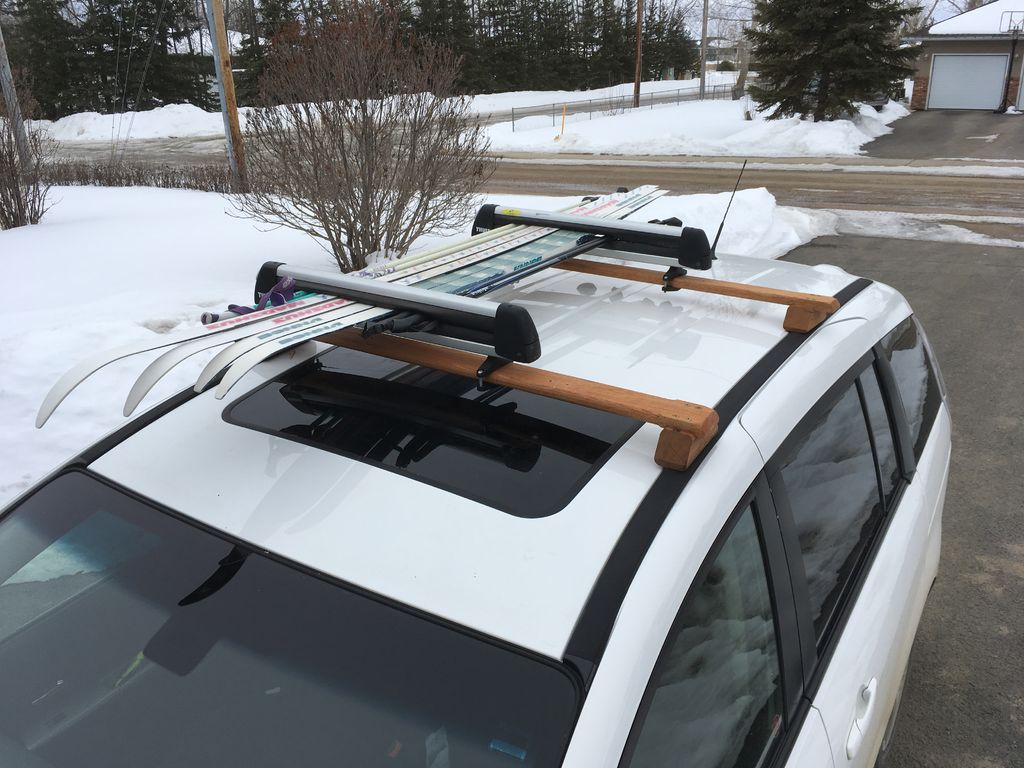

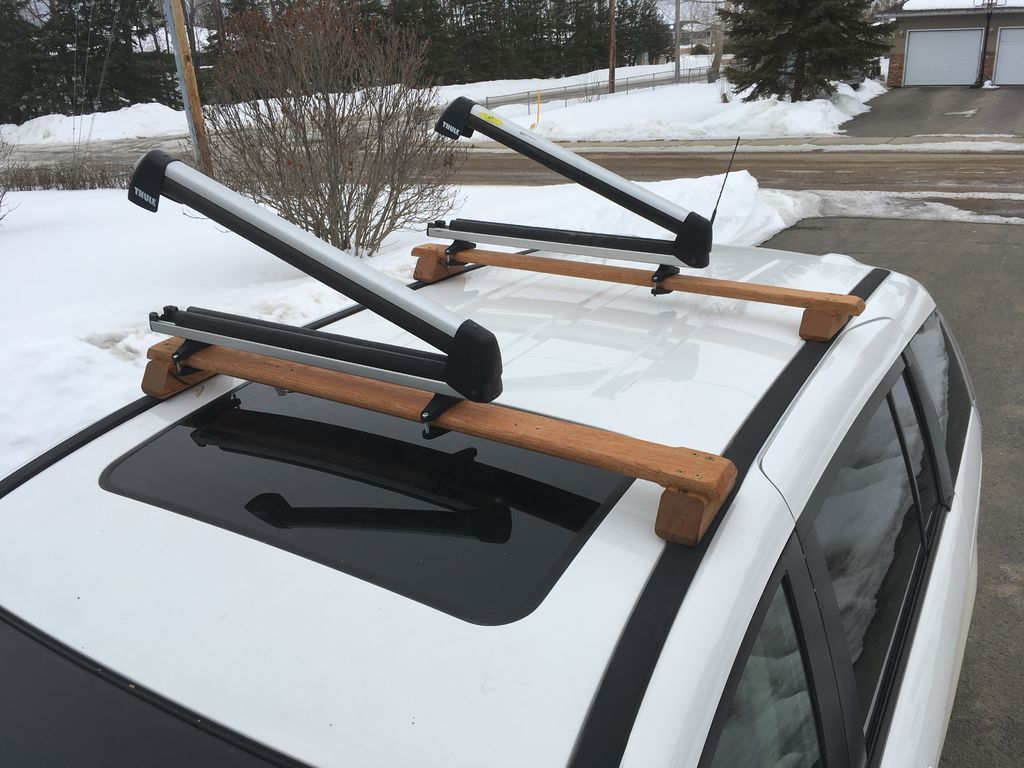

Now that I had finished the roof rack, I wanted to add a variety of accessories to make it more useful. I have a ski rack that I haven't been able to use for about four years.
Now that I havethis wooden shelf, I was eager to try it again.
As you can see in the pictures, the ski rack adhered perfectly to the wooden rails and the system worked very well.
It's a shame I didn't think about making the roof rack years ago.
Step 11: Cargo Luggage Holder

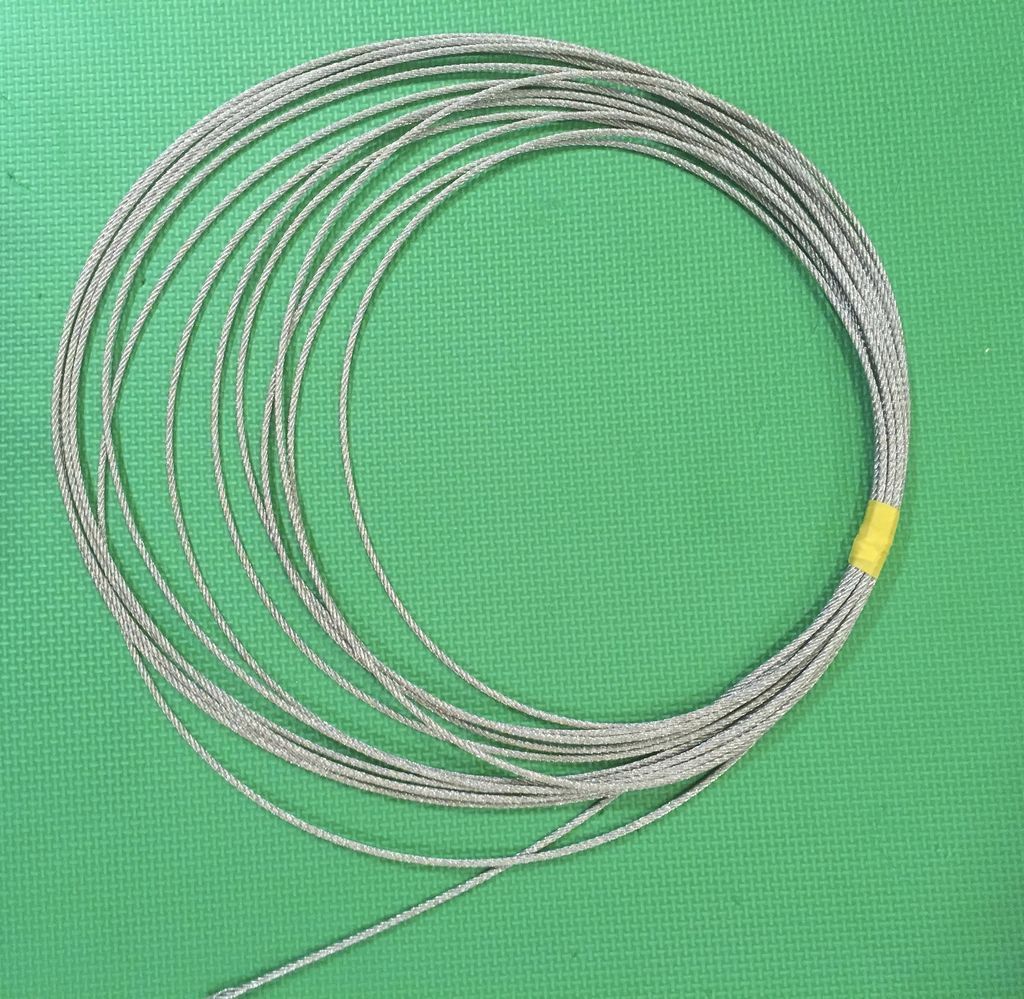


One side of the frame had holes about 4″ apart. I drilled matching holes along the opposite side of the frame and also along the two short lengths of the rectangle. Using airplane wire that I purchased at my local hardware store, I wove the wire through the holes in both directions to form a web as shown in the pictures.
To attach the frame to the rails, I used four U-bolts. I centered the frame on the wooden rails and marked the location where the holes for the U-bolts should be drilled. After drilling the holes, I attached the metal frame to the rails with the U-bolts. The platform was ready to use.
Step 12: Ready.


These are great car accessories because they are lightweight and tightly wrapped around the cargo inside with the compression straps. As the images show, it fits the frame very well and is easily secured with the straps.
Step 13: Kayak Rack Attachment


The final accessory I made for the luggage rack is for a kayak. There are a variety of kayak racks on the market, everything from J-cradles, stackers, and saddle racks. I decided to make a saddle kayak type roof rack. After going through my "recycling" supply, I found some brackets that are used to mount satellite dishes to ceilings or walls. I used to install dishes and often had pieces left over that I usually kept just in case. I thought the wall mount would make a great adjustable kayak saddle.
To attach the metal clamps to these blocks, I cut a section of each side of the block in a curve using the same method of 1/8″ incremental cuts using the guide on the table saw. I then drilled a 1/4″ hole in each block to allow the wood to attach to the metal frame.
Before putting the two together, I coated the blocks with linseed oil.
Step 14: Kayak Saddle Supports


Then I used some scraps of plywood to make a backing board for any soft material. After cutting the four boards, I folded the sides with the Router and rounded them a little. I applied linseed oil to one side of the boards and the edges. I marked andI drilled four holes for the bolts needed to attach the boards to the metal supports. I attached the four tables as shown.
Next, I found some dense foam and cut it into four rectangles the same size as the plywood boards. I then glued the foam to the plywood boards and, using a utility knife blade, cut the foam. This completed the four kayak rack saddles.
Step 15: Attach the kayak supports to the rails

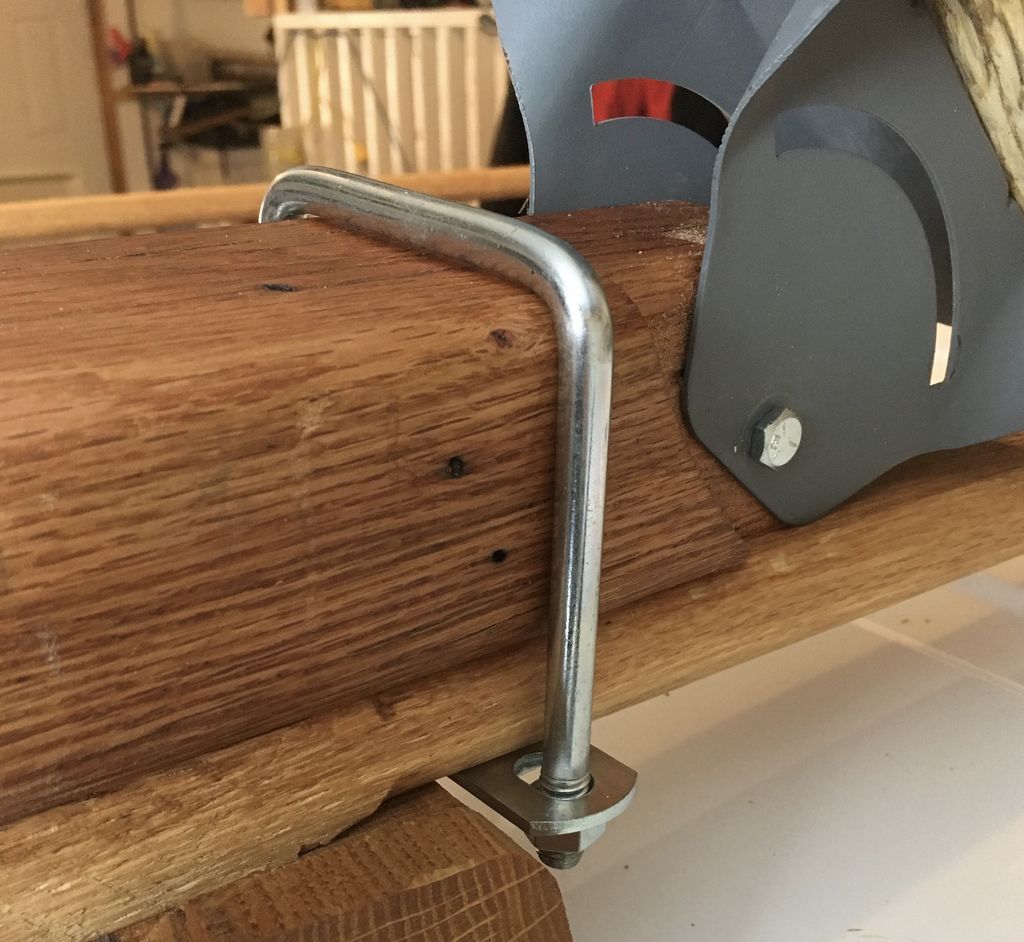

To attach the mounts to the wood railing, I purchased four square bolts. These were 3" wide by 7" long, which was too long for what I needed. I had to cut about 2.5" from each of the 8 bolts. I then attached the four saddles to the wooden rails with the U-bolts. It is very easy to adjust the distance between these saddles and the angle of the foam boards to achieve the best fit for the kayak. Using the tie down straps as shown, the kayak is mounted securely to the van. You don't need to attach the extra straps to the front and back, but it adds an extra level of stability.
Once again, since it's still winter here, I won't be using this kayak rack for a while. I'm looking forward to the summer season.
Step 16: Kayak saddles version #2
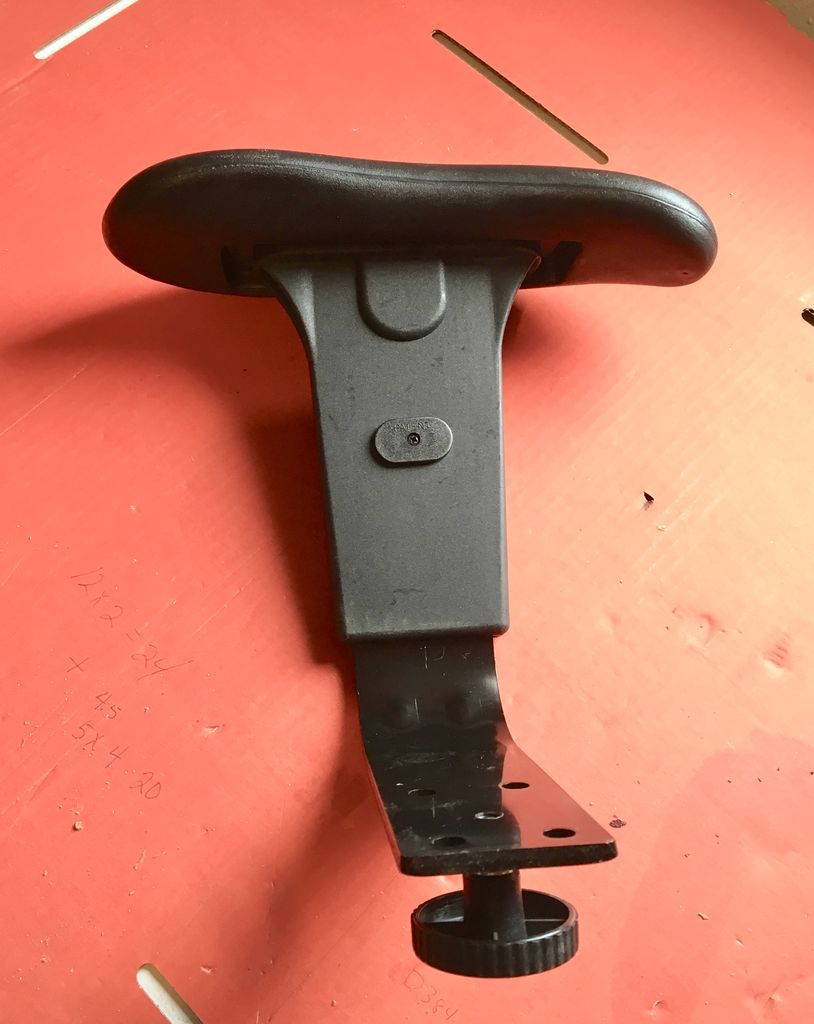


The kayak mounting rack I made works great, but I found them a little bulky. I decided to make another set, one that is a little smaller. Then I went back to check my “stuff.” This time I found something that I thought would be a perfect, low profile type of kayak rack. I'm not sure why I kept them, but when some of the desk chairs at my workplace broke, I decided to save the wheels and adjustable armrests. The armrests are molded pads and the four I had saved were in excellent condition. I took off the arm pads.
Step 17: Make more oak blocks

As I did with the first set I made, I cut blocks of oak wood (approximately 3″x 3″ x 6″ long). I made 5 of these so I would have a spare in case I need it. I then cut a wedge from each of the blocks. This wedge was cut at a fairly flat angle so the pads sit fairly flat as well.
Step 18: Cut and Attach the Cross Pieces


Next, I found a pallet board that was 3.5″ wide, 1″ thick, and about 4 feet long. Using my thickness planer and table saw I cleaned up the rough board.
I cut the board into 5 pieces, each 6″ long. I rounded the edges of the board again with the Router.
Finally, I drilled two 3/8″ holes in these boards 4″ apart to allow the boards to attach to the foam pad.
Step 19: Finish the wood blocks and attach the padded armrests

I then attached the boards to the blocks I had made earlier using glue and #8 x 1.5″ GRK low profile pan head screws. After the glue dried, I coated these blocks with linseed oil.
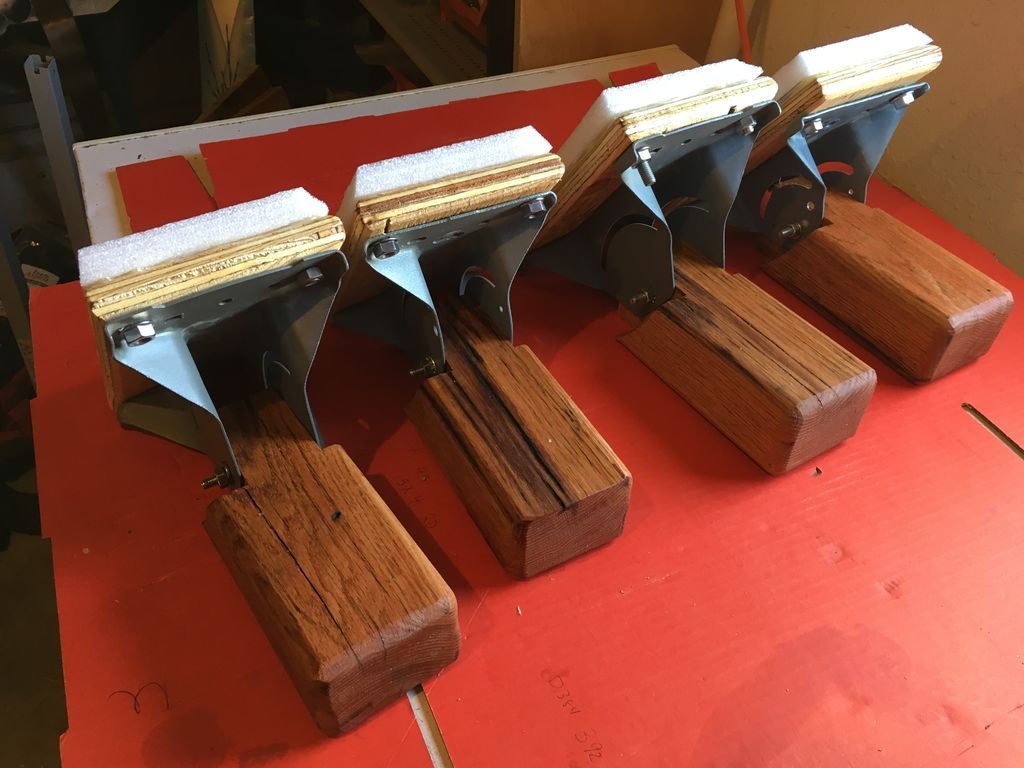
Step 20: Attach the brackets to the rails


The last step was to place the foam pads. I used 1.5″ bolts with washers to secure the foam pad to the blocks.
The new saddle pads were finished and ready to attach to the roof rack rails.
I used the same U-bolts that I had used for the first set I made. The kayak sits great on this new stand and I really like the sleeker look of these pads. I can't wait to try them this summer.
Step 21: Everything done… For now!
I really enjoyed making the roof rack and all the other accessories. Thank you for visiting us!
Get more information at perfectionidea.com and on our Facebook for more 3 Designs of Wooden Luggage Rack Roof Support for your Car
- Tags
- Guide
Popular Content
How to make a rocket stove for outdoors
Cardboard Drawers Lined with Jeans
Change the facade of your home with simple steps!
Latest Articles
How to make a refrigerator out of insulating material: Practical step-by-step guide
How to make a Kilim for the Home: Complete Step by Step Guide
How to protect ourselves from accidents in our workplace: Complete prevention and safety guide
Related Content
How to Beautify the House with Wood
10 Glass Houses That Would Surprise Anyone!
Guide and Tips for Building Stairs in the Garden Quickly and Easily!
How to Decorate the Mirrors in your Home
Creative Home Decor Ideas to Transform Every Space
Refreshing your home starts with smart design choices that combine comfort, personality, and functionality. Whether you want to modernize a small apartment, upgrade outdoor areas, or create cozy rustic interiors, these trending ideas can completely change the atmosphere of your space.
Outdoor Spaces That Increase Style and Functionality
Outdoor living continues to dominate modern home trends. Homeowners are increasingly investing in practical entertainment zones inspired by these BBQ shed ideas, which create the perfect setup for gatherings and weekend cooking sessions.
First impressions also matter when designing exteriors. Elegant farm entrance gates design ideas help properties stand out while improving privacy and curb appeal.
Compact living solutions are also gaining popularity. These inspiring 16x40 shed house interior design ideas show how smaller spaces can still feel luxurious and functional.
To enhance patios and entryways, homeowners are adding stylish protection with these creative porch awning exterior DIY ideas that blend aesthetics with practicality.

Rustic and Cozy Interior Design Trends
Warm and natural interiors remain timeless. These charming rustic decor ideas combine wood textures, vintage accents, and earthy tones to create welcoming spaces.
Bedrooms are becoming more personalized with curated wall arrangements. Many homeowners use these stylish picture wall ideas for bedroom spaces to display memories and artwork creatively.
Textured wall treatments are another major trend. Installing a board and batten wall adds architectural character while keeping interiors elegant and modern.
Similarly, bold accent wall ideas can instantly transform plain rooms into eye-catching focal points without requiring a full renovation.
Smart Kitchen and Organization Inspiration
Functional kitchens are essential for modern homes. These practical kitchen wall cabinet ideas maximize storage while maintaining a clean and stylish appearance.
Organization also starts at the entrance. Well-designed mud room ideas help families keep shoes, coats, and daily essentials neatly arranged.
Colorful and Personalized Home Styling
Vibrant interiors are becoming increasingly popular thanks to playful dopamine decor ideas that use bright colors and joyful accessories to improve mood and energy.
Gallery walls also continue to evolve as a major decorative feature. These trendy gallery wall inspiration ideas offer creative ways to combine prints, photos, and statement art.
Young renters and new homeowners are especially embracing these stylish first apartment aesthetic ideas to create sophisticated interiors on a budget.
Finally, selecting the right shades can dramatically influence any room’s atmosphere. These modern trendy color ideas help homeowners choose palettes that feel fresh, elegant, and timeless.
Final Thoughts
From rustic charm and colorful interiors to outdoor entertaining areas and functional storage solutions, today’s home decor trends focus on creating spaces that feel both beautiful and livable. By combining smart layouts, modern textures, and personalized decorative elements, any home can become more stylish, comfortable, and inspiring.


