


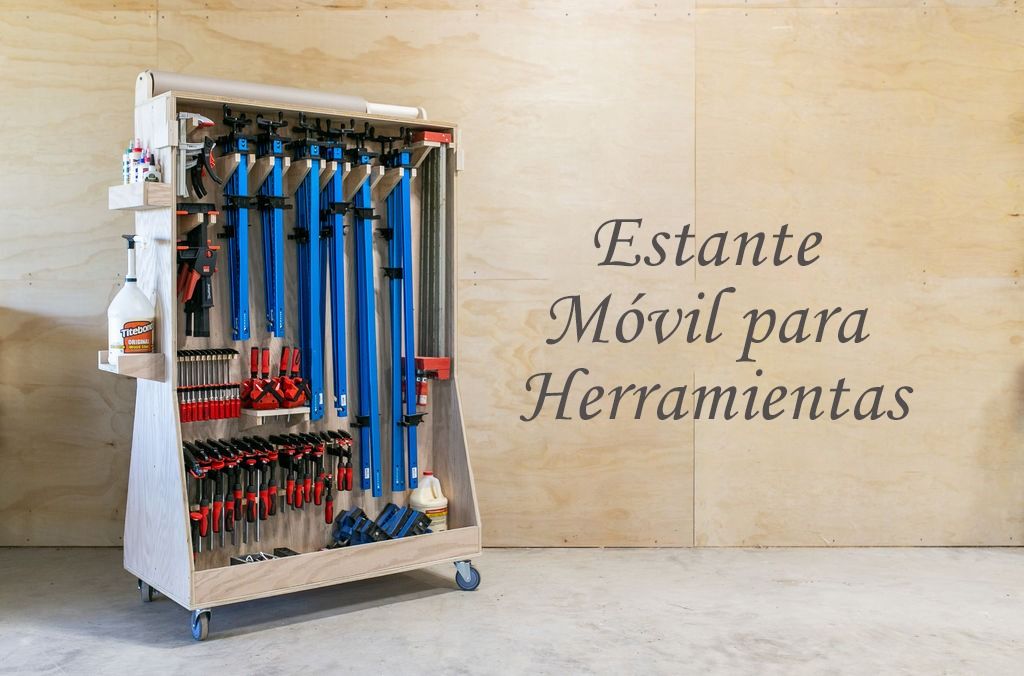
Mobile Shelf for your Woodworking Tools, I built this impressive mobile clamp rack for storing clamps and other tools.
Now I can move all my clamps to one work surface instead of carrying several of them at once.

Don't miss the full build tutorial video above for more details:
Video Link.
#1: Things I used in this project
- Right Angle Clamps
- Triton track saw
- Wood glue
- Nail gun
- Clamps
#2: Cut the plywood


I started by laying out the boards on my work table and drawing those two unique side shapes on a sheet of plywood and then used my track saw to cut them out.
They look like an Erlenmeyer Flask in that it's wider at the bottom and narrower at the top and I can tell you, having built it, that the rack doesn't feel too heavy, even when fully loaded.
#3: Build the framework


Next, I moved everything to the floor to make it easier to attach the center plywood board.
I placed it on its side and marked where the board needed to go and then wood glue.
I lifted the unit up to secure it with screws, and although I had the pencil mark where the board needed to land, I found it easier to cut a spacer, fix it in place, and just set the board in place and then screw it down. below.
After finishing one side, I repeated on the other side.
Next was more glue and then attaching the front edge to create a bottom shelf. I screwed them in from the sides but then also flipped the unit over to attach it from the bottom.
Here I took the opportunity to also secure the center board in some places from the bottom as well.
#4: Add wheels

I wanted to make the unit mobile so next I added some heavy duty casters and I recommend investing in some good casters for projects like this.
I first reinforced the area where they would be mounted on the rack because it will carry quite a bit of weight when fully loaded.
I chose to mount these pads on the inside of my unit to avoid adding height to the rack, but if 3/4″ doesn't make a difference to you, these can also be mounted on the bottom so they are not visible.
#5: Build the clamp supports


Okay, now to get on with customizing this unit so that it is truly functional.
This is where things may vary for you as everyone's tweezer collection is different.
I recommend pulling out all the clamps you own, getting some dimensions, then dictating the number and location of brackets that will make the most of the space for you.
All my brackets are extremely simple, put together with wood glue and driving nails and then attached to the frame with pocket holes.
I didn't use any glue when attaching the brackets because as my clamp collection changes, I want to have the ability to move things around and rearrange them.
#6: Support for the Bessey K


Since I have so many Bessey K Body style clamps, I dedicate an entire side of the rack to them. I sped up the process by grouping the supports by touching the plywood cuts.turning them off and then running them through the band saw, all at the same time.
This creates the triangular support piece on the underside of the shelf. After drilling a few pocket holes in each shelf, I attached things with glue and nails.
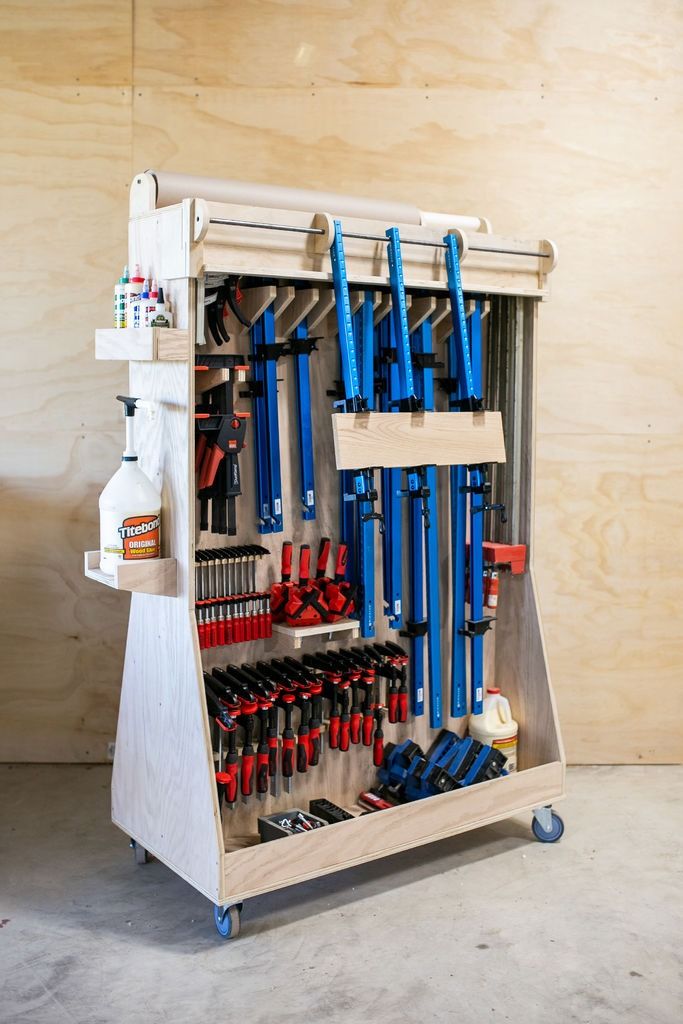
To save space, I will store all of my really long clips vertically but all of my medium sized clips horizontally and it's extraordinary how many clips I was able to block by doing it this way. 42 if you're wondering!
Just a suggestion when putting these shelves in, put in one screw, but make sure you put a level on it before putting in the second one.
This will make things look really tight and sharp in the end.
Once I had placed enough shelves to mount all of my clamps of this style, I placed a small lip on the front of each bracket to prevent the clamps from sliding while I moved the entire rack.
Oh, another tip for you: I found that a shelf would have four clamps if I placed them all in the same direction, but if I alternated the heads, then I could put six clamps on each shelf.
So if I need more space in the future, I could consolidate and free up more space at the bottom.
#7: Supports for Surefoot clamps


These Surefoot clamps are aluminum and very lightweight, so I kept their hanging brackets much simpler and left them as two shallow triangles with a few pocket holes to attach them to the back.
Now I had something unique planned for this side of the rack, so I made sure that all of these hangers along the top kept the clamps on this side inside the side walls of the rack.
I'll get to my reasoning later, but keep in mind that if you don't want to add-on like I do, you can make these brackets stick out beyond the side walls and attach more clamps to fit them in your collection.
#8: Supports for smaller clamps

With the space left over on this side, I started making brackets and attaching my other smaller clamps, including these Bessey KliKlamp and Duo Clamps.
#9: F Design Clamp Brackets


Moving on to put away my F Style tweezers. For this, I was inspired by my friend Tyson, who made a really cool three-tier wall shelf for his collection.
I started by swapping out my blade for a stack of dice that matched the thickness of the collar of the clamp. Of course, to cut the slots evenly, you can measure across your board and mark where to cut and then manually move the board.
But I ended up using a cool new lap template from Rockler that makes this task an easy task.
The template works so you can place a metal gauge on the sacrifice fence to match the width of your given cut.
This way, after you cut a slot, you can place that cut on this gauge and it will then space all the other cuts equally for you.
You'll see that I went ahead and stacked two boards while making these cuts because I wanted two boards for the top of the clamps and the bottom. Or at least that's the case for the larger sizes.
To attach these brackets, I glued some pocket holes along the bottom and secured them directly to the center board.
#10: Miter Clamp Holder

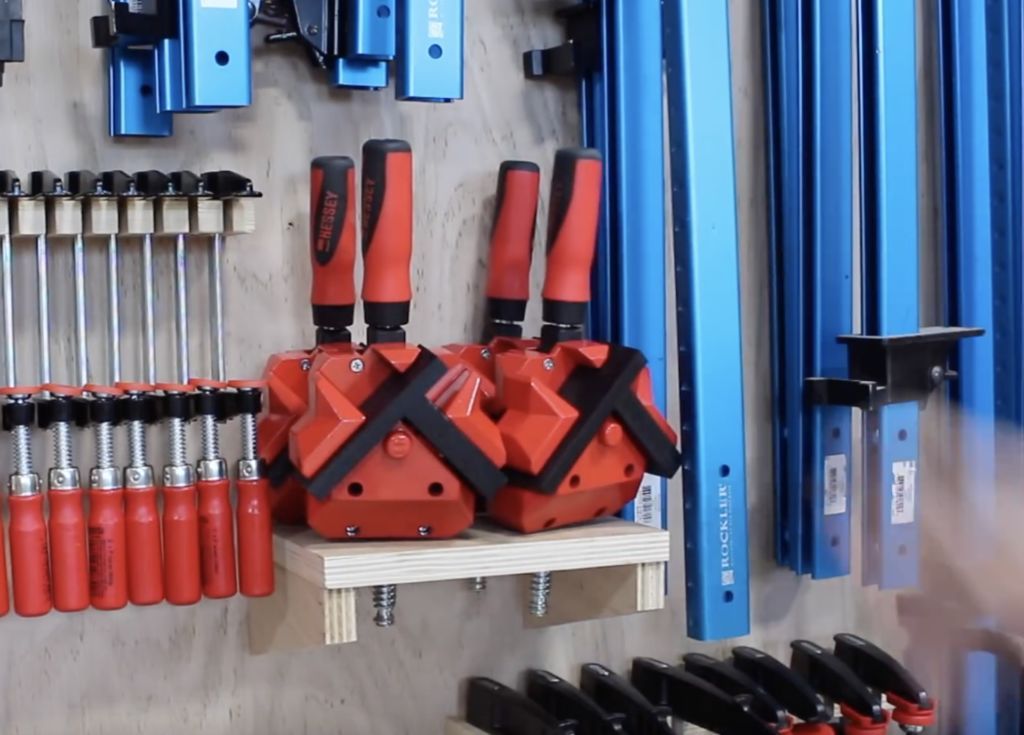
This was an easy rack with a few holes drilled to match the diameter of the threads on these clamps. I added some triangle support wings and then used pocket holes to attach it.
#11: Wood Handscrew Clamp Holder

Finally, the lasto style of clamp I wanted to hang were these wood screw clamps.
These were the easiest as it was just a scrap piece with a few pocket holes to attach it to.
I ended up making two different sizes for the three sizes of clamps I have.
#12: Equipping the bottom shelf

I'll have to play around and see what I end up using this bottom shelf primarily for, but in the meantime, I used it for glue-on accessories, like storage for my gallon bottle, these little clips that I placed in a container.
Right angle bra, templates that I so often reach for.
#13: Additional Storage: Glue Filling Station


The first thing was a glue refill station. If you keep your small glue bottles almost full, then you don't have to squeeze as hard during application.
However, going from the gallon jug to the smaller one is always a challenge.
By adding a shelf for my gallon jug to sit on, I'm thinking I won't stop filling my smaller bottles like I normally do.
Then, in the same thought process, I went ahead and made another shelf to house my little glue bottles.
#14: Glue the frame: Building the base


Ok, this next plugin is something I was very excited to try, but I understand it's an experiment so it might need some tweaking in the future.
What I'm aiming for is to have a rack glued onto my clamp rack.
This will eliminate the need to take up workbench space for any small glues, which for me covers about 90% of my glues.
I wanted this accessory to be removable, so I came up with a design that incorporates a French cleat.
I started by making these dowels on the band saw and then put them on the frame at each end.
This setup could end up supporting a good amount of weight, so I went ahead and used wood glue on these.
#15: Glue the grille: Attaching the clamps


Next I started figuring out how to modify these Rockler Surefoot clamps so I could hang them from this metal bar.
These clamps already come with two holes drilled near the end. I enlarged the last hole to match the size of my rod, then placed it on my band saw and cut some material to create a hook.
I cut this hook into all my 24″ and 36″ long clamps.
The gluing frame is removable, so I can remove it if necessary, but then snap it back into place when needed.
Then I can hang my clamps with this hook and I can place the clamps anywhere along this bar.
If I have a short board to glue, I can put two close together or four close together, but then if I have a long tail for the board, I can go up to 4′ wide with my clamp spacing.
#16: Adapt the glue rack for another space

Note that you can easily build this rack yourself and place it anywhere in your tent where you would place a docking cleat.
I went ahead and placed a dowel on my wood shelf so if I don't want it on my peg shelf for some reason, I have another option other than the workbench surface.
#17: Roll Paper Storage


One of the last few accessories for this Swiss Army clamp rack... adding in a roll of brown construction paper and a roll of wax paper.
It is very useful to have a roll of each in the workshop to protect surfaces and prevent them from being damaged by paint, finish or glue.
I placed some dog ears along the top surface and then ran another metal rod through.
These brackets are attached by pocket holes, facing outward, so if any of the rolls need to be replaced in the future, it is an easy task.
People have suggested that I add a bandsaw blade to the grid to make tearing this paper easier.
I did this for my other roll on my feed table and I can tell you that moving a pocket knife through the paper is much easier than moving the 4' wide paper through a stationary blade. But to each his own of course.
#18: Storage for the rack

The gluing station takes up one side of the frame, but the other is still blank, so I added it on a dowel so that when I'm not using the glued lattice, I can store it in the clamp holder.
This keeps it evaluable for use, but also prevents it from leaning against a wall somewhere, taking up space.
I think I'll have to go back and add a handle to each side to make grabbing and pulling this thing easier. Click here if you would like a set of plans for this.
I hope you enjoyed it because I loved this project.
I like things to have a home and be easy to find. I hope this inspires you to make your own peg rack. Greetings!
Get more information at perfectionidea.com and on our Facebook for more Mobile Shelf for your Woodworking Tools.
Popular Content
How to make a rocket stove for outdoors
Cardboard Drawers Lined with Jeans
Ideas and Advantages of Window Grilles for the Home!
Latest Articles
How to make a refrigerator out of insulating material: Practical step-by-step guide
How to make a Kilim for the Home: Complete Step by Step Guide
How to protect ourselves from accidents in our workplace: Complete prevention and safety guide
Related Content
Flower Pot Designs for Cat Lovers
Get to know the Parquet Floor that is a Jewel at Home!
Ideas for Putting Floors in the Patio or Garden
How to Build a Pond in the Garden: step-by-step guide, design and functionality
Creative Home Decor Ideas to Transform Every Space
Refreshing your home starts with smart design choices that combine comfort, personality, and functionality. Whether you want to modernize a small apartment, upgrade outdoor areas, or create cozy rustic interiors, these trending ideas can completely change the atmosphere of your space.
Outdoor Spaces That Increase Style and Functionality
Outdoor living continues to dominate modern home trends. Homeowners are increasingly investing in practical entertainment zones inspired by these BBQ shed ideas, which create the perfect setup for gatherings and weekend cooking sessions.
First impressions also matter when designing exteriors. Elegant farm entrance gates design ideas help properties stand out while improving privacy and curb appeal.
Compact living solutions are also gaining popularity. These inspiring 16x40 shed house interior design ideas show how smaller spaces can still feel luxurious and functional.
To enhance patios and entryways, homeowners are adding stylish protection with these creative porch awning exterior DIY ideas that blend aesthetics with practicality.

Rustic and Cozy Interior Design Trends
Warm and natural interiors remain timeless. These charming rustic decor ideas combine wood textures, vintage accents, and earthy tones to create welcoming spaces.
Bedrooms are becoming more personalized with curated wall arrangements. Many homeowners use these stylish picture wall ideas for bedroom spaces to display memories and artwork creatively.
Textured wall treatments are another major trend. Installing a board and batten wall adds architectural character while keeping interiors elegant and modern.
Similarly, bold accent wall ideas can instantly transform plain rooms into eye-catching focal points without requiring a full renovation.
Smart Kitchen and Organization Inspiration
Functional kitchens are essential for modern homes. These practical kitchen wall cabinet ideas maximize storage while maintaining a clean and stylish appearance.
Organization also starts at the entrance. Well-designed mud room ideas help families keep shoes, coats, and daily essentials neatly arranged.
Colorful and Personalized Home Styling
Vibrant interiors are becoming increasingly popular thanks to playful dopamine decor ideas that use bright colors and joyful accessories to improve mood and energy.
Gallery walls also continue to evolve as a major decorative feature. These trendy gallery wall inspiration ideas offer creative ways to combine prints, photos, and statement art.
Young renters and new homeowners are especially embracing these stylish first apartment aesthetic ideas to create sophisticated interiors on a budget.
Finally, selecting the right shades can dramatically influence any room’s atmosphere. These modern trendy color ideas help homeowners choose palettes that feel fresh, elegant, and timeless.
Final Thoughts
From rustic charm and colorful interiors to outdoor entertaining areas and functional storage solutions, today’s home decor trends focus on creating spaces that feel both beautiful and livable. By combining smart layouts, modern textures, and personalized decorative elements, any home can become more stylish, comfortable, and inspiring.


