


Adjustable Wooden Easel for Various Uses, a good saw easel is essential in a workshop, especially if you work with wood and, often, you need to take out a board or piece to cut and sand.
And if you need a temporary table in the garden for barbecues and parties, these two stackable and adjustable easels are the perfect support for these activities and many more.

Step 1: The project


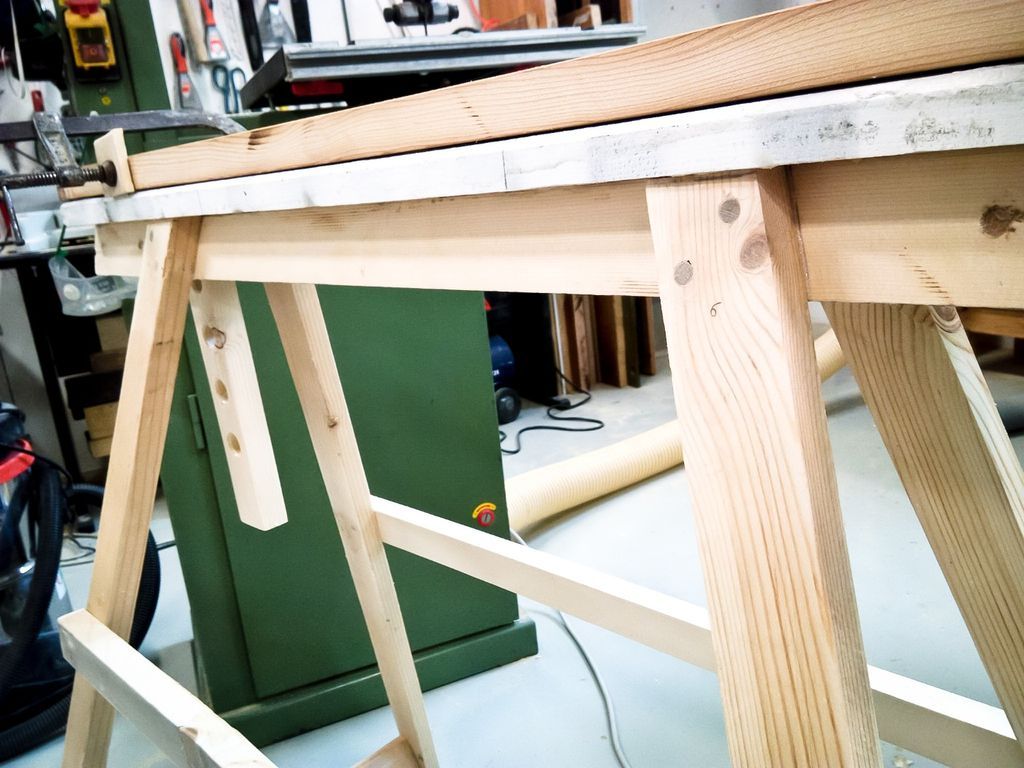
I built these supports for the carpentry workshop where I use to participate. I found some wooden boards and adapted my project to their dimension and length. I wanted a pair of very stable wooden easels, solid and tall, so that everyone can work standing right in front of the temporary table.
I was inspired by a good pair of easels from IKEA, as you can see in the image. But I build them bigger and stronger, with the stacking feature too.
You can see a drawing with real dimensions.
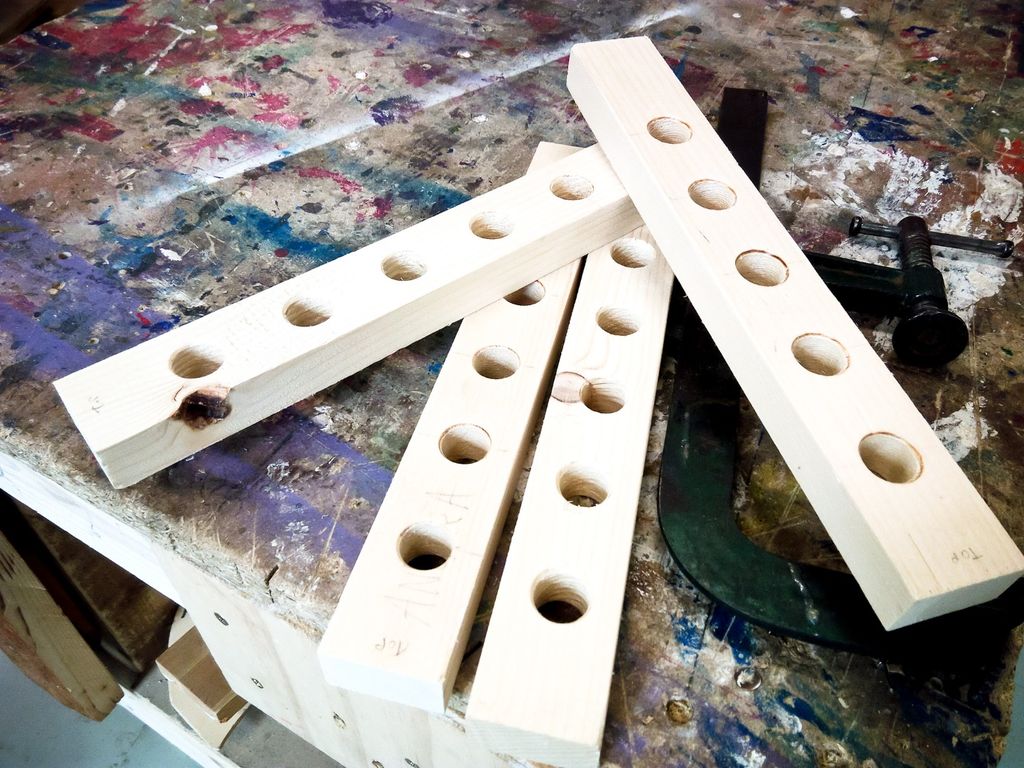
Step 2: Material and cutting

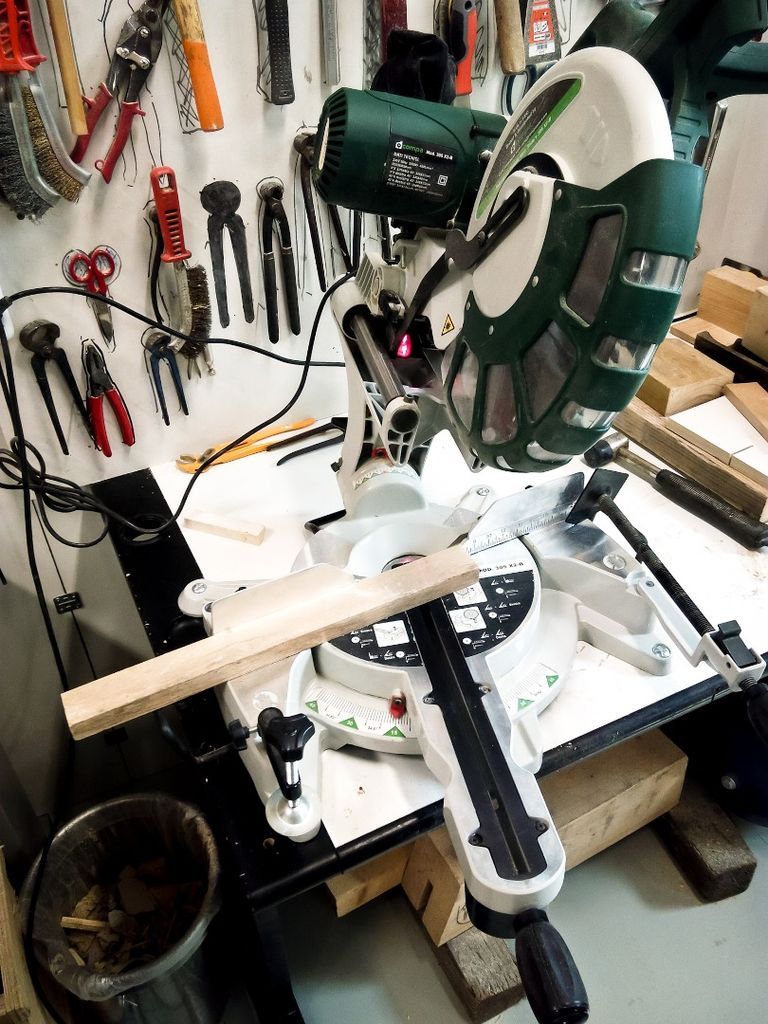
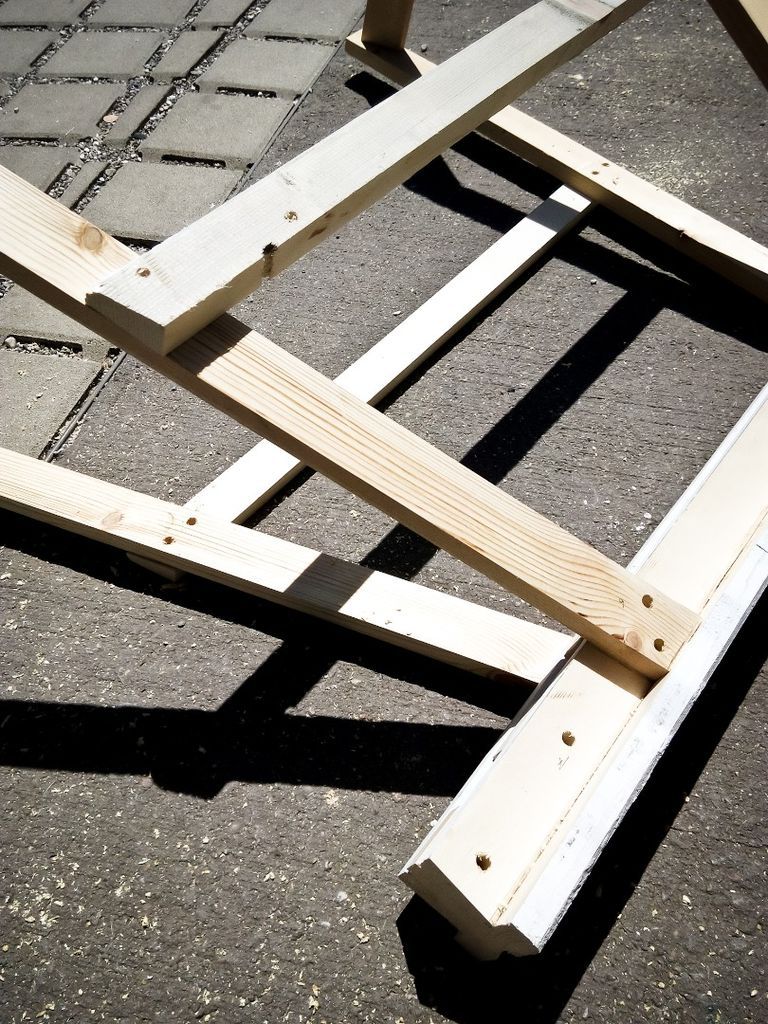
Find good, straight wooden boards, I had a 70x45mm section for the main horizontal elements, but it can be different.
Tilt the table saw at a 15° angle and cut these elements lengthwise, as in the project. Then complete the cut with another longitudinal cut (this time vertical). Save all the pieces you get with these cuts.
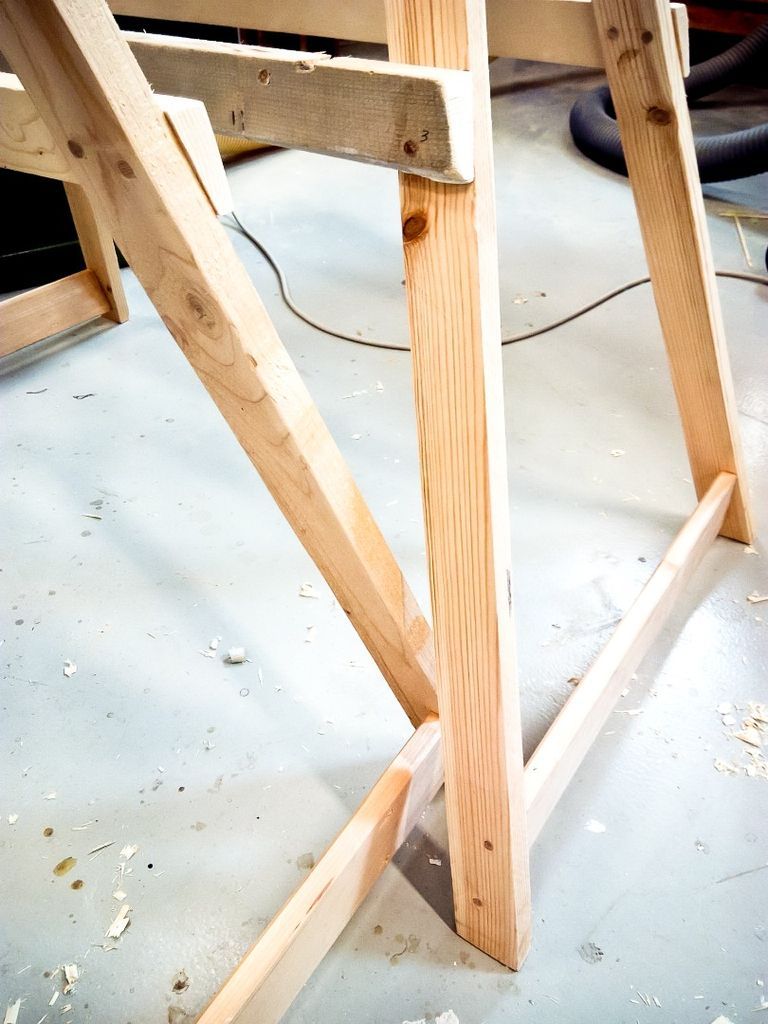
Also cut all boards to the correct length. Please note that all angles for this project are 15° and the feet must be cut double grade for both the longer and shorter sides.
Always check boards for nails before sewing.
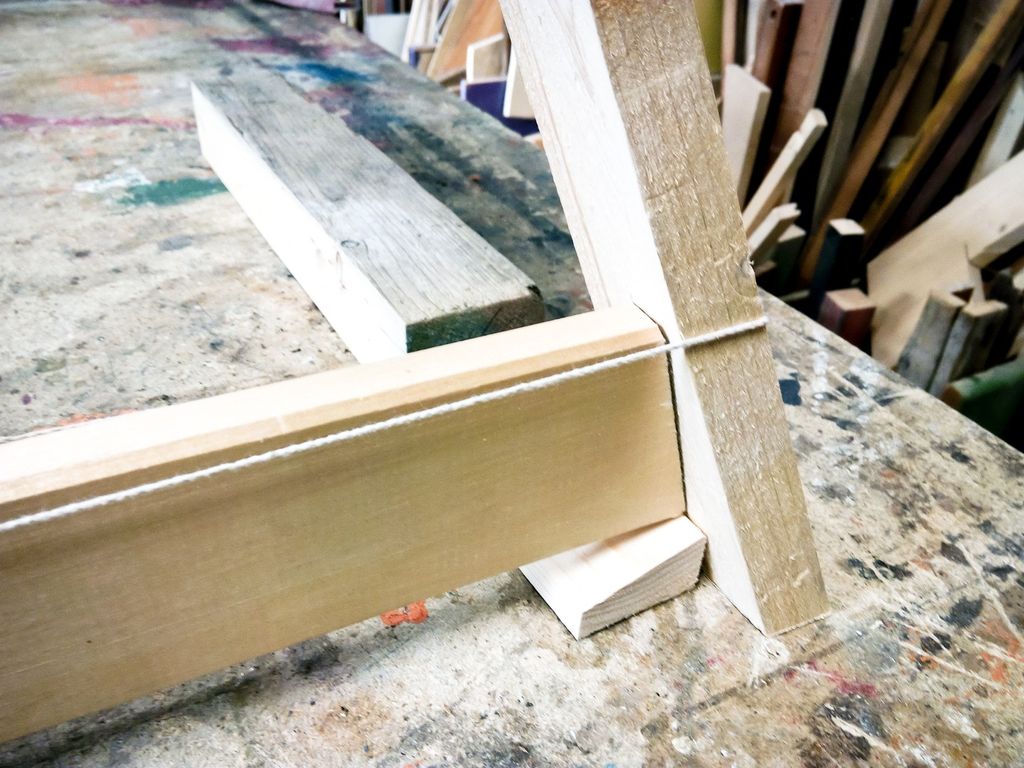
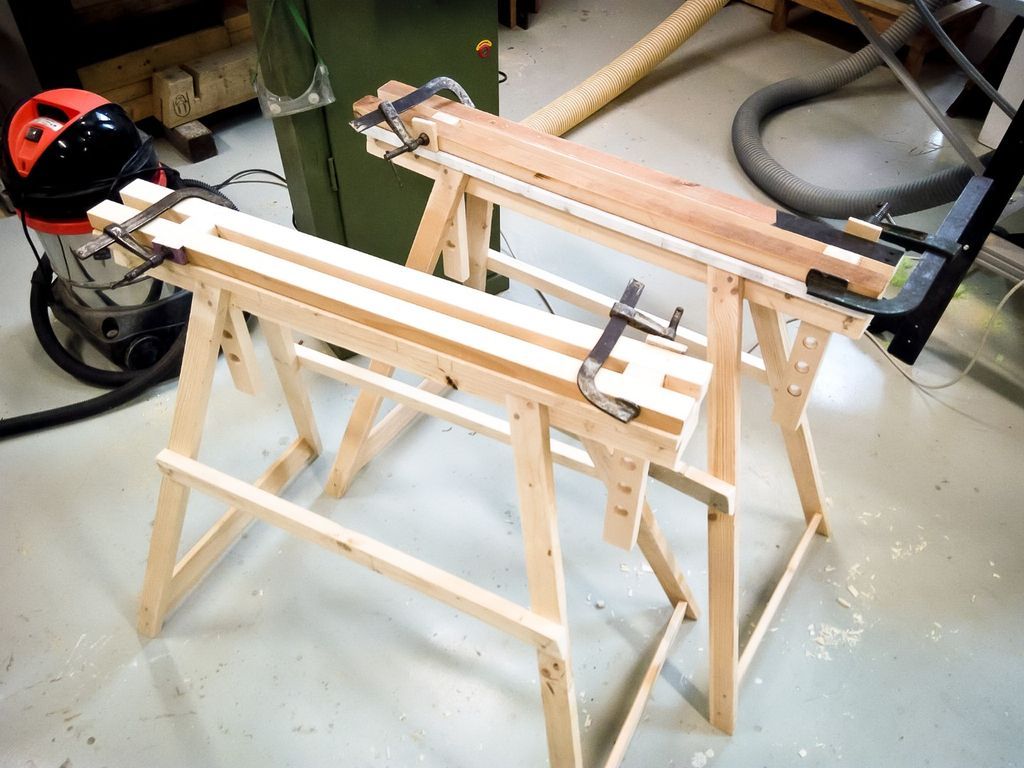
Step 3: Pasting
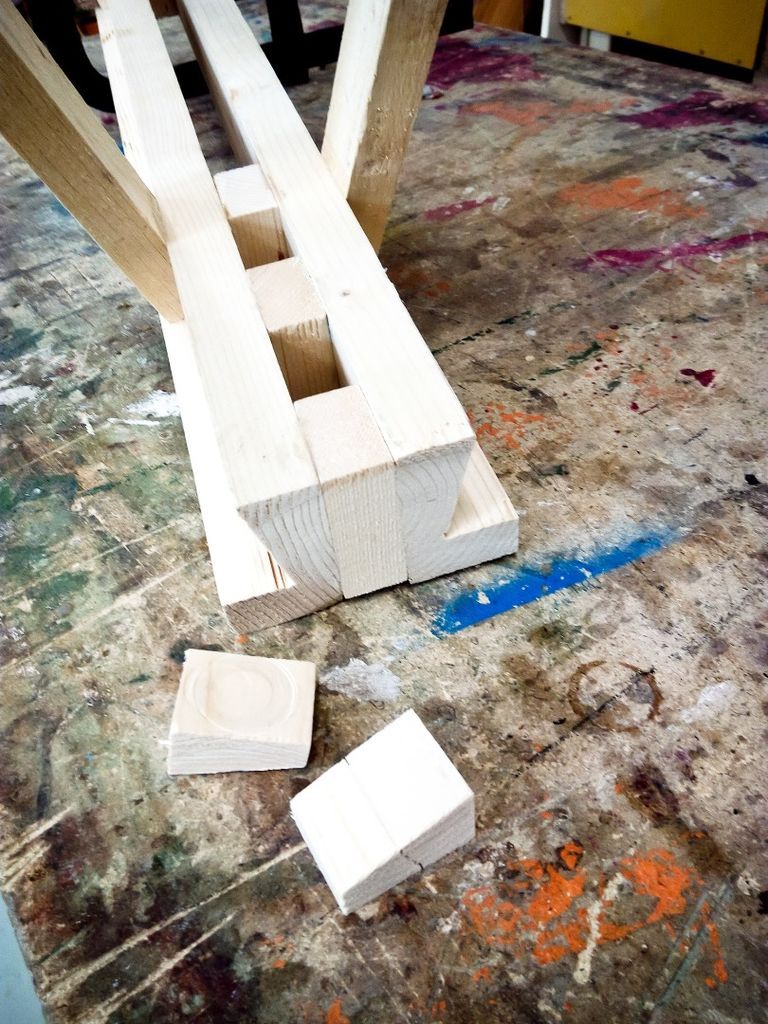
When you have all the pieces, assemble them on a flat table, use some wood glue and clamps. Check that the space between the small blocks is enough for the vertical boards to remain between them.
I suggest cutting some small wooden wedges with a 15° side, so you have a straight surface to use the clamps.
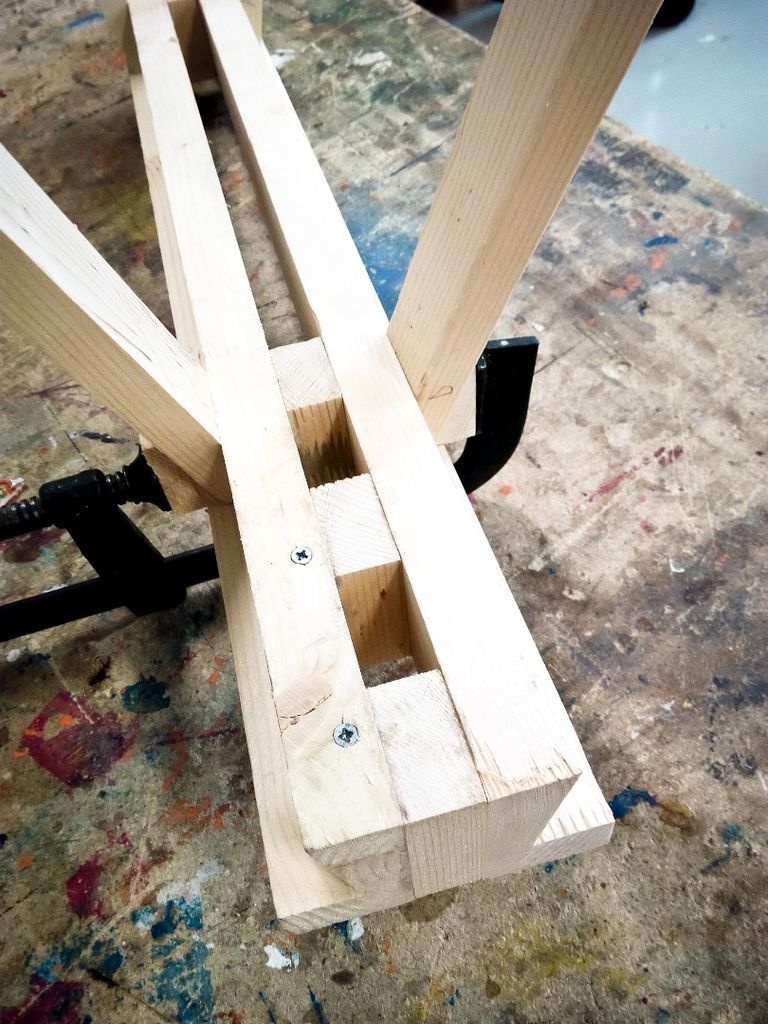
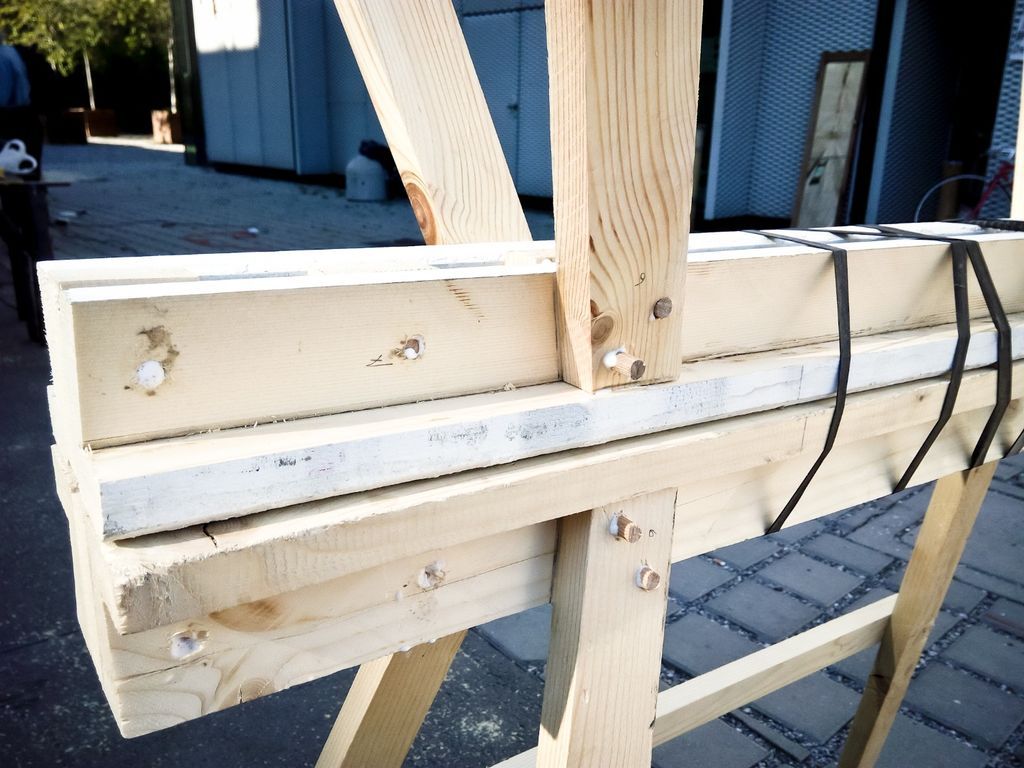
Step 4: More glue


Continue gluing paying attention to all angles and dimensions. You can adjust the position of the parts for a few minutes after assembly. You can also use some cables.
I didn't use wooden blocks for now. I think it's simpler, but you have to be very careful not to move the pieces around each other after ten minutes, and you have to keep them very close together.
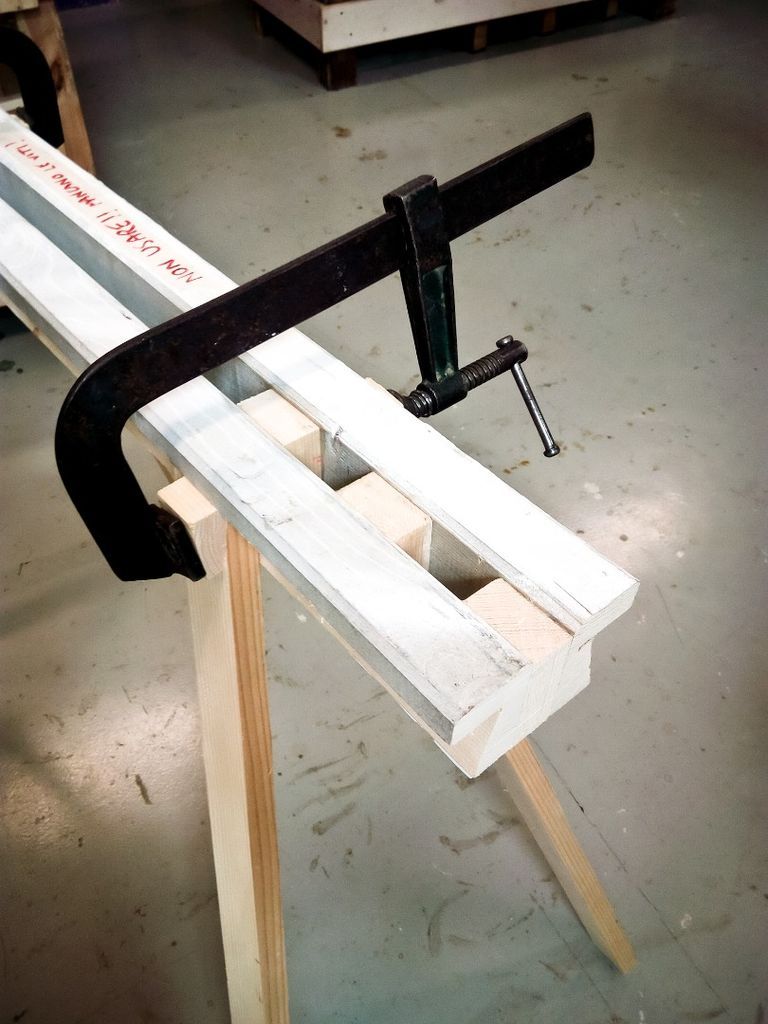
Step 5: Clamps

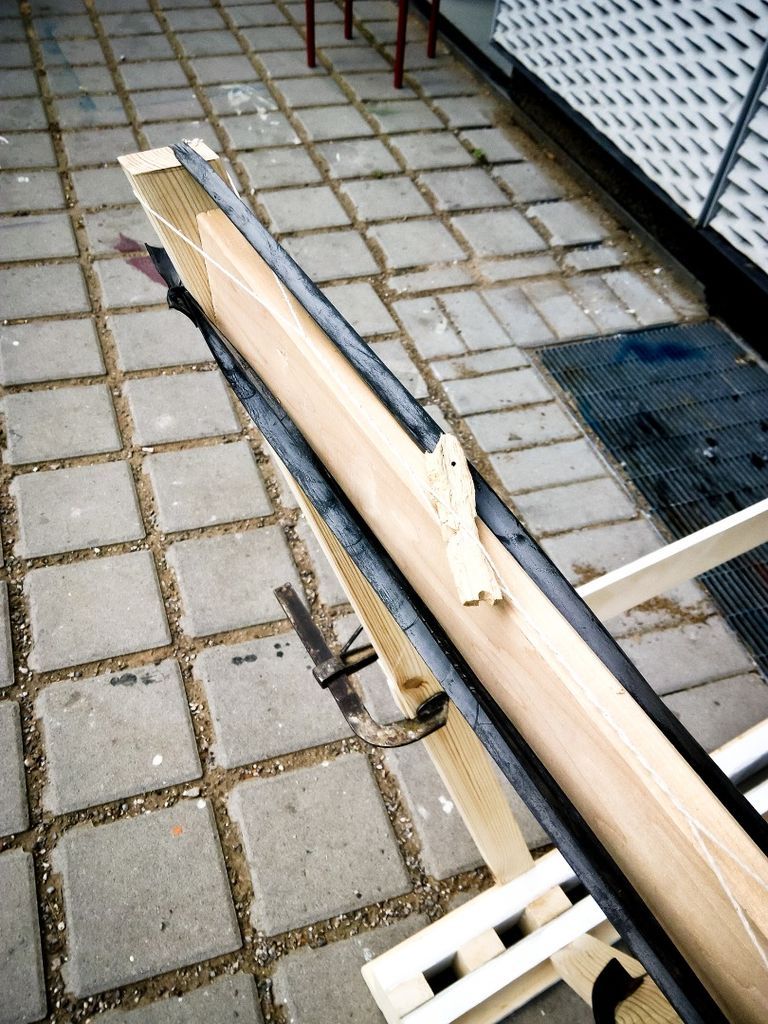
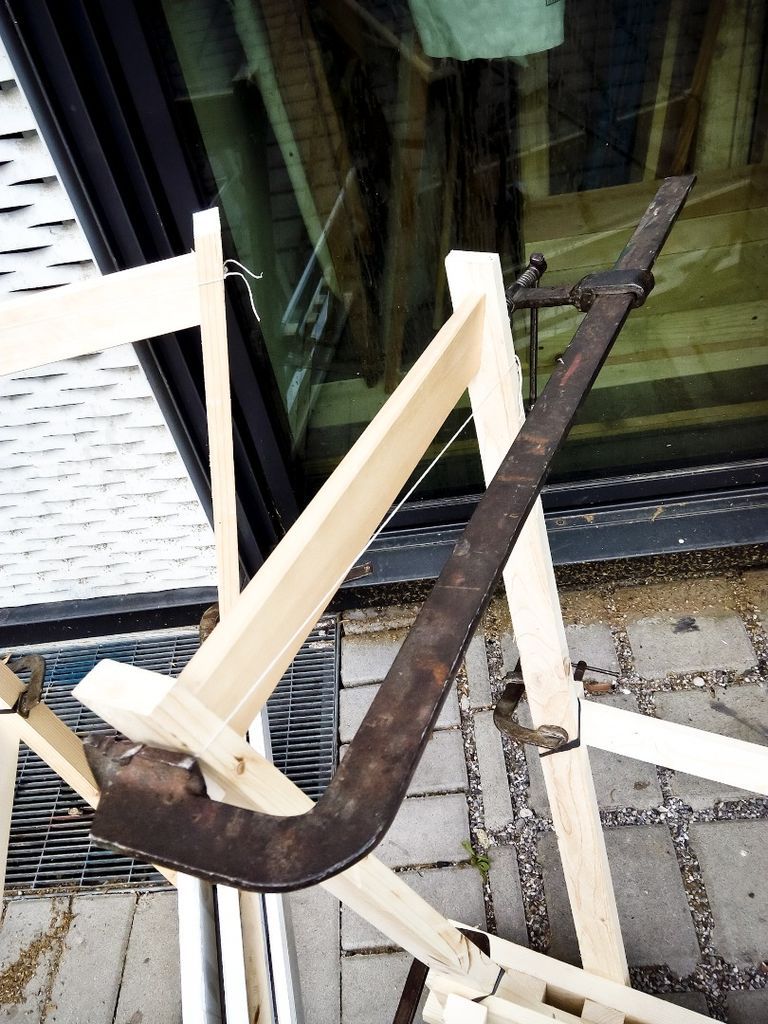
It is best to use long clamps if you can, and if you have enough. I used some bike tubes too.
Step 6: Drying
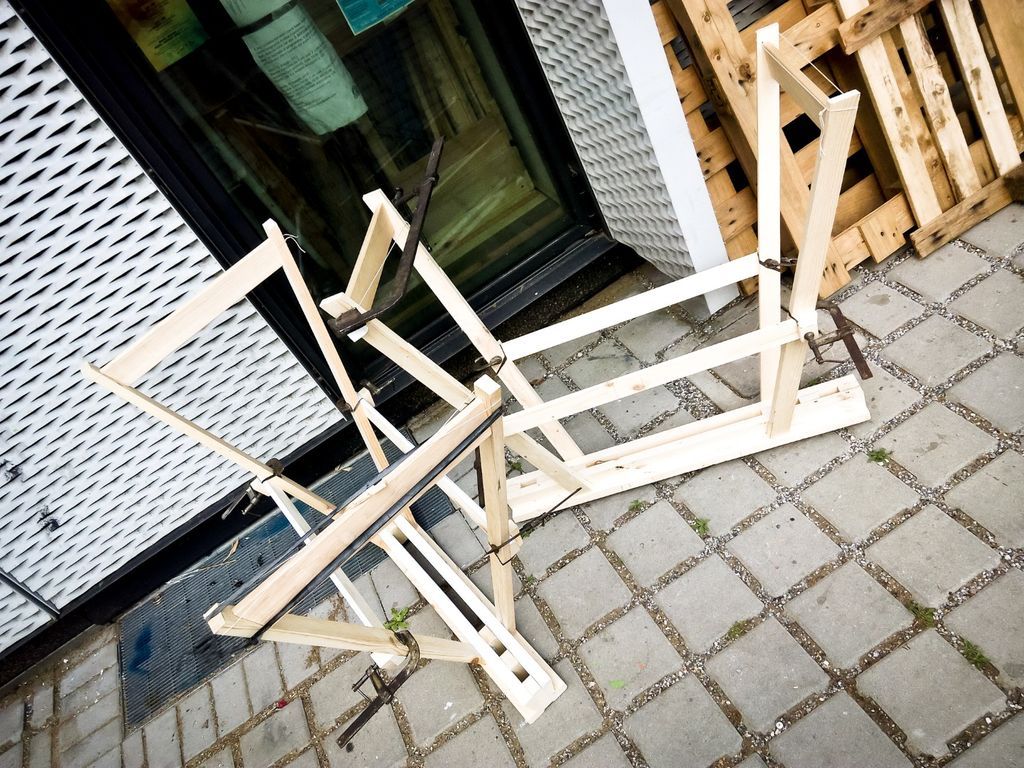

Let the glue dry for at least a few hours. But read the instructions on the glue and follow them to the letter.
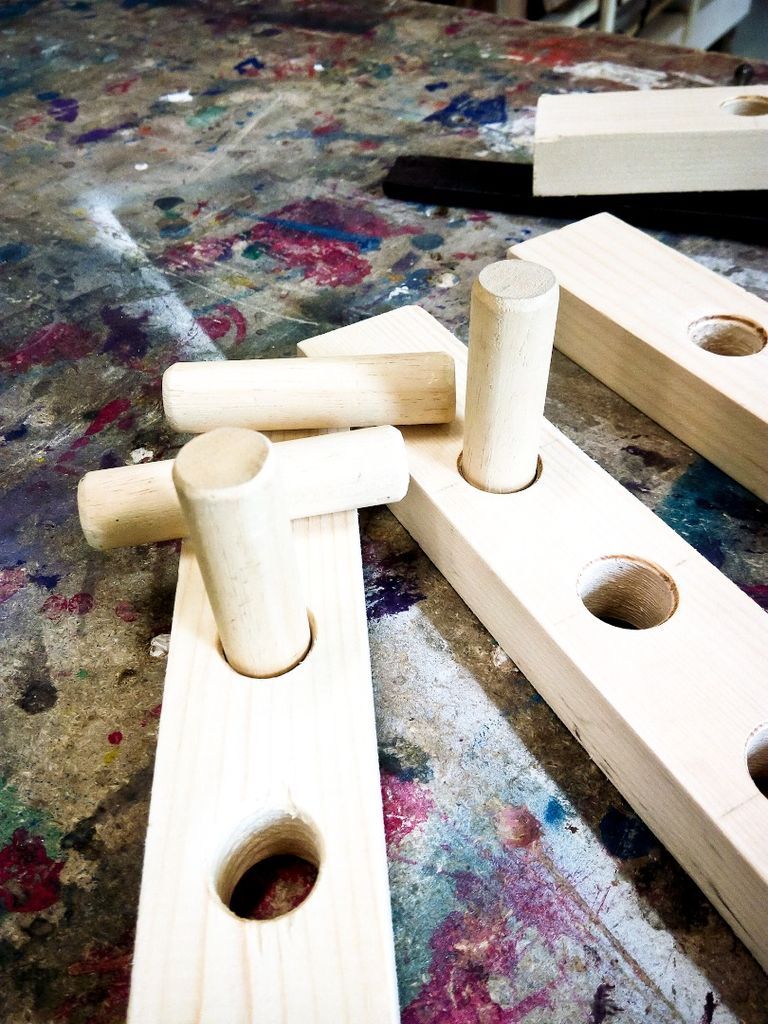
Step 7: Drilling

When the glue is completely dry, you can rRemove the clamps and begin drilling the holes for the dowels.
You don't have to be 100% accurate in determining the position of the holes, just make sure the depth is the same value as the length of the pins.
Also remember that you need at least two plugs for each connection, preferably three not aligned.
If you can try not to come out the opposite side, it will be easier to add glue into the hole.
For some connections, you will see that I drilled two holes on one side and one hole on the opposite side, so I will insert three pins.
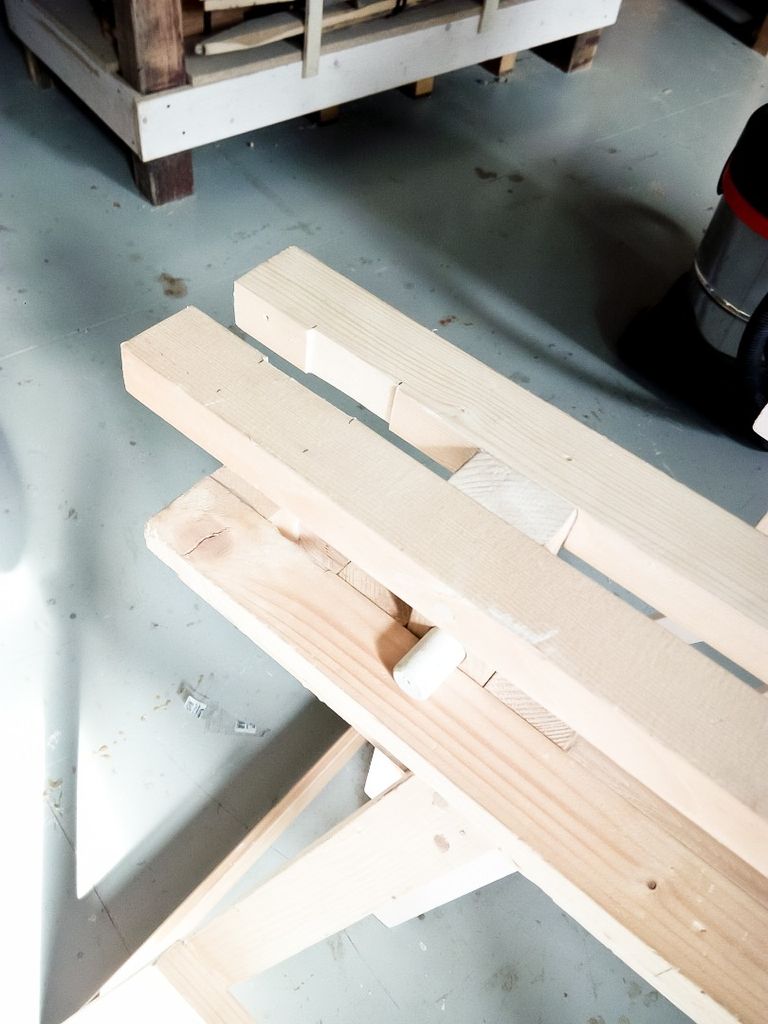
Step 8: Add Pins
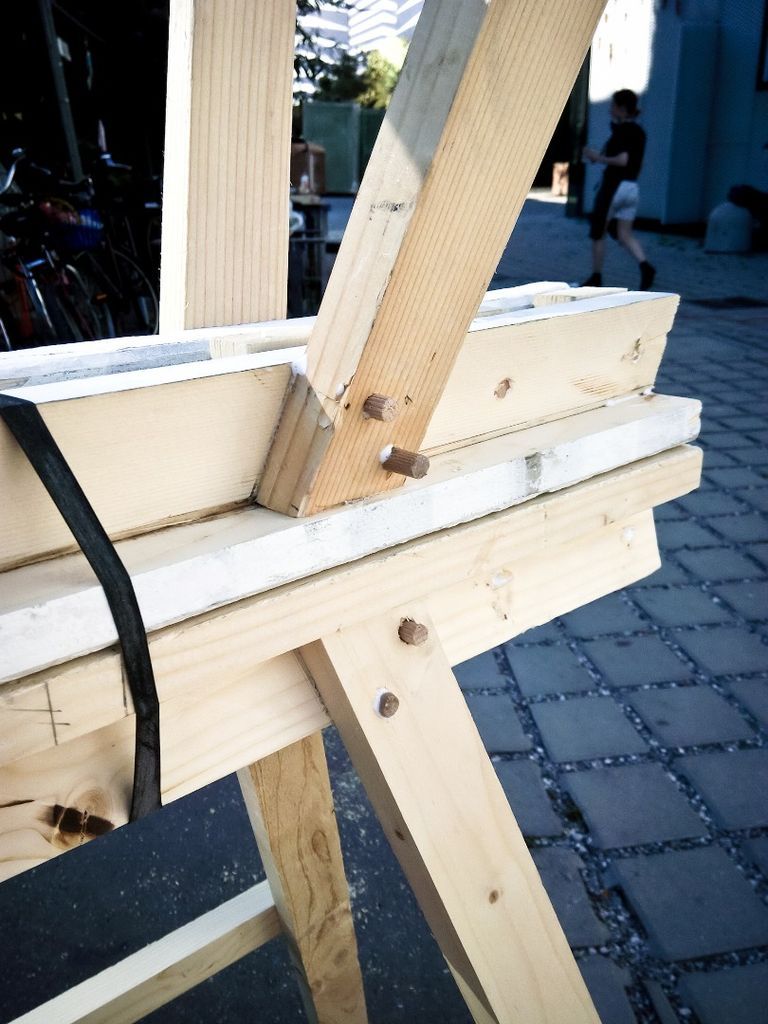
When you have all the holes drilled, you can add glue and insert dowels. Usually the pins may protrude from the surface, so you will refine them with a saw after the glue dries.
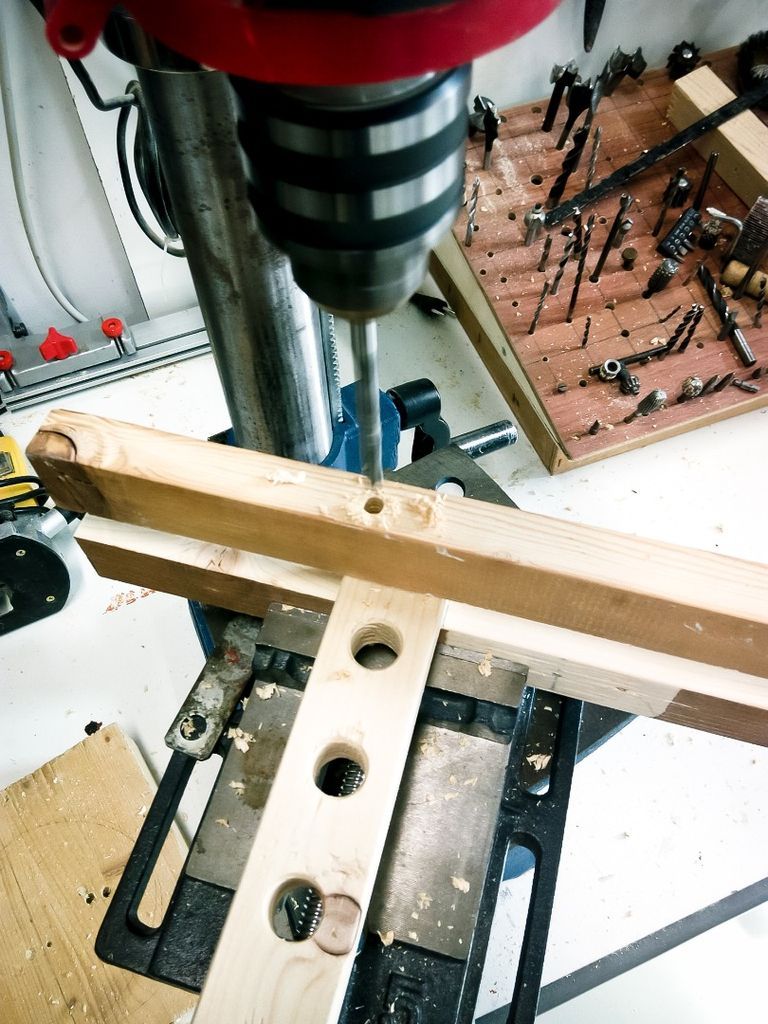
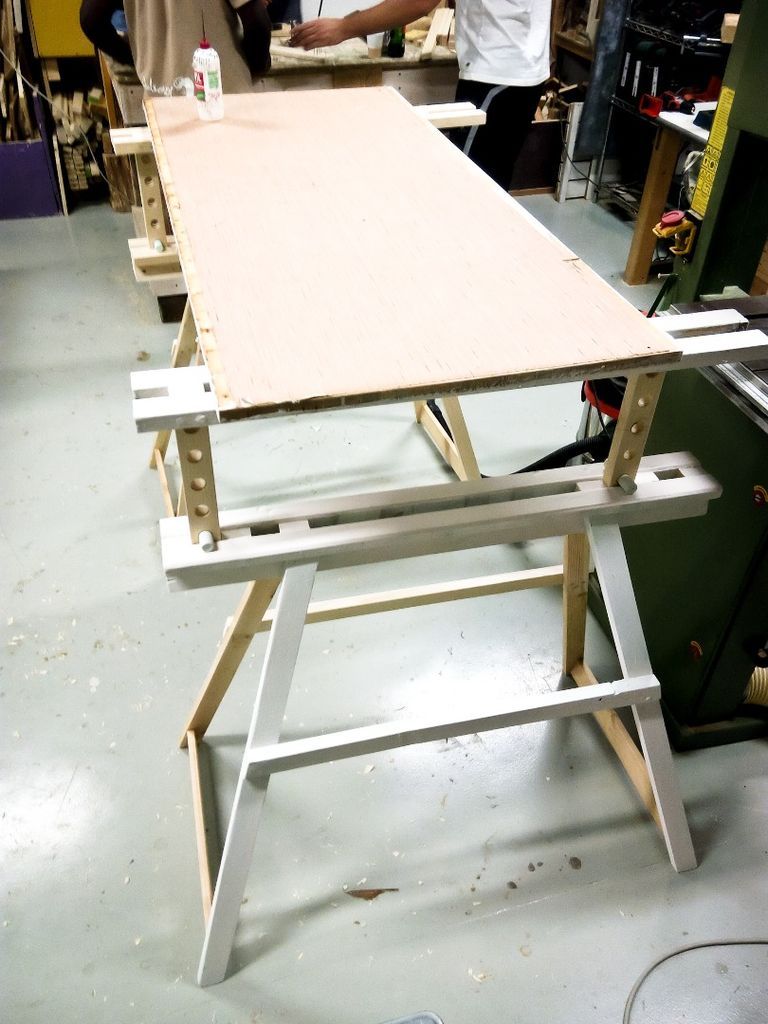
Step 9: Adjustable part
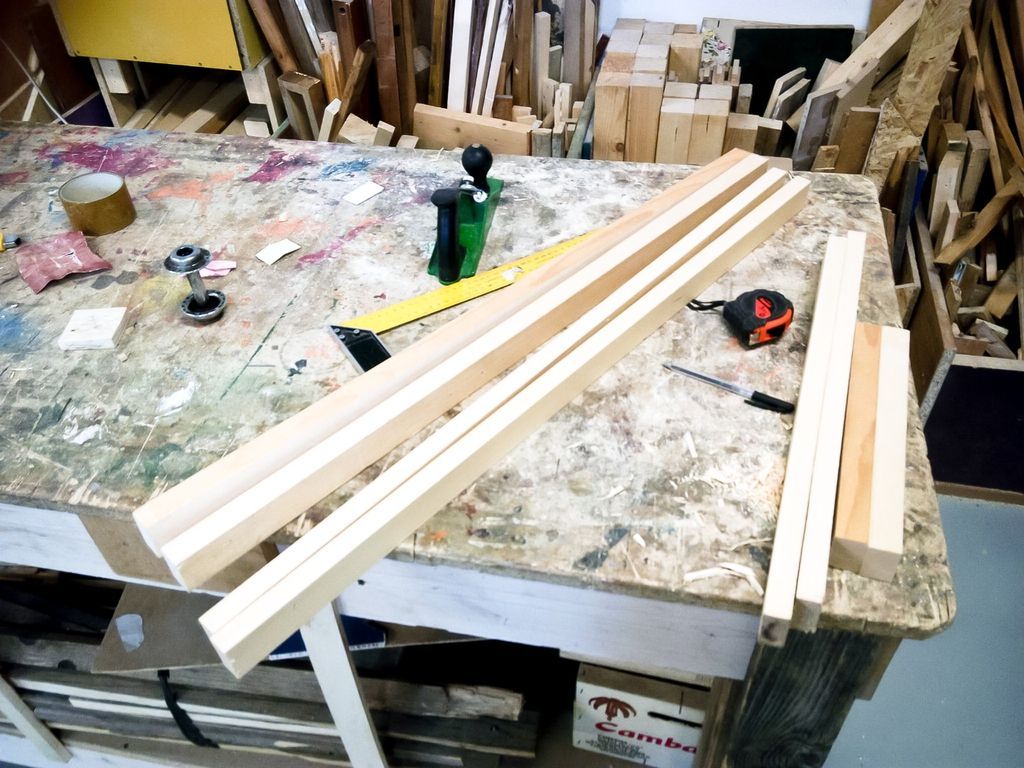
It's time to make the top of the trestles, the part that can go up and down, different heights.
As I had wooden cylinders with 20 mm diameter, I chose to make 20 mm holes. Always check what materials you have before continuing with the project.
I did a test to decide the distance between the holes in the vertical beam, I decided to make 5 holes 50mm apart. Leave at least 80 mm below the bottom hole.
Step 10: Place and paste

Now place the vertical elements in the rectangular holes at the bottom. Pay attention that in the end I decided to place vertical elements not symmetrically to the center of the easel, so that the easels can be stacked.
If rays enter with some difficulty, you have to enlarge the holes with chisels, just pay attention not to overdo it.
You can glue and fasten the horizontal boards together with the vertical elements. Again check all perpendicularity and distances.
Step 11: Add Pins

Also for these parts you have to drill holes and glue plugs. Use two plugs for each connection. Let it dry for a few hours.
Step 12: Touch up the pins
When all the dowels are glued and the glue is dry, you can take a Japanese saw and cut the outside of the dowels.
Step 13: Stacking Feature
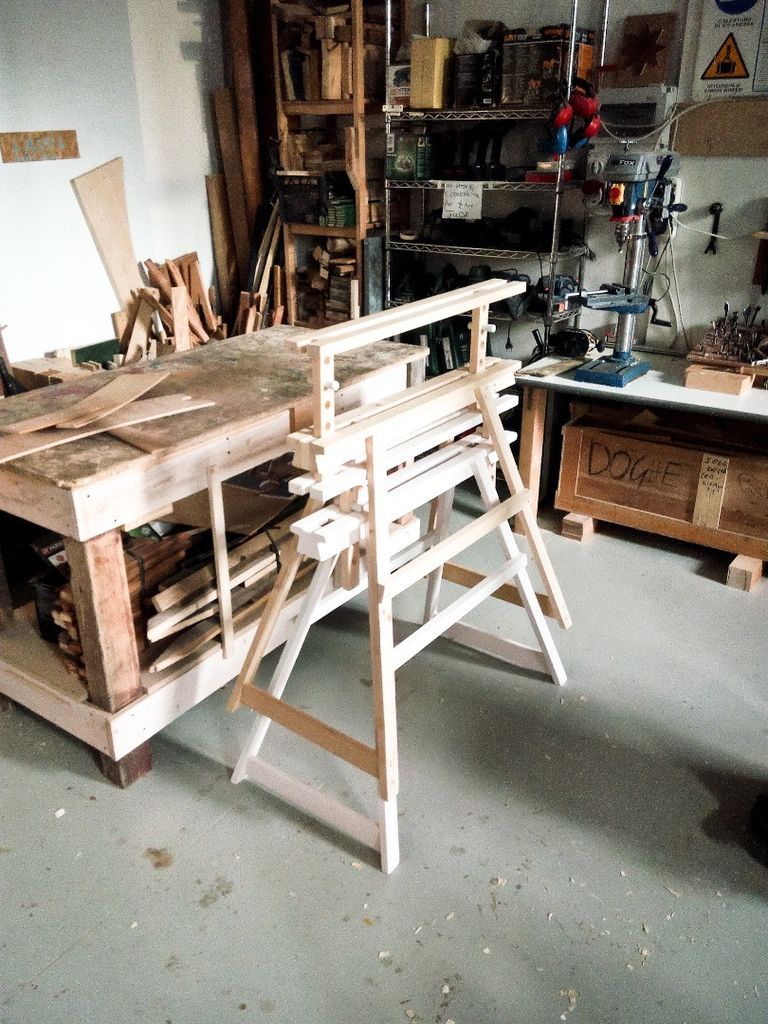
To help stake the two trestles, I cut with chisels on one trestle the part corresponding to the vertical elements of the other. Refine the cuts.
You can also paint one or both of them as you wish.
Step 14: Try and enjoy
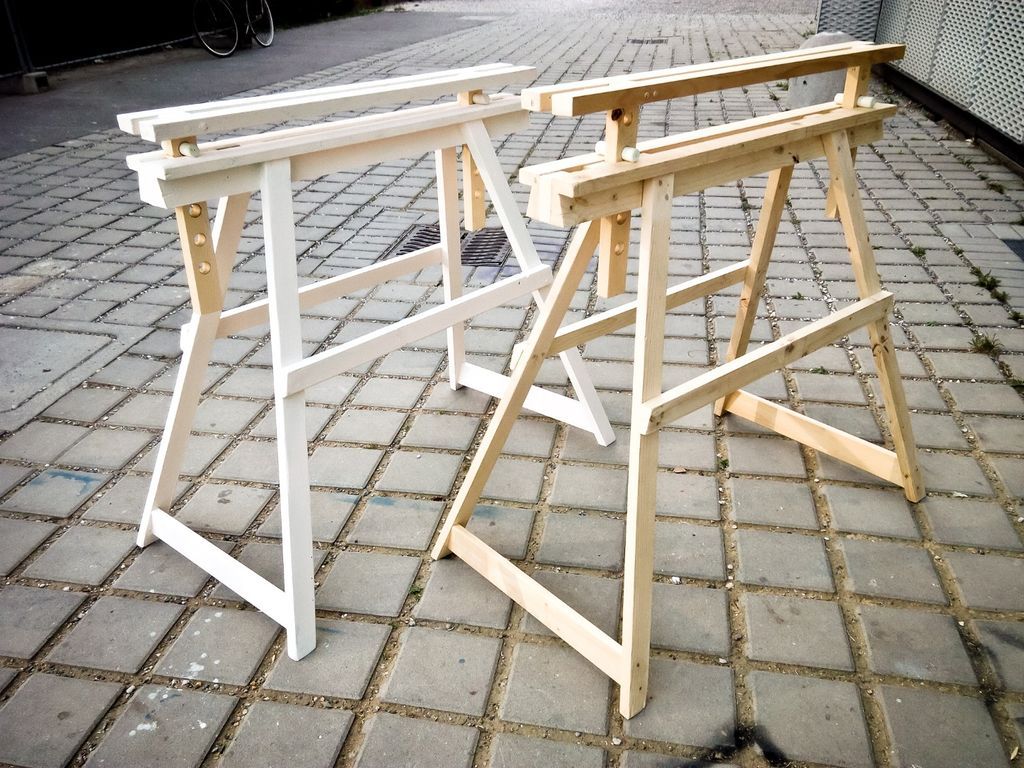

The easels are complete now and you can test their stability and solidity. One of them can maintain my 80 kilos of weight without difficulty. You will use them for years. Greetings!
Get more information at perfectionidea.com and on our Facebook for more Adjustable Wooden Easel for Various Uses.
- Tags
- Guide
Popular Content
How to make a rocket stove for outdoors
Cardboard Drawers Lined with Jeans
Ideas and Advantages of Window Grilles for the Home!
Latest Articles
How to make a refrigerator out of insulating material: Practical step-by-step guide
How to make a Kilim for the Home: Complete Step by Step Guide
How to protect ourselves from accidents in our workplace: Complete prevention and safety guide
Related Content
Playhouse Designs for the Little Ones
Low Maintenance Landscaping Ideas for Your Garden
The Best Creative Ideas to Paint your Walls
Auxiliary Tables Made with Industrial Pipe
Creative Home Decor Ideas to Transform Every Space
Refreshing your home starts with smart design choices that combine comfort, personality, and functionality. Whether you want to modernize a small apartment, upgrade outdoor areas, or create cozy rustic interiors, these trending ideas can completely change the atmosphere of your space.
Outdoor Spaces That Increase Style and Functionality
Outdoor living continues to dominate modern home trends. Homeowners are increasingly investing in practical entertainment zones inspired by these BBQ shed ideas, which create the perfect setup for gatherings and weekend cooking sessions.
First impressions also matter when designing exteriors. Elegant farm entrance gates design ideas help properties stand out while improving privacy and curb appeal.
Compact living solutions are also gaining popularity. These inspiring 16x40 shed house interior design ideas show how smaller spaces can still feel luxurious and functional.
To enhance patios and entryways, homeowners are adding stylish protection with these creative porch awning exterior DIY ideas that blend aesthetics with practicality.

Rustic and Cozy Interior Design Trends
Warm and natural interiors remain timeless. These charming rustic decor ideas combine wood textures, vintage accents, and earthy tones to create welcoming spaces.
Bedrooms are becoming more personalized with curated wall arrangements. Many homeowners use these stylish picture wall ideas for bedroom spaces to display memories and artwork creatively.
Textured wall treatments are another major trend. Installing a board and batten wall adds architectural character while keeping interiors elegant and modern.
Similarly, bold accent wall ideas can instantly transform plain rooms into eye-catching focal points without requiring a full renovation.
Smart Kitchen and Organization Inspiration
Functional kitchens are essential for modern homes. These practical kitchen wall cabinet ideas maximize storage while maintaining a clean and stylish appearance.
Organization also starts at the entrance. Well-designed mud room ideas help families keep shoes, coats, and daily essentials neatly arranged.
Colorful and Personalized Home Styling
Vibrant interiors are becoming increasingly popular thanks to playful dopamine decor ideas that use bright colors and joyful accessories to improve mood and energy.
Gallery walls also continue to evolve as a major decorative feature. These trendy gallery wall inspiration ideas offer creative ways to combine prints, photos, and statement art.
Young renters and new homeowners are especially embracing these stylish first apartment aesthetic ideas to create sophisticated interiors on a budget.
Finally, selecting the right shades can dramatically influence any room’s atmosphere. These modern trendy color ideas help homeowners choose palettes that feel fresh, elegant, and timeless.
Final Thoughts
From rustic charm and colorful interiors to outdoor entertaining areas and functional storage solutions, today’s home decor trends focus on creating spaces that feel both beautiful and livable. By combining smart layouts, modern textures, and personalized decorative elements, any home can become more stylish, comfortable, and inspiring.


