


I realized that there wasn't really a design for a laptop harness made only of paracord that didn't involve simply weaving it, so I decided to make my own.
When I started this project, I had several criteria that I wanted to get right, and after three more prototypes, this one is successful.

1) 100% paracord
2) Symmetrical and aesthetically pleasing.
3) Successfully holds the laptop where it is supposed to be!
4) It is easy to remove the laptop and put it back
(The ancillary benefit was that it also left my stickers visible, because they are awesome.)
Steps to make a paracord harness for laptops:
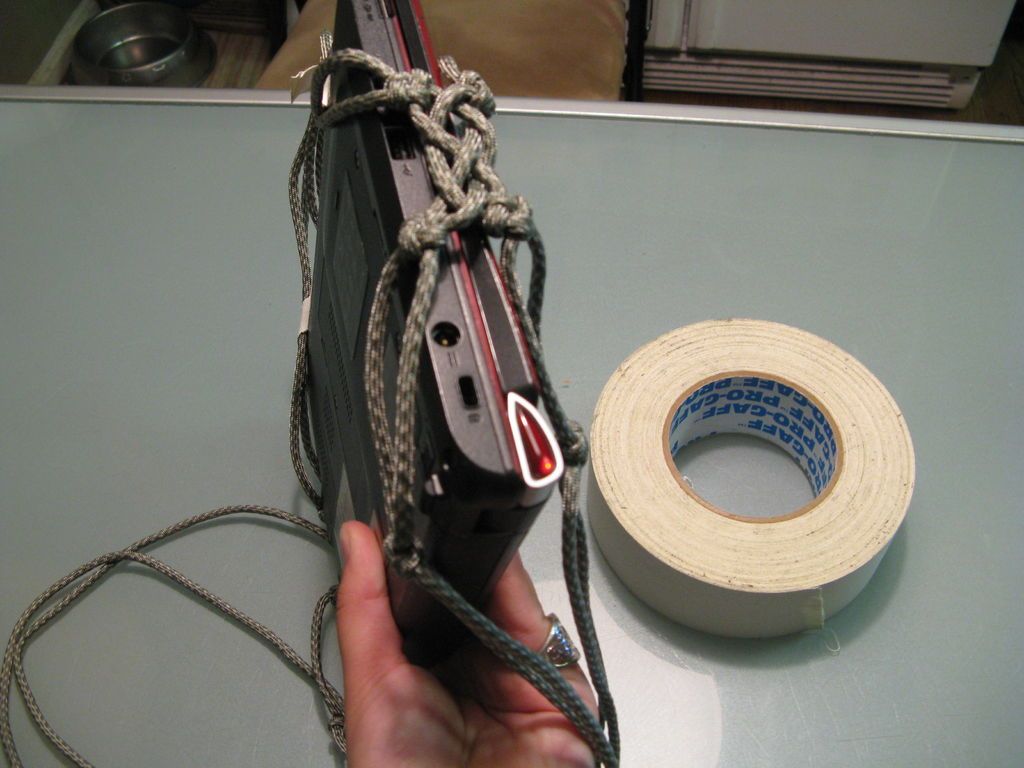
Step 1: Necessary Materials

You won't need much for this project. I used about 44 feet of paracord, although you'll probably need more if your laptop is larger.
- I used my 10″ Acer netbook. If you don't have that much paracord lying around yet, it's cheap enough to buy. If you are the type of person who likes paracord and has a lot of it, then it is free.
- The scissors are for cutting the paracord.
- Lighter is for burning the ends (be careful)
- Gaffer tape is optional, but I find it useful and leaves no residue on either the paracord or the laptop. If you don't have tape, any type of tape will do.
Step 2: Preparation

Cut four lengths of paracord to the same length. These strands will form the body of the harness. Mine were 8′ long, but you may want to add an extra foot or three if your laptop is larger than a 10″ netbook.
Not shown in the photo is another pair of threads, each approximately 6′ long for the handles. Put them aside as you won't need them for a while.
I recommend burning the ends to prevent them from fraying while you work.
Step 3: Combine and round them!

Match the strands of your body and find the center. Glue it together and keep the two pairs separate from each other.
While you're here, tear off a few pieces of tape and keep them handy near the edge of a table or something.
Step 4: Set up your handles

Center the engraved pieces on the top of your laptop, one on each side, and stick them for as long as you like. On the side a little shorter and be sure to do the same for the other side.
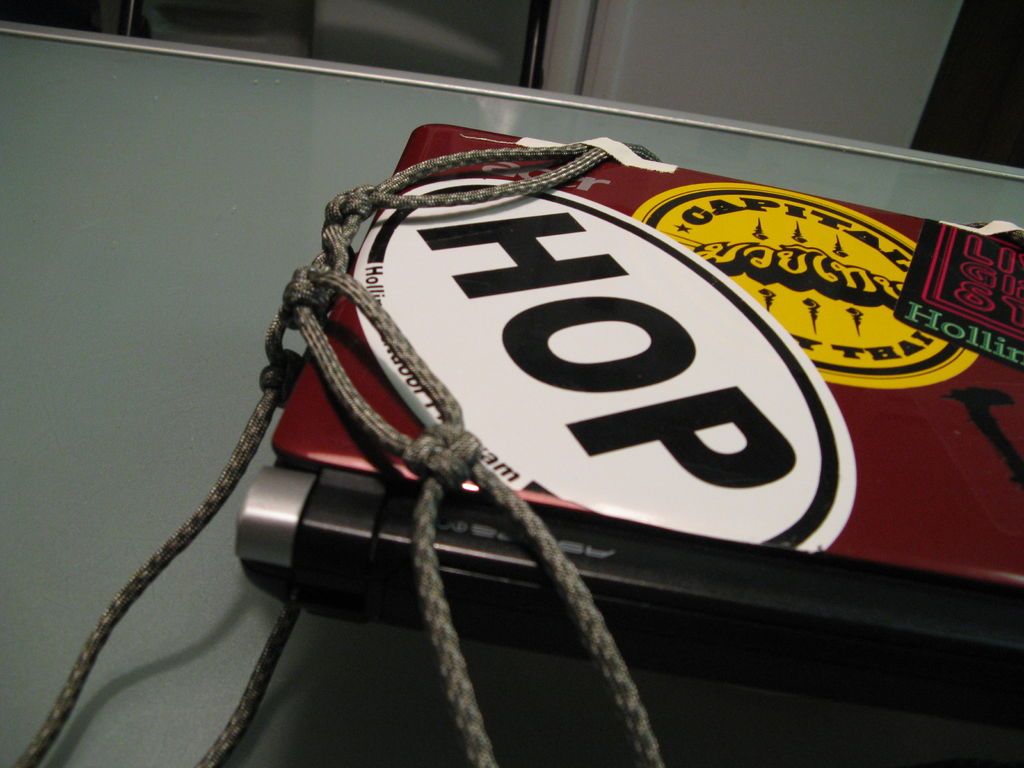
Step 5: Cross Knot


Tie a cross knot where the strands of your paracord reach the edge of the laptop
Instructions for a cross knot can be found online, although I walk through them in image form here. Apologies for slight blur.
While you're at it, get used to the cross knot. You'll be making a lot of them. For now, however, just do this with all 4 pairs of your worker threads. Make sure you keep them facing you if aesthetics are important to you.
Step 6: Joining the sides


On each side, they loosely braid the strands to create a light side to the harness. There's no need to overtighten it, and I actually recommend that you don't.
If you don't feel like doing that, you can loop each other.
Once you're done with that, put a cross knot andn each pair of threads. Do this on both sides of the harness. Symmetry is your friend, as is spacing.
Step 7: More Cross Knots!
On each pair of strands, tie another cross knot about half an inch from the bottom of your laptop when the strands are pulled at an angle of about 45 degrees from the sides. If that doesn't make sense, just look at the photos.
Step 8: More and less

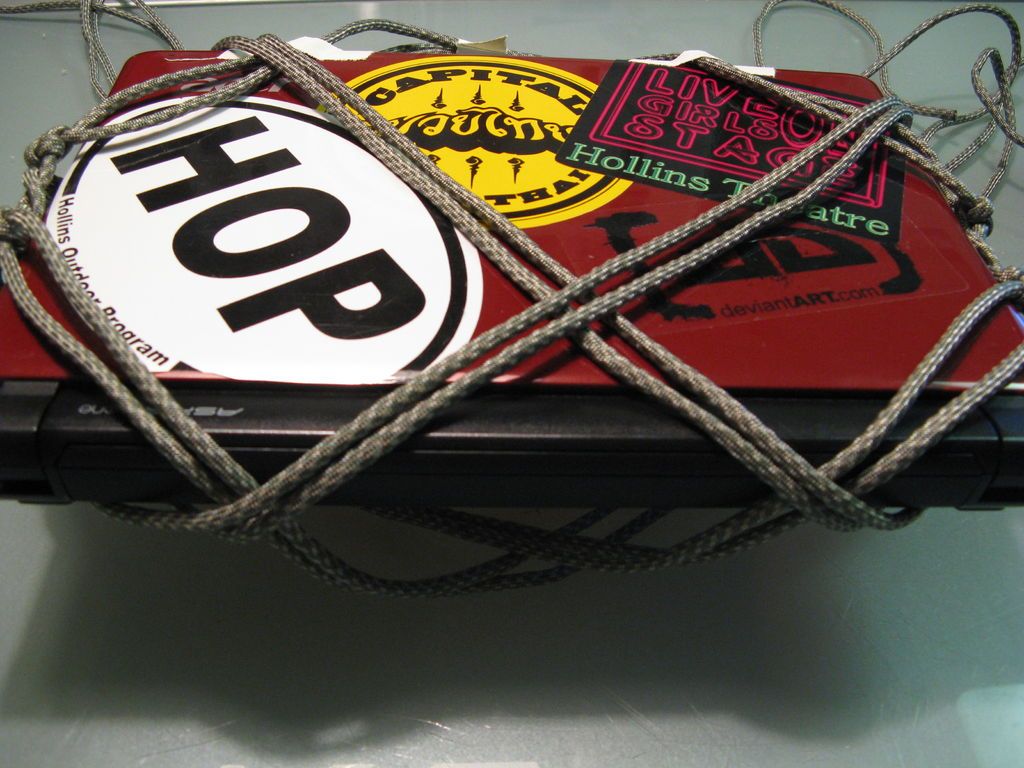
Cross each pair under the laptop to the other side, weaving the strands together. Do this for all four pairs to make it symmetrical.
The second image only gives the general shape of what will end up.
Step 9: The last set of cross knots, I swear

Take each pair of strands and tie another set of cross knots. These are the last ones, I promise. Once they are finished and evenly spaced, cross the strands in the same over-under pattern. Do this for both sides of the laptop.
Step 10: Stitches


Take each pair of threads and thread them through the threads that you taped to the laptop (if you chose to use tape)
Once you turn them over, start a cobra stitch down from where you just came from and continue until you like the length. Do this on both sides.
Before your cobra point goes too far, be sure to pull the threads until you are pulling a little on the puller. This will keep the laptop much more comfortable in the harness and keep it safe.
Step 11: Trim and Burn!


I highly recommend removing your laptop harness to trim and burn the ends of the cobra stitch. Then you can put it back and appreciate it for a moment or two.
And I shouldn't have to remind you that fire is as dangerous as molten paracord. Be careful!
Step 12: Handles!

Take those strands (mine were 6′ and they gave me about 7″ each). It's time to put some handles on this suction cup. Remove the tape from the center of the threads before and begin your cobra stitch where you want your handle to begin.
When your handles are as long as you want, trim and burn the ends.
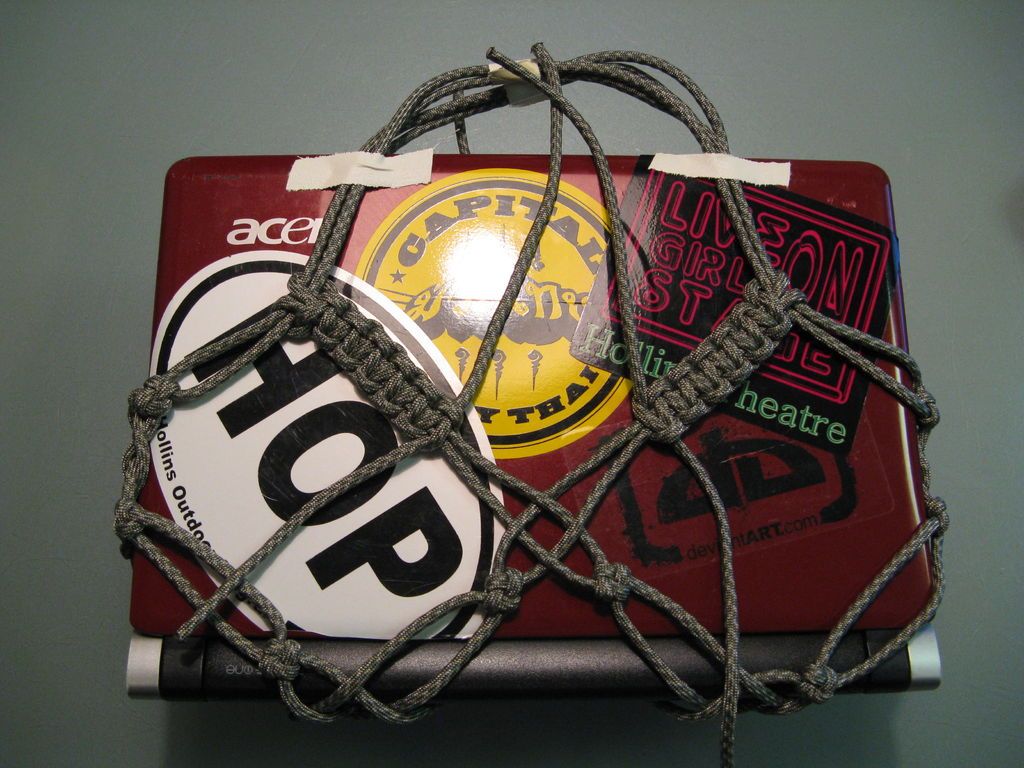
Step 13: Finished!


Follow us on our social networks for more content.
Popular Content
How to make a rocket stove for outdoors
Cardboard Drawers Lined with Jeans
Ideas and Advantages of Window Grilles for the Home!
Latest Articles
How to make a refrigerator out of insulating material: Practical step-by-step guide
How to make a Kilim for the Home: Complete Step by Step Guide
How to protect ourselves from accidents in our workplace: Complete prevention and safety guide
Related Content
Learn to Decorate your Interior with Tree Branches
Building a Wooden Xylophone Quickly and Easily!
Football Goal Made of PVC Pipes
Weeping Willow Candlesticks
Creative Home Decor Ideas to Transform Every Space
Refreshing your home starts with smart design choices that combine comfort, personality, and functionality. Whether you want to modernize a small apartment, upgrade outdoor areas, or create cozy rustic interiors, these trending ideas can completely change the atmosphere of your space.
Outdoor Spaces That Increase Style and Functionality
Outdoor living continues to dominate modern home trends. Homeowners are increasingly investing in practical entertainment zones inspired by these BBQ shed ideas, which create the perfect setup for gatherings and weekend cooking sessions.
First impressions also matter when designing exteriors. Elegant farm entrance gates design ideas help properties stand out while improving privacy and curb appeal.
Compact living solutions are also gaining popularity. These inspiring 16x40 shed house interior design ideas show how smaller spaces can still feel luxurious and functional.
To enhance patios and entryways, homeowners are adding stylish protection with these creative porch awning exterior DIY ideas that blend aesthetics with practicality.

Rustic and Cozy Interior Design Trends
Warm and natural interiors remain timeless. These charming rustic decor ideas combine wood textures, vintage accents, and earthy tones to create welcoming spaces.
Bedrooms are becoming more personalized with curated wall arrangements. Many homeowners use these stylish picture wall ideas for bedroom spaces to display memories and artwork creatively.
Textured wall treatments are another major trend. Installing a board and batten wall adds architectural character while keeping interiors elegant and modern.
Similarly, bold accent wall ideas can instantly transform plain rooms into eye-catching focal points without requiring a full renovation.
Smart Kitchen and Organization Inspiration
Functional kitchens are essential for modern homes. These practical kitchen wall cabinet ideas maximize storage while maintaining a clean and stylish appearance.
Organization also starts at the entrance. Well-designed mud room ideas help families keep shoes, coats, and daily essentials neatly arranged.
Colorful and Personalized Home Styling
Vibrant interiors are becoming increasingly popular thanks to playful dopamine decor ideas that use bright colors and joyful accessories to improve mood and energy.
Gallery walls also continue to evolve as a major decorative feature. These trendy gallery wall inspiration ideas offer creative ways to combine prints, photos, and statement art.
Young renters and new homeowners are especially embracing these stylish first apartment aesthetic ideas to create sophisticated interiors on a budget.
Finally, selecting the right shades can dramatically influence any room’s atmosphere. These modern trendy color ideas help homeowners choose palettes that feel fresh, elegant, and timeless.
Final Thoughts
From rustic charm and colorful interiors to outdoor entertaining areas and functional storage solutions, today’s home decor trends focus on creating spaces that feel both beautiful and livable. By combining smart layouts, modern textures, and personalized decorative elements, any home can become more stylish, comfortable, and inspiring.


