
How to Make a Height Adjustable Work Table: a mobile table, with a top that I can easily level wherever I choose to use it.
I'm very happy with the way it turned out and the versatility it offers, and I hope this information can be helpful to anyone with a similar need.

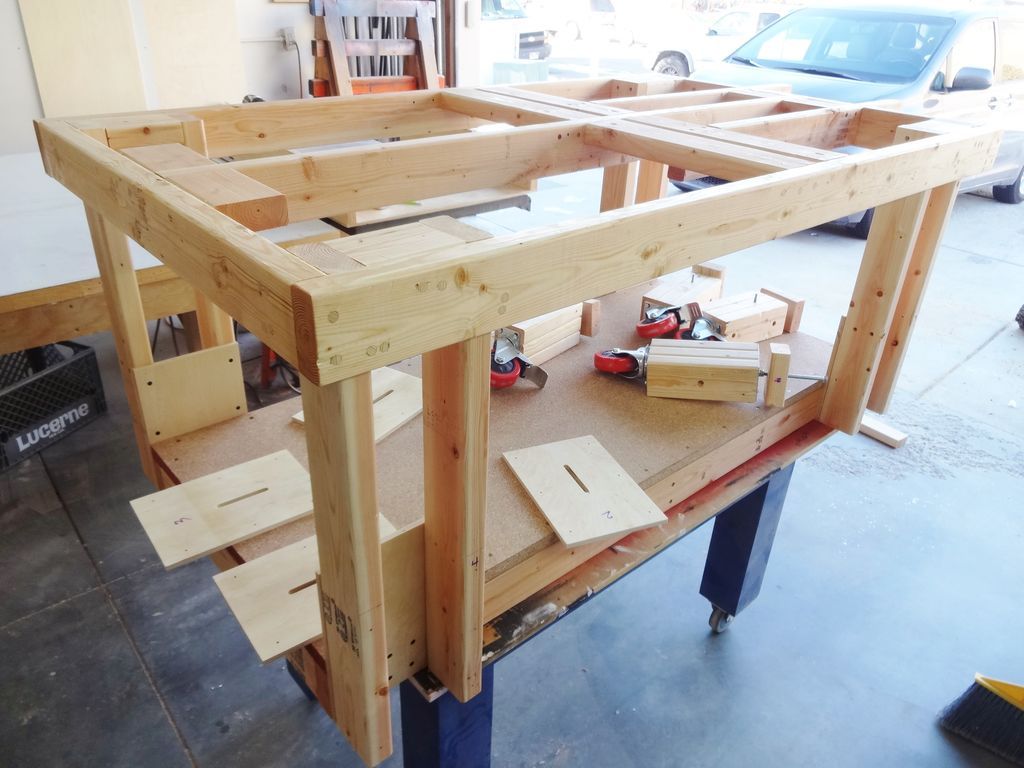
Step 1: Overview

The table itself was built much like the hundreds of other work tables found on the Internet: Cut 2x4 wood boards held together with glue and screws.
Here are a couple of other work tables I've made that cover some basic procedures in more detail: Simple Workshop Cart with Hidden Drawer
The top of my table was made from 2 halves of a solid core door that I picked up at a thrift store, which was screwed to the table frame from the bottom.
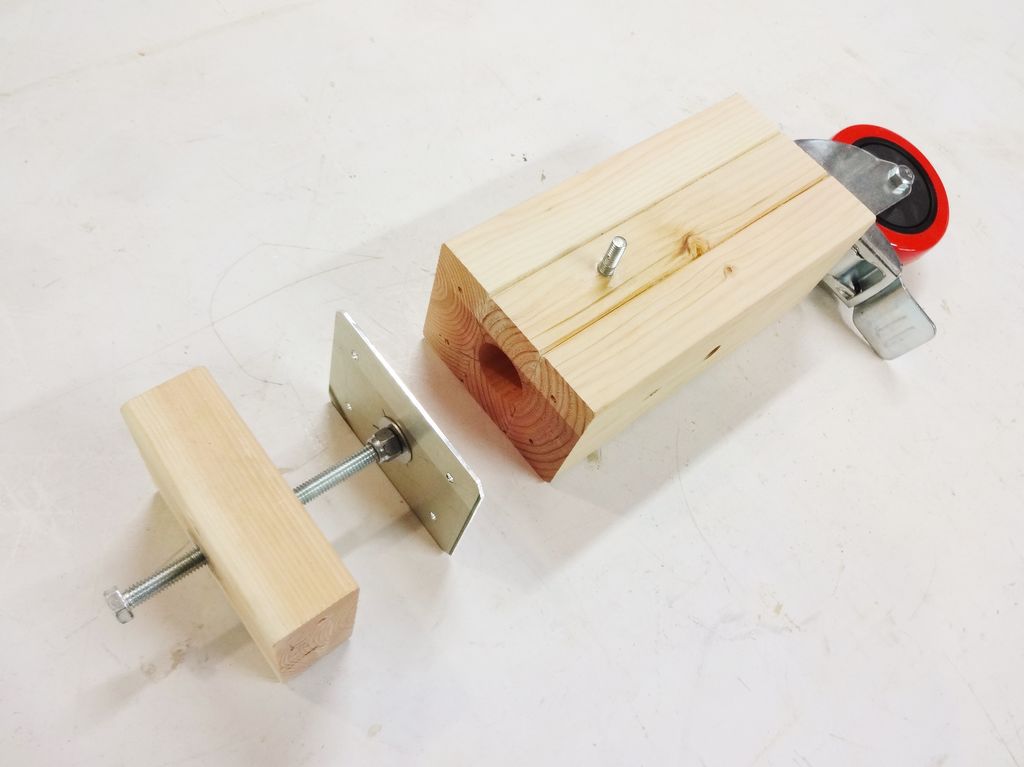
The bottom shelf section was covered with a piece of an old countertop. The legs themselves and the adjustable mechanism are the main focus of this project. The photos here show what they consist of and the essence of how they go together.
Step 2: Piston and upper block
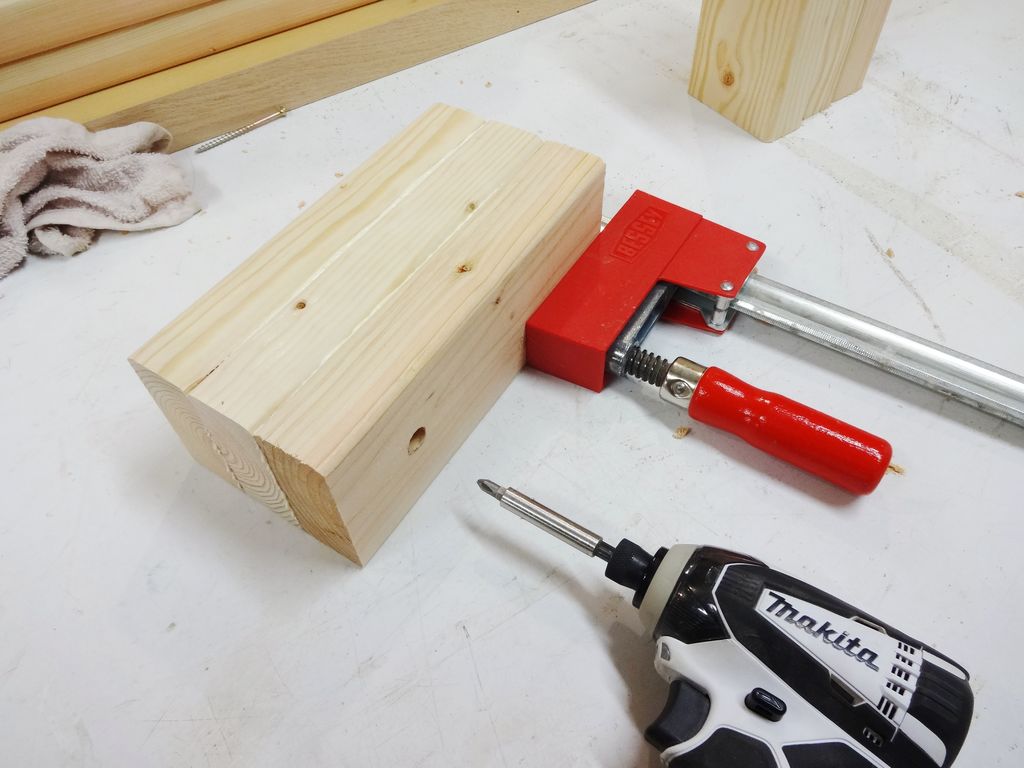

I started by making the adjustable piston assembly for each leg. The actual piston part is made of three pieces of 9-inch-long frame wood. Each piece was run through the table saw to trim about 1/32″ from the width, so the finished piece would slide freely inside the leg housing.
These three blocks were glued and screwed together. A clamp was used to help keep them perfectly aligned. The next top block through which the bolt is screwed. It was cut to be about 1/16″ longer than the width of the 3 piece block you just made.
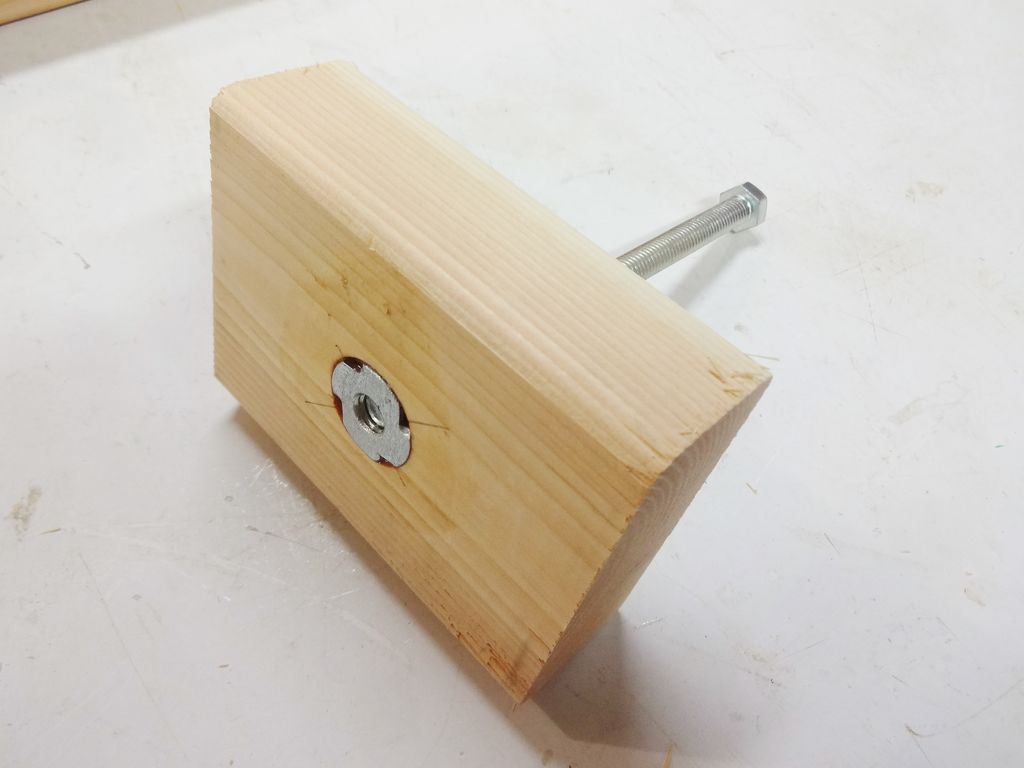
The holes were drilled to receive a toothed nut at the bottom of the block and a T-nut with the teeth removed at the top. A hole was drilled to run all the way too. I used 6 inch 3/8″ bolts and a matching hardware for each leg mechanism. With two T-nuts like this, you need to make sure the threads are synchronized in such a way that it allows the bolt to thread freely up and down.
The serrated T-nut was dipped in epoxy and tapped into place first, and a bolt was screwed into place.
The teeth on the second T-nut were cut with a rotary tool, and this toothless nut was epoxyed in place by threading it along the bolt and placing it on the block.
A wing nut was used to temporarily hold it in place while the epoxy dried. It's critical that you don't use too much epoxy, as you don't want it to reach the bolt at all. When the epoxy has dried, you should be able to easily pass the bolt up and down through the block.
Step 3: Assembly
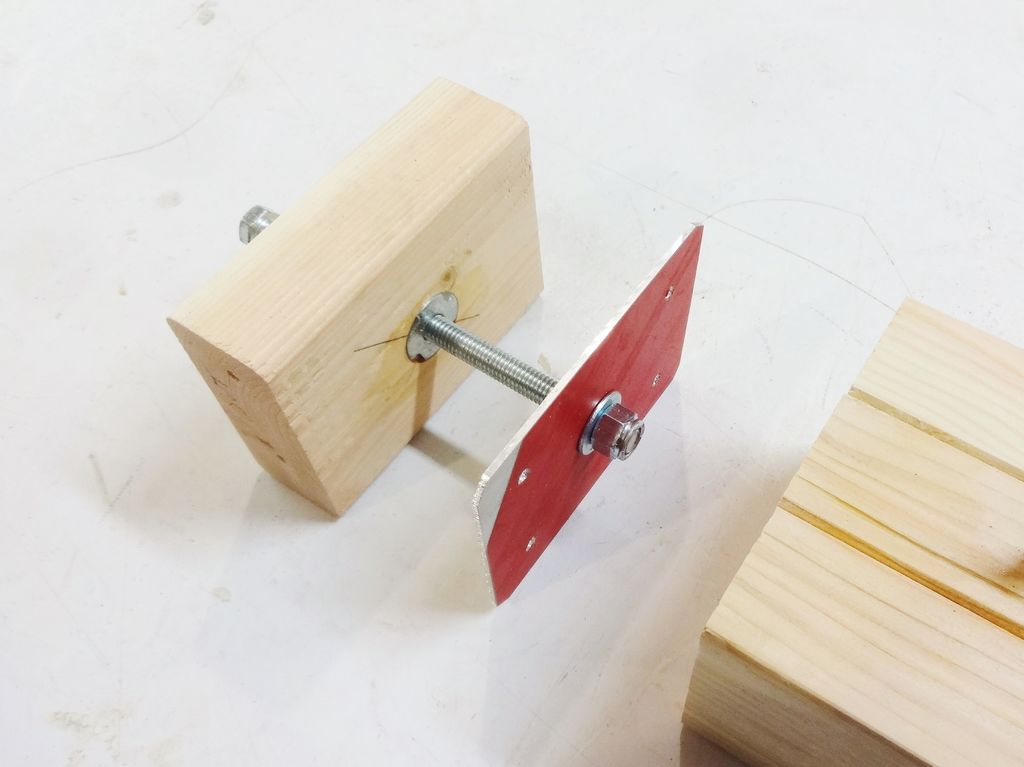
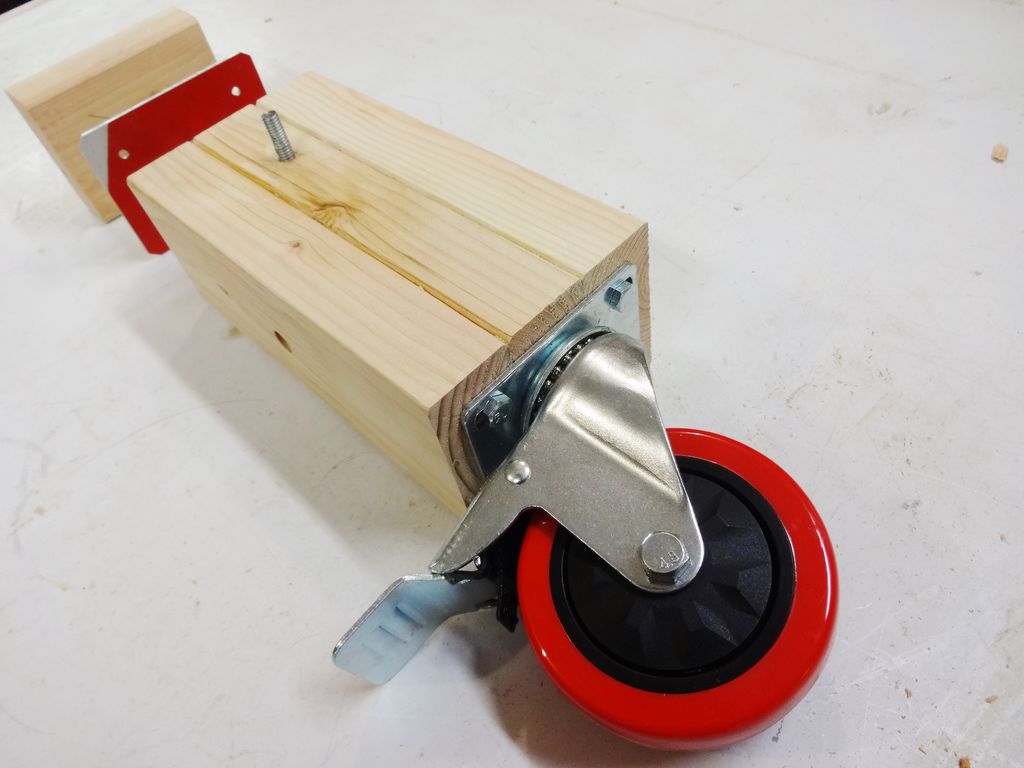
With the bolt and nuts in place on the upper block, a piece of scrap aluminum was cut to fit the top of the piston portion of the leg and the hole was drilled in the center. I cut the aluminum with this.
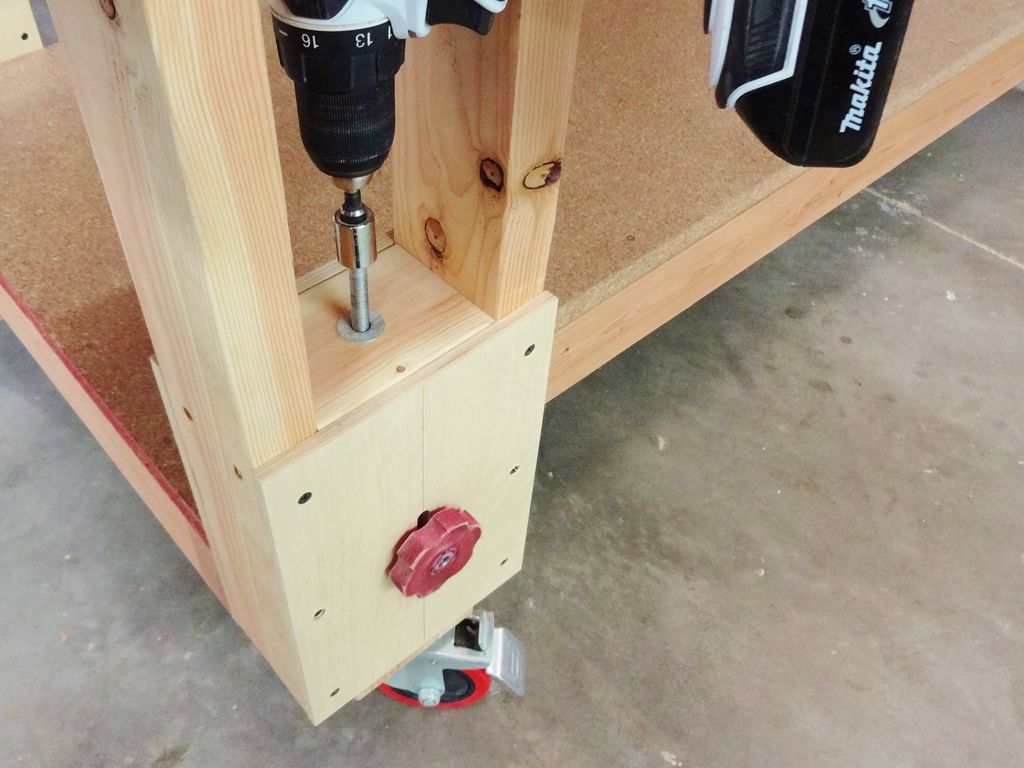
The end of the bolt is secured to the plate with lock nuts and washers, but is kept loose enough to rotate freely. This plate is bolted to the top of the piston, and a locking wheel is attached to the bottom end with set screws in drilled holes.
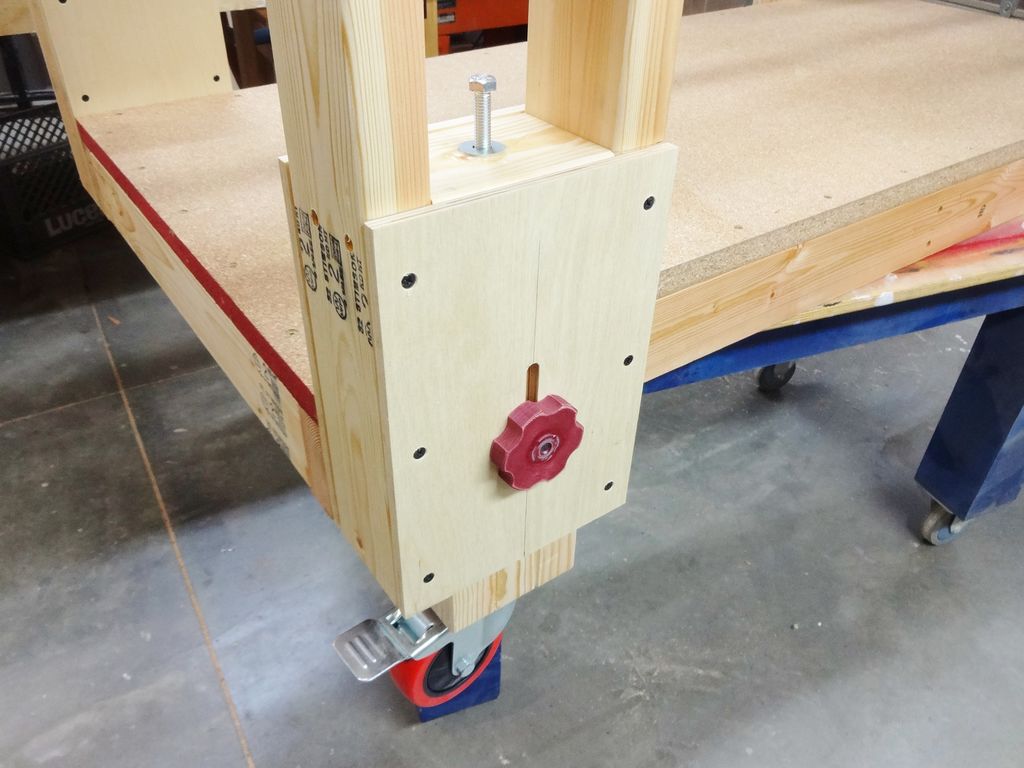
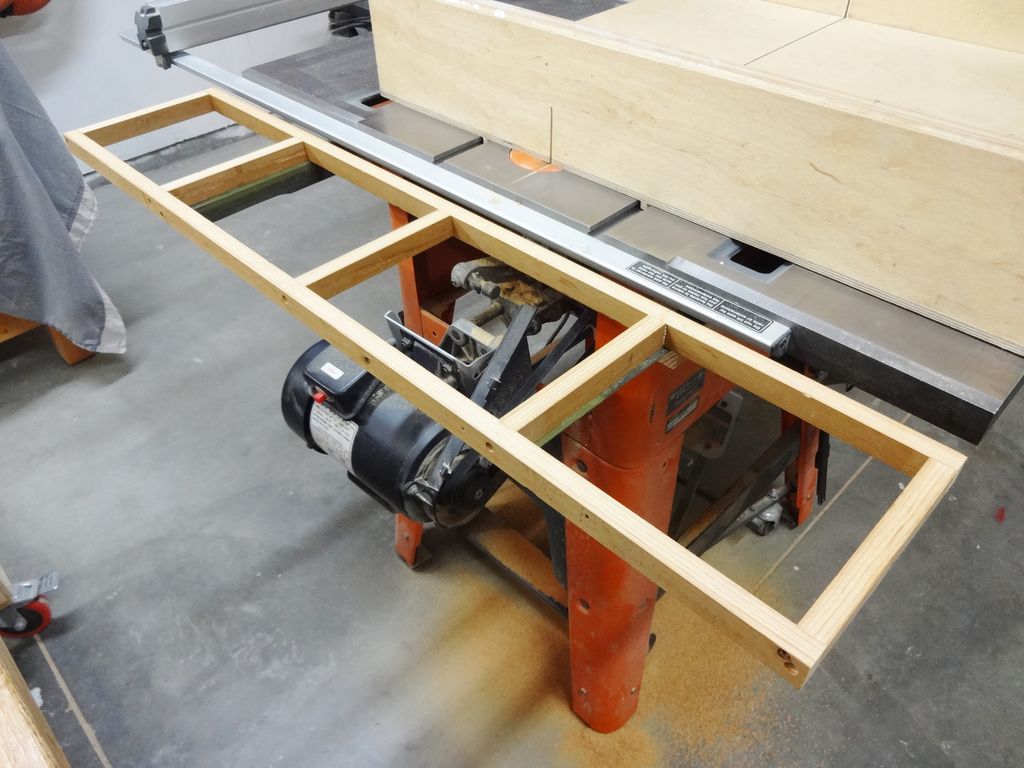
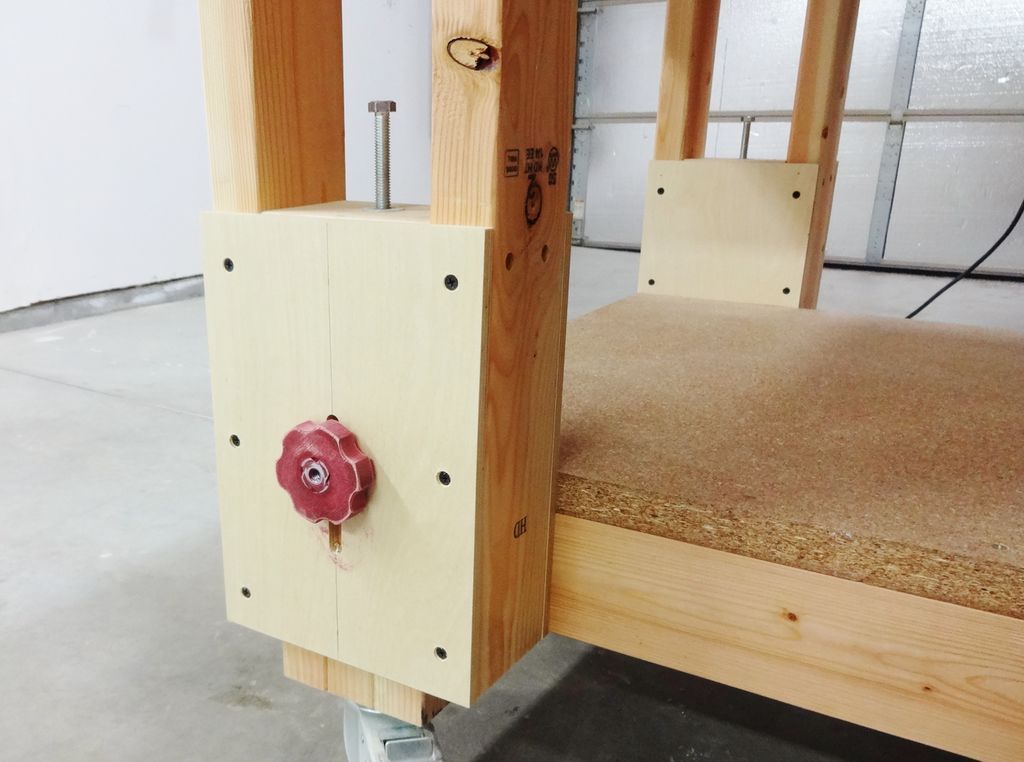
Step 4: Install on the table legs
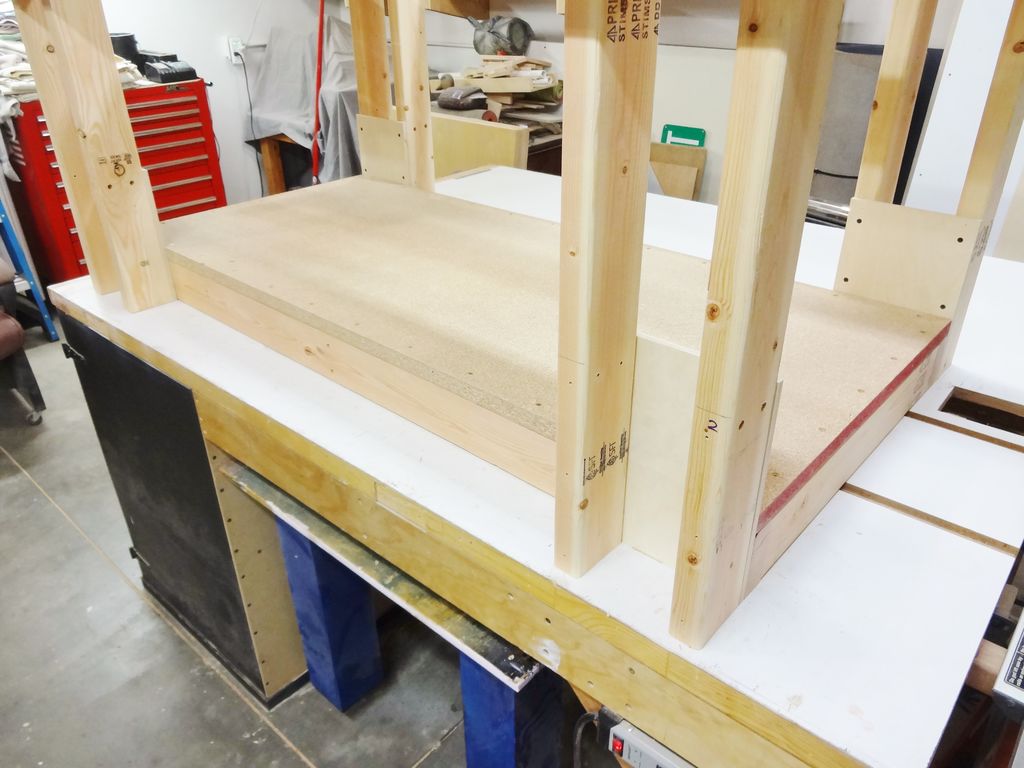
The table was constructed with leg pieces, as shown, to allow the piston mechanism to be installed on the underside of the legs.
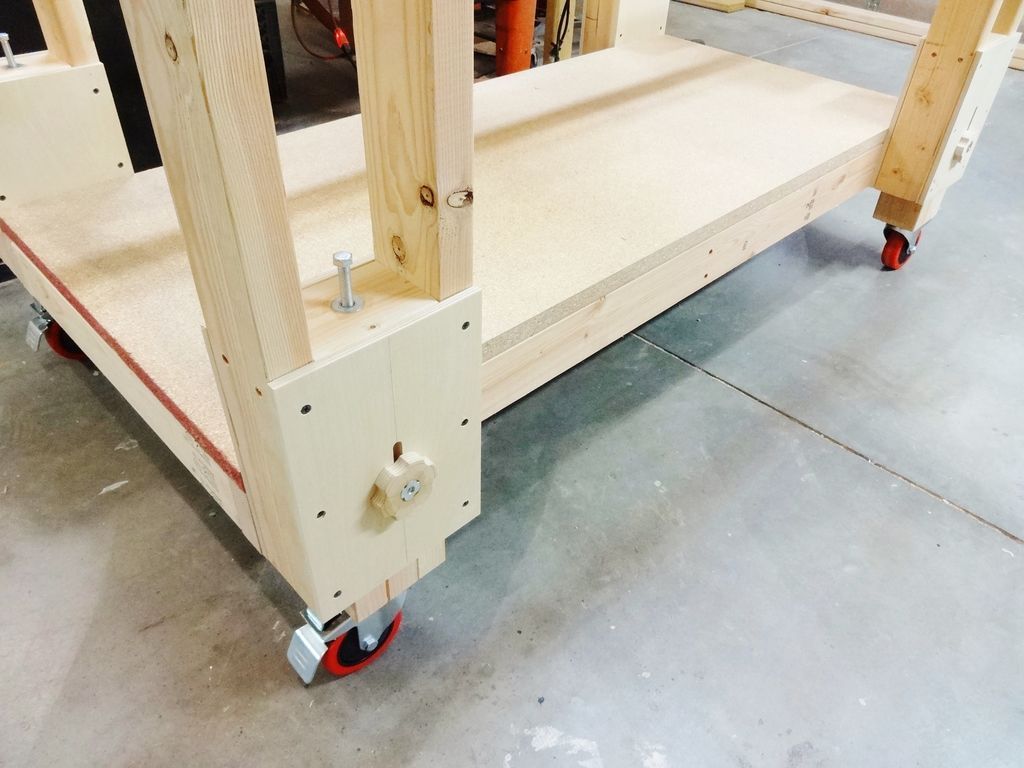
The upper block of the piston assembly is attached with the first 11 inches from the bottom of thethe legs of the table. Some knobs were made of plywood with T-nuts that act as locks on the vertical movement of the piston assemblies.
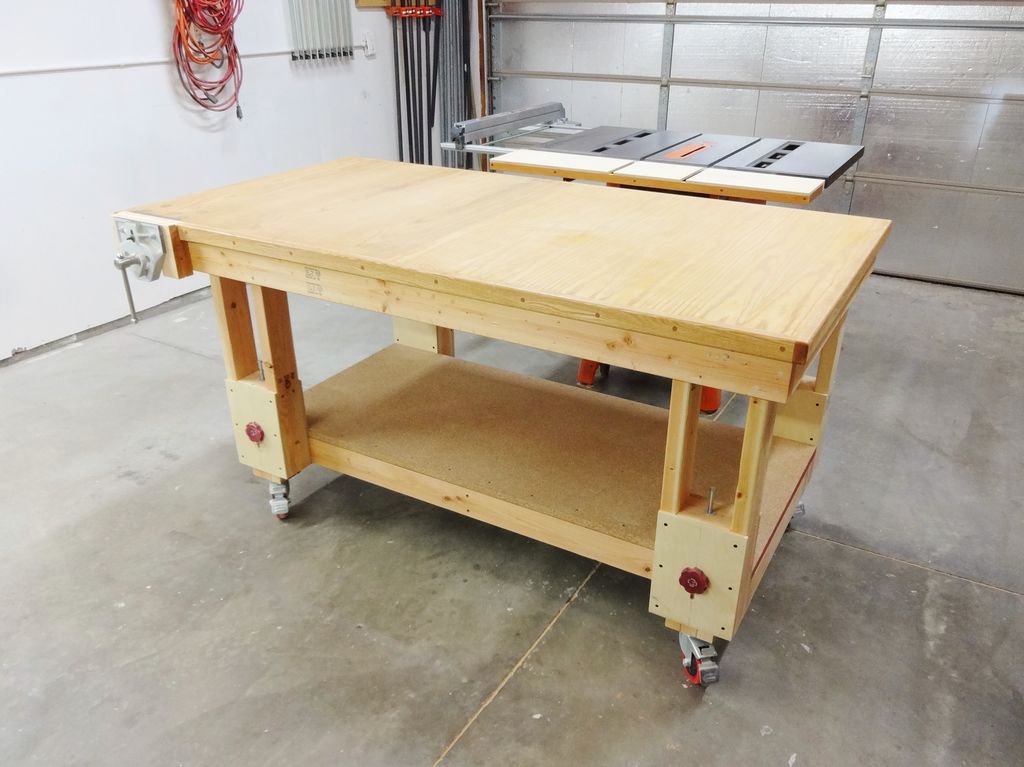
Step 5: Table Frame
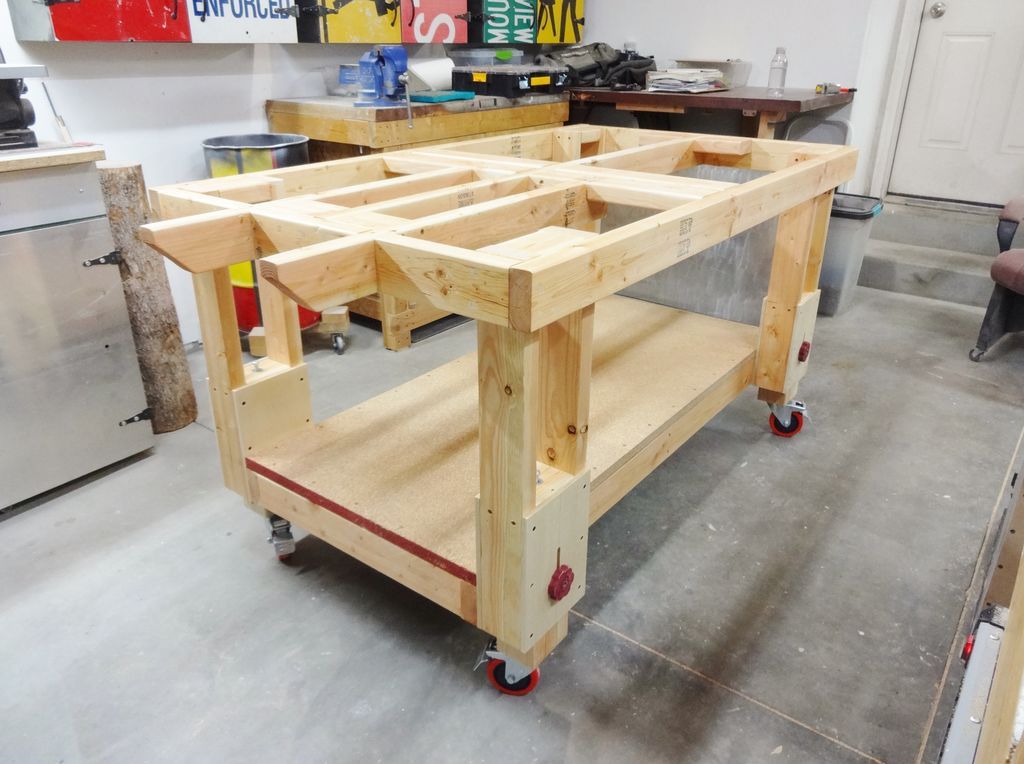
Here's a closer look at the table frame. Everything received several coats of lacquer, and the knobs were also painted.
Step 6: Add the Cap, Trim and Screw
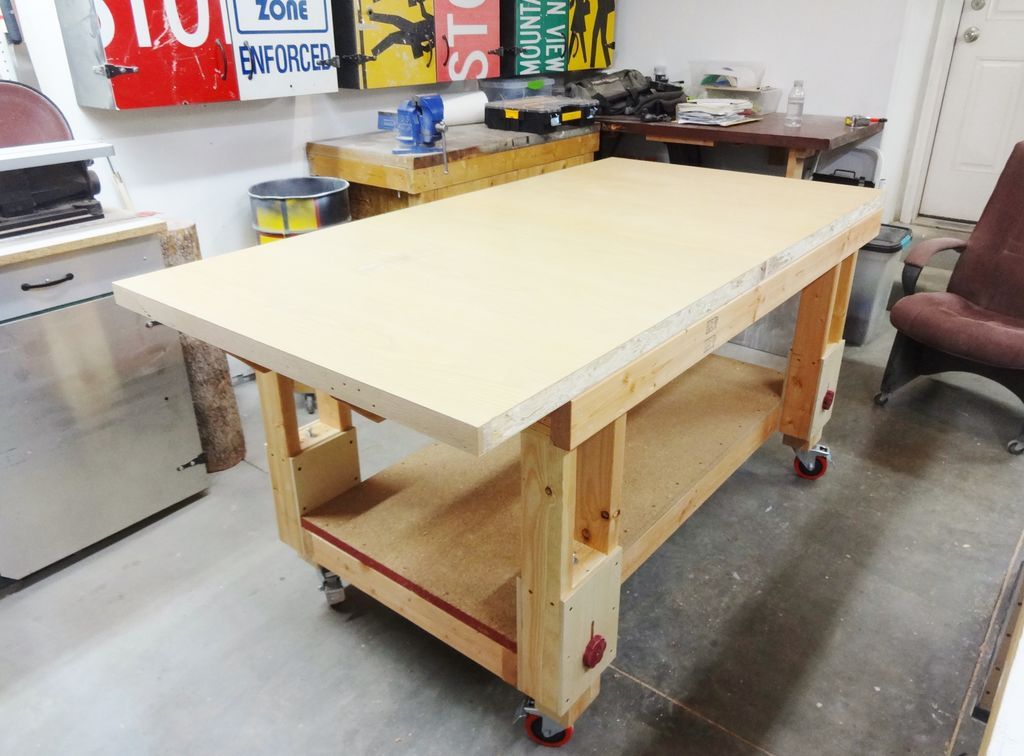
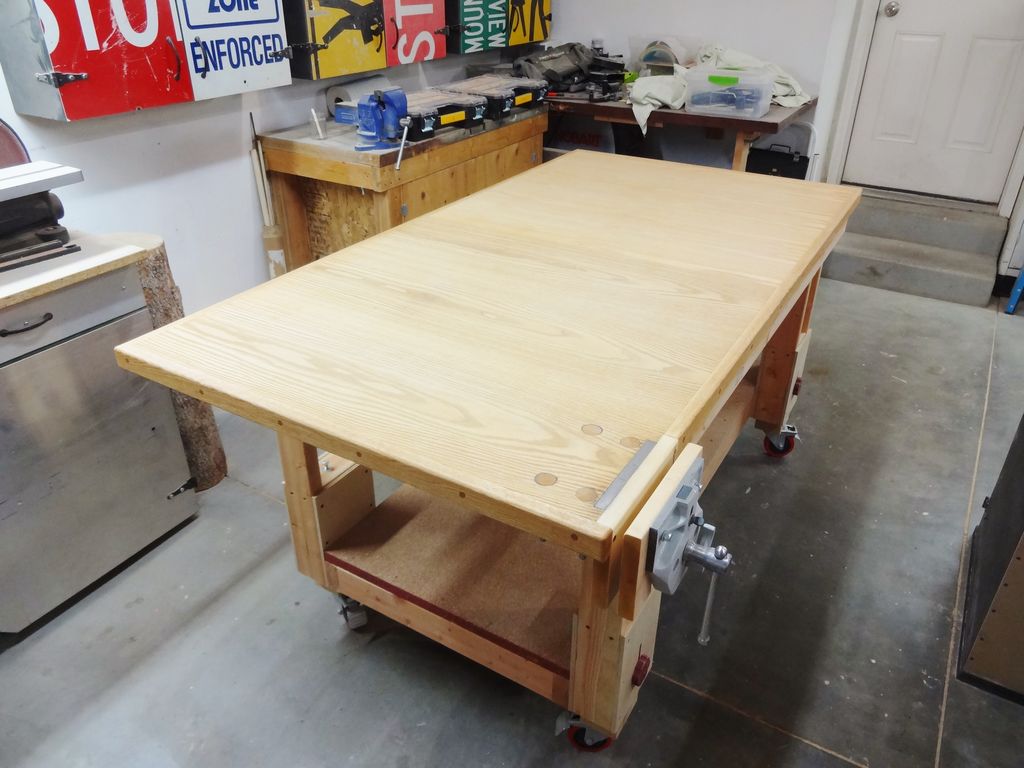
The table top was added and the oak trim was screwed around the outside.
A vise was screwed to the corner of the table where it protruded from the frame. The bolts were covered with pieces of oak wood that were glued in place, and the entire top received a few coats of lacquer. Sand a little and spray with more lacquer if necessary.
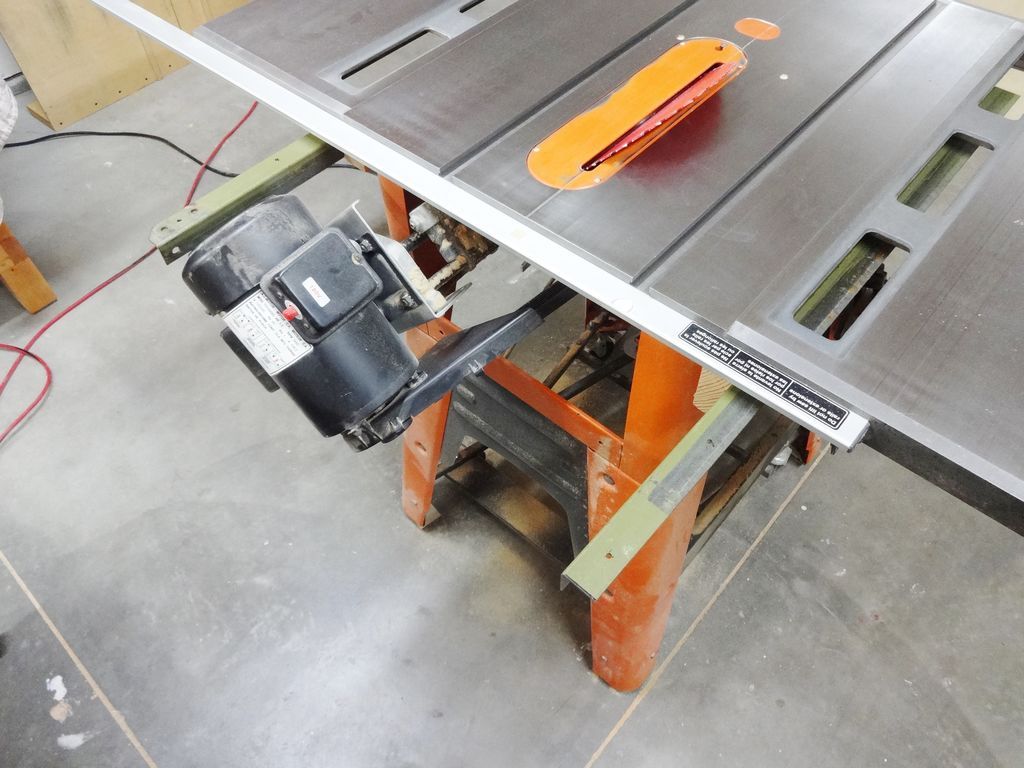
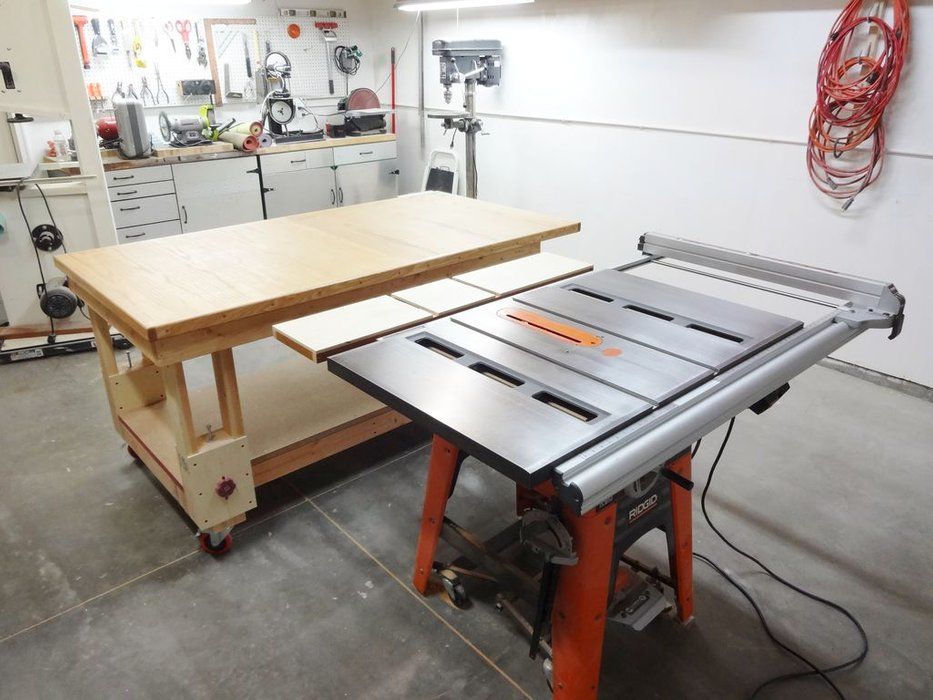
Step 7: Bonus: Table Saw Extension
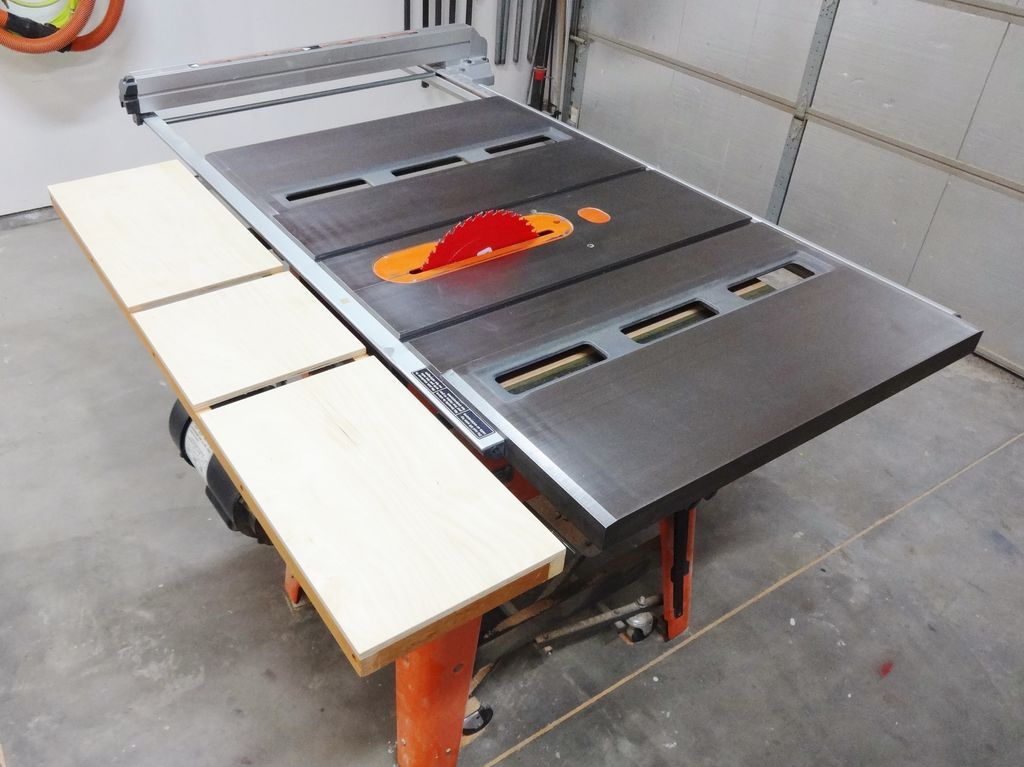
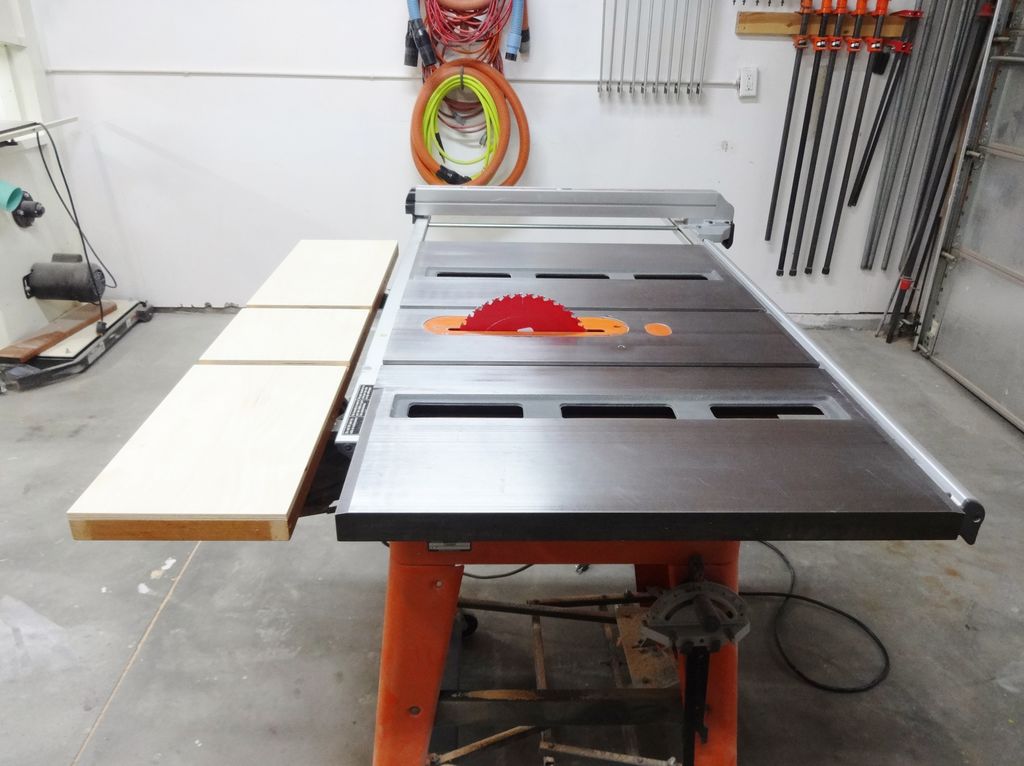
I added this mini extension to the back of my table saw, and when I need the big output table to cut long boards or sheets, I place it about 8 inches behind this extension, and I'm all set.
The following steps show how this was done.
Step 8: Support Rails
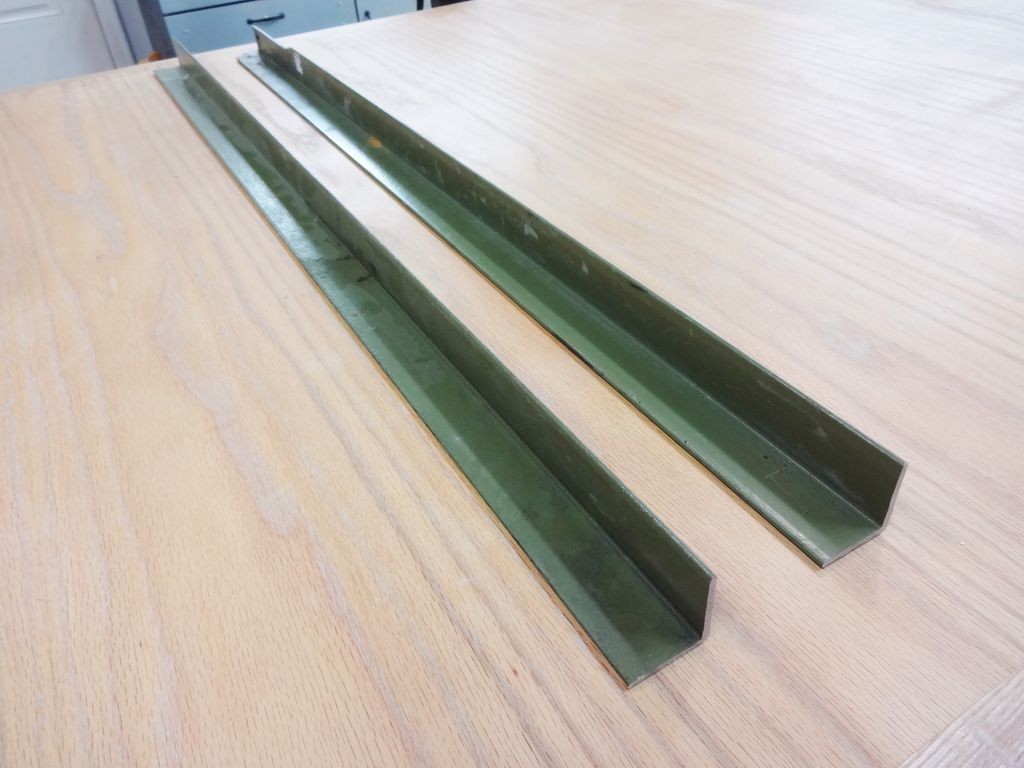
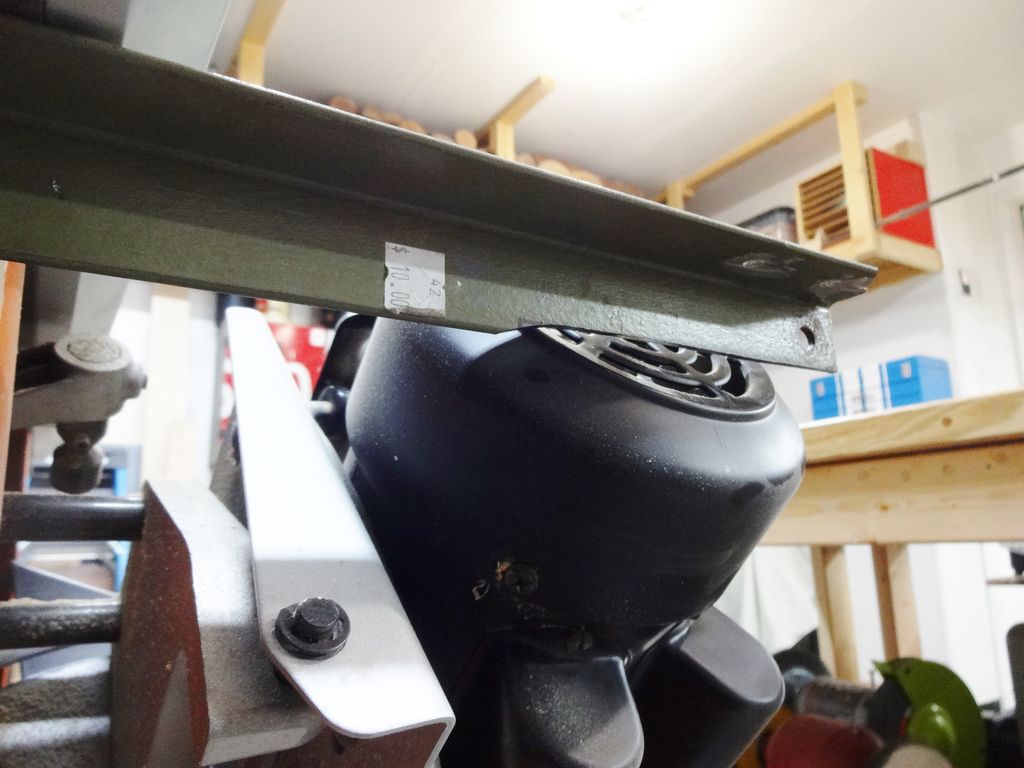
Two pieces of angle iron were cut and prepared for attachment to the sides of the table saw cabinet. These are actually from a used bed frame.
Some material had to be removed from one to allow clearance for the motor when the blade was adjusted to its maximum tilt.
Step 9: Fasten the rails
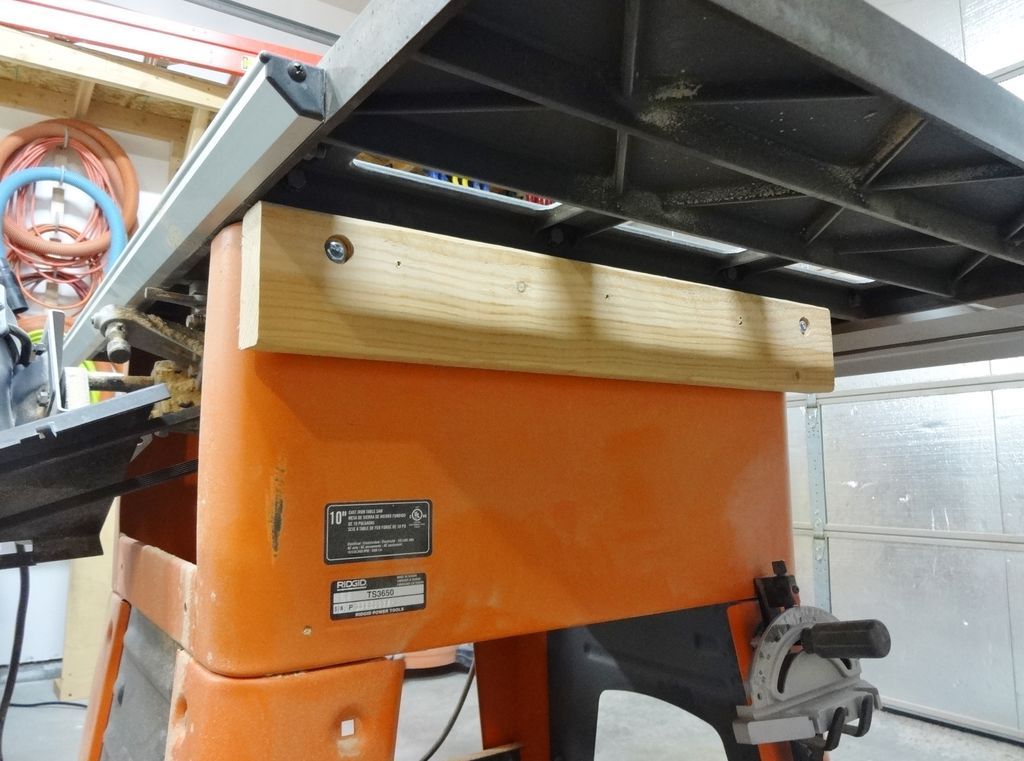
I had two pieces of wood screwed to my saw from a previous project, which really made attaching these rails even easier. The holes were drilled into the metal with a drill bit and the rails were screwed to the wood with flat head screws.
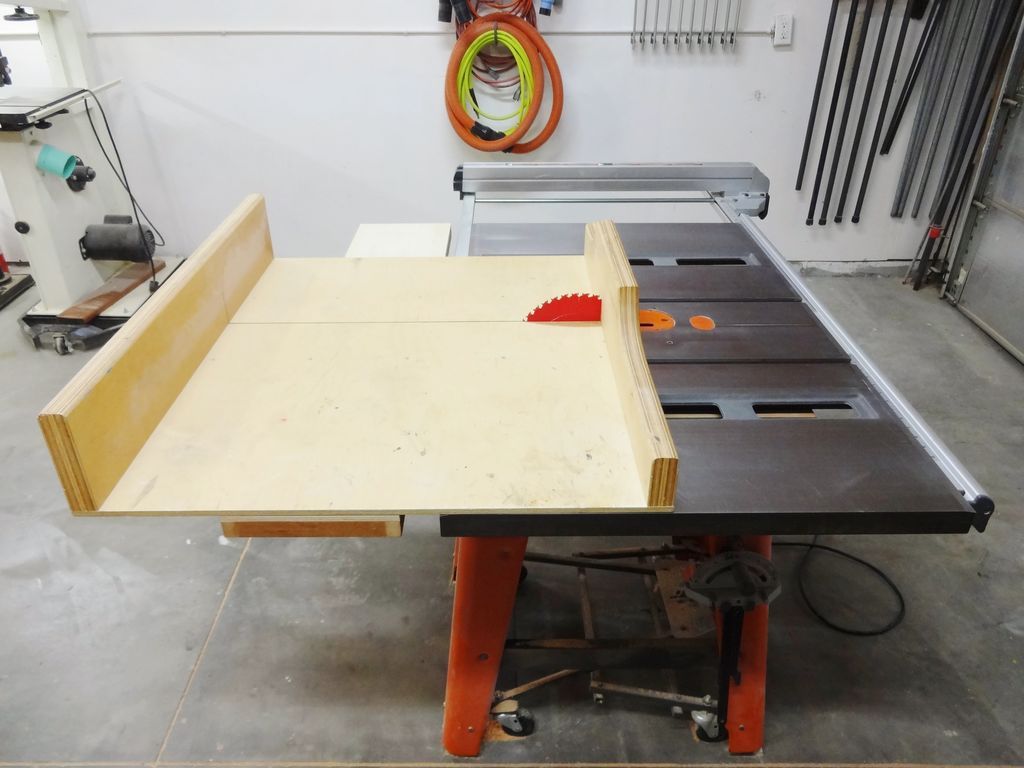
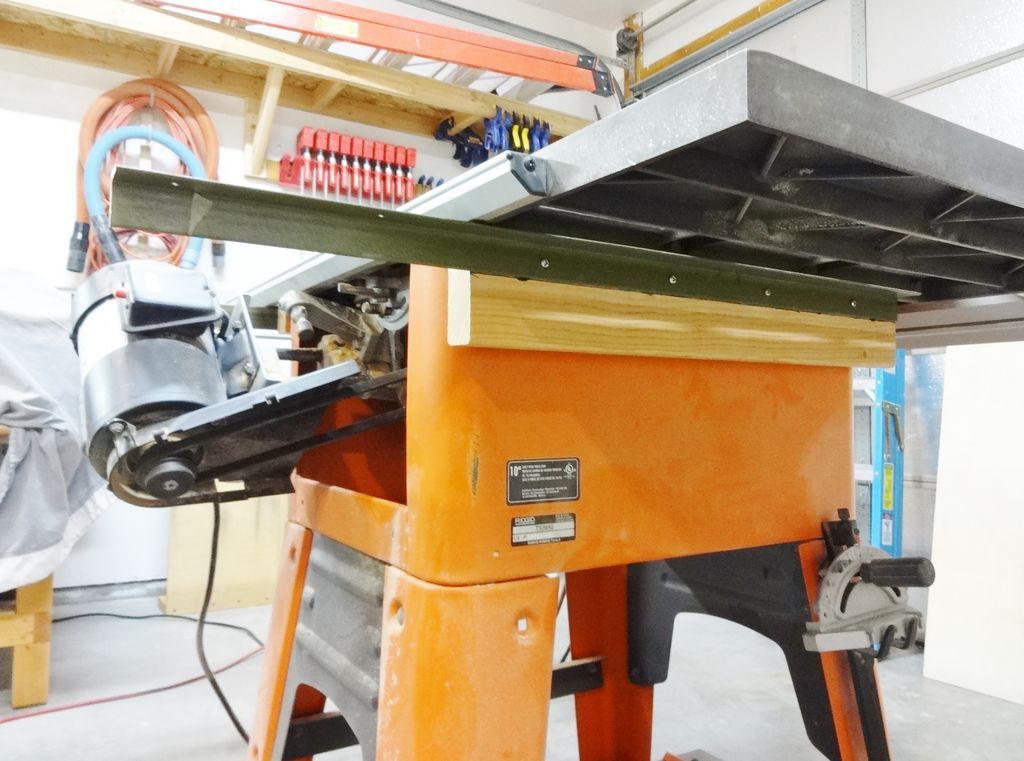
Step 10: Light frame

Using scrap metal, I built a lightweight frame and finished it off with pieces of Baltic birch plywood. The frame was glued and screwed and the top was attached with glue and nails. It was finished with lacquer and a coat of paste wax.
Screws were installed from the bottom to secure it in place. For smaller projects and cutting shorter pieces, I have often found that I do not need to put the large output board in place, and this extension is sufficient.
It is a great addition to my saw and works perfectly for what I needed.
Step 11: Completion
That's all! Thanks again for taking a look. Thoughts and comments are always encouraged! 🙂
Get more information at perfectionidea.com and on our Facebook for more How to Make a Height Adjustable Work Table.
Popular Content
How to make a rocket stove for outdoors
Cardboard Drawers Lined with Jeans
How to Create a Fairy Garden: Magic, Creativity and Nature in One Place
Latest Articles
How to make a refrigerator out of insulating material: Practical step-by-step guide
How to make a Kilim for the Home: Complete Step by Step Guide
How to protect ourselves from accidents in our workplace: Complete prevention and safety guide
Related Content
Bathrooms at the height of the little ones in the house
How to Install an Exterior Metal Door: Professional Step-by-Step Guide
How to Make a Conference Table
Power Tool Storage with Charging Station
Creative Home Decor Ideas to Transform Every Space
Refreshing your home starts with smart design choices that combine comfort, personality, and functionality. Whether you want to modernize a small apartment, upgrade outdoor areas, or create cozy rustic interiors, these trending ideas can completely change the atmosphere of your space.
Outdoor Spaces That Increase Style and Functionality
Outdoor living continues to dominate modern home trends. Homeowners are increasingly investing in practical entertainment zones inspired by these BBQ shed ideas, which create the perfect setup for gatherings and weekend cooking sessions.
First impressions also matter when designing exteriors. Elegant farm entrance gates design ideas help properties stand out while improving privacy and curb appeal.
Compact living solutions are also gaining popularity. These inspiring 16x40 shed house interior design ideas show how smaller spaces can still feel luxurious and functional.
To enhance patios and entryways, homeowners are adding stylish protection with these creative porch awning exterior DIY ideas that blend aesthetics with practicality.

Rustic and Cozy Interior Design Trends
Warm and natural interiors remain timeless. These charming rustic decor ideas combine wood textures, vintage accents, and earthy tones to create welcoming spaces.
Bedrooms are becoming more personalized with curated wall arrangements. Many homeowners use these stylish picture wall ideas for bedroom spaces to display memories and artwork creatively.
Textured wall treatments are another major trend. Installing a board and batten wall adds architectural character while keeping interiors elegant and modern.
Similarly, bold accent wall ideas can instantly transform plain rooms into eye-catching focal points without requiring a full renovation.
Smart Kitchen and Organization Inspiration
Functional kitchens are essential for modern homes. These practical kitchen wall cabinet ideas maximize storage while maintaining a clean and stylish appearance.
Organization also starts at the entrance. Well-designed mud room ideas help families keep shoes, coats, and daily essentials neatly arranged.
Colorful and Personalized Home Styling
Vibrant interiors are becoming increasingly popular thanks to playful dopamine decor ideas that use bright colors and joyful accessories to improve mood and energy.
Gallery walls also continue to evolve as a major decorative feature. These trendy gallery wall inspiration ideas offer creative ways to combine prints, photos, and statement art.
Young renters and new homeowners are especially embracing these stylish first apartment aesthetic ideas to create sophisticated interiors on a budget.
Finally, selecting the right shades can dramatically influence any room’s atmosphere. These modern trendy color ideas help homeowners choose palettes that feel fresh, elegant, and timeless.
Final Thoughts
From rustic charm and colorful interiors to outdoor entertaining areas and functional storage solutions, today’s home decor trends focus on creating spaces that feel both beautiful and livable. By combining smart layouts, modern textures, and personalized decorative elements, any home can become more stylish, comfortable, and inspiring.


