
Mini Vise: Plastic Workbench Made from Ikea Plastic Boards, I was recently restoring an old vise and wanted to make some smooth jaws to avoid marring the object.
Looking for some plastic to cover the jaws, I came across an old cutting board that did the trick.

In the process of attaching the plastic to the jaws of the vise, I thought it would be helpful to try making a plastic vise using pieces from a couple of IKEA cutting boards and laminating them with a little hot glue.
Let's get started!
#1: Materials and tools

Material:
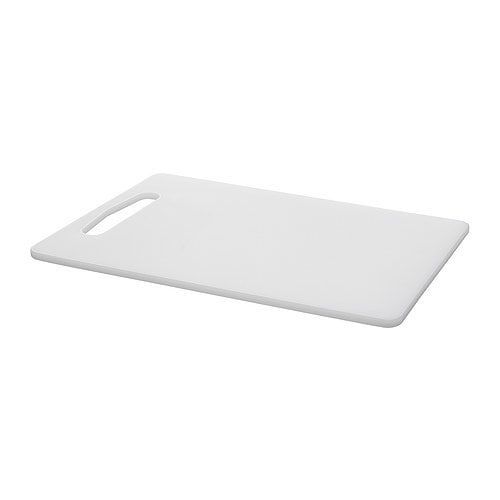
- (2) IKEA LEGITM Cutting Boards 13.5″ x 9.5″ x 1/4″
- (4) 10″ x 1/2″ diameter high temperature glue sticks
- (1) 5/16″ x 6″ Carriage Bolt
- (1) 5/16″ x 3″ carriage bolt
- (2) 5/16″ Nuts
- Spray contact adhesive
- 60 grit sandpaper
- Scissors
- Template
Tools:
- Printer (to make copies of the supplied template)
- High temperature glue gun
- Band saw or saw
- Wood rasp
- Drill
- 5/16″ Drill Bit
- Utility knife and additional blades.
- Small chisel
- Propane torch
#2: Template
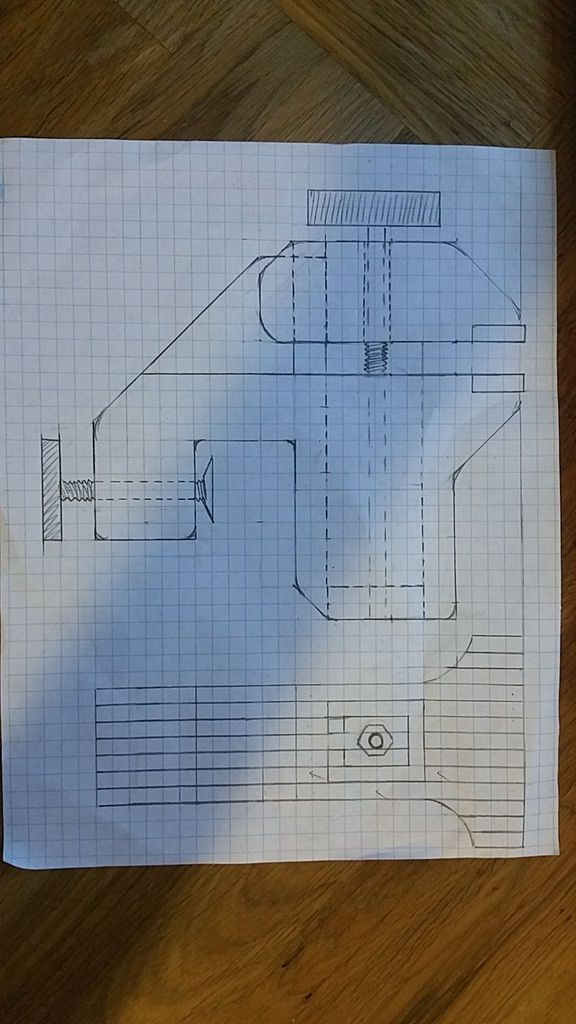

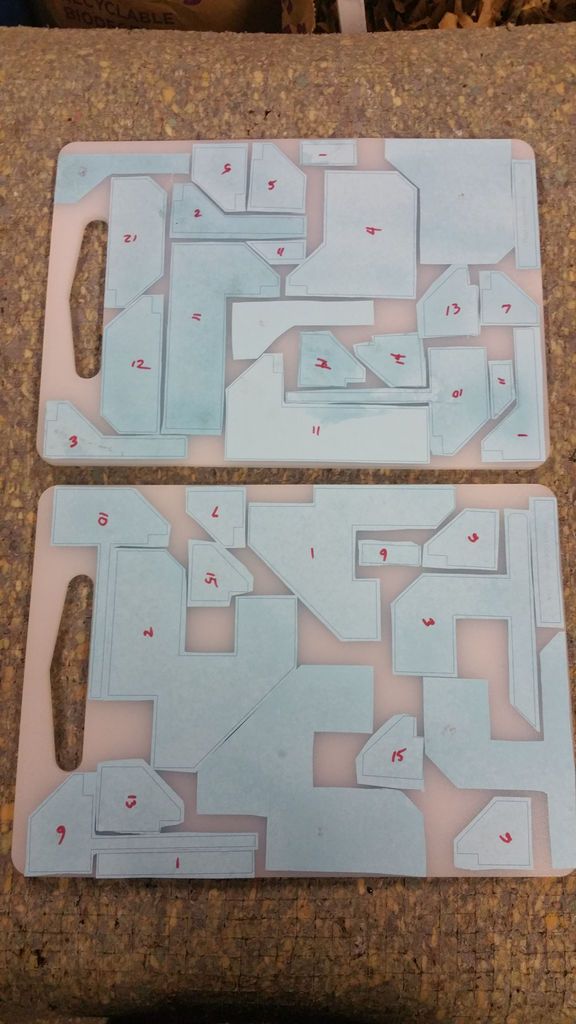
- Start by printing (2) copy the supplied PDF file, which is the template for the different parts that make up the press. One copy will be used as a build reference and the other will be trimmed as a template.
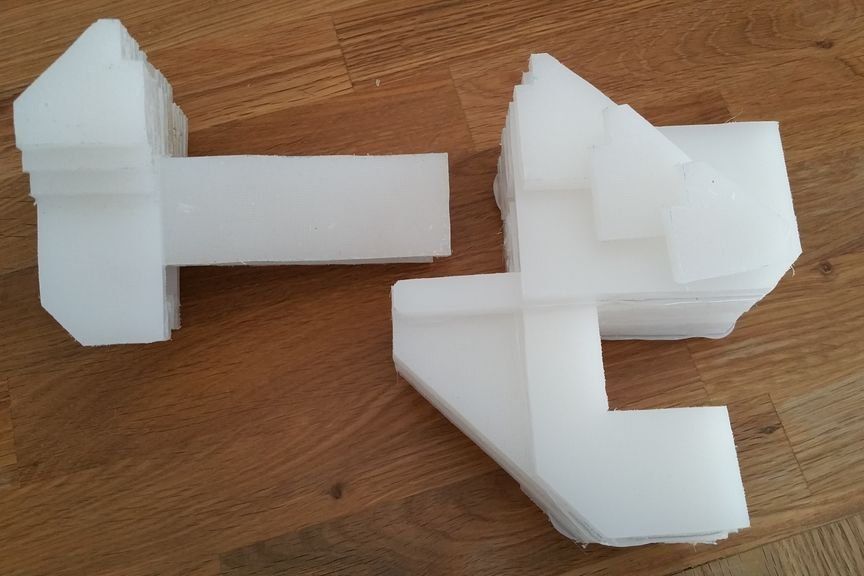
- Pages 1 and 2 are images of the fully assembled laminate vise, minus the 2 screws used to hold the vise to a bench and to engage the clamping action.
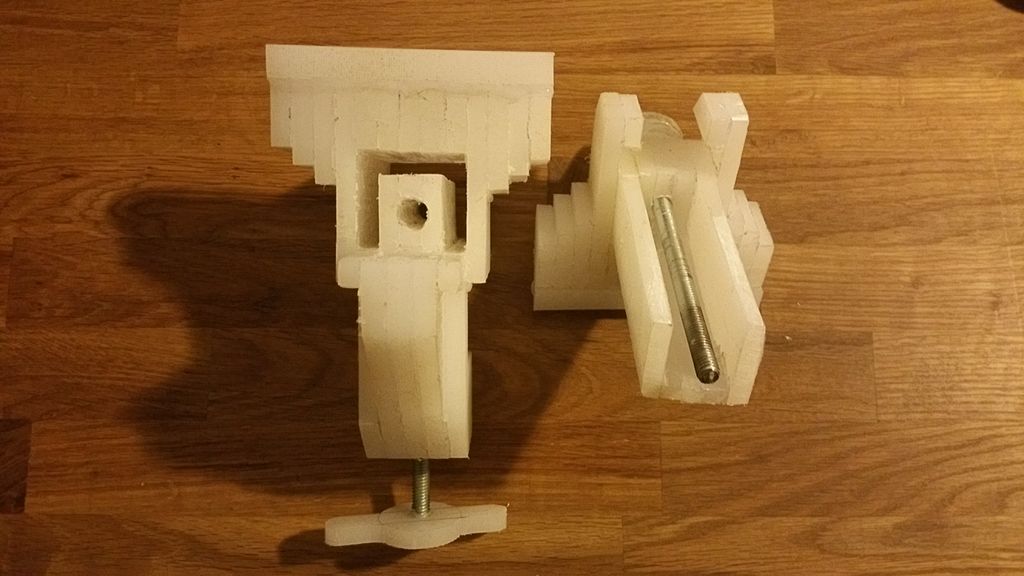
- Proceed to cut the pieces and place them in numbered order. There is a set of templates for the FIXED JAW (#1 to #7) and the MOVING JAW (#9 to #15) along with a view showing how the layers should be assembled. Yes, I know what's up with #8? Ignore him, I was absent from school that day.
#3: Layout
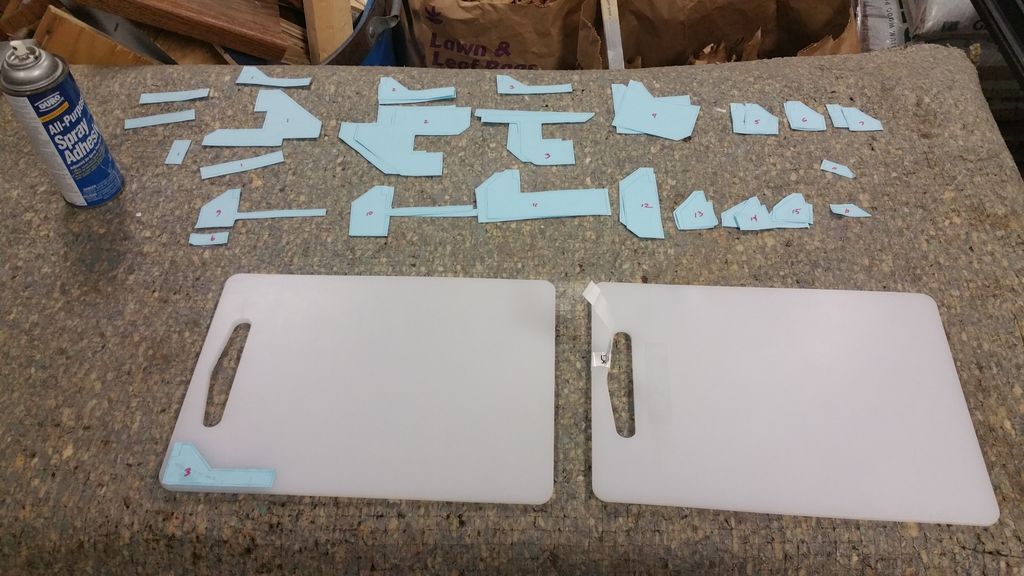
- All pieces have been sized to fit the 2 cutting boards. It is highly recommended to use the design image on both boards to guide the templates.
- To maximize the layout on the boards, some of the templates will need to be reversed.
- Specifically, one of each of templates #2, #3, #4, & #10.
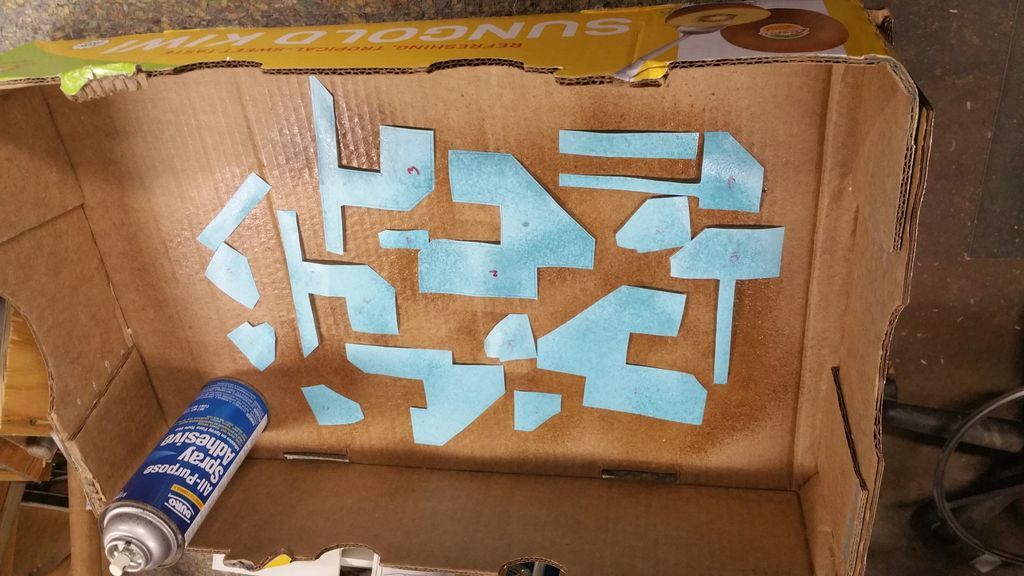
- Spray contact adhesive on one side of each of the two cutting boards.
- On the back of each stencil, apply a light layer of contact adhesive.
- Wait 5 minutes before applying the stencils to the board in the order shown.
#4: Cut the pieces from the board
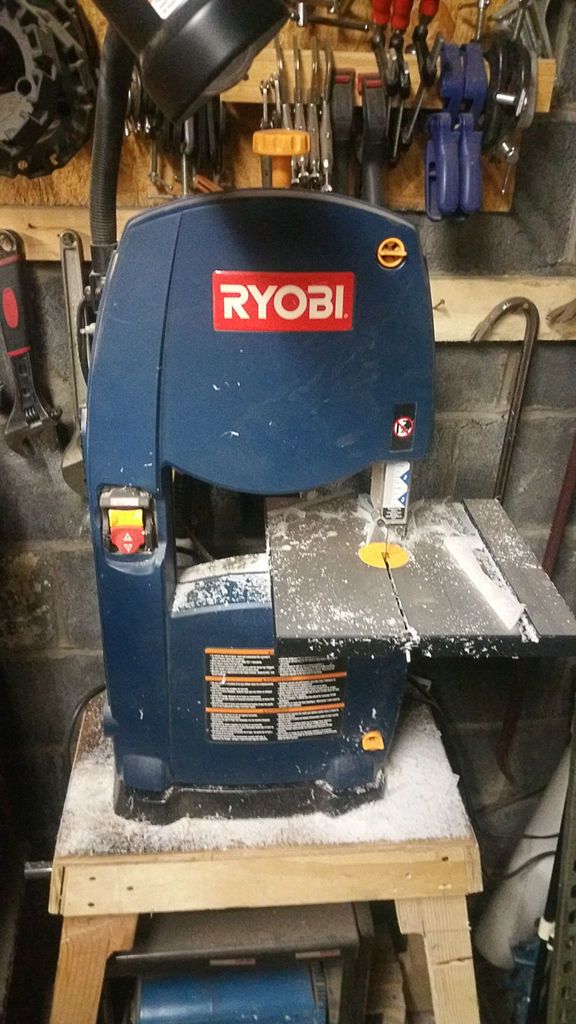
This step is quite simple. Using a saw, preferably a band saw or scroll saw, cut the different pieces of board as close to the line as possible.
You can use a hand saw, but this step is extremely tedious even with a power tool.
A tip: Have a vacuum cleaner on hand, as this creates a lot of plastic saw dust.
#5: Gluing the pieces
Okay. Now the fun begins. I would like to have photos of the gluing process, but I didn't.a free hand to take some shots while I applied glue
WARNING:
Hot glue can be tricky to work with and can also be painful if it comes into contact with your skin. Do it at your own risk.
- Plug in the glue gun and set it to high temperature. Let it heat until the glue flows freely.
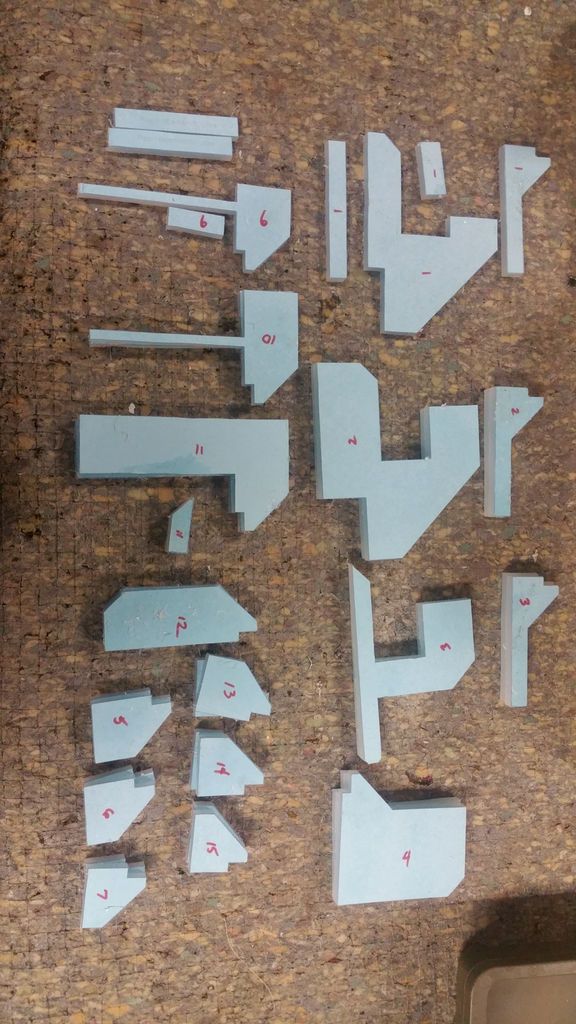
- Remove all paper backing from the cut plastic pieces. Have a second printout on hand or use a permanent marker to number the pieces after removing the paper.
- It is best to complete each layer on both sides of the middle layer before moving on to the next layer.
- Some layers have multiple pieces with the same number. Use the second copy of the print to get an idea of how the parts are oriented relative to each other and the spacing between the pieces.
- Start with the center layer (#1 for the FIXED JAW and layer #9 for the MOVING JAW).
- Blot the backing layer dry to ensure proper alignment.
- Apply hot glue to one side of the contact surface. Quickly press it onto the mating surface of the next part, align and apply pressure for several seconds.
- The union between the two parts occurs very quickly and is extremely strong. There is very little room for error. If you see that the joint is not satisfactory, immediately separate the pieces and let the glue cool.
- A knife can be used to scrape the pieces and reuse them.
Continue building the layers until the parts are complete.
#6: Adjustment
The parts will not fit together initially due to the tight line-to-line fit of the two parts.
- Using a utility knife, remove excess glue from the edges that form the sliding contact between the FIXED AND MOVING SAWS.
- With a flat surface available, secure a piece of 60-grit sandpaper to it. Proceed to sand the faces to eliminate any misalignment of the layers due to the glue. Feel free to shape the jaws to your liking.
- I have found that a chisel and rasp are effective in shaping the U-shaped channel of the FIXED JAW.
- Work the two parts with sandpaper, chisel and rasp until the two parts slide freely against each other.
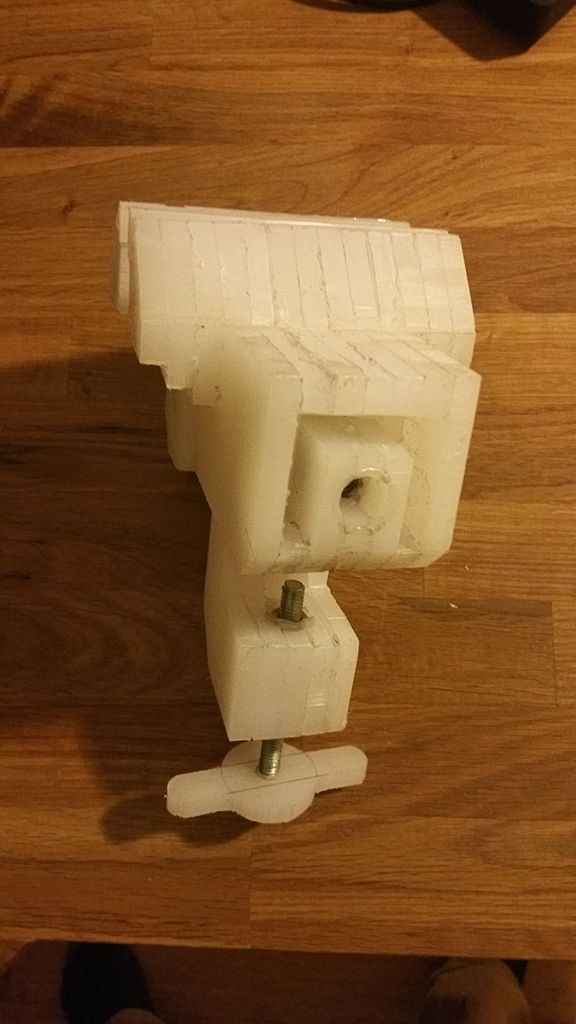
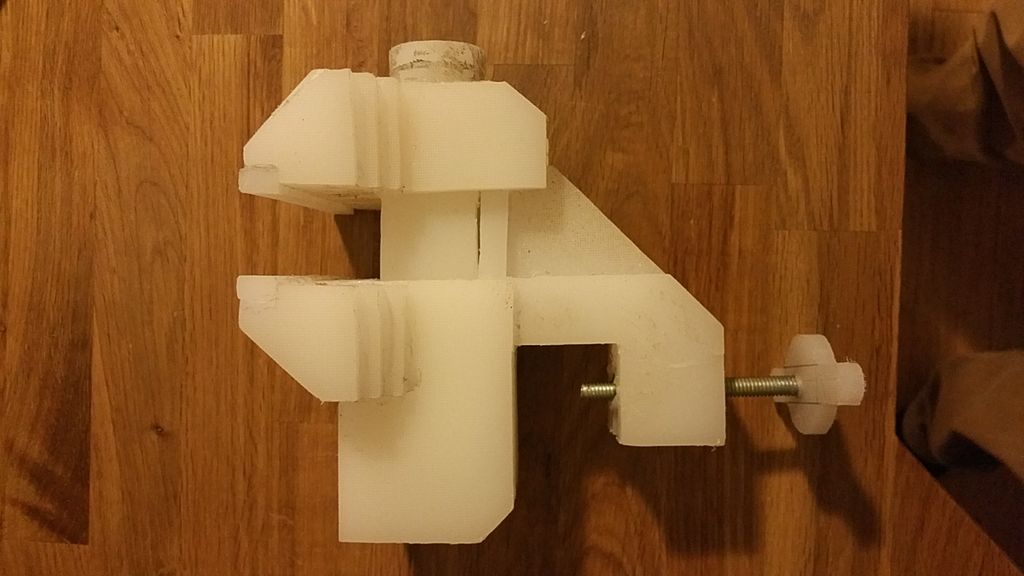
#7: Threaded hardware (jaw screw)
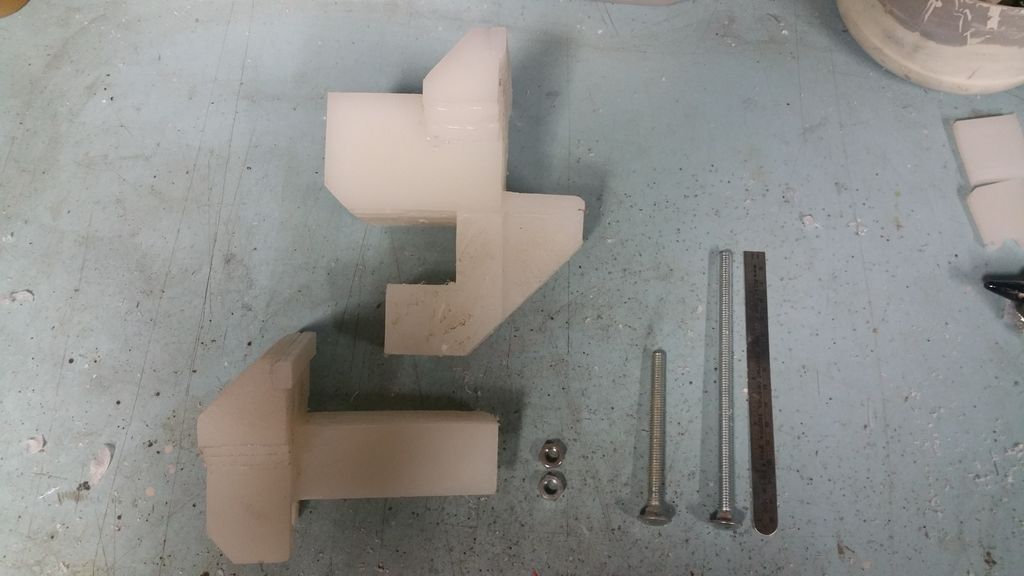
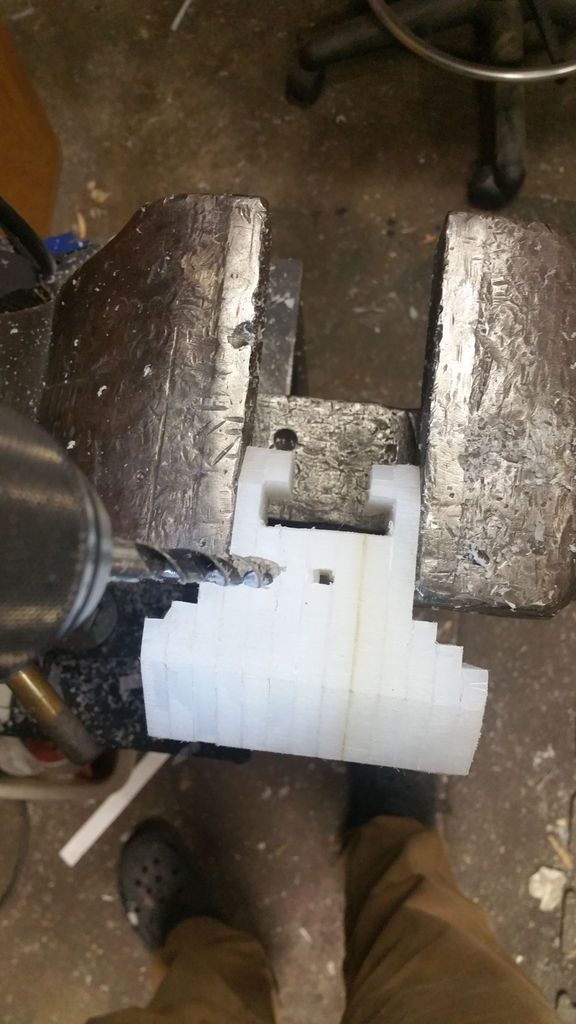
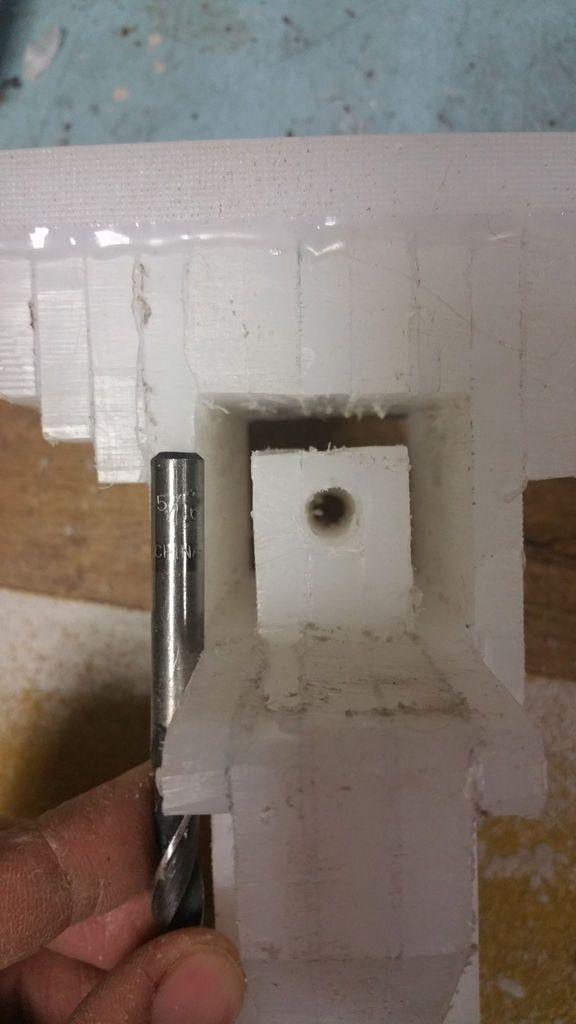
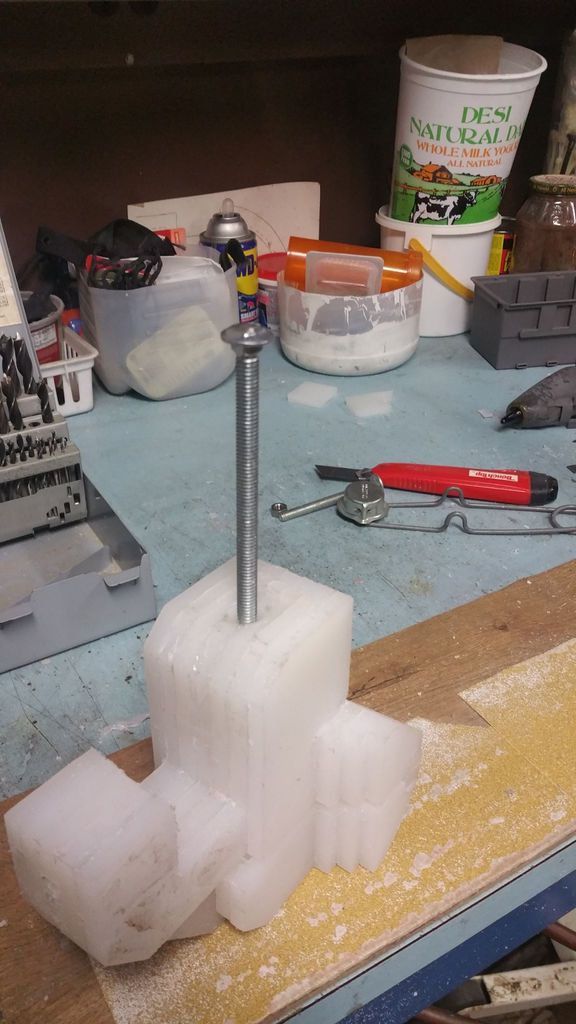
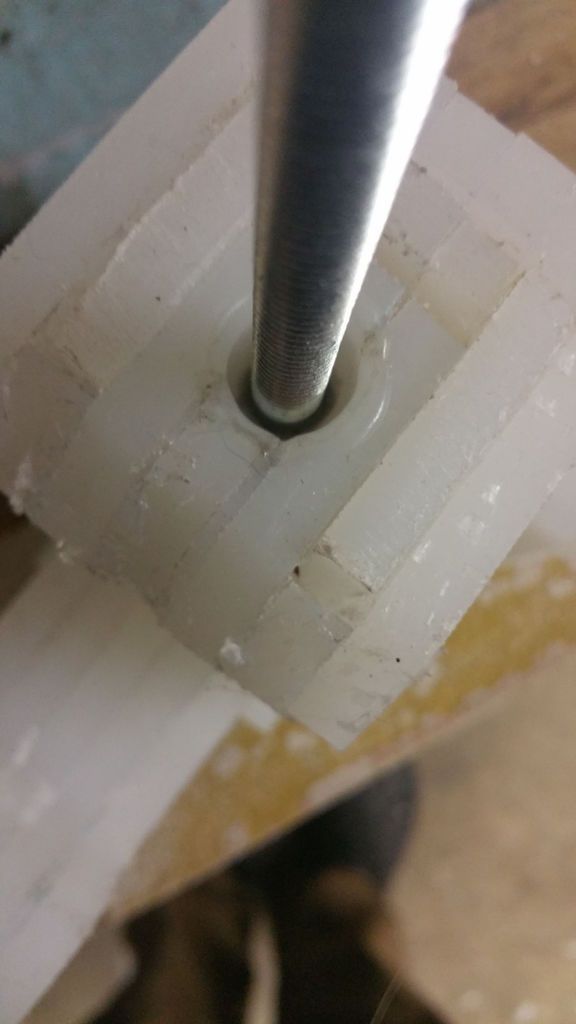


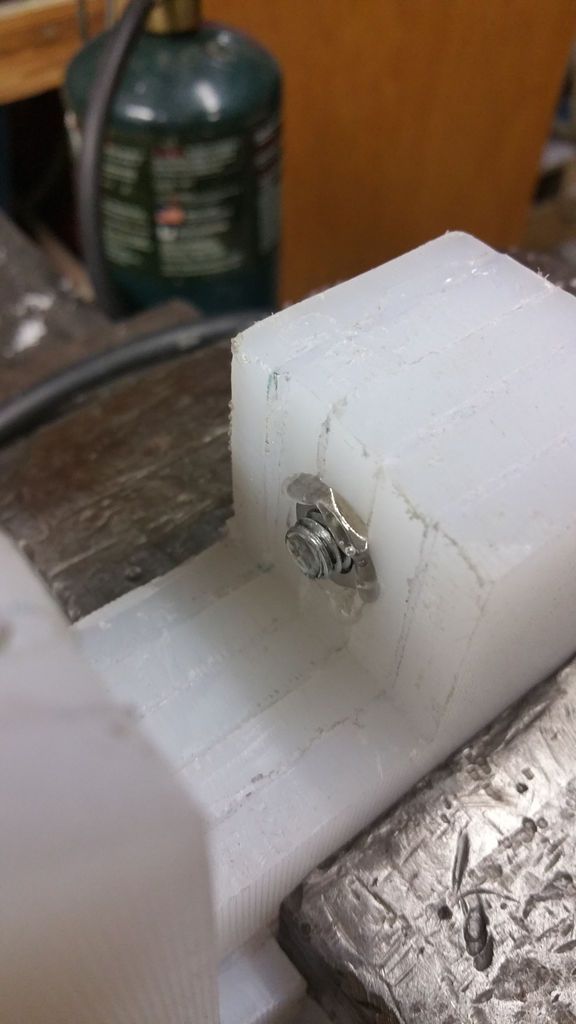
- Using a 5/16″ drill bit, enlarge the square hole that runs across the FIXED JAW and MOVING JAW
- The 5/6″ nut will lock onto the FIXED LOCK by heating it with a torch and pressing it into the back of the FIXED LOCK.
- Thread the nut onto the 6″ bolt halfway.
- While holding the bolt in a vise or with pliers, heat the nut with a torch. Try to keep the heat localized to the nut.
- With the nut sufficiently hot, slide the bolt into the 5/16″ hole of the FIXED PULL. The nut will begin to melt the plastic. Push it down approximately 2″ into the body of the FIXED JAW. Make sure the bolt is straight in the body while the nut cools.
- Unscrew the screw.
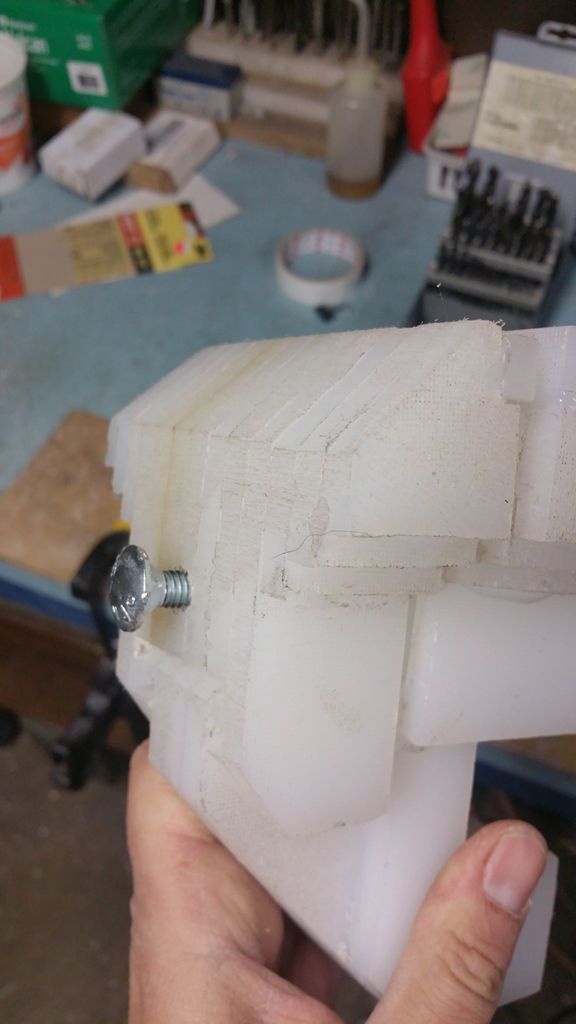
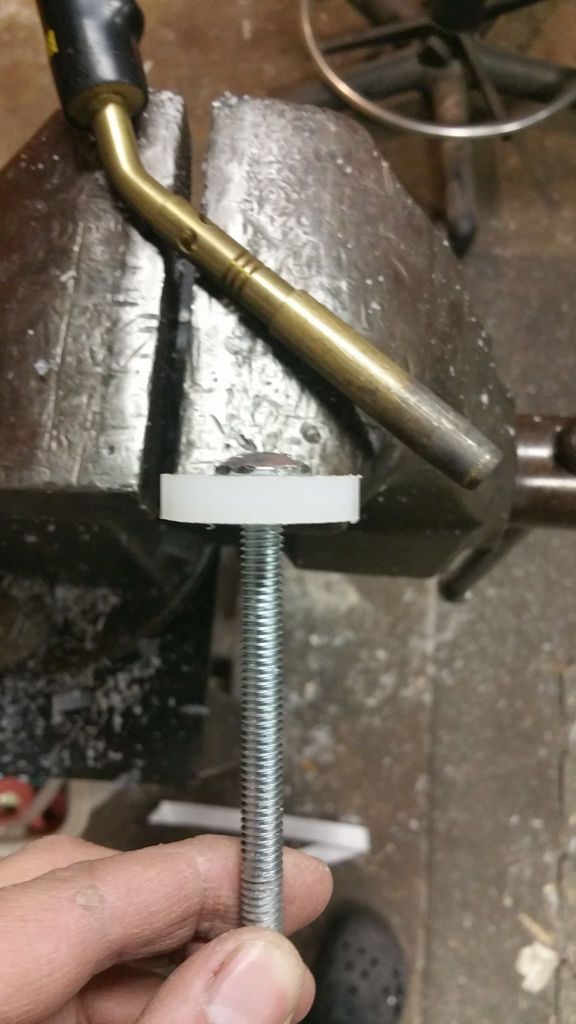
#8: Threaded hardware (vise)
- Using a 5/16″ drill bit, enlarge the square hole of the FIXED STICK into the feature that will allow it to attach to a table or bench.
- Slide the 3″ carriage bolt into the orifici.
- Thread the nut onto the bolt.
- Using the torch, heat the nut with localized heat.
- When it is hot enough, pull the end of the bolt to insert the hot nut into the body of the FIXED JAW. The nut will begin to melt the plastic.
- Continue pulling the nut until it is flush with the face of the C channel that will allow it to clamp to a bench.
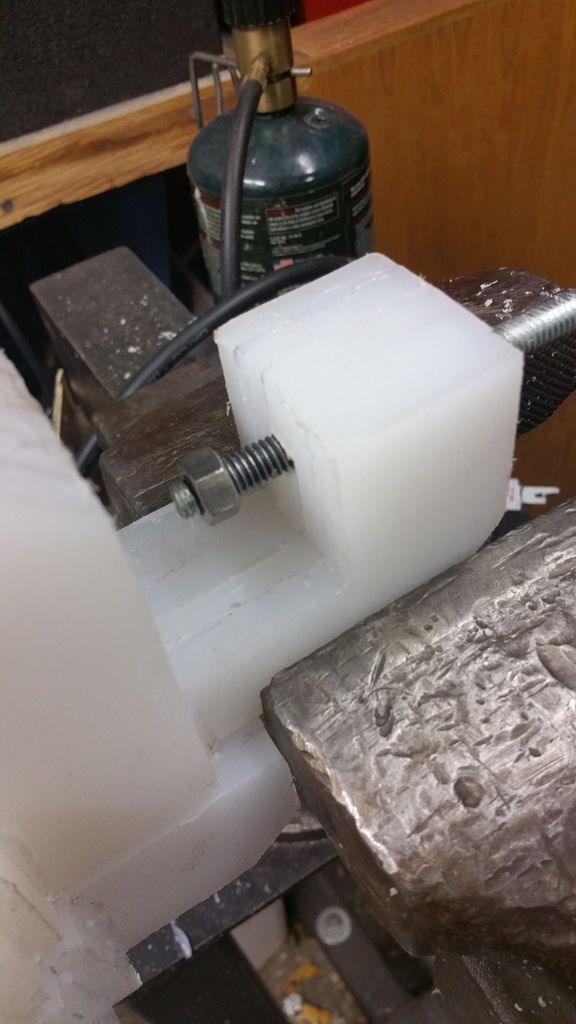
#9: Final touches
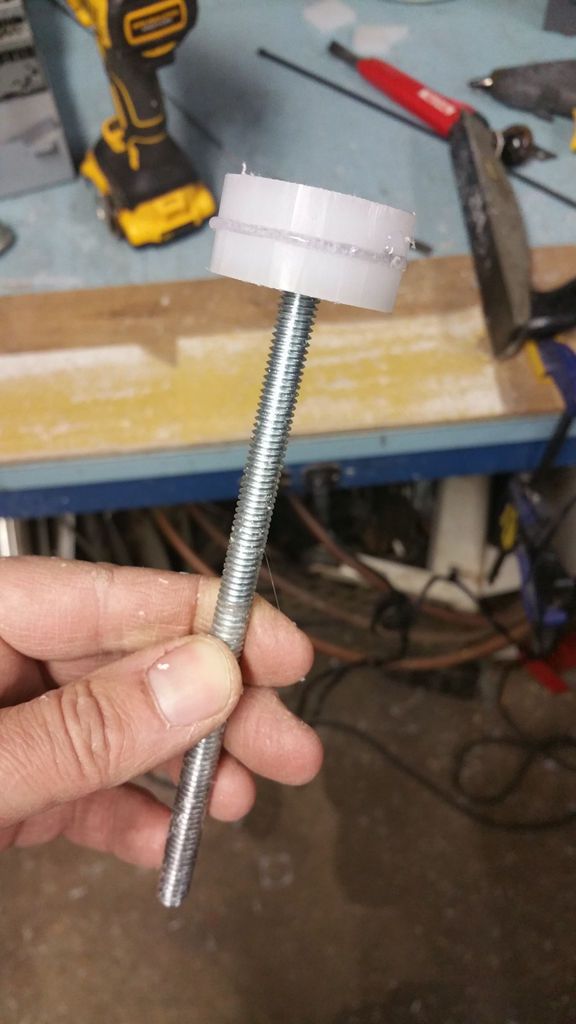
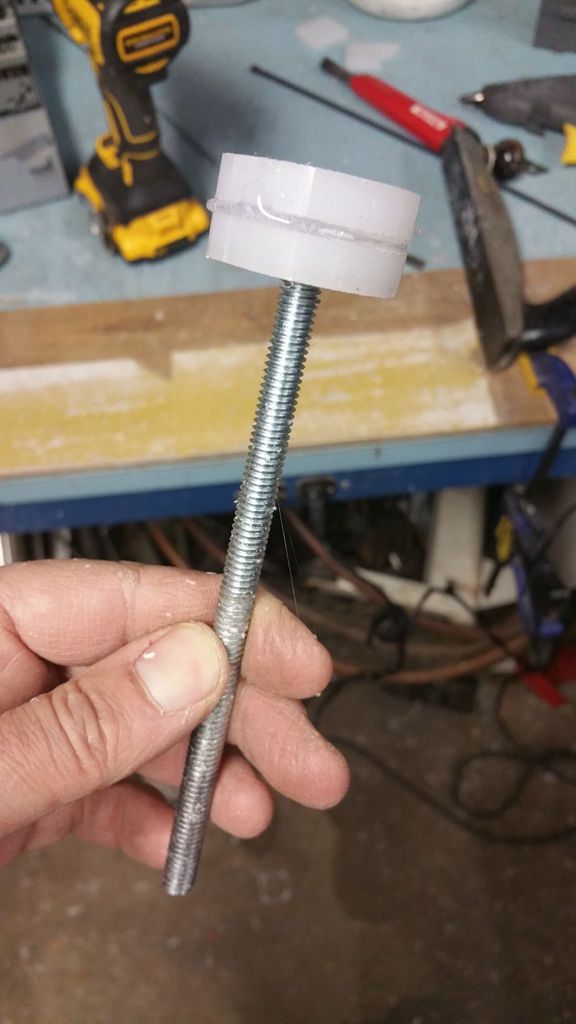
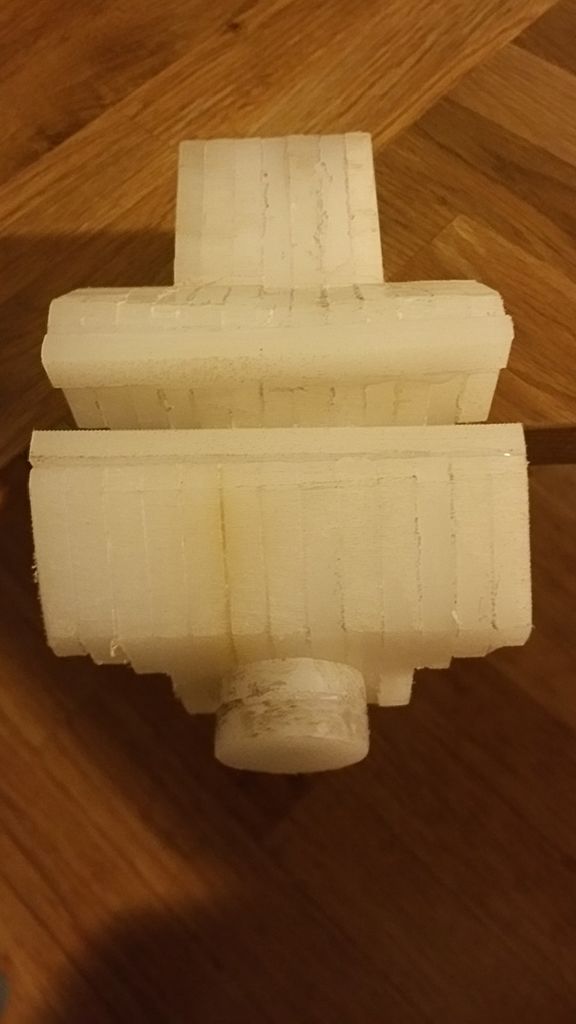
With some of the leftover scraps, I made a couple of buttons that were not included in the templates.
Attaching them to the ends of the carriage bolts was done the same way using the torch.
#10: Finished and final thoughts
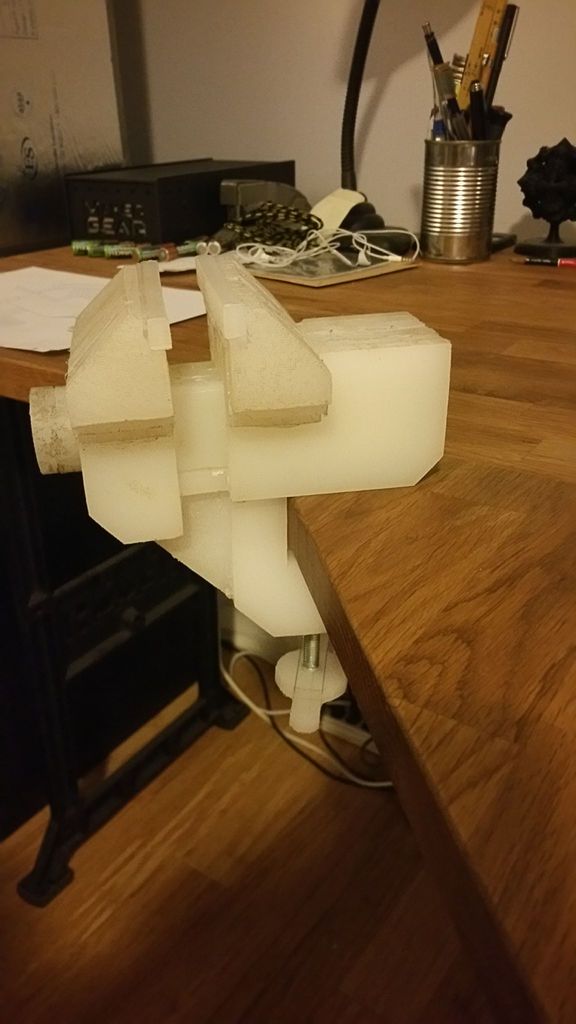
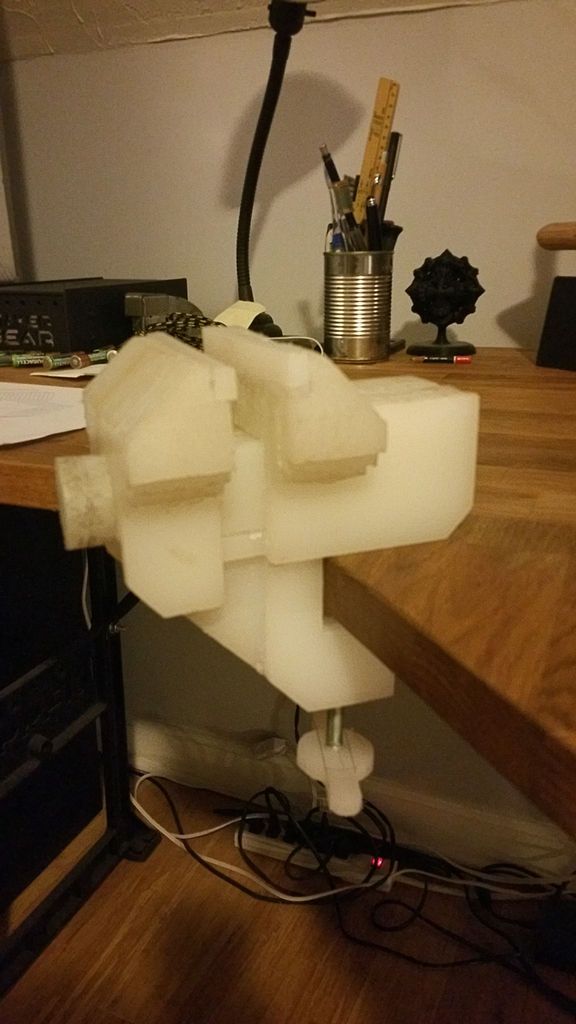
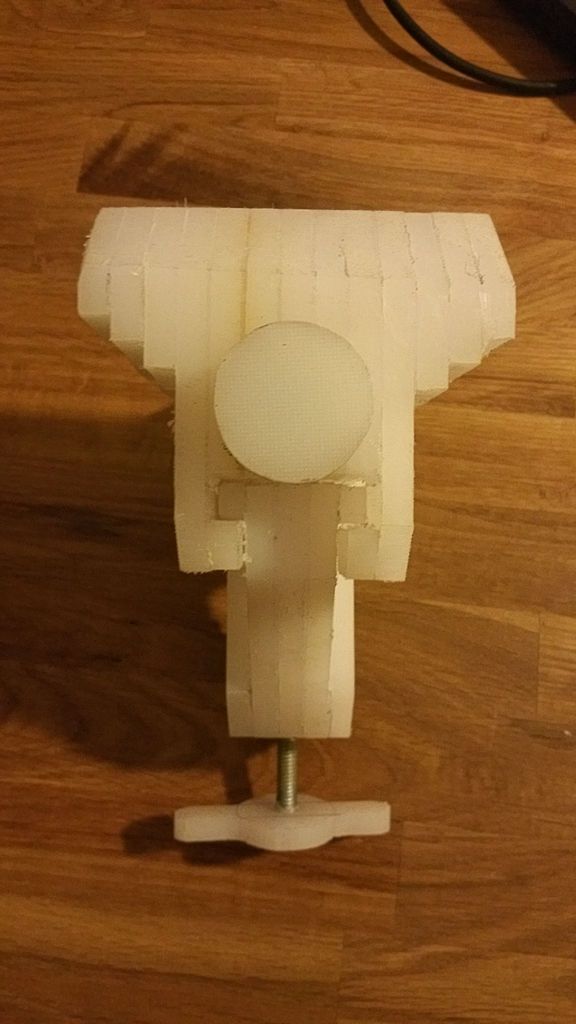
The jaw screw is not secured to the MOTION CONTROL. In the closing action, the screw pulls the two halves together applying surprisingly large force.
In the opening action, the screw will retract, but the jaws must be opened manually. Not a big problem, but a bit inconvenient and easy to remedy in the future.
Greetings!
Learn more at perfectionidea.com and on our Facebook for more Mini Vise: Plastic Workbench Made from Ikea Plastic Boards.
- Tags
- plastic
Popular Content
How to make a rocket stove for outdoors
Cardboard Drawers Lined with Jeans
How to Create a Fairy Garden: Magic, Creativity and Nature in One Place
Latest Articles
How to make a refrigerator out of insulating material: Practical step-by-step guide
How to make a Kilim for the Home: Complete Step by Step Guide
How to protect ourselves from accidents in our workplace: Complete prevention and safety guide
Related Content
Trick to Have Lock Nuts
Greengrocer Made with Fruit Boxes!
Colors in the Bathroom: How to Do and Which Colors to Prioritize?
Learn How to Build a Cool Concrete Cube of LED Lights!
Creative Home Decor Ideas to Transform Every Space
Refreshing your home starts with smart design choices that combine comfort, personality, and functionality. Whether you want to modernize a small apartment, upgrade outdoor areas, or create cozy rustic interiors, these trending ideas can completely change the atmosphere of your space.
Outdoor Spaces That Increase Style and Functionality
Outdoor living continues to dominate modern home trends. Homeowners are increasingly investing in practical entertainment zones inspired by these BBQ shed ideas, which create the perfect setup for gatherings and weekend cooking sessions.
First impressions also matter when designing exteriors. Elegant farm entrance gates design ideas help properties stand out while improving privacy and curb appeal.
Compact living solutions are also gaining popularity. These inspiring 16x40 shed house interior design ideas show how smaller spaces can still feel luxurious and functional.
To enhance patios and entryways, homeowners are adding stylish protection with these creative porch awning exterior DIY ideas that blend aesthetics with practicality.

Rustic and Cozy Interior Design Trends
Warm and natural interiors remain timeless. These charming rustic decor ideas combine wood textures, vintage accents, and earthy tones to create welcoming spaces.
Bedrooms are becoming more personalized with curated wall arrangements. Many homeowners use these stylish picture wall ideas for bedroom spaces to display memories and artwork creatively.
Textured wall treatments are another major trend. Installing a board and batten wall adds architectural character while keeping interiors elegant and modern.
Similarly, bold accent wall ideas can instantly transform plain rooms into eye-catching focal points without requiring a full renovation.
Smart Kitchen and Organization Inspiration
Functional kitchens are essential for modern homes. These practical kitchen wall cabinet ideas maximize storage while maintaining a clean and stylish appearance.
Organization also starts at the entrance. Well-designed mud room ideas help families keep shoes, coats, and daily essentials neatly arranged.
Colorful and Personalized Home Styling
Vibrant interiors are becoming increasingly popular thanks to playful dopamine decor ideas that use bright colors and joyful accessories to improve mood and energy.
Gallery walls also continue to evolve as a major decorative feature. These trendy gallery wall inspiration ideas offer creative ways to combine prints, photos, and statement art.
Young renters and new homeowners are especially embracing these stylish first apartment aesthetic ideas to create sophisticated interiors on a budget.
Finally, selecting the right shades can dramatically influence any room’s atmosphere. These modern trendy color ideas help homeowners choose palettes that feel fresh, elegant, and timeless.
Final Thoughts
From rustic charm and colorful interiors to outdoor entertaining areas and functional storage solutions, today’s home decor trends focus on creating spaces that feel both beautiful and livable. By combining smart layouts, modern textures, and personalized decorative elements, any home can become more stylish, comfortable, and inspiring.


