


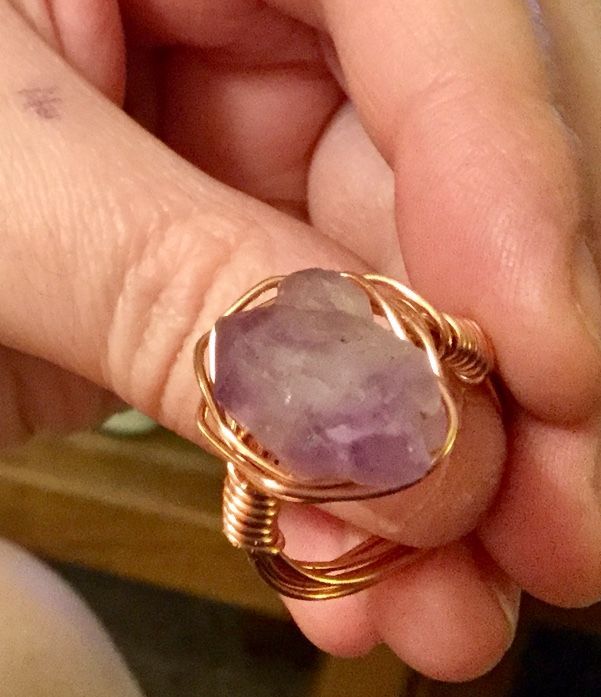
Learning how to make a simple wire wrapped ring is the perfect way to practice basic wire wrapping techniques.
Not only are they a fun accessory to wear or make with friends, but they also make great gifts.

Once you learn how to form a symmetrical round band, you'll be on your way to creating all kinds of unique wire wrapped rings!
Video on how to make a wire wrapped ring
Click to see the Video.
Materials needed:
- 21″ wire – 22g (you can also use 20g)
- A 6-8mm bead
- Plastic or metal chuck
- Cutters
- Nose pliers
- Rubber/plastic/rawhide mallet

Steps to make a wire wrapped ring:
Step 1: Place the bead on the wire

After selecting your 6-8mm bead, thread on your cable. Make sure it is centered. For this ring, I am using a 6mm natural garnet bead.
Both round and faceted beads will work.
Step 2: Determine the ring size

Place the bead centered on your ring.
You will want to start about one size larger than the size of the ring you want to finish.
For example, I want to make a size 5 ring, so I'm starting with a size 6.
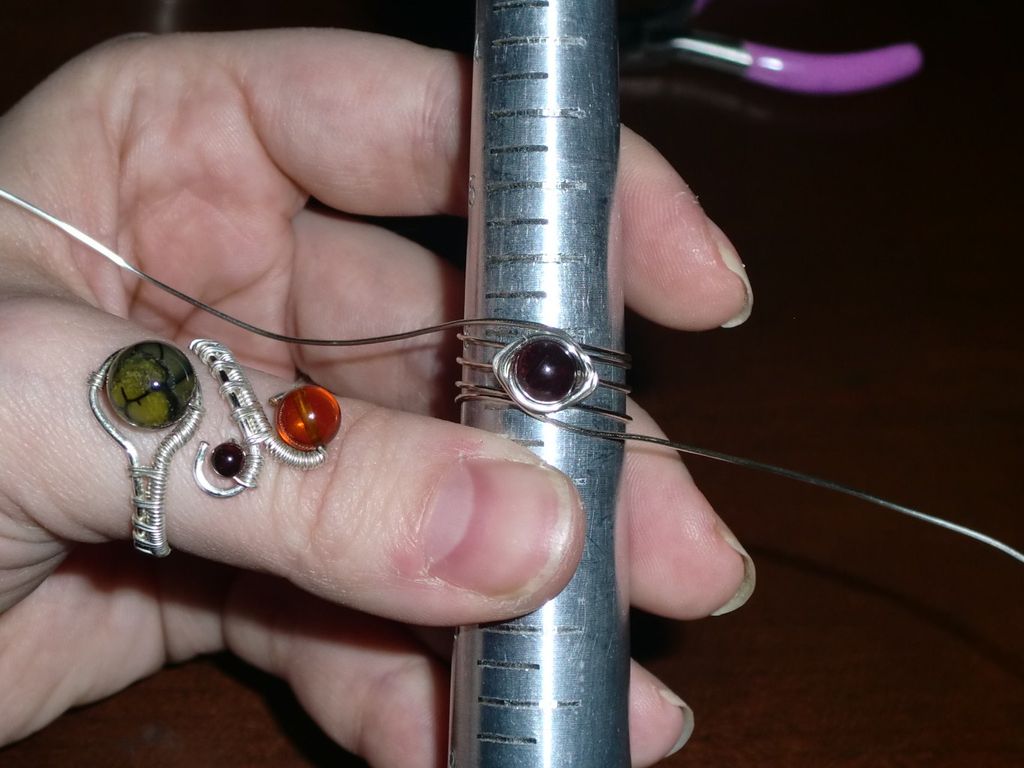
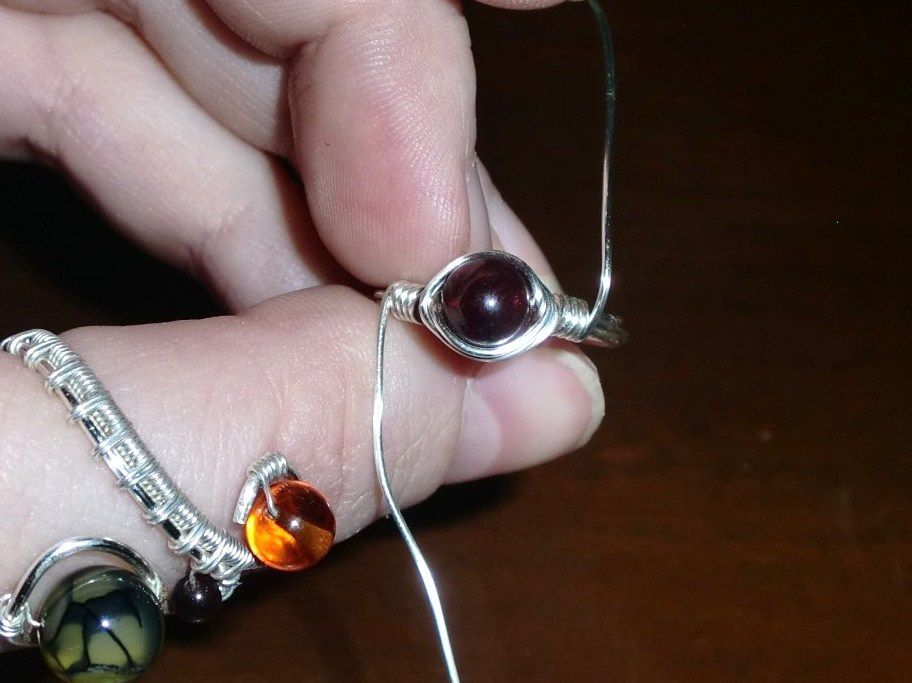
Step 3: Wrap the wire

Carefully wrap your cable around 3-4 times; I like my ring bands to have four cables.
In this picture, I'm holding the loose ends of the cable down so you can see what I've done, which makes it look like I've wrapped it around 5 times - there will only be four cables when we're done.
Quick Tip:
I have two ring mandrels: one plastic and one metal.
I usually end up using both when making wire wrapped rings, especially if I use silver plated art wire;
The metal mandrel will scratch the finish in some of the following steps.
I usually use the metal mandrel for the initial wrapping (this step) and again at the end when I use the mallet to shape the ring (step 11).
Step 4: Gather the wire under the bead

Place the cables as close to the cord as possible.
Work slowly to prevent the ring from losing its shape.
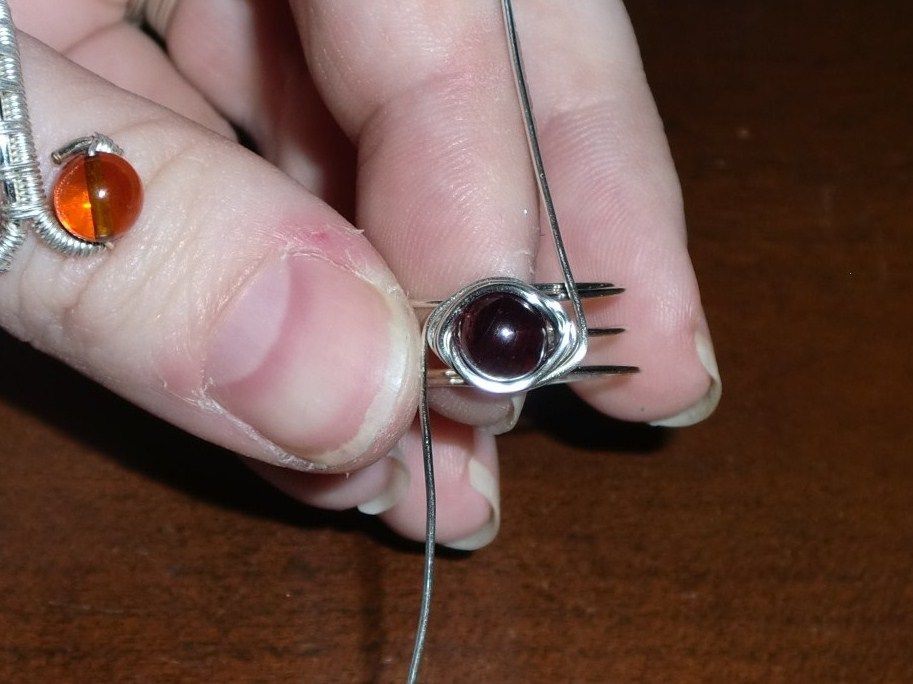
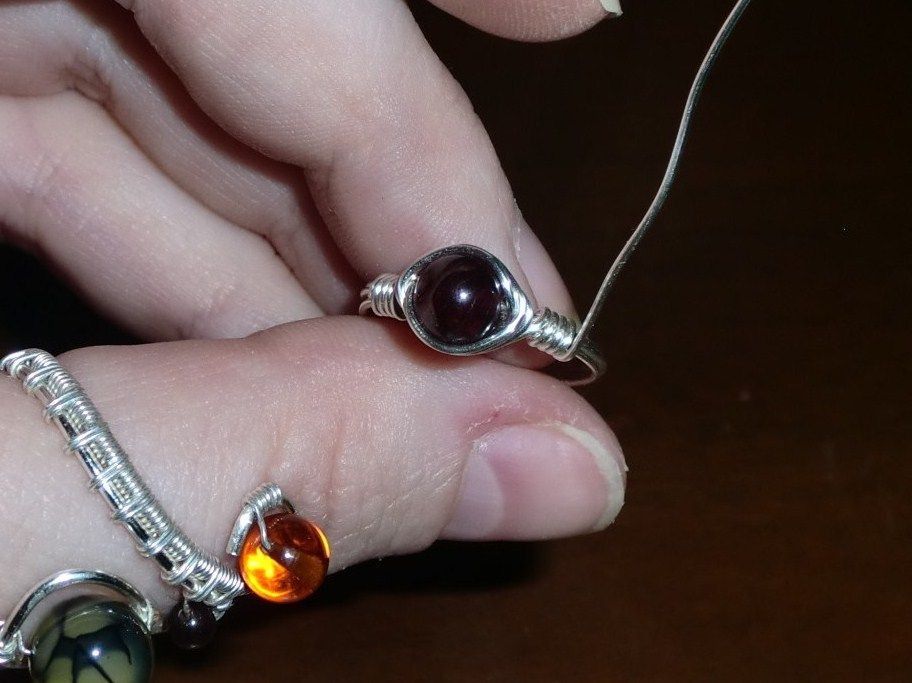
Step 5: Start wrapping the bead

Begin wrapping the ends of the wire around the bead in a counterclockwise motion;
Each successive wrapper will go below the previous one. While you are wrapping, be sure to maintain even tension on both cables.
I usually do 3-4 full wraps.
Step 6: Start winding the cable
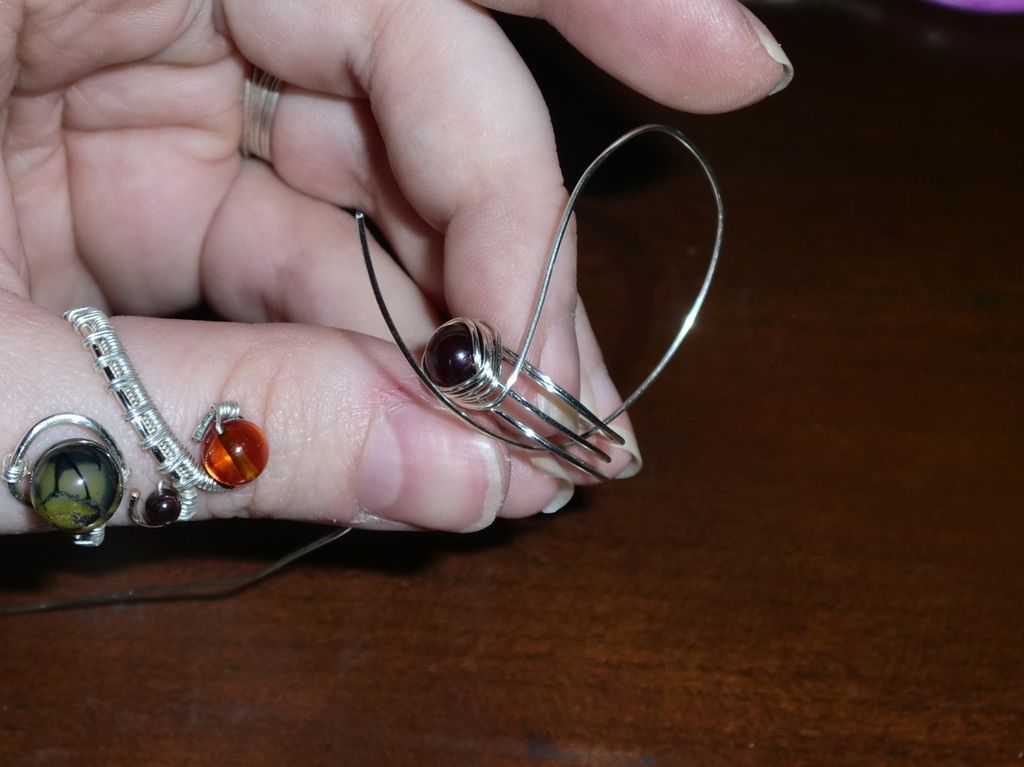
Remove the ring from the mandrel - you should have one end of the cable pointing up and the other pointing down.
If you don't, adjust them so they fit.
Working with the end of the cable pointing up, begin by bending down and across the ring band.
Step 7: Finish the rolling

Pull firmly on the end of the cable with the chain nose pliers and then continue wrapping around the four cables that form the ring band.
Do everything you can to keep your rolls tight; if you need to, snap them together with your pliers. Personally I like to do 4-5 complete rolls;
Without eHowever, three is also a popular way to do it.
The more you make at this time, the smaller your ring will be.
Do not cut the excess cable yet.
Step 8: Finish the other side
Turn your ring and repeat.
Be sure to make the same number of rolls on this side too!
Otherwise, you will end up with an unbalanced looking ring.
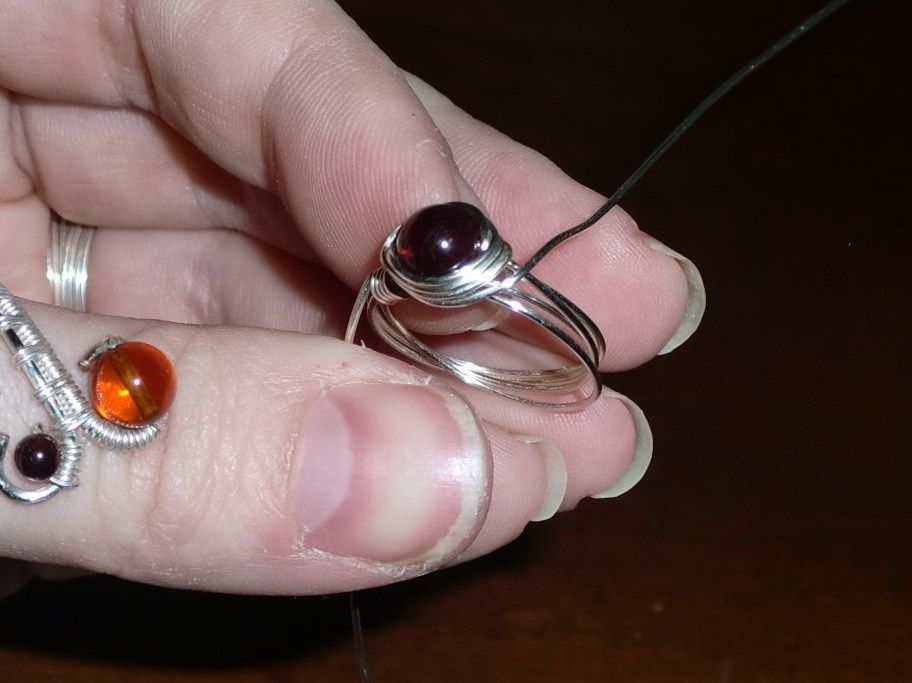
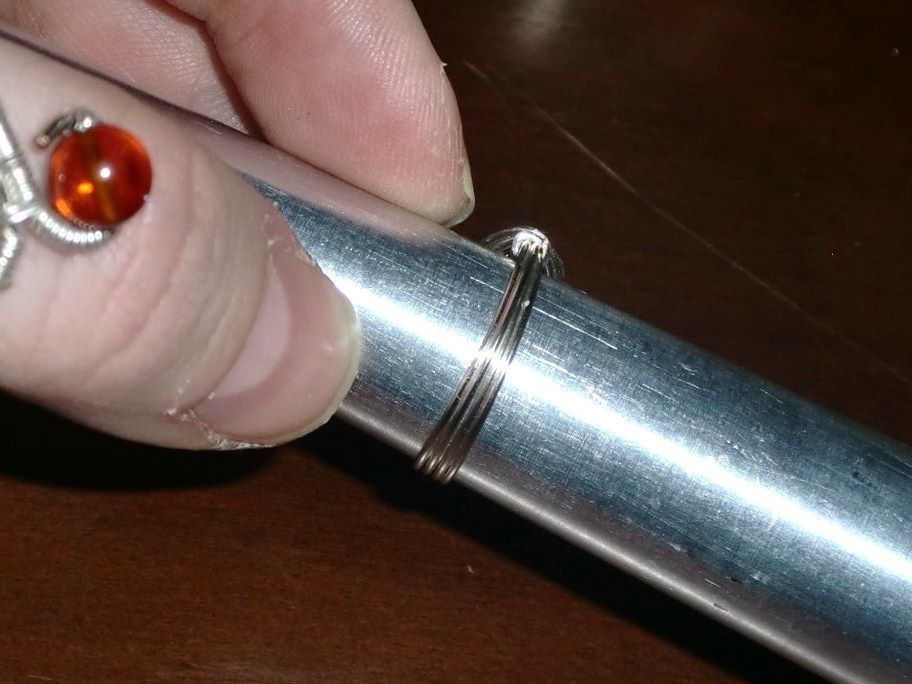
Step 9: Straighten the ring band
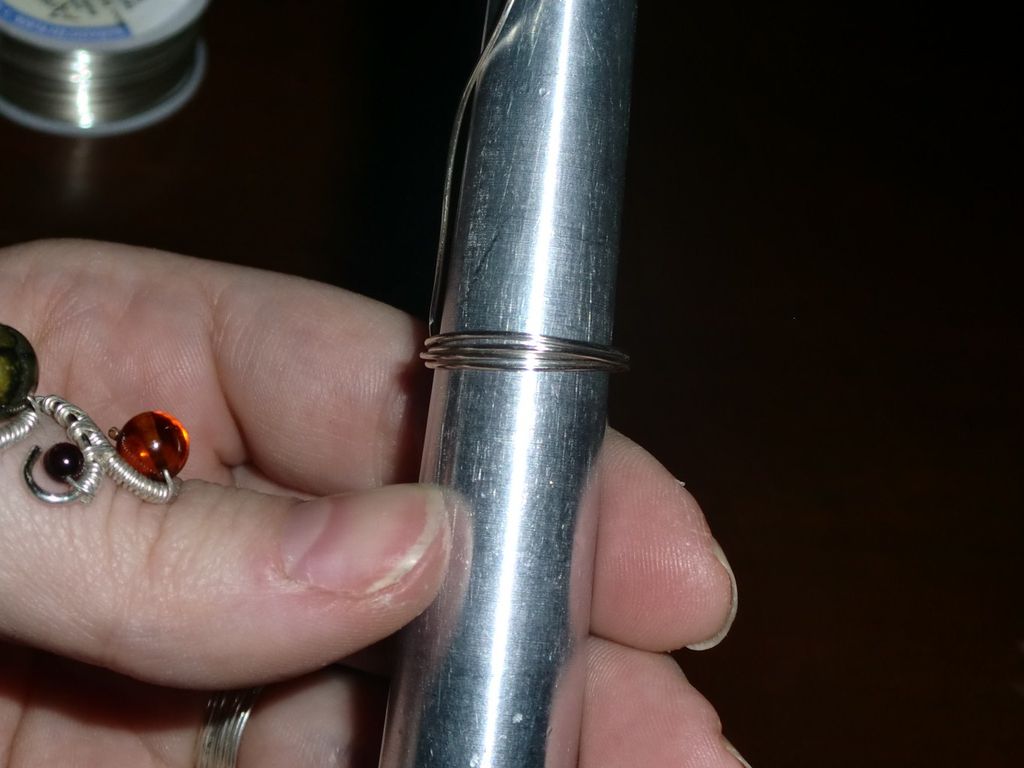
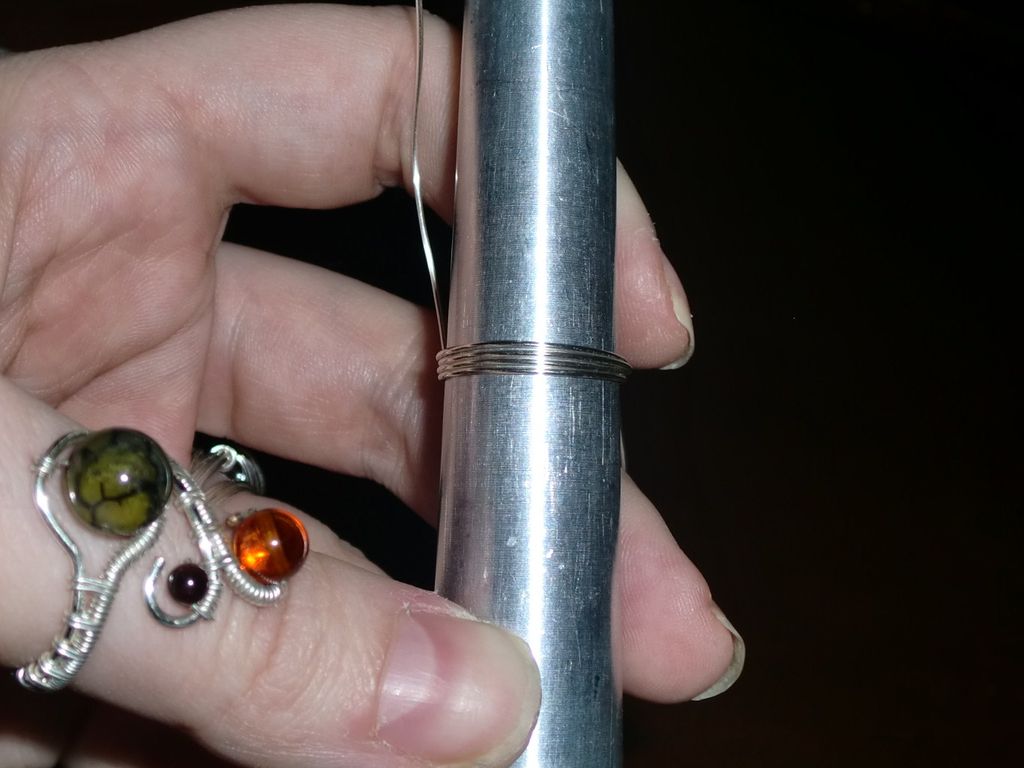
Place your ring back on your ring mandrel.
If you are using plated wire, I would recommend using a plastic ring mandrel at this point because it will not scratch the finish.
See how the cables overlap each other?
We want our band cables to be clean so they fit comfortably and look good.
Pull the ring down as far as it will go on the chuck to straighten the cables.
When you're done, they should be placed next to each other, rather than overlapping.
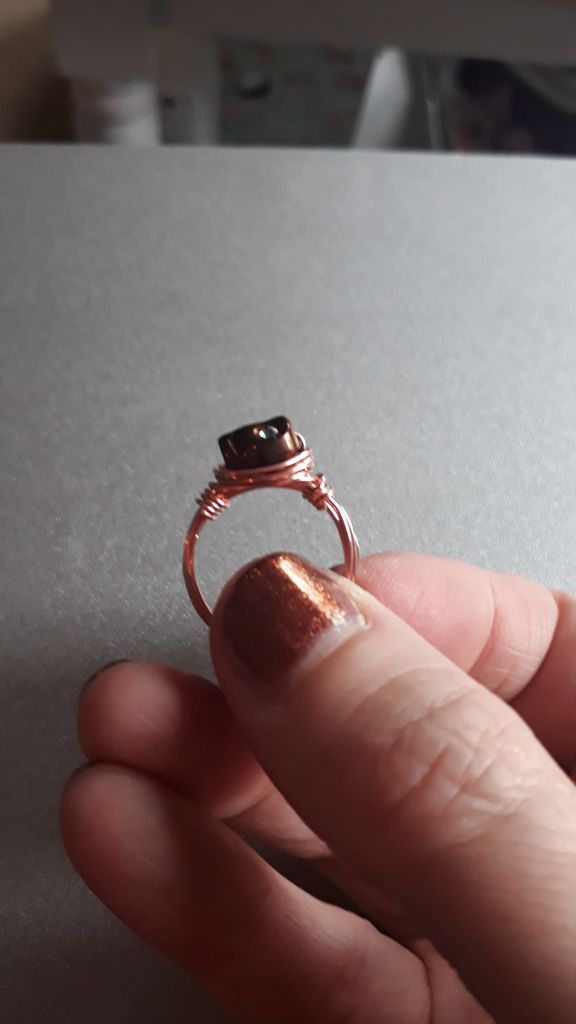
Step 10: Finish your wire ends
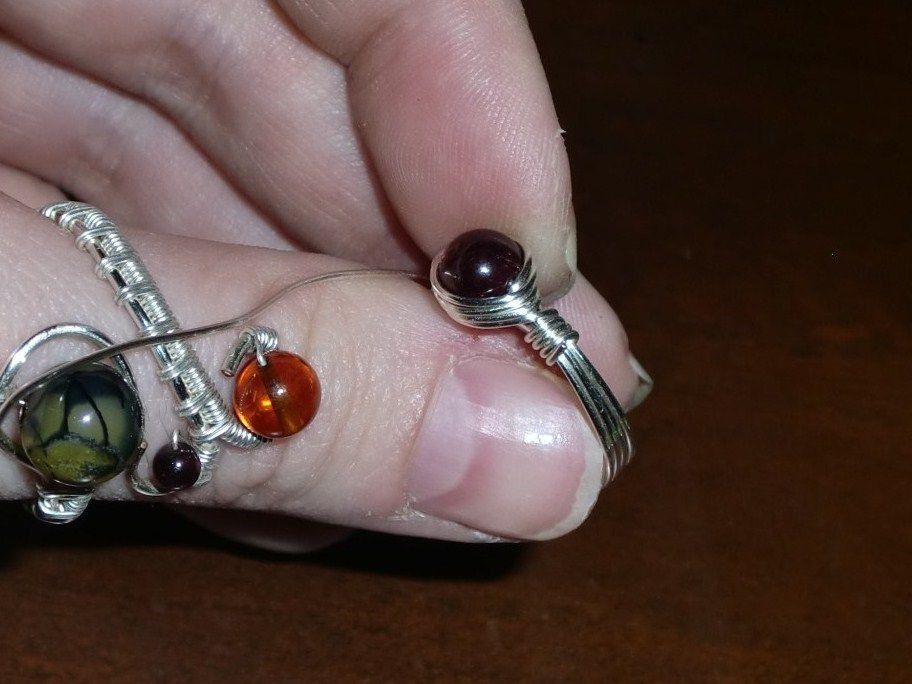
Trim the excess wire and round the ends with your file.
Using the nose pliers, push the ends down so they don't stick together anymore.
Do not tighten too much, otherwise you will have to fix the band again.
Step 11: Shape the band one last time

After pushing down the ends of the wire, you may need to flatten the band again, I did that for this ring.
If you look at the picture of the ring from the side, you can see how the wires are placed on top of each other slightly.
Just place your ring over the mandrel again and pull down as far as it will go.
Using the rubber mallet, go over the ring band several times to finish straightening the wires; This will also stiffen the wire, which will help the ring maintain its shape.
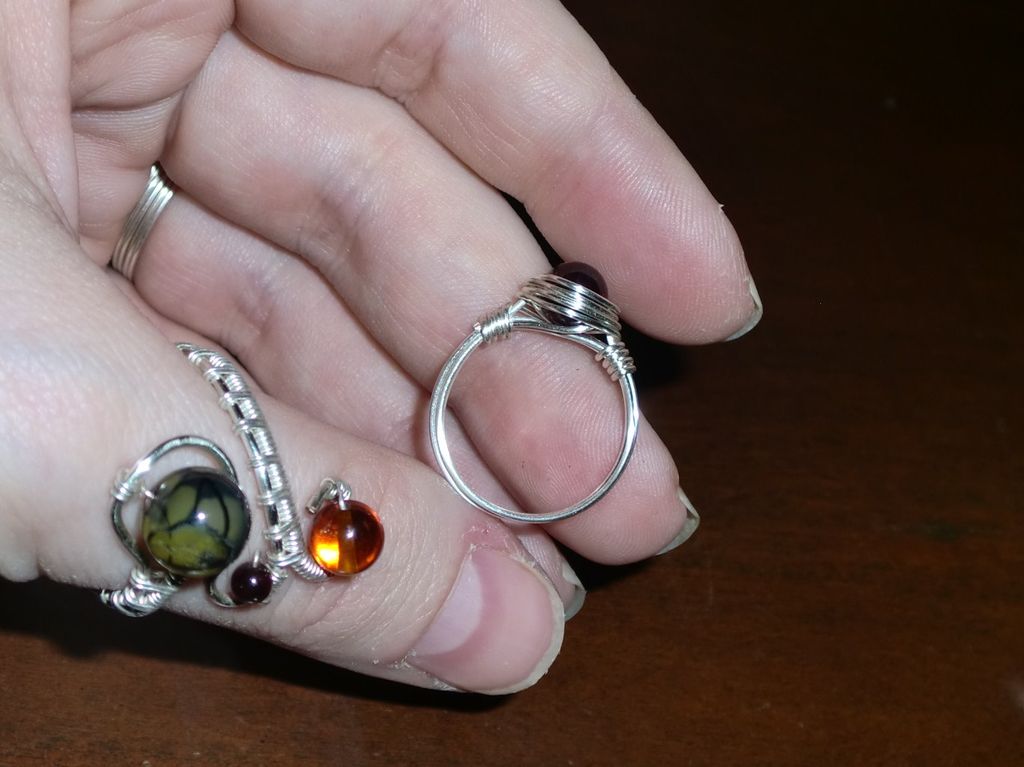
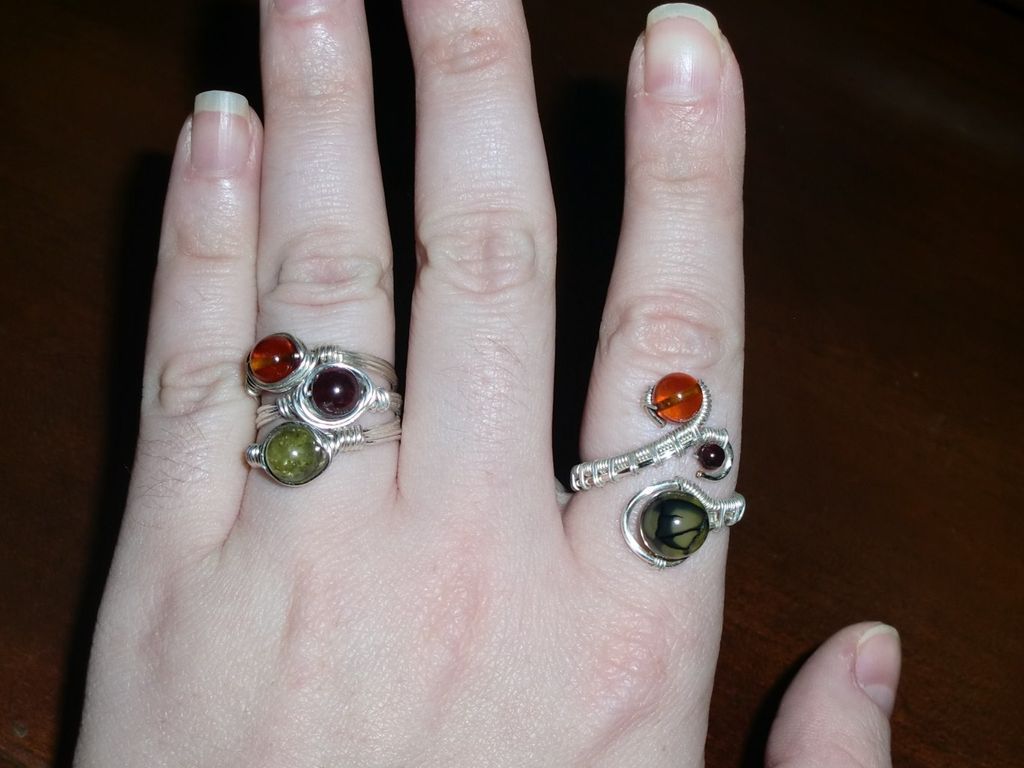
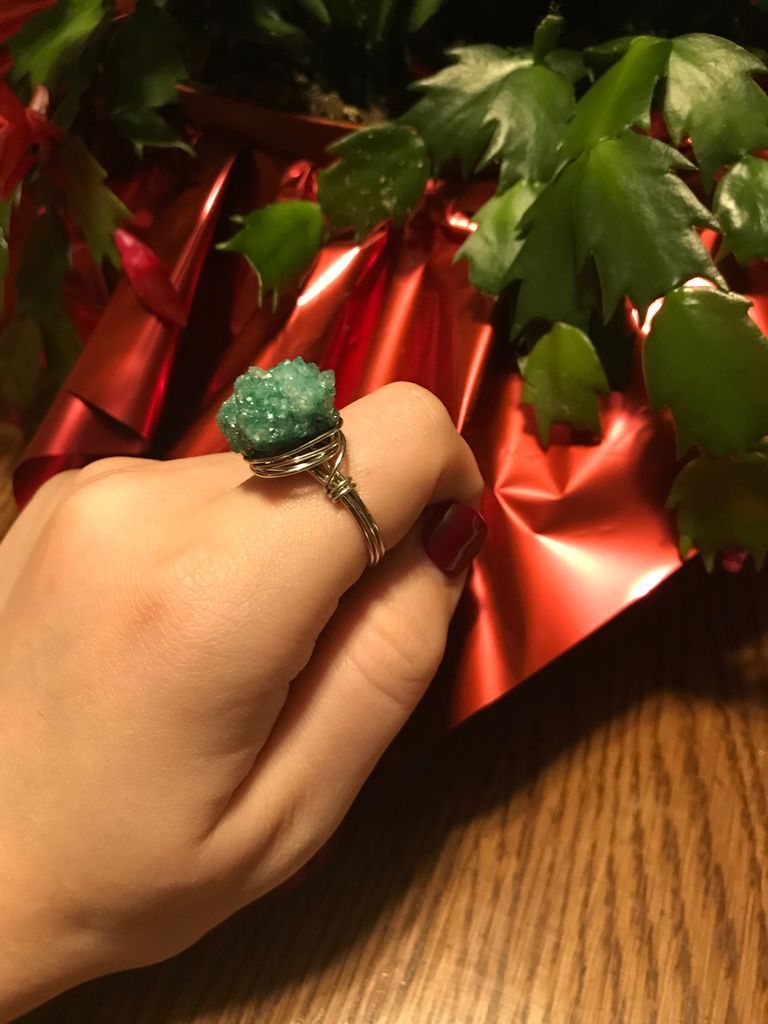
More Ideas with the Same Procedure:


Greetings!
Learn more at Perfectidea.com and on our Facebook for more How to Make a Wire Wrapped Ring.
Popular Content
How to make a rocket stove for outdoors
Cardboard Drawers Lined with Jeans
Ideas and Advantages of Window Grilles for the Home!
Latest Articles
How to make a refrigerator out of insulating material: Practical step-by-step guide
How to make a Kilim for the Home: Complete Step by Step Guide
How to protect ourselves from accidents in our workplace: Complete prevention and safety guide
Related Content
How to Build a Cool Boat-Shaped Shelf!
How to Make a Wooden Lamp with Hangers!
The Best Outdoor Shower Ideas
Ideas to Renovate Your House Without Works and with Little Money
Creative Home Decor Ideas to Transform Every Space
Refreshing your home starts with smart design choices that combine comfort, personality, and functionality. Whether you want to modernize a small apartment, upgrade outdoor areas, or create cozy rustic interiors, these trending ideas can completely change the atmosphere of your space.
Outdoor Spaces That Increase Style and Functionality
Outdoor living continues to dominate modern home trends. Homeowners are increasingly investing in practical entertainment zones inspired by these BBQ shed ideas, which create the perfect setup for gatherings and weekend cooking sessions.
First impressions also matter when designing exteriors. Elegant farm entrance gates design ideas help properties stand out while improving privacy and curb appeal.
Compact living solutions are also gaining popularity. These inspiring 16x40 shed house interior design ideas show how smaller spaces can still feel luxurious and functional.
To enhance patios and entryways, homeowners are adding stylish protection with these creative porch awning exterior DIY ideas that blend aesthetics with practicality.

Rustic and Cozy Interior Design Trends
Warm and natural interiors remain timeless. These charming rustic decor ideas combine wood textures, vintage accents, and earthy tones to create welcoming spaces.
Bedrooms are becoming more personalized with curated wall arrangements. Many homeowners use these stylish picture wall ideas for bedroom spaces to display memories and artwork creatively.
Textured wall treatments are another major trend. Installing a board and batten wall adds architectural character while keeping interiors elegant and modern.
Similarly, bold accent wall ideas can instantly transform plain rooms into eye-catching focal points without requiring a full renovation.
Smart Kitchen and Organization Inspiration
Functional kitchens are essential for modern homes. These practical kitchen wall cabinet ideas maximize storage while maintaining a clean and stylish appearance.
Organization also starts at the entrance. Well-designed mud room ideas help families keep shoes, coats, and daily essentials neatly arranged.
Colorful and Personalized Home Styling
Vibrant interiors are becoming increasingly popular thanks to playful dopamine decor ideas that use bright colors and joyful accessories to improve mood and energy.
Gallery walls also continue to evolve as a major decorative feature. These trendy gallery wall inspiration ideas offer creative ways to combine prints, photos, and statement art.
Young renters and new homeowners are especially embracing these stylish first apartment aesthetic ideas to create sophisticated interiors on a budget.
Finally, selecting the right shades can dramatically influence any room’s atmosphere. These modern trendy color ideas help homeowners choose palettes that feel fresh, elegant, and timeless.
Final Thoughts
From rustic charm and colorful interiors to outdoor entertaining areas and functional storage solutions, today’s home decor trends focus on creating spaces that feel both beautiful and livable. By combining smart layouts, modern textures, and personalized decorative elements, any home can become more stylish, comfortable, and inspiring.


